Você está no 3DFinder
Buscamos em Thingiverse, MakerWorld e Printables ao mesmo tempo para te dar o melhor de cada uma.
Descrição
BreezeBuddy Max
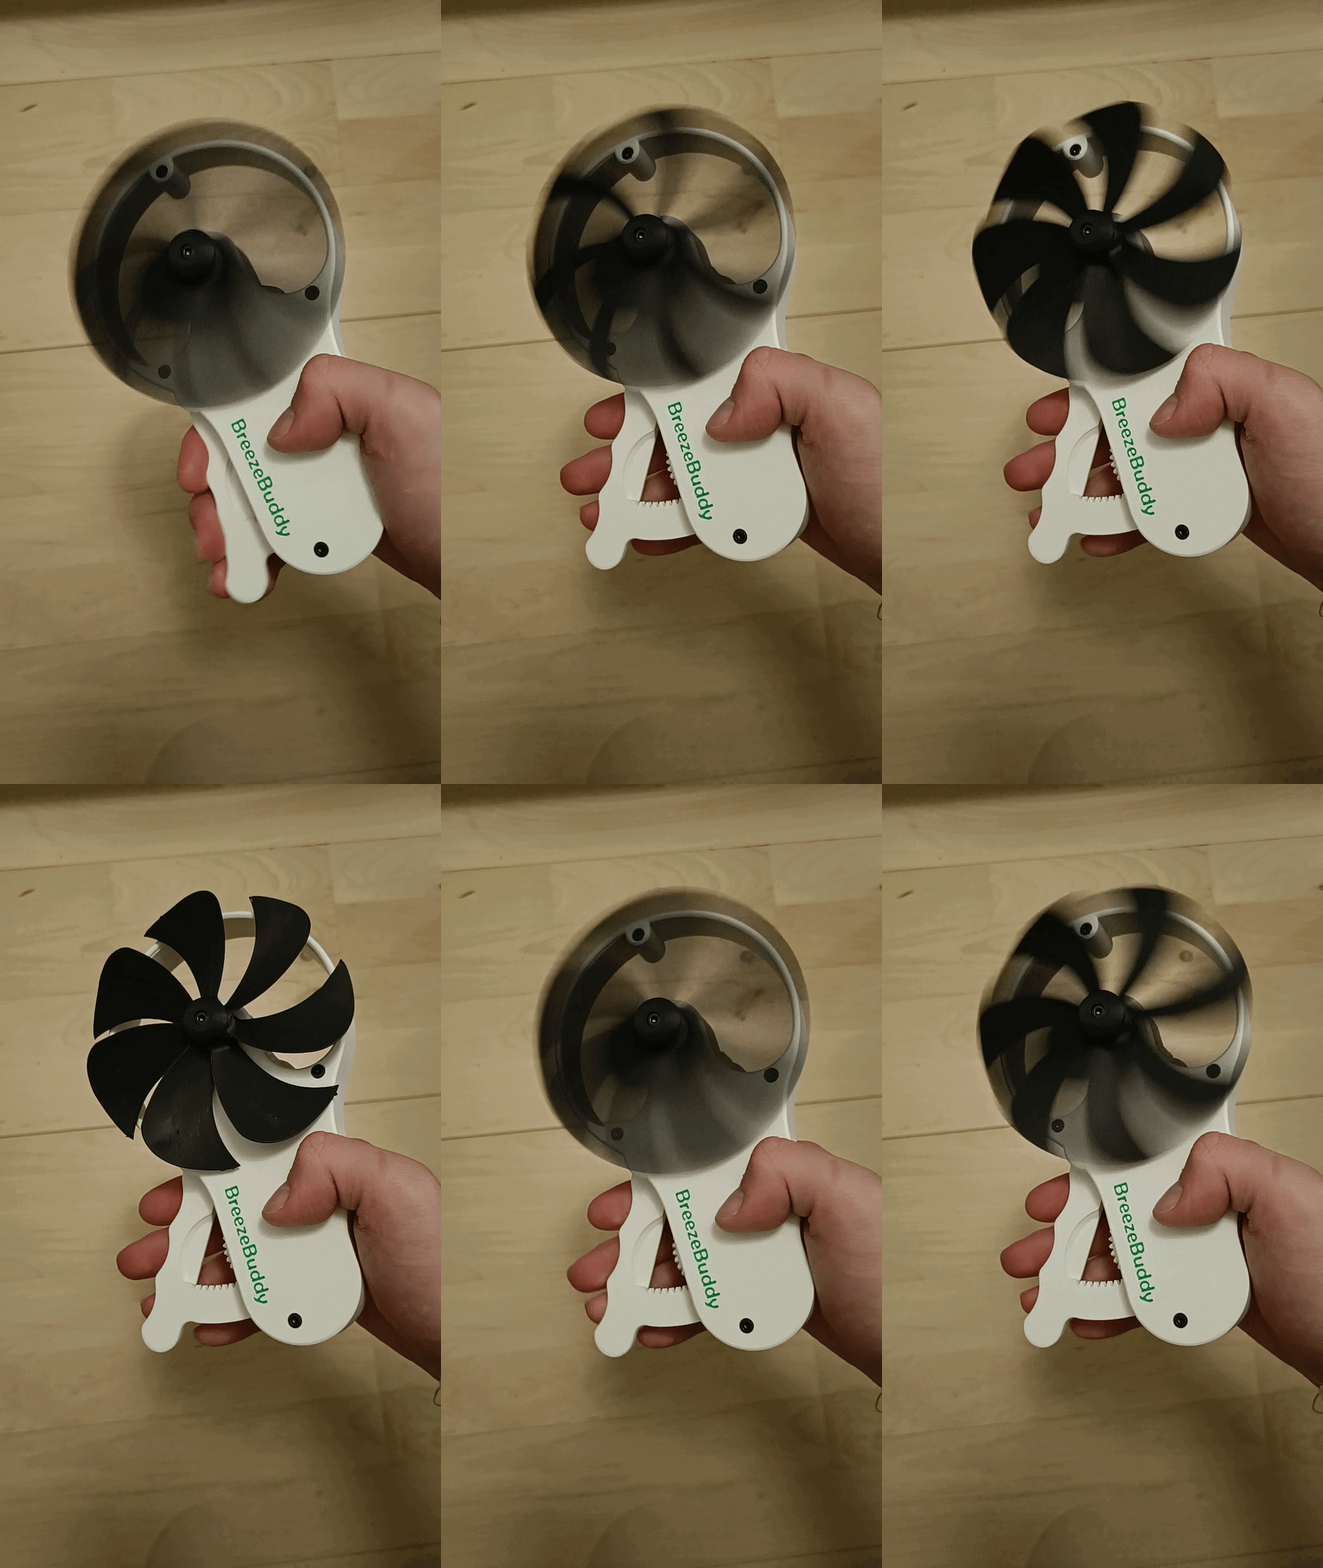
The all-new BreezeBuddy Max is here to deliver a powerful stream of air unlike any other 3D-printed squeeze fan.
The BreezeBuddy Max comes with a list of brand new features:
- 120 mm propeller diameter for strong airflow
- Now includes an optional ball-bearing configuration for extra performance
- Propeller designed for maximum performance
- Mixed herringbone/spur geartrain designed for silent operation
- Better gear tolerances compared to previous versions
- Clean and aesthetic design
- Durable and reliable spring mechanism
Are you excited to print it yet? I sure hope so!
Design updates
20/6/2025
The print profiles are combined into one print profile now: plate 1 for the gears and body parts, plate 2 for the propeller.
The propeller is now easier to print.
A few issues with the body and handle has been fixed and fine tuned.
27/06/2025
The BreezeBuddy Max is now Spring loaded which eliminates the annyoing rubber band that tended to break for many of you.
Also, the body and handle are a bit longer, making it easier to grip.
Factors of noise
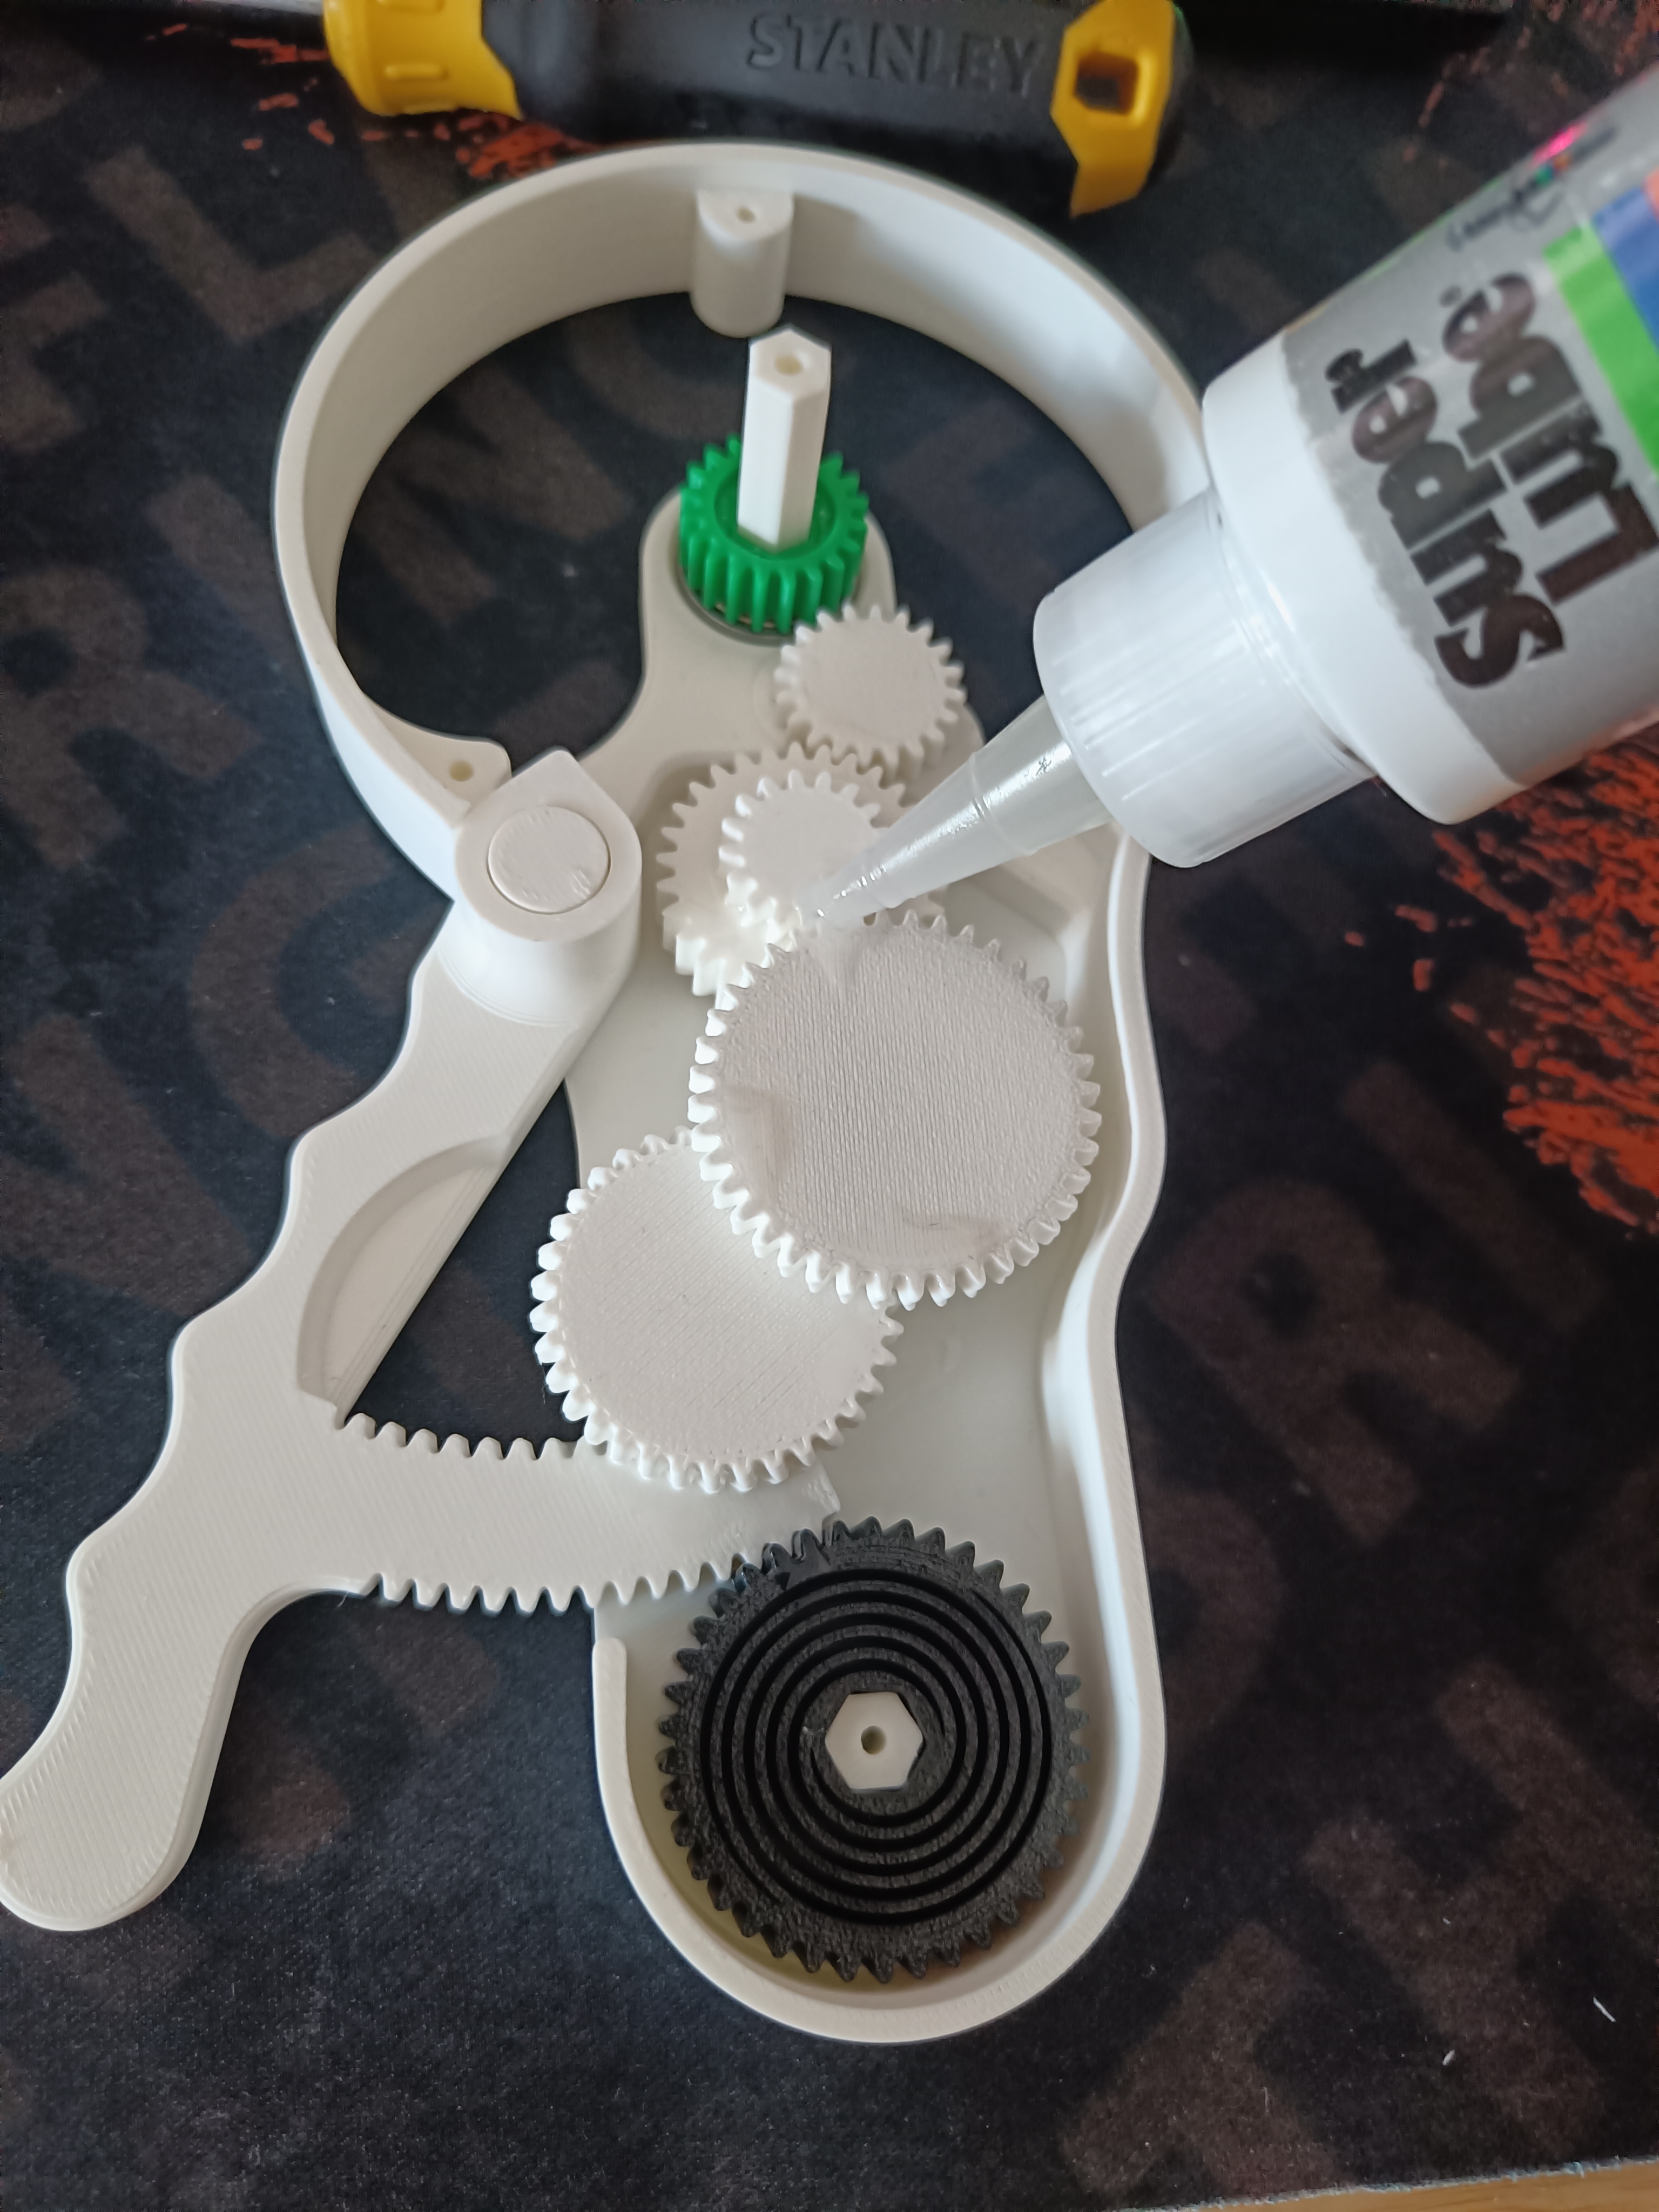
Most of the noise while using the BreezeBuddy Max comes from the high RPM gears and the bearing. Therefore, to minimize noise, make sure that all the gears are well lubricated.
I really recommend using a high quality ball bearing (like the one i linked to in the bill of materials) to further minimize noise.
Hardware list
To assemble the BreezeBuddy Max, you need the following:
- 6 x M3 bolts (12mm length)
- A ball bearing (optional)
- Lubricant for the gears (highly recommended)
Assembly guide
The BreezeBuddy Max is fairly simple to put together
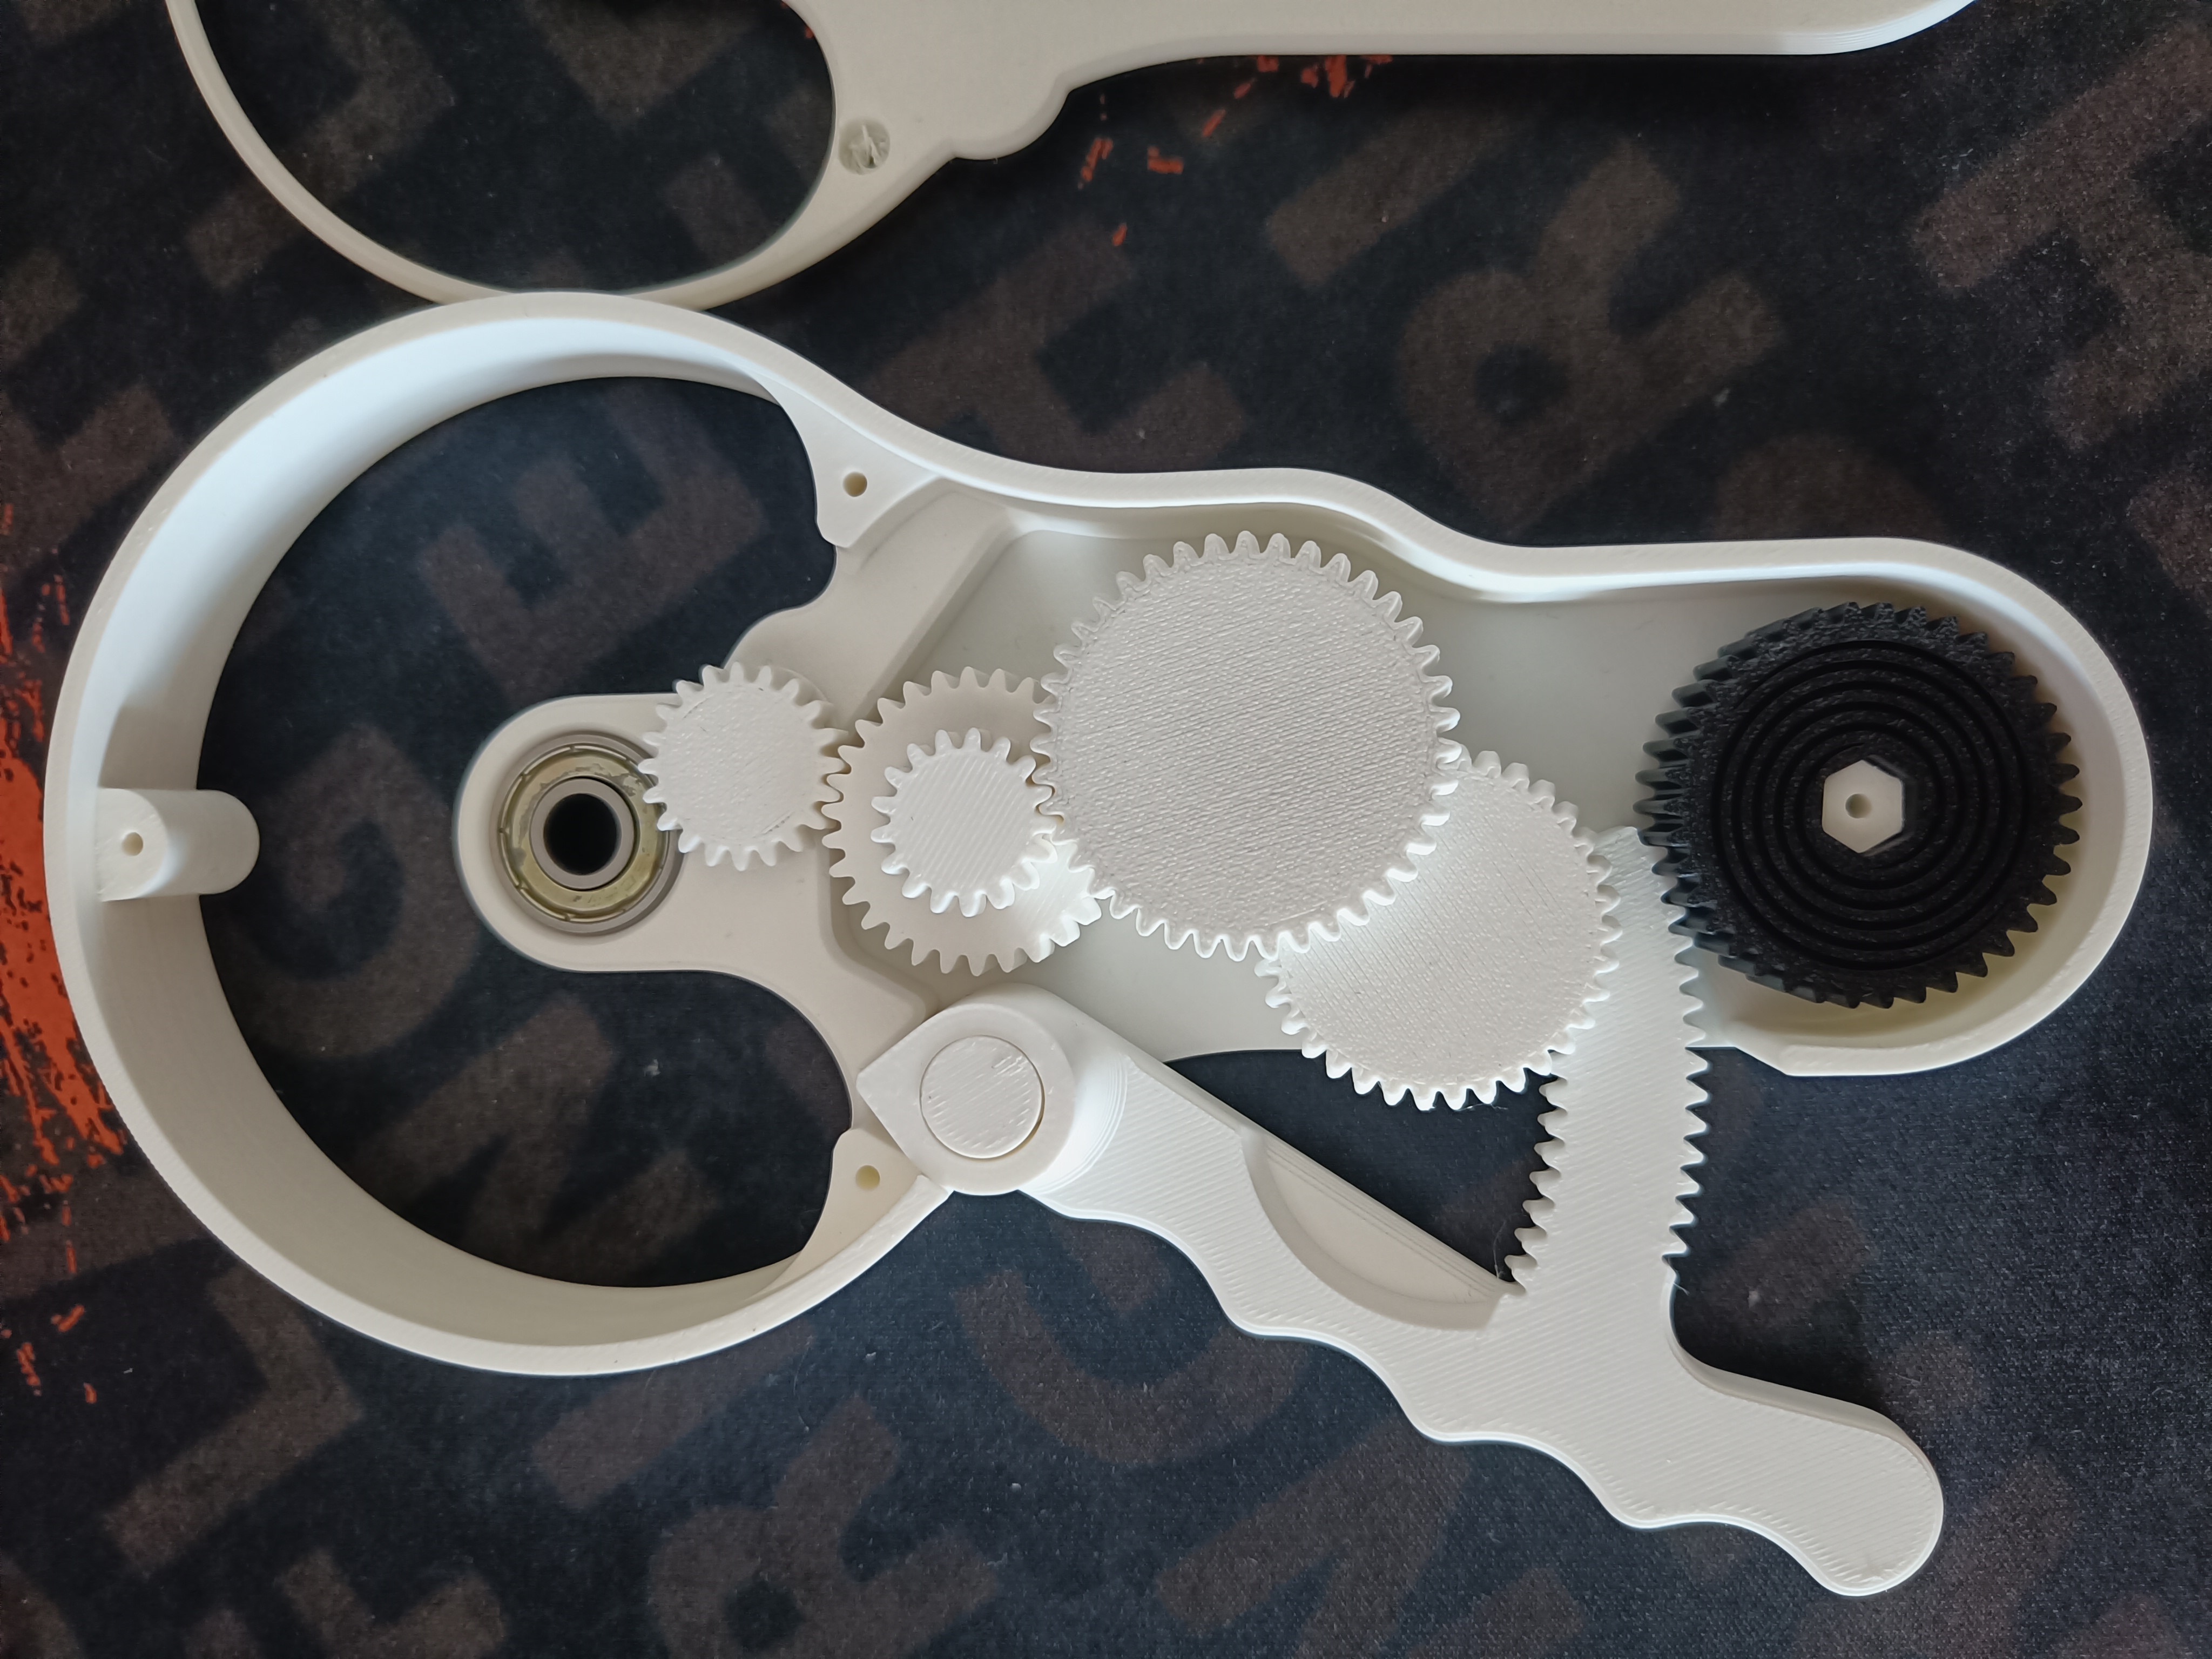
Step 1 - Insert the ball bearing and all the gears like on the image below
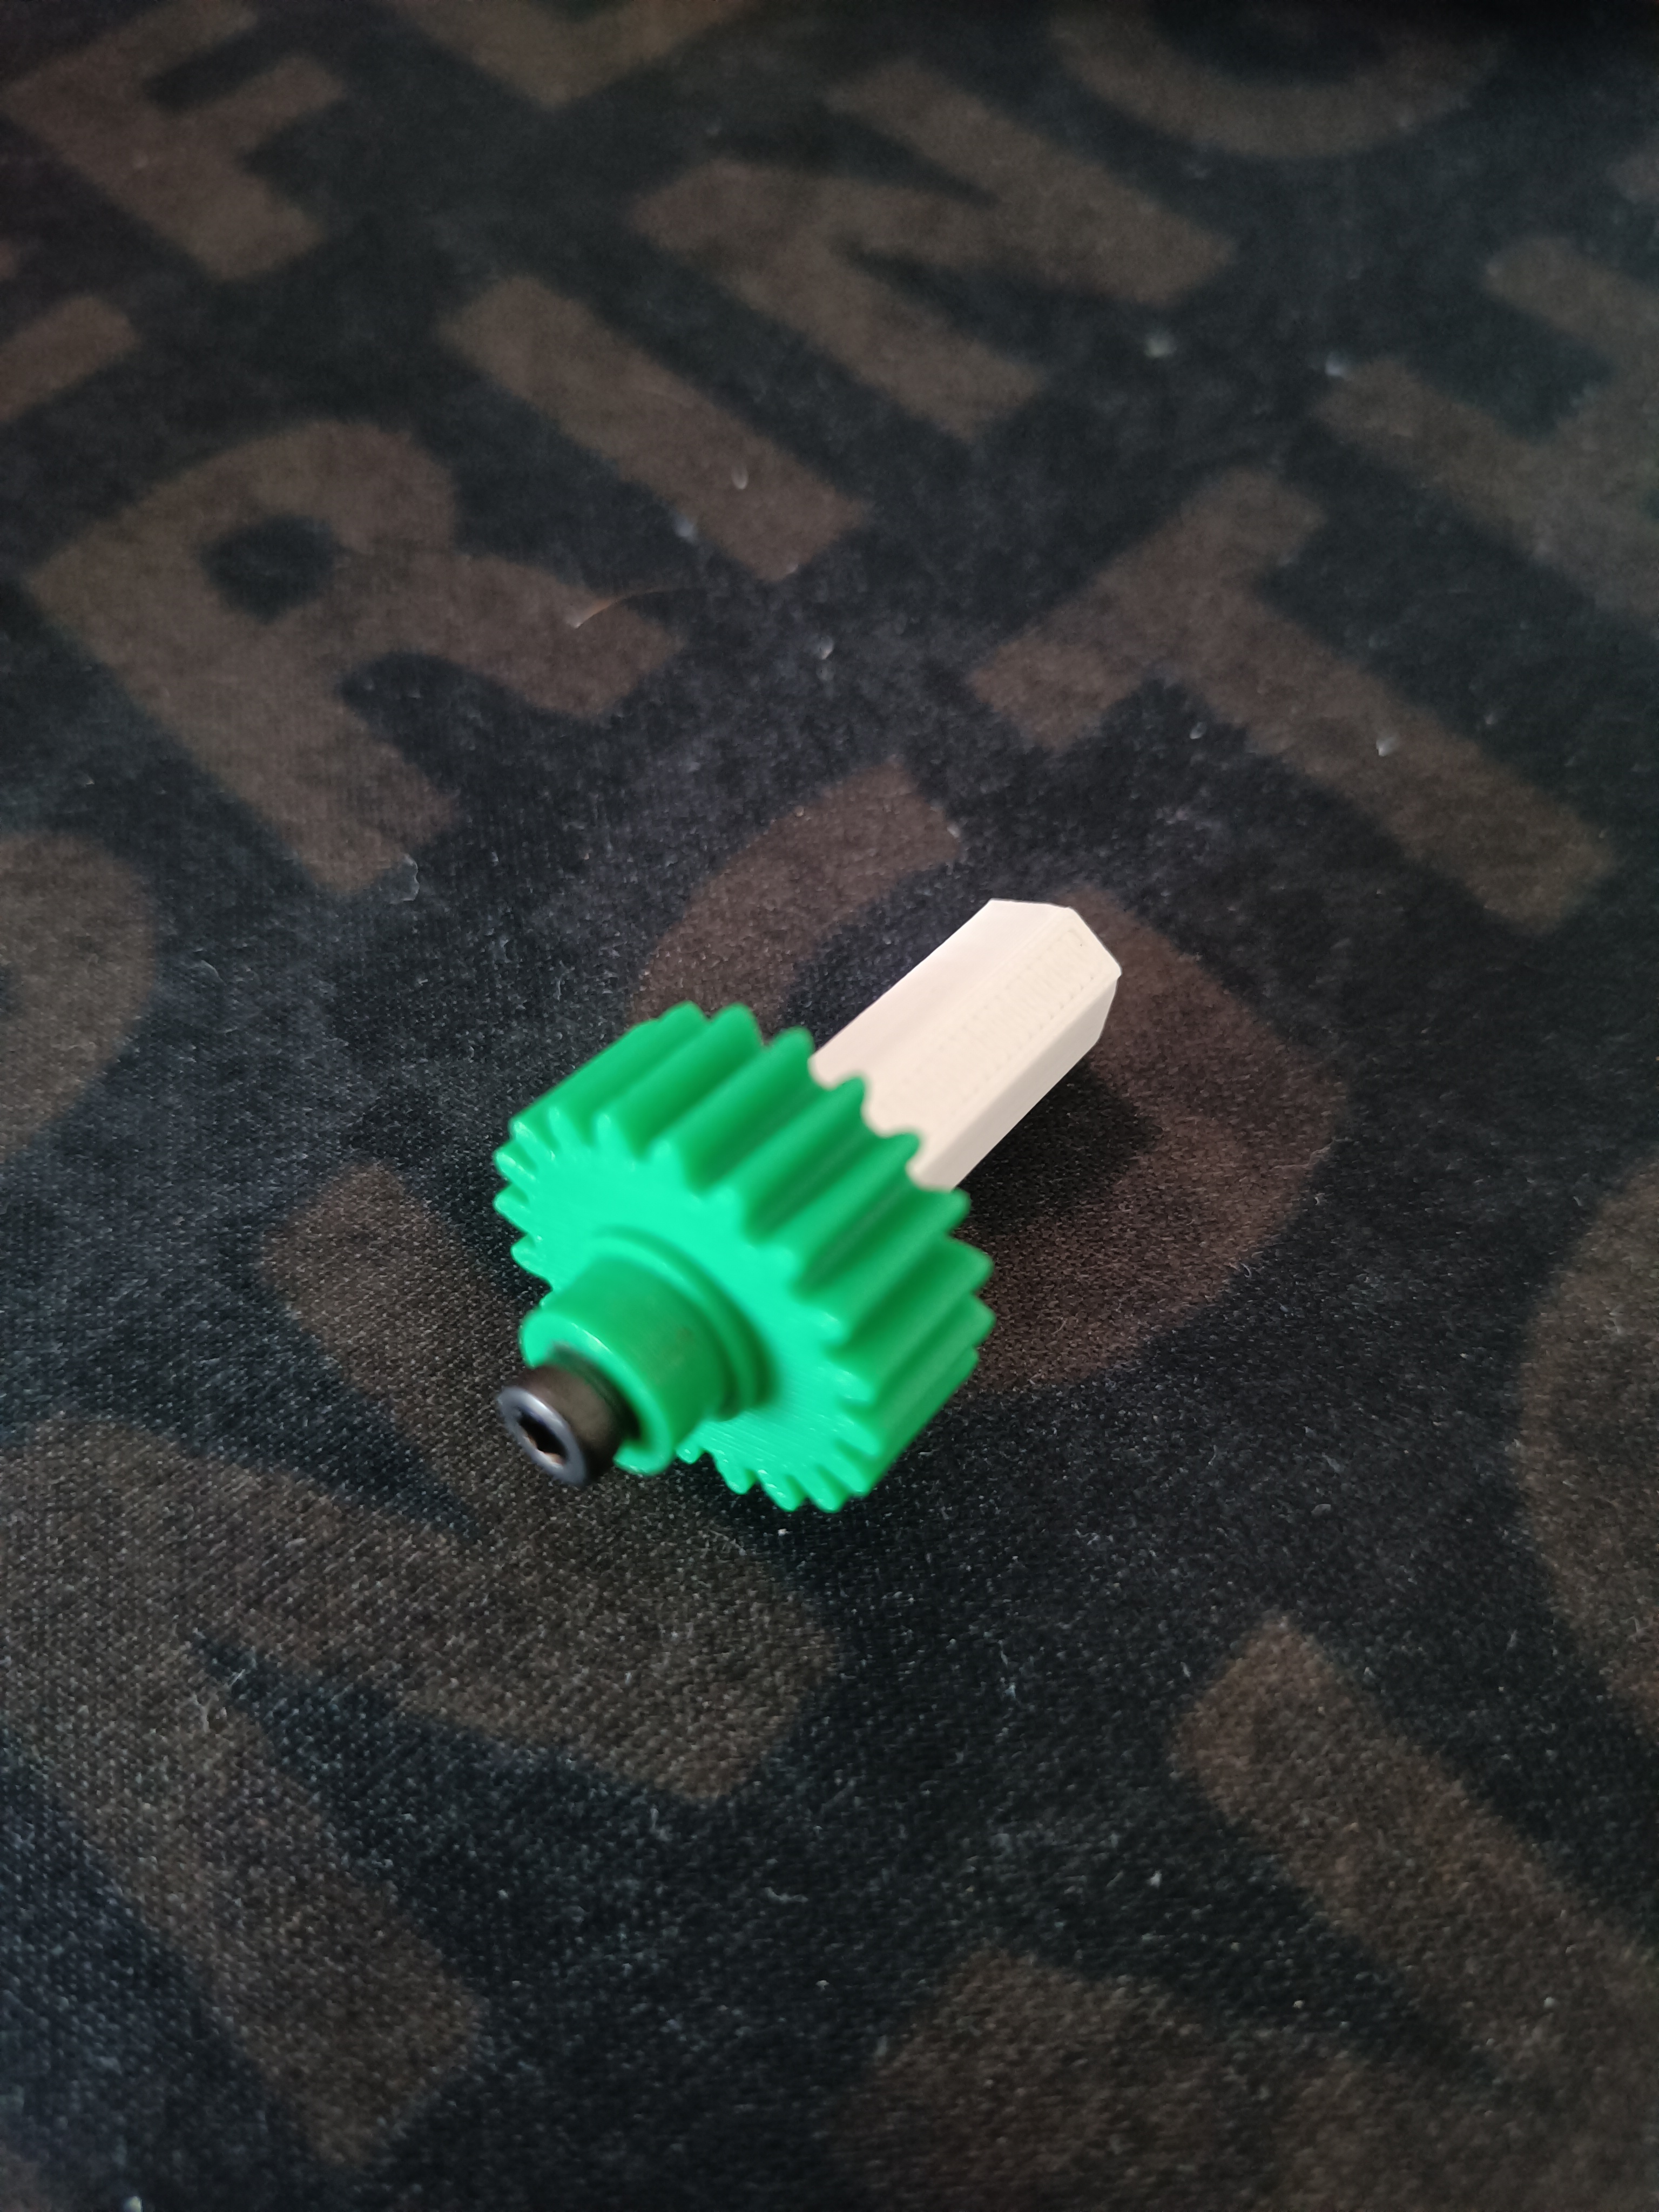
Step 2 - Screw on the shaft to the propeller gear
Use the shortest shaft / rod if you use a ball bearing.
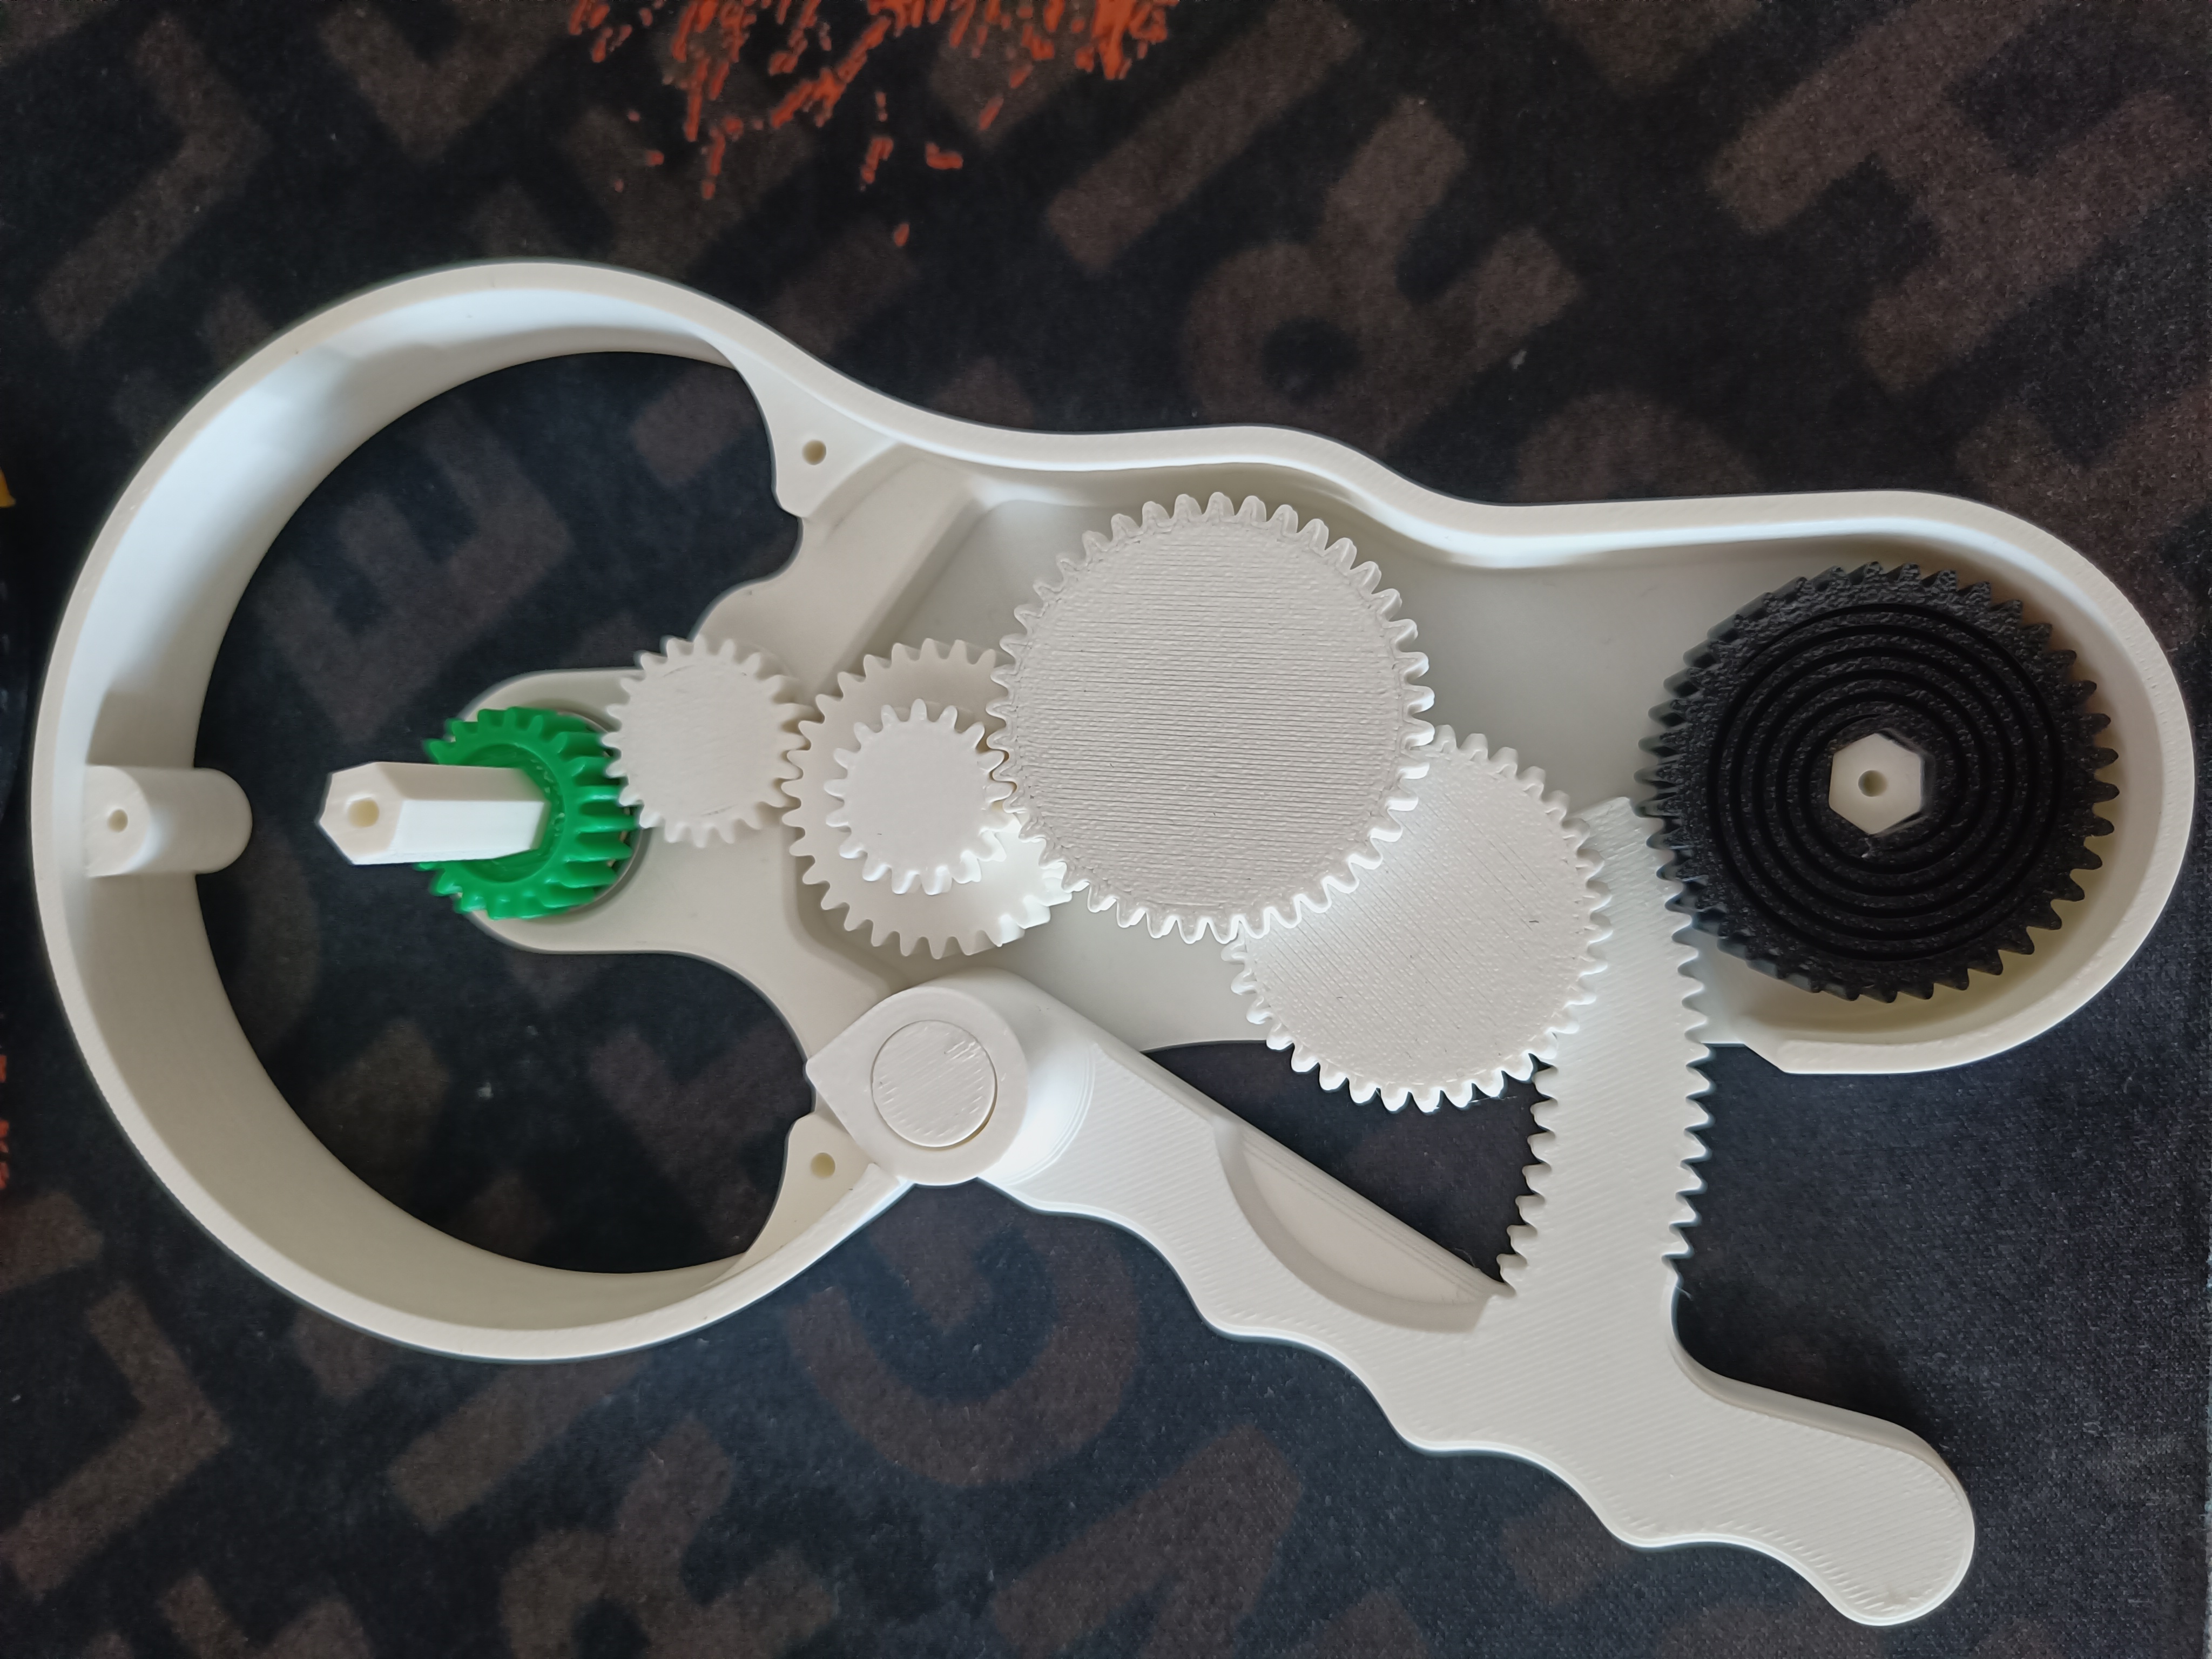
Step 3 - Insert the propeller gear like on the image below
Step 4 - Lubricate the gears (Highly recommended)
Step 5 - Screw on the lid
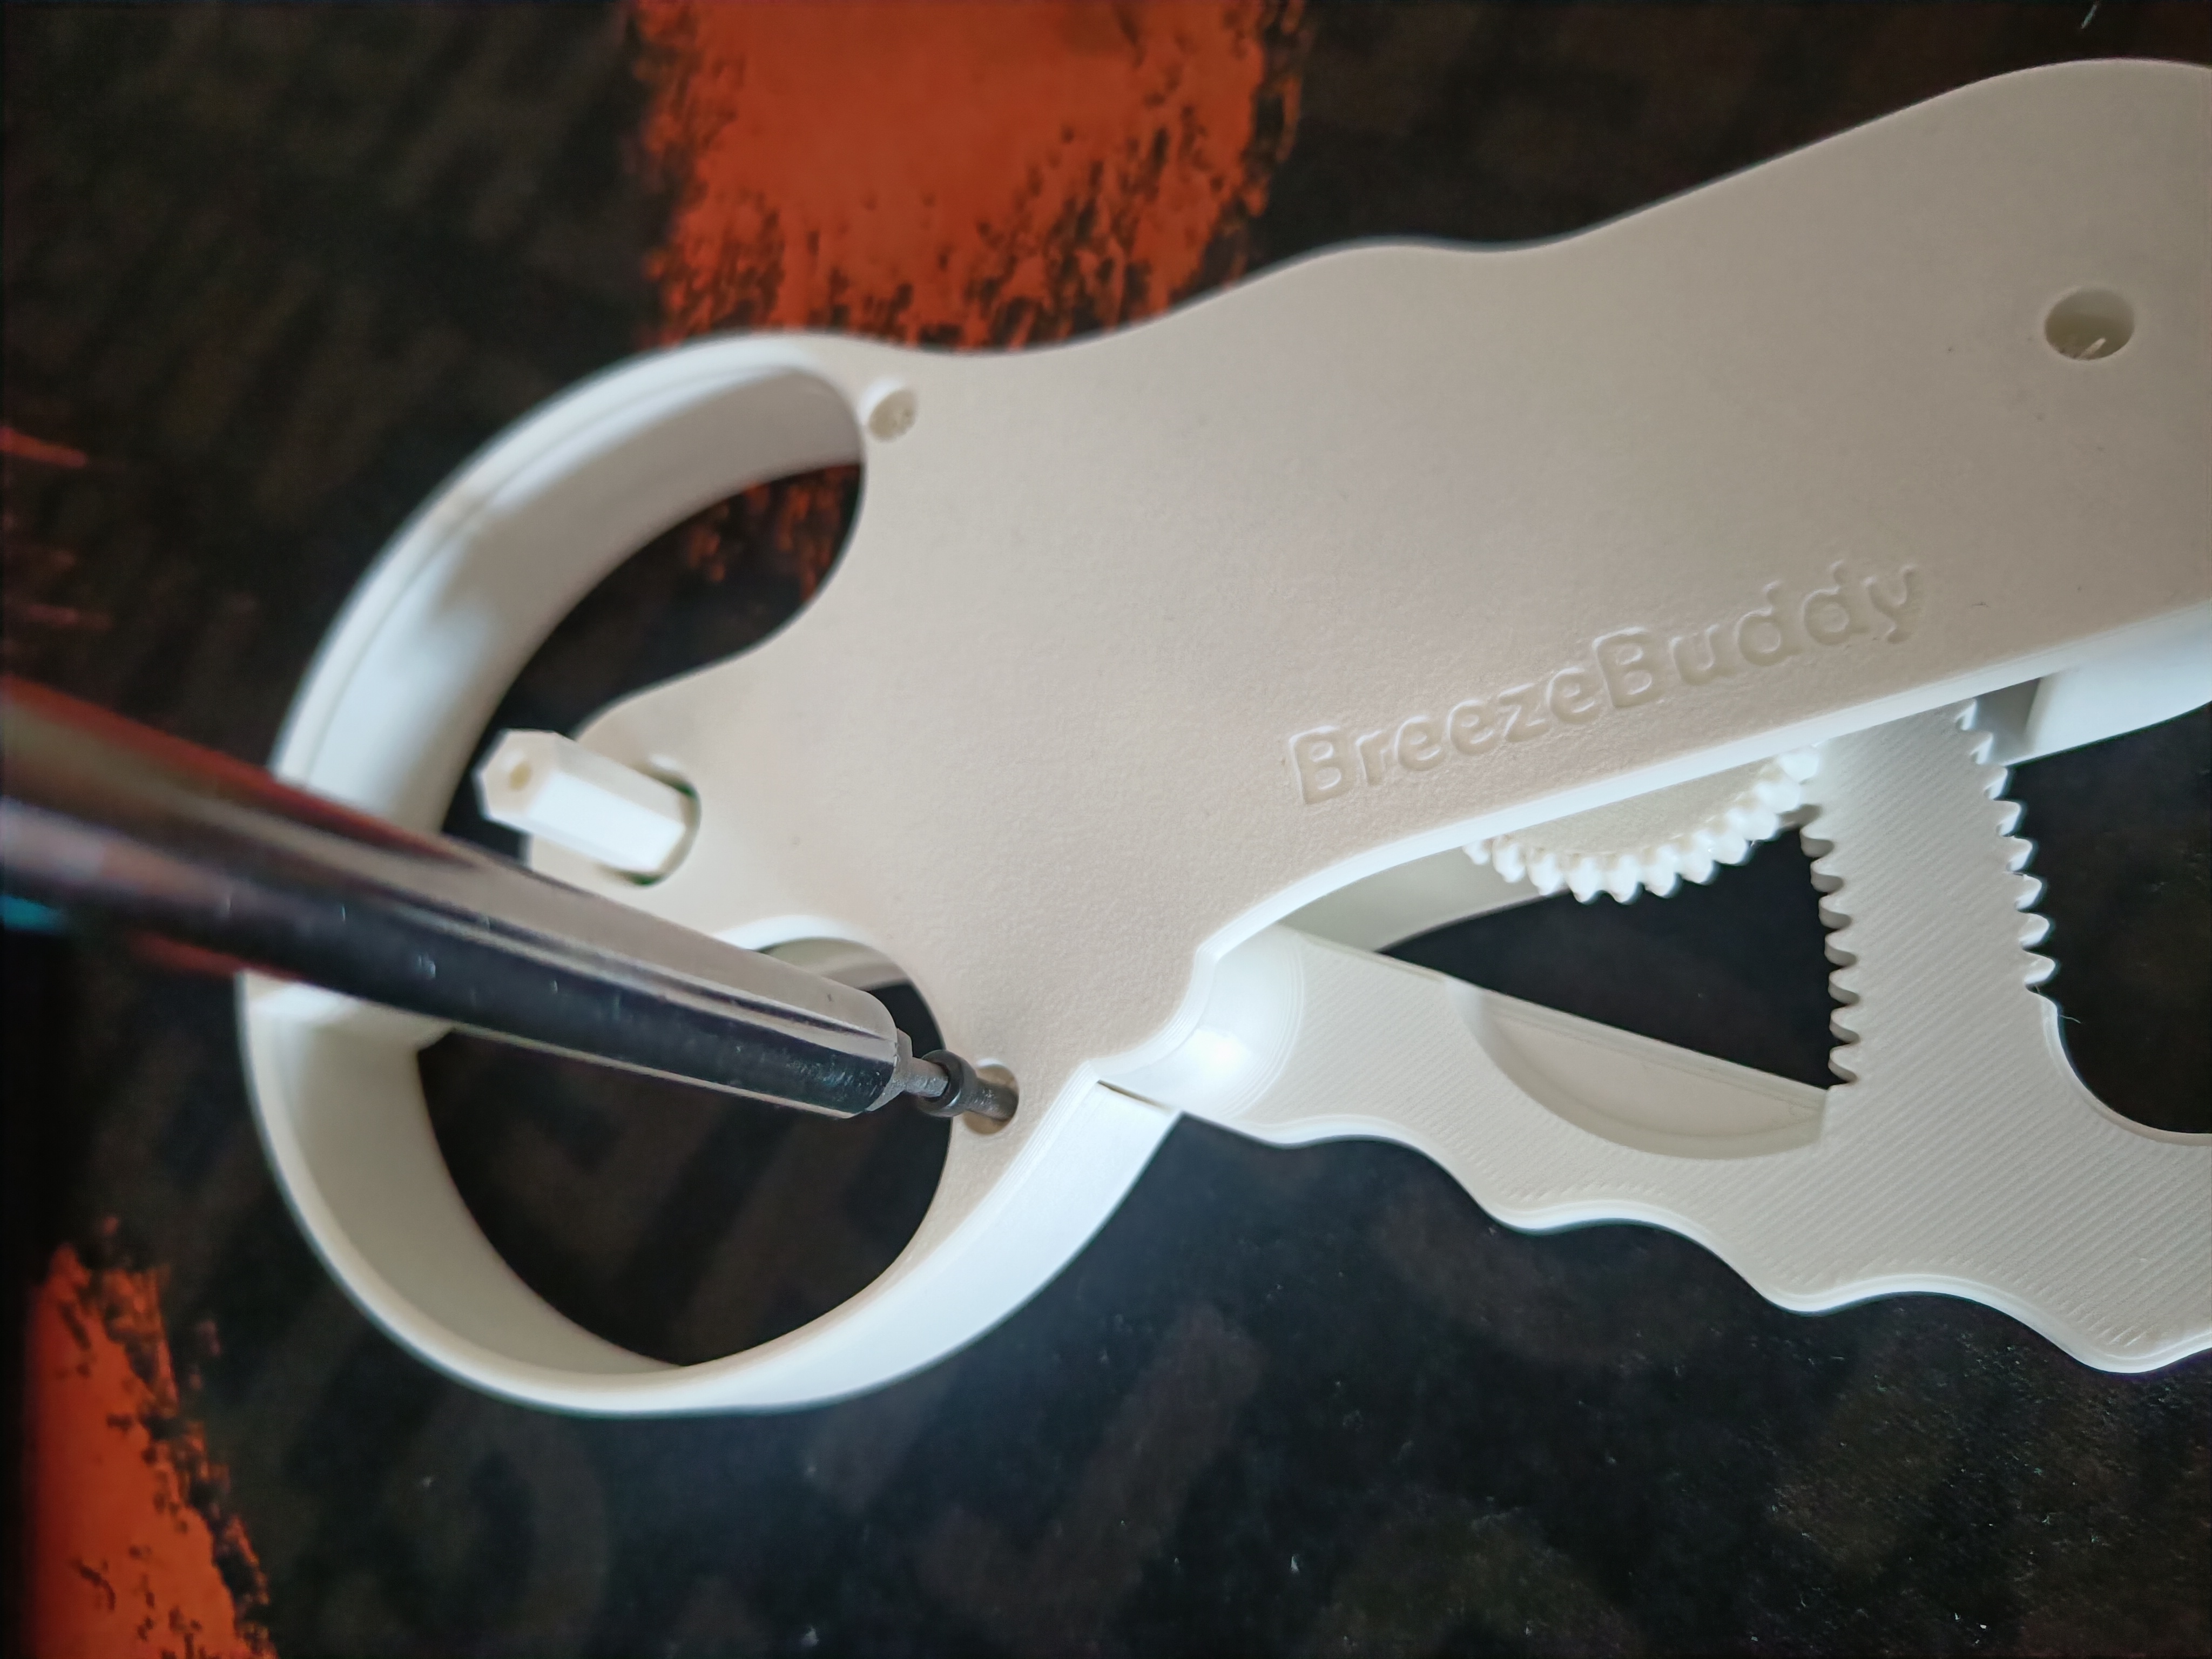
Step 6 - Screw on the propeller, and you're done!

Gostou deste modelo? Crie uma conta grátis para salvar seus favoritos e voltar a eles depois.
Criar conta