Você está no 3DFinder
Buscamos em Thingiverse, MakerWorld e Printables ao mesmo tempo para te dar o melhor de cada uma.
Descrição
Customizable Pole Cap round pieces of various diameters
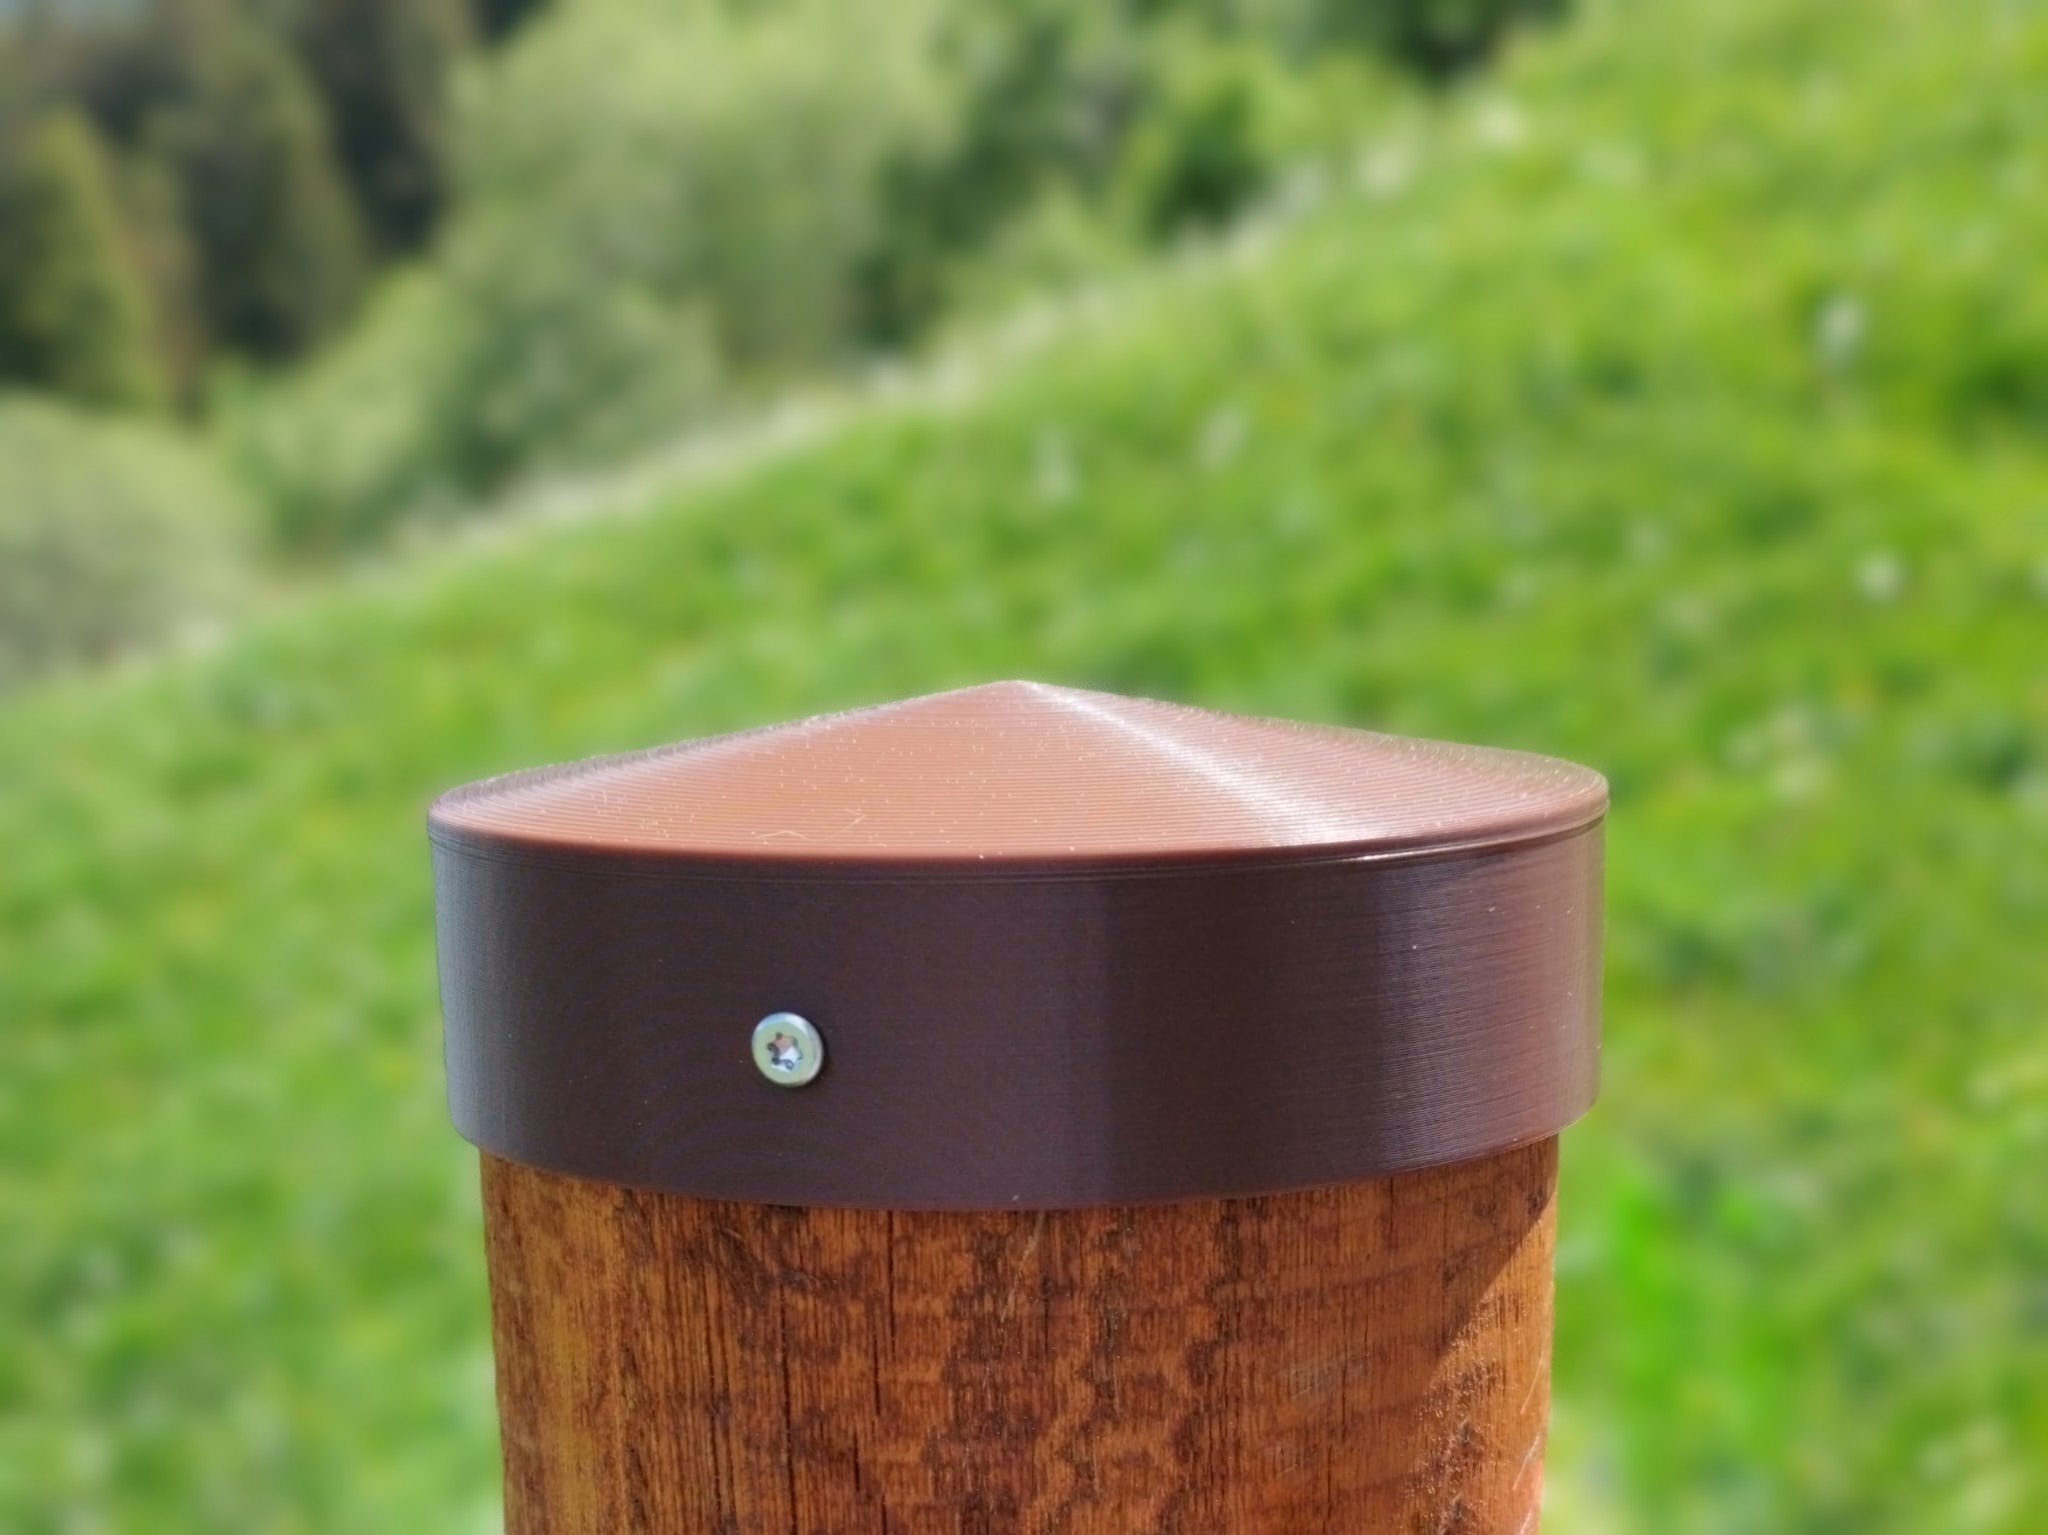
This is a customizable round pole/post cap, designed for 3D printing in weather-resistant materials such as PETG to protect and extend the life of your outdoor wooden posts.
The cap fits on round wooden, plastic and metal poles and is available in ready to print multiple diameters from 3.00 to 12.00 cm (1.18 to 4.72 inches), with diameter increments of 0.50 cm (0.20 inches), and available in customization mode making it suitable for a wide range of DIY, fencing, gardening, and outdoor construction projects.
2 possible options:
- You can download the pre-prepared STL files available and already exported in various versions
- Create your own model using the customisation tools directly on Makerworld!
Features
- Available in ready to print cap STL files in diameters from 3.00 to 12.00 cm (1.18 to 4.72 inches), with diameter increments of 0.50 cm (0.20 inches).
- Available online customization on Makerworld customization window
- Designed for round wooden poles and posts
- 10° sloped conical top promotes efficient water runoff (customizable)
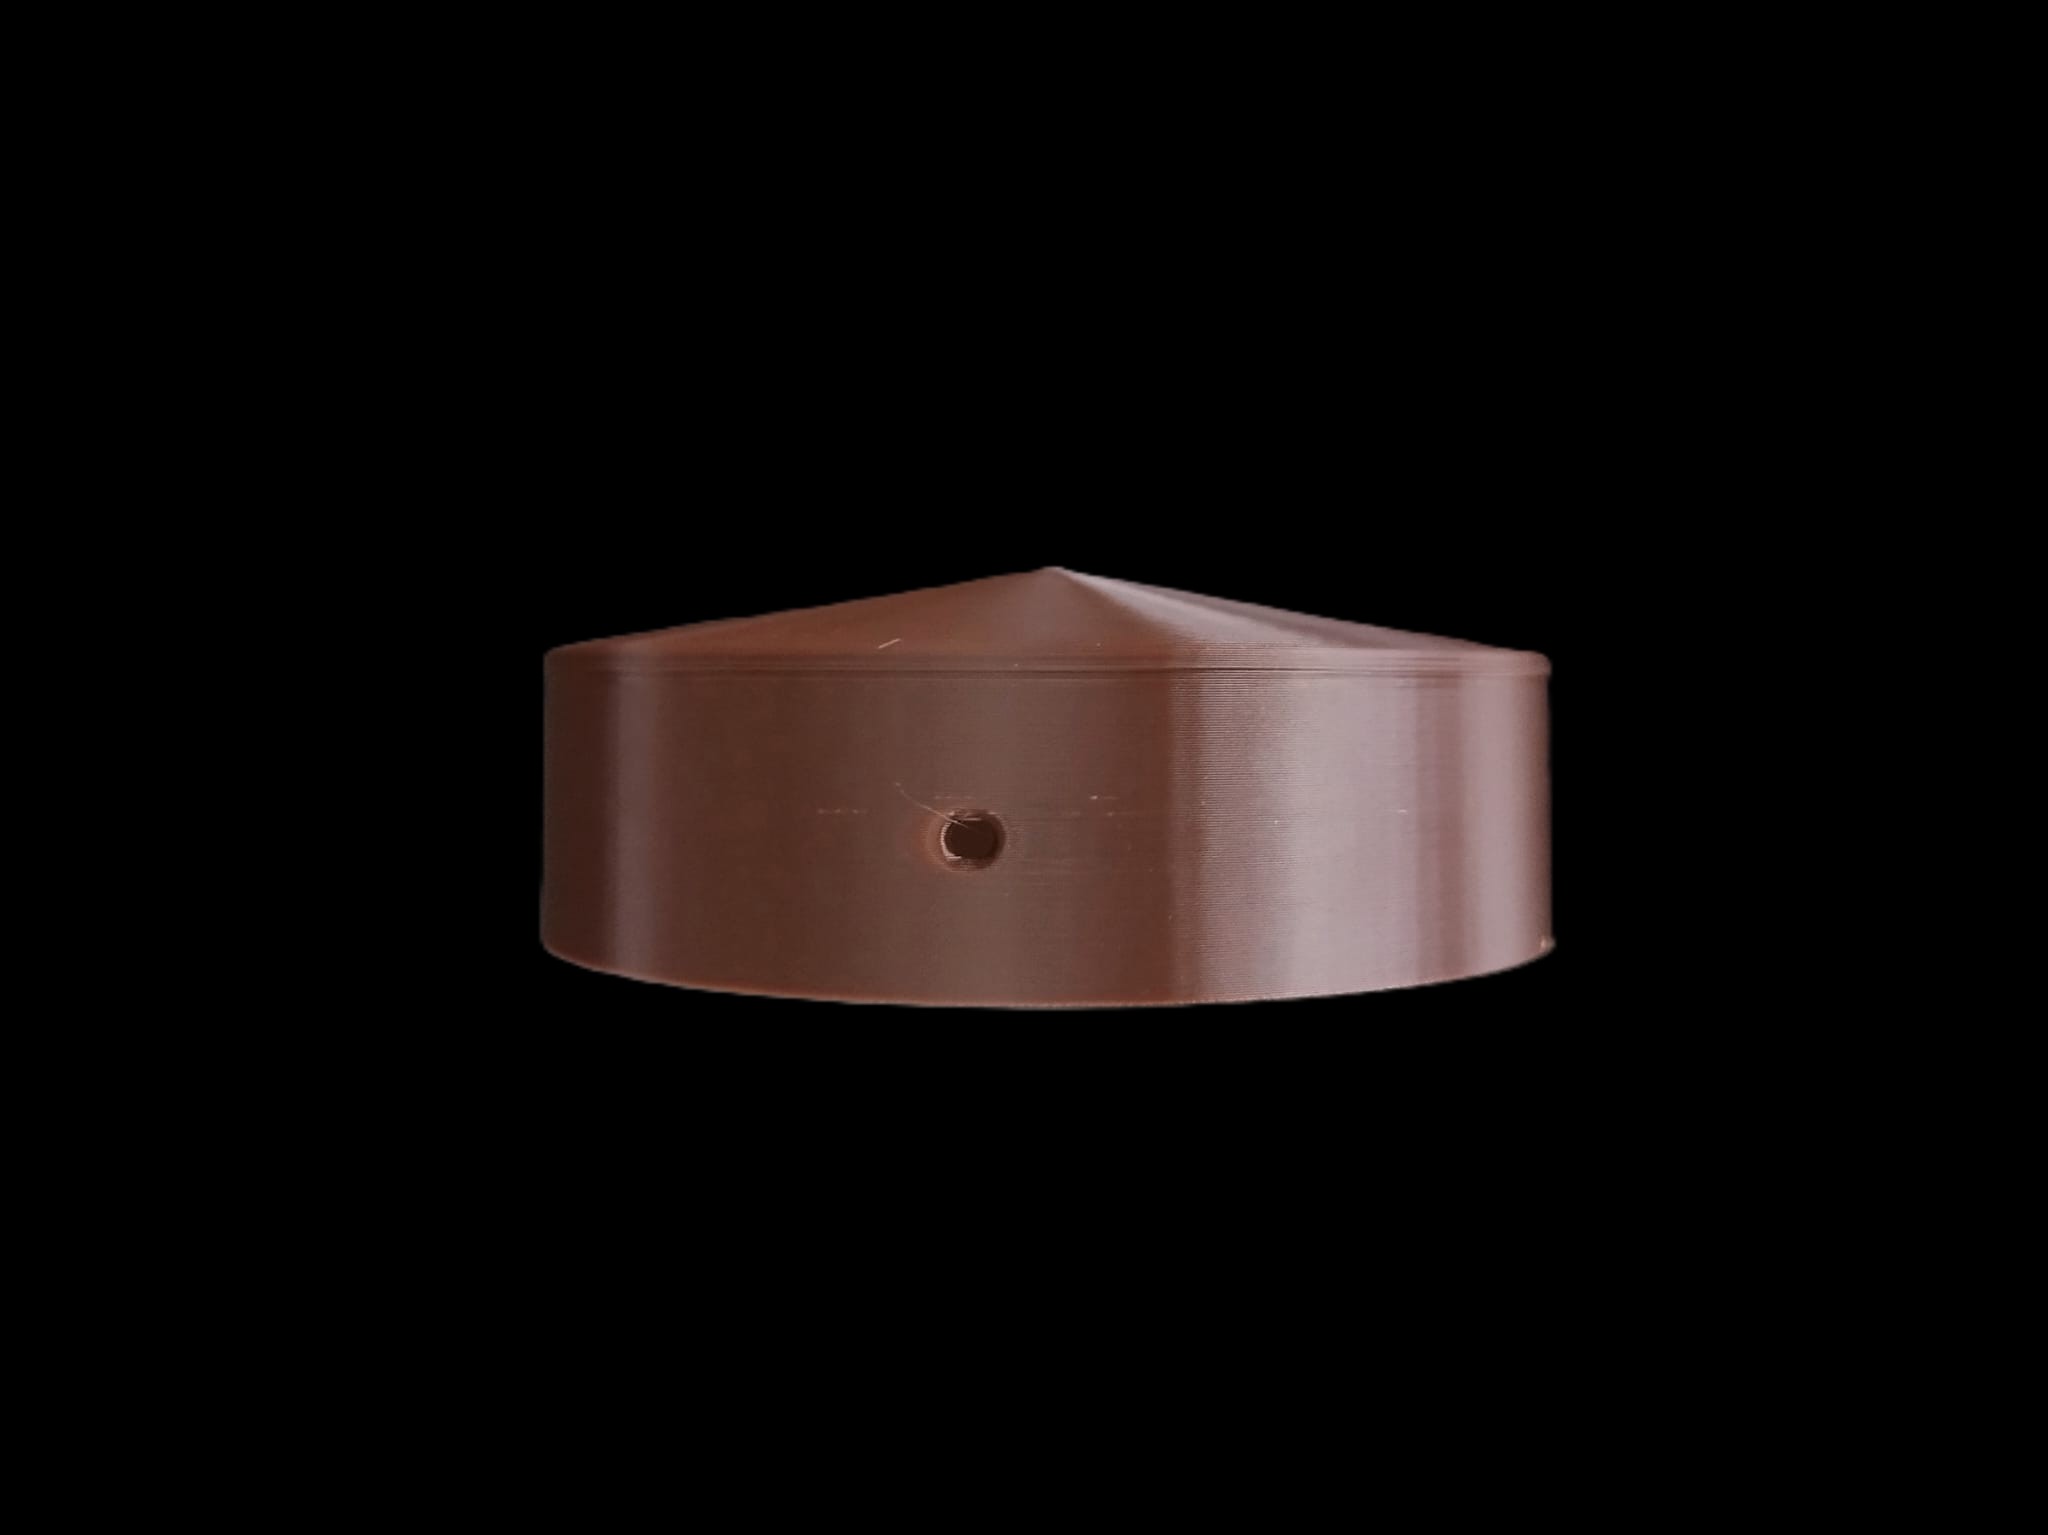
- Two side mounting holes for secure installation
- Compatible with screws up to approximately 3 mm diameter (diameter customizable)
- Easy to install and remove when required
- Rounded design with no sharp or hazardous points
- Helps prevent rainwater from entering and soaking the top of the post
The top part features a pattern that resembles wood grain circles (result of the printing process—but it’s also an interesting detail)
- User-configurable customization settings:
- Diameter of the pole to which it is to be fitted
- Diameter of the side fixing holes
- Angle of the top cone
- Thickness of the edges
Dimension by which the pole cap fits onto the pole
- Reduces the risk of:
- Wood rot
- Moisture damage
- Cracking and splitting
- Swelling and warping
Weathering caused by repeated wet/dry cycles
Ideal for:
- Protecting exposed wooden posts and improving the longevity of outdoor structures
- Fence posts
- Garden structures
- Pergolas
- Handrails
- Outdoor wooden supports
- DIY woodworking projects
The top surface features a gentle 10° conical slope, allowing rainwater to drain away efficiently while avoiding sharp edges or pointed shapes.
By preventing water accumulation on the end grain of the wood, the cap helps reduce moisture penetration, cracking, swelling, and long-term rot caused by repeated wet and dry cycles or that the metal, synthetic, or plastic poles become filled with standing water.
Two side mounting holes allow the cap to be securely fixed in place using small screws max 3 mm diameter 1.5 to 2 cm length.
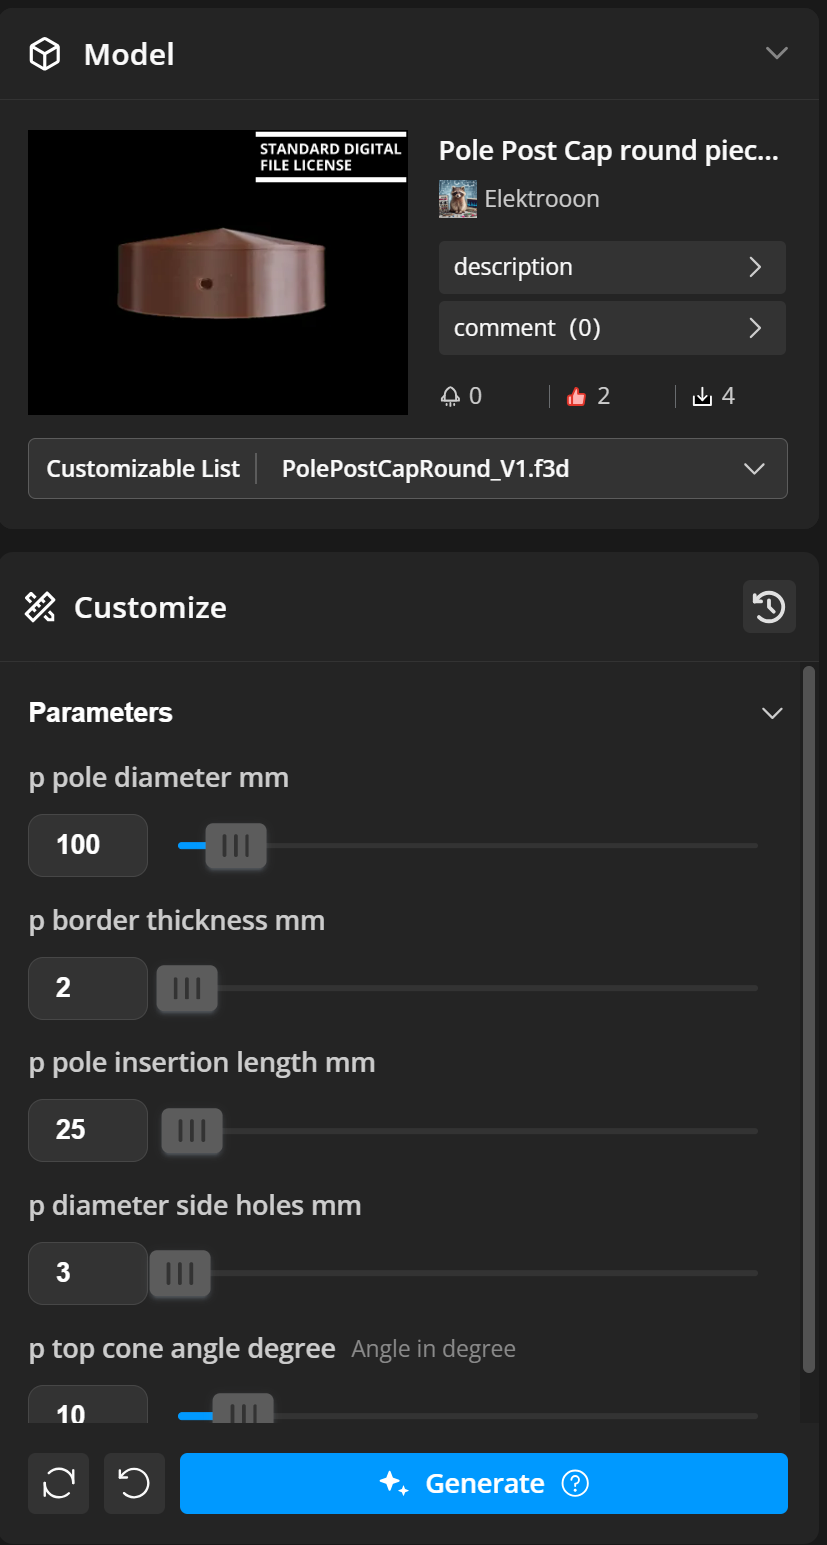
User can customize all parameters on Makerworld.
Customisation procedure and tips
Whenever you change the parameters, you need to click ‘Generate’ to apply the changes and update the displayed 3D model with your settings.
Each regeneration takes a few seconds and isn’t particularly fast (depend on the site and other stuff). patience. The parameters avaiulable are as follow:
The available parameters are explained below, one by one:
Pole diameter (mm)
Enter the diameter of the pole on which the cap will be installed. The diameter should already include a clearance allowance so that the cap can fit onto the pole easily without requiring force. The cap should be able to move freely during installation. If the fit is too tight, any swelling or expansion of the pole may cause the cap to crack. If the fit is too loose, the cap will not sit properly on the pole and may be difficult to secure firmly.
Border thickness (mm)
The thickness of the cap wall. It should be sufficient to ensure adequate strength and durability. A value of 2 mm is recommended, or a thickness that is a multiple of the 3D printer's line width. For example, if the printer uses a line width of 0.4 mm, choose multiples of 0.4 mm to achieve solid internal walls.
Pole insertion length (mm)
The length over which the pole is inserted into the cap. A larger value allows the cap to extend further down from the top of the pole, while a smaller value results in less overlap. The insertion length should be sufficient to allow the cap to be securely fastened with screws.
Side hole diameter (mm)
The diameter of the two side holes used for securing the cap with screws.
Top cone angle (degrees)
The angle, expressed in degrees, of the cone at the top of the post cap. A larger angle creates a sharper, more pointed cone, while a smaller angle results in a flatter and less inclined top surface.
Do not exceed 89° and do not use values below 0.01°. If a smooth, nearly flat top is desired, use an angle close to zero, such as 0.01°, but not exactly zero.
For most applications, angles around 10° are recommended. They provide a slightly pointed shape that is safer while still allowing effective water drainage.
Recommended customization procedure order
- Clic “Customize” on the model page
- The customization page opens with default settings
- Change the parameters
- If everything looks right, click ‘Generate’
- If the pole cap you’ve got is OK, move on to the next step; otherwise, repeat the previous steps
- “Download” the customized model as STL file (NOT 3MF file!!!!, if downloaded from customization files it contains default not good settings!)
- Download my suggested print profile
- Remove any plates and parts you don’t need from the print profile before importing your cap
- Import the cap into in my print profile and now slice
- To be on the safe side, first print a test piece to try out, then print the rest to avoid any unpleasant situations where the pole cap doesn’t fit onto the pole by a few tenths of a millimetre, otherwise copy the cap and create as many copies as you need to print on the plate
- There you go – you’ve saved time and got your pole cap!
NOTES:
- If you make a mistake and the cap comes out badly or misshapen, you can always click “UNDO” or “RESET0” to the default correct settings and try again.
- When you need to download the model from the customization page, do not download 3MF files suggested by Makerworld Customization; instead, download the recommended print profile and import the STL file. If you export a 3MF file from the customisation window, the settings will not be suitable for the model and will contain default values. The print profile is the reference to use; it has been carefully checked, maintained and tested.
Mounting tips
If the pole is not perfectly circular, choose a diameter that allows the top of the pole cap to sit securely on the pole, leaving a margin of 1 mm or more around the diameter.
Leave always some margin in diameter: if the pole swells slightly, there is a risk of the pole cap cracking!
Do not overtighten the screws when securing the pole cap, especially if the pole is not perfectly circular, as this risks putting strain on the rim and causing the cap to crack! The side fixing screws are only there to prevent rotational movement and the cap from being pulled off the pole; it should not be fixed and immobile perfectly.
My tests: mounted outdoors on circular larch and chestnut wooden posts since may 2026 in a sunny mountain setting.
Material and printing notes
Recommended for outdoor printing using PETG, ASA, or other weather-resistant materials filaments.
For optimal printing, use the provided print profile and upload the STL file of the part with the diameter and quantity you need.
The inner part requires supports for optimal printing, and to prevent separation issues, a PLA filament is used as an interface between the supports to allow for quick and easy removal and detachment of the print supports! See print profile for details. You can use any colour, but I’d recommend colours similar to that of the pole cap to avoid unwanted mixing if the nozzle isn’t cleaned properly.
To print versions with different diameters (the print profile is set up for example with a single 10 cm diameter cap), replace the part in the sample print profile with the STL files of the diameter and quantity of pole covers you need, using the same settings.
For best results, align the seams on one side of the cap without holes.
Always print just one cap first to test and see which parameters still need adjusting and fine-tuning; then print them in bulk once everything is OK.
The print profile provided is optimised for small diameters and the default model; you may need to adjust certain settings, such as infill, etc., if you are producing pole caps with diameters or parameter values that differ significantly from the default ones.
Better print with AUX fan OFF. Print at reduced acceleration and speed for better result.
Test and results
Result showed in the images are printed with brown PETG BASIC and as support interface layer black PLA BASIC filament with printer Bambulab P1S, 0.4 nozzle, Textured PEI Plate / , AUX fan OFF
Customizable Pole Post Cap Round

Publicado em 2 de jun de 2026