Você está no 3DFinder
Buscamos em Thingiverse, MakerWorld e Printables ao mesmo tempo para te dar o melhor de cada uma.
Descrição
X2D/P2S Gridfinity plate - AMS Flipper friendly
This model is a Gridfinity top plate to fit onto the top of your X2D/P2S printer. It slots into place and sits securely attached to the top glass hugging around the top glass hindle and the entire plate can be lifted off the printer with the glass plate as one unit.
The top plate features a 9x2 gridfinity grid with magnet cutouts.
Overview
- Gridfinity grid 9x2
- Standard gridfinity square width of 42x42mm
- Magnet cutouts
- Flush with the printer edges on the sides
Front edge features a fitted angle ridge that doubles as a lifting handle to lift plate with top glass
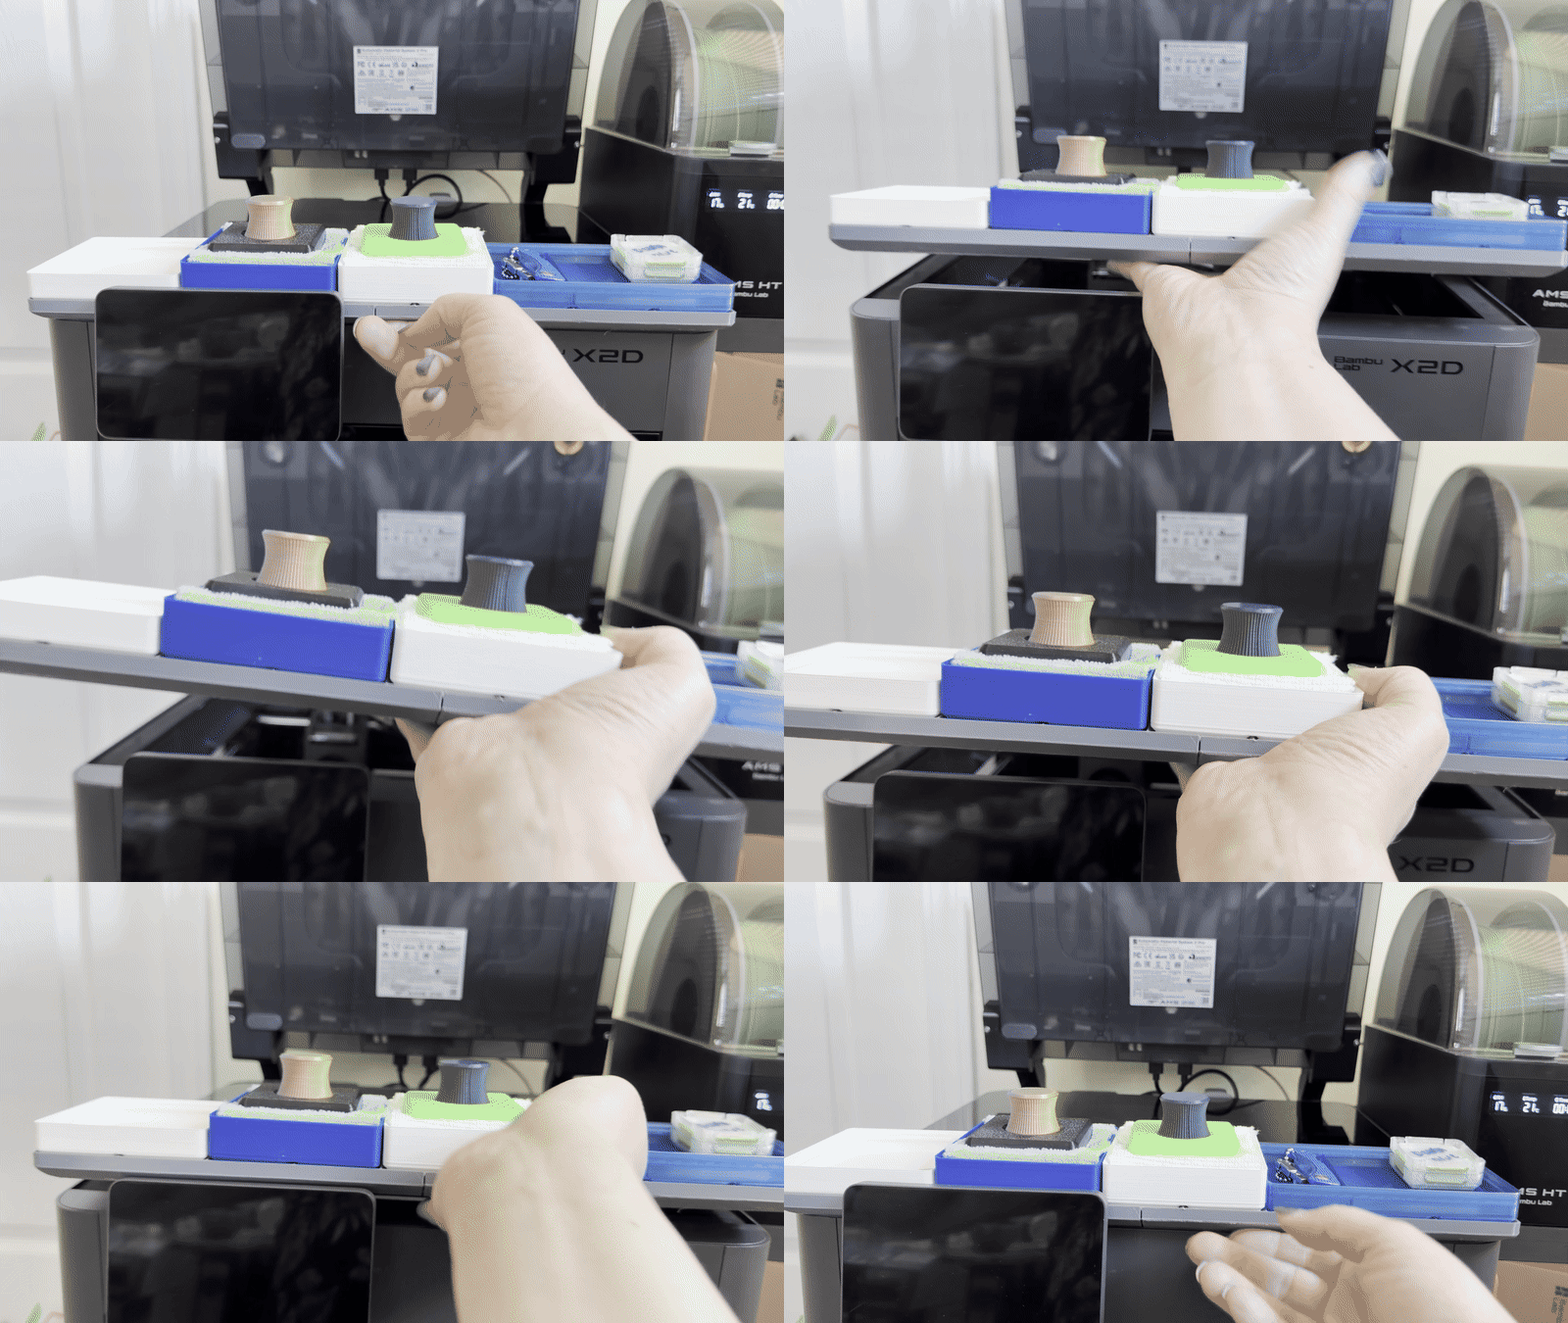
- Back edge is compatible with AMS Flipper by @Jakob_K_Design
- Prints in two parts for left and right side, meeting in the middle around the glass plate handle
- Both parts align together using magnets in the mating sides
- Plate Holds in place being locked in by two removable magnetic dowels
- Sides of the plates feature two to fit reclose-able tape (such as 3M Dual Lock or Velcro) allowing removability but secure hold
Supplies needed
- Required for assembly:
- 12 x size 6x2mm round magnets for connecting the plates
- 2 x pairs of reclose-able tape strips (4 pieces total) cut to size to fit into the 26x30mm cutouts on the bottom of each plate
- Glue to secure the magnets (e.g. Cyanoacrylate Superglue)
- Optional:
- If filling the Gridfinity grid with magnets, an additional 72 x size 6x2mm magnets are used
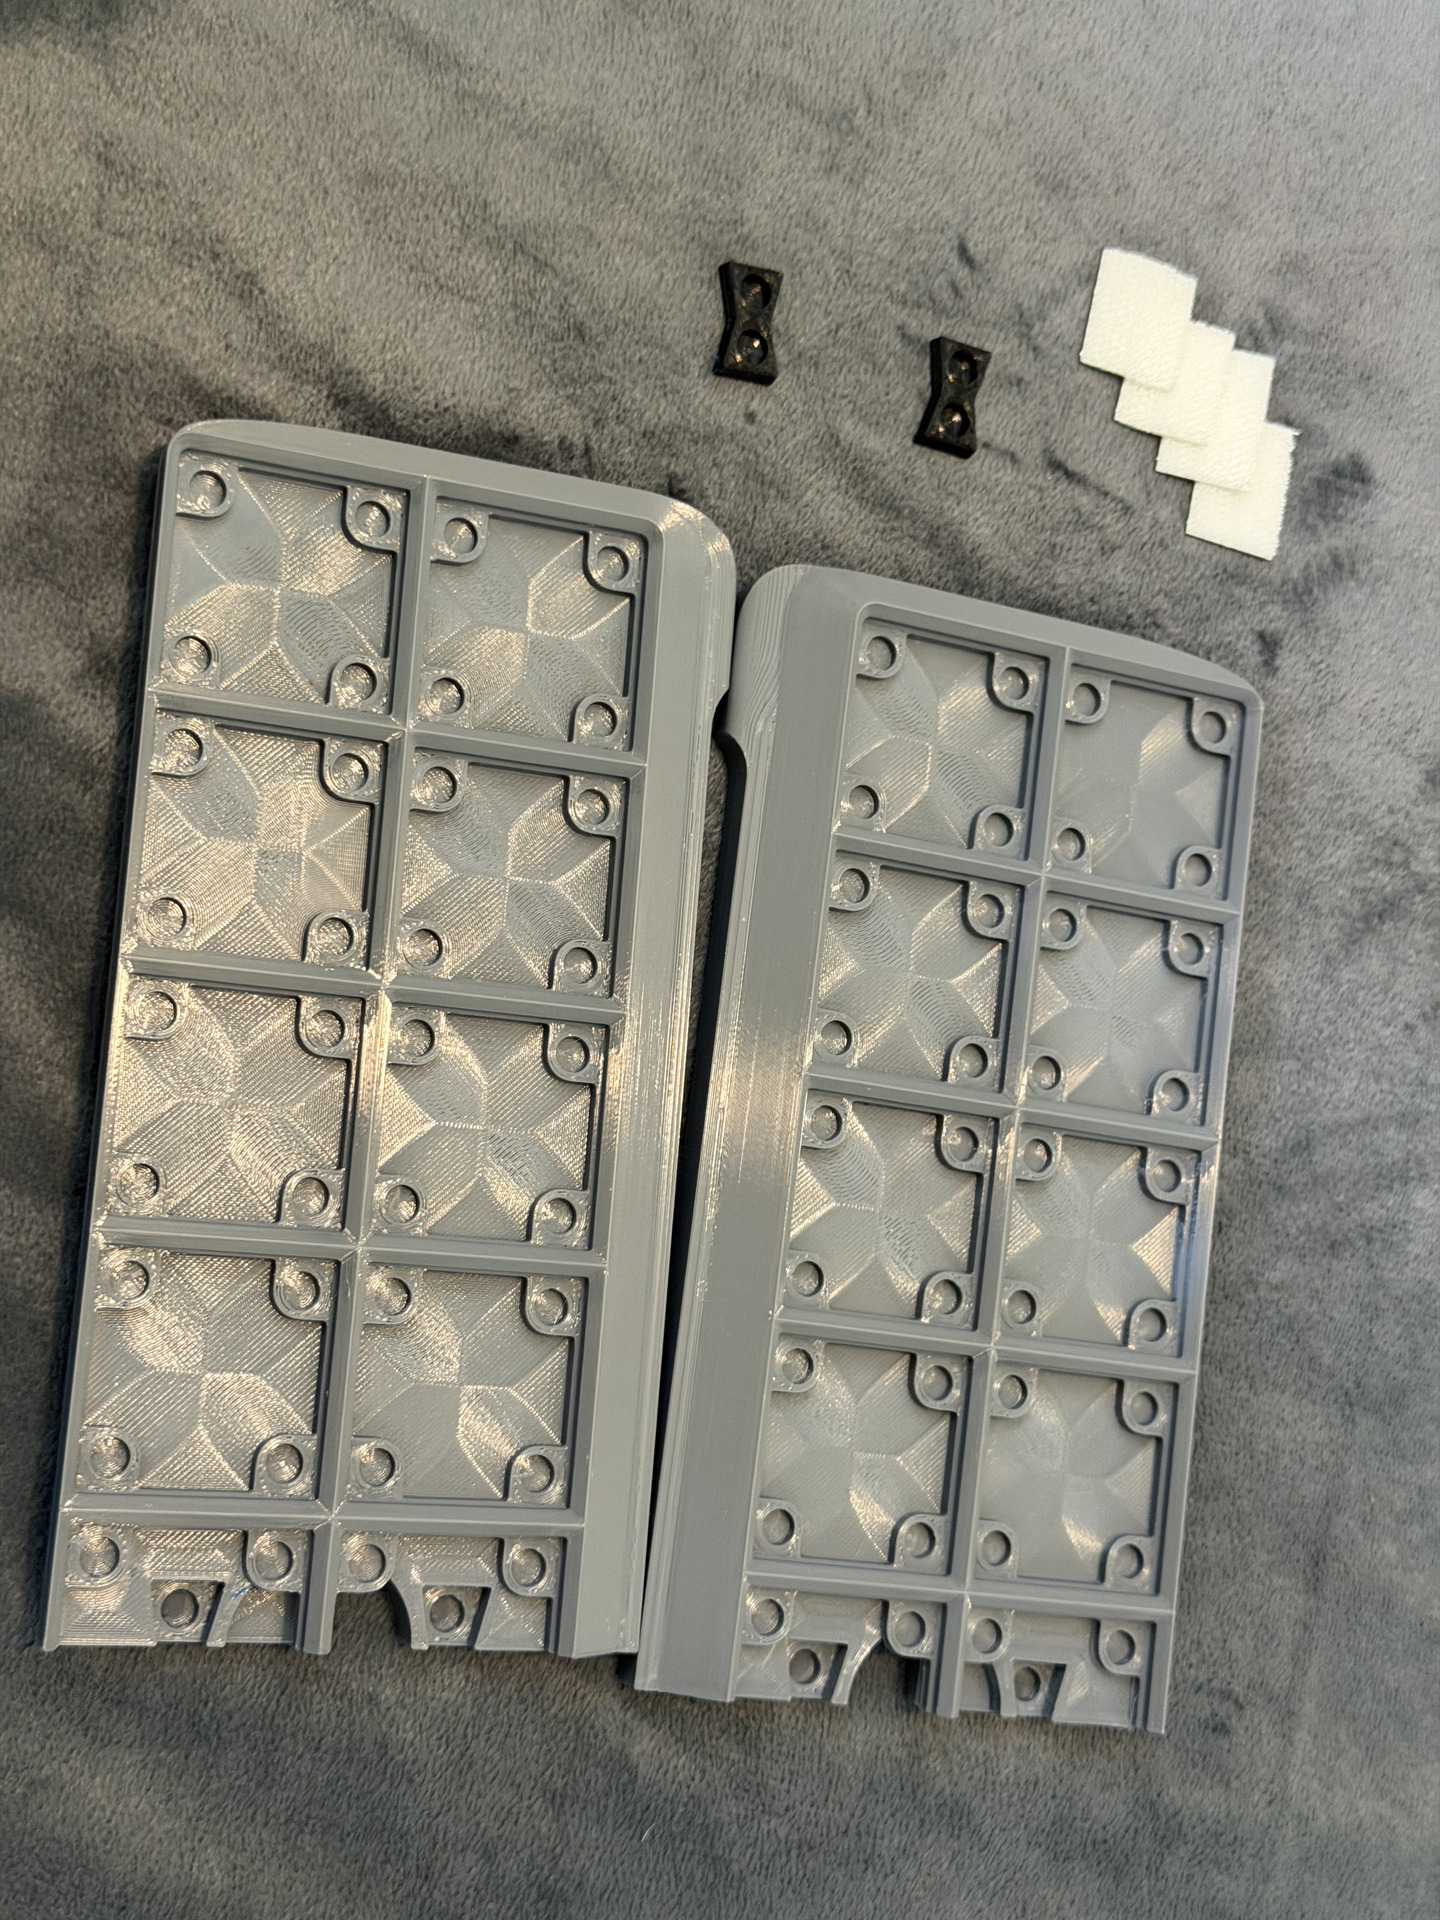
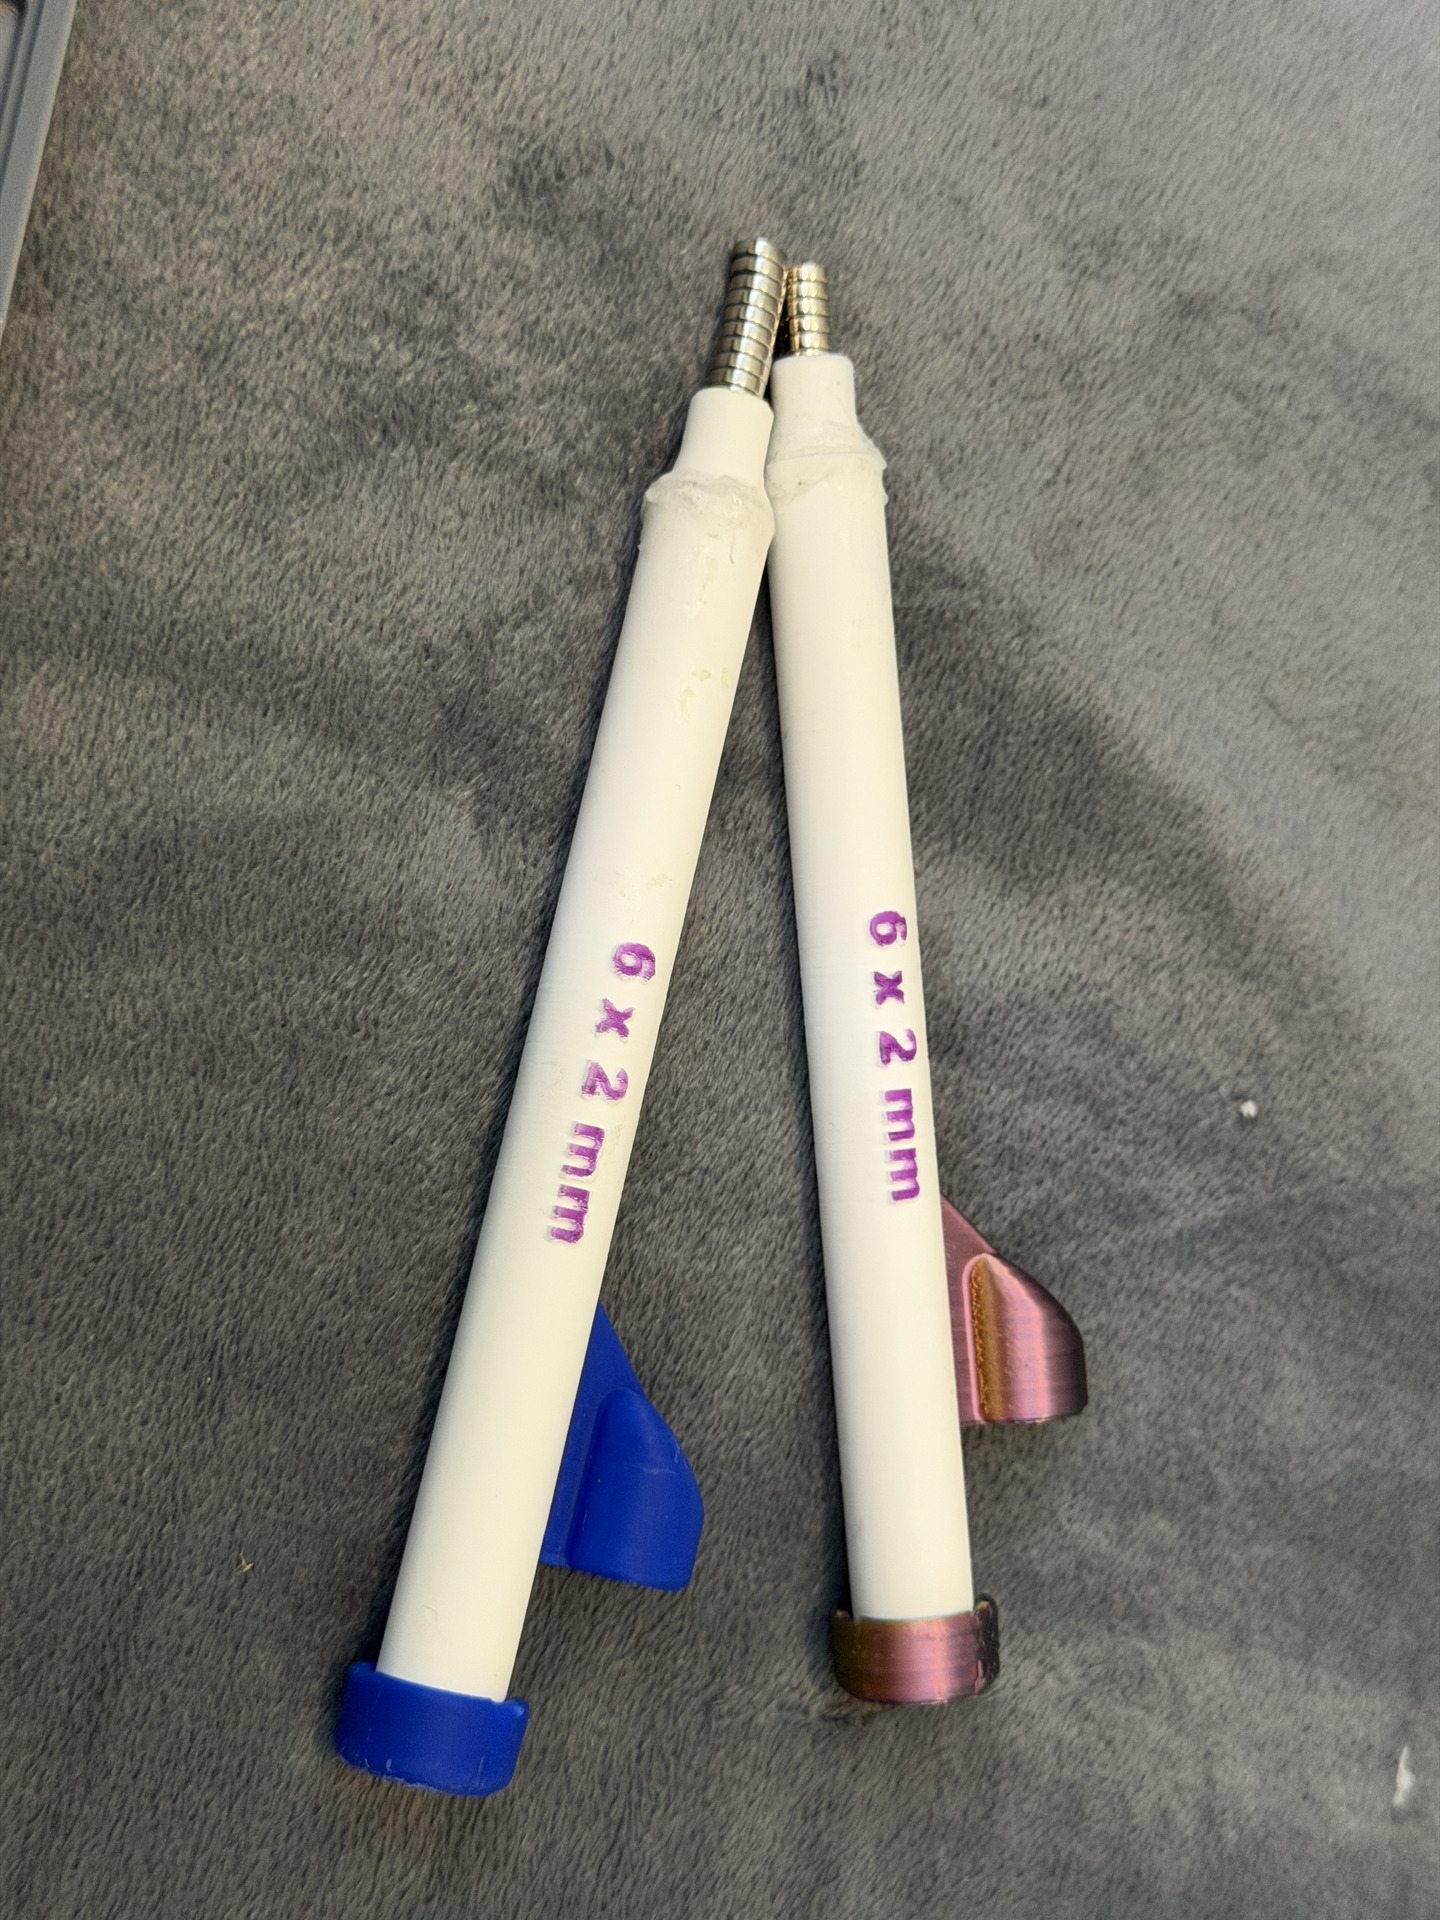
Assembly & Installation
- Print both sides using PETG and make sure it is well dried
- Print the two dowels
- To remove the supports from the two plates, use a pair of pliers
- For the inner sides of the plates center cutout - pull directly sideways should easily remove the supports thanks to the interface layer
- For the bottom USB flash drive cutout, poke a hole into the visible support layer and pull it out. The interface layer should usually come right out with it, but if it is stuck, use a pair of tweezers or crafting scalpel to nudge the side to make it fall out
Glue two (2) size 6x2mm magnets into each of the two dowel connector, and using opposite polarity into the corresponding cutouts on the plates
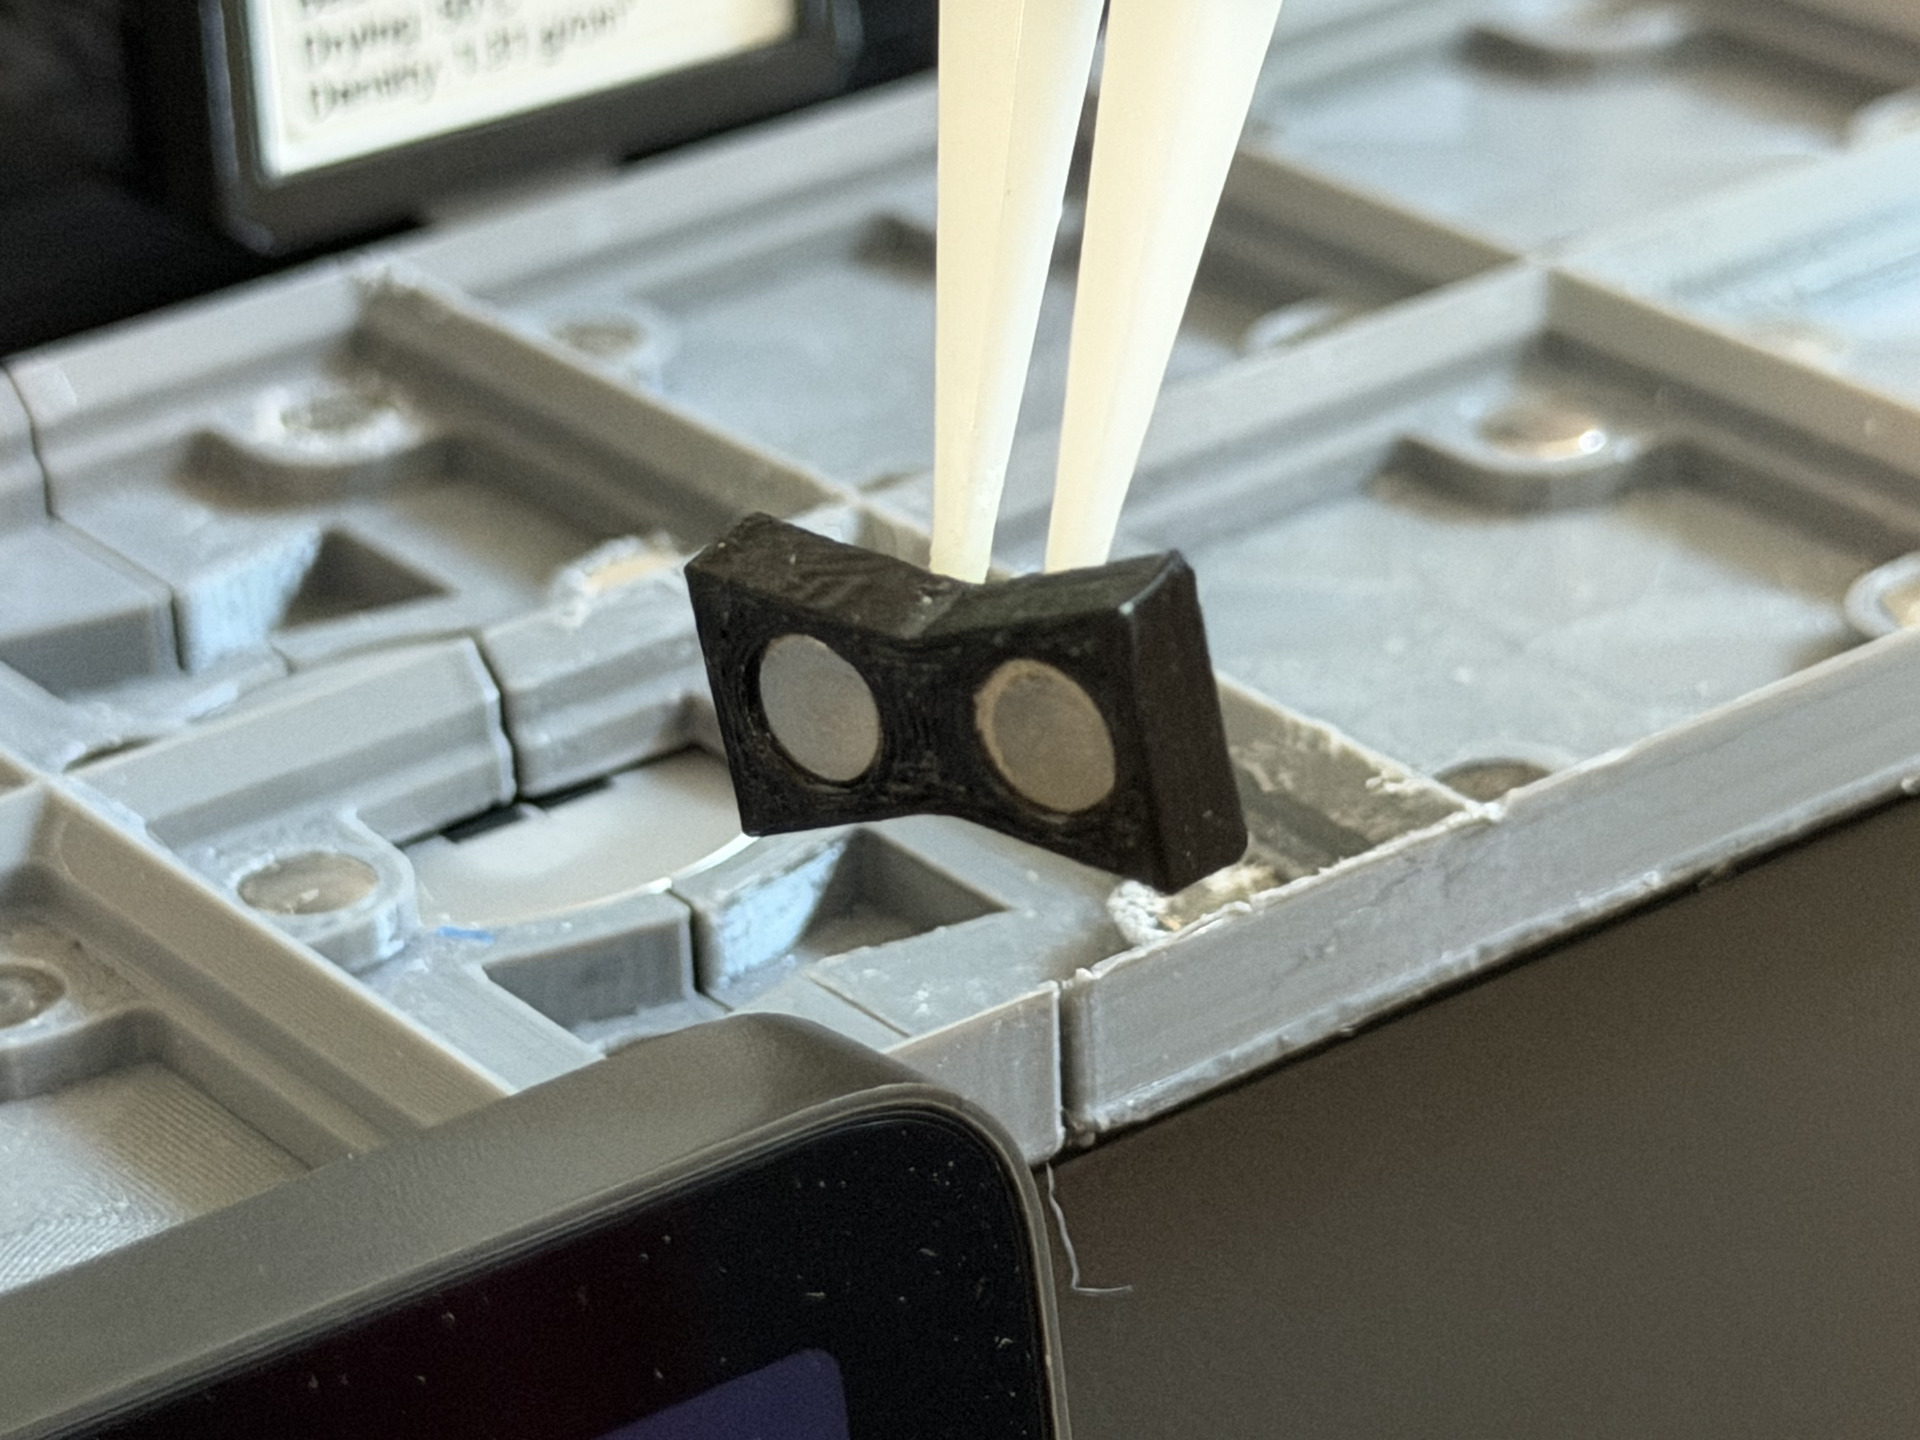
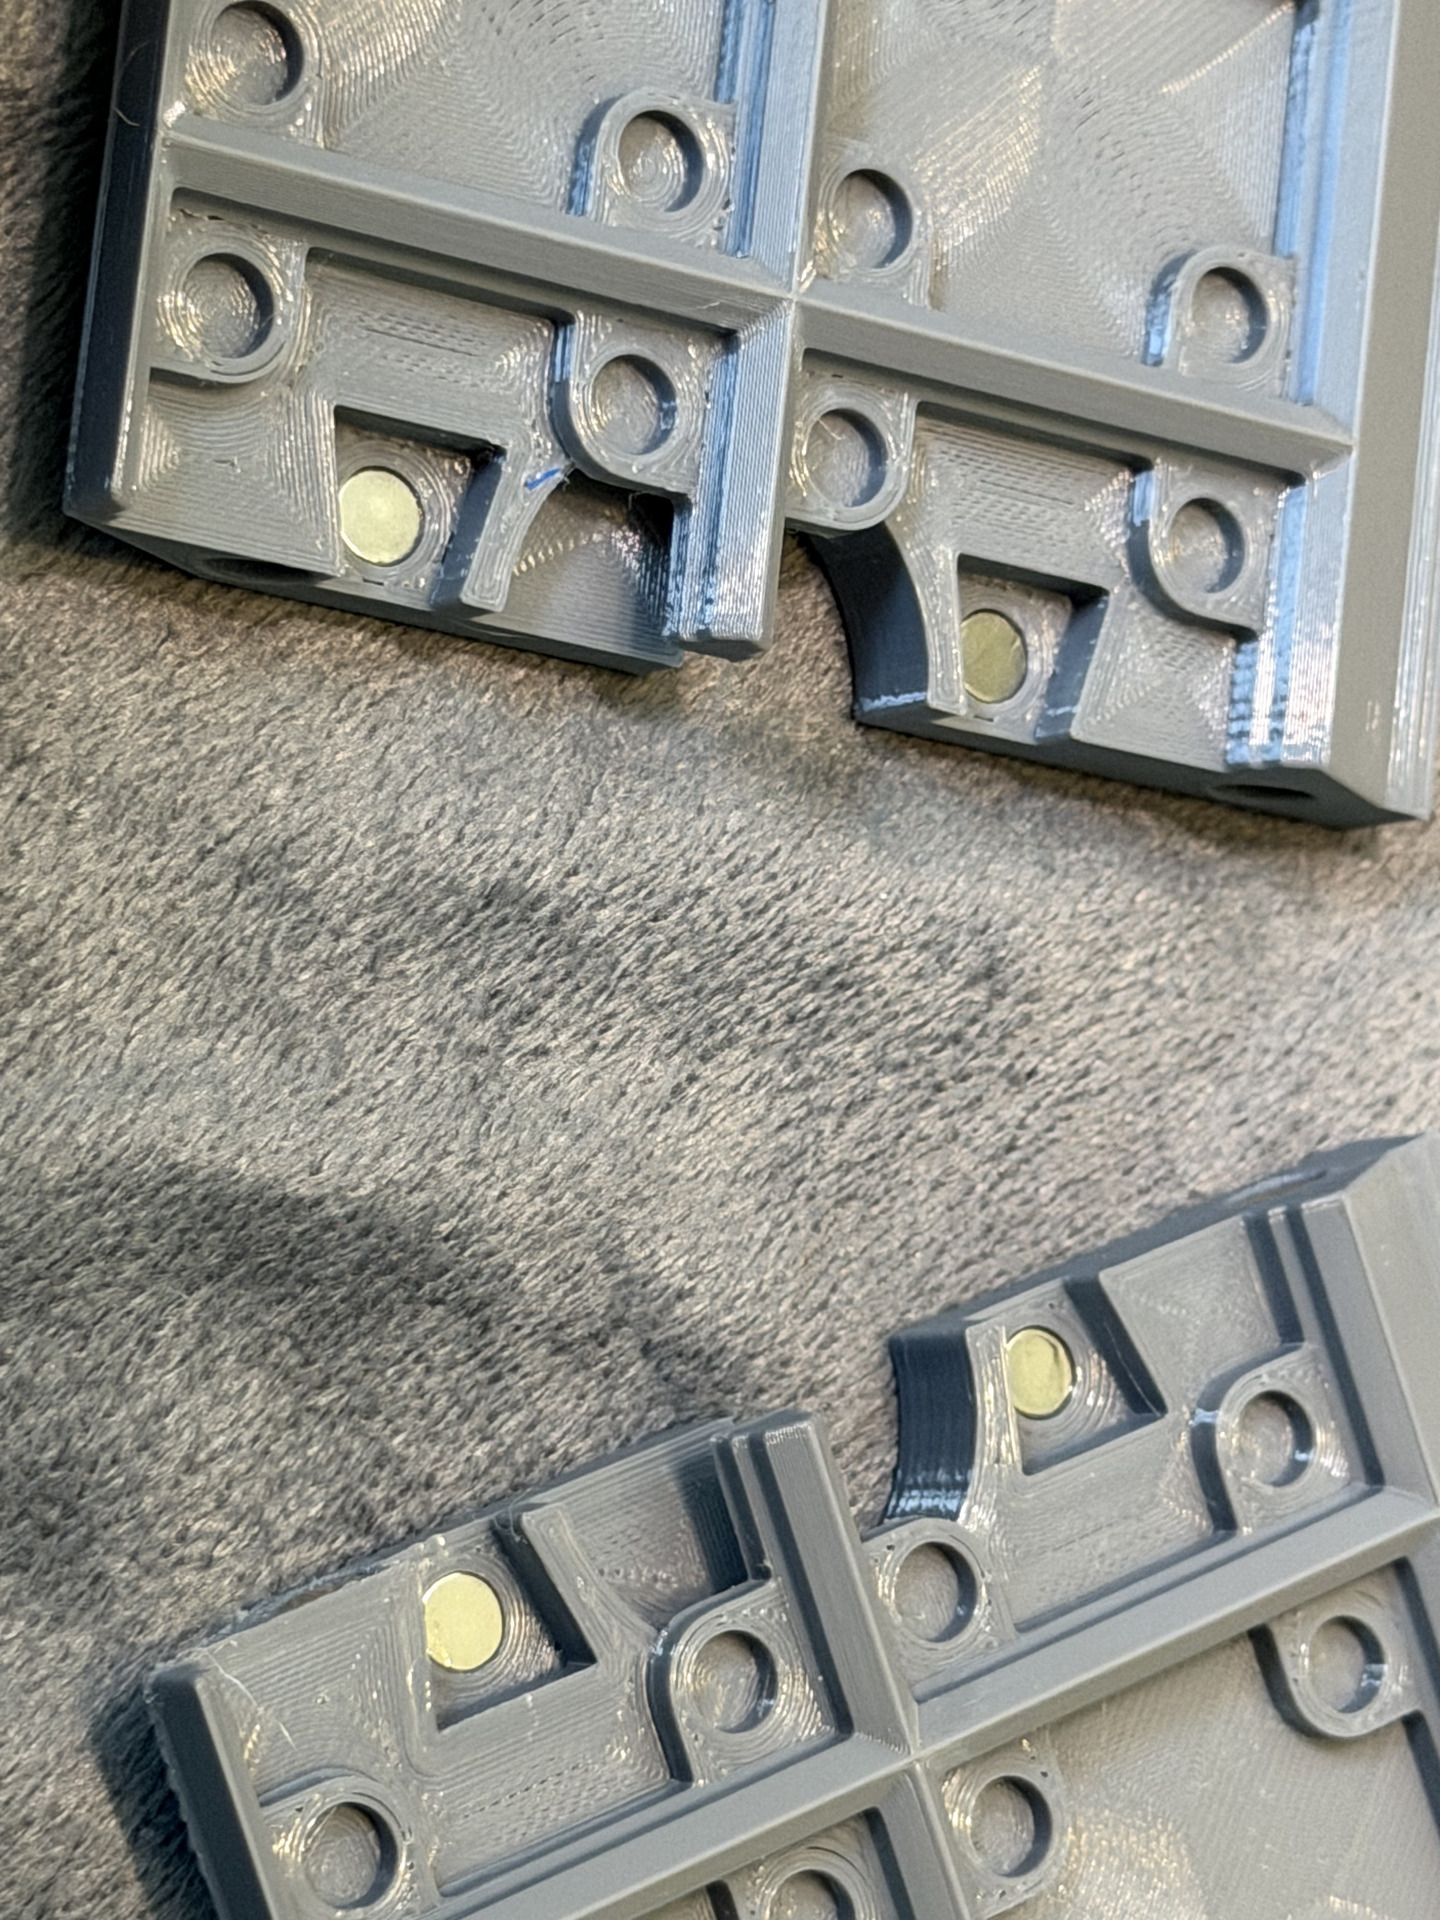
Glue two (2) size 6x2mm magnets into the mating sides of each plate, changing polarity for one side so that the two plates can meet in the middle - note that the magnetic force is just to align them and not to actually hold them together strongly
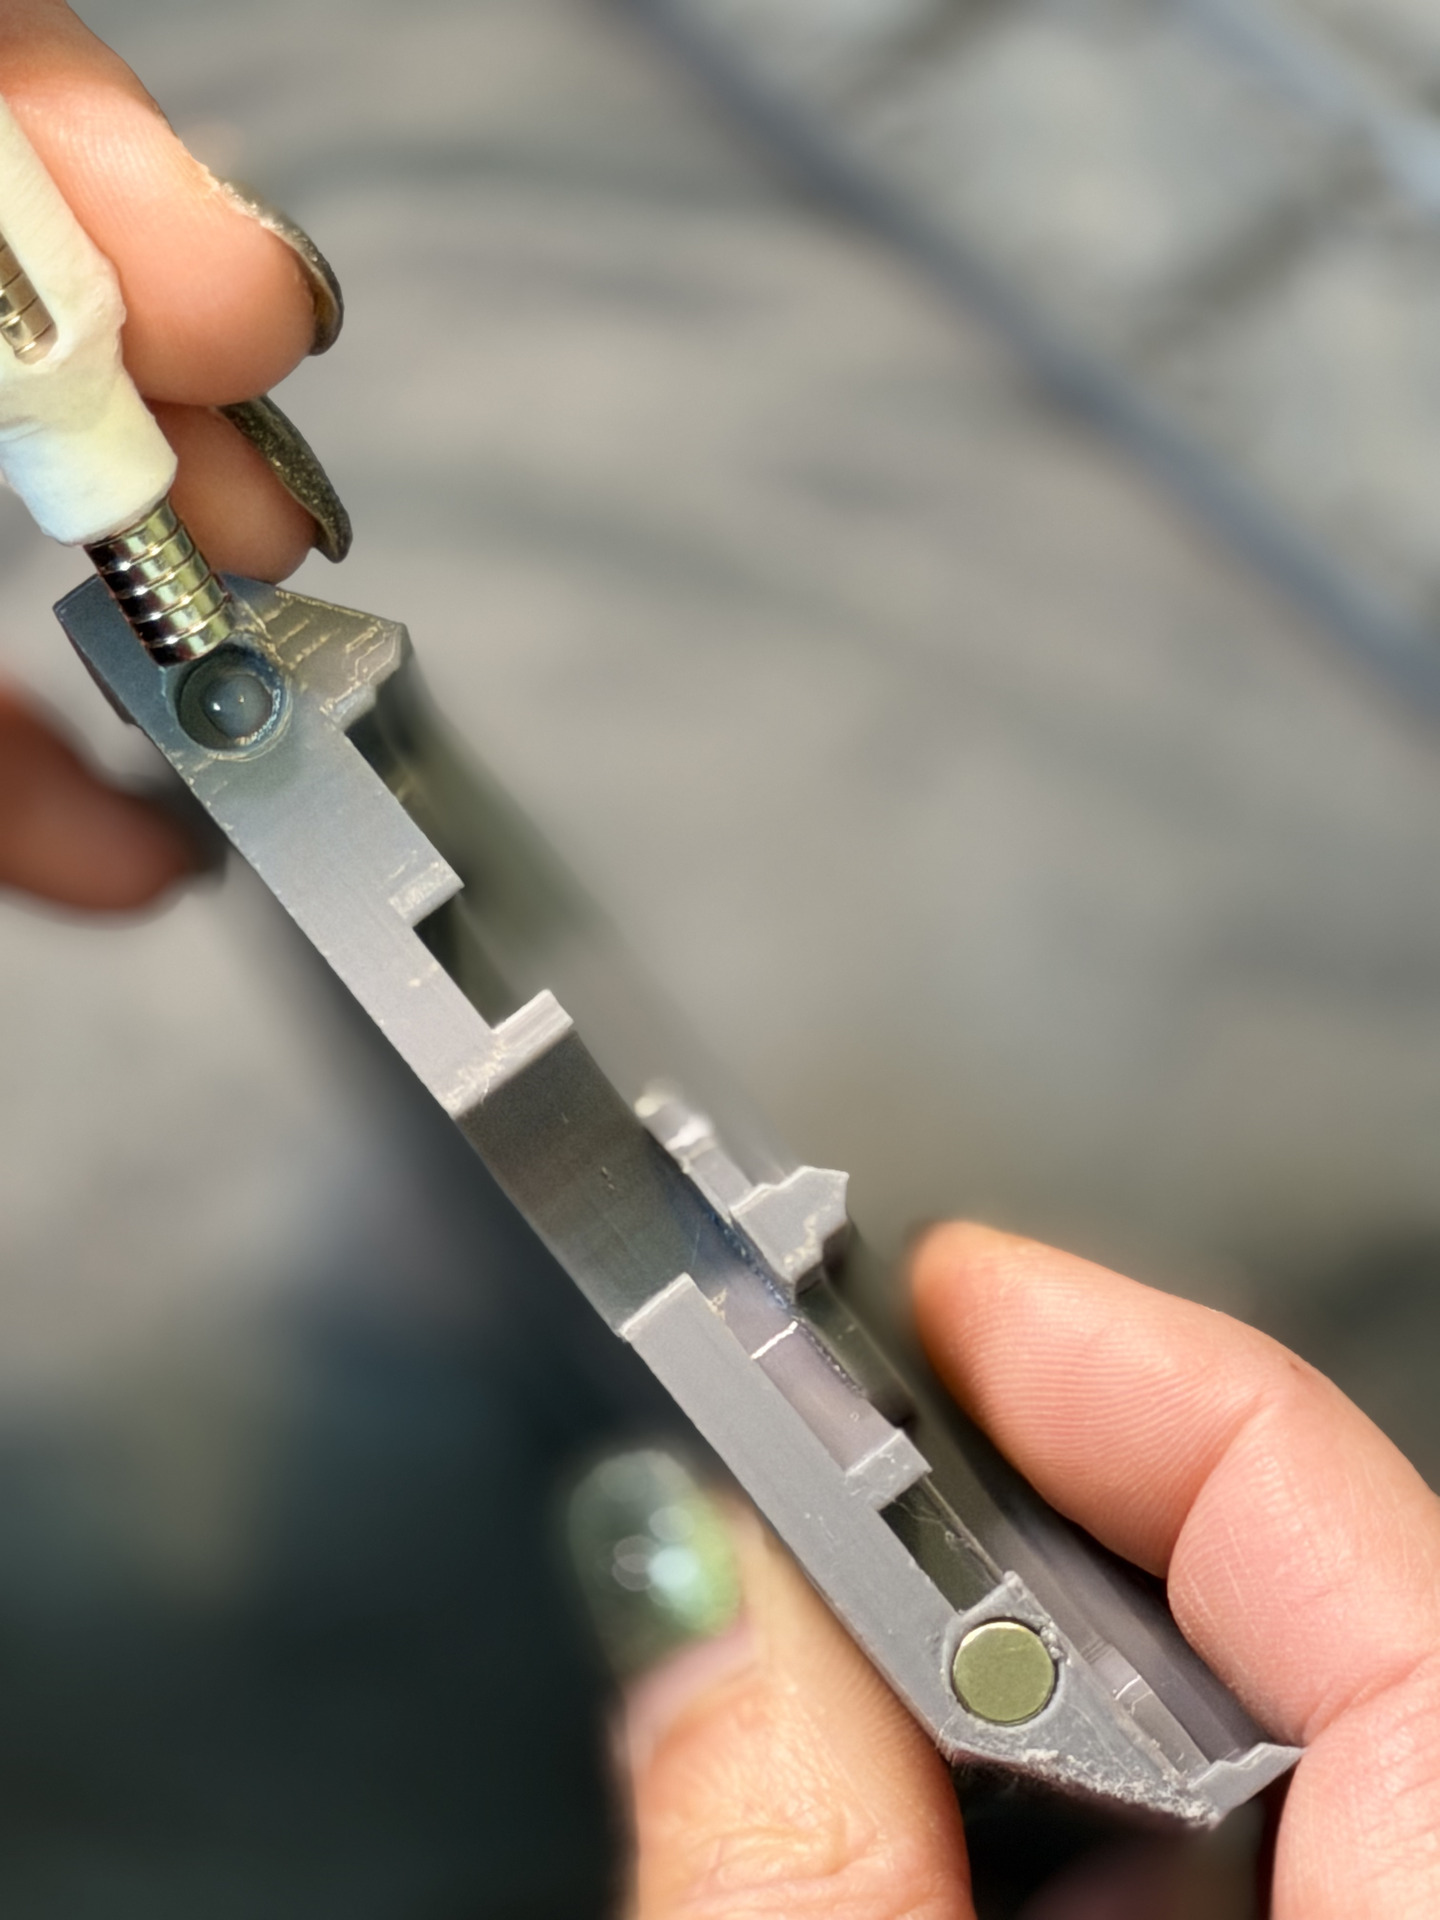
- If desired - add four (4) magnets into each of the 9x2 Gridfinity grid bases (a total of 72 magnets are needed to fill the Gridfinity grid)
- Cut two (2) pairs of reclose-able tape (4 equal pieces in total) to fit into the rectangular 26x30mm cutouts on the bottom of each plate
Peel the tape off one side of each pair and attach the sticky side to the plates into the cutouts
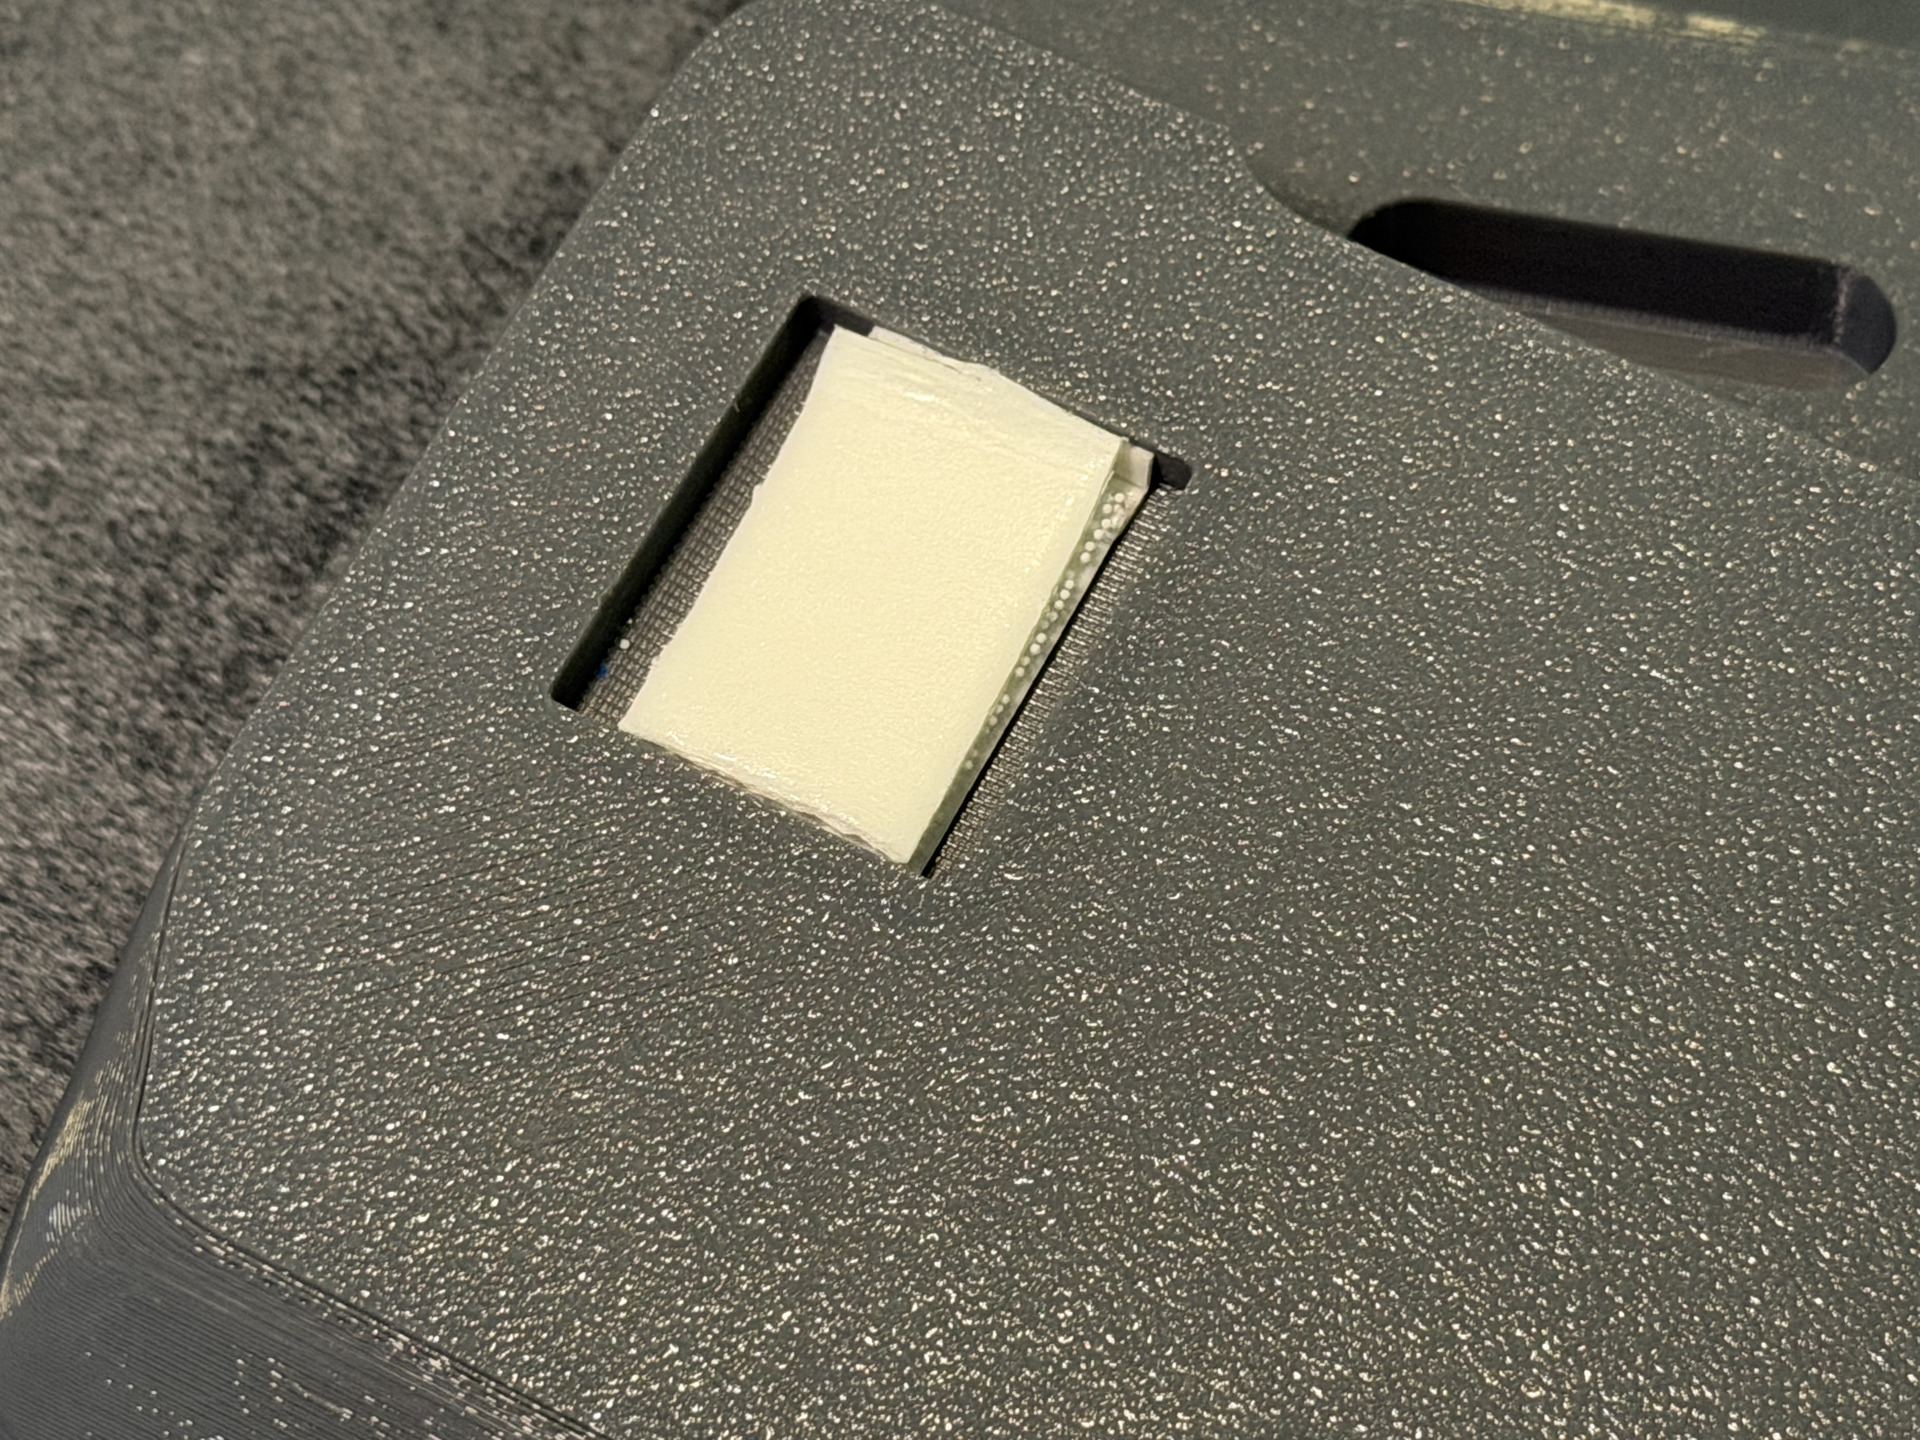
- Peel the tape off the opposing sides of each pair so they will automatically stick to the right location on the top glass plate of the printer
- If you have an AMS Flipper installed, I recommend lifting it during the installation to have it out of the way
- Now take the left side plate (which has an additional cutout on the bottom to fit a USB flash drive) and slide it in from the side to the center at a slight angle, aligning the round center cutout around the glass handle
Once it's all the way to the center, lower the side of the plate to sit flush and push lightly on the outer side to lock the sticky tape to the top glass
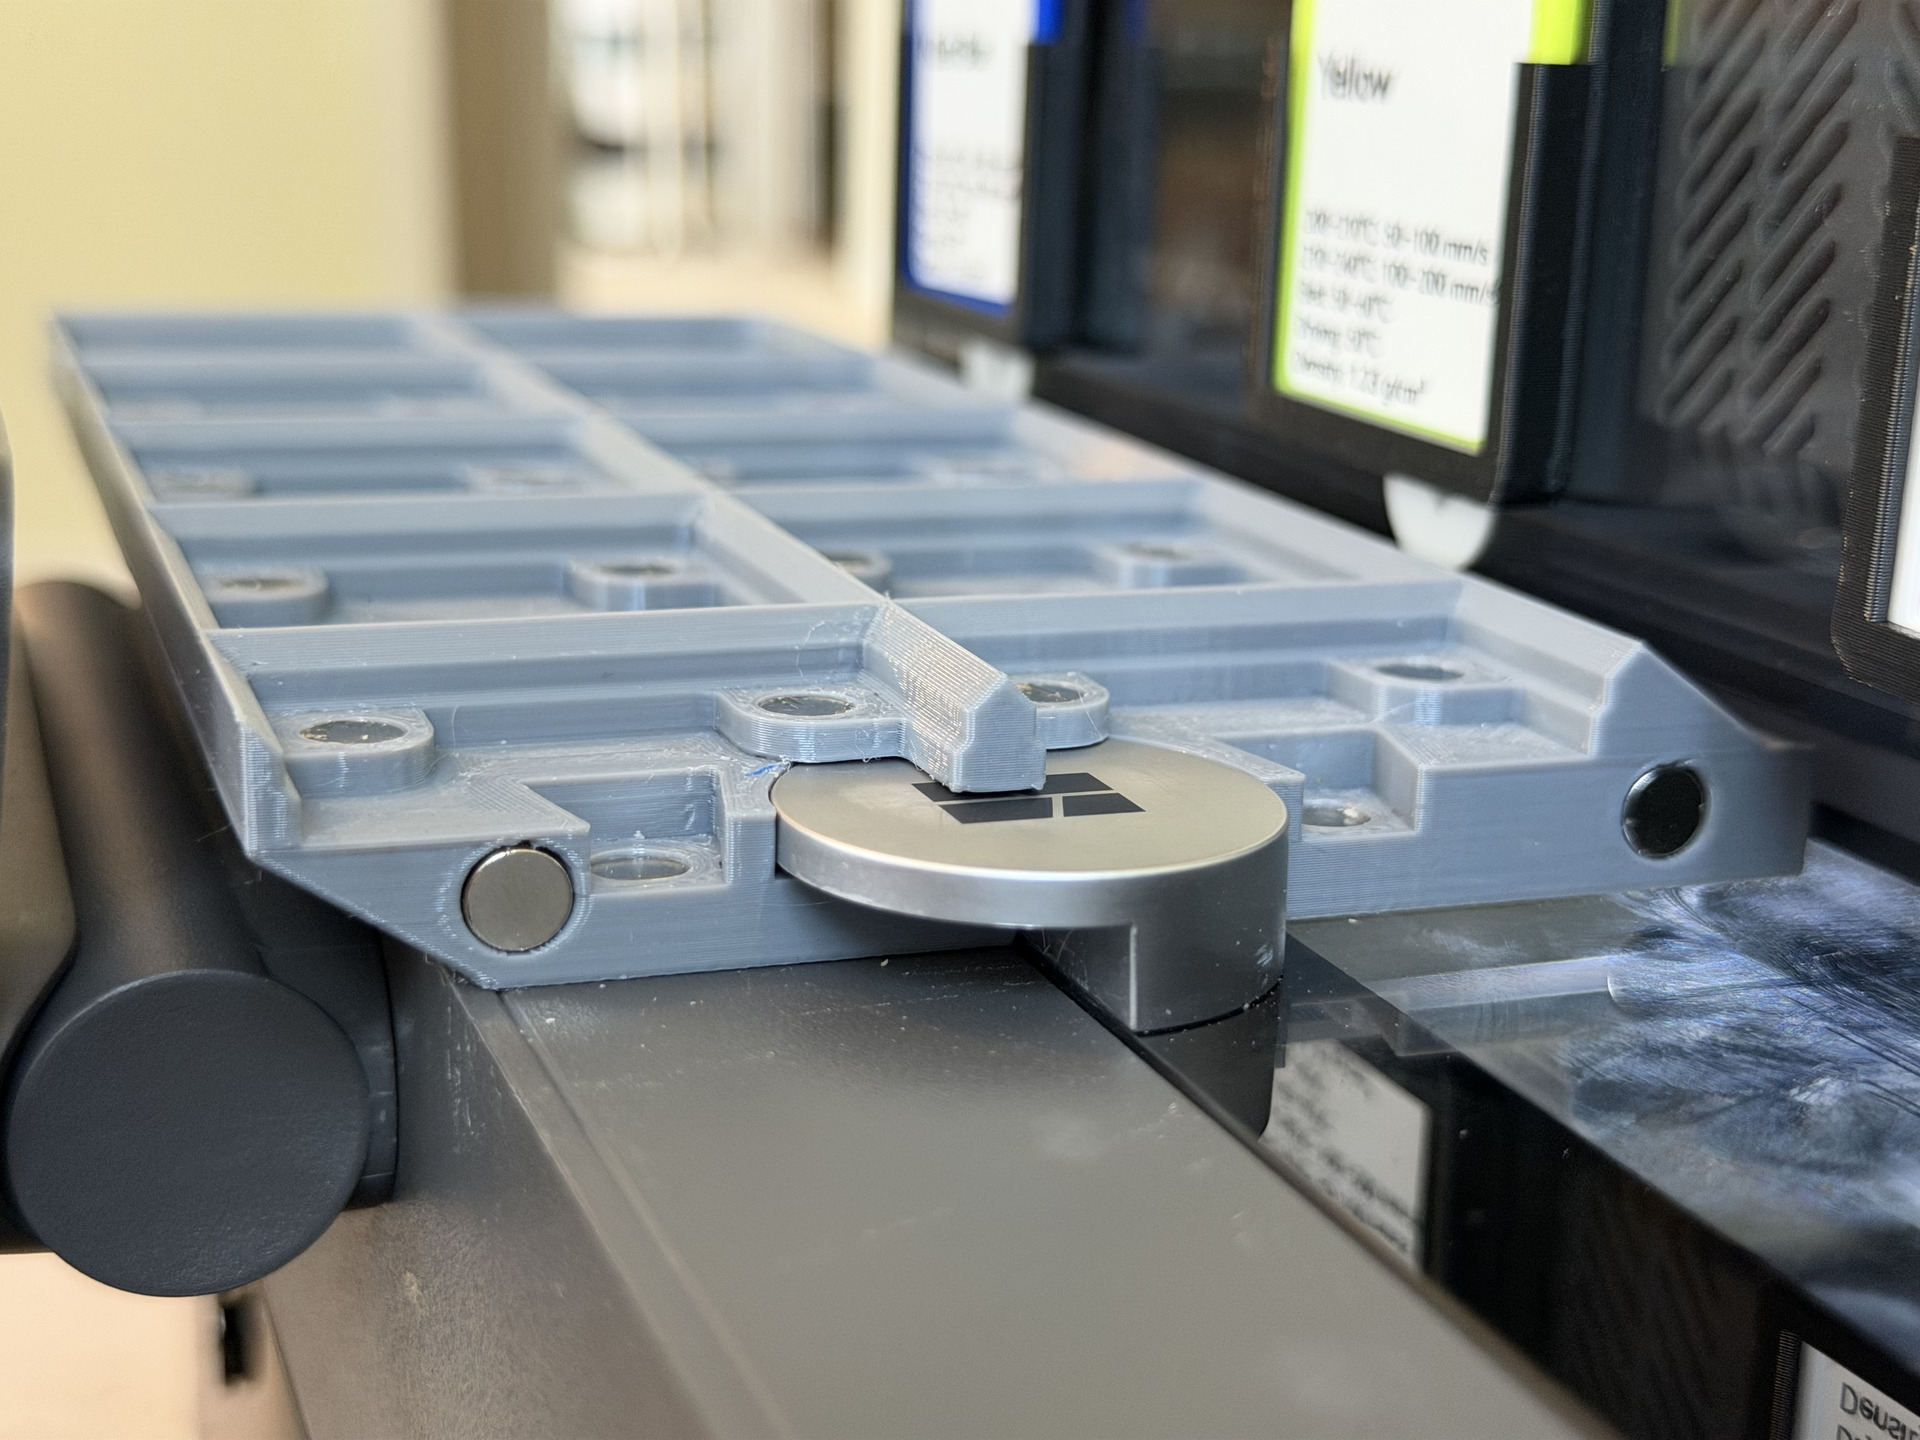
Now repeat steps 9 & 10 for the right side plate and slide them together
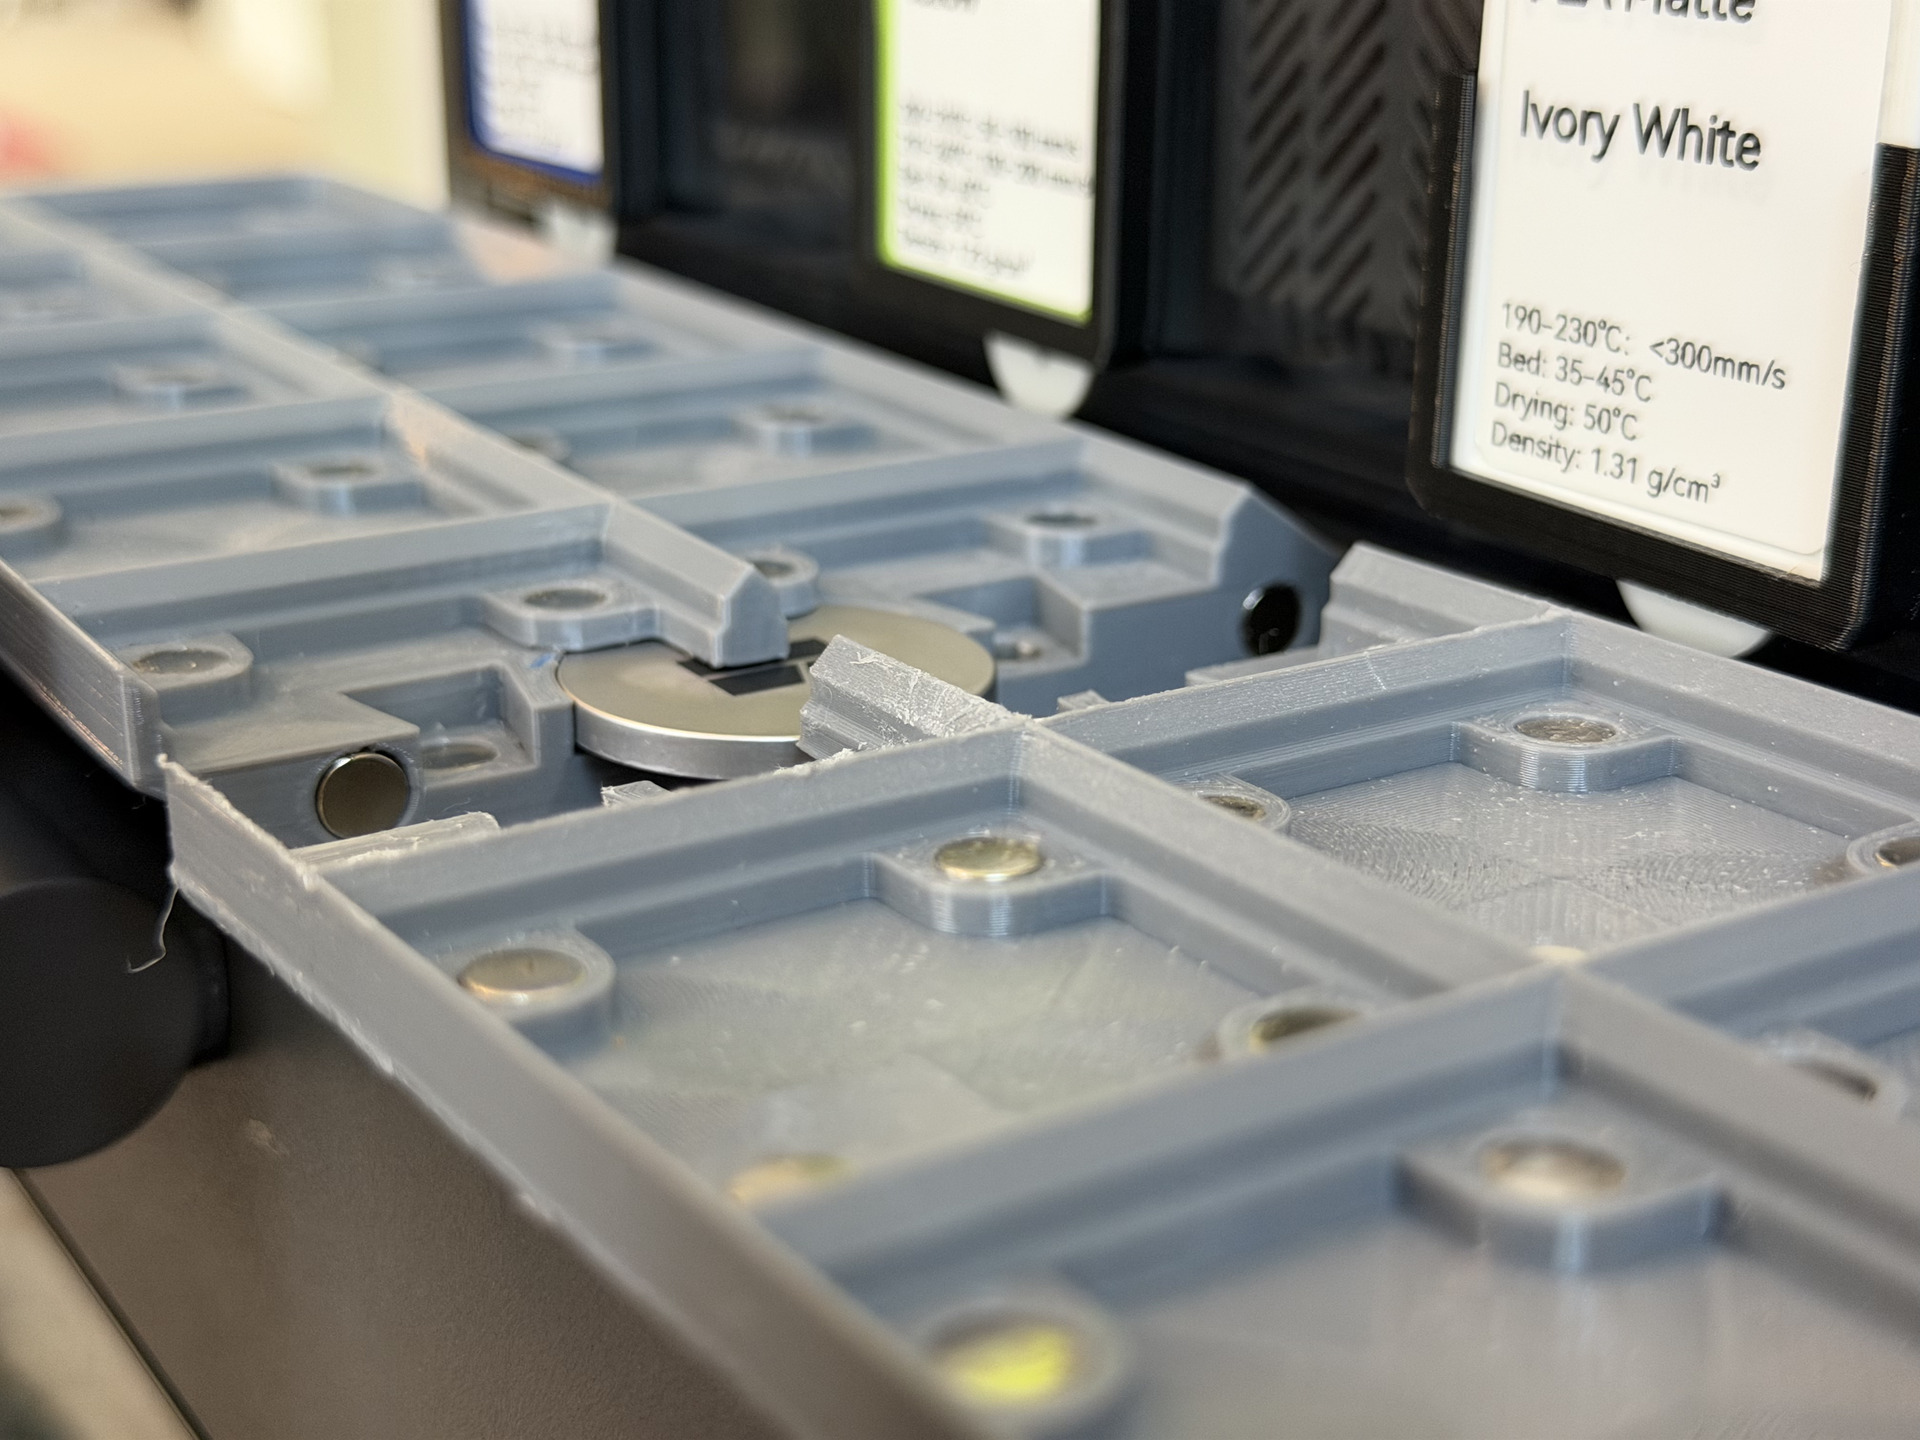
Take the two magnetic dowels and place them into the locking cutouts to secure the center in place.
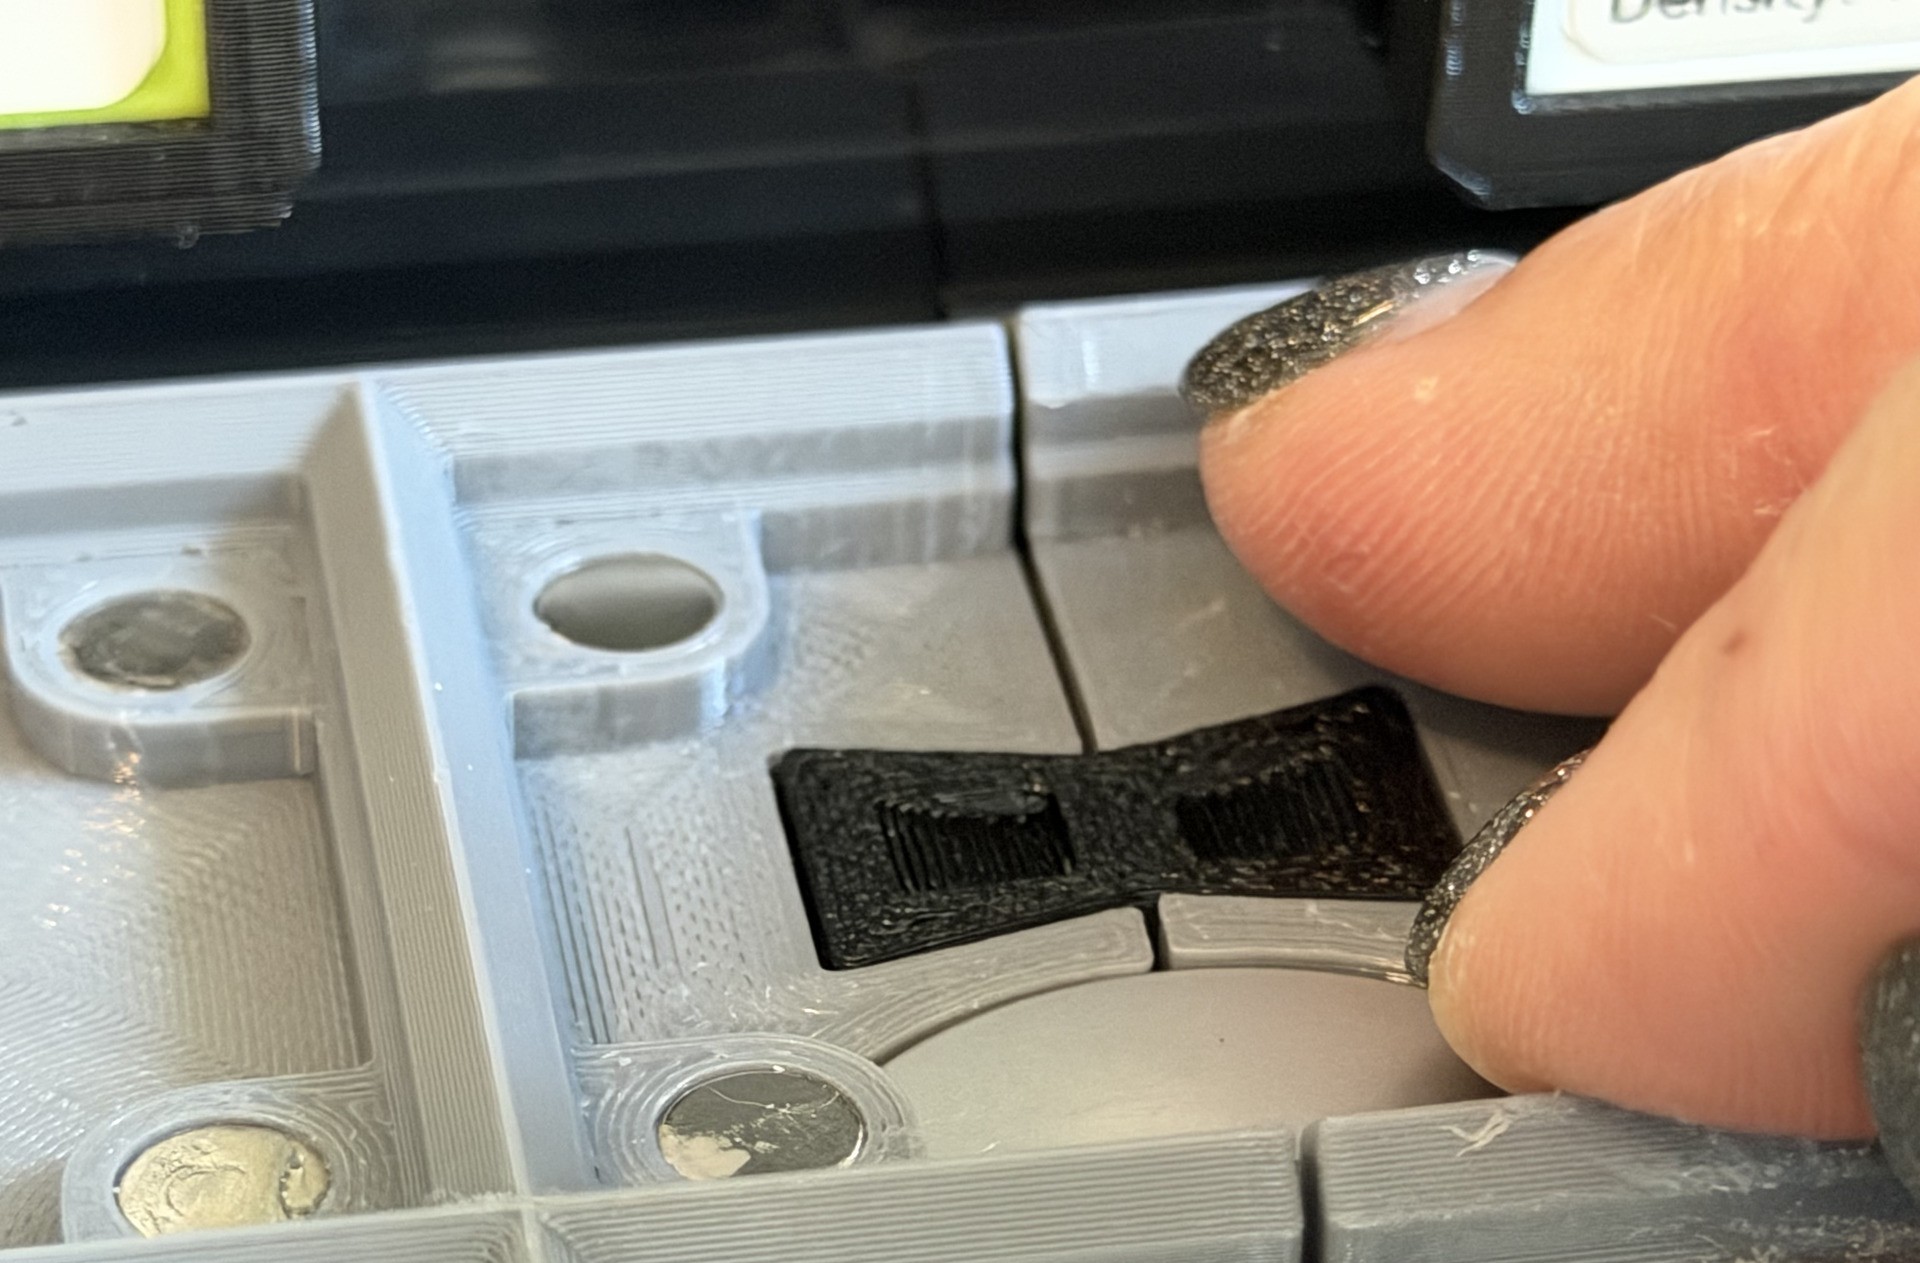
Done, enjoy your Gridfinity top plate and add your Gridfinity trays
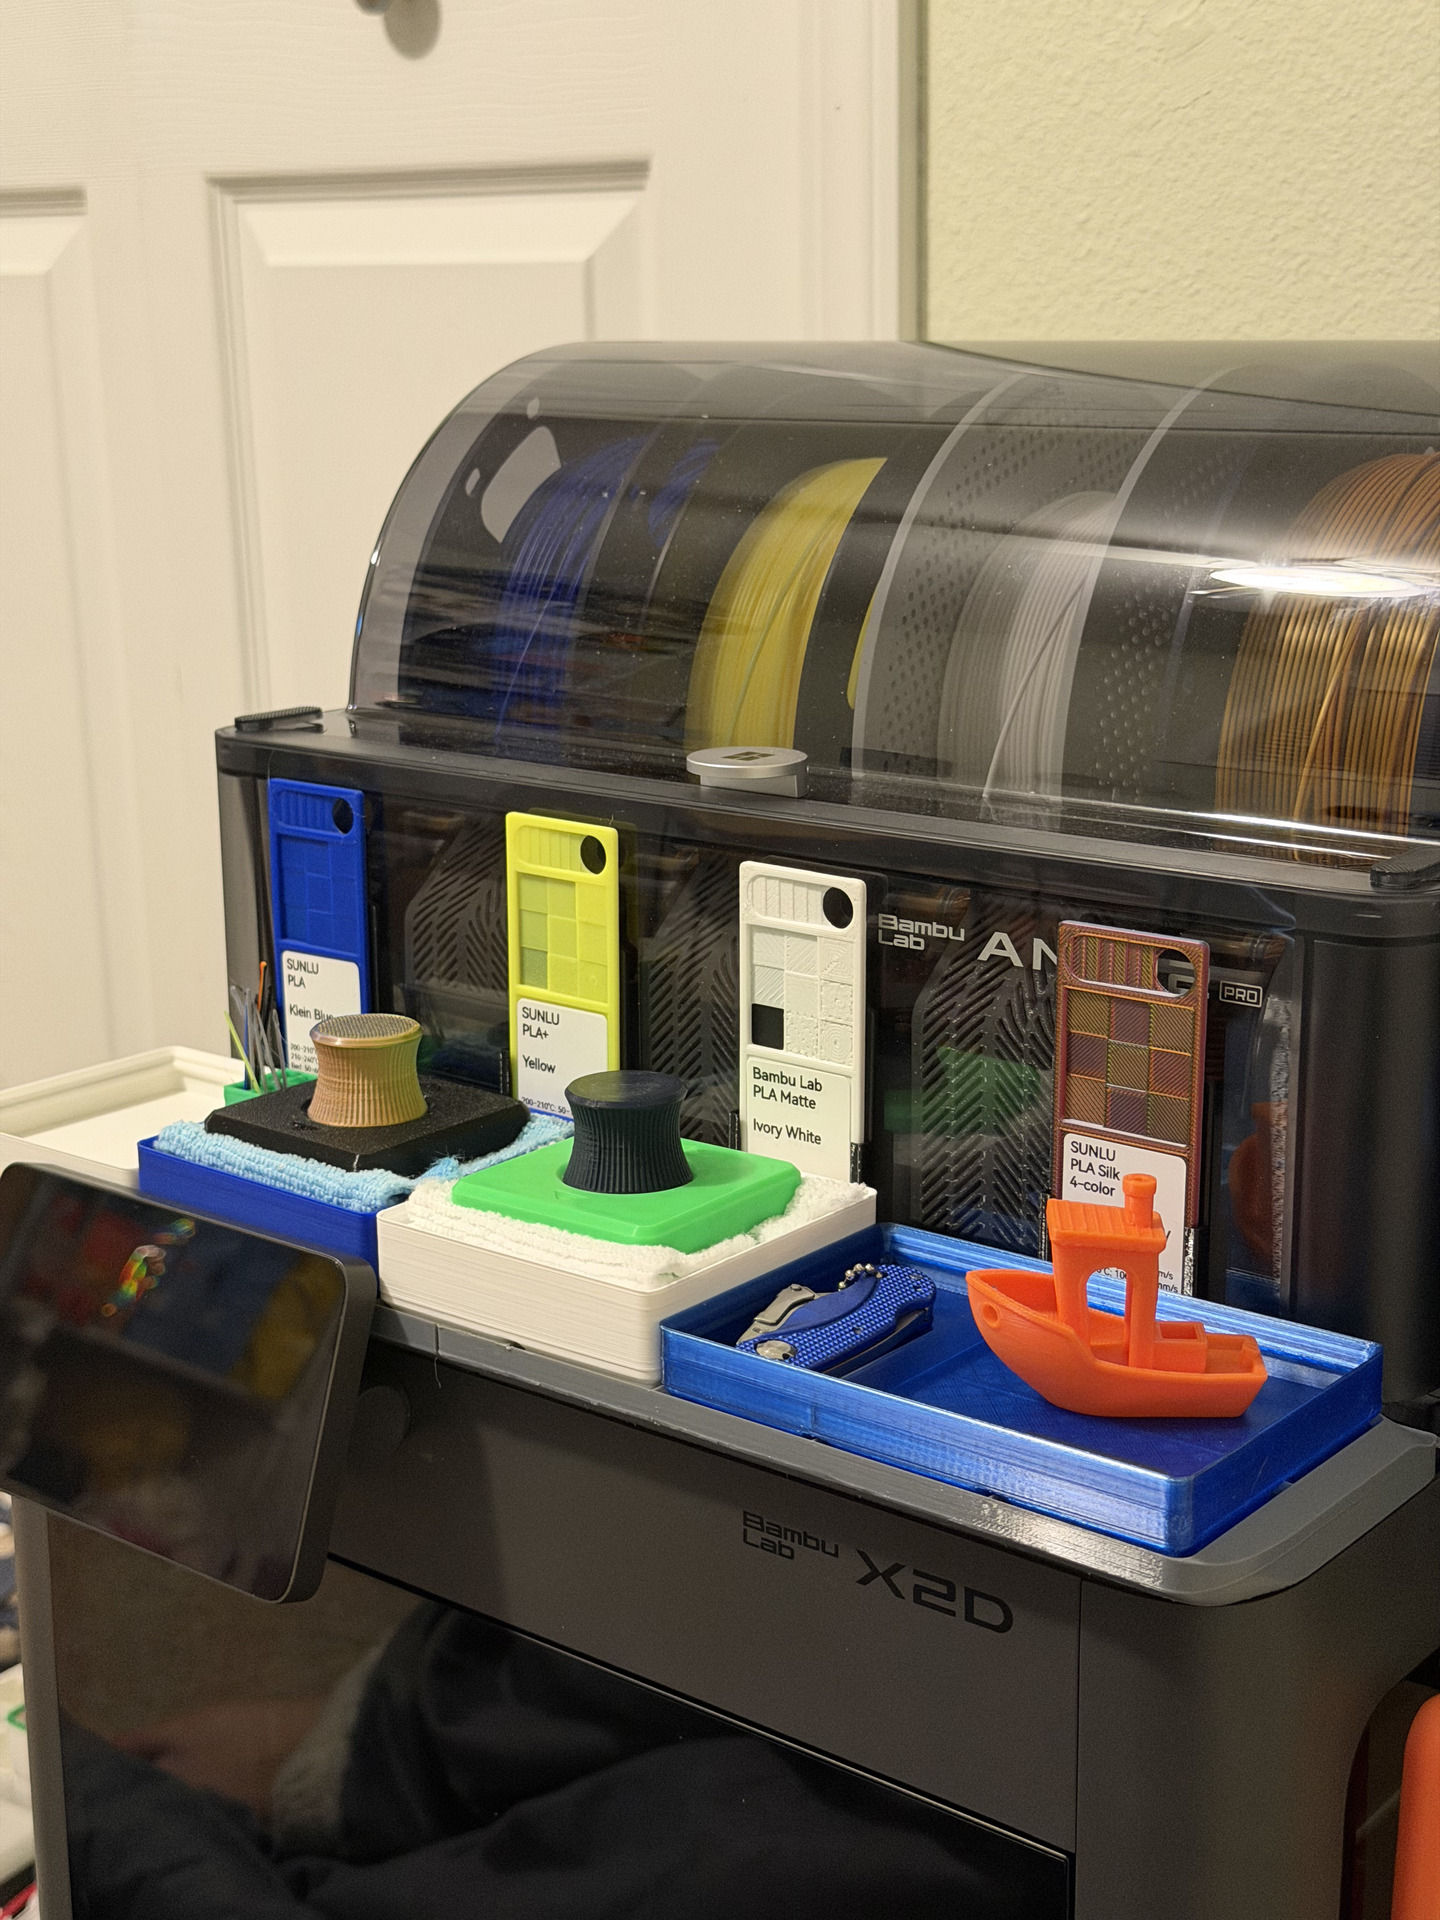
Usage notes
You can lift the glass plate with the Gridfinity Plate in place, simply use the front edge lip at the center and lift the entire glass plate with the trays attached
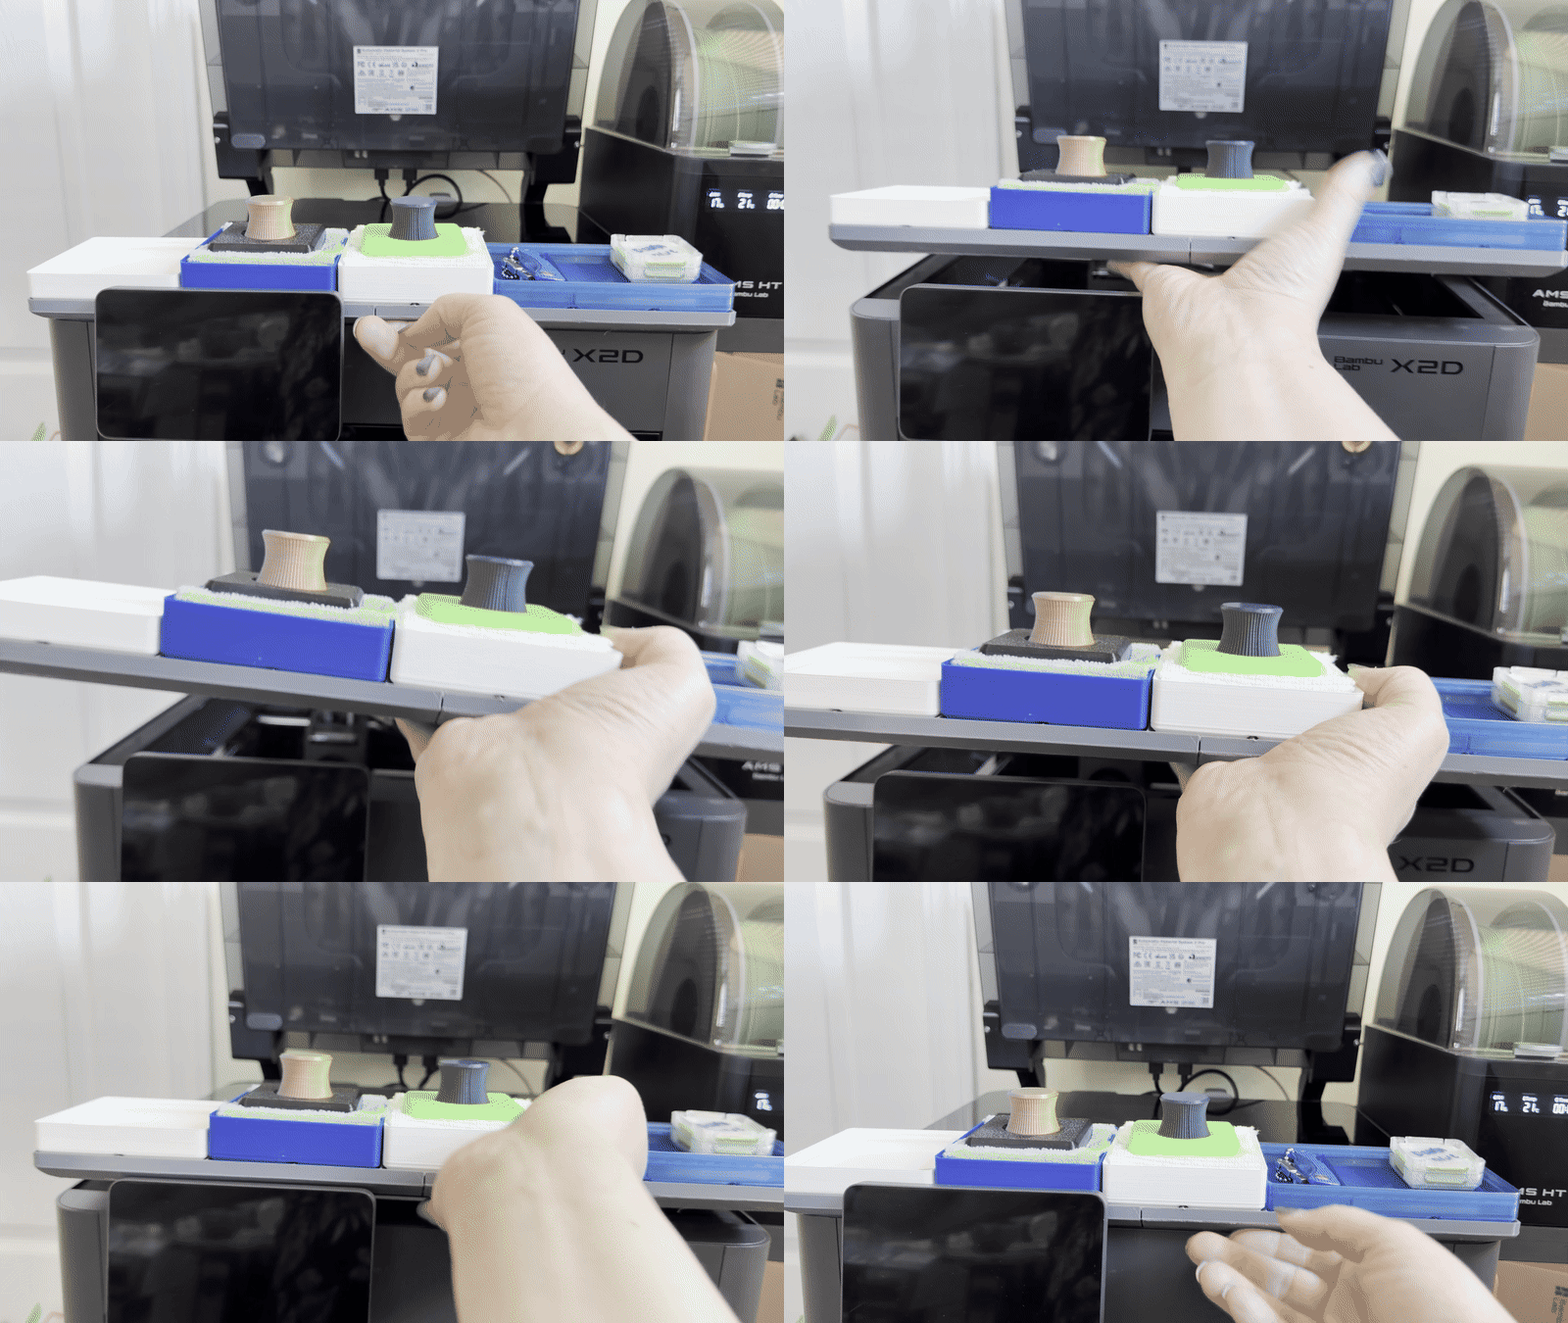
- Note that you can still move the angle of the screen, but it's full movement will be reduced slightly
- If you ever need to remove the plates for some reason:
- First, remove the two center dowel connectors using a pair of tweezers or pliers - there are grippy cutouts on the top to make it easy to grip to
- Now lift the side of a plate slightly to release the reclose-able strips and then slide it out towards the side
- Remember for the left side plate that if you're using a USB flash drive to lift it over the flash drive
Model variants for different USB flash drive sizes
The model was designed to fit the compact PNY Elite-X Fit USB 3.1 Flash Drive which measures 15.5 x 7.75 mm on the cap and the model is fitted to an 8.6mm recess cutout height to easily fit a USB flash drive of this size to slide over.
I also created a variant profile for the popular Samsung FIT Plus USB 3.2 Flash Drive which is slightly wider and a little bit taller, with the model cutout fitted to 13mm recess cutout height.
If you're using another low-profile USB flash drive that doesn't fit either of the models, please reach out and I'll see if I can adapt it for your drive.
Print Settings
- Supports: yes, with top interface layer enabled for smooth finish on supported portions on the recesses
- Note that the front side angle does not need supports as the print profile is optimized to print support free
- Brim: No if you have good bed adherence, I recommend using an Aux Fan deflector to avoid the risk of lifting corners for large flat prints like this
- Layer Height: 0.16mm for smooth edges
- Infill: 10% cubic for strength
- Walls: 4
- Print orientation:
- Flat on the bed
- Material:
- Parts: Dry PETG for strength and temperature resistance due to the close proximity to the printer. Loaded into Primary (left) nozzle - I decided to use Grey for the plates and black for the dowel connectors matching the aesthetic of the printer. But you can also print everything in a single color of course.
- Support Interface: PLA (PLA won't bond strongly with PETG, so removal is easy, but the bond is strong enough for print support and using just interface layer reduces nozzle swaps). Loaded into Aux (right) nozzle if printed on X2D
Gostou deste modelo? Crie uma conta grátis para salvar seus favoritos e voltar a eles depois.
Criar conta