Você está no 3DFinder
Buscamos em Thingiverse, MakerWorld e Printables ao mesmo tempo para te dar o melhor de cada uma.
Descrição
模型简介:
这是一款精致的桌面摆件,只需用手指轻轻一滑,牌子就会自动翻面,展示您当前的状态或心情。更重要的是,牌子内容支持自定义!快来动手制作专属于您的翻翻牌吧!
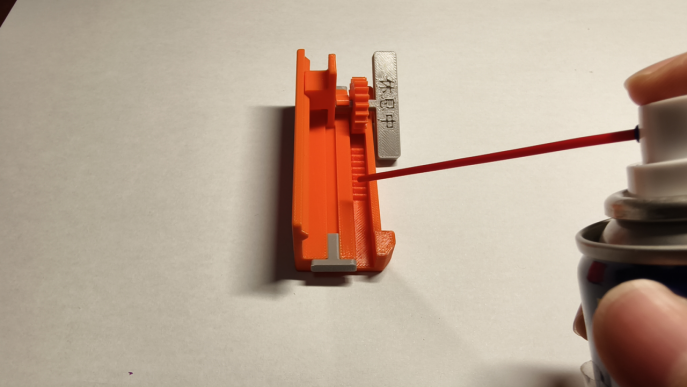
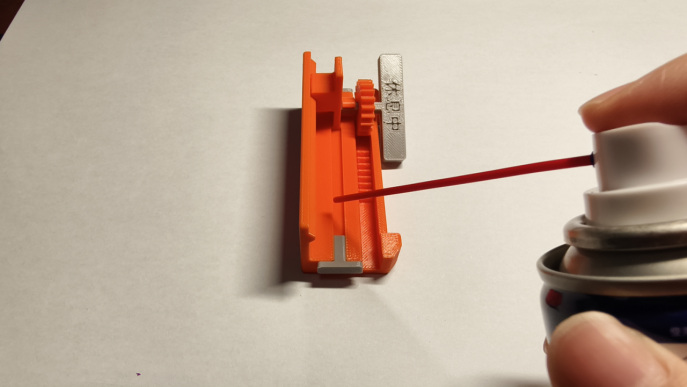
无需额外配件,为了使滑动过程更顺滑,可以在齿轮和凹槽位置上点润滑油。
安装步骤:
一、中文注释
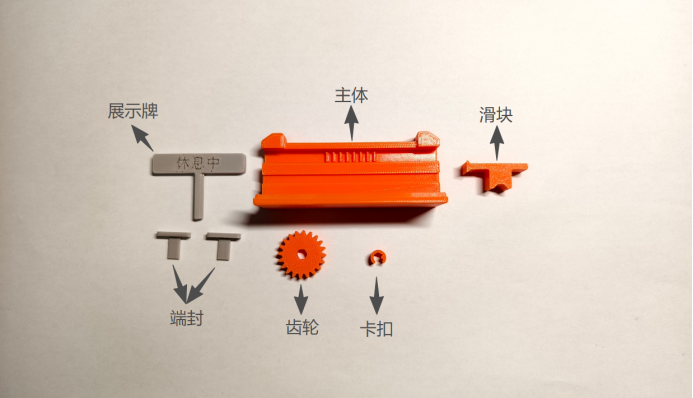
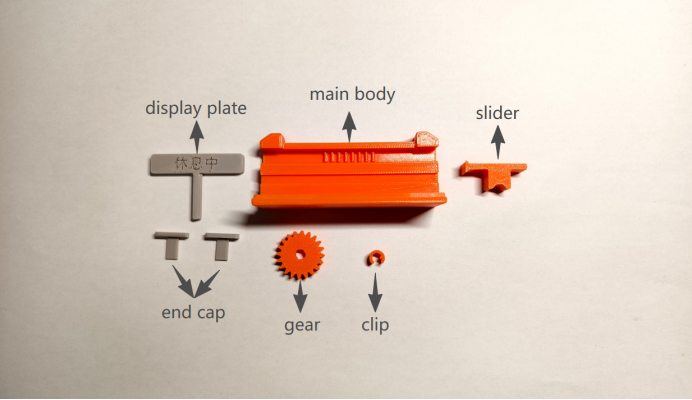
本模型共包含6种零件,分别为:主体、齿轮、滑块、展示牌、卡扣、封头。
具体步骤:
1.将“齿轮”套在“展示牌”的轴上,如图所示。
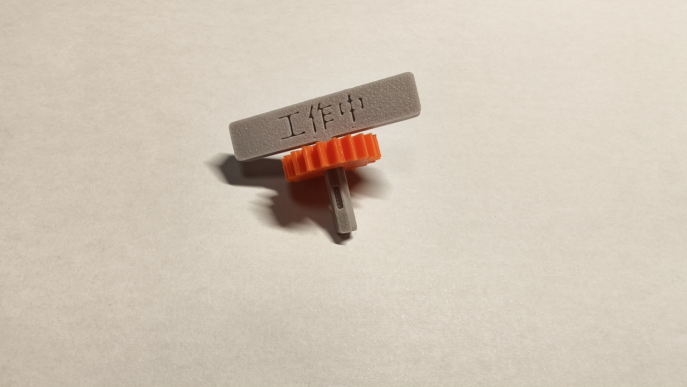
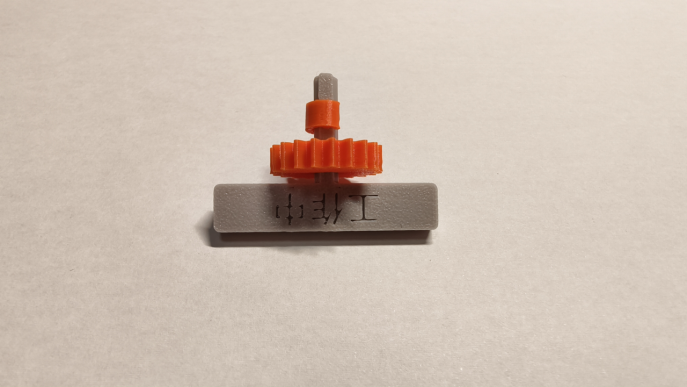
2.在“展示牌”的轴上安装“卡扣”,注意“卡扣”内部的凸起应嵌入轴的凹槽内,安装完成后效果如图。
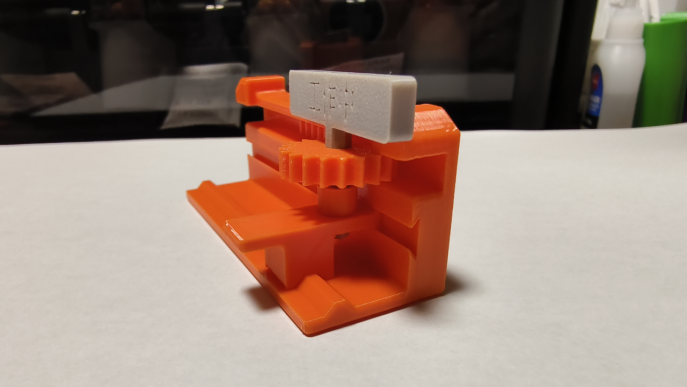
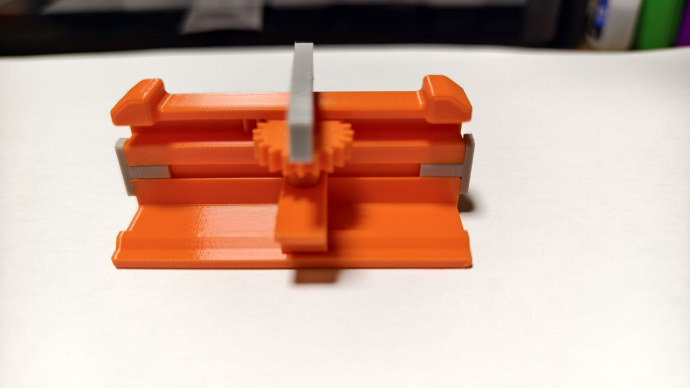
3.在“展示牌”轴的末端套上“滑块”,并将“滑块”嵌入“主体”的凹槽内,调整“齿轮”上下位置,使“齿轮”也嵌入滑道内,安装完毕的正面和侧面图如图所示。

4.在“主体”的两端插入“端封”,防止“滑块”从滑道左右两侧滑出,如图所示。

5.在齿轮和凹槽位置上点润滑油,可以让滑块运行更顺滑。
完成!成品如图所示。

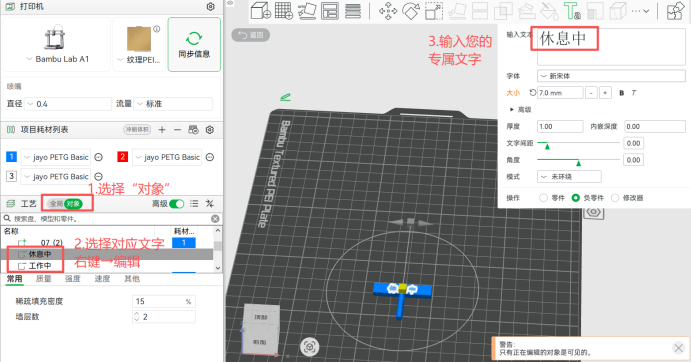
拓展:如果您想要更改“展示牌”的文字,只需打开电脑端bambu studio应用,按照如图所示步骤输入您的专属内容即可。
恭喜!您现在拥有了您的专属桌面翻翻牌啦!
二、英文注释:
This model includes 6 types of parts in total: Main Body, Gear, Slider, Display Plate, clip and End Cap.
Detailed assembly steps:
1.Fit the Gear onto the shaft of the Display Plate as shown in the figure.

2.Install the clip onto the shaft of the Display Plate. Make sure the inner protrusion of the clip snaps into the groove on the shaft. See the figure for the assembled effect.

3.Attach the Slider to the end of the Display Plate shaft, then insert the Slider into the groove of the Main Body. Adjust the vertical position of the Gear to fit it into the slide track as well. The front and side views of the assembled structure are shown in the figure.

4.Insert the End Caps into both ends of the Main Body to prevent the Slider from slipping out of the left and right sides of the slide track, as shown in the figure.
5.Apply lubricating oil to the gears and grooves to make the slider move more smoothly.


Installation completed! The finished product is shown in the figure.

Extended Guide
If you want to modify the text on the Display Plate, just launch the desktop version of Bambu Studio, and follow the steps in the illustration to input your personalized content.

Congratulations! You now have your one-of-a-kind desktop flip sign!
欢迎您来:
常来我的主页逛逛呀,一定有您需要的东西呢 (●'◡'●)
主页链接为:[https://makerworld.com.cn/@Pbreak](https://makerworld.com.cn/@Pbreak)