Você está no 3DFinder
Buscamos em Thingiverse, MakerWorld e Printables ao mesmo tempo para te dar o melhor de cada uma.
Descrição
This is a very detailed functioning microscope, other than the zoom. The features:
- 3 turnable lens tubes (different sizes)
- Tilting arm
- Working stage clips
Body tube can be adjusted up or down
There are 29 parts, with three materials. The white is PETG, the silver is PLA Basic, and I used PLA Tough for the black. You will need superglue, and maybe a bit of hot glue just to be safe. Assembly is relatively easy-to-medium, with it taking around 30-minutes, including the wait time for drying. \
How to assemble:
After printing everything with your preferred colors or materials, you need to assemble all 29 parts. Here's how.
| 1.Glue each of the three small feet to the indents on the bottom of the base. Make sure they are pushed through all the way. | 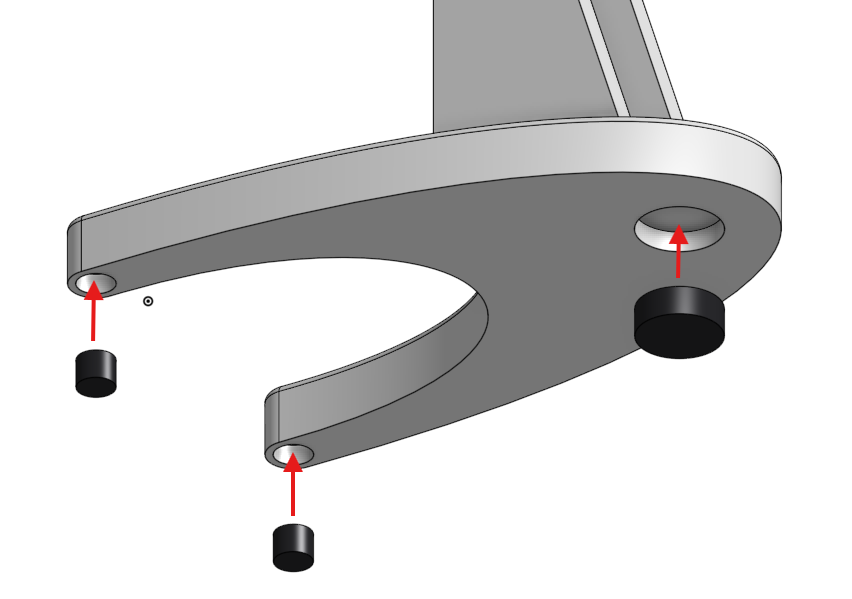 |
2. Glue the three components of each stage clips together. The stage clips should be sandwiched between the two pins. The pin with the square should be glued onto the bottom of the stage, and the circular pin should fit snugly into the hole in the square. Glue the pins together. | 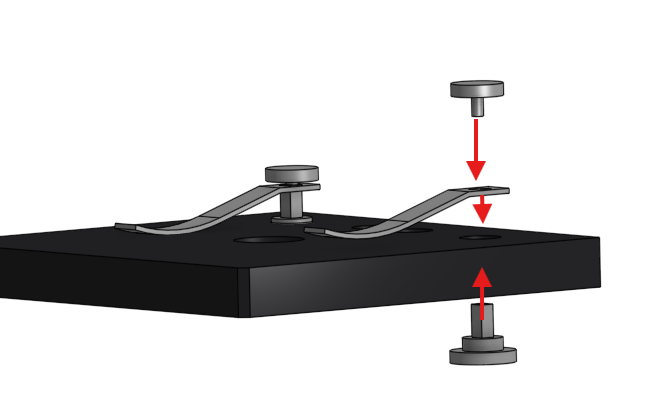 |
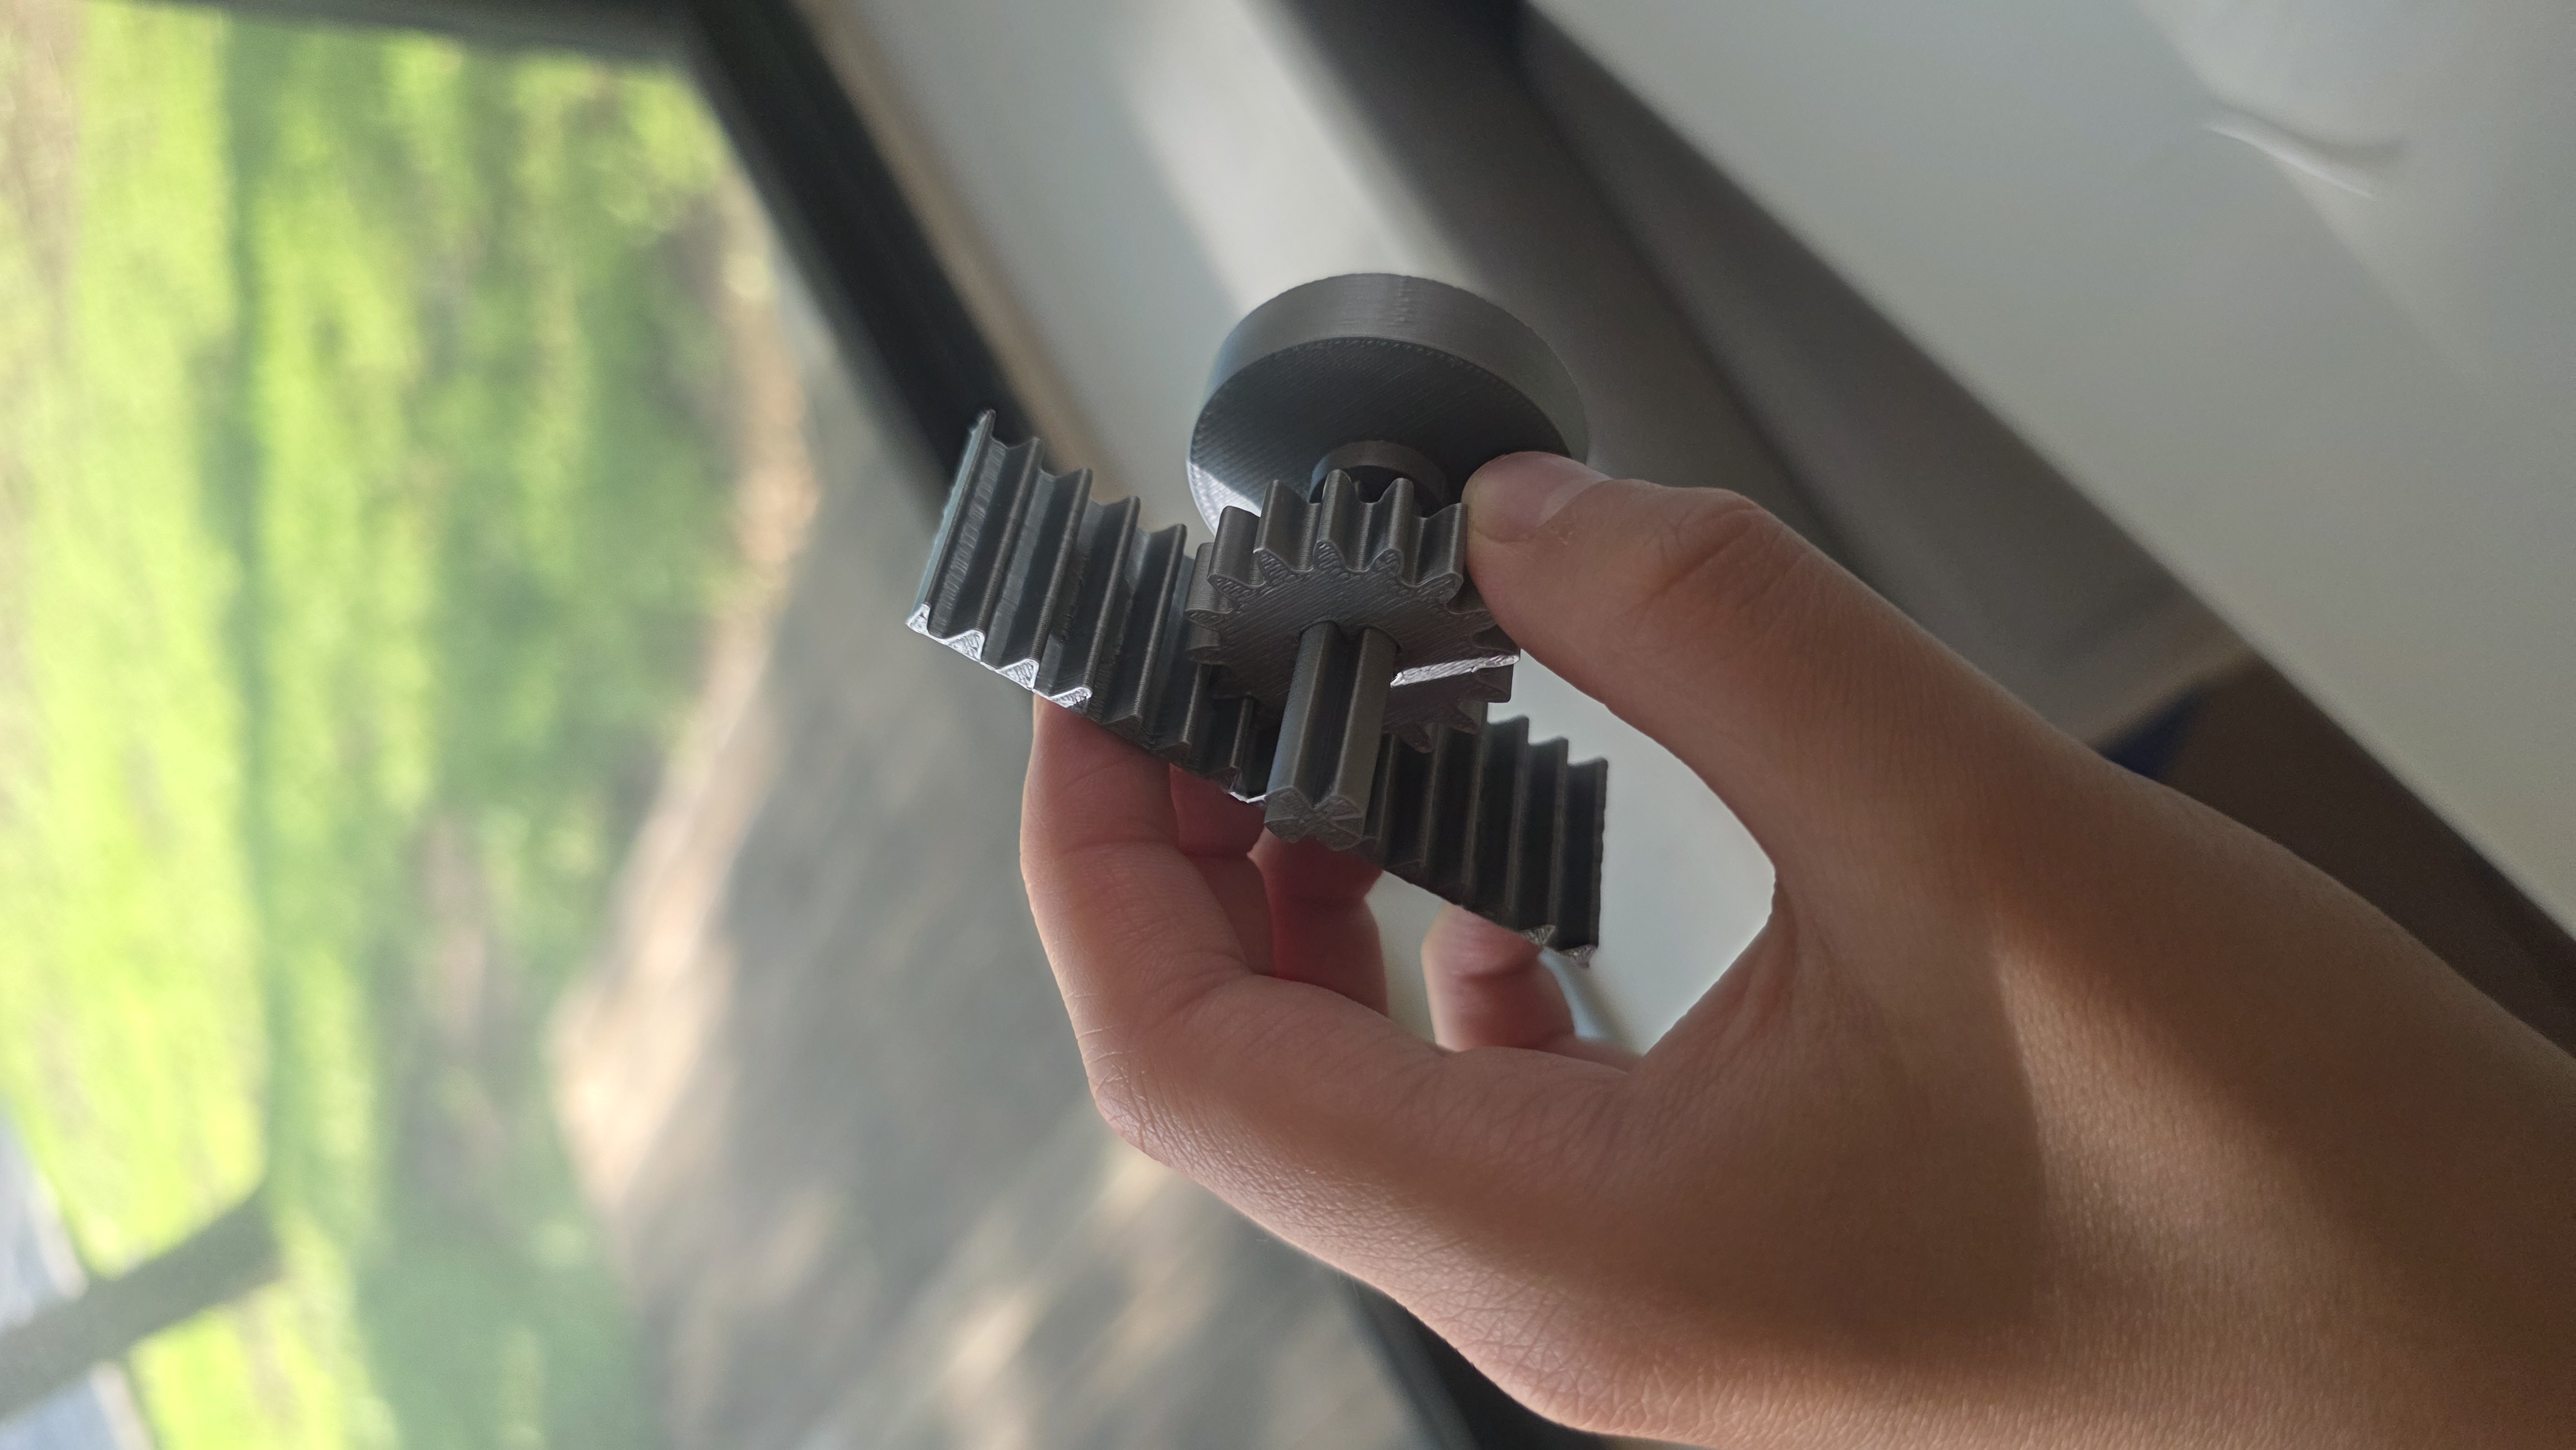
3.Place the gear into the small crevice at the top of the arm. Align the plus shape with the hole. Stick the knob dowel through, and glue the other knob to the protruding dowel. Then, place the stage support onto the arm and hammer the two pins tightly. | 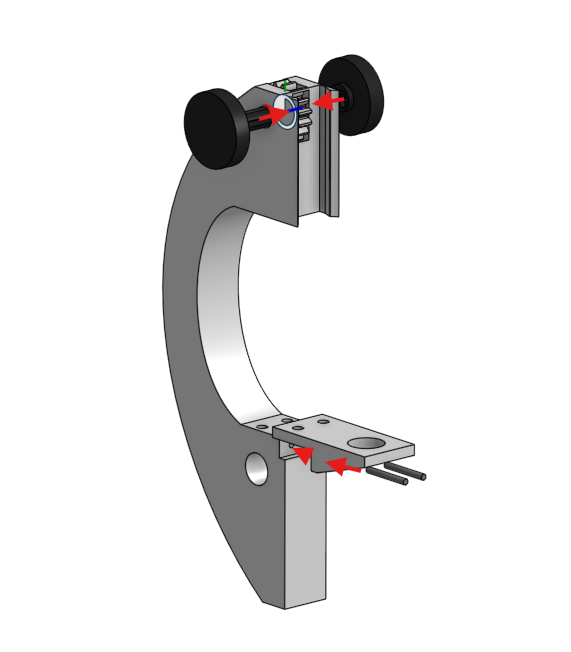 |
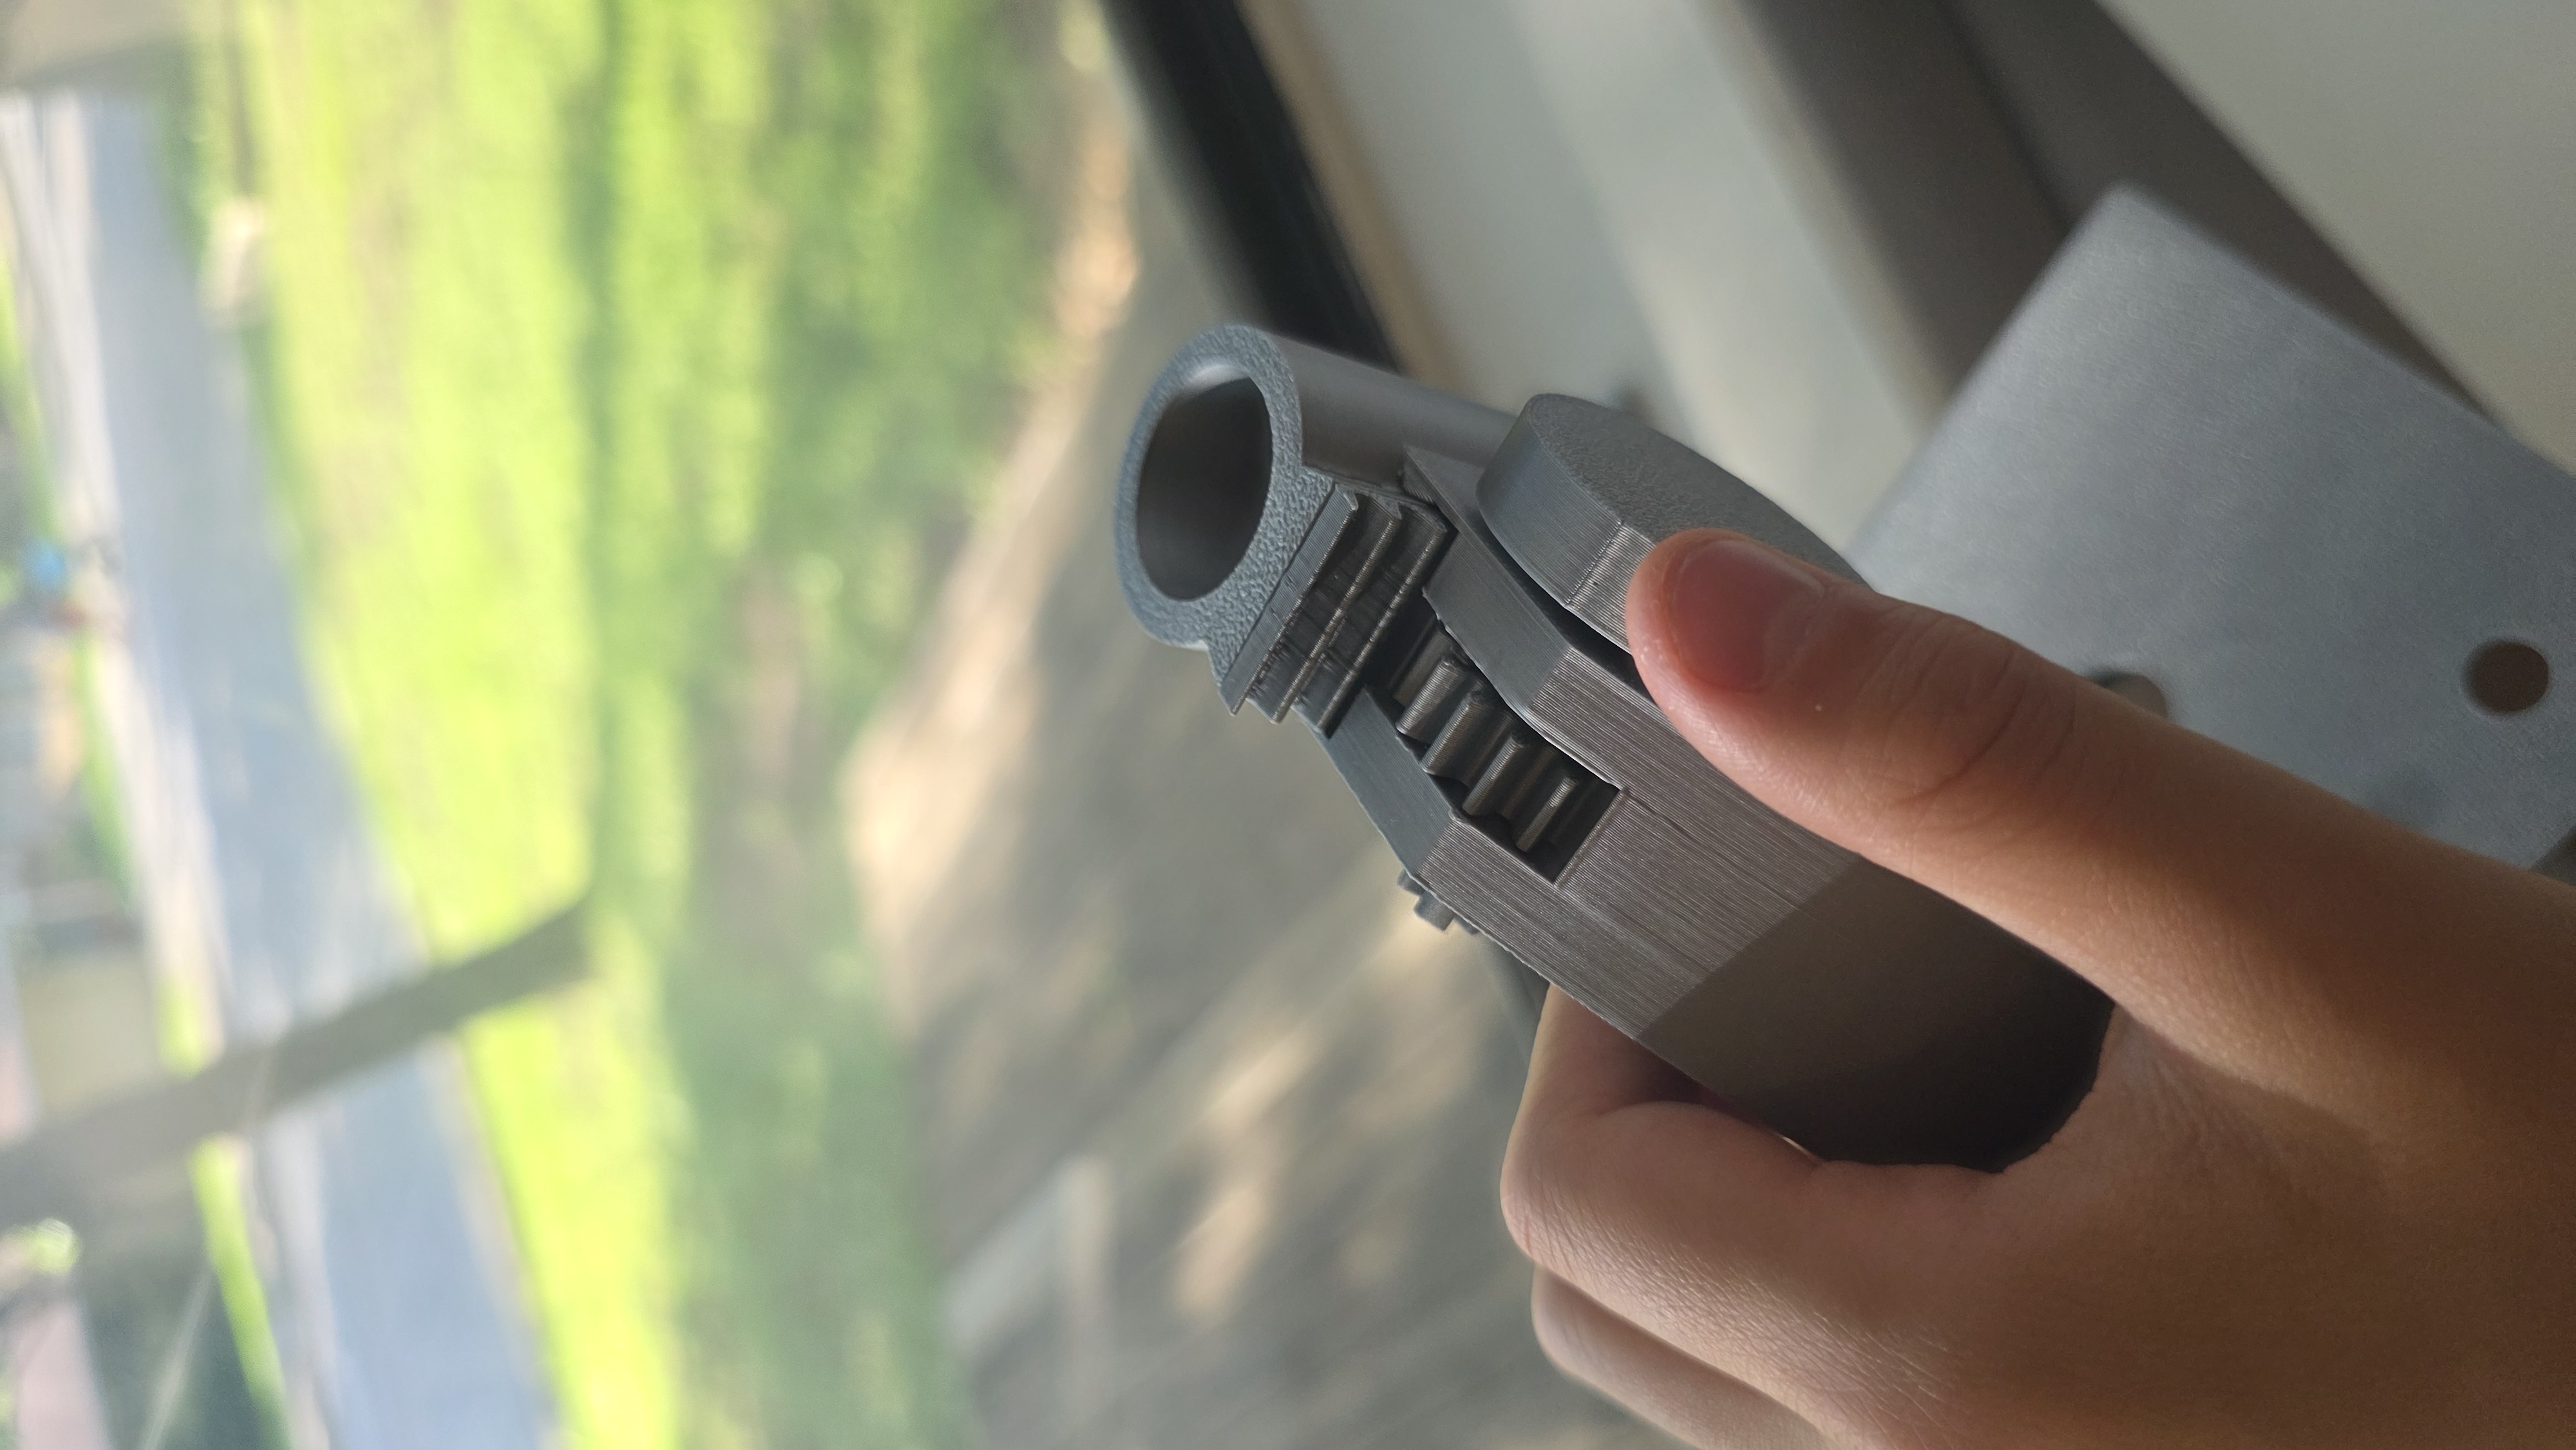
4.Push the gear rack into the two indents on the body tube. Push the black eyepiece to the body tube. Glue the lens base to the bottom of the body tube. Make sure the small bump on the top is facing opposite of the rack orientation. Then, glue the swivel to the lens base and the lens turret. IMPORTANT! ONLY GLUE THE MOVING PARTS TO THE ASSIGNED PIECE. | 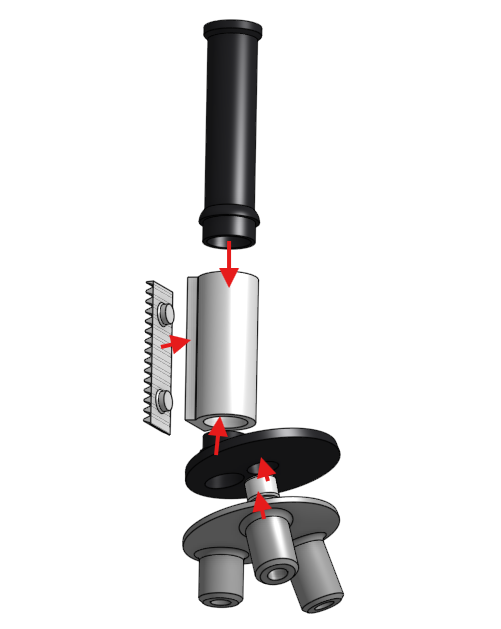 |
5.Slide the body tube rack down to up into the gear on the arm. You may need a little force, but only a little. | 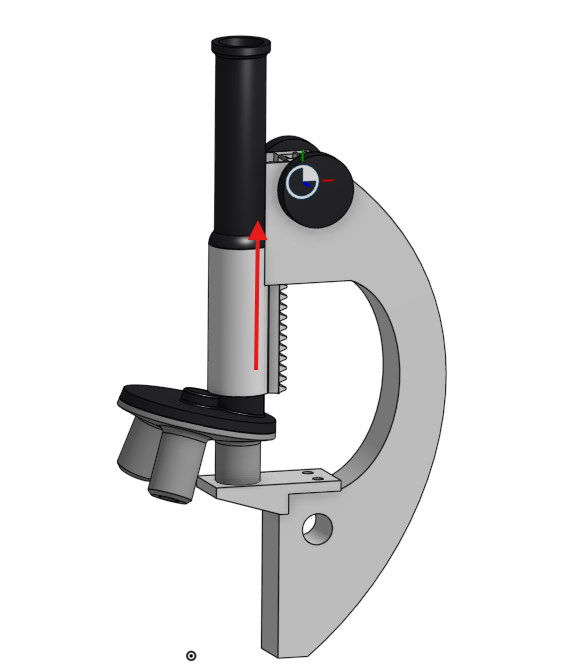 |
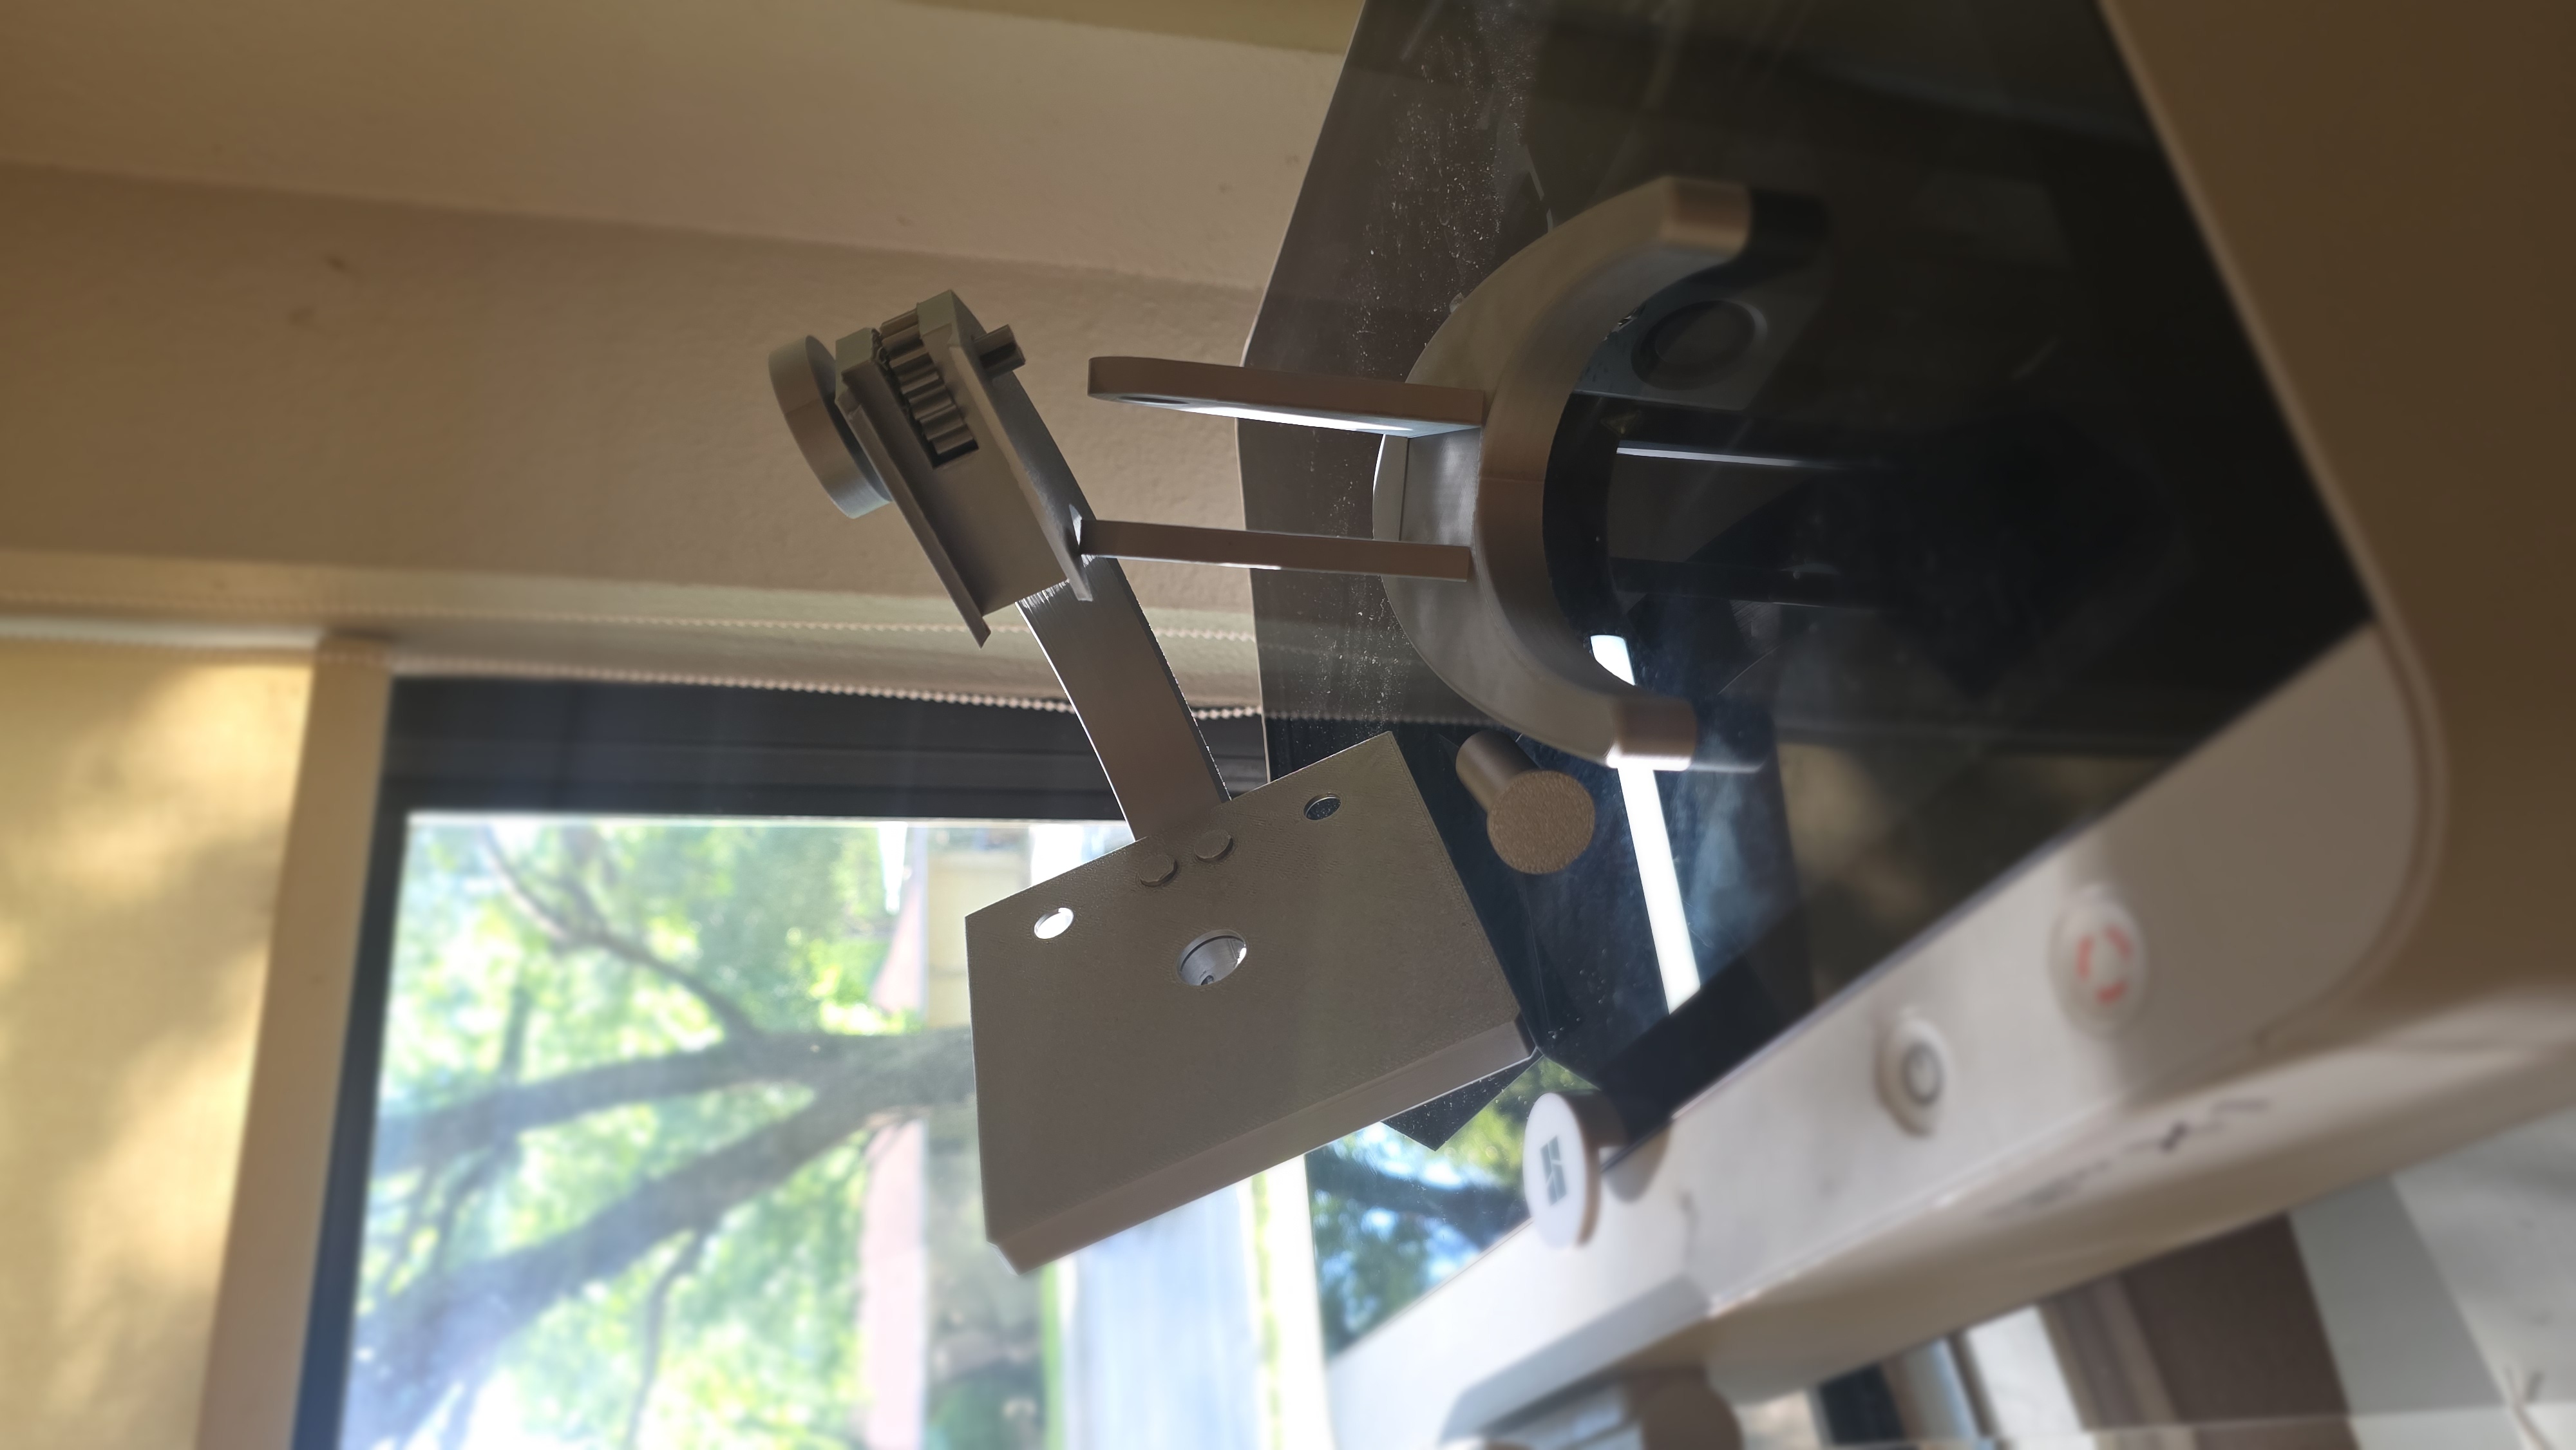
| 6.Hammer/push the two thicker stage pins through the assembled stage and into the stage support. Glue the stage onto the tip of the stage support for extra stability. | 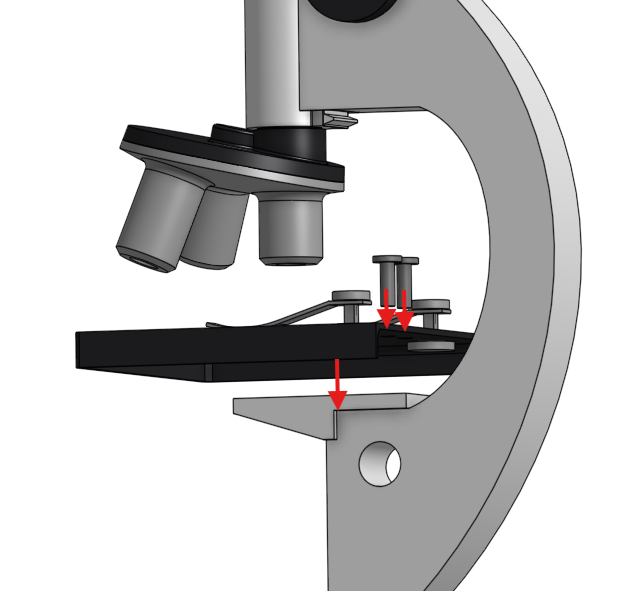 |
| 7.Align the large holes of the base and arm and slide the large dowel through. You may need to put a line of hot glue on the dowel to create more resistance when assembled. Glue the other cap on. | 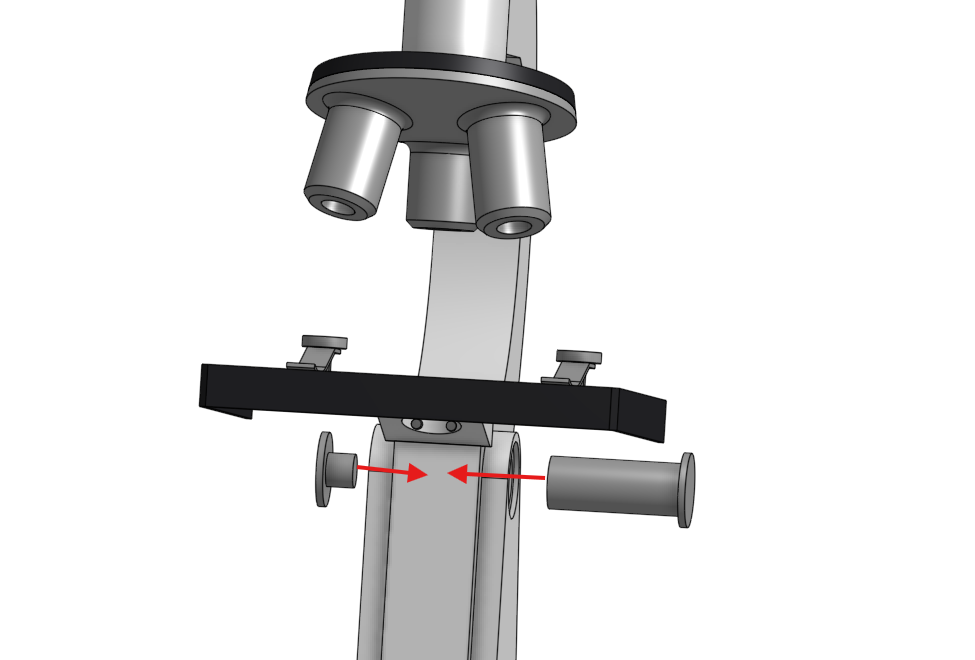 |
| This is what the finished product is supposed to look like. | 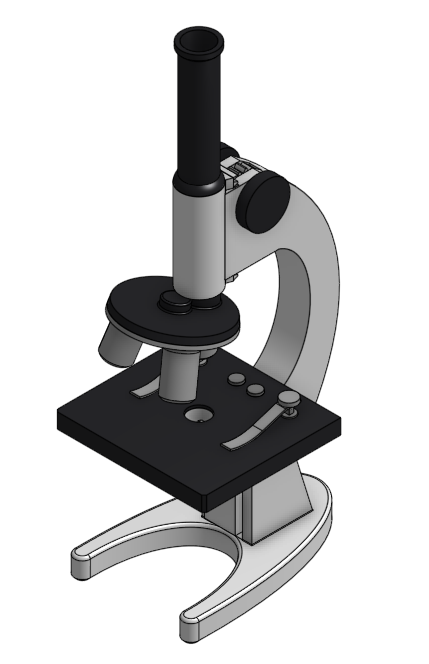 |
This model is my most complex, so it took lots of time. Here were my prototype documentation images:
 |  |  |
All parts were designed by me in Onshape
All pictures were taken by me.
Practice Microscope | Fully 3D Printed

Publicado em 13 de mai de 2026