Você está no 3DFinder
Buscamos em Thingiverse, MakerWorld e Printables ao mesmo tempo para te dar o melhor de cada uma.
Descrição
A grip for a single Joycon for the Switch 2 that prints without supports and transforms it into a much more ergonomic controller, enabling longer gaming sessions free of discomfort. The shape was iterated upon through countless prototypes and many hours of modeling, and is not based on any existing controller. I am really pleased with how it turned out and I hope you like it as well!
Stand for this grip released, find it here: [https://makerworld.com/sv/models/2785666-stand-for-switch-2-joycon-grip?from=search#profileId-3096608](https://makerworld.com/sv/models/2785666-stand-for-switch-2-joycon-grip?from=search#profileId-3096608)
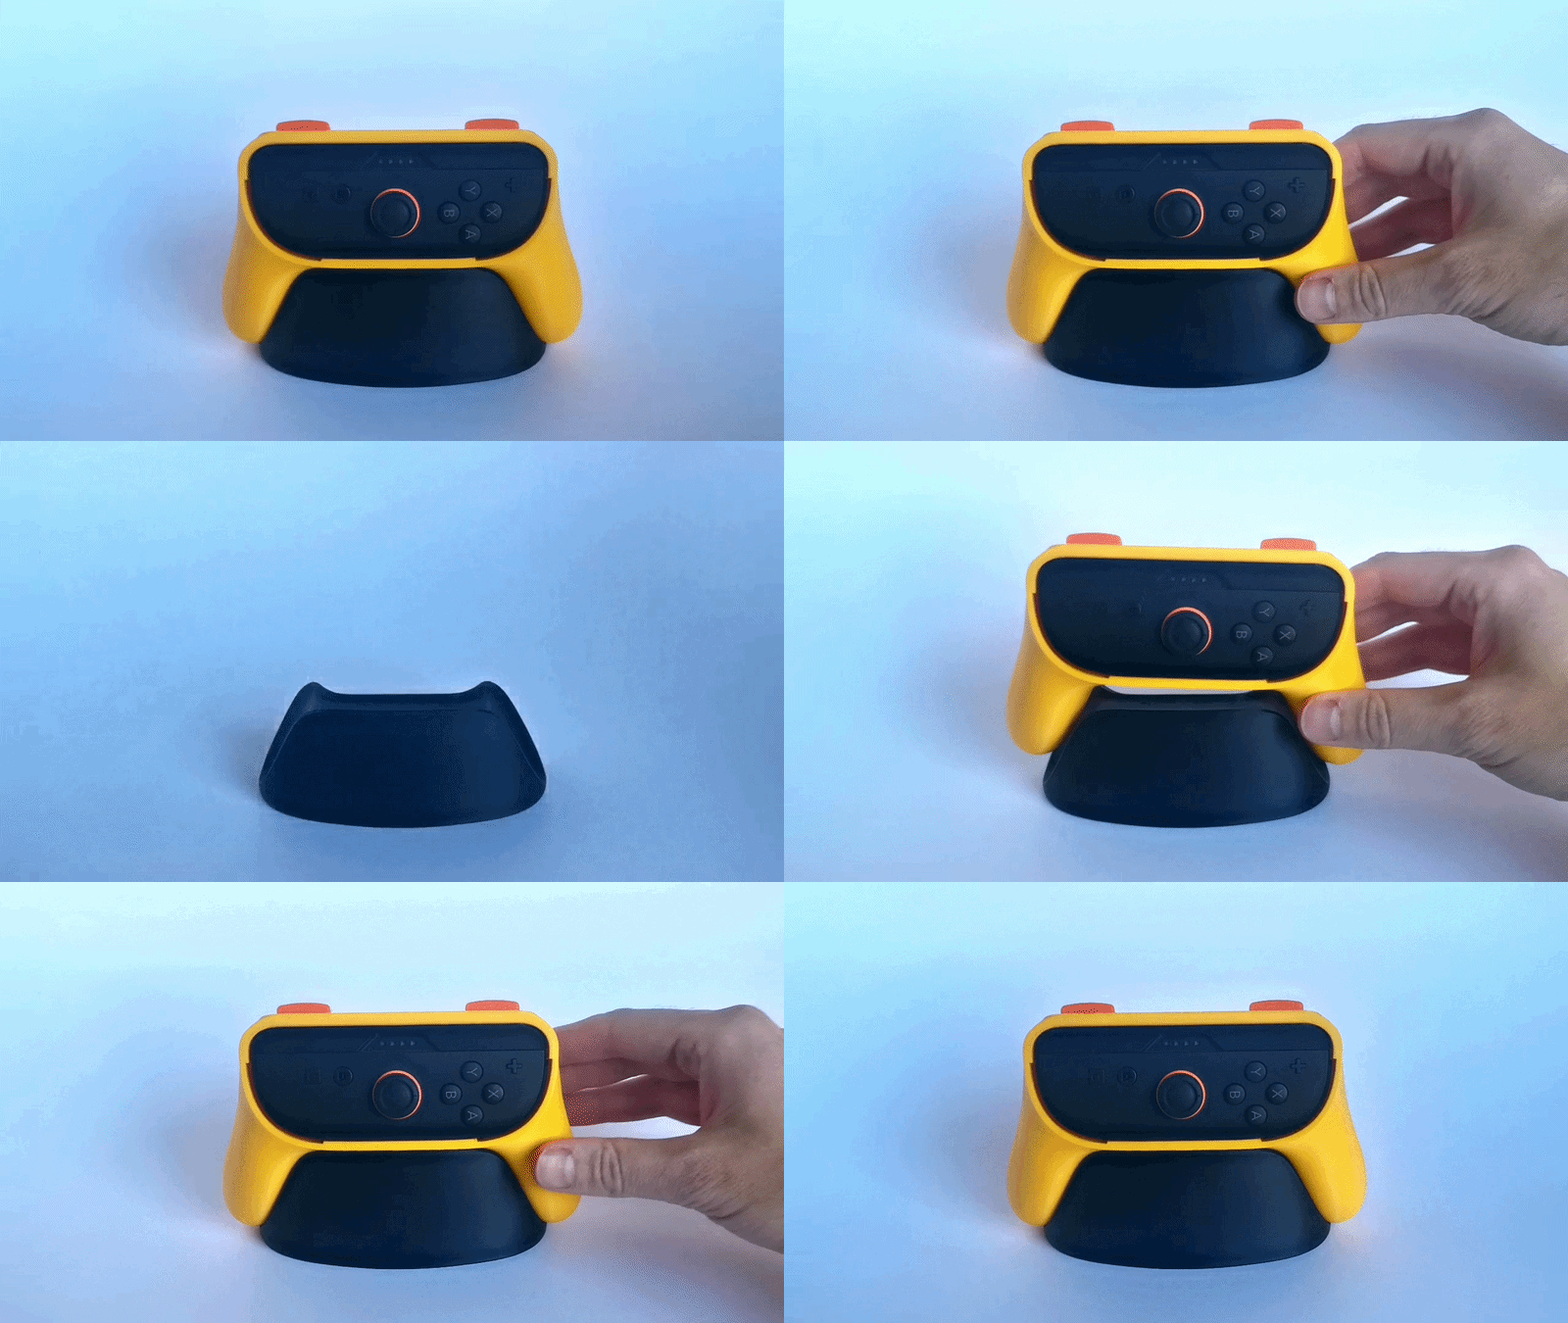
The grip was designed with these principles in mind, in order of importance:
Comfort: The goal was to get as close to a “real” controller as possible considering the limitations set by the Joycon 2 and 3D printing in general. It also needed to be comfortable even when shifting the hands around as left and right Joycons have different placement of buttons and sticks. This is a little larger than most other Joycon grips I've seen and might not suit younger children.
No or very little assembly: Ideally, the controller would be printed in a single piece, but during design I found that the shoulder buttons needed to be printed separately to maximize comfort and get the ergonomics closer to a traditional controller. Assembly is still extremely easy and takes literal seconds as the shoulder buttons slide into place!
Appealing and customizable design: I wanted to create a design that users find appealing and that looks sleek even when displayed - more like a complete controller than a simple shell. The controller also has several modifiers in the 3mf-file that can be used to create a unique look by changing colors on parts, and also add a grippier surface to the handles. More on that below.
Printable without supports: Goal achieved!
MODIFIERS FOR CUSTOMIZATION
There are 3 modifiers in the 3mf-file, each named after their function, and they are all active when opening the file. Delete them if you want to remove individual or all effects. In Bambu Studio, you find them under the Objects tab on the settings panel - or simply click on them and hit delete.
All modifiers:
FRONT_PANEL_COLOR: This can be used to change the color of the part of the front that covers the Joycon connector. If you want the front of the grip to match the Joycon (like the gray and yellow variants in my pictures), choose a color as close to the Joycon as possible (In my prints, black filament was used).
TOP_PART_COLOR: This changes the color of the very first layers printed (that will become the top of the controller - see the gray controller in my pictures).
GRIP_TEXTURE: This is a modifier that adds a small amount of Fuzzy Skin to the rear parts of the handles, adding a grippier surface and improving visuals on some areas that can look a little rougher on a smooth grip. If you want, you can even set this modifier to also print in another color!
PRINTING INSTRUCTIONS AND SETTINGS
There are a few important settings that maximize quality, even if the grip will probably still print at standard settings. Yes, it will print slower with these adjustments, but trust me - it's worth it! Here is what I would suggest:
Nozzle Size: 0.4 mm
Line Height: 0.2 mm
Line Width: 0.55 mm on main shell (improves overhangs significantly), 0.42 mm is enough on trigger buttons.
Variable Layer Height: Yes - higher quality is best. This improves overhangs and general quality on all parts by a large amount and is what affects the end result the most.
Infill: 8%
Brim: No
Orientation of parts: Everything has been designed to be printed in the provided orientation to be strong and print without supports - even the buttons. Do not change it.
Only tested in PLA, but I see no reason why it shouldn't work in other materials, with a small chance the fit changes somewhat. In my testing, matte PLA has a slightly looser grip of the controller than basic PLA. There even seem to be some variance between colors of the same filament.
The tolerances on this model really favor a high-quality printer. Everything in my pictures was printed on a Bambu Lab A1.
ASSEMBLY
Slide the Shoulder buttons into the top of the controller shell by aligning the keys with the holes from the front and then pushing them back until they lock in place (see images). The more rounded edge of the buttons should face toward the back of the shell. Both SL and SR buttons are identical, so they go on either side, but if you have printed the variants with markings you should of course place the one marked SL to the left and SR to the right. If they feel loose a very small amount of super glue can be used to further lock them in place.
That´s it!
USE OF AI
No AI was used during any phase of this project. I believe in supporting projects made by actual humans and want to live by that creed.
FILAMENT USED IN PRINTS
Bambu Lab PLA Matte Ash Grey
Bambu Lab PLA Basic Turquoise
Bambu Lab PLA Basic Sunflower Yellow
Generic PLA black
LICENCE
All files provided are FOR PERSONAL USE ONLY. You are not allowed to sell, give away or in any way distribute the files to a third party, nor sell 3D prints of it locally or online. At this point in time there is no commercial license available for this project.