Você está no 3DFinder
Buscamos em Thingiverse, MakerWorld e Printables ao mesmo tempo para te dar o melhor de cada uma.
Descrição
I designed it as a request from friend working at university who is making a lot of physics demonstrations for children. Aim of project laser gun able to pop hydrogen filled balloons from the distance.
First disclaimer, if you put strong laser inside it is dangerous so handle with care. Designed to have safety switch with key.
Electronics parts:
Laser module 5W from engraver, 3S Lipo, step-down converter, key switch, momentary push switch some wires, and XT60E-F AMASS connector for charging.
Mechanical parts:
M3 x 6 round head screw x 9
Neodymium magnet round 4x4 x5 (one used as positioning pin of flash cover)
M3 x 8 flat head x 6
M3 x 12 for AMASS connector x2
Tools:
M3 tap
Epoxy adhesive for connector housing/handle bottom
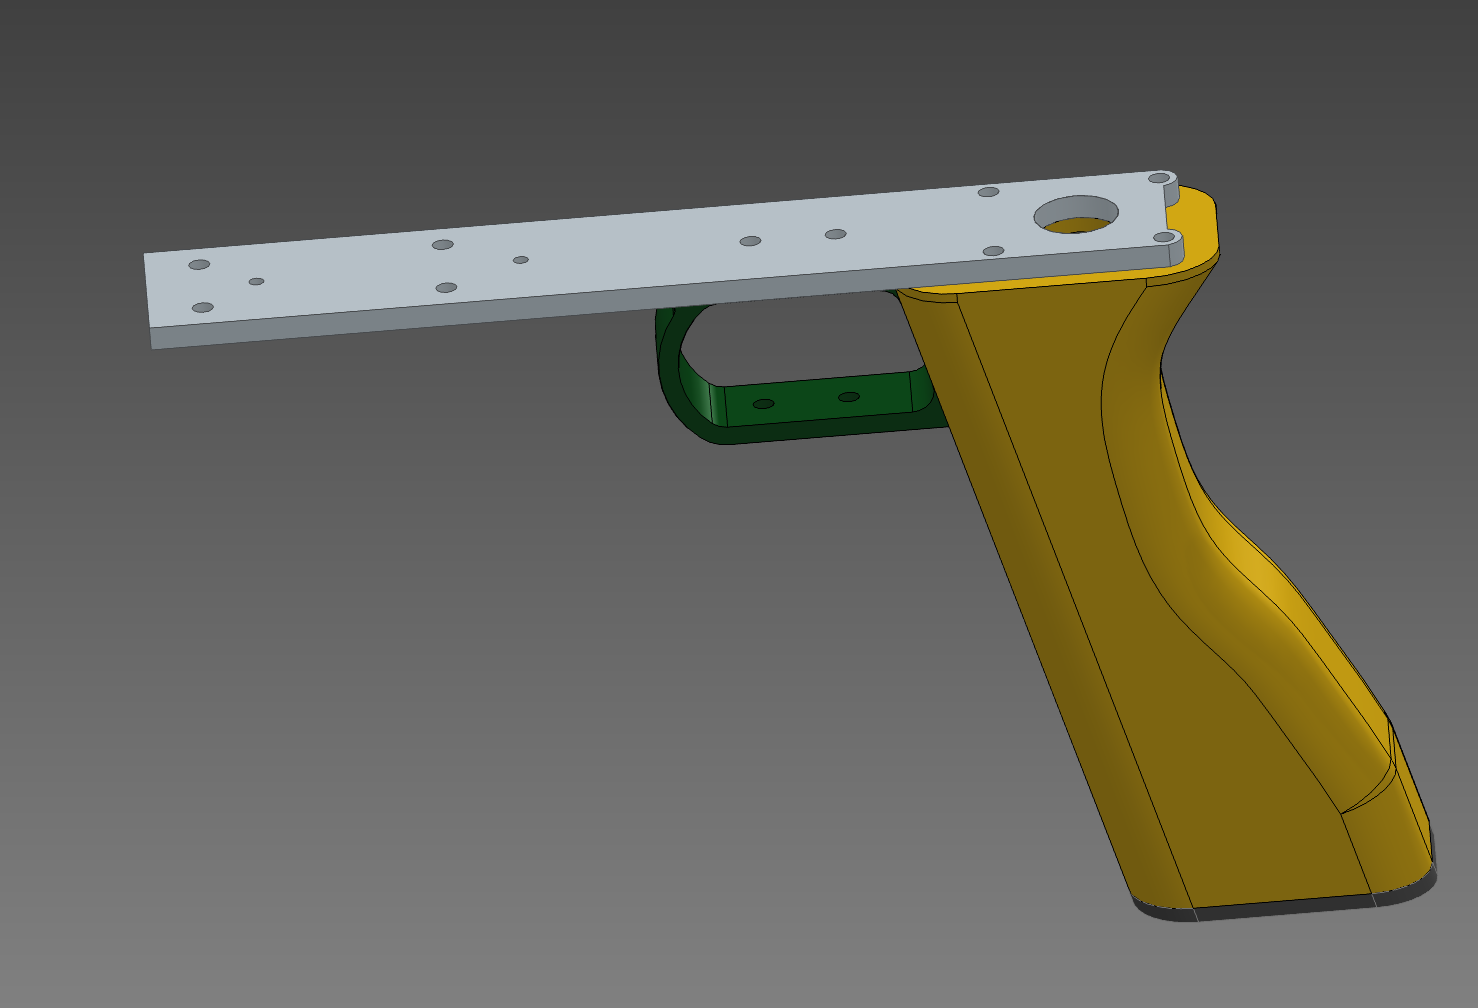
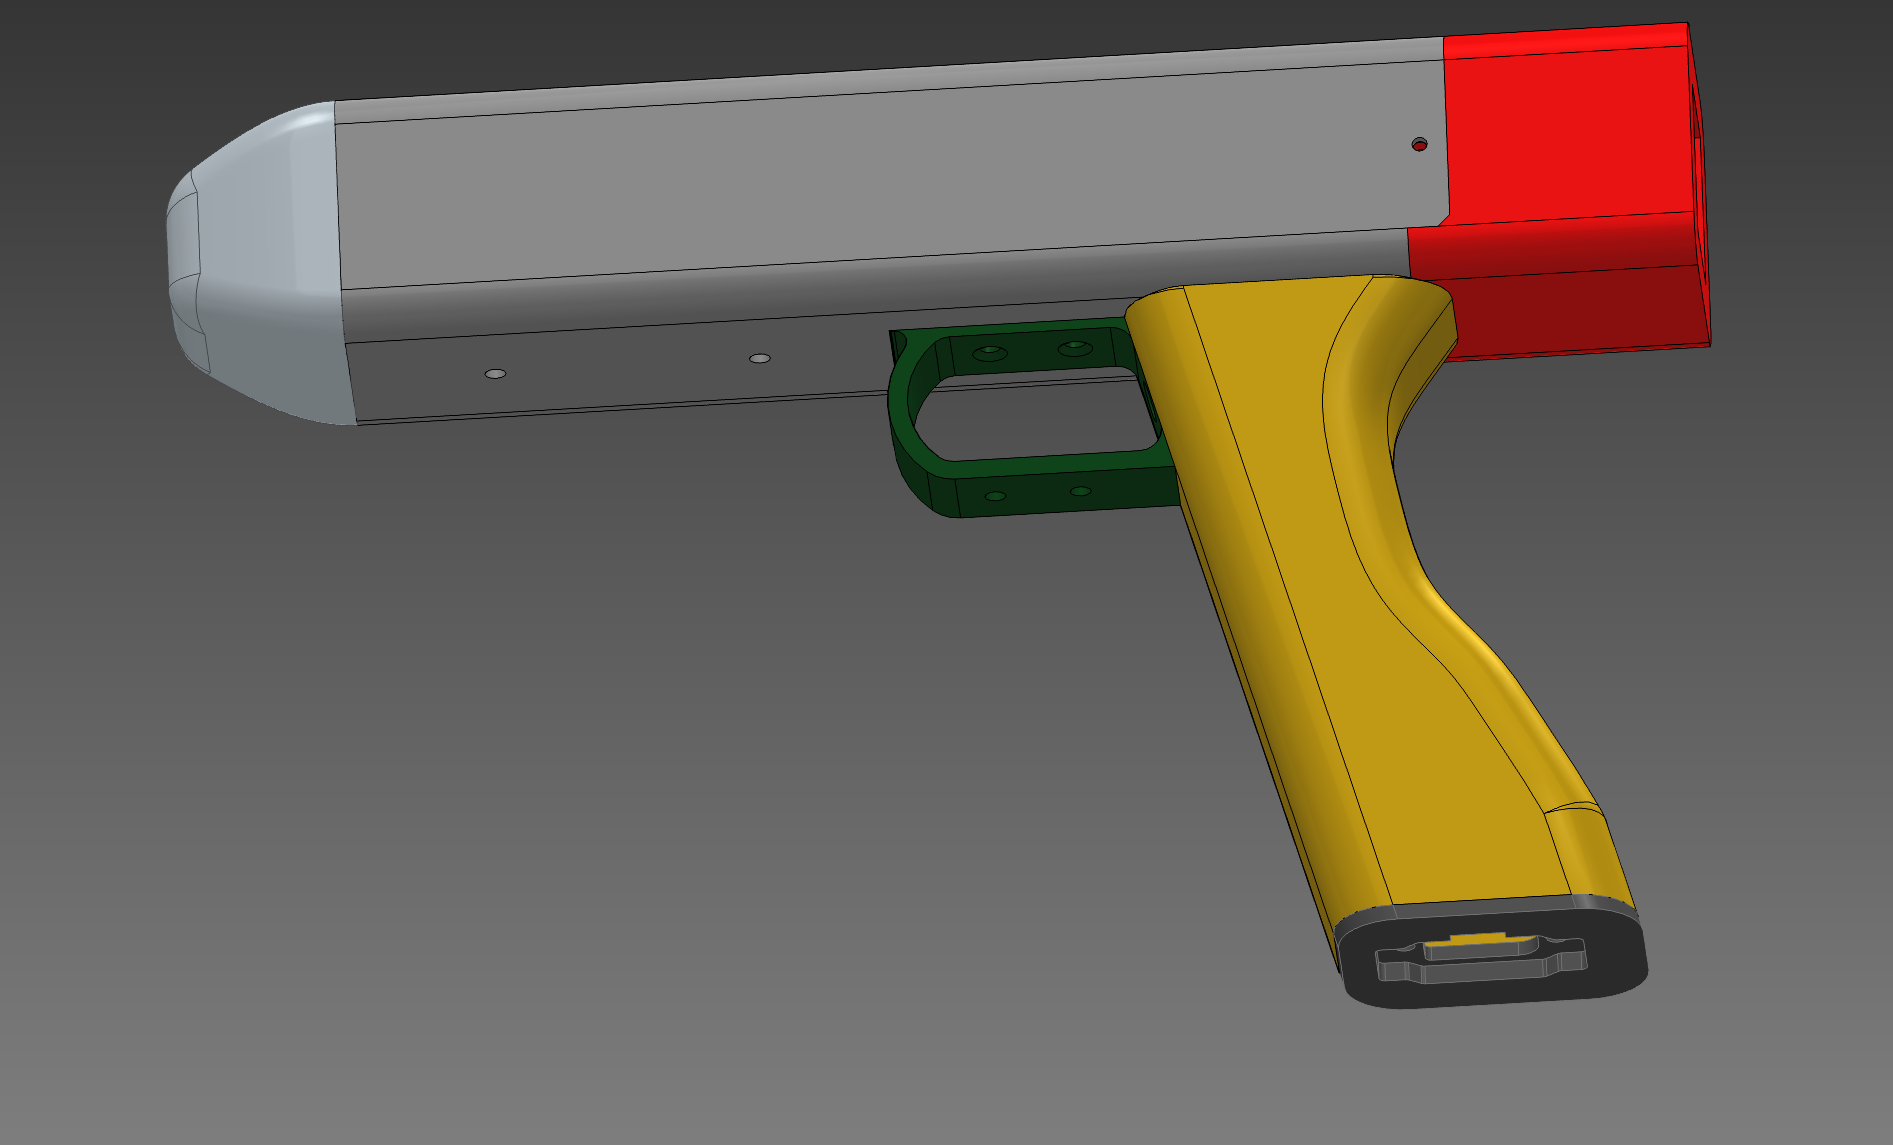
Color Scheme on picture
- Slide – gray
- Back cover – red
- Handle – dark yellow
- Trigger guard – green
- Handle base – black
- Flash cover – light gray
- Frame – light gray
Assembly
0. Preparation
- Tap threads in:
- 4 holes in the handle
- 3 holes in the back cover
- 4 holes in the frame
1. Electronics Installation
- Insert the switch into the frame opening and secure it with a nut.
- Install the key switch in the back cover
- Recommended: pre-solder wires to both switches before installation.
- Place the step-down (or buck/boost) converter inside the handle and route the wires through the designated hole.
2. Wiring
- Solder all GND connections together with the LiPo negative.
VCC path:
LiPo → Key switch → Step-down / Buck-boost → Momentary switch → Laser module
3. Final Assembly (Electronics)
- Verify operation before closing.
- Glue the connector into the bottom of the handle.
- Bolt together:
- frame
- laser module
- trigger guard
4. Flash Cover Retention
- Take a long metal rod, place one magnet at the end, and insert it into the cover channel.
- Push (or gently tap) it until seated.
- Total: 4 magnets inside the cover
- Glue 4 magnets into the corners of the flash cover
- Check polarity before gluing
- Add a 5th magnet as a positioning pin
⚠️ The positioning hole in the cover may require drilling (Ø4 mm) for a proper fit.
5. Final Closure
- Slide the flash cover fully into place
- Slide the back cover until it overlaps with the main body
- Secure with 3× M3 × 6 screws
I added also step file, so you can adjust it if needed for personal use.
ONCE AGAIN, REMEMBER SAFETY FIRST!
Gostou deste modelo? Crie uma conta grátis para salvar seus favoritos e voltar a eles depois.
Criar conta