Você está no 3DFinder
Buscamos em Thingiverse, MakerWorld e Printables ao mesmo tempo para te dar o melhor de cada uma.
Descrição
The Ultimate Solution for Perfect Top Surfaces
Are you tired of rough top surfaces or unsightly "plowing" lines? This is not just another calibration test-it is a high-end engineering tool designed for those who demand aesthetic and functional perfection in their 3D prints.
Advanced Engineering Design
Unlike standard calibration cards, this model integrates industrial design principles to help you see the results clearly:
- G2 Curvature Continuity: Every fillet between the tiles and the base follows a G2 continuity path. This ensures fluid light reflections, eliminating the harsh "break lines" found in standard (G1) fillets.
- 3° Draft Angle: Each tile features a precise draft angle to elevate the ironed surface, making it the focal point for light analysis and easier to inspect.
High-Readability Engravings: Values are engraved at a 0.4 mm depth to remain perfectly legible with any material, eliminating the need for multi-color printing.
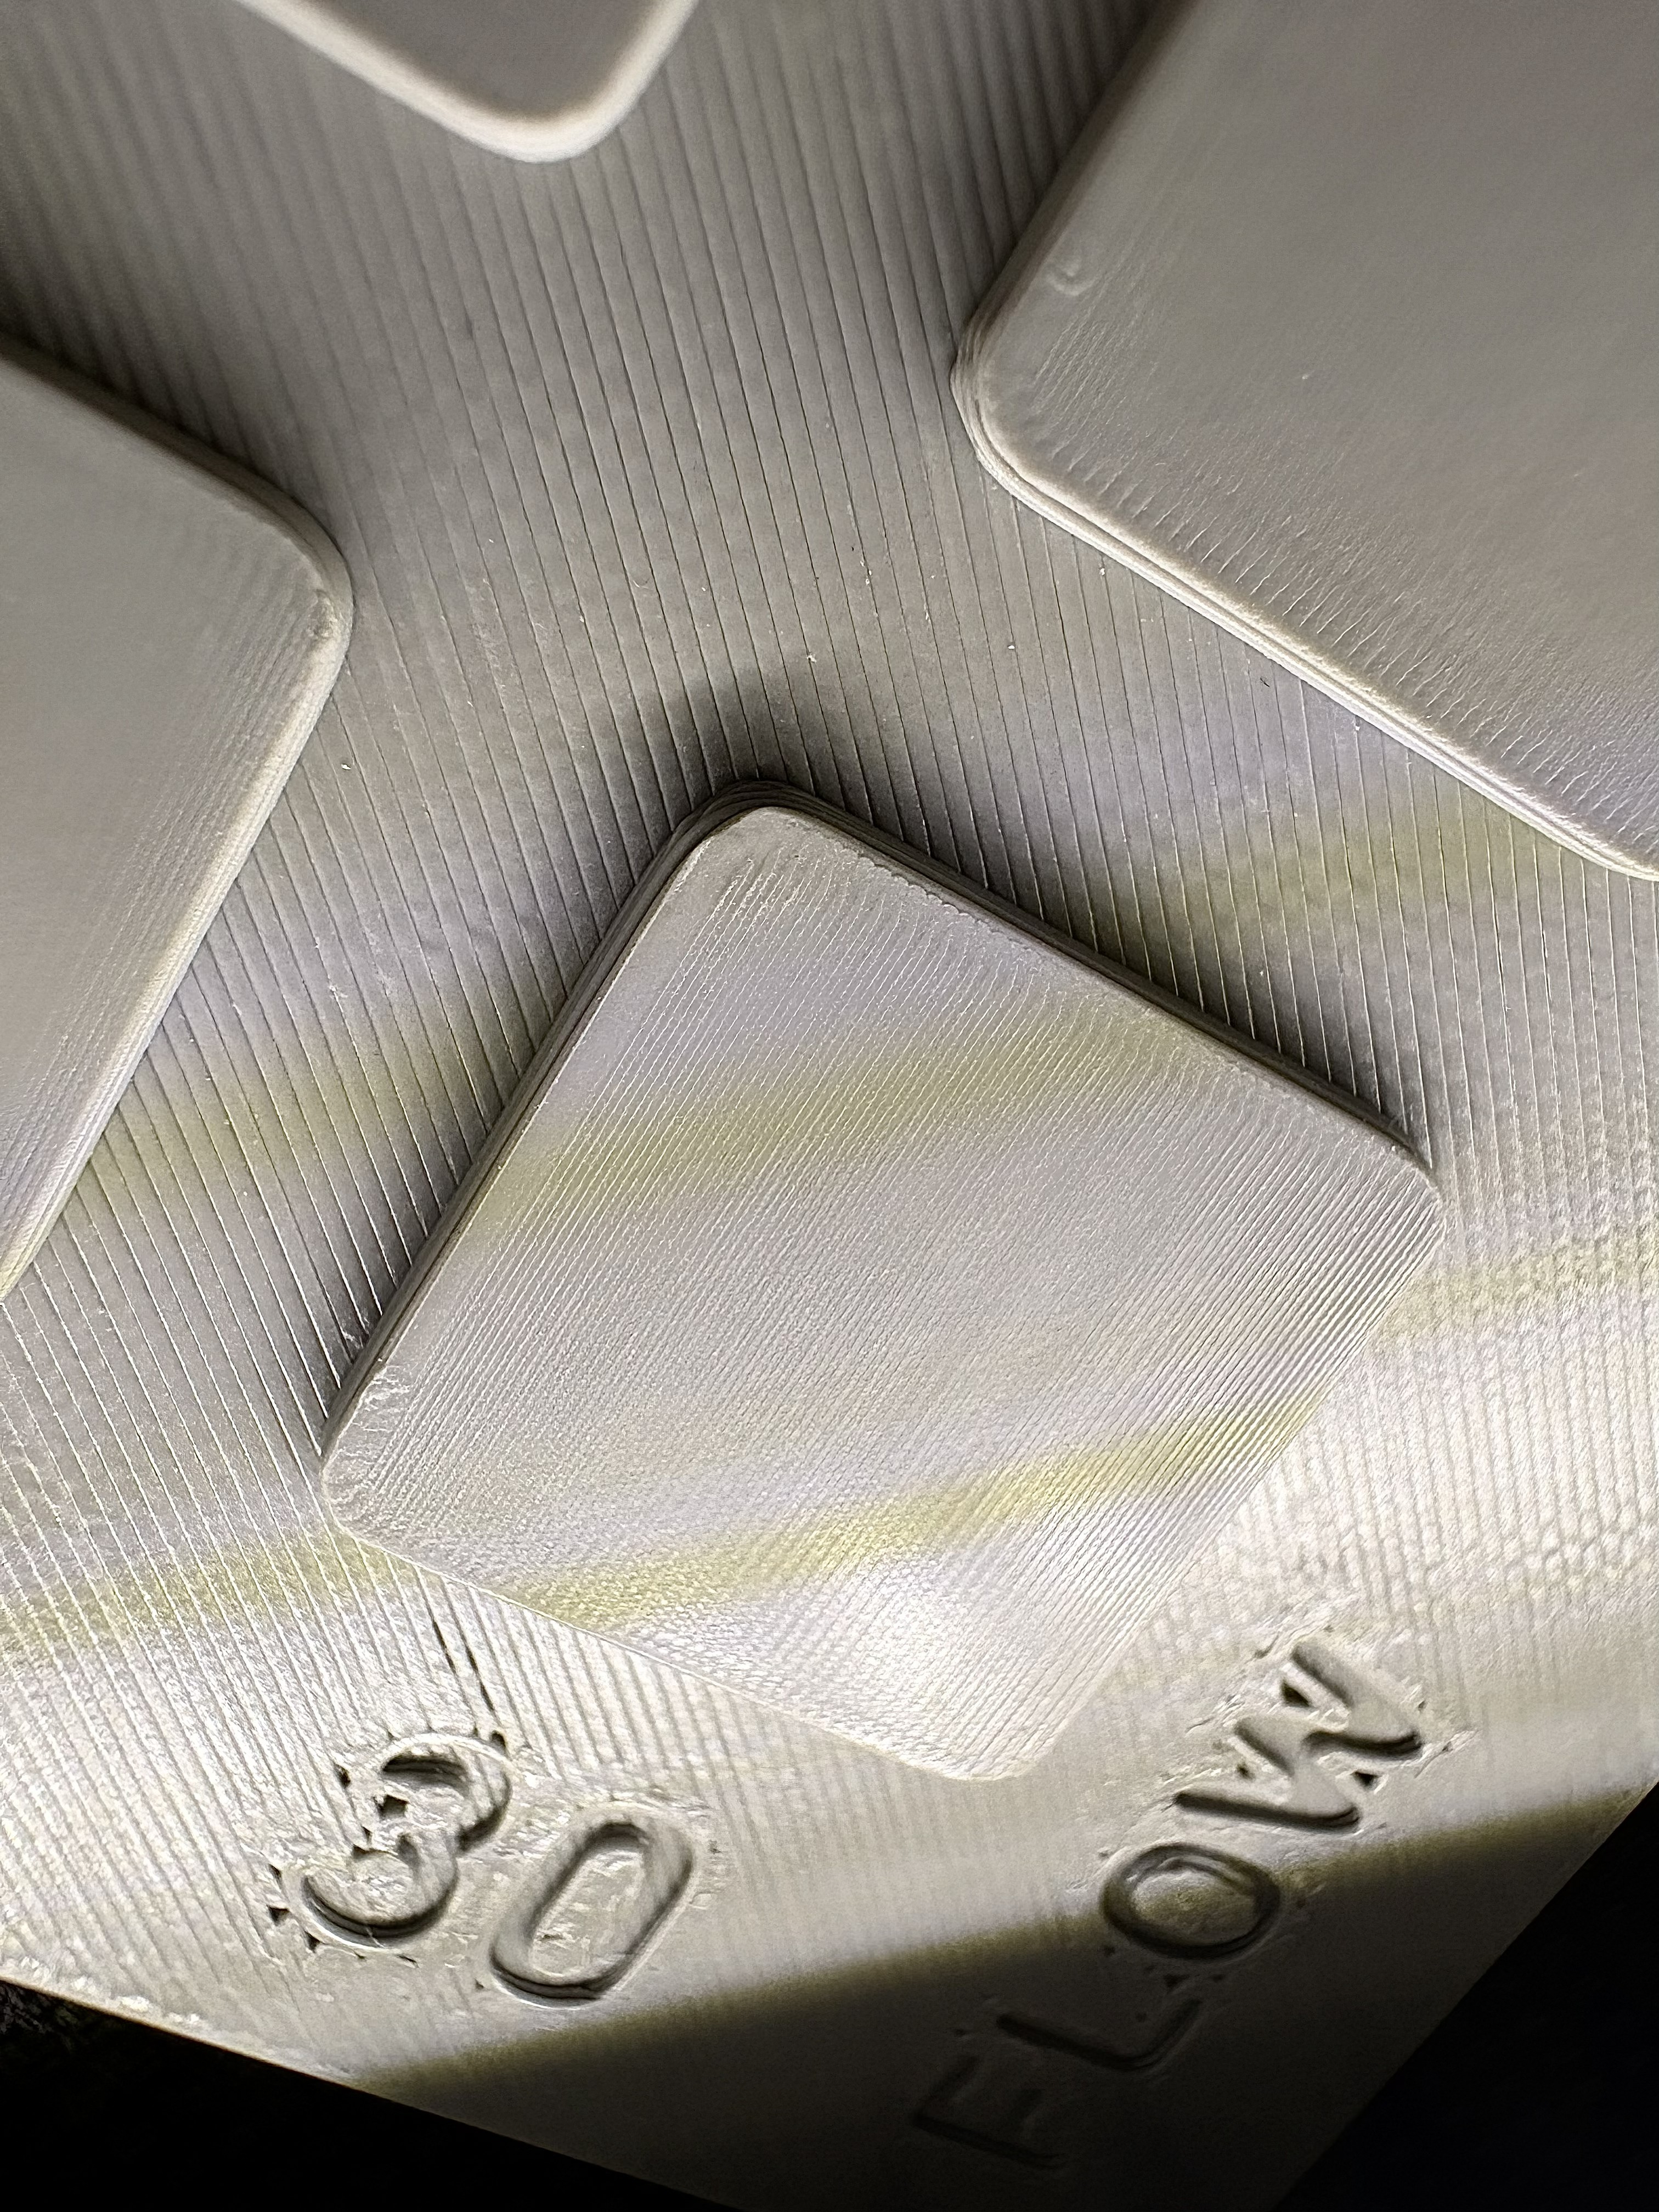
Close-up of G2 Continuity and 3° Draft Angle under raking light.
How the Test Works
The model consists of a 5x5 grid crossing the two most critical ironing variables:
- Ironing Flow (10% - 30%): Find the exact extrusion volume to fill every gap.
Ironing Speed (10 - 30 mm/s): Determine the ideal speed for a flawless melt.
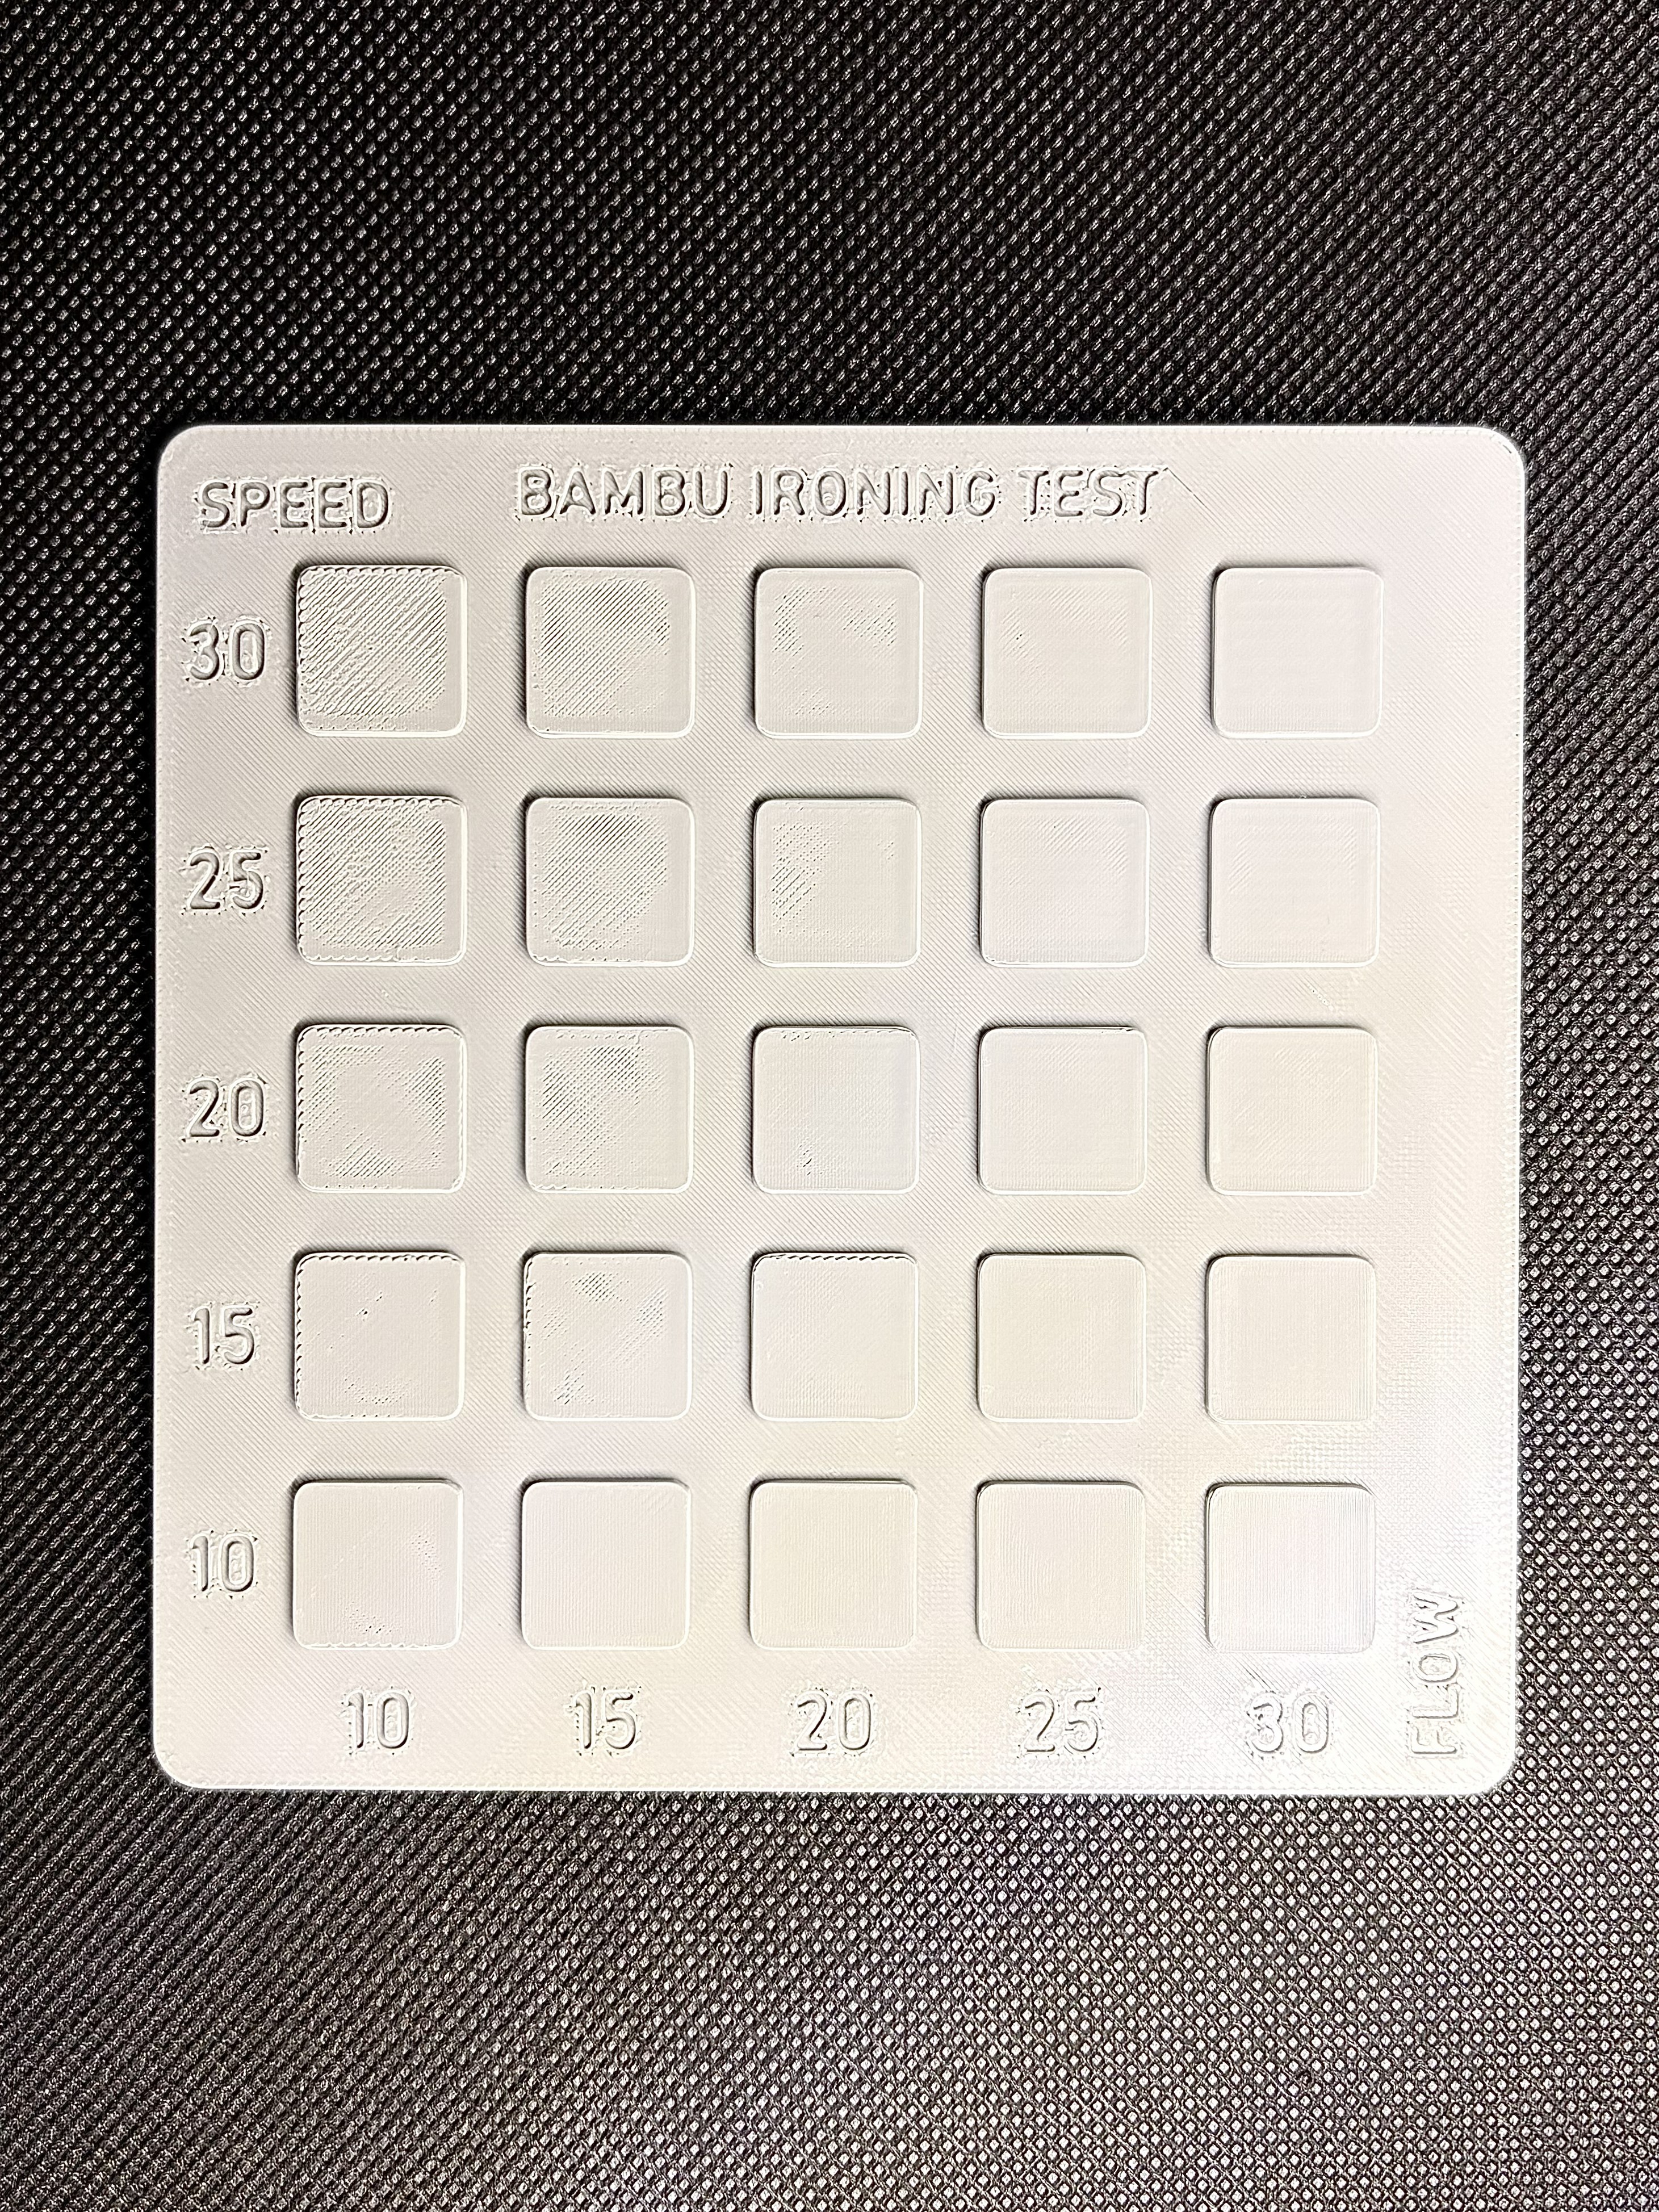
5x5 Grid Layout: Compare different Flow and Speed combinations at a glance.
Optimization for 0.4mm & 0.2mm Nozzles
This test is optimized for both, but requires different approaches:
- 0.4mm Nozzle: The ideal starting point for most users.
- 0.2mm Nozzle: Perfect for miniatures or ultra-fine details.
- Pro Tip: For the 0.2 mm nozzle, do not rely on automatic slicer math. Manually force the Ironing Spacing to 0.08 mm and the Ironing Inset to 0.05 mm to avoid gaps between passes.

