Você está no 3DFinder
Buscamos em Thingiverse, MakerWorld e Printables ao mesmo tempo para te dar o melhor de cada uma.
Descrição
A clean, medieval-style wall torch that adds some serious atmosphere without being a pain to print. Uses a simple tea light to create a warm flame effect that throws light onto the wall for a really nice glow.
The shield backplate, rivets, and cage give it that forged iron look, while the handle can be finished for a wood grain effect. Everything is lightweight, easy to assemble, and prints clean on most setups.
Print Notes:
- Easy prints overall
- Looks best with a thicker coat of hammered paint
- Handle: print in black, dry brush or wipe for wood grain effect
- Flame is designed for vase mode
Assembly Instructions (H2D Version)
Step 1: Lay Out All Parts
Start by laying out all of your 3D printed parts so everything is easy to access.
You will need:
- All printed components
- Super glue
- Rust-Oleum Hammered Gray paint
- Rust-Oleum Hammered Bronze paint
- A glove
A tea light candle
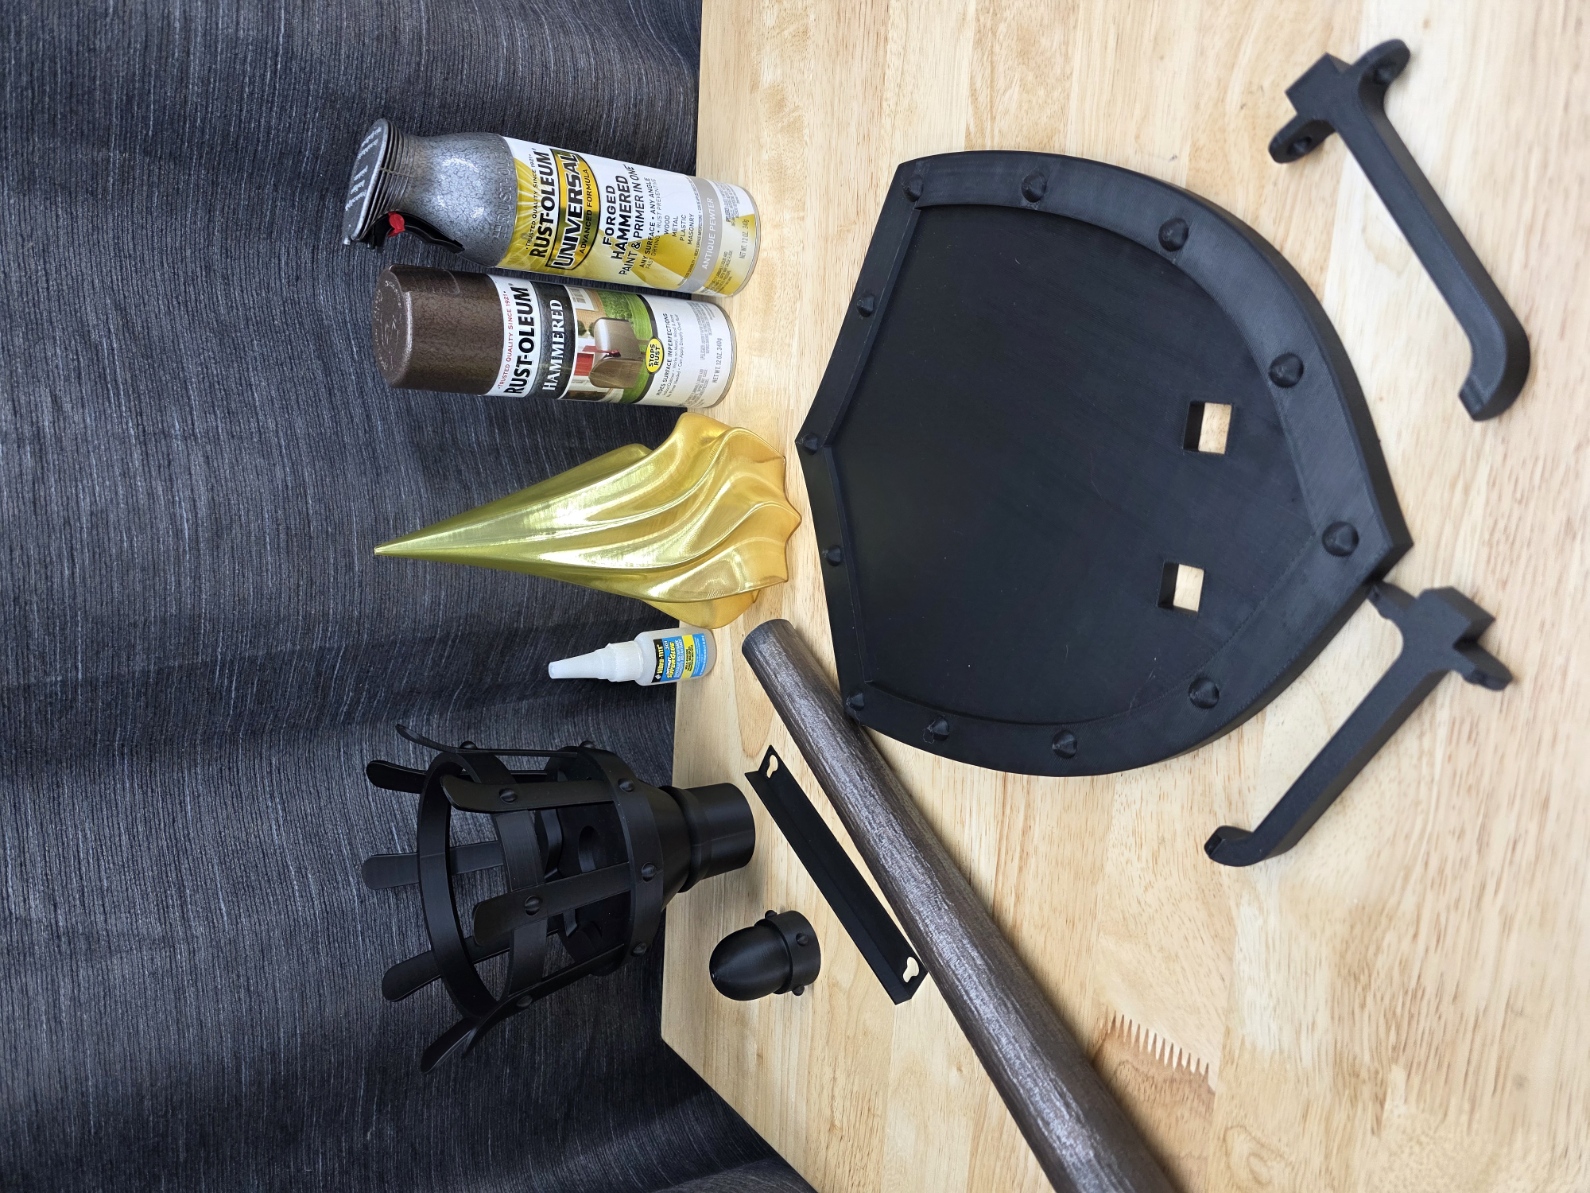
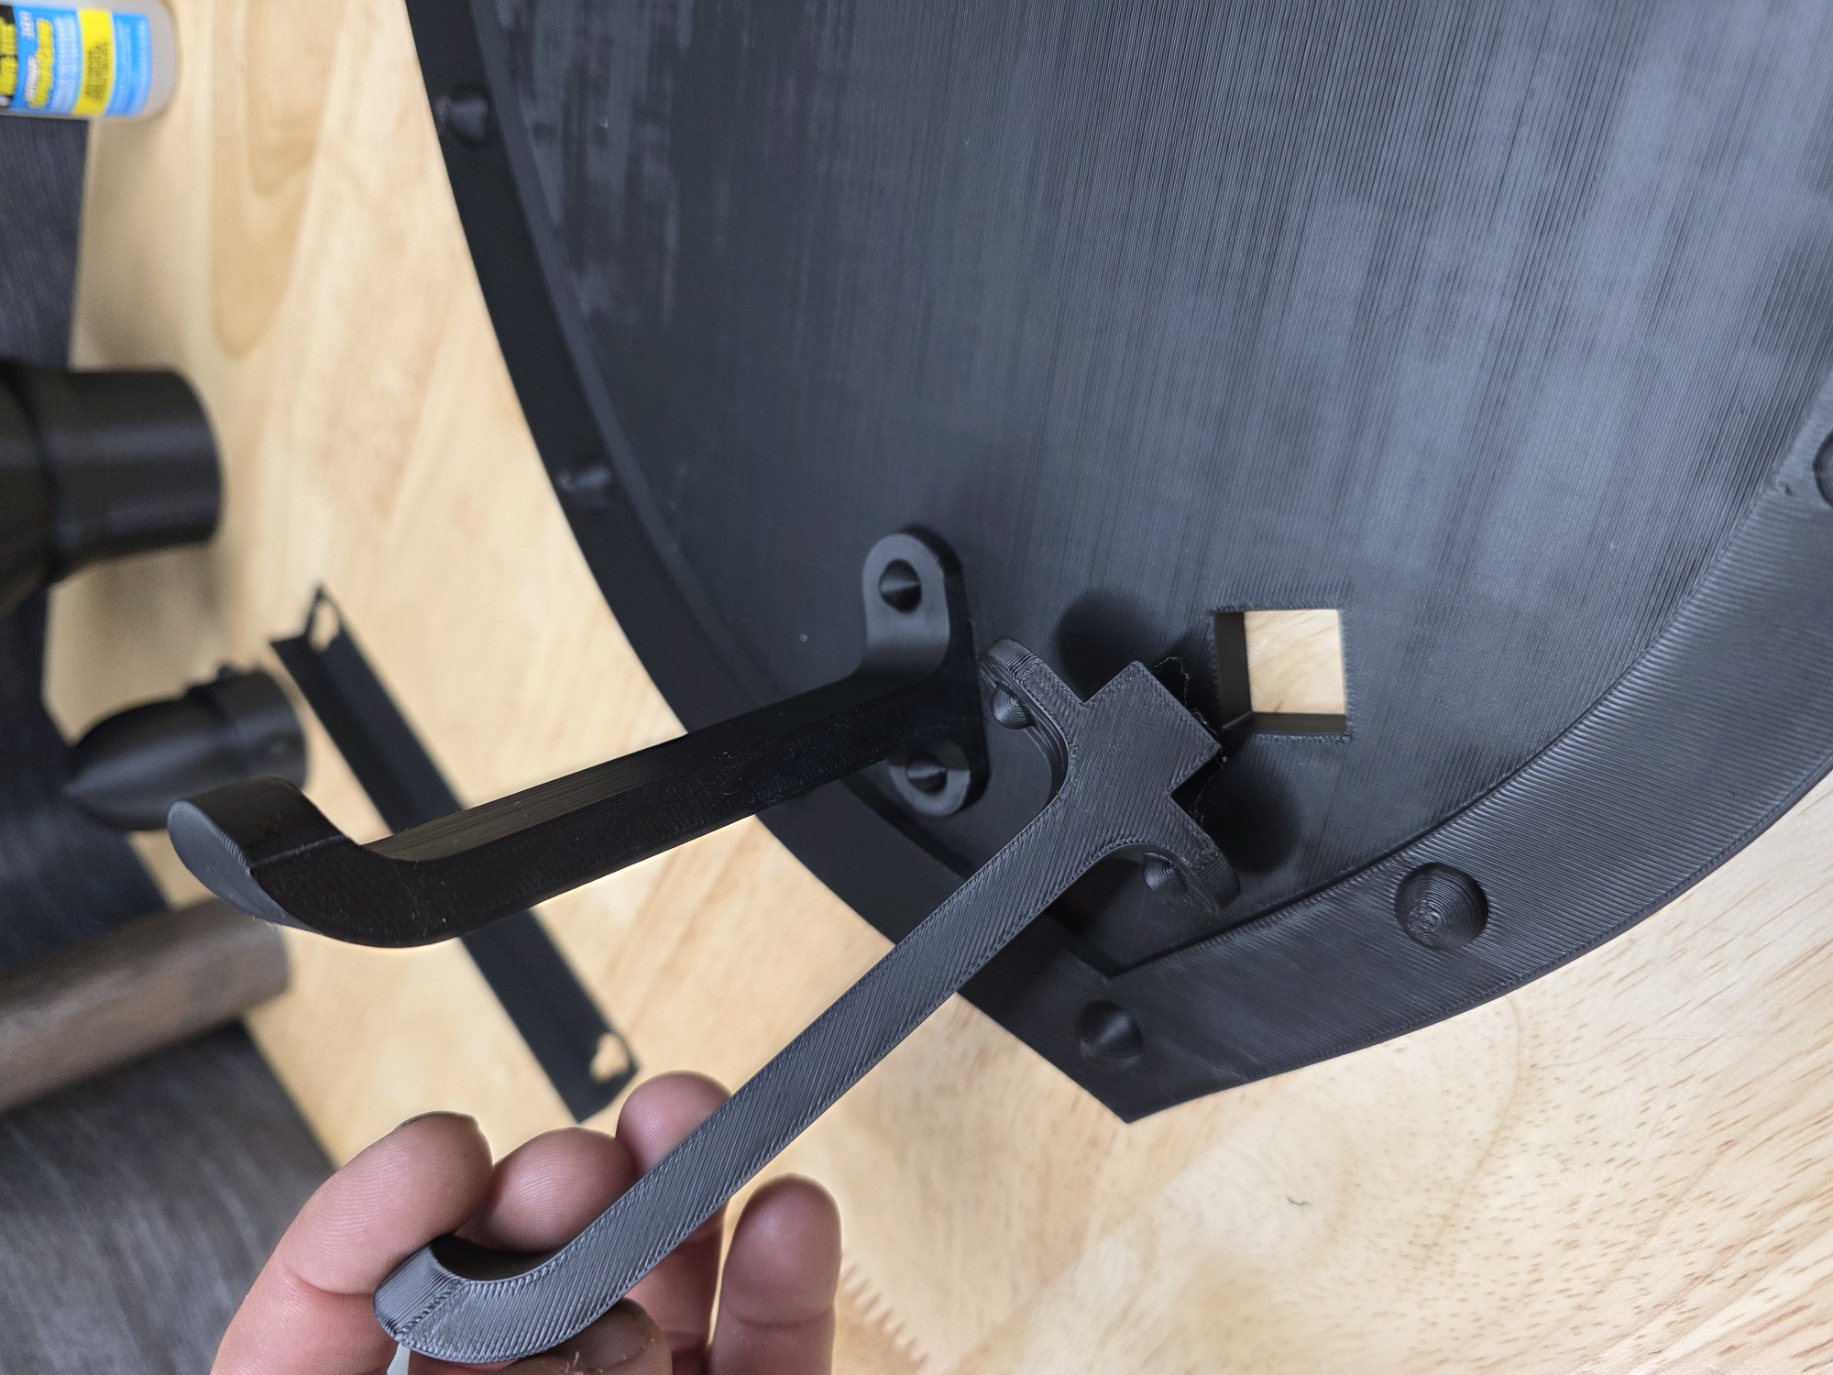
Step 2: Install Hanger Hooks
Insert the hanger hooks into the shield.
These do not have to be glued, but it is recommended for a more secure hold.
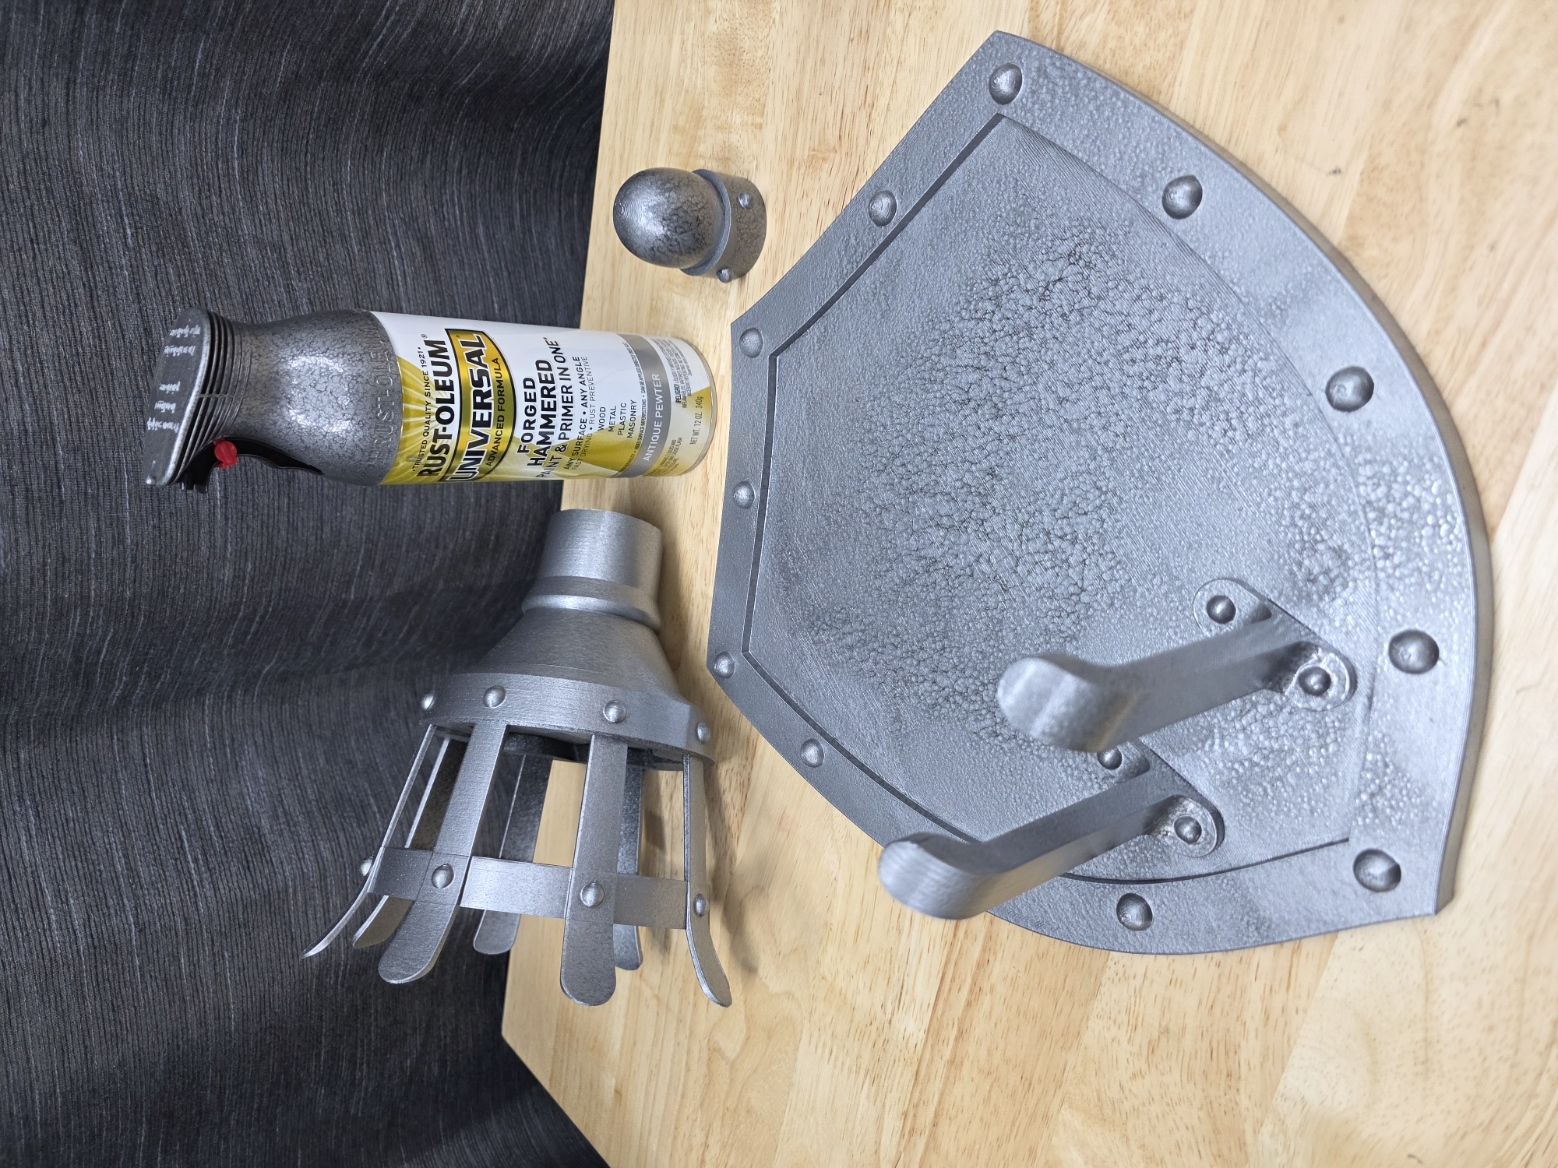
Step 3: Paint Components
Paint all parts using Rust-Oleum Hammered Gray.
- Apply a thick coat to achieve a stronger hammered effect
Keep in mind: thicker coats = longer drying time
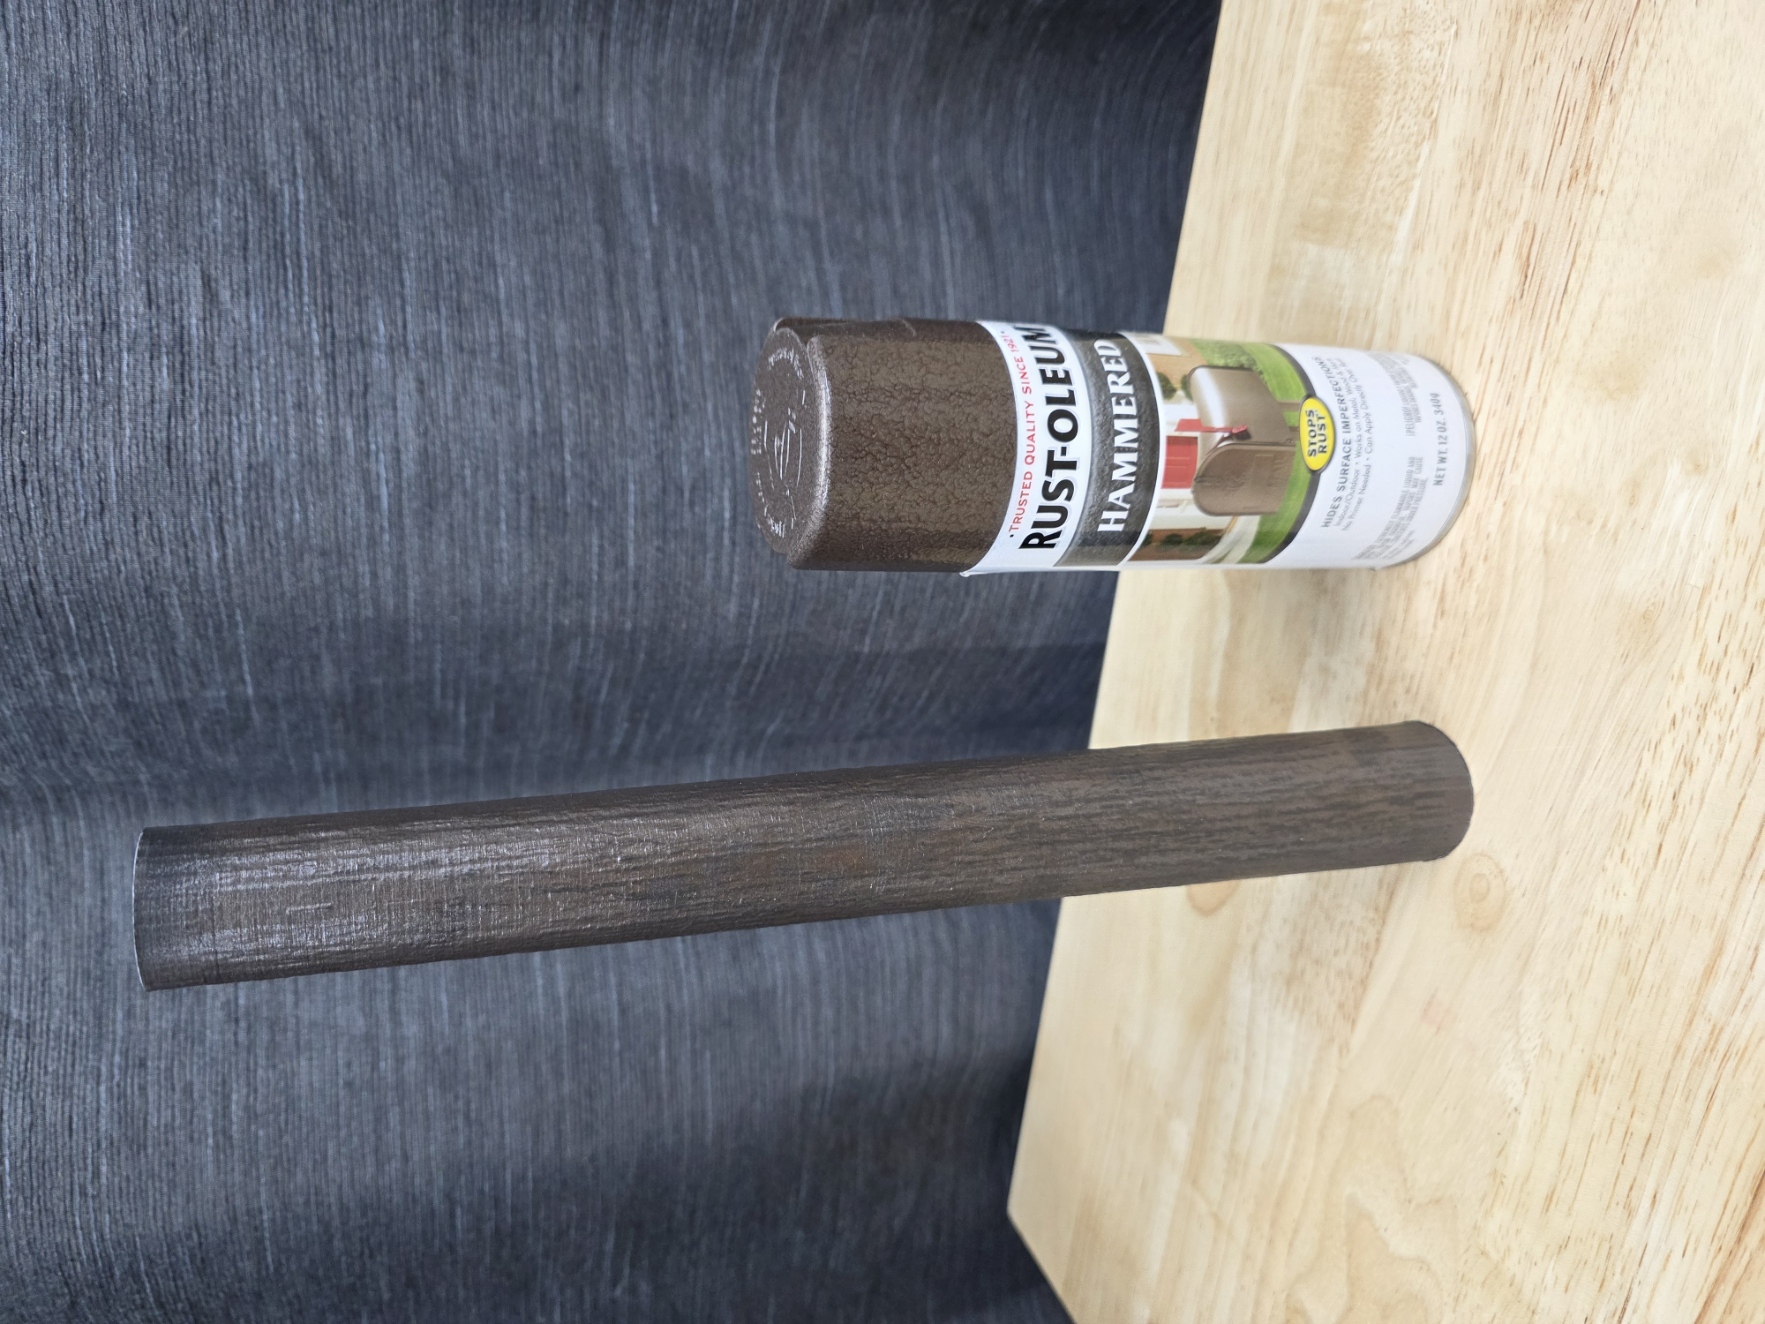
Handle Finish Tip
For the wooden handle look:
- Print the handle in black
- Spray with Hammered Bronze
- While wearing a glove, slide your hand downward along the handle
- This removes some paint and lets the black show through
Creates a natural wood grain effect
Step 4: Assembly
- Glue all components together using super glue
Ensure everything is aligned before the glue sets
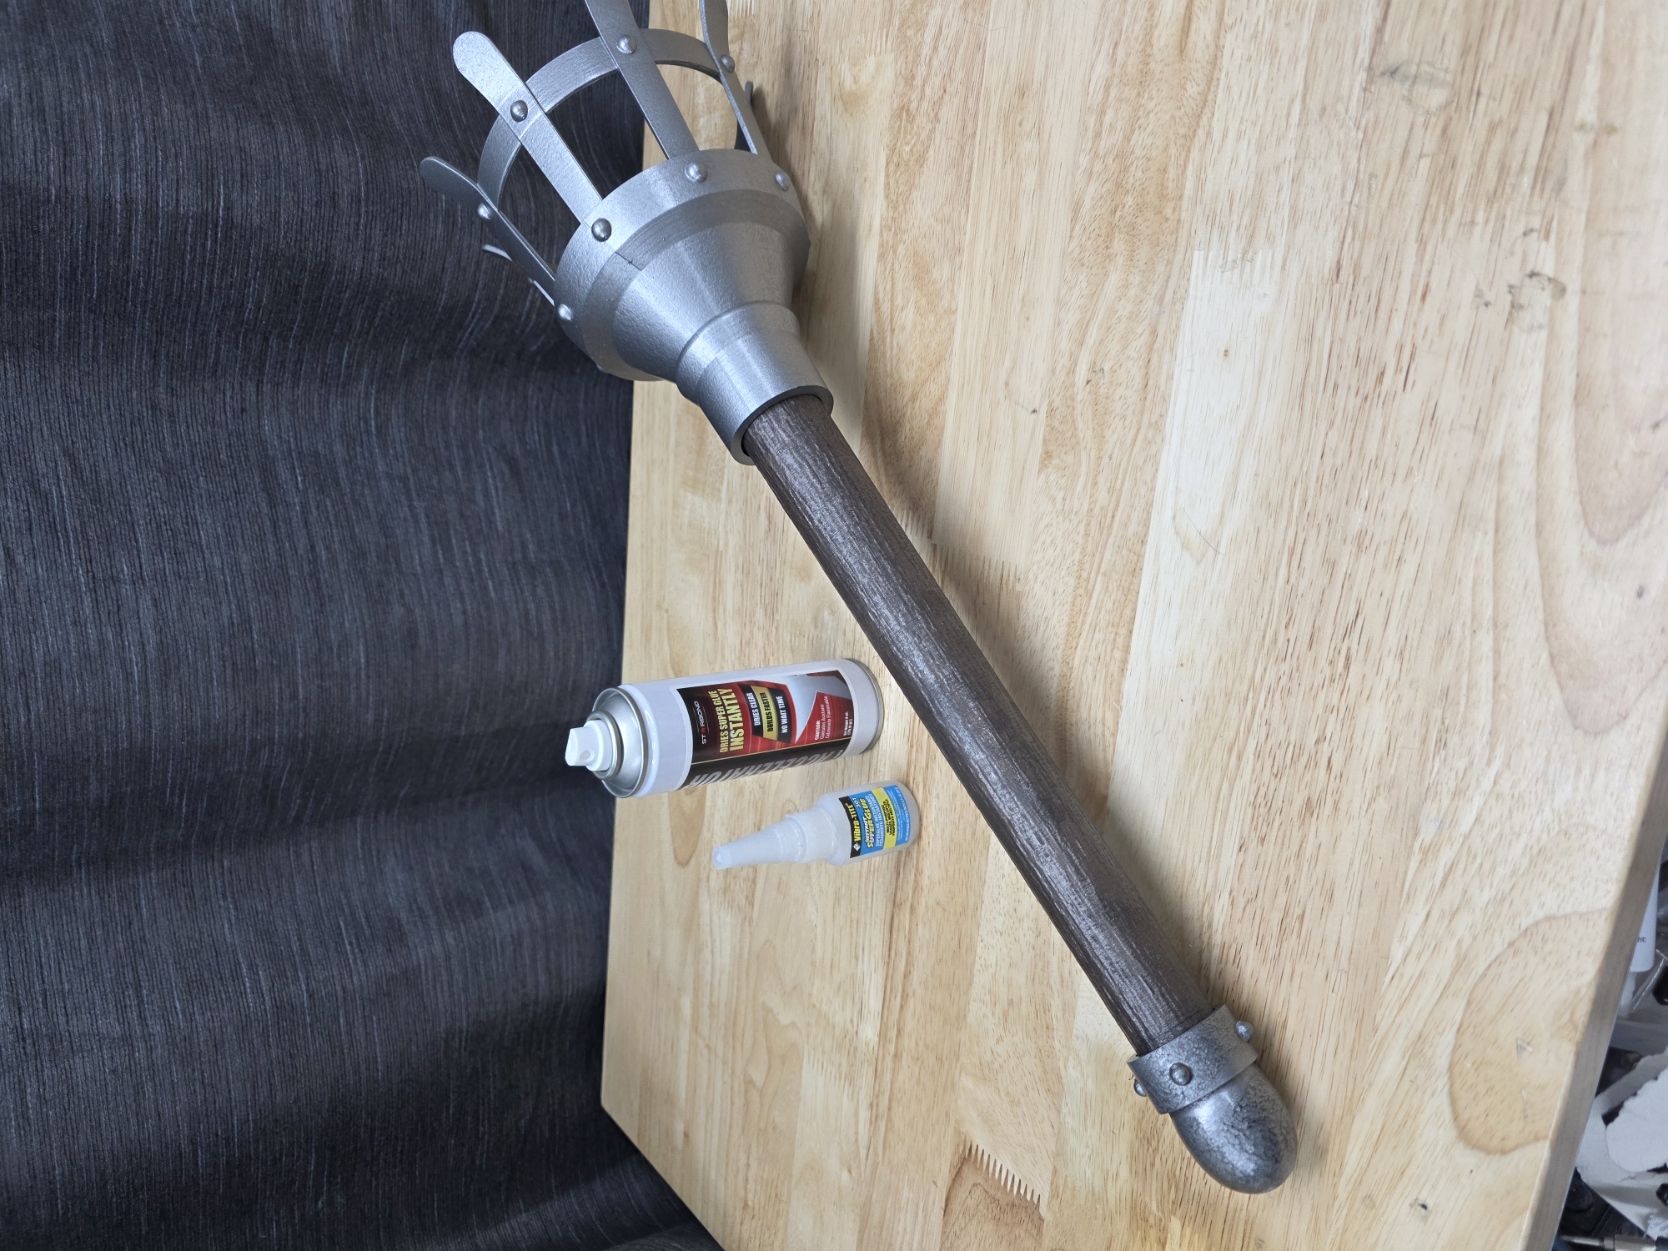
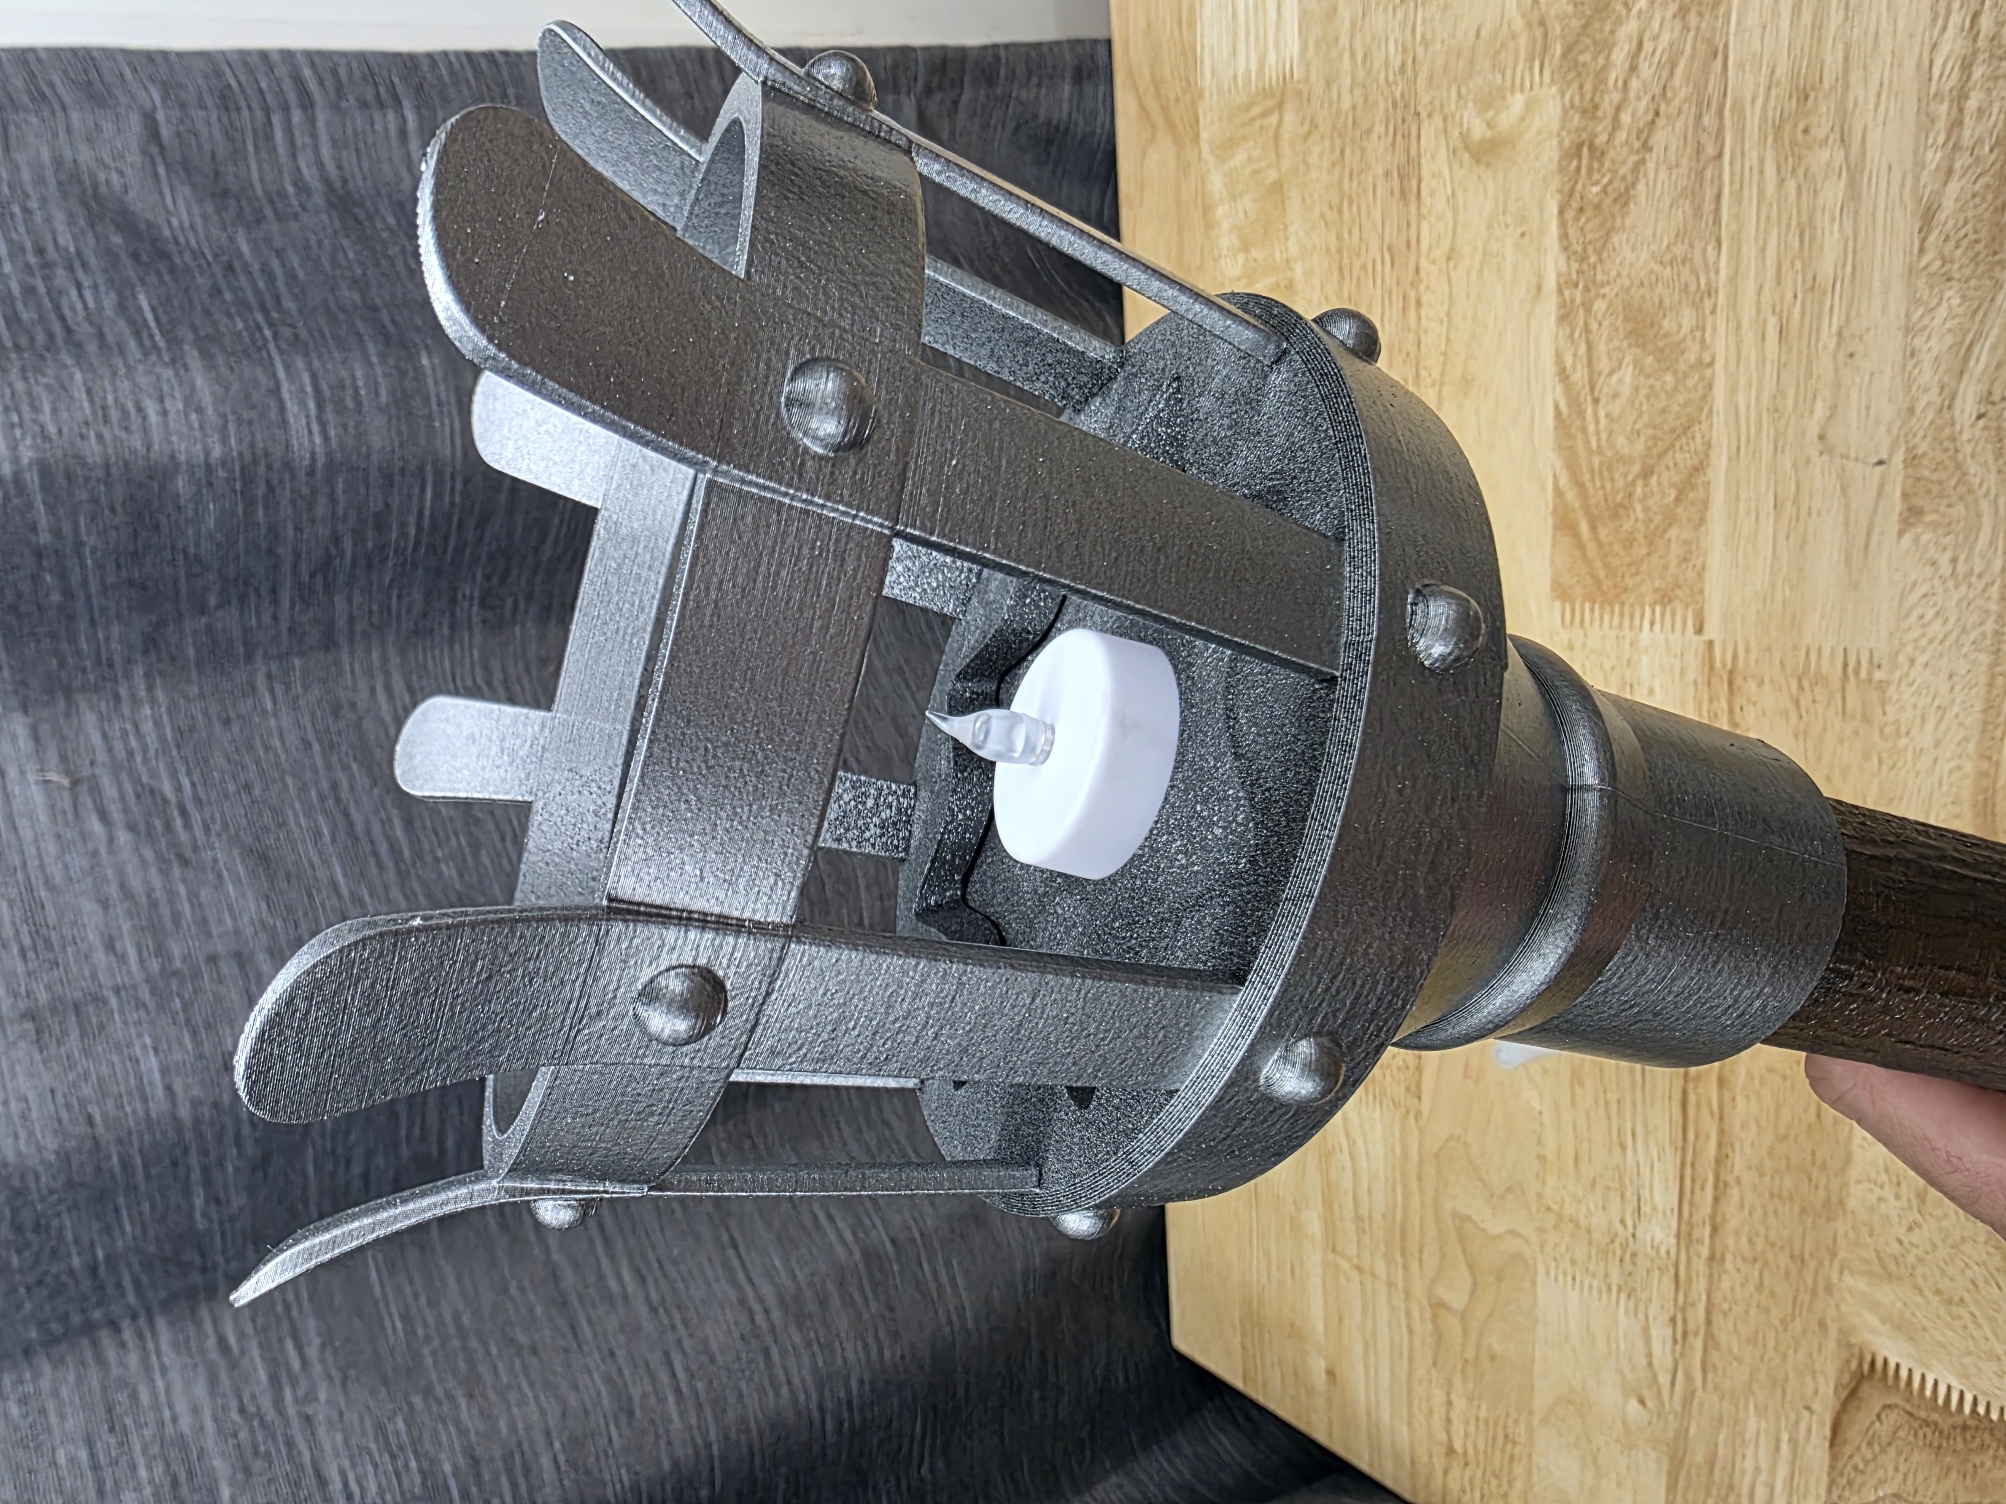
Step 5: Install Tea Light
- Turn the tea light ON
Insert it into the torch cage
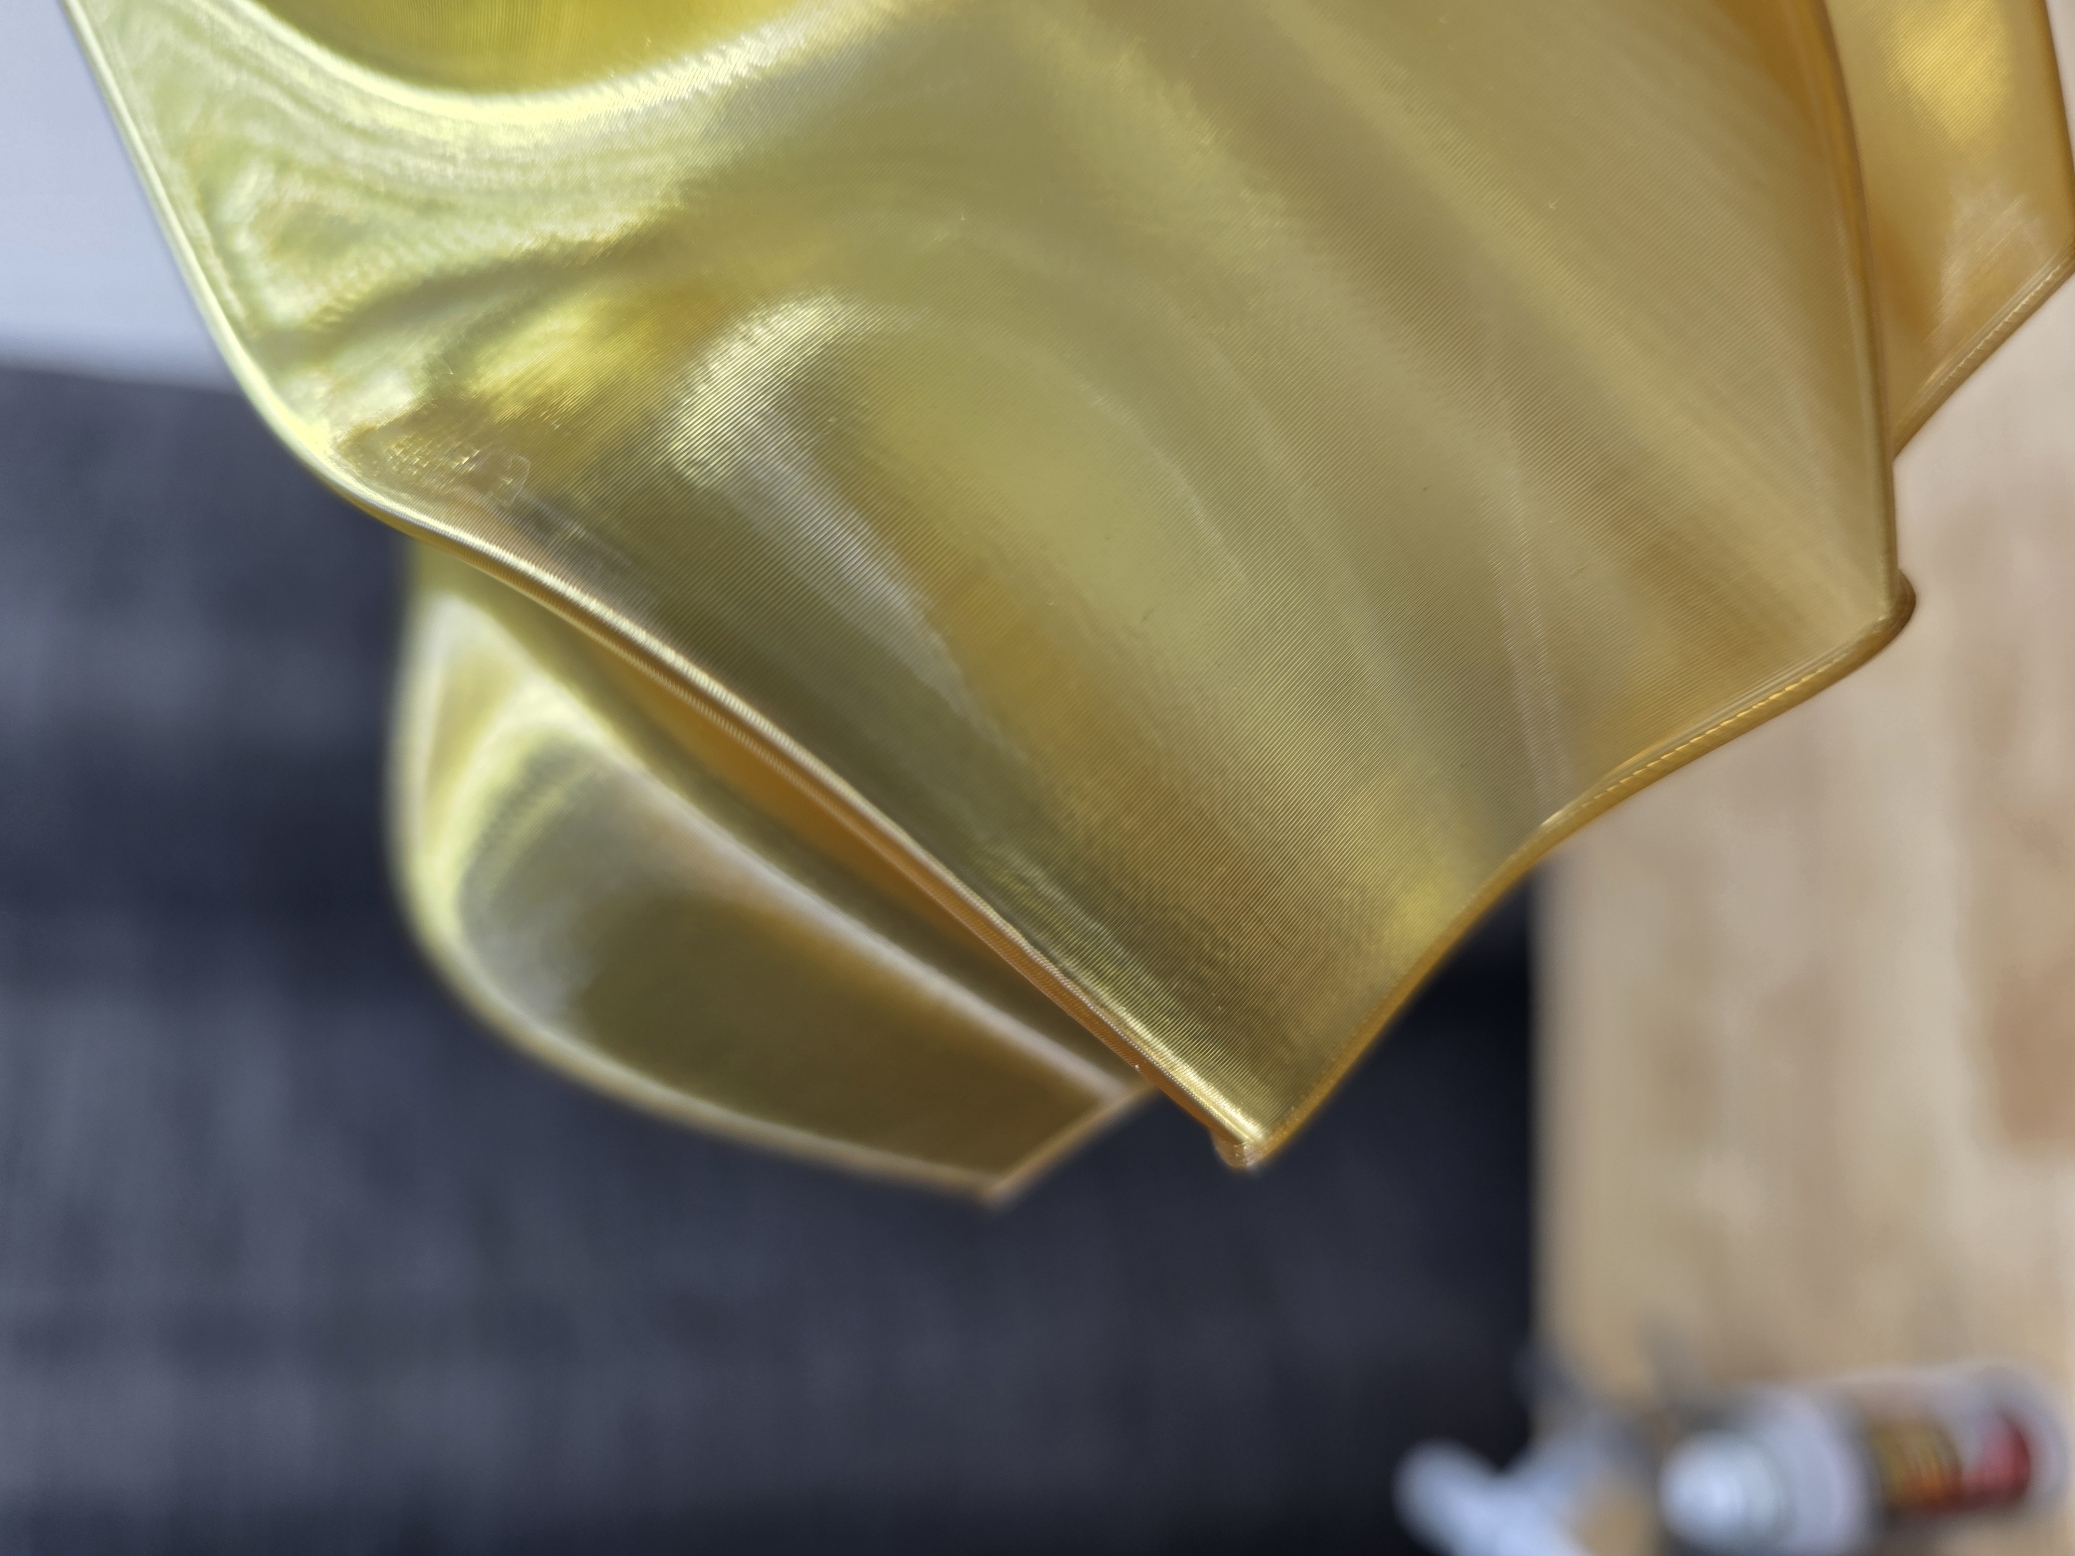
Step 6: Install Flame
The flame (printed in spiral vase mode) should have a small lip on the bottom.
Press it into place until it clicks and locks into the cage
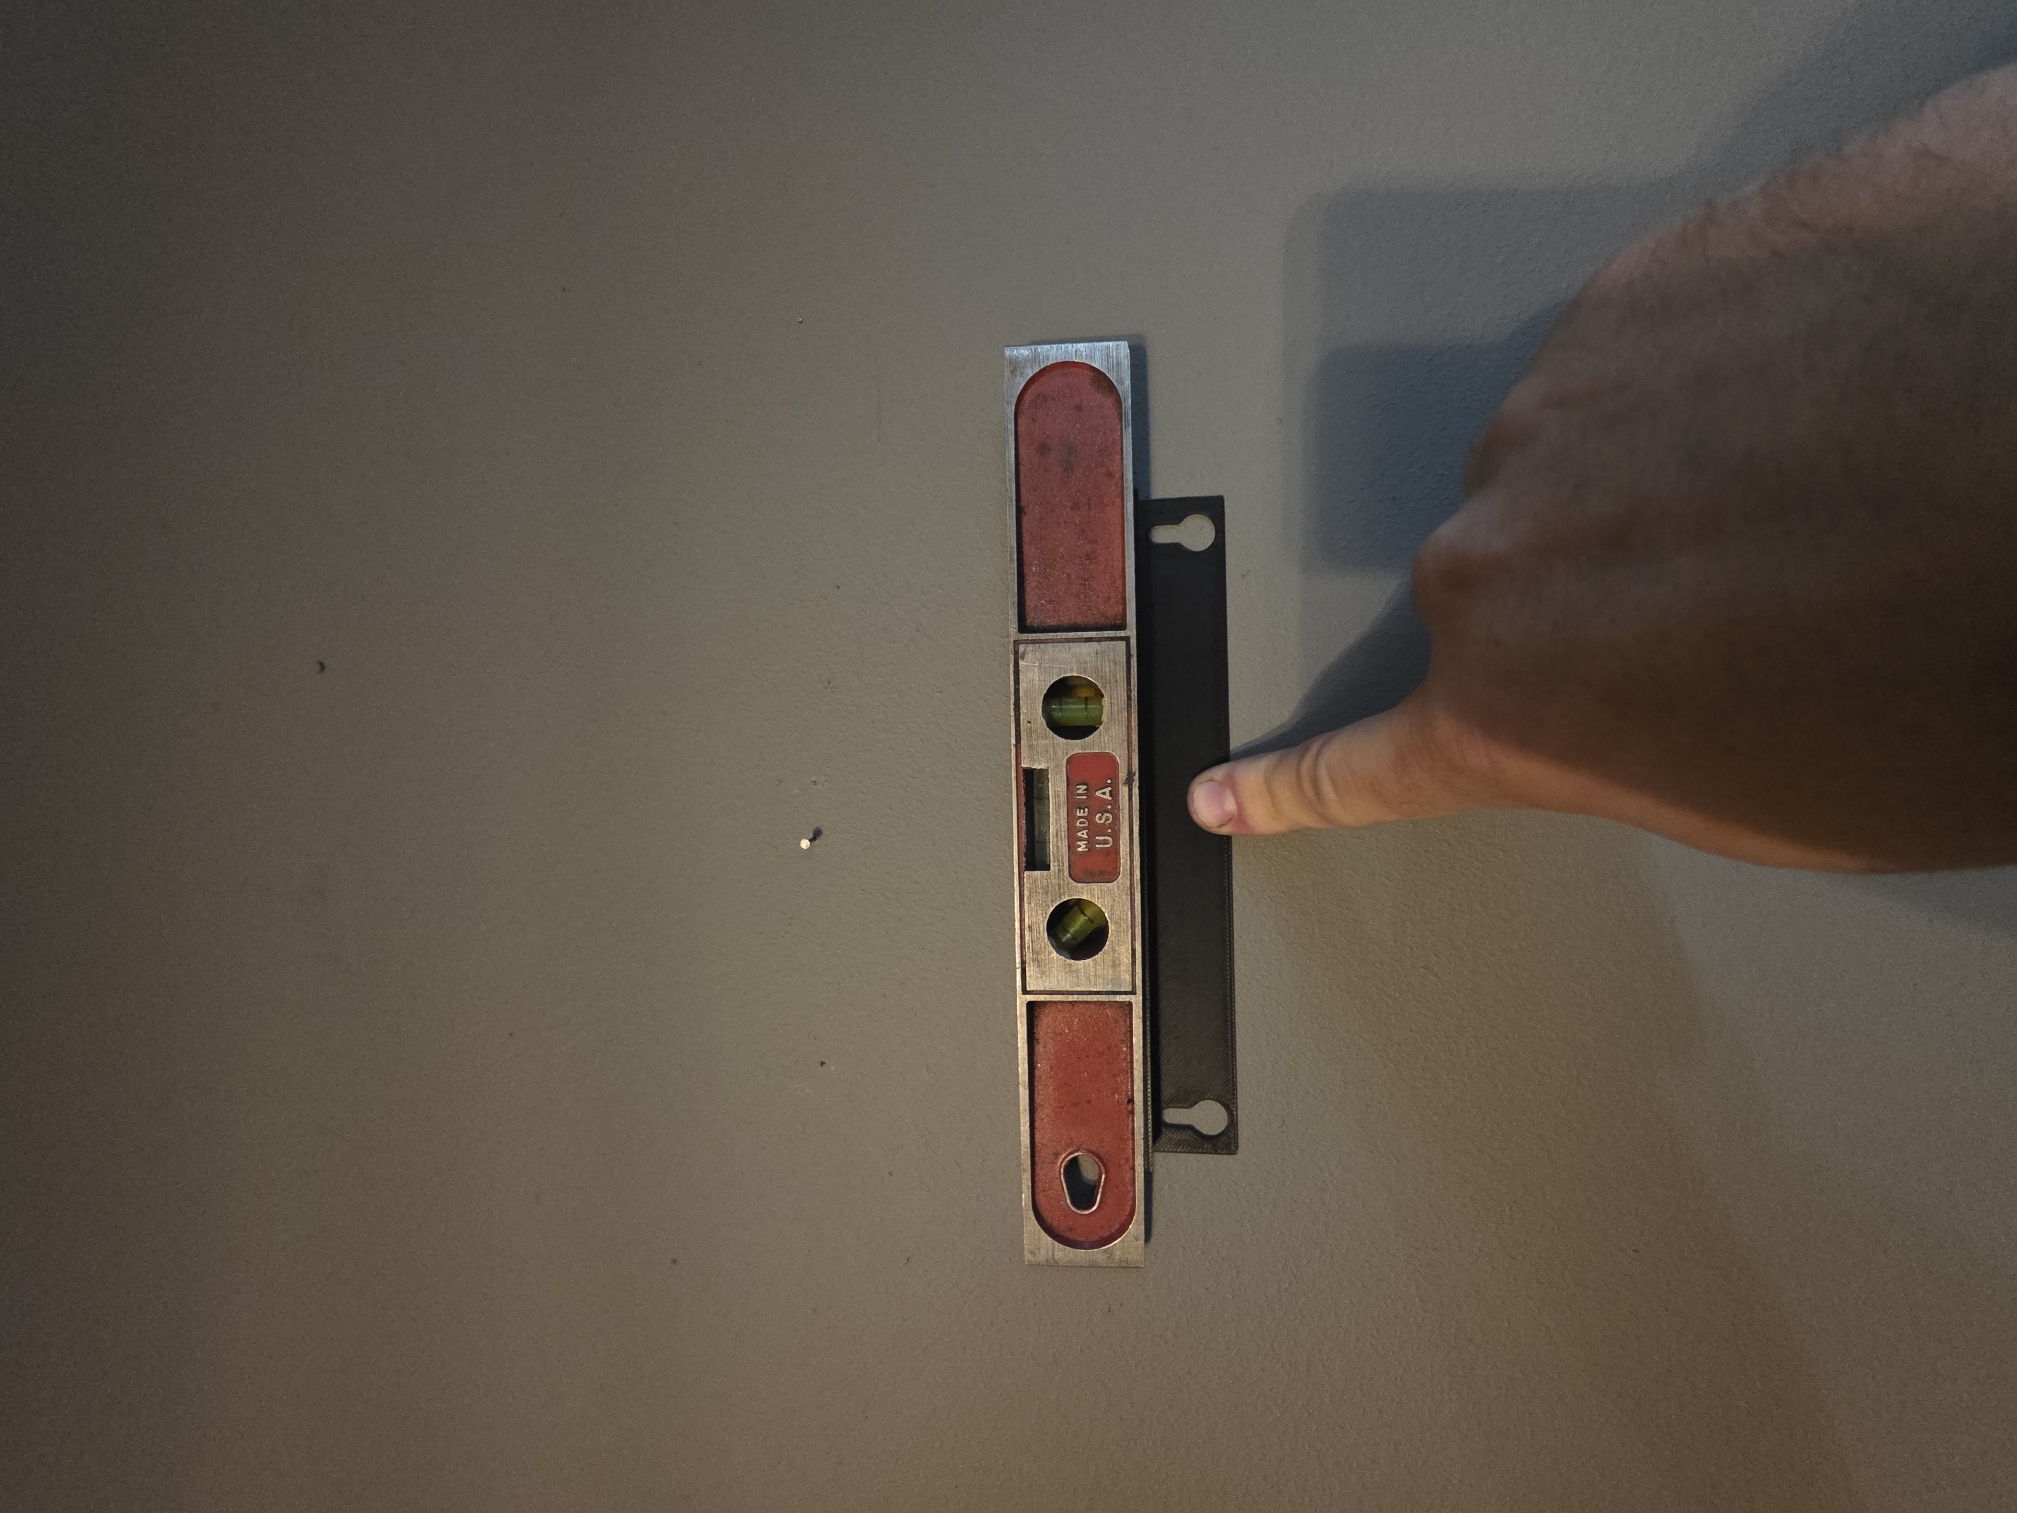
Step 7: Mounting the Torch
- Use the provided mounting bracket to position the torch
- Use a bubble level to ensure it is straight
Mark your holes and install into the wall
Final Notes
- Allow all paint to fully cure before final assembly for best results
- The hammered paint finish will continue to improve as it dries
- Take your time—this piece really shines with careful finishing

Gostou deste modelo? Crie uma conta grátis para salvar seus favoritos e voltar a eles depois.
Criar conta