Você está no 3DFinder
Buscamos em Thingiverse, MakerWorld e Printables ao mesmo tempo para te dar o melhor de cada uma.
Descrição
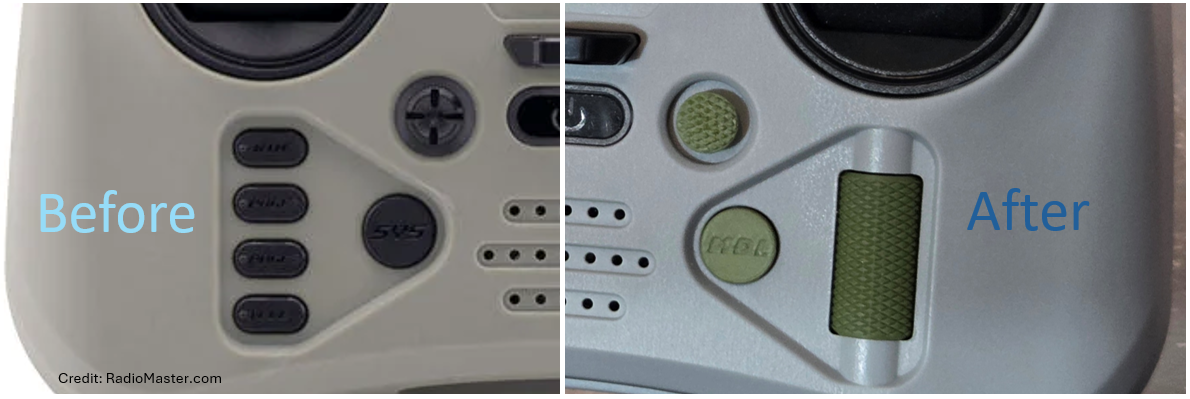
Description
Upgrade you're RadioMaster Pocket Crush with this nice knurled thumb wheel and new buttons in the color of your favorite filament!
Refines the optics and is pretty easy to install.
This should also work for the classic RadioMaster Pocket.
Disclaimer : you will probably void your warranty by doing this. I take no responsibility for any damage to your radio, proceed at your own risk :P
Assembly instructions for the thumb wheel.
Each of the button sets comes with hex-pins:
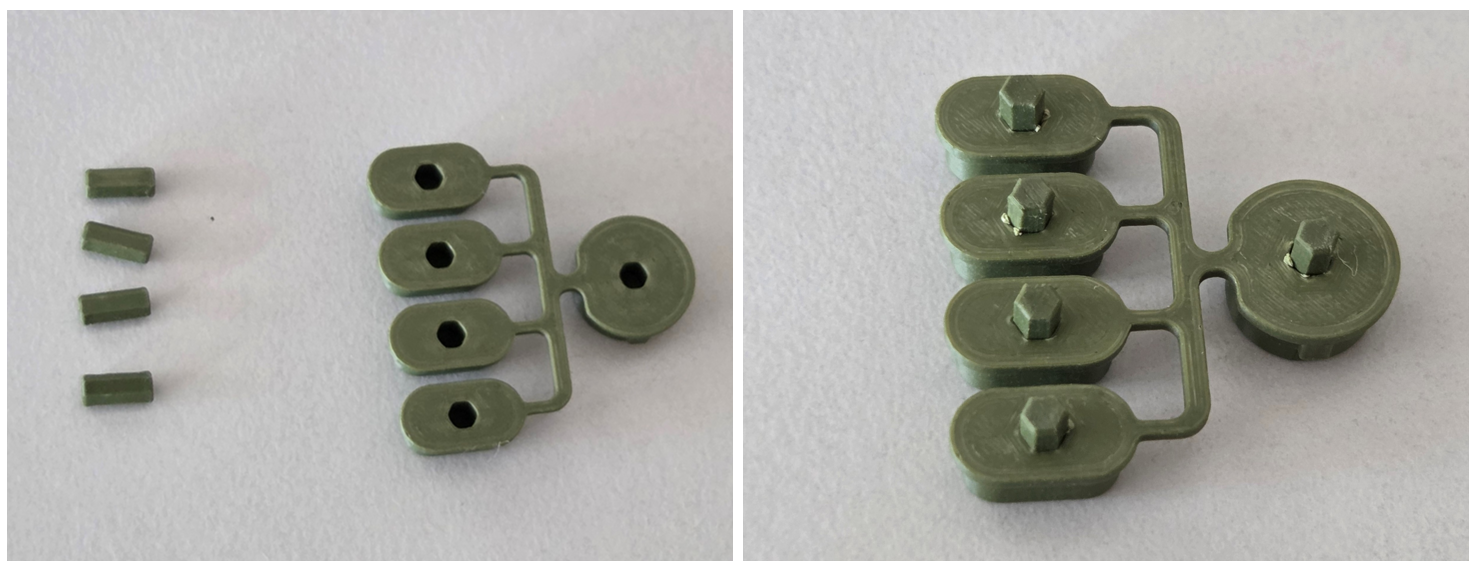
Push them into the corresponding holes in the back. Make sure they are pressed all the way in. otherwise they will be pushing the buttons on installation. The best way i found to do that is with my upgraded Proxxon Mini-Press :)
Now let's open up your radio! I used this great tutorial from Whirly Bloke on YouTube for the details.
Make sure you remove your batteries first, then take out the four screws on the back of the radio:
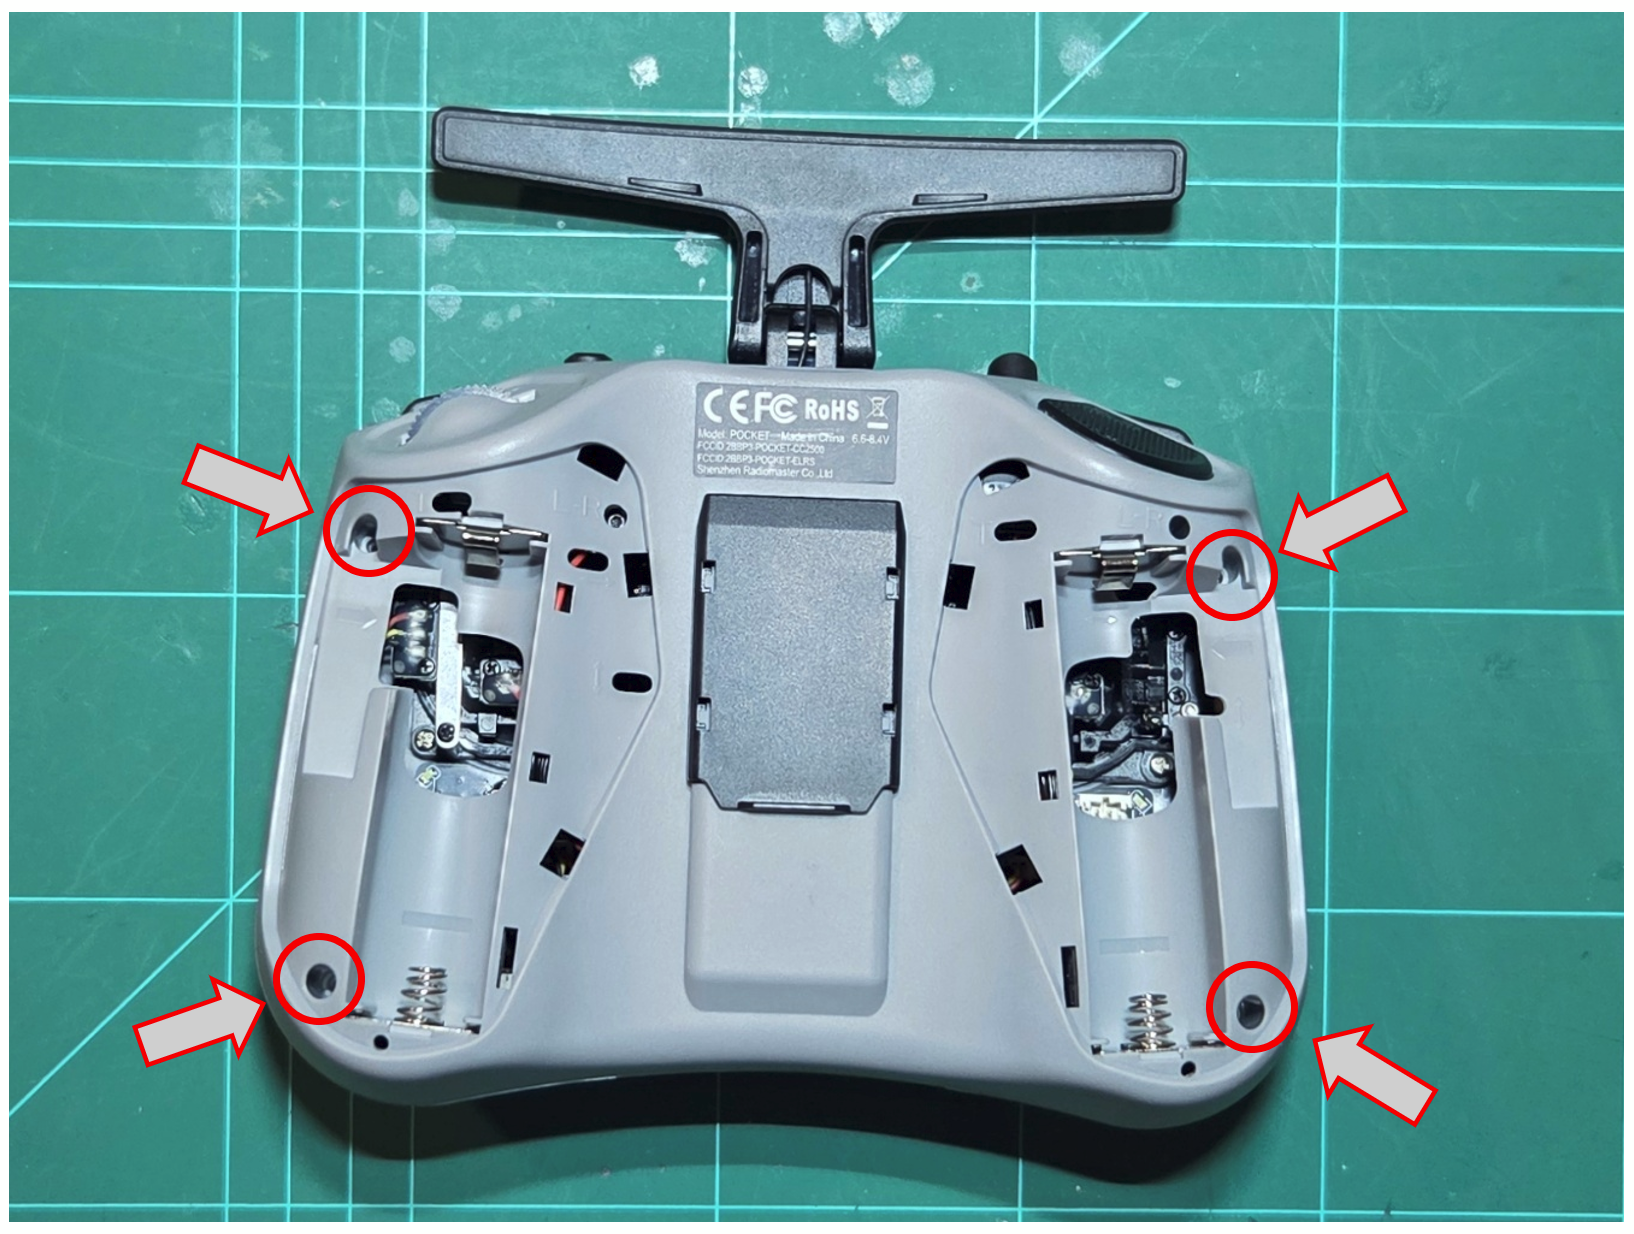
Then open up the controller and separate the two halves by unplugging the multi-wire connector:
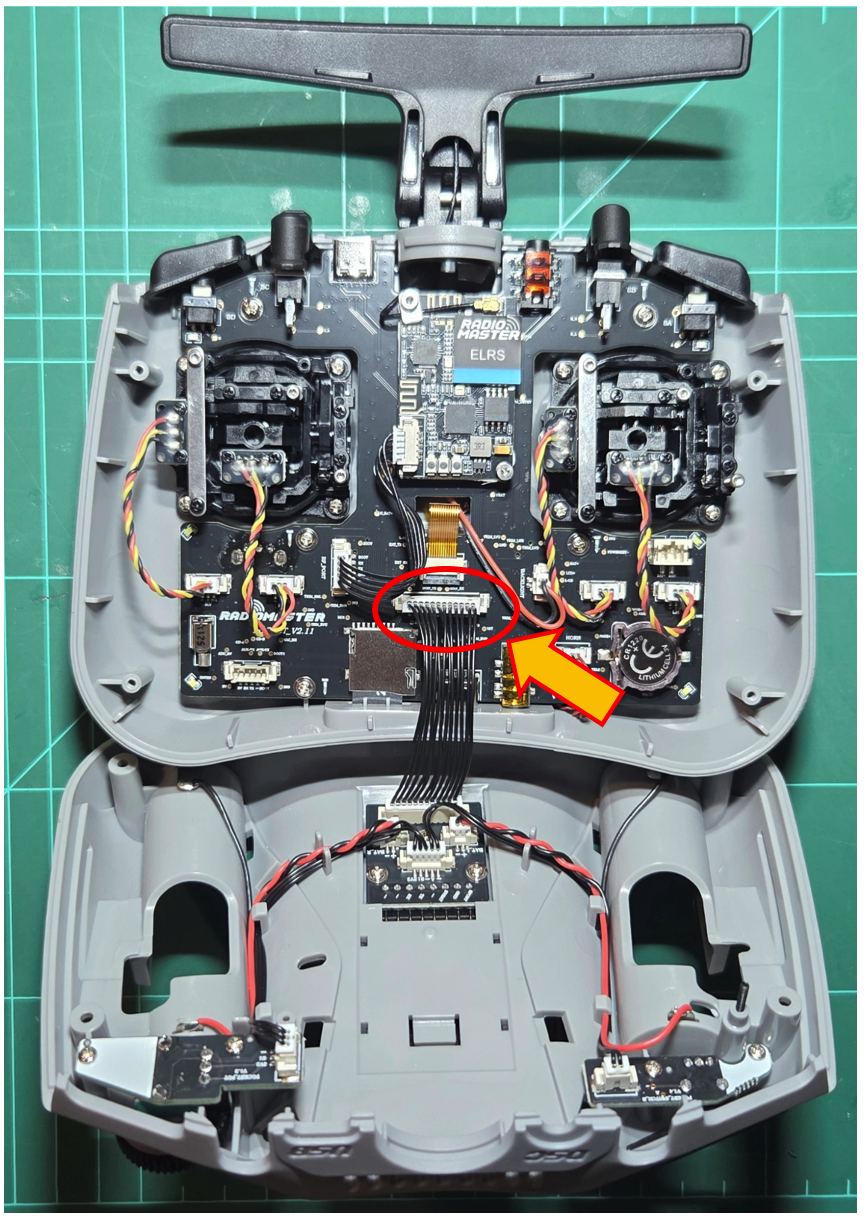
Next, unplug all of the connectors, including the screw holding the antenna wire (yellow arrow) and open the latch for the ribbon cable before pulling it out (green arrow) the black tab at the bottom flips up, took me a minute to figure that out:
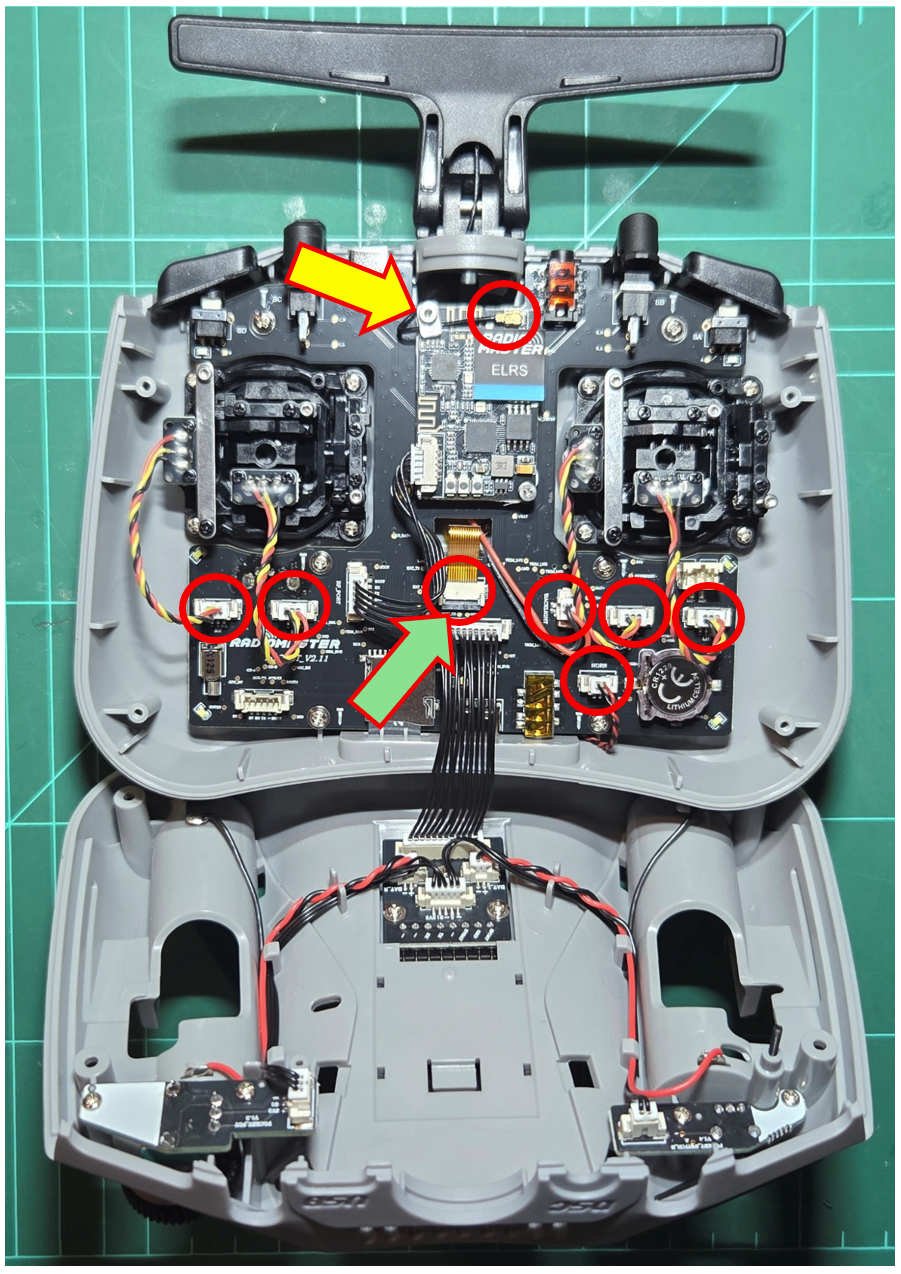
At this point, take out the SD card and put it somewhere safe.
Then you can remove all of the screws holding the PCB in, luckily they are different from the ones fro the case, so you can't really mix them up…
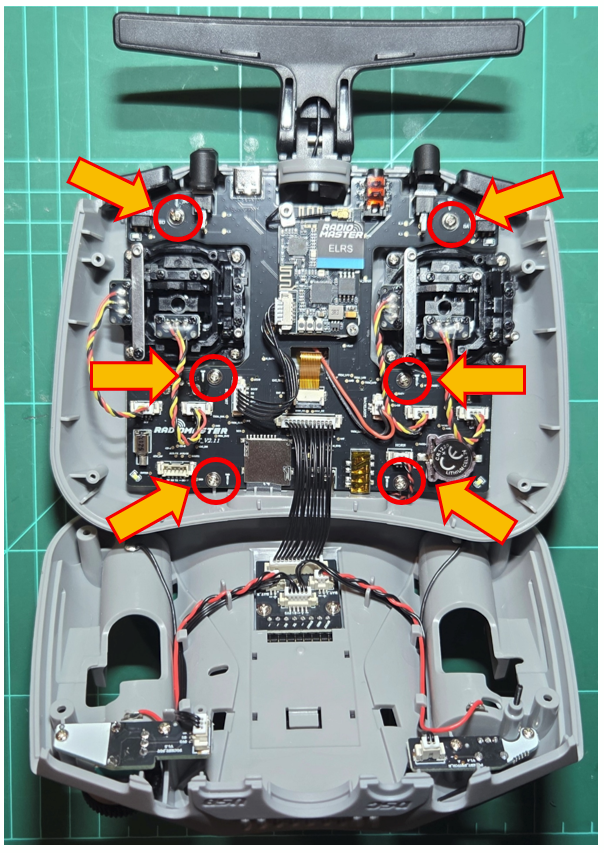
Now you can pull out your PCB. You should not feel any resistance. If you do, check if there is still a screw somewhere or maybe you missed unplugging a connector.
And don't worry, it's normal that the buttons fall off while doing this step.
Dump out the old buttons and lay in the new ones:
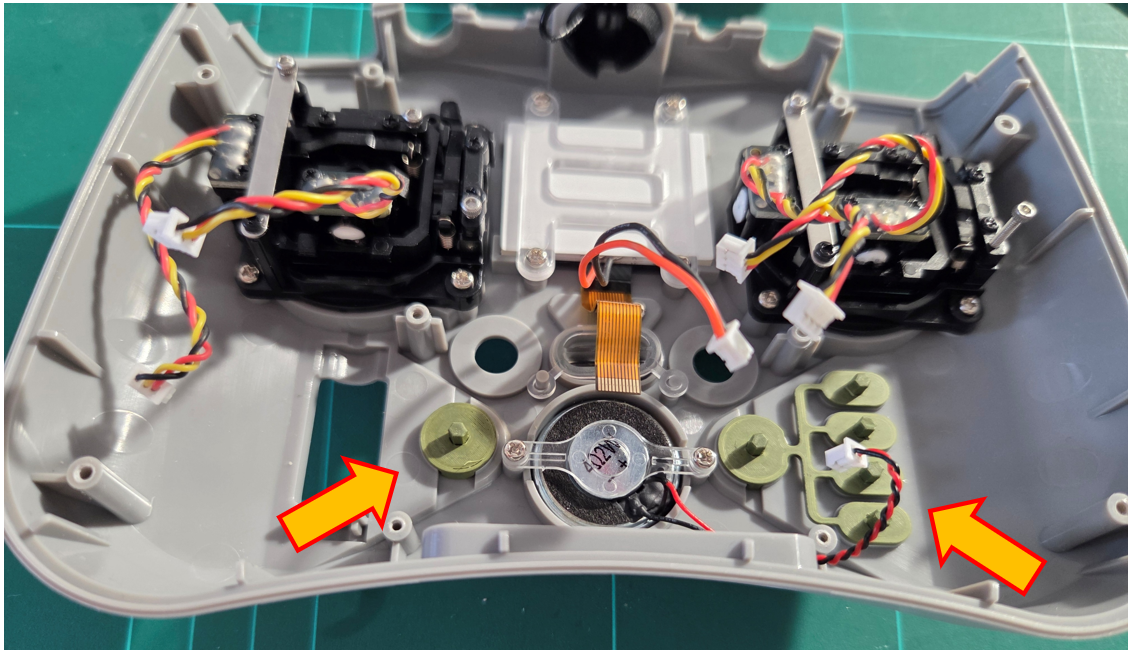
If the thumb wheel didn't fall out on it's own, you can take it out and replace it with the new one. Slide the hex pin into the potentiometer:
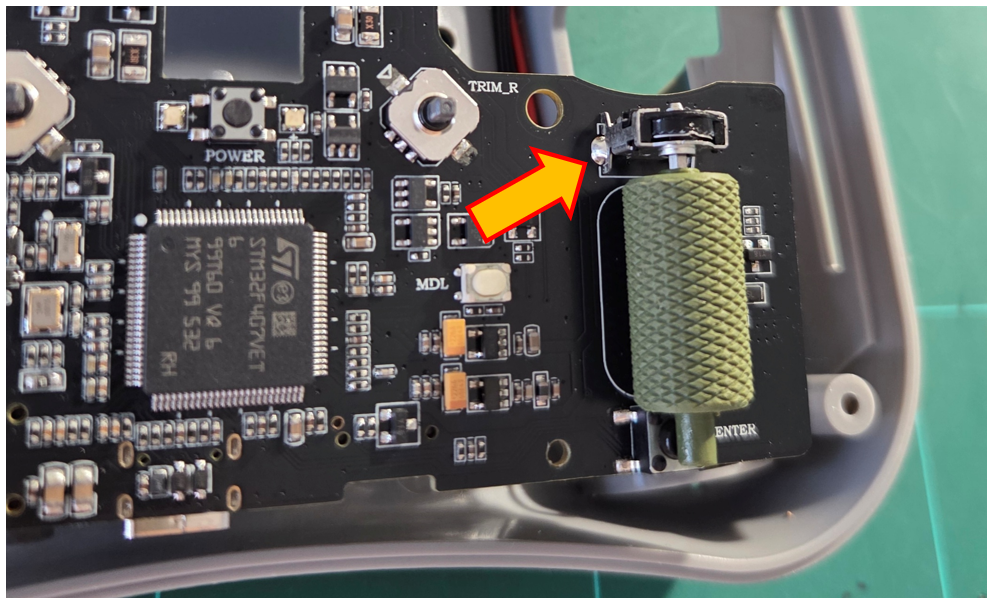
To reassemble just do all of the steps backward.
Inserting the ribbon cable is a bit finicky and don't forget to plug the antenna back in (!) and refasten it's cable with the screw holder clamp.
I tested the scroll wheel after putting the PCB screws back in, and after it felt good I got to plugging back in all the connectors.
At last push the new mini joy-sticks on the buttons. They might be a bit tight the first time you press them on.
Check the orientation of the knurling before pressing them on ;)
Then you will have an upgraded RadioMaster Pocket! Congrats!
Radiomaster Pocket Button Set

Publicado em 13 de abr de 2026
Gostou deste modelo? Crie uma conta grátis para salvar seus favoritos e voltar a eles depois.
Criar conta