Você está no 3DFinder
Buscamos em Thingiverse, MakerWorld e Printables ao mesmo tempo para te dar o melhor de cada uma.
Descrição
Here is the big one, the big vault. You will need an H series sized printer or larger or break into smaller pieces. I am working on a version that will fit the smaller printers.
Make sure your bed is very clean and glued and your filament is calibrated and dry. These large prints try to pull up at the edges so good practices are needed. Print the door first and make sure you can get things working before printing the main body. This with prevent possible wasted time and filament.
Assembly
Step 1: Glue the alignment ring to the door with super glue. Then glue the number indicator to the door making sure to keep things lined up and pressed together well.

Step 2: Set your code wheels. there are three “driven code wheels” and 1 “drive wheel” as well as 4 “code pins” that snap into each code wheel.
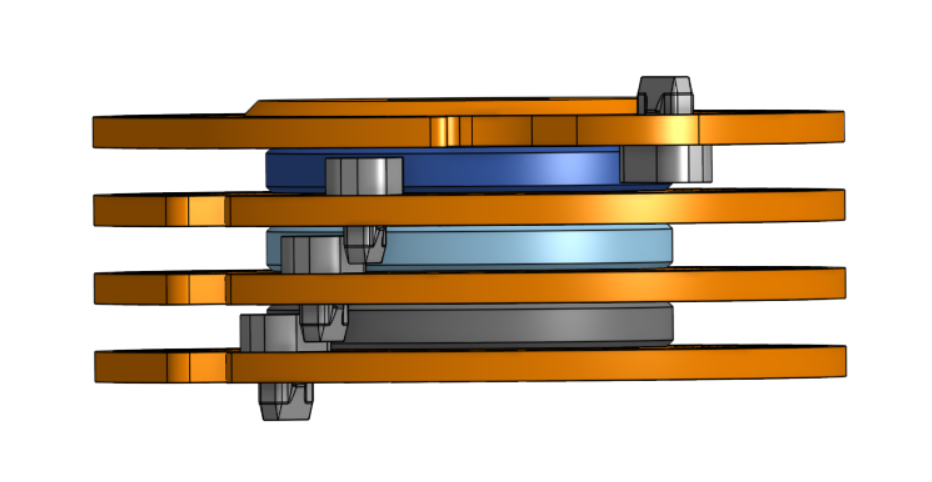
When picking a code there are a few limitations.
1 avoid the first six notches shown on wheel 3
2. two adjacent wheels cannot have a code pin in the same hole.
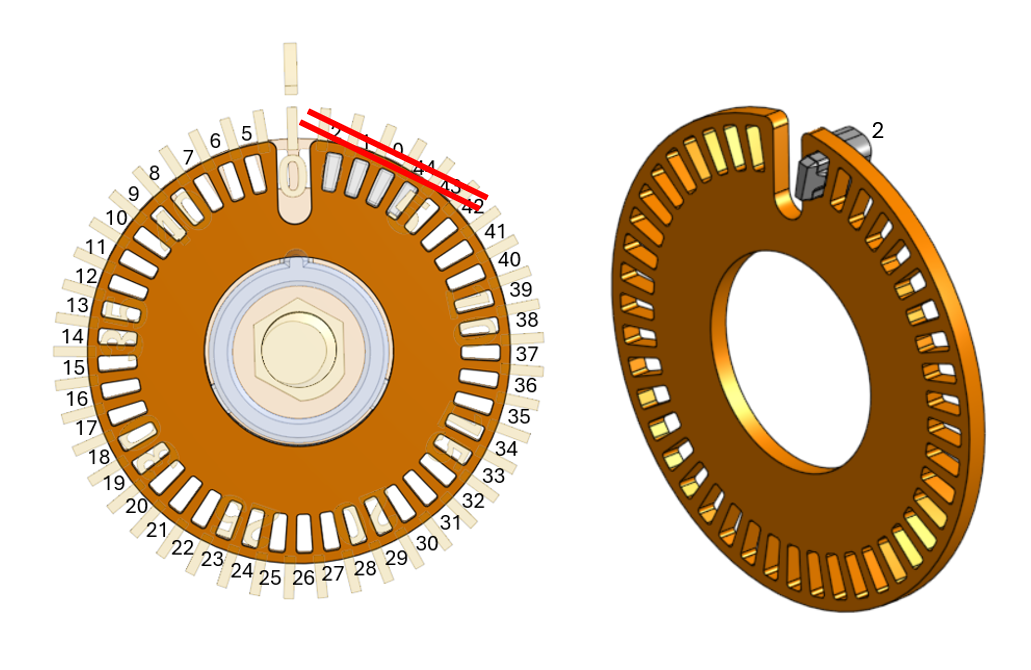
For the driven wheel I recommend placing the code pin in the first slot as shown below. You can change this later if you want. The large side of the code pin on the flat side of the drive wheel.
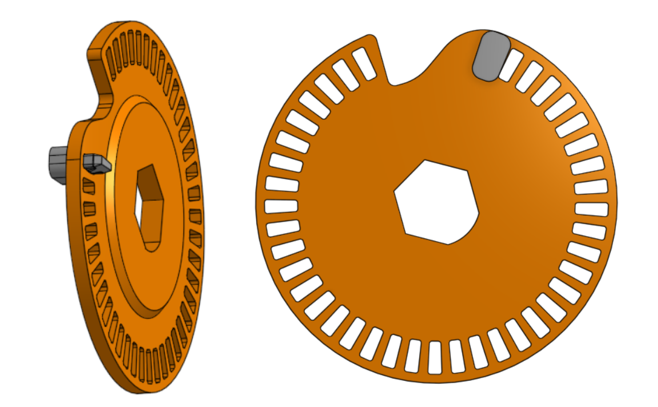
First wheel: pay attention to the orientation of the code clip to get the right digit. pick the number you want, write it down.
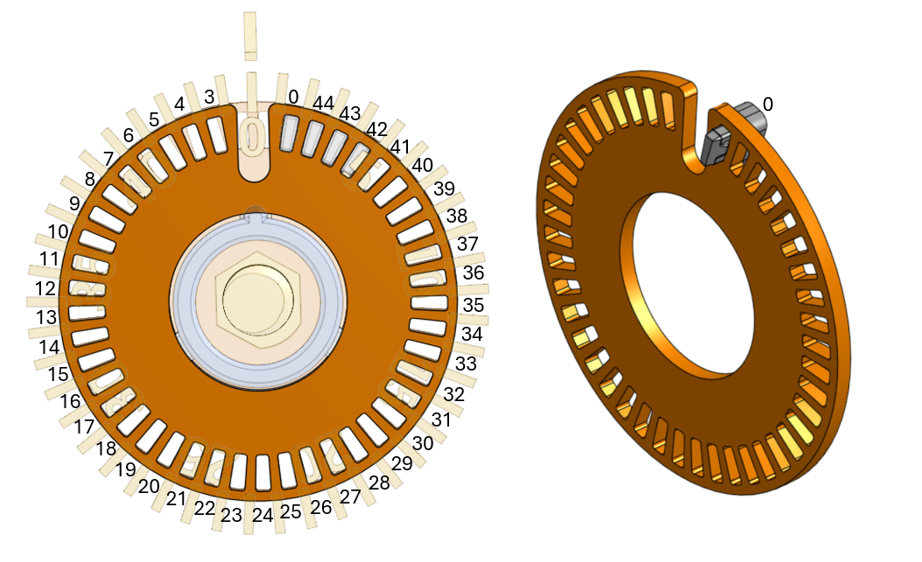
Second wheel: pay attention to the orientation of the code clip to get the right digit. Pick the number you want, write it down.
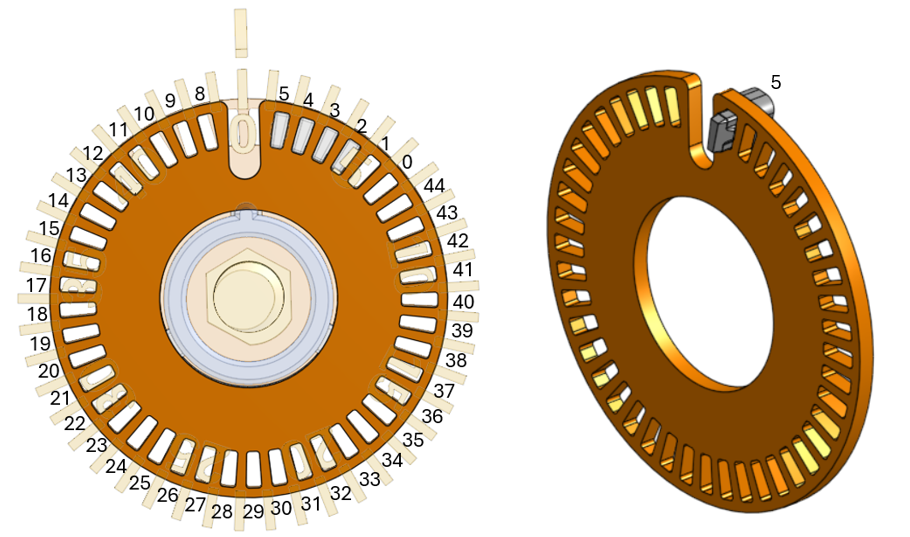
Third wheel: pay attention to the orientation of the code clip to get the right digit. Pick the number you want, write it down.
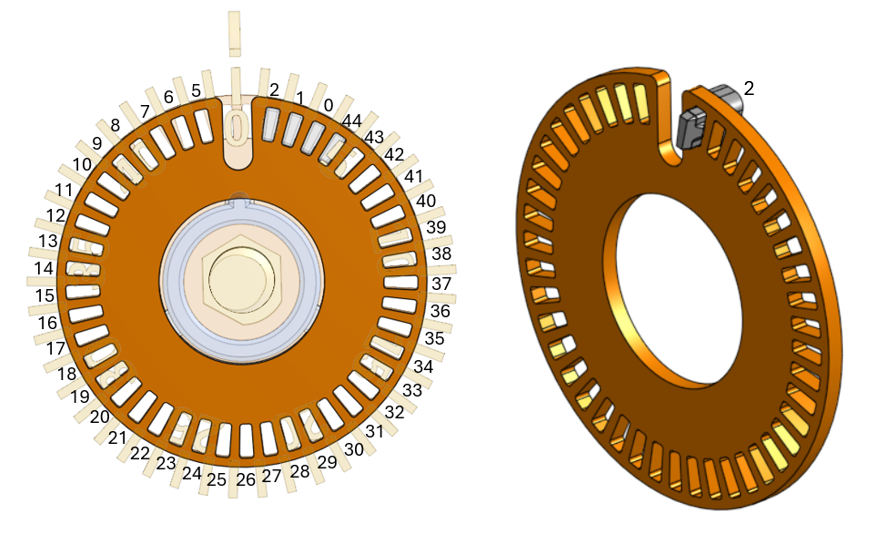
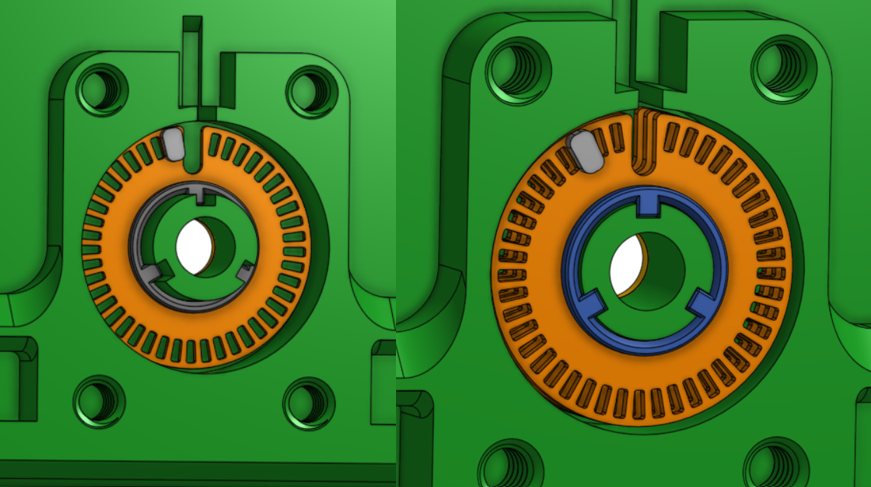
Step 3: grab the door, code wheels and spacers, knob screw knob number wheel,
place the first code wheel with the large side of the code pin facing out of the pocket towards you. then place a spacer followed by the second code wheel, space, third code wheel, spacer.
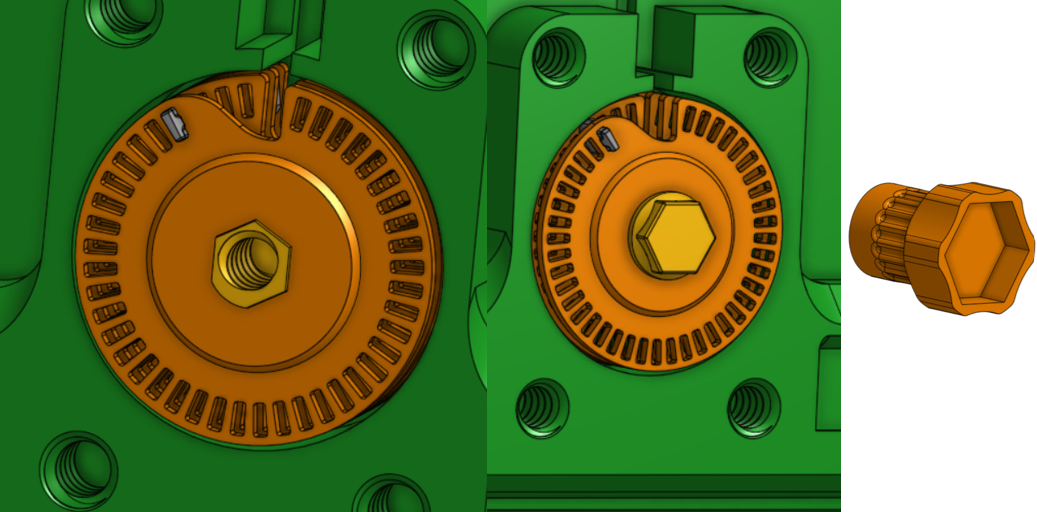
Install the number wheel and the number wheel knob as shown these 2 parts only go together one way.

install the drive code wheel as well as the knob screw with the inlcuded tool.
DO NOT SKIP THIS STEP!!! CHECK YOUR CODE!!!
Try your code out or decode your wheels.
Turn the dial 4 times counter-clockwise and stop on your first number.
Turn the dial clock wise passing your second number twice and stopping on the third revolution.
Turn the dial counter-clockwise passing your third number once and stopping
Turn the dial clockwise to Zero.
All the slots in the wheels should be lined up. If you are not setting a specific number you can go through the unlocking procedure taking note of the numbers displayed while the code wheel is lined up with the lock latch.
Step 4: install lock bar 1 and slide all the way in. install lock bar 2 and slide all the way in.
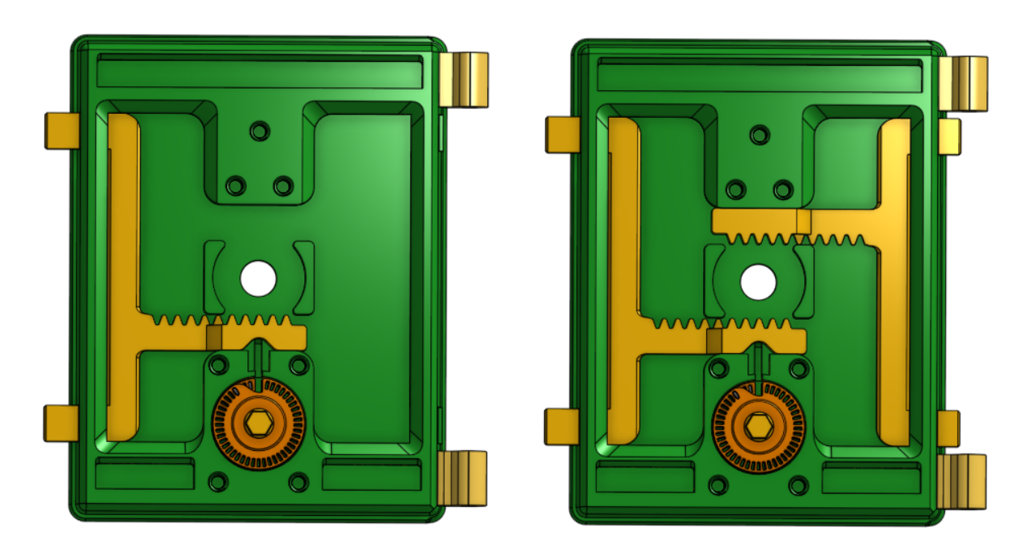
Step 5: install the handle and handle ring as well as the spur gear. pay attention to the locations of the dots facing up at the 12-o-clock position.
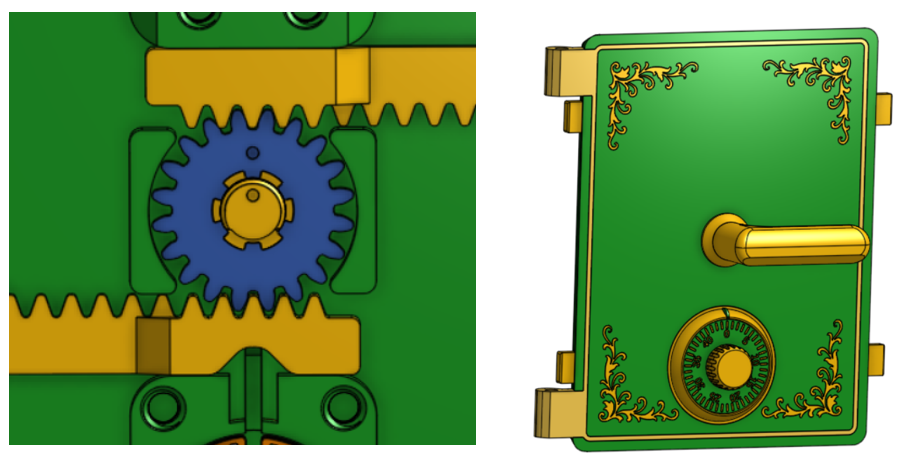
Step 6: Secure the handle assembly with the handle nut. also slide the lock latch into place.
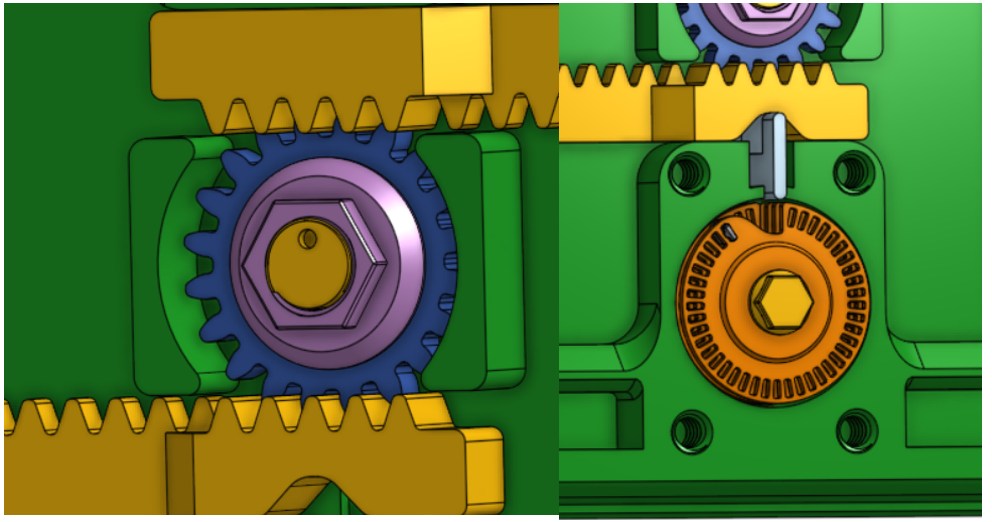
Step 7: Install the cover plate with all the cover plate screws and the included tool.
CHECK YOUR CODE AGAIN BY UNLOCKING THE DOOR AND OPERATING THE HANDLE!!!
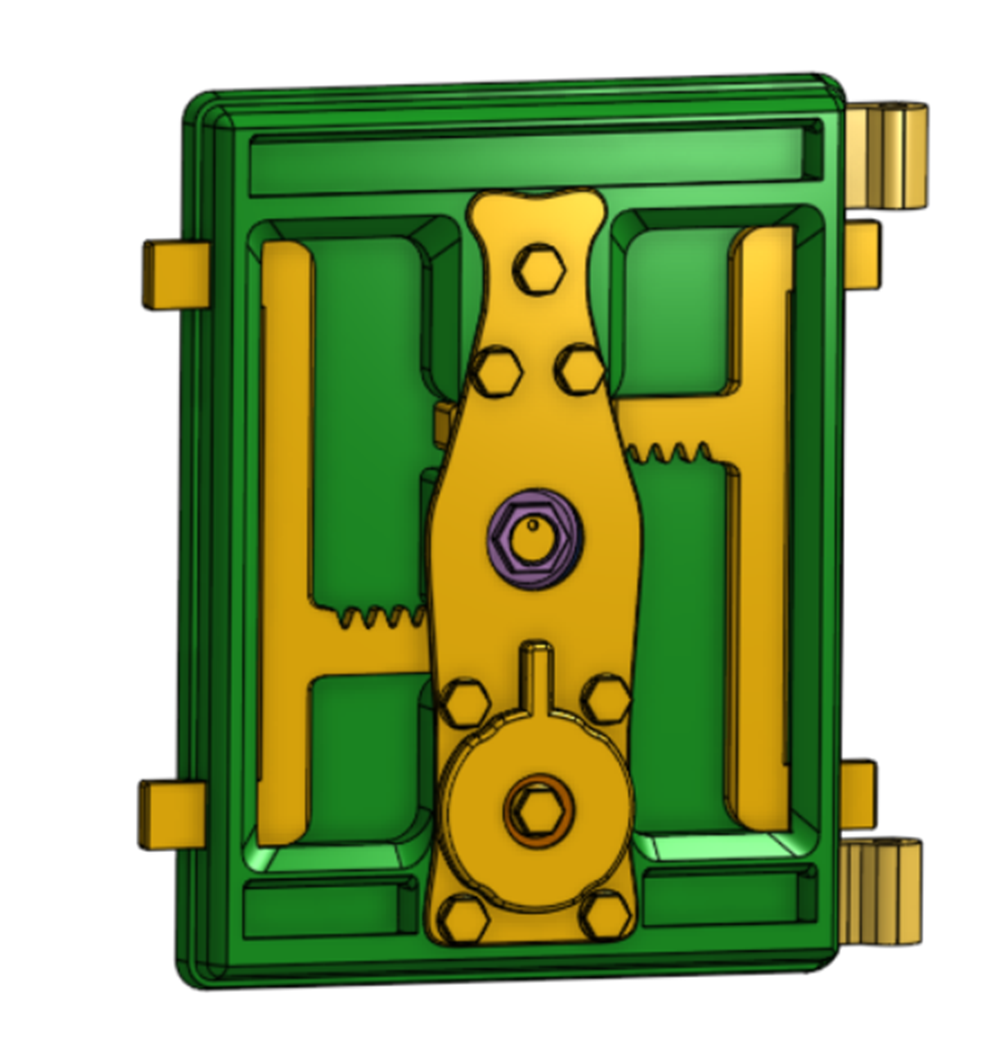
Step 8: Install the door on the main body by sliding the hinge in place.
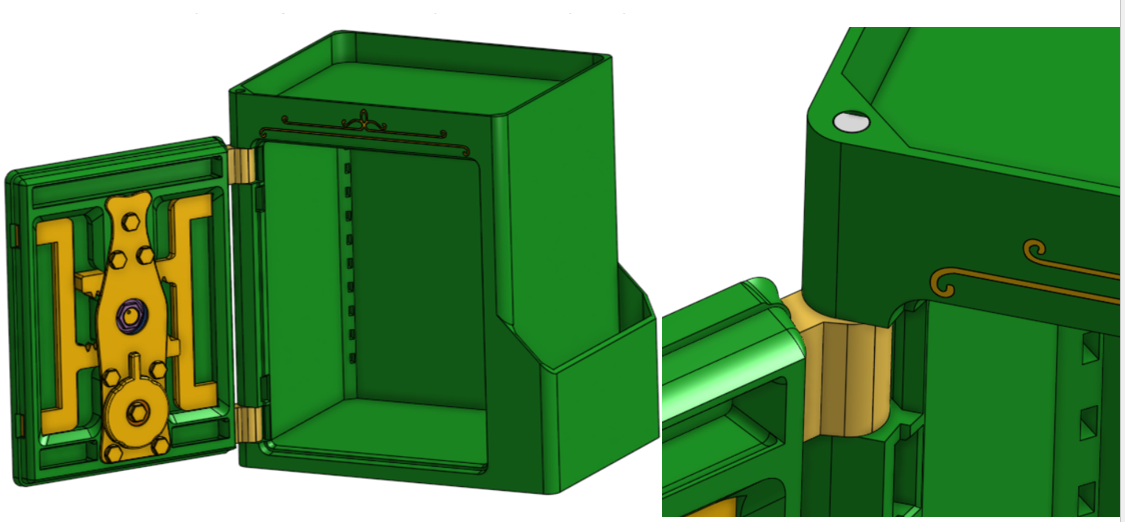
Step 9: If using the shelf install the shelf pins all at the same height and maneuver the shelf into place. if this is difficult remove 2 pins place the shelf and install the other 2 pins
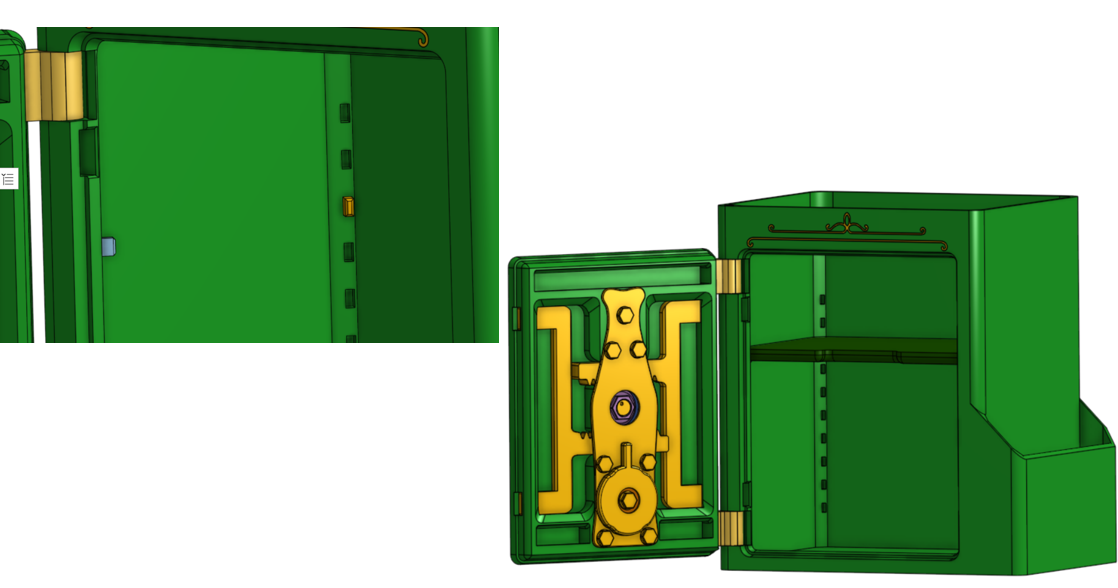
Before you close your door and lock it make sure you know your code. if you forget or lose it you will have to break some parts to get in.
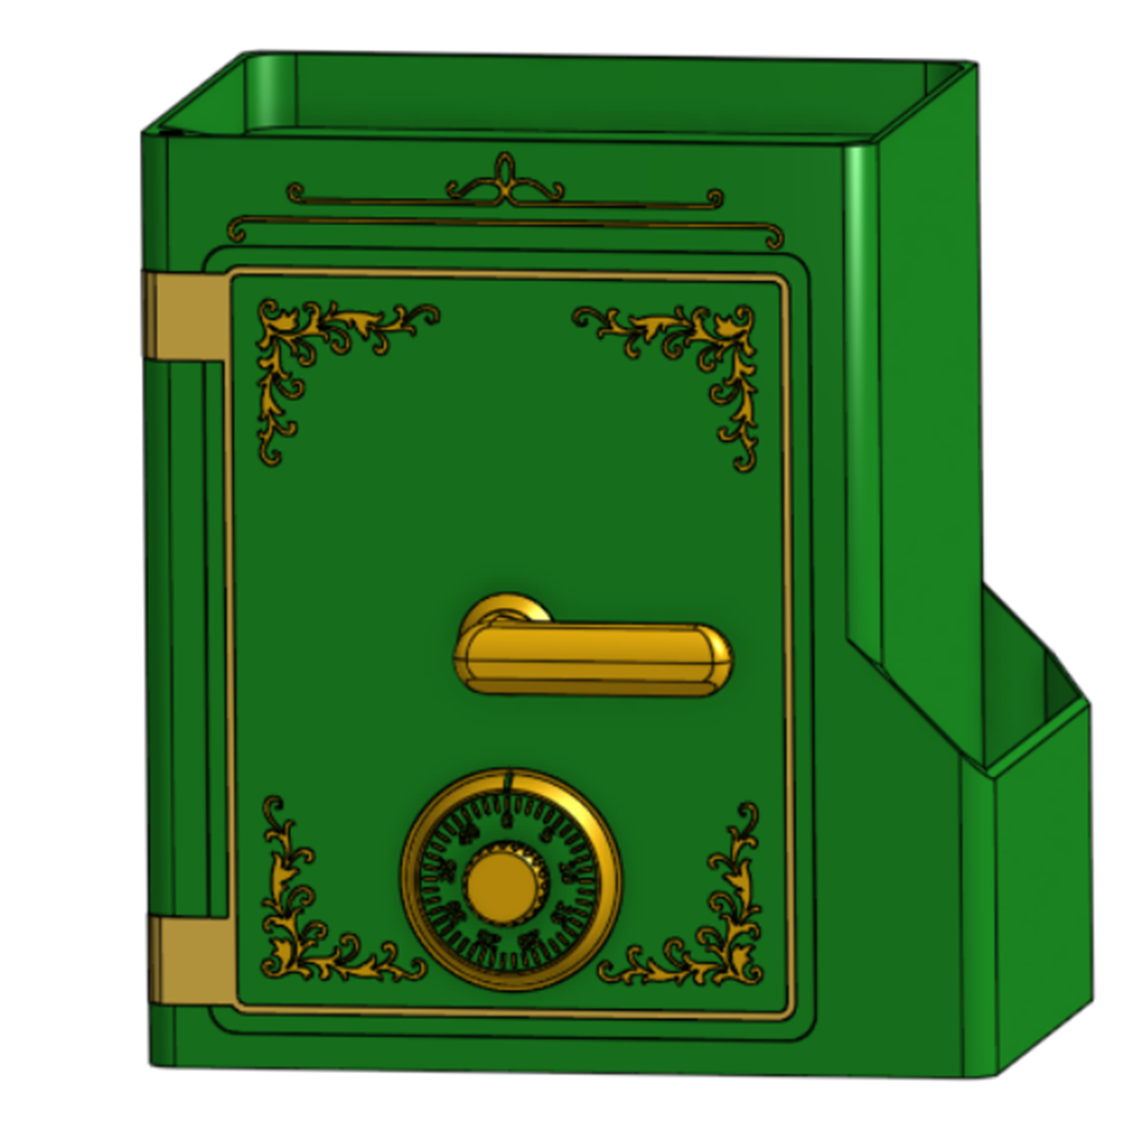
Enjoy
Big Vault Combination Safe

Publicado em 12 de abr de 2026
Gostou deste modelo? Crie uma conta grátis para salvar seus favoritos e voltar a eles depois.
Criar conta