Você está no 3DFinder
Buscamos em Thingiverse, MakerWorld e Printables ao mesmo tempo para te dar o melhor de cada uma.
Descrição
Router Alignment Jig.
What is it? It’s a modular router alignment system that is highly configurable, mostly reusable, has a lot of parts depending on what you want to do (very few parts for a simple project) and is very hard for me to describe. Take a look – see what you think (it works for me).
This is an alignment system / jig that I came up with for my plunge router as I wanted something to be able to make cuts at consistent distances from the edges of a board (specifically for making key holes).
I also wanted something that worked with my router base plate and the three different bushing sizes I had, and, worked for different lengths and shapes for different projects without having to reprint too many pieces.
It is held in place using double sided woodworking tape – I line it up without the tape, verify where the center of the bit will go using the dummy bushings and a pencil and then add the tape and secure it in place and cut.
I figure this will work for my Dremel as well but I haven’t tried that yet.
These were printed in PETG on a P1S but all parts should work on the A1 Mini.
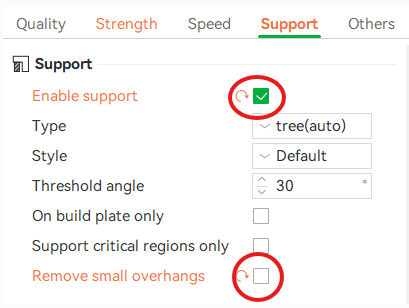
I ‘Enabled support’ and unchecked the ‘Remove small overhangs’ checkbox as when it was checked it did not support the pegs.
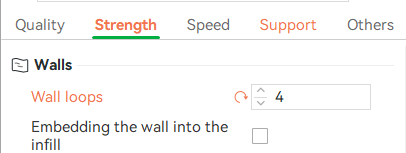
I don’t know if it was necessary but I used 4 ‘Wall Loops’ as I thought the edges of the parts would take the most beating.
Base Plates.
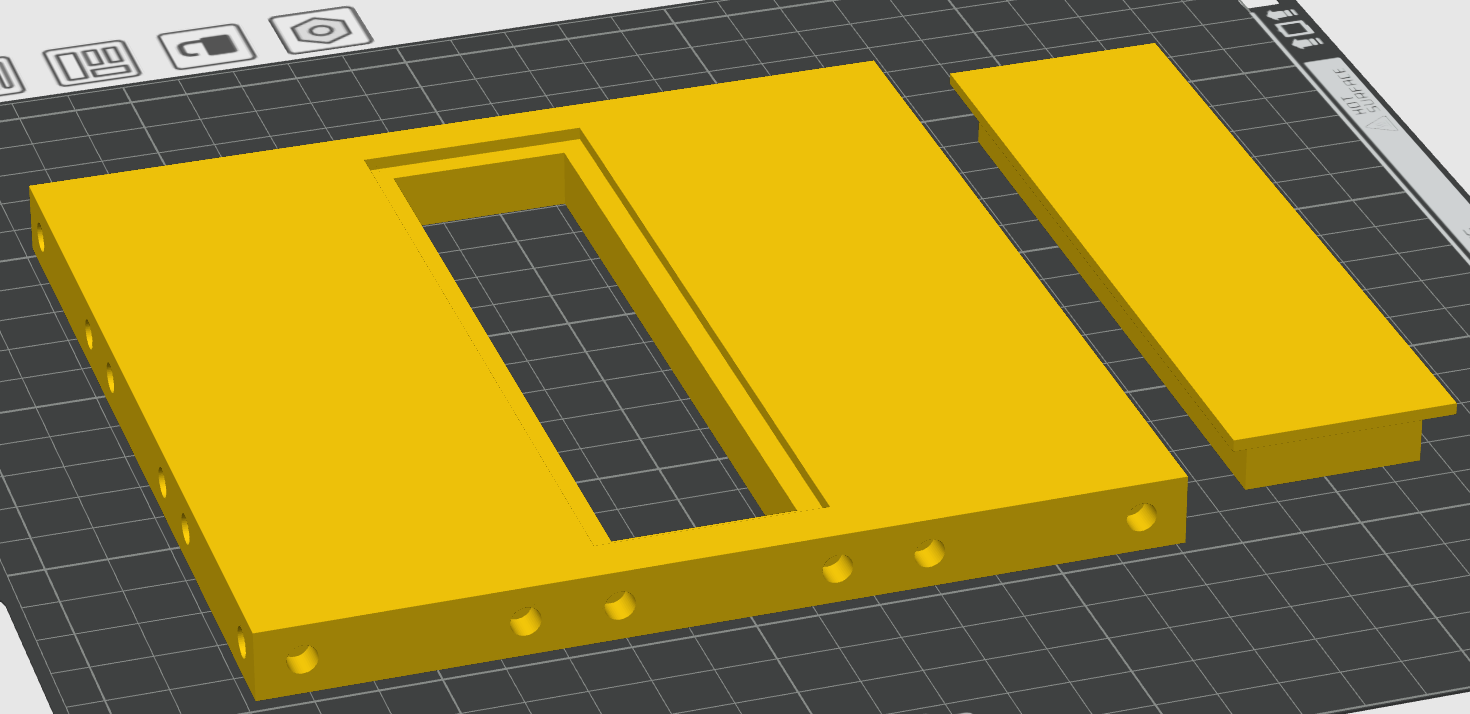
There are two main ‘base’ plates which have ‘inserts’ that can be popped out (held in by friction). The base plates are 150mm x 150mm. They have three sets of holes on each edge which you can plug alignment pieces / base plate extenders into.
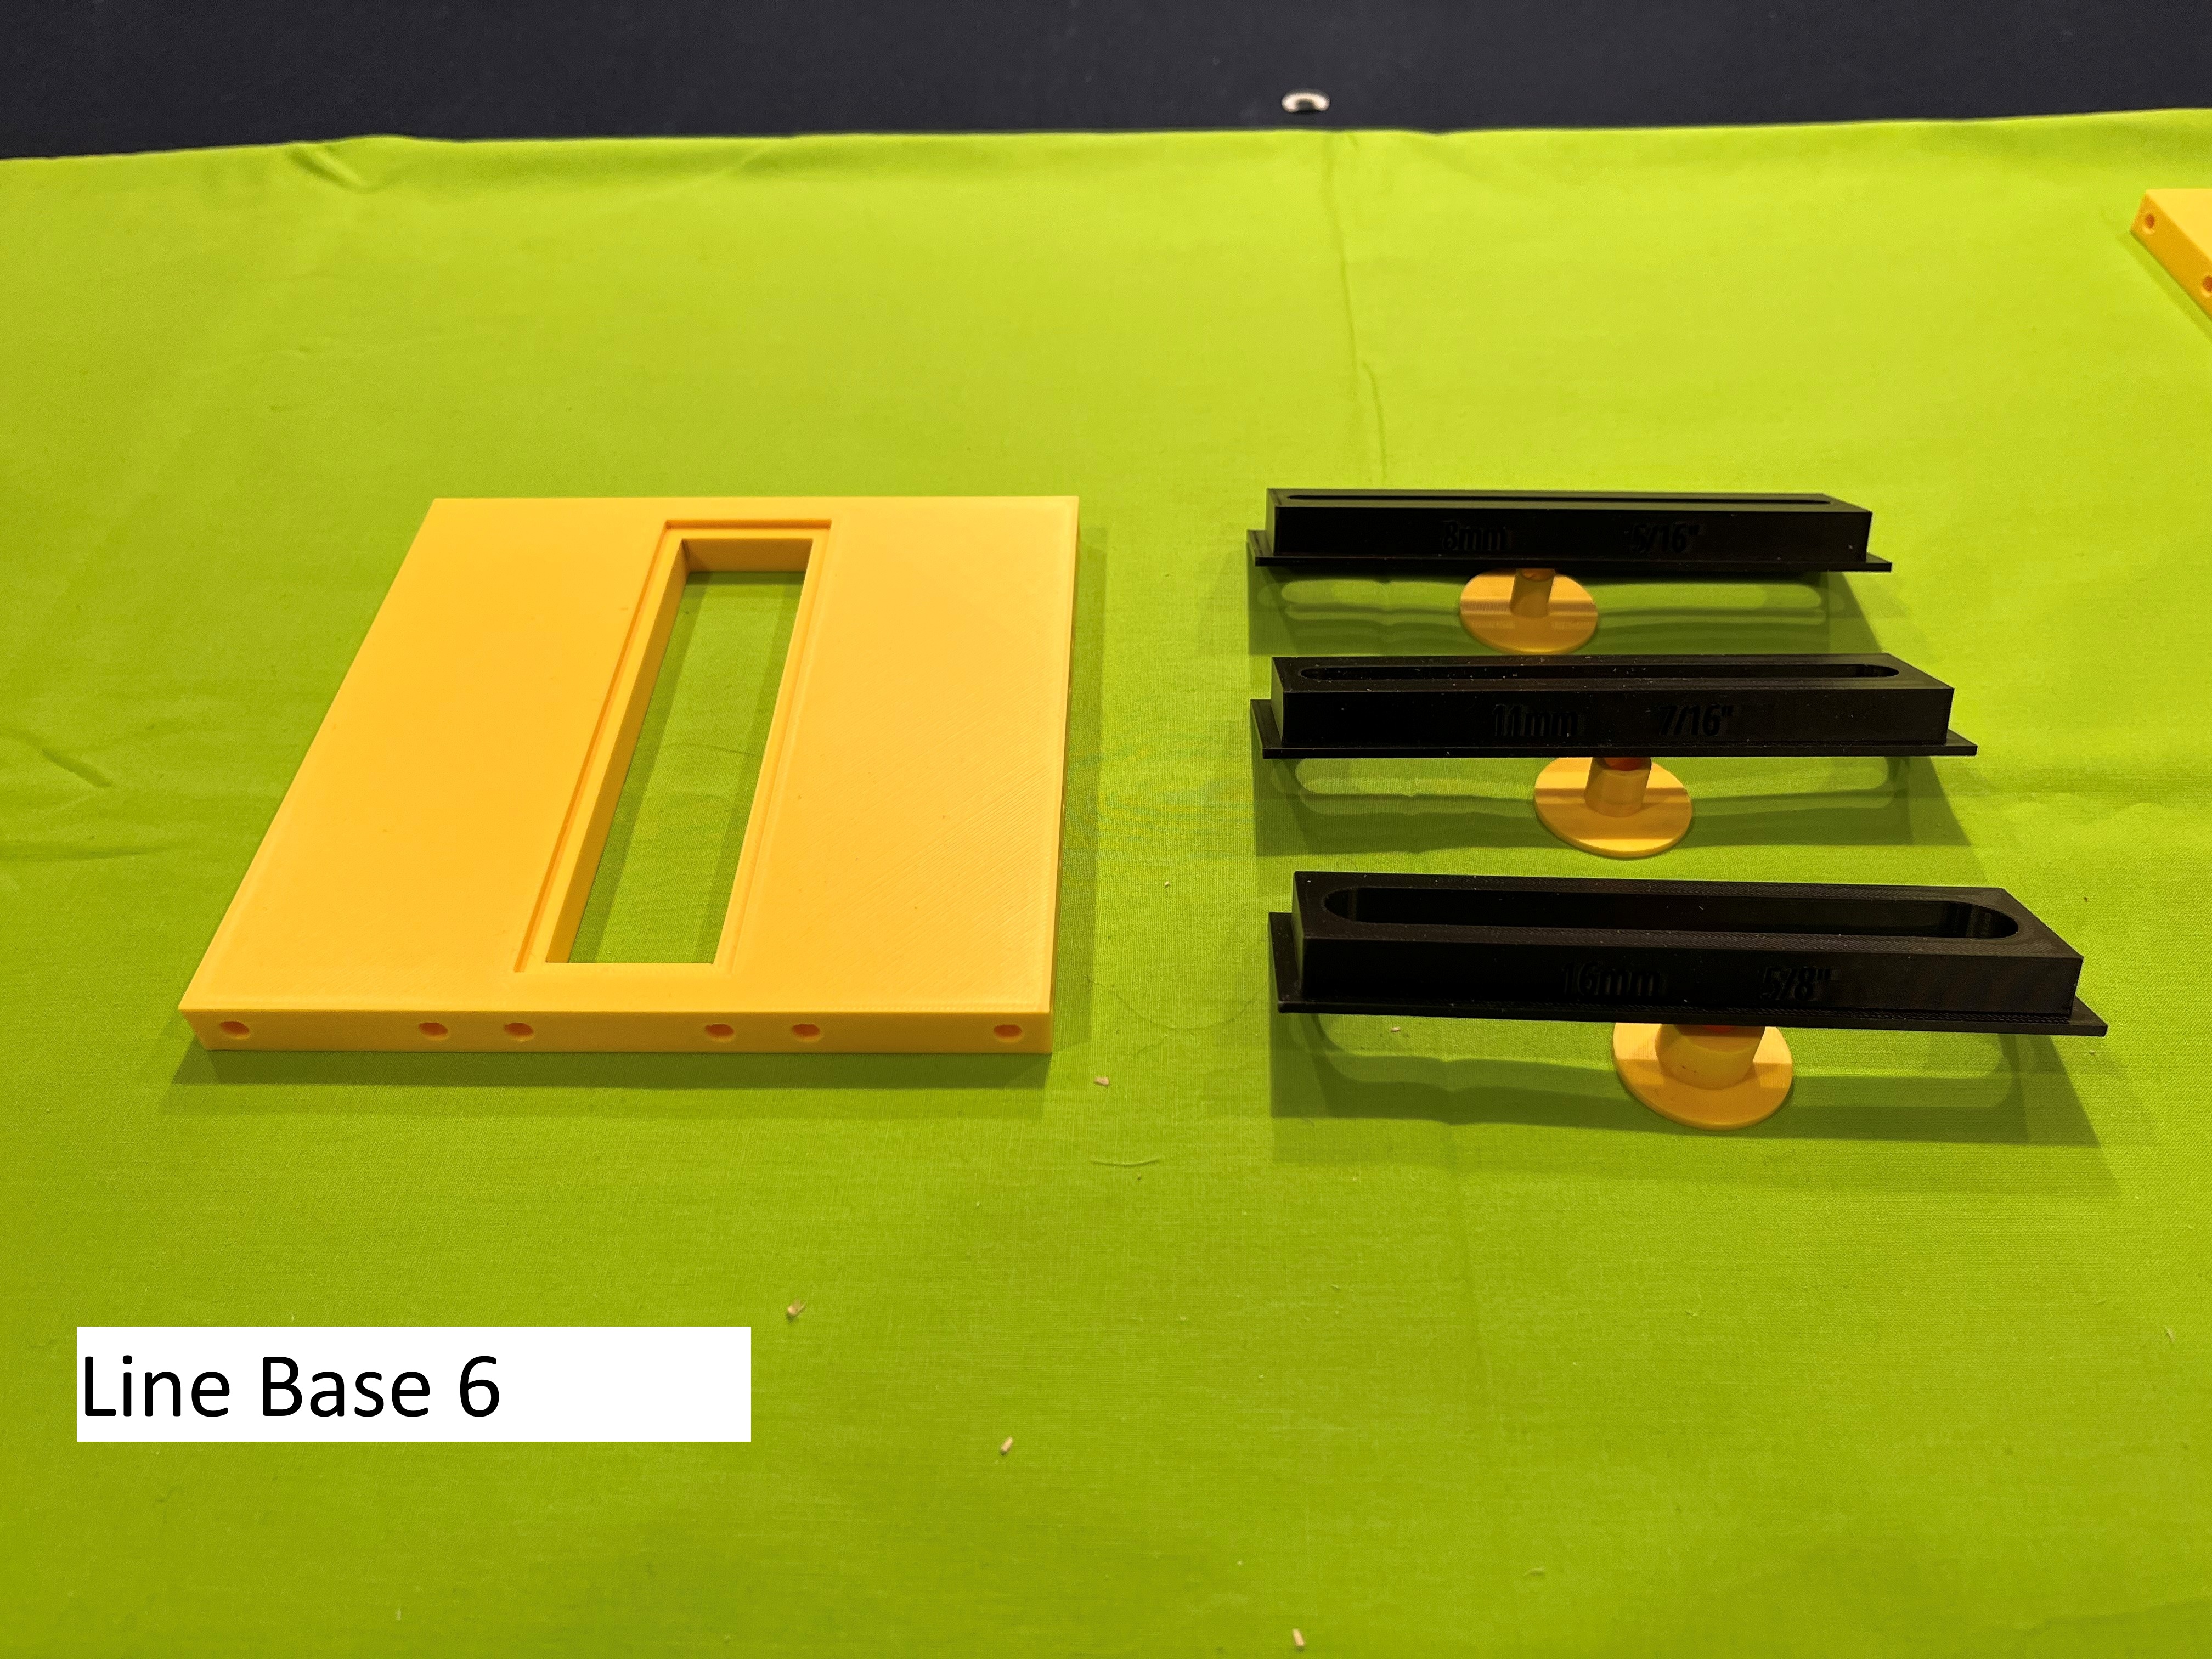
The first ‘base’ plate (line) is for straight lines and has a small central insert that can be printed with the desired bushing size / length for the job at hand. I have included a blank insert you can customize as necessary plus I have included the three I created for my 8mm/11mm/16mm outer diameter router bushings (they are approx. 115 mm long).
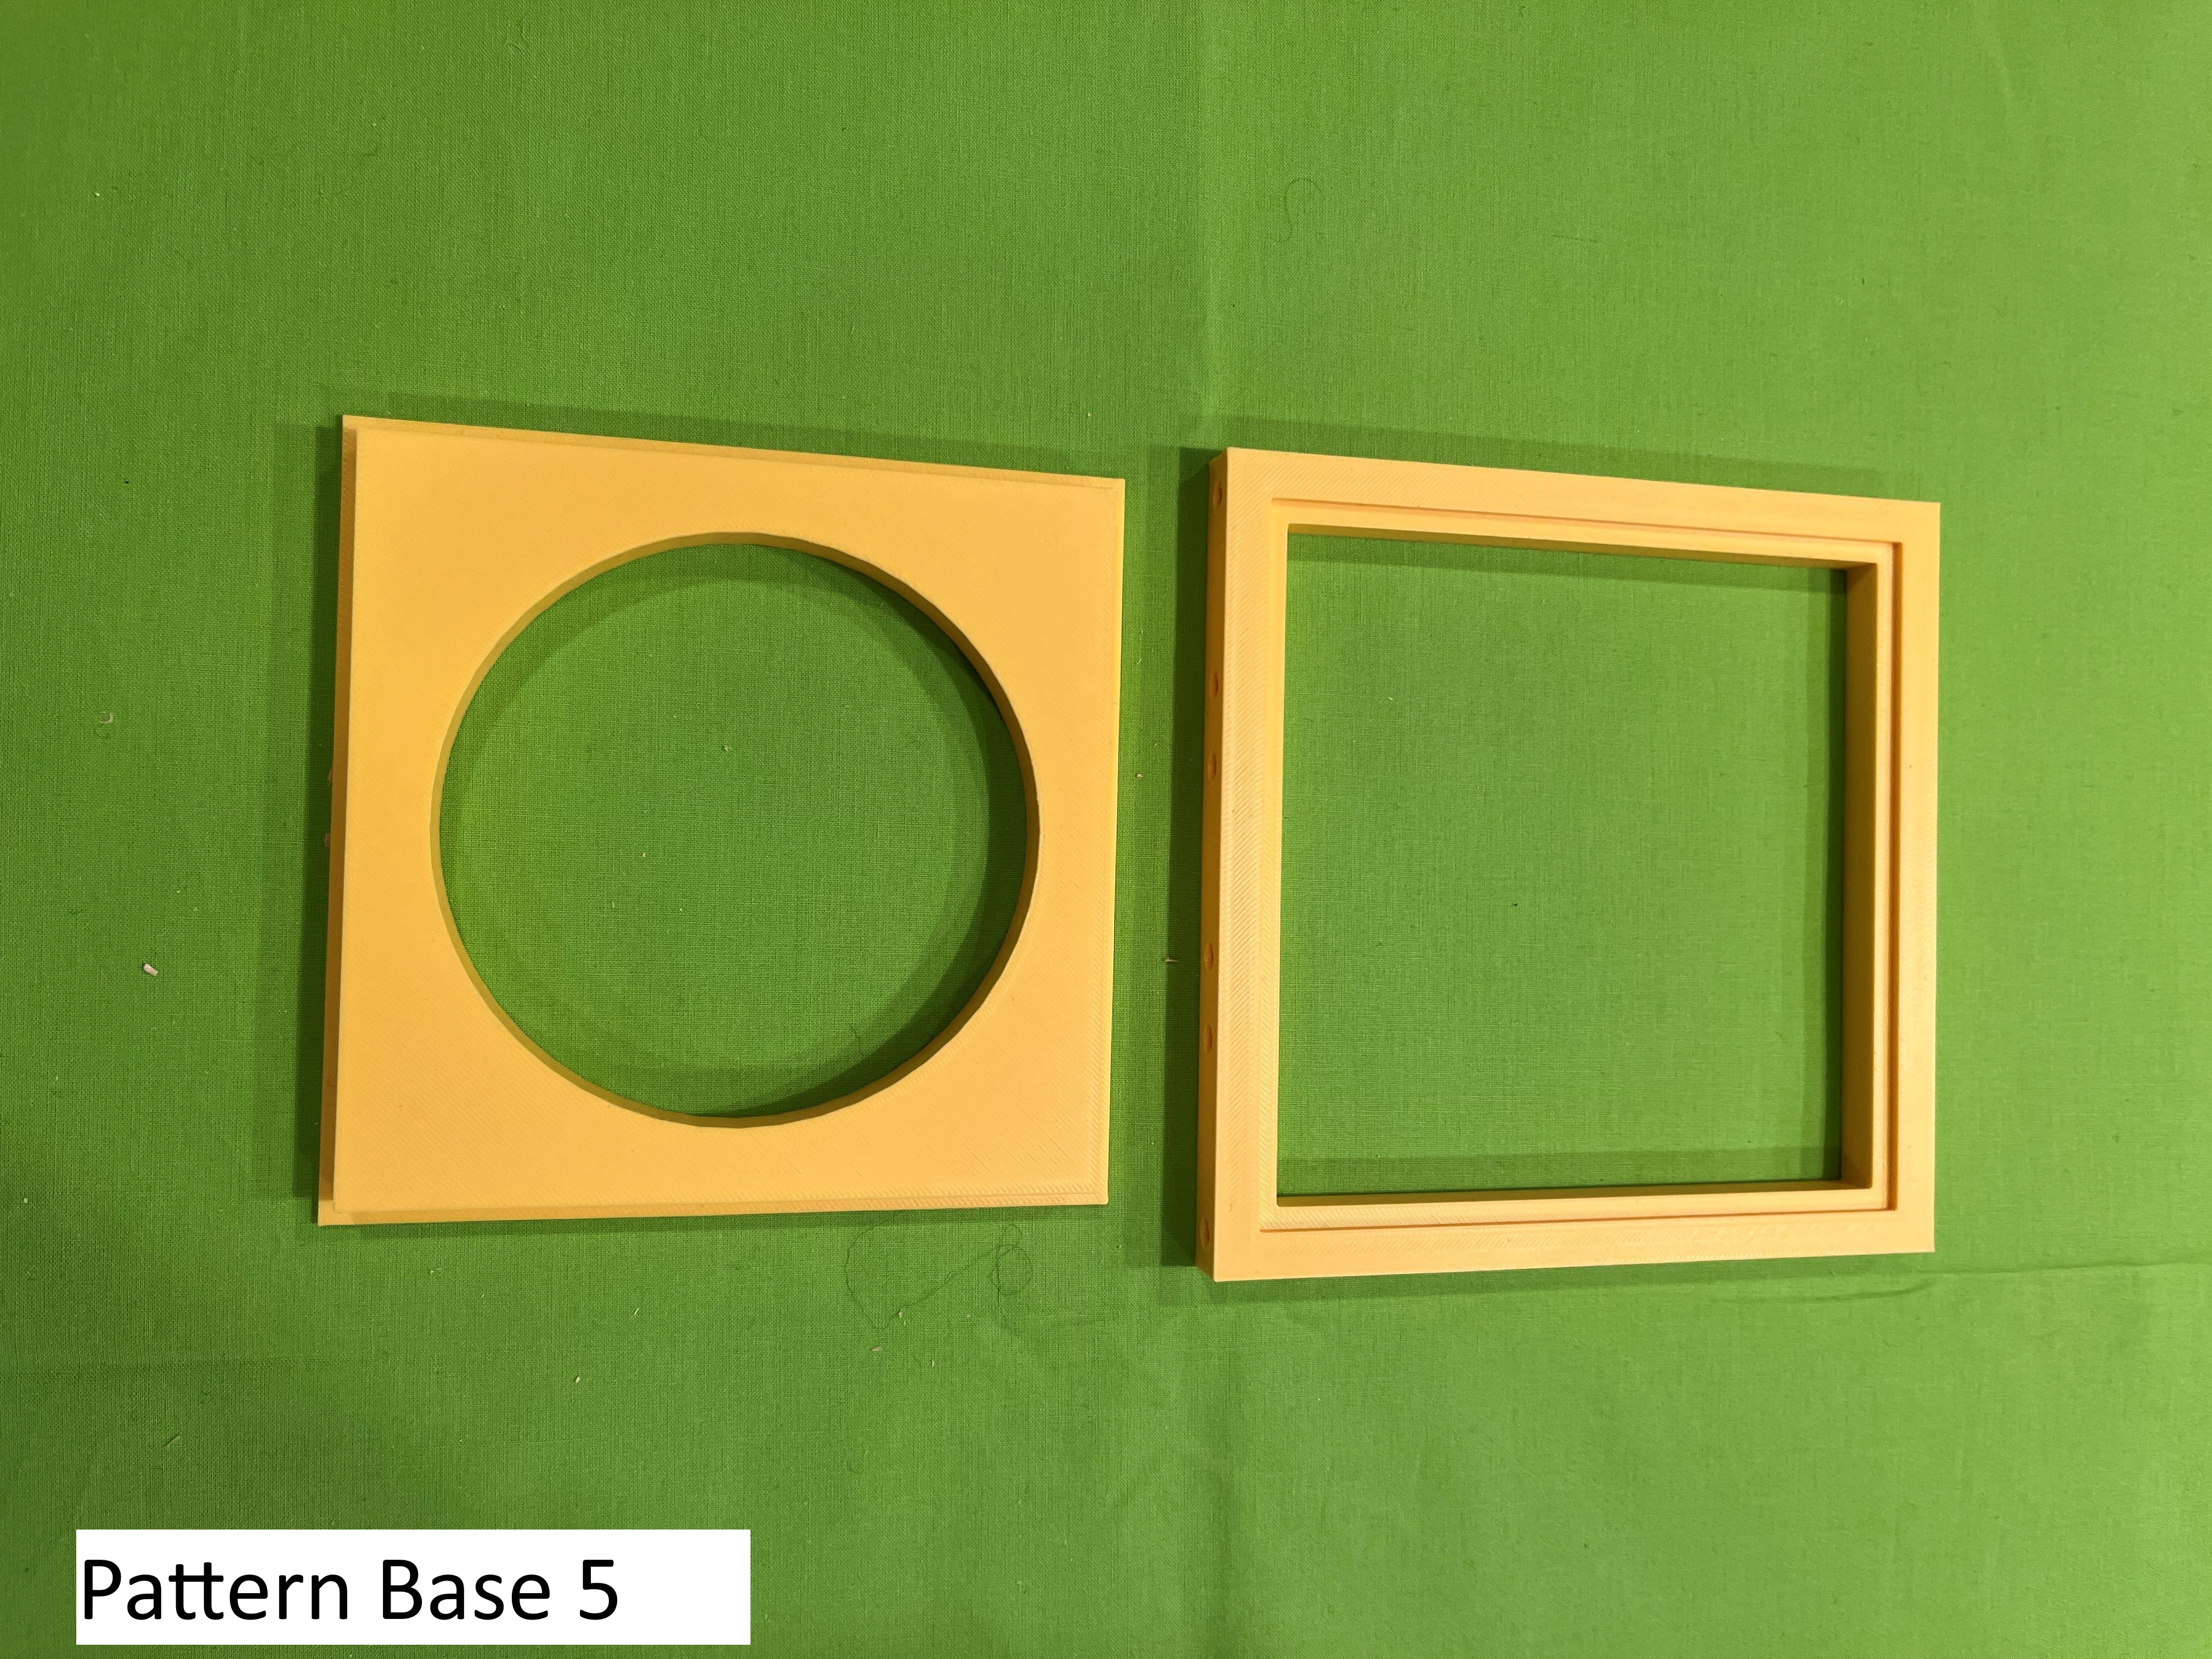
The second ‘base’ plate (pattern) is for customizable shapes and has a large square insert. Again, there is a blank insert to customize and I printed demo insert with a circle which I used for some of the included photos.
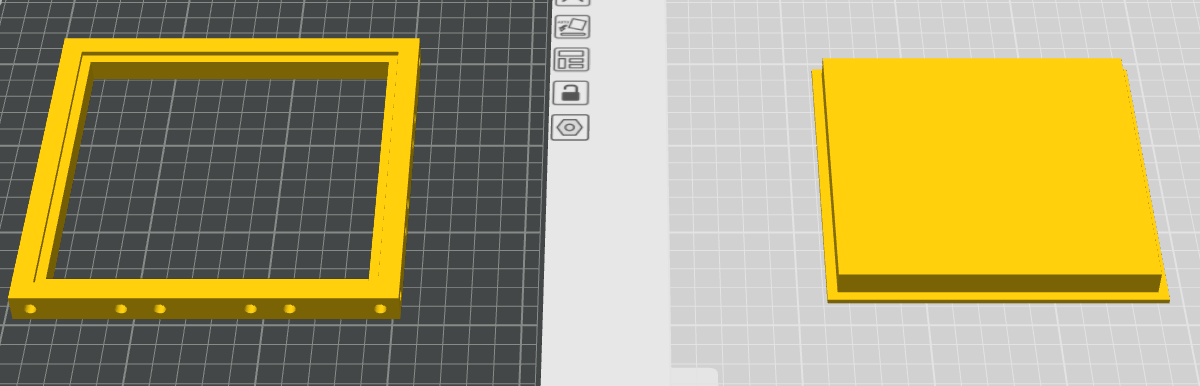
I used Tinkercad to make the desired slots / patterns in the ‘blank’ inserts.
Alignment Parts.
To ‘align’ the base plates there are several pieces that attach to the outer edges of the bases. They are all 50mm wide and fit in either the left / center / right pair of edge holes on all edges of either base plate.
‘Alignment End Cap’ – plugs into a set of holes in the plate or another alignment part – has two pegs and provides a flat surface for alignment.
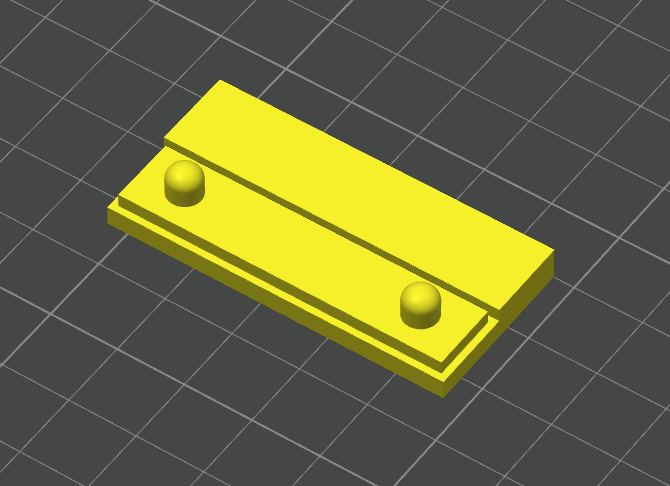
‘Alignment Extender’ – holes on both ends - customize to required length / combine with ‘Outside Connector’ / ‘Inside Connector’ / ‘Alignment End Cap’ to reach desired alignment.
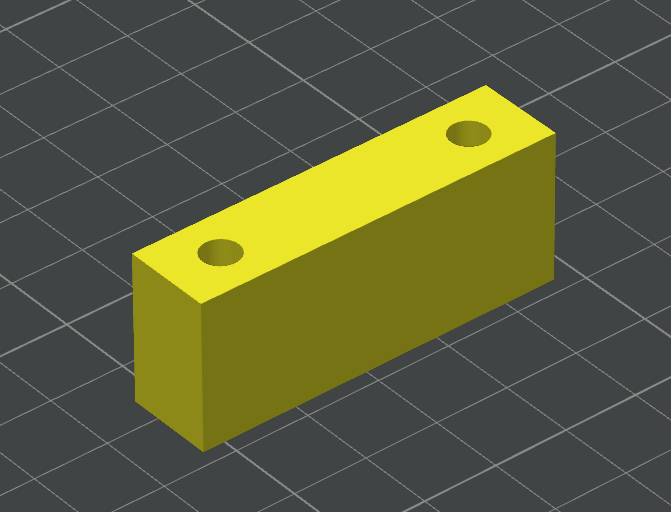
‘Outside Connector’ – pegs on both sides (same height as base plate) – allows ‘Alignment Extender’ / ‘Base Plate Extender’ to be attached to increase how far into the board the base plate extends. Also allows the combination of multiple extenders that you may have already printed.
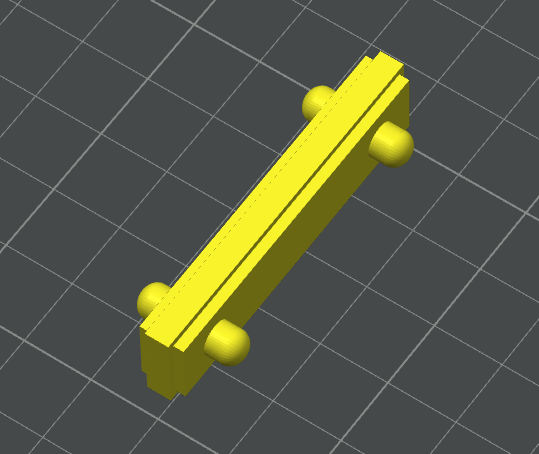
‘Inside Connector’ – two sets of pegs that allow an ‘Alignment Extender’ to be connected to increase the overhang of the base plate on the board.
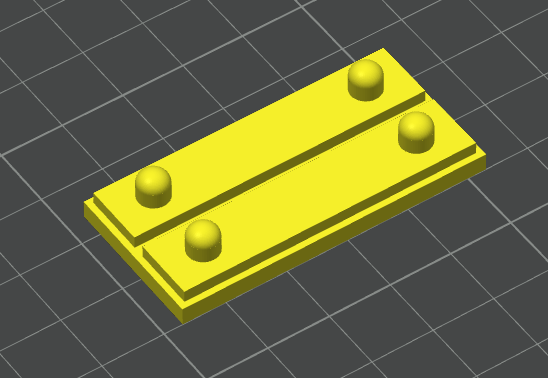
Base Plate Extensions.
In addition to the base plates I created some ‘Base Plate Extensions’ that will plug onto the edge of the base plate to provide more surface area to support the router base plate when necessary.
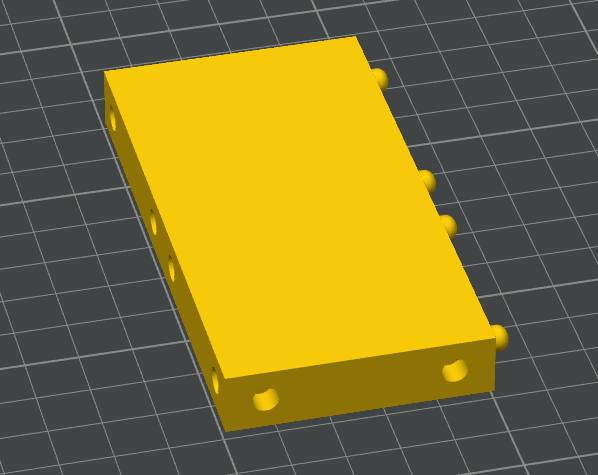
The extensions have pegs on one of the long edges and holes on the other three edges so they can attach to the base plates. They are a little tricky to fit together and may need the pegs to be sanded to make them easier to use.
The 50mm extension has pegs on two edges and holes on two edges and can be used to combine multiple extensions.
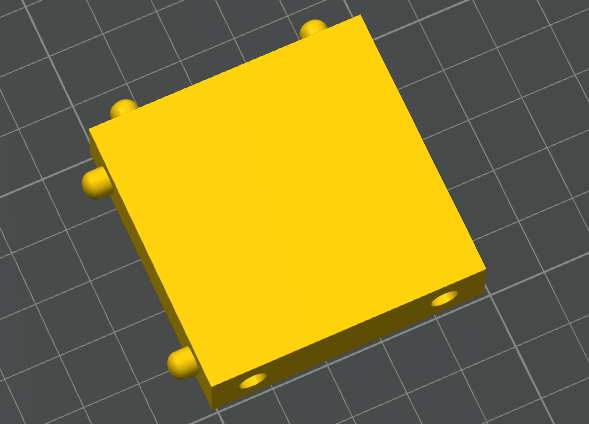
I created files for extensions that are 50mm / 100mm / 150mm / 200mm / 250mm. Note, I have not printed the 250mm extension as I have not had a need for it but they it was easy enough to create so I included it.
Dummy Bushings.
I also created three ‘dummy bushings’ (8mm/11mm/16mm) to replicate the ones I have for my router base plate so that I can insert a pencil into them and use them with the inserts to see where the center of my router bits would cut.
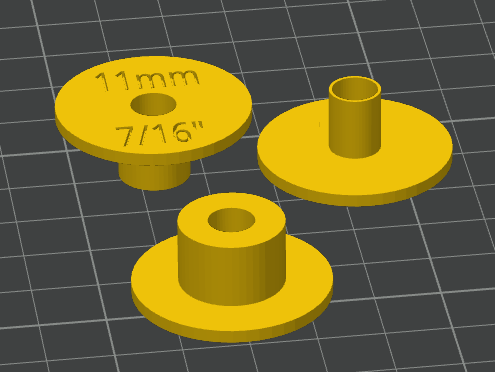
Photo Explanations.
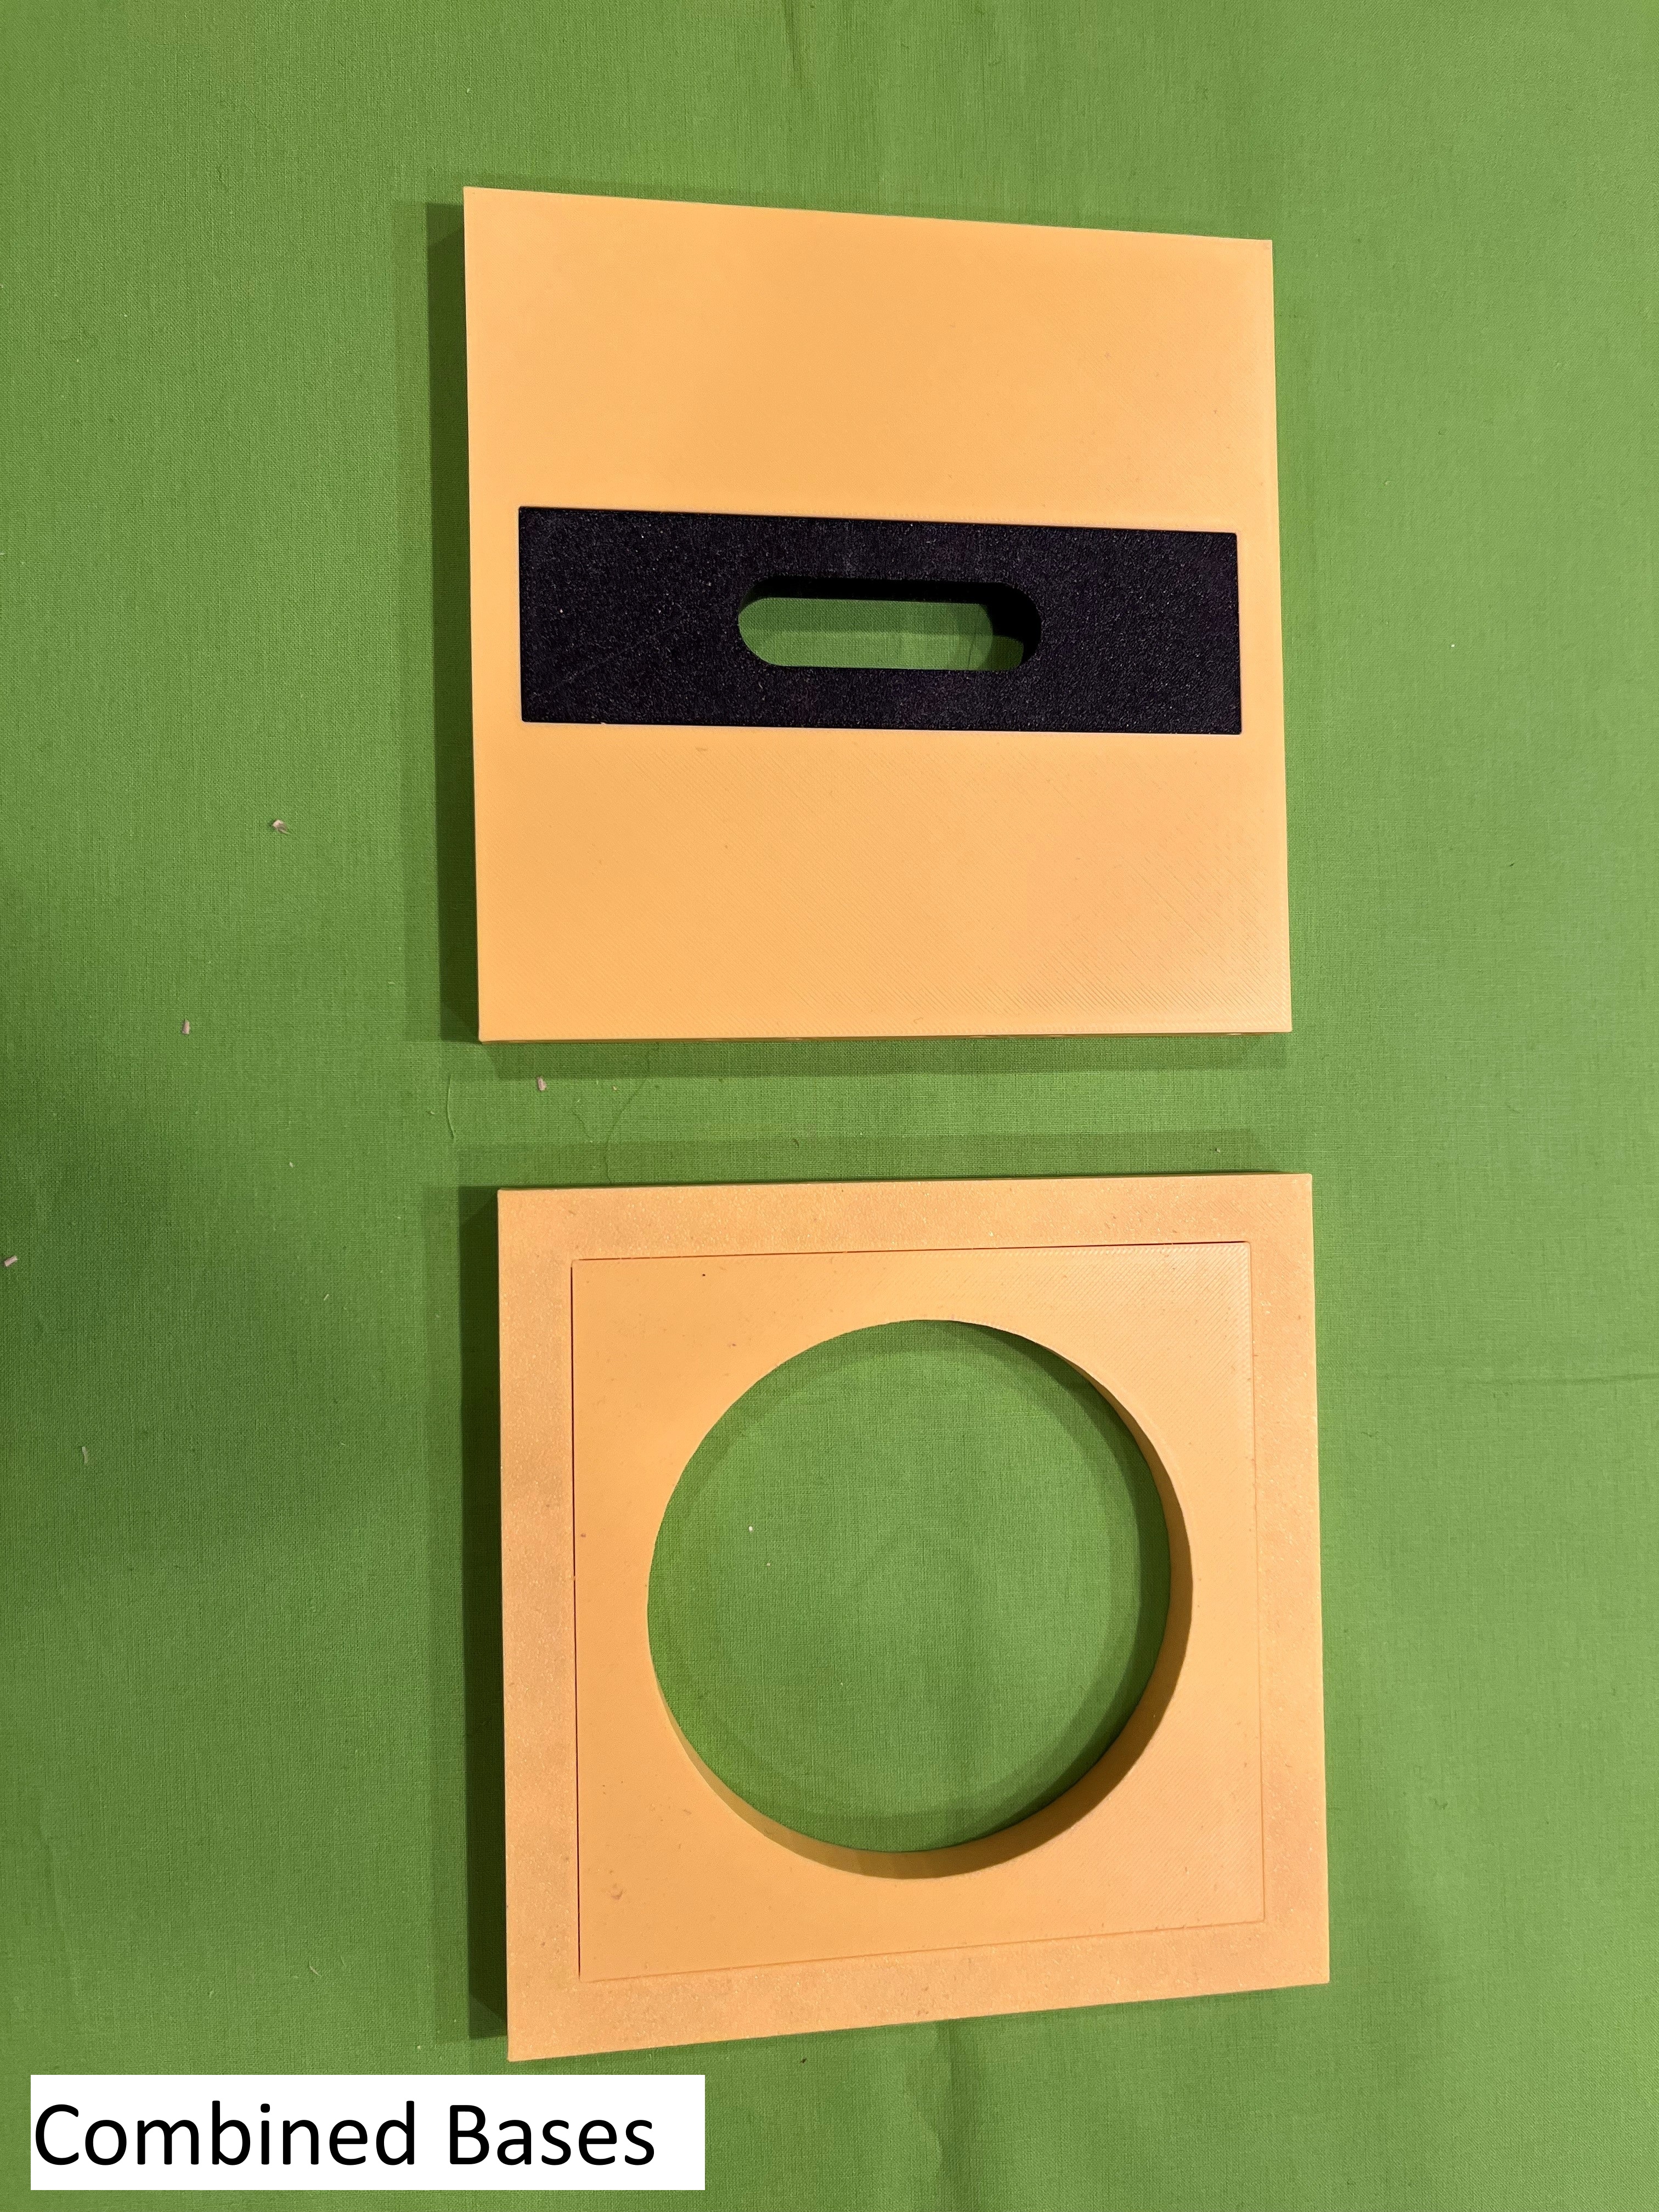
Combined Bases – examples of the ‘line’ base plate with the key hole template inserted, and, the ‘pattern’ base plate with the circle template inserted.
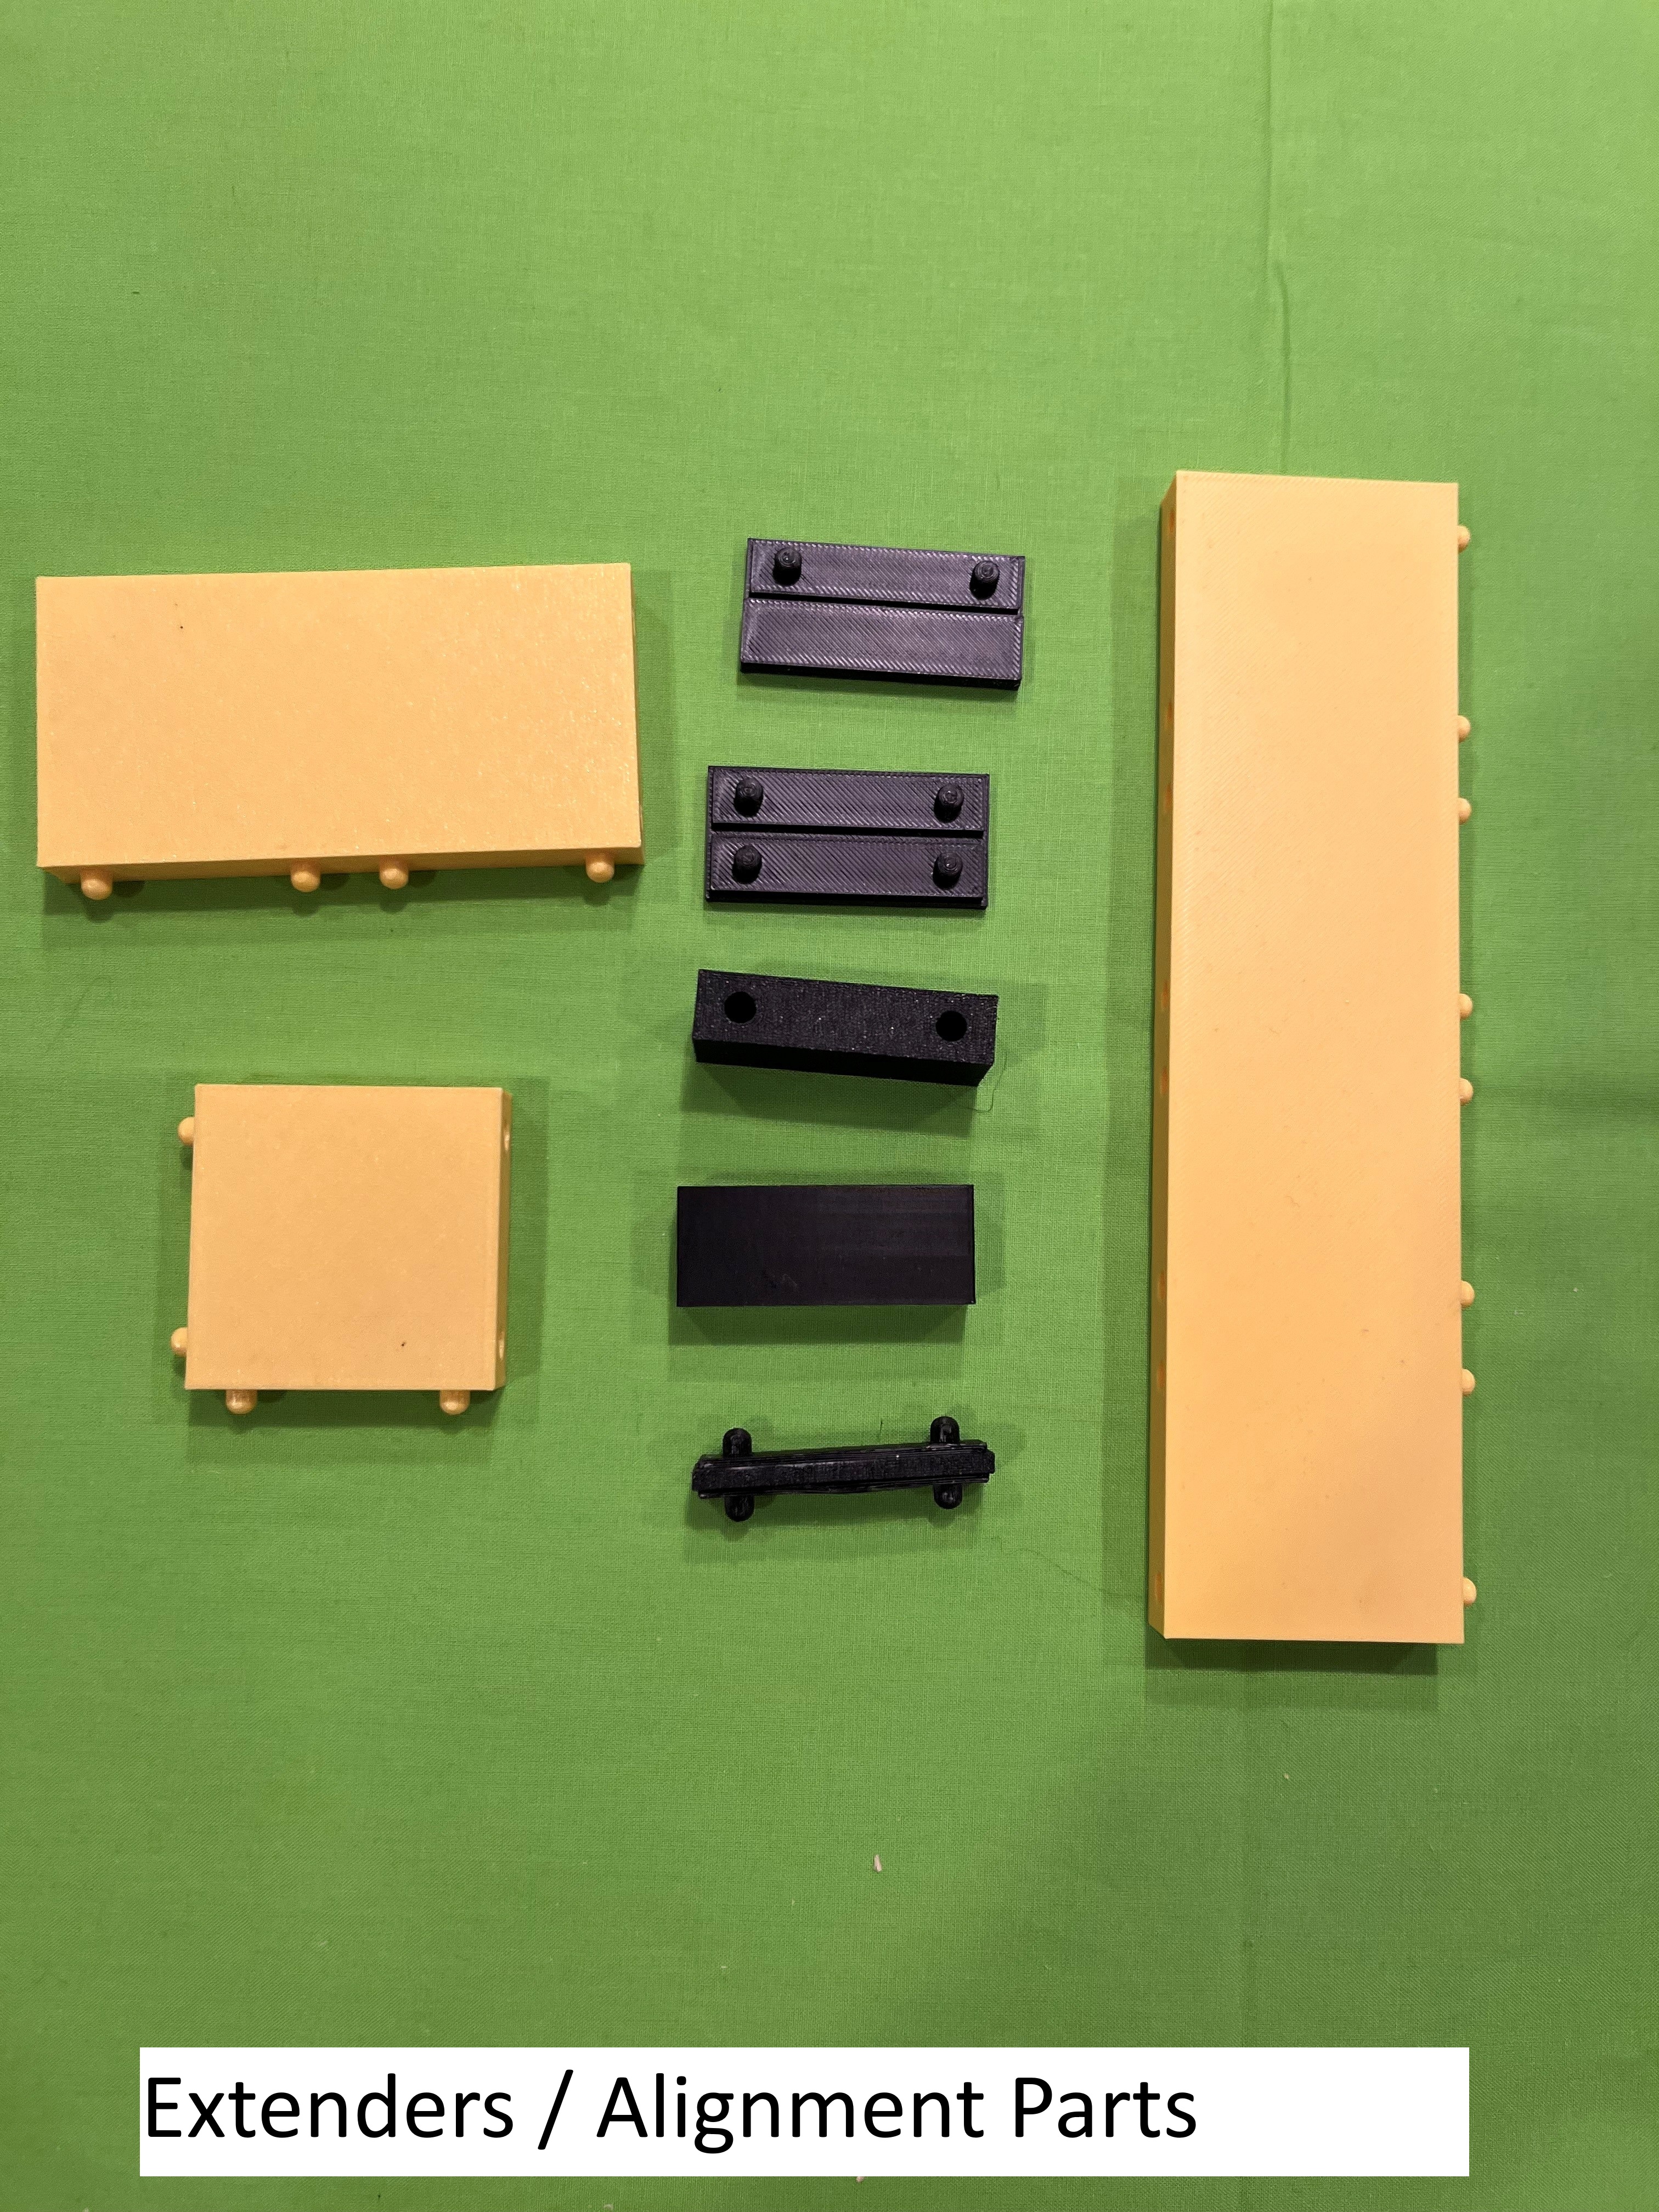
Extenders / Alignment Parts – shows the 50mm / 100mm / 200mm ‘Base Plate Extenders’ in yellow. Shows the alignment parts in black – top to bottom -
‘Alignment End Cap’ / ‘Inside Connector’ / ‘Alignment Extender’ (side view) / ‘Alignment Extender’ (top view) / ‘Outside Connector’.
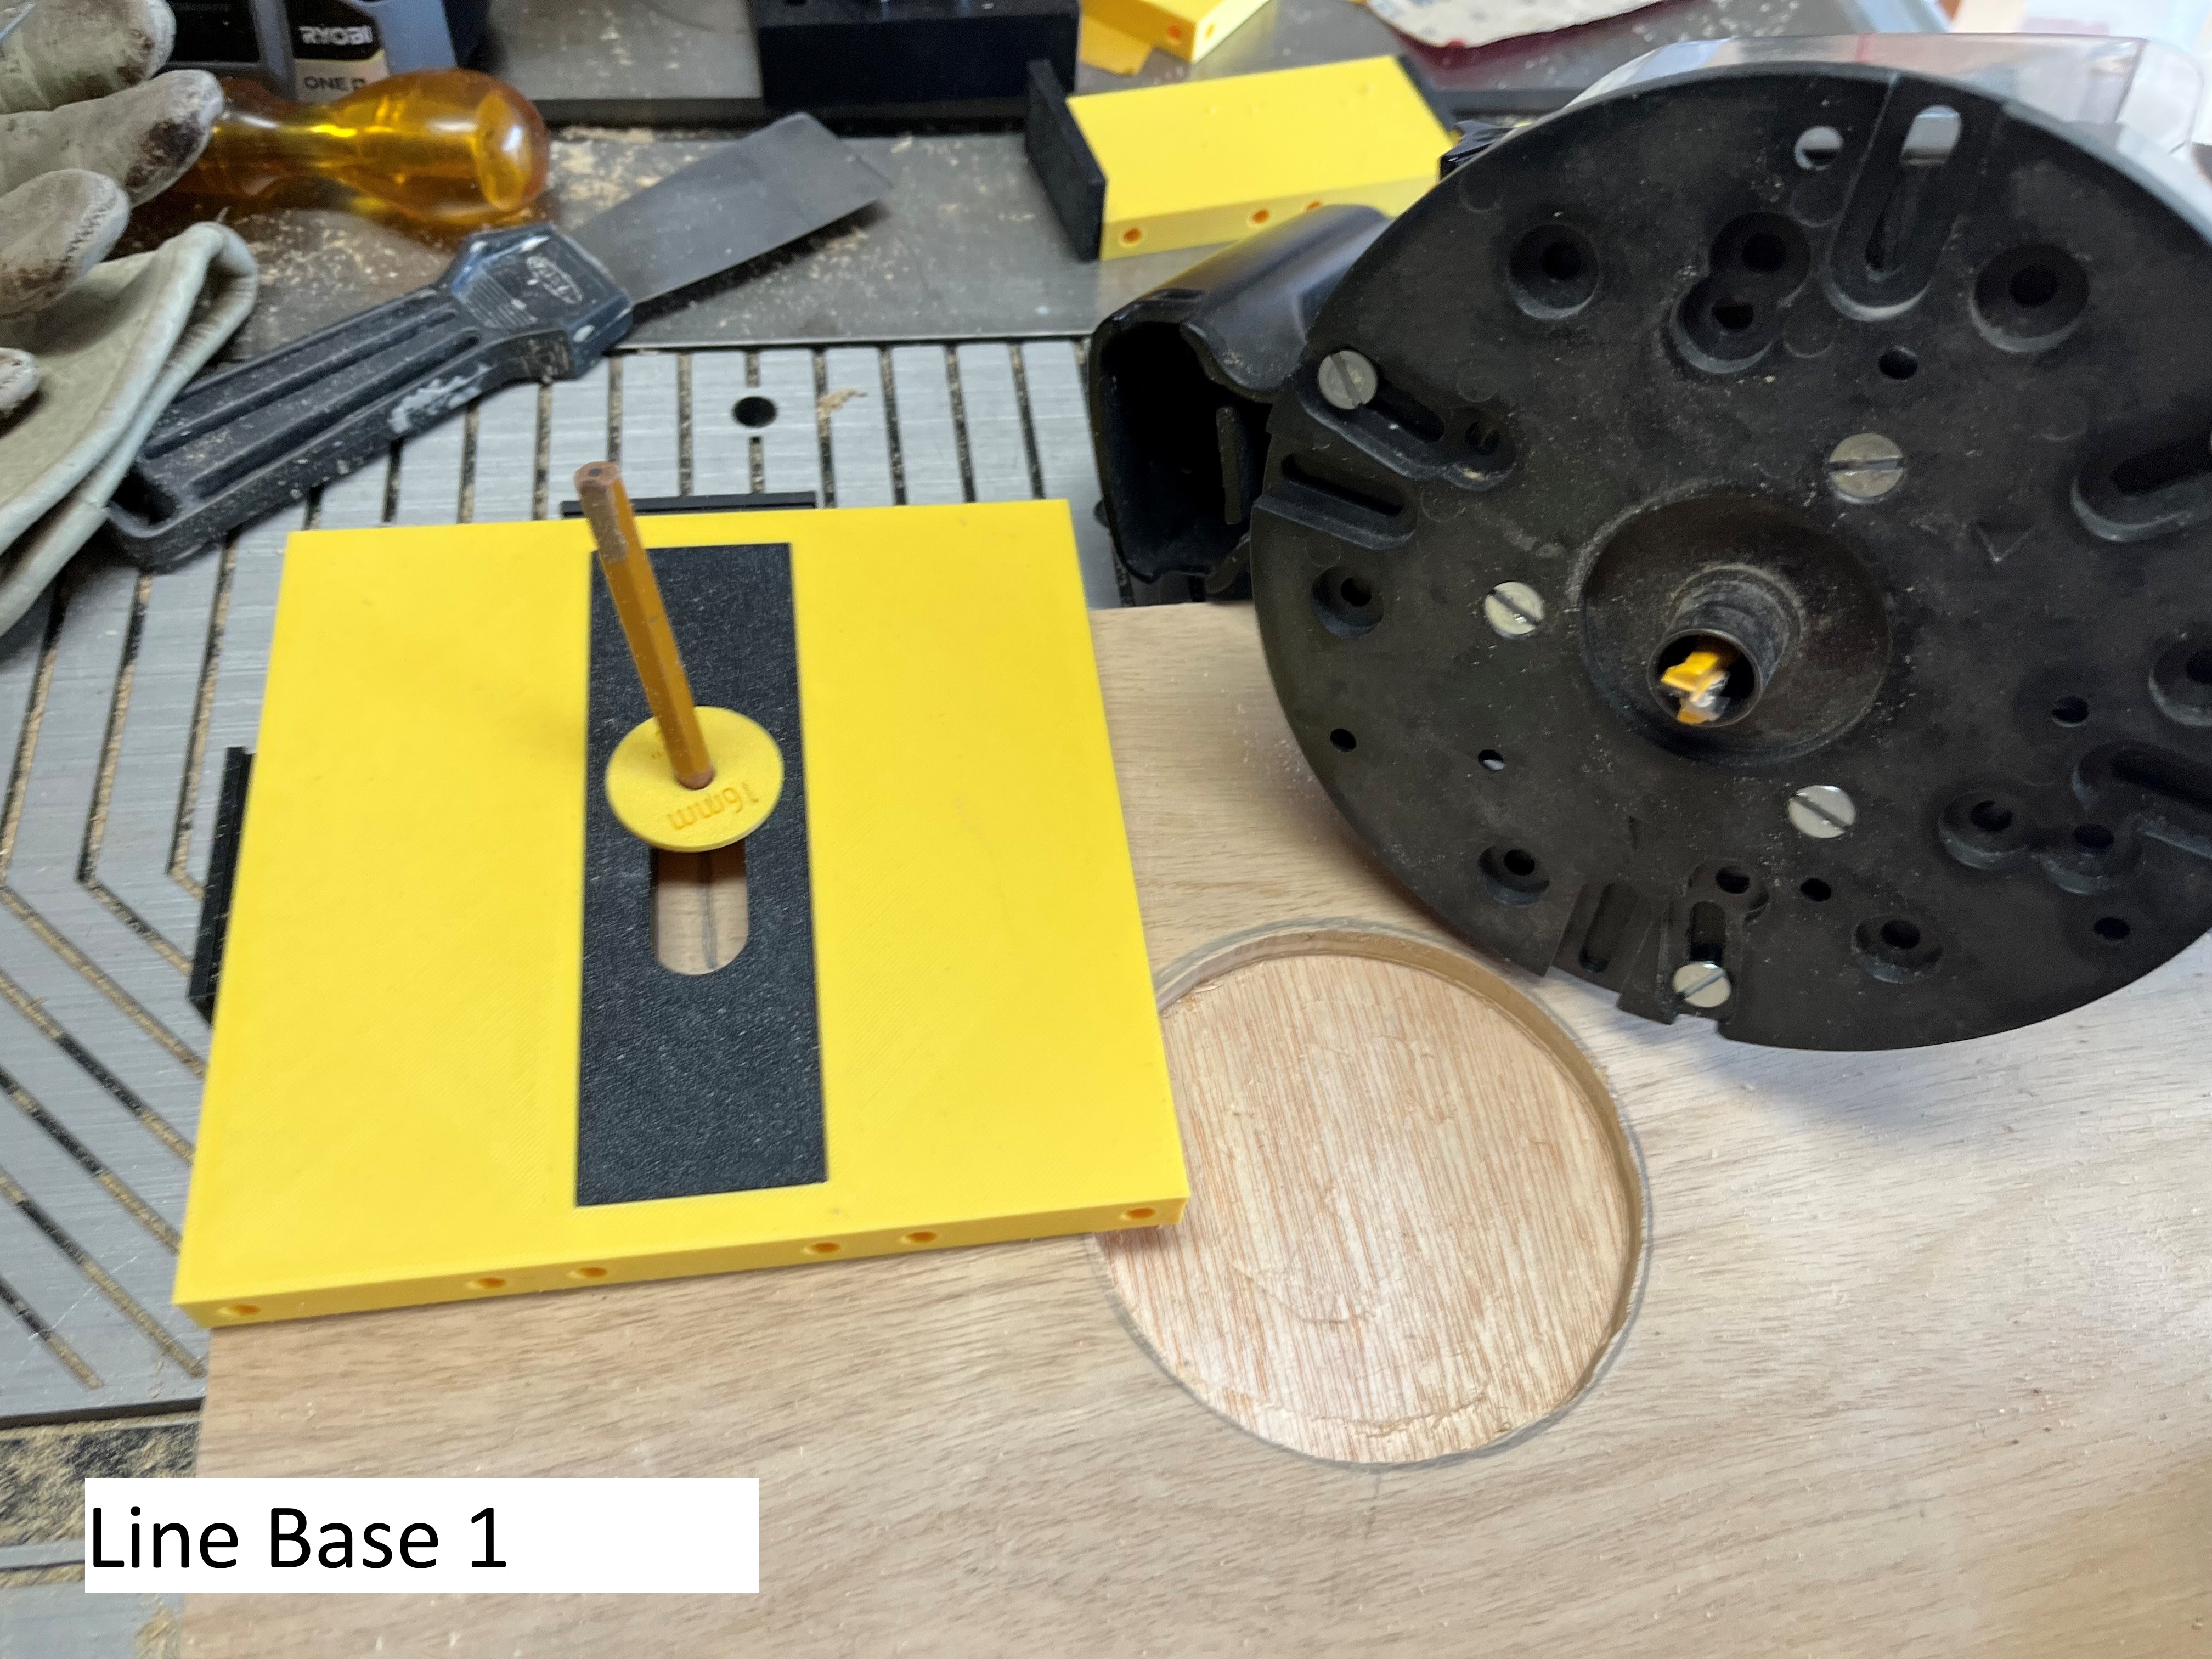
Line Base 1 - shows the ‘line’ base plate with a customized 16mm insert for cutting keyholes on the demo board. It has an ‘Inside Connector’ and an ‘Alignment Extender’ attached to one side which will align to the edge of the board underneath the base plate. The other side is aligned to the board edge with an ‘Alignment End Cap’. It shows a ‘Dummy Bushing’ / pencil used to draw where the center of the router bit would go. It also shows my plunge router (keyhole bit extended) with router base plate / bushing.
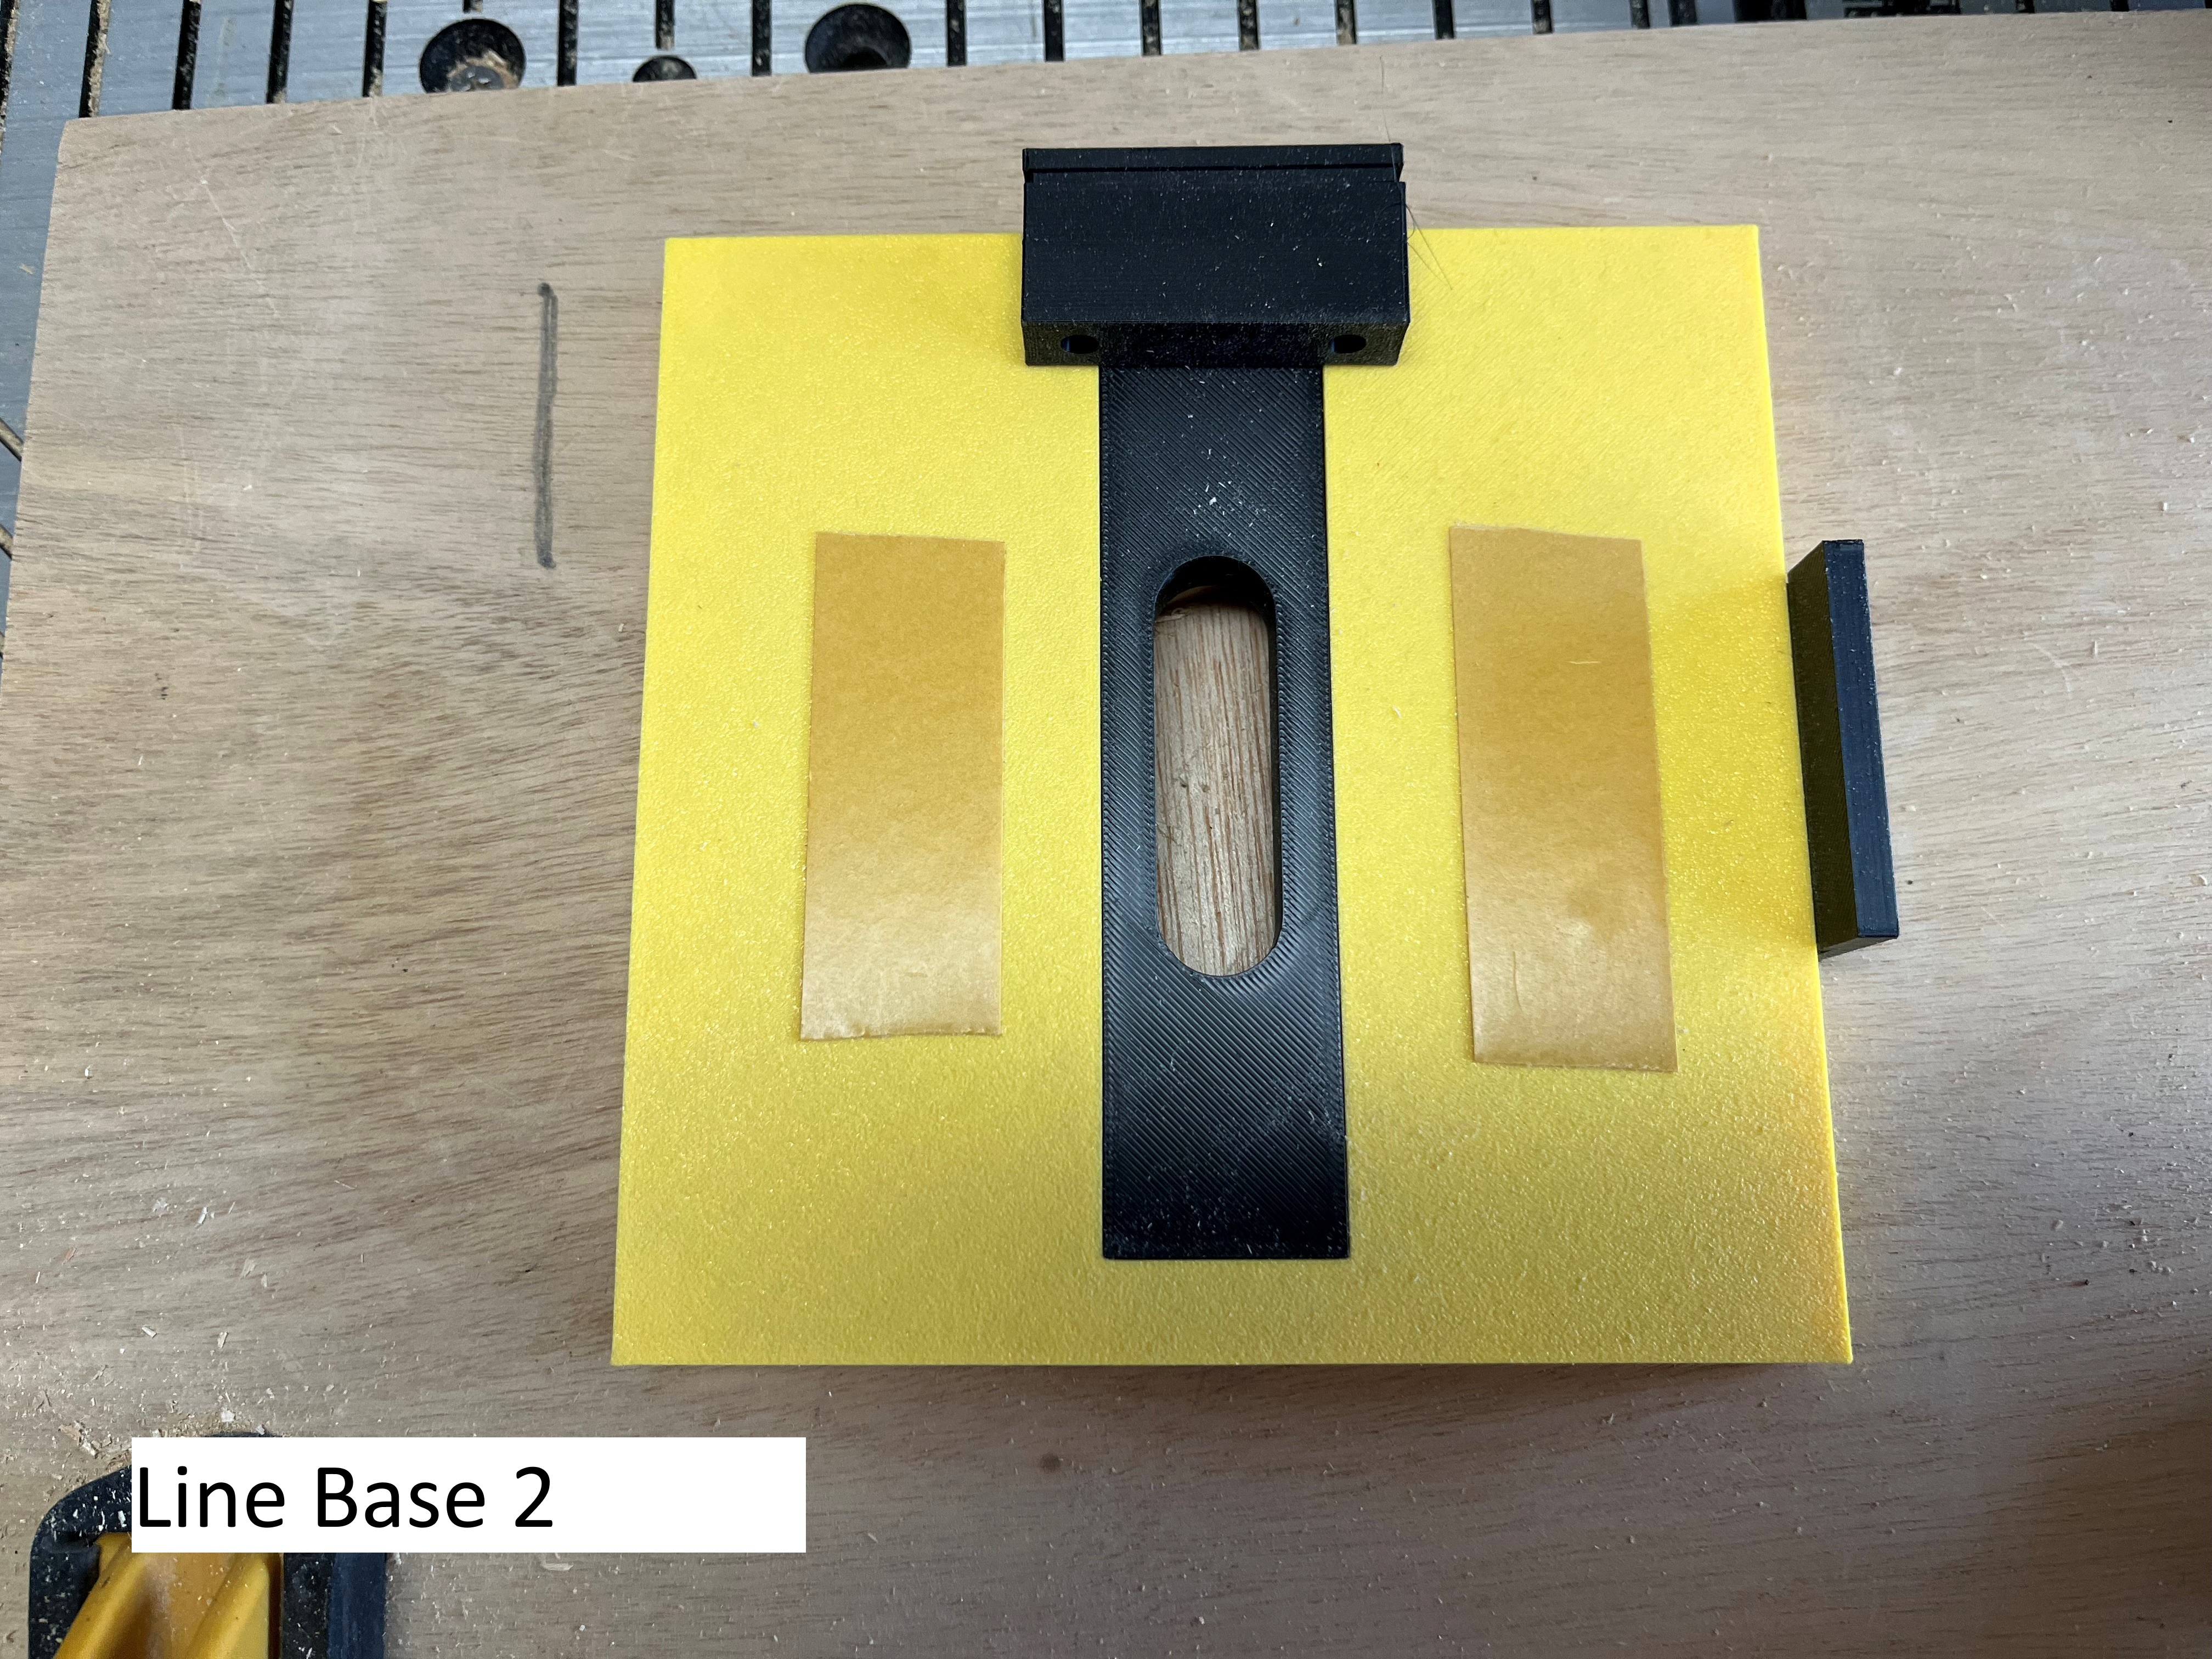
Line Base 2 – shows the same alignment configuration from underneath. You can see the double-sided tape ready for use
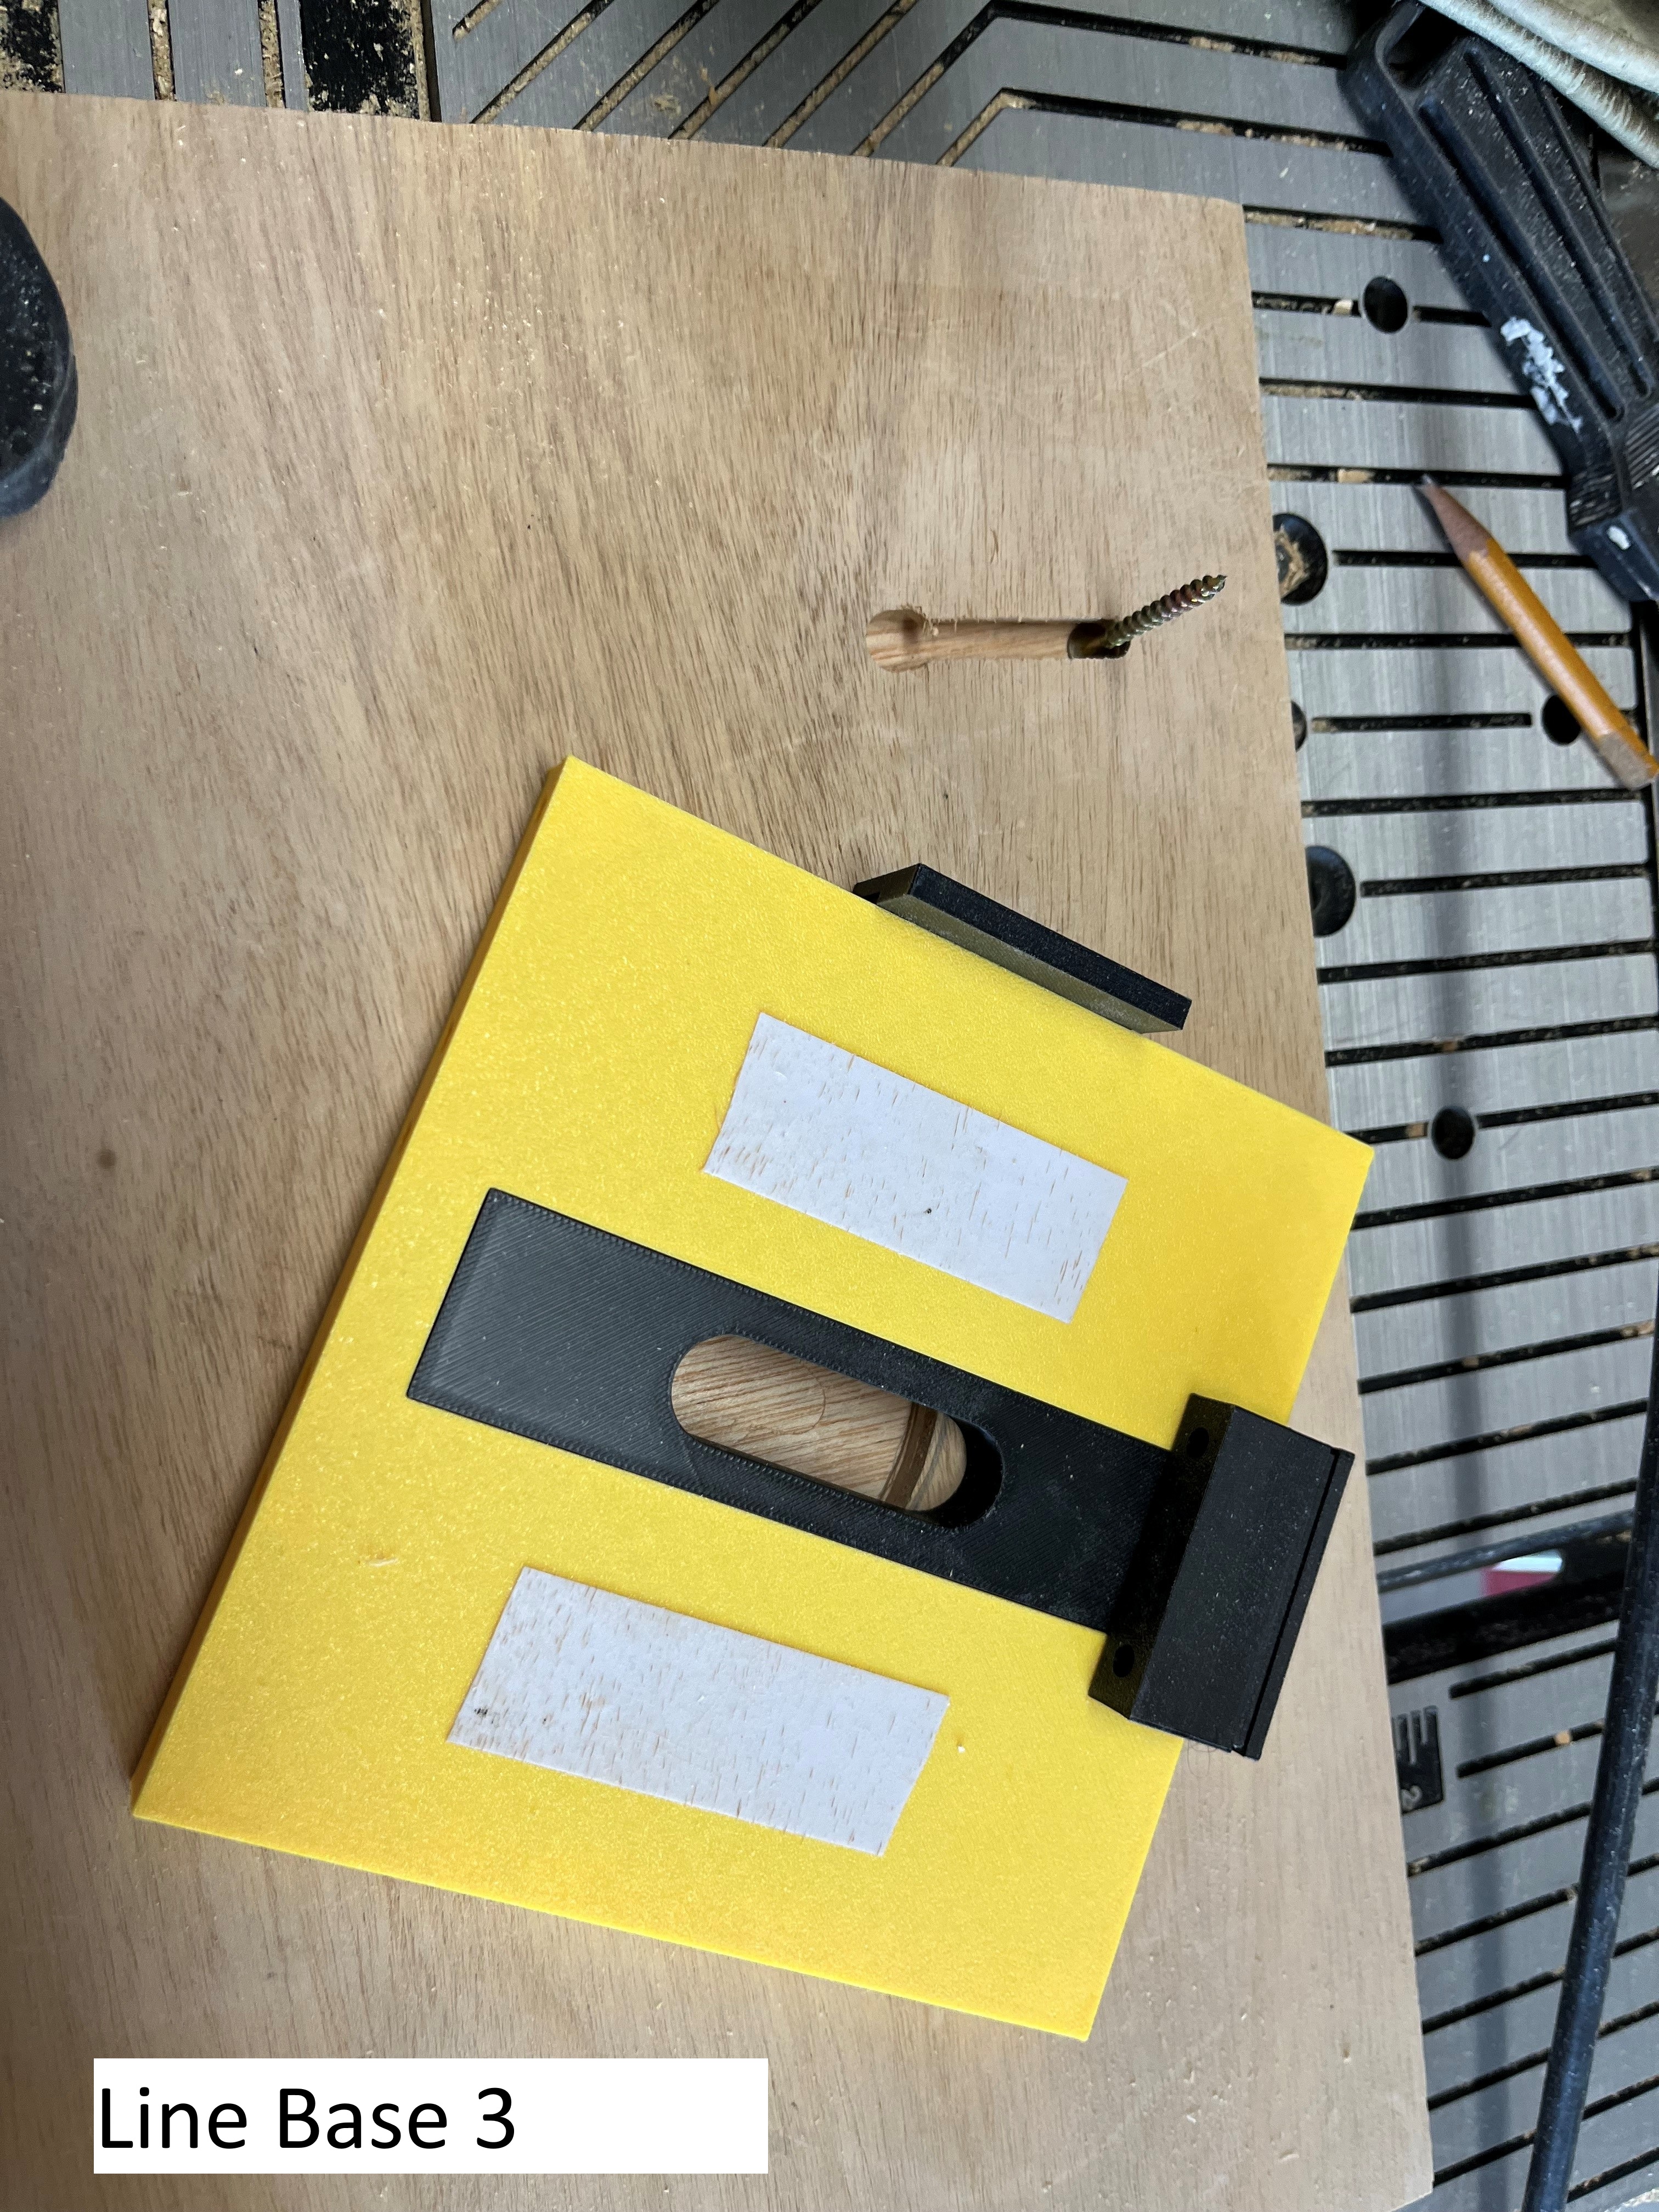
Line Base 3 – after cutting the first key hole I swapped the ‘Alignment End Cap’ to the opposite side so I could make another key hole the same distance in from the other end of the board.
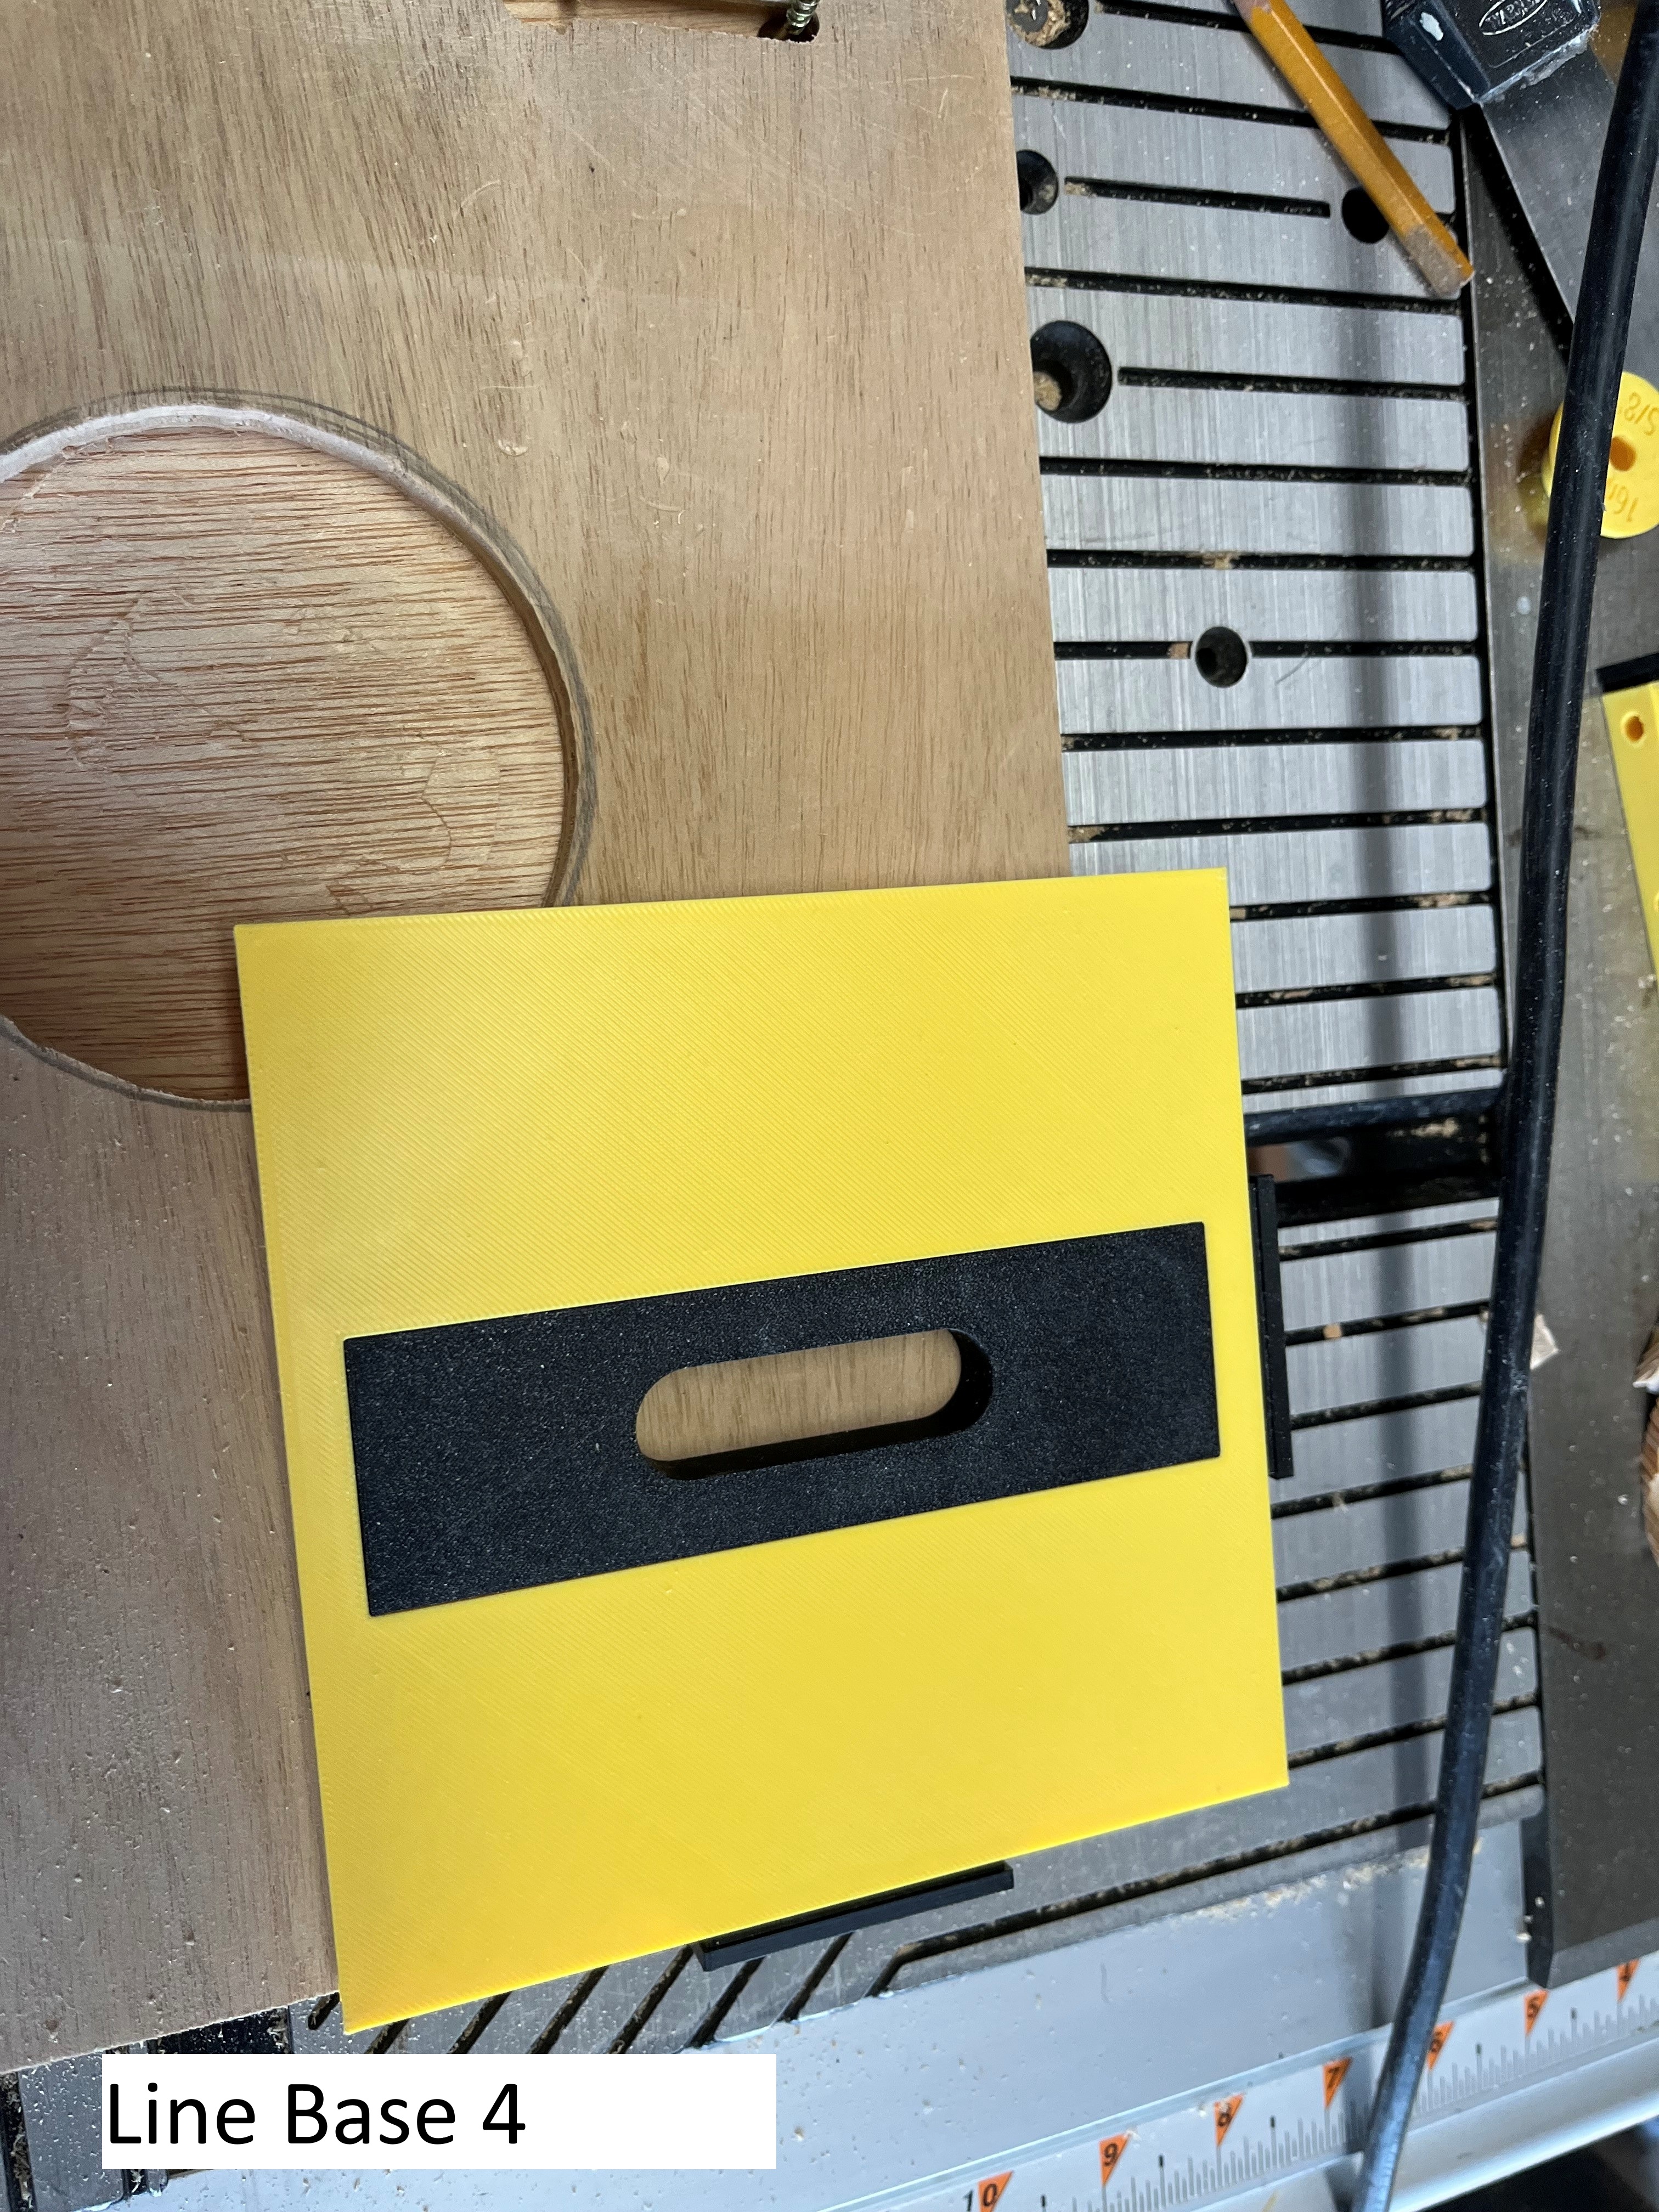
Line Base 4 – shows the swapped alignment ready to go on the other side of the board.
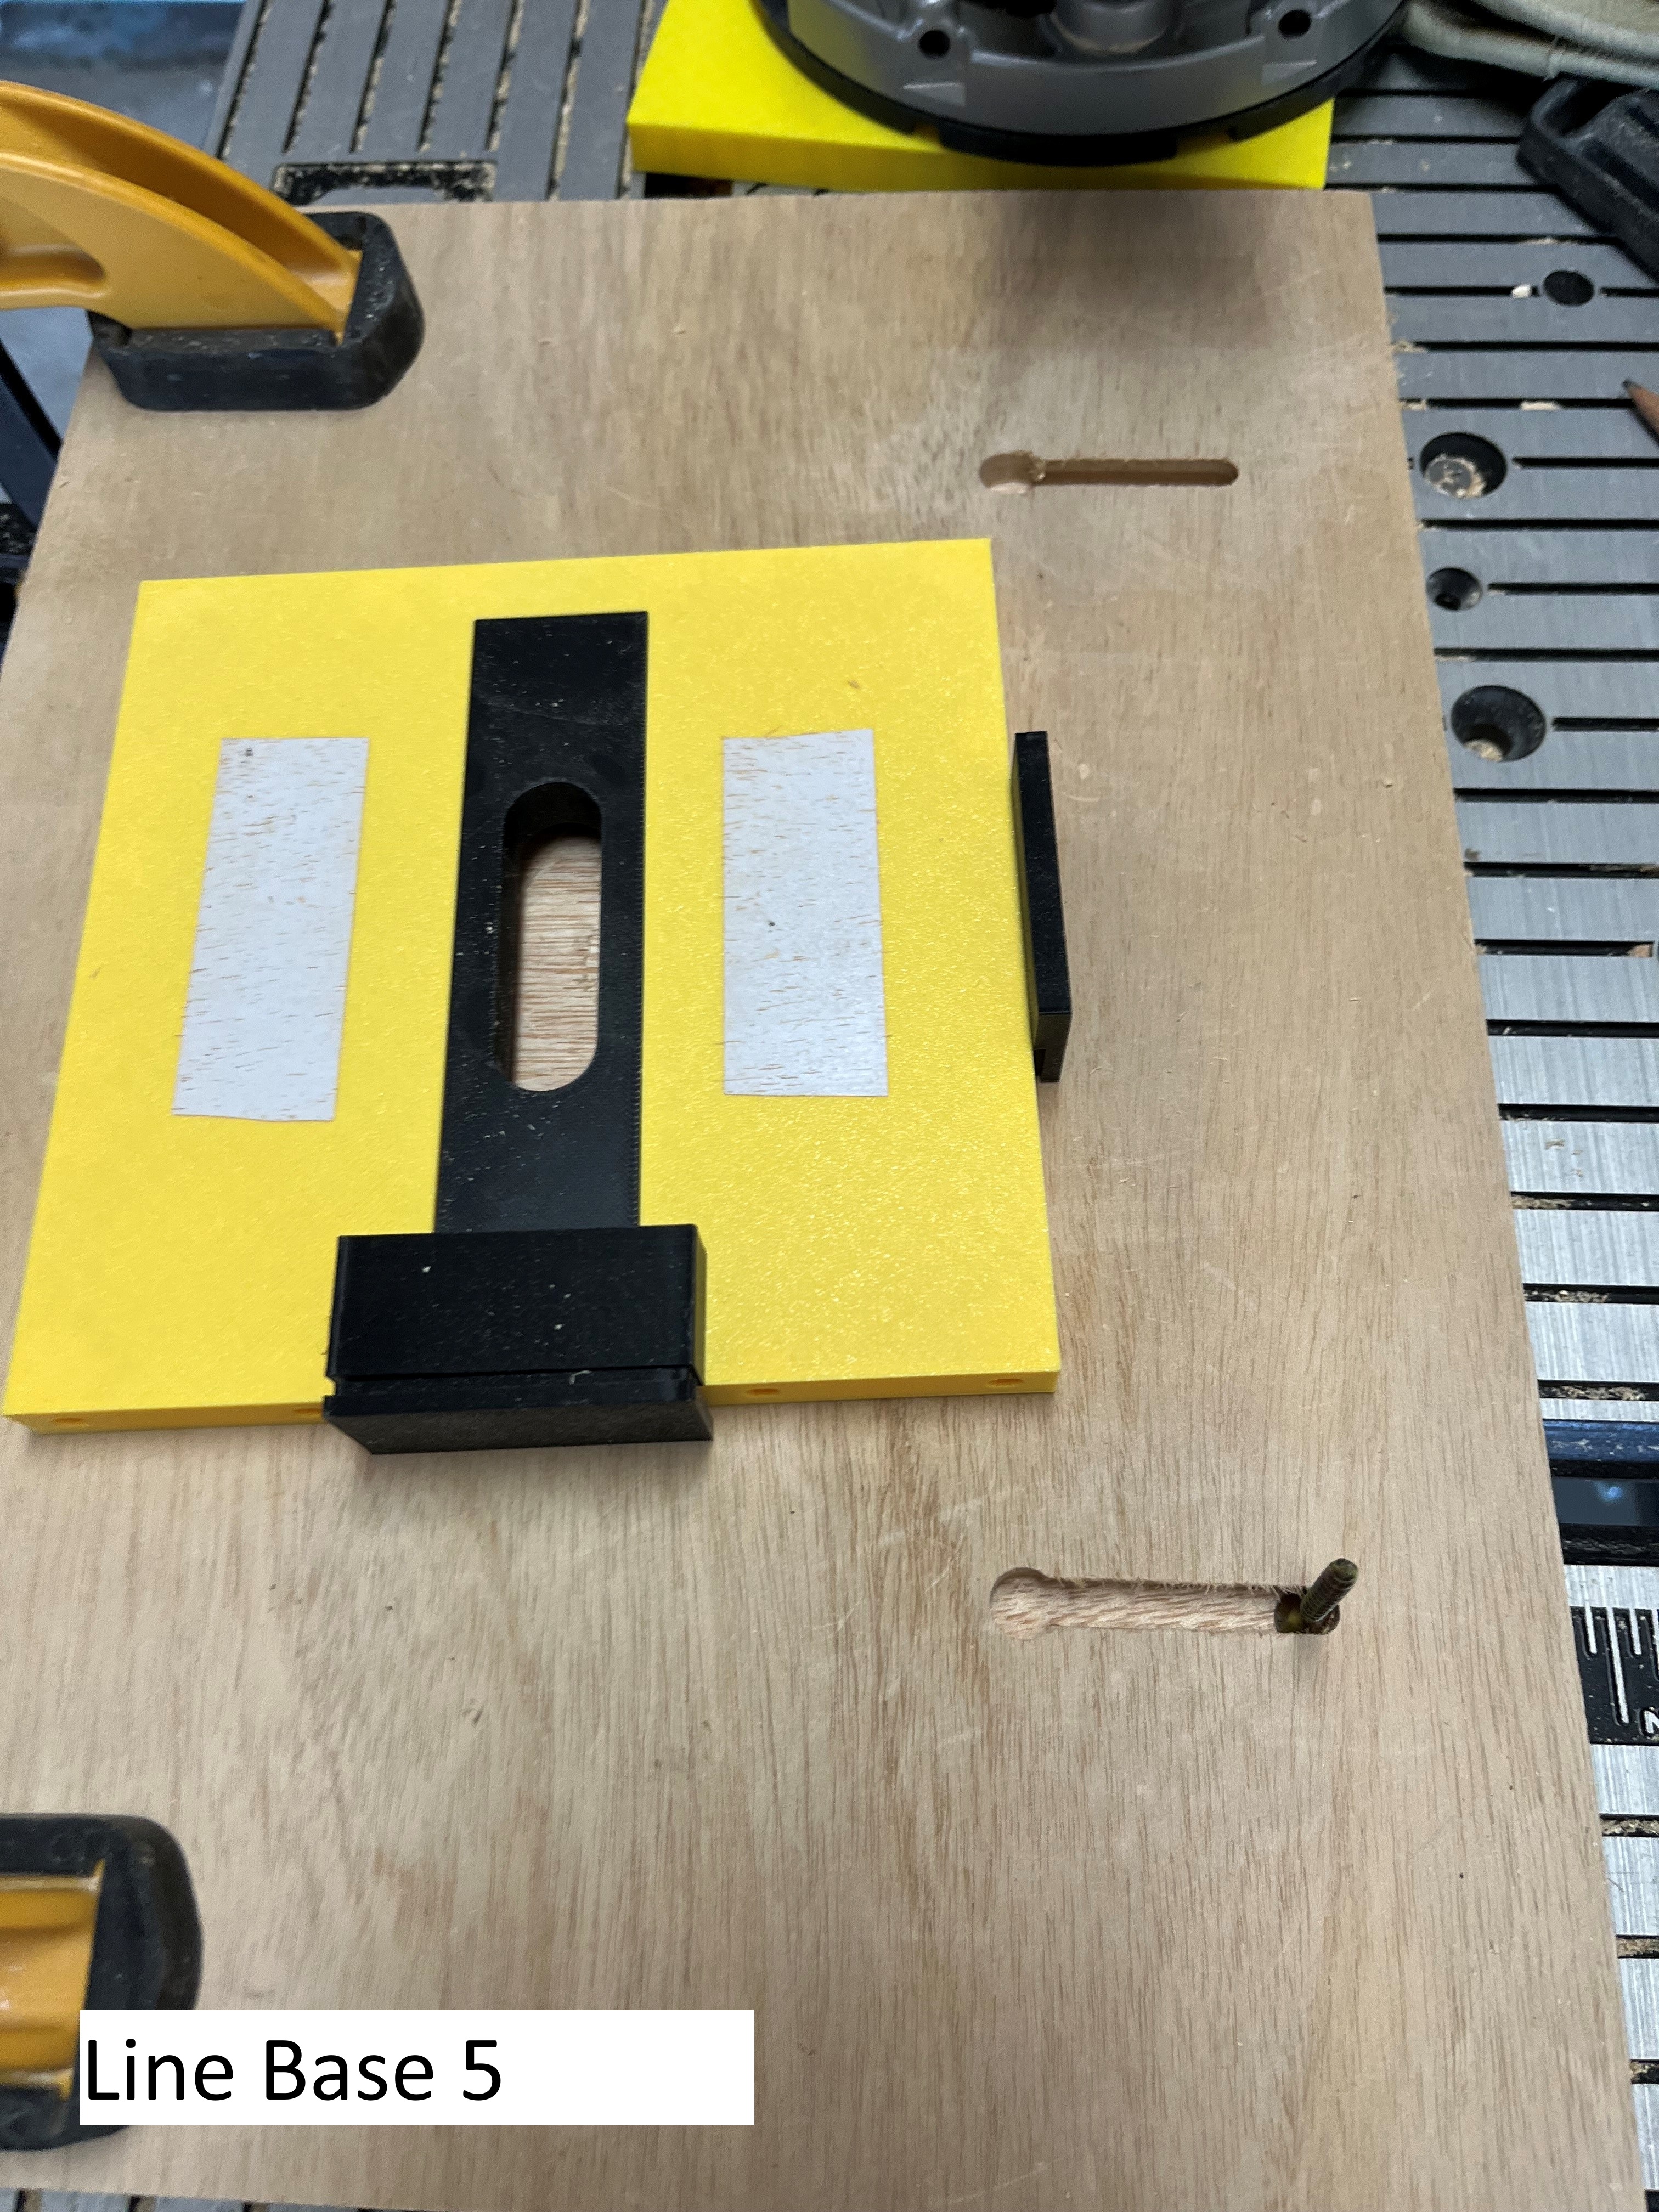
Line Base 5 – mission accomplished.
Line Base 6 – shows the ‘line’ base plate and the 8mm/11mm/16mm line inserts and dummy bushings. Note the holes on the edges of the base plate.
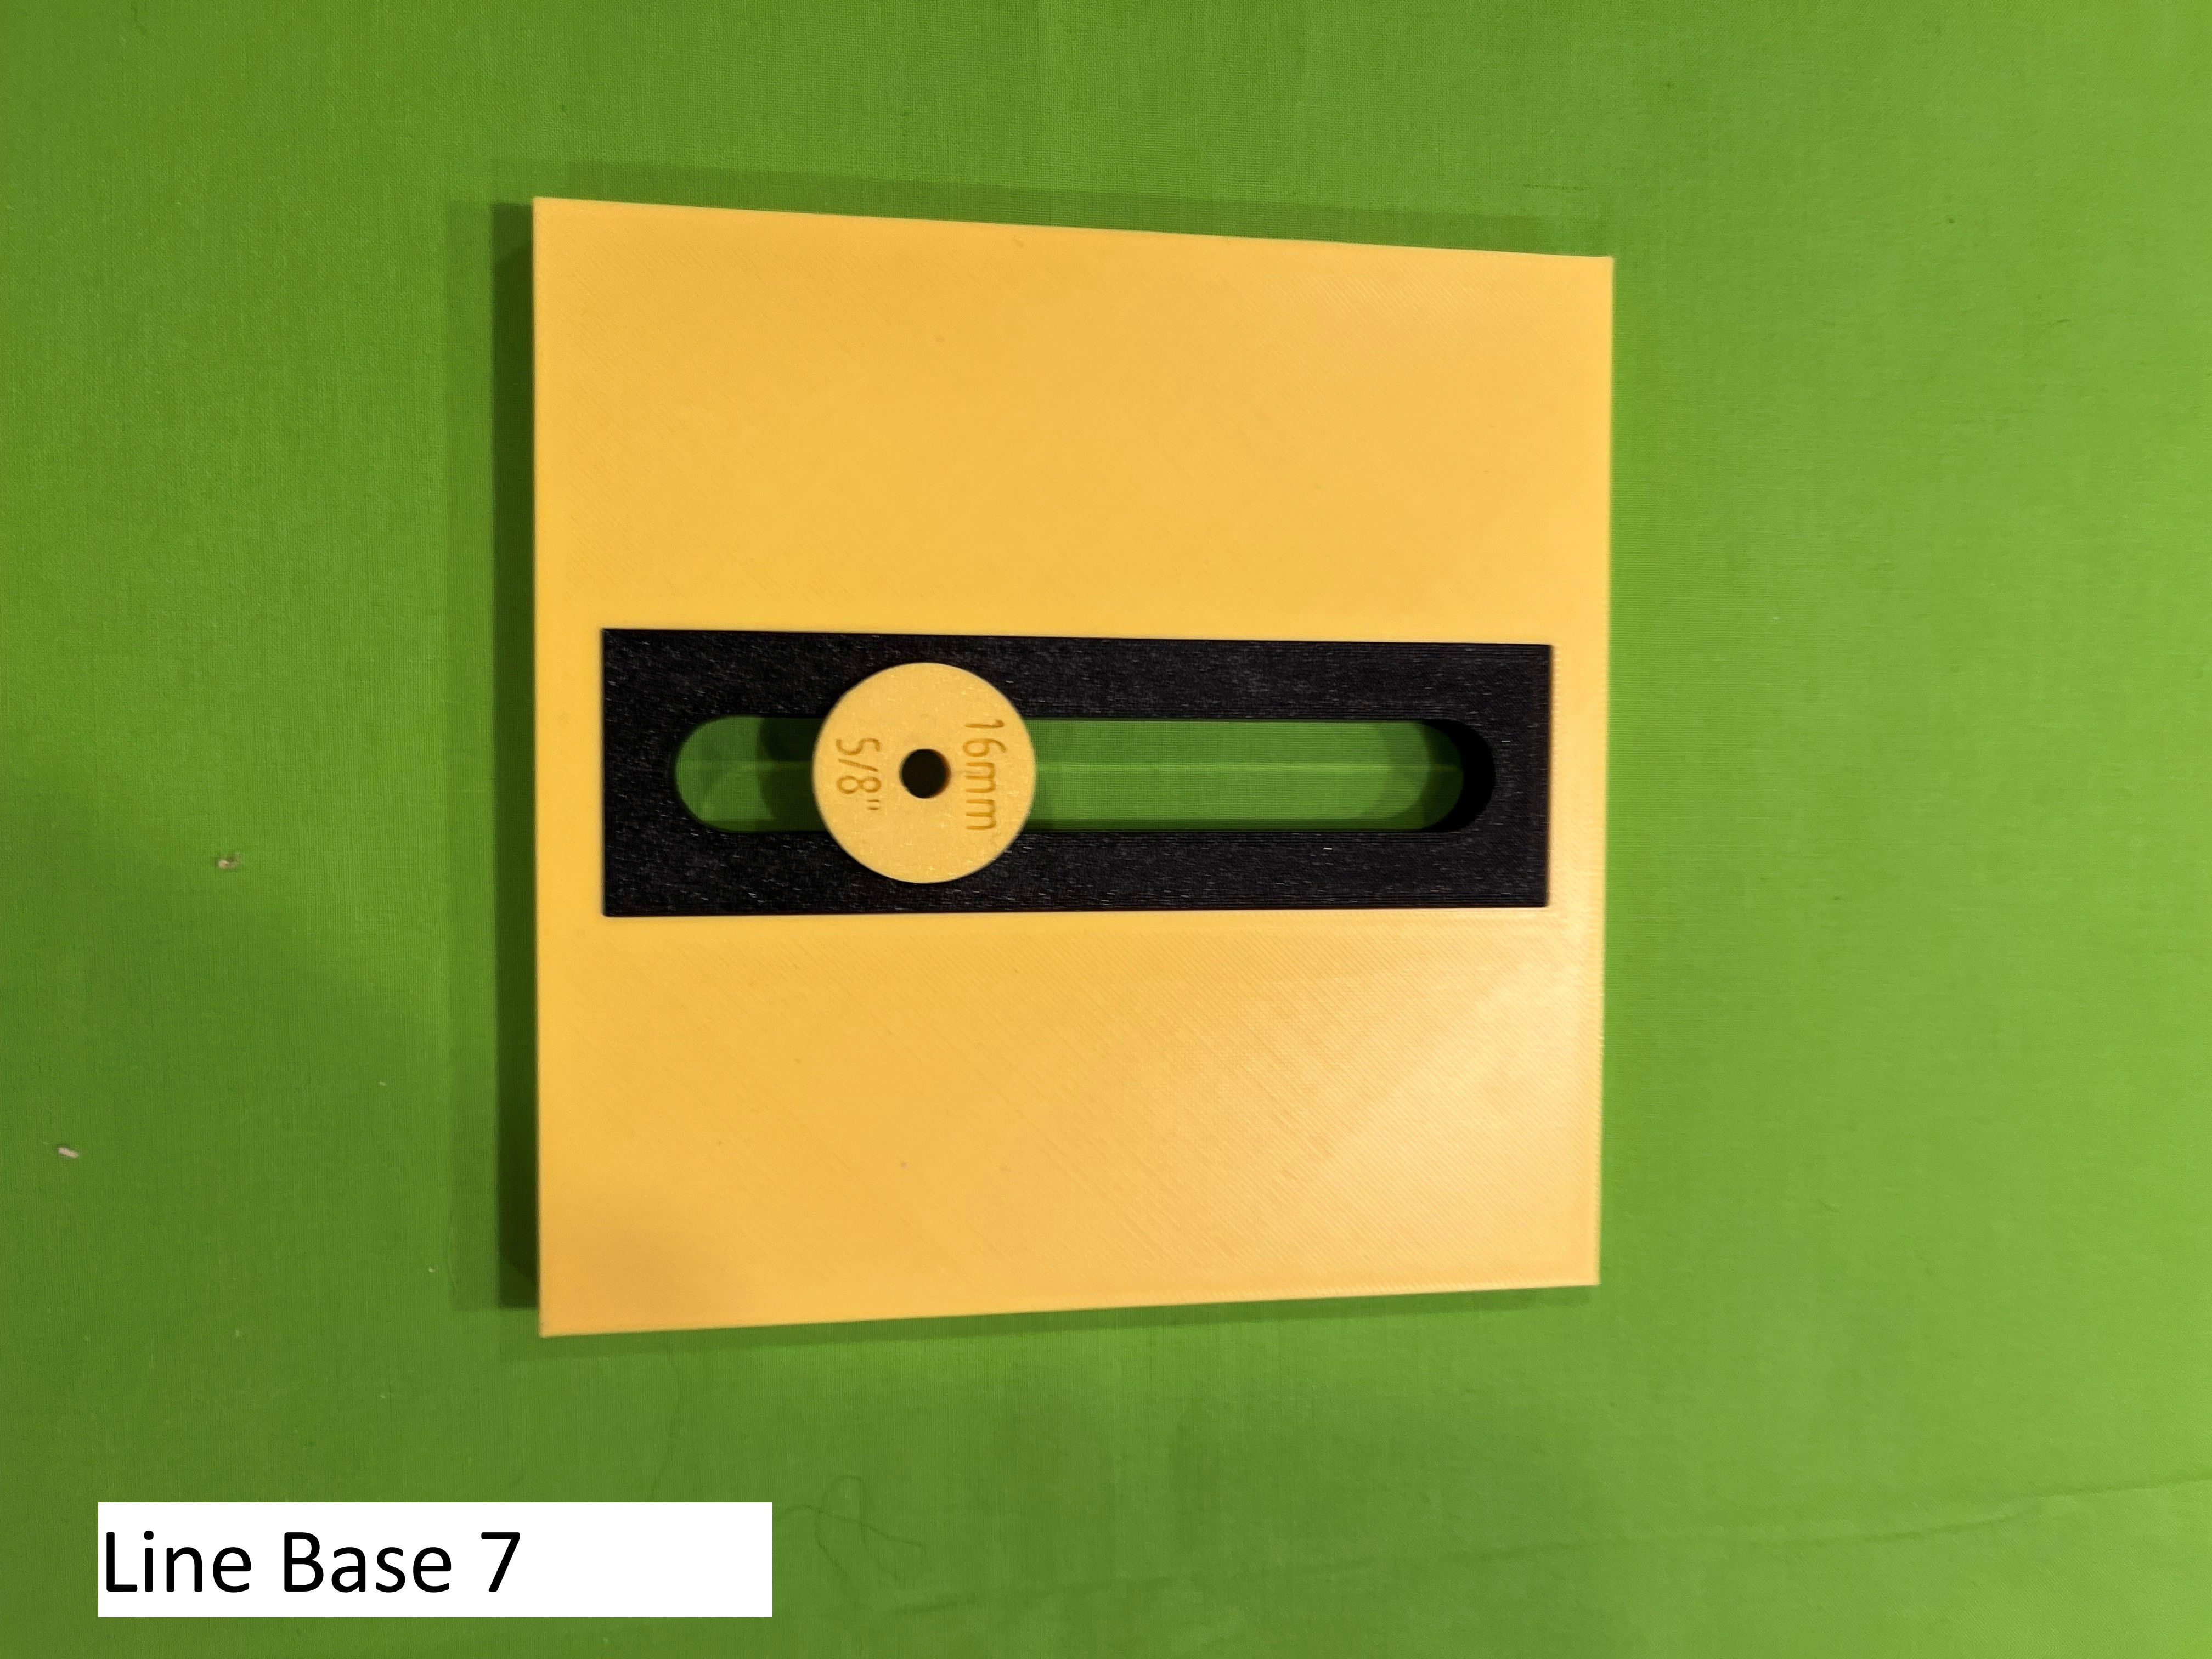
Line Base 7 – shows the ‘line’ base plate with the 16mm insert in place and the dummy bushing.
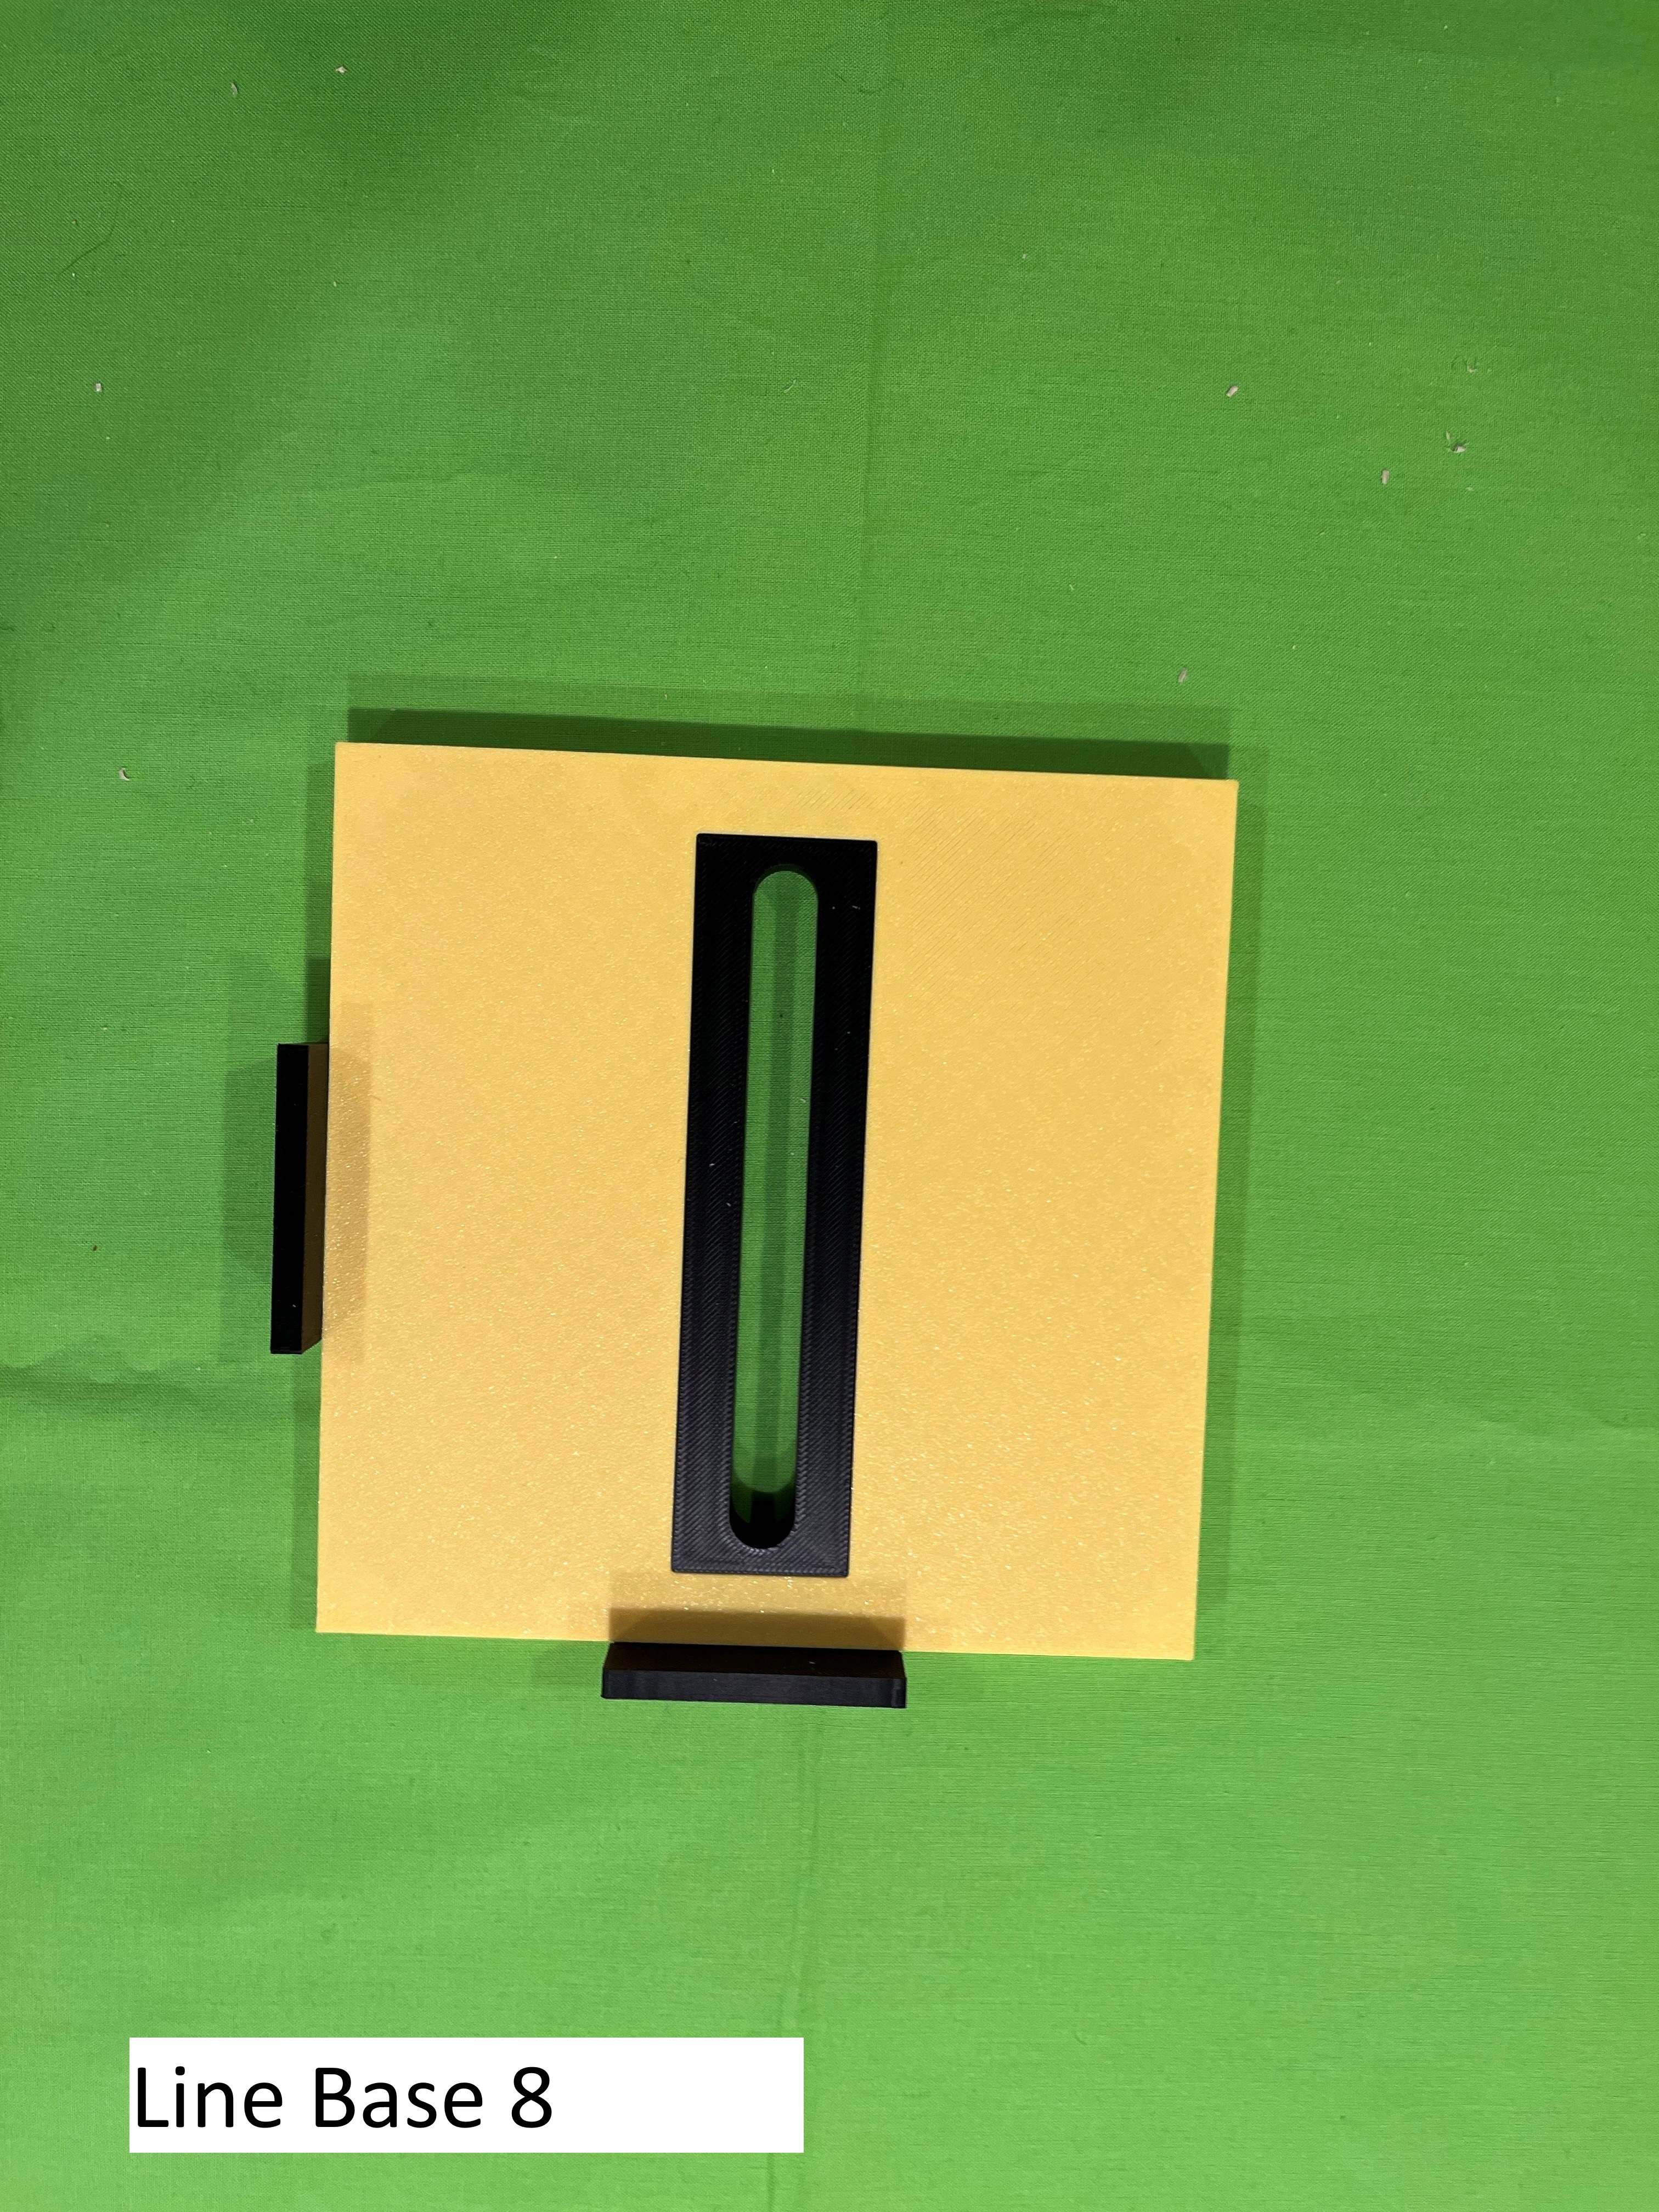
Line Base 8 – shows the ‘line’ base plate from underneath with two ‘Alignment End Caps’ attached.
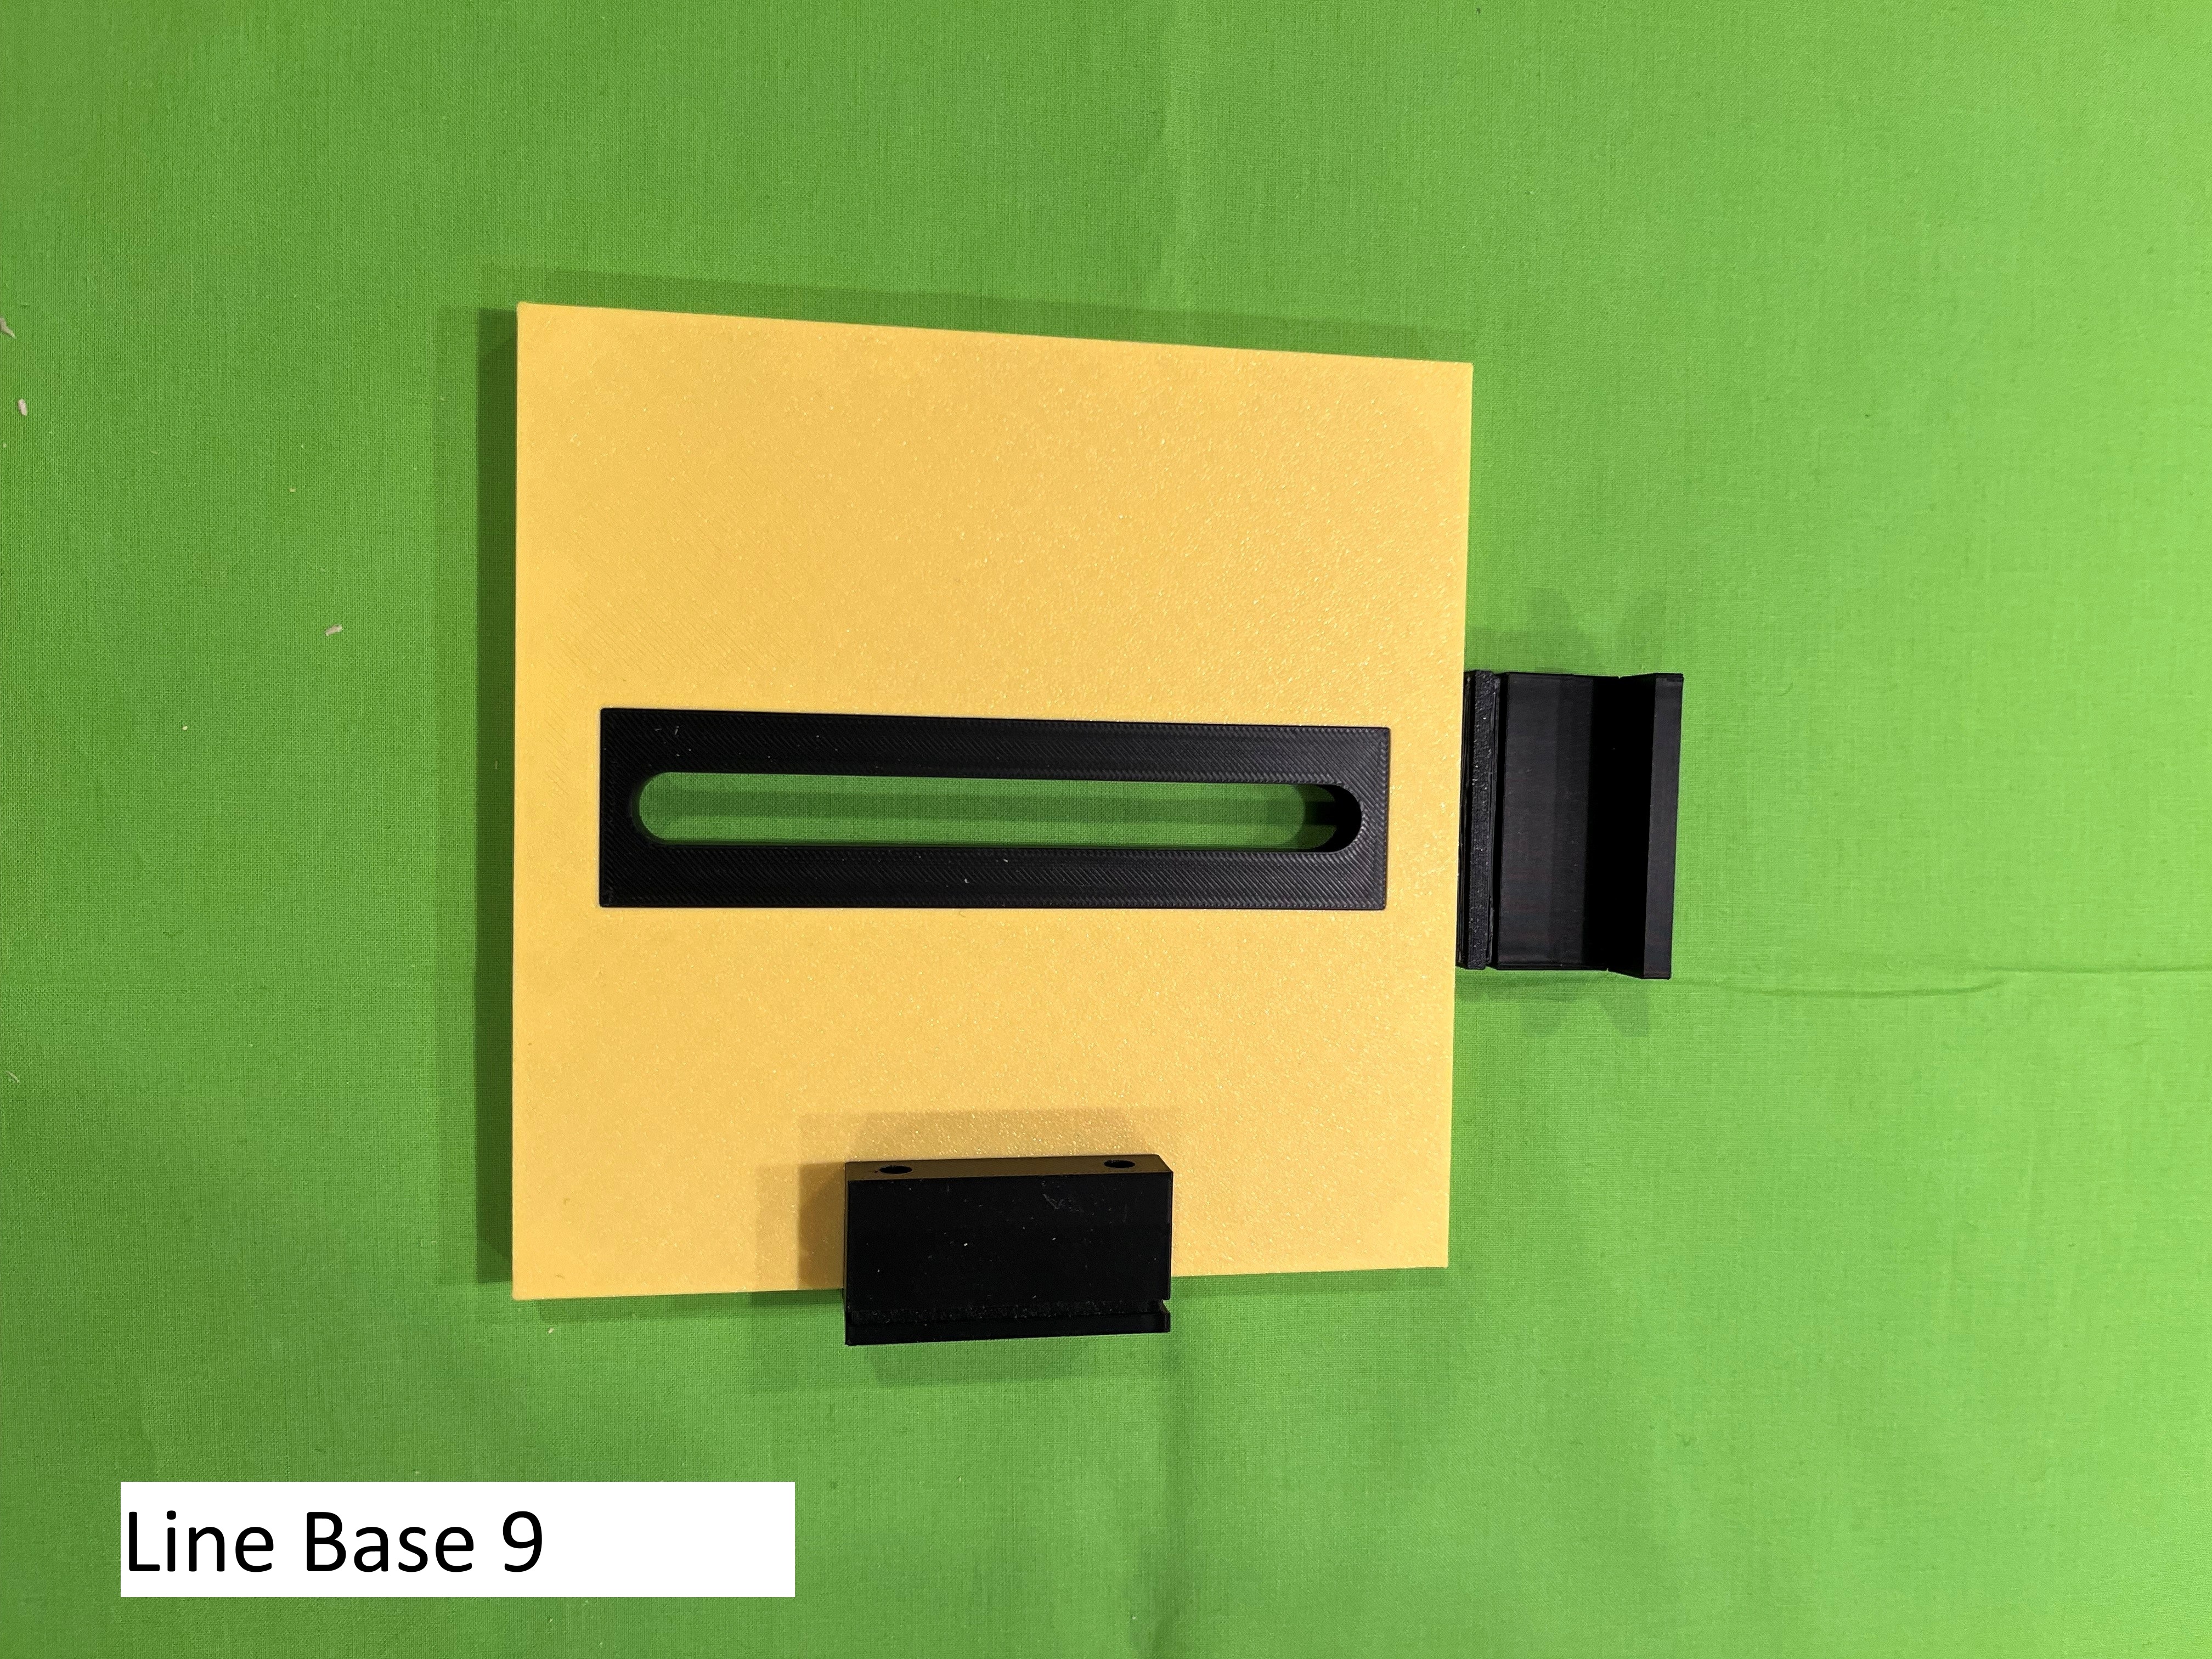
Line Base 9 - shows the ‘line’ base plate from underneath with an ‘Outside Connector’, an ‘Alignment Extender’, and an ‘Alignment End Cap’ on one side, and, an ‘Outside Connector’ and an ‘Alignment Extender’ on the other side.
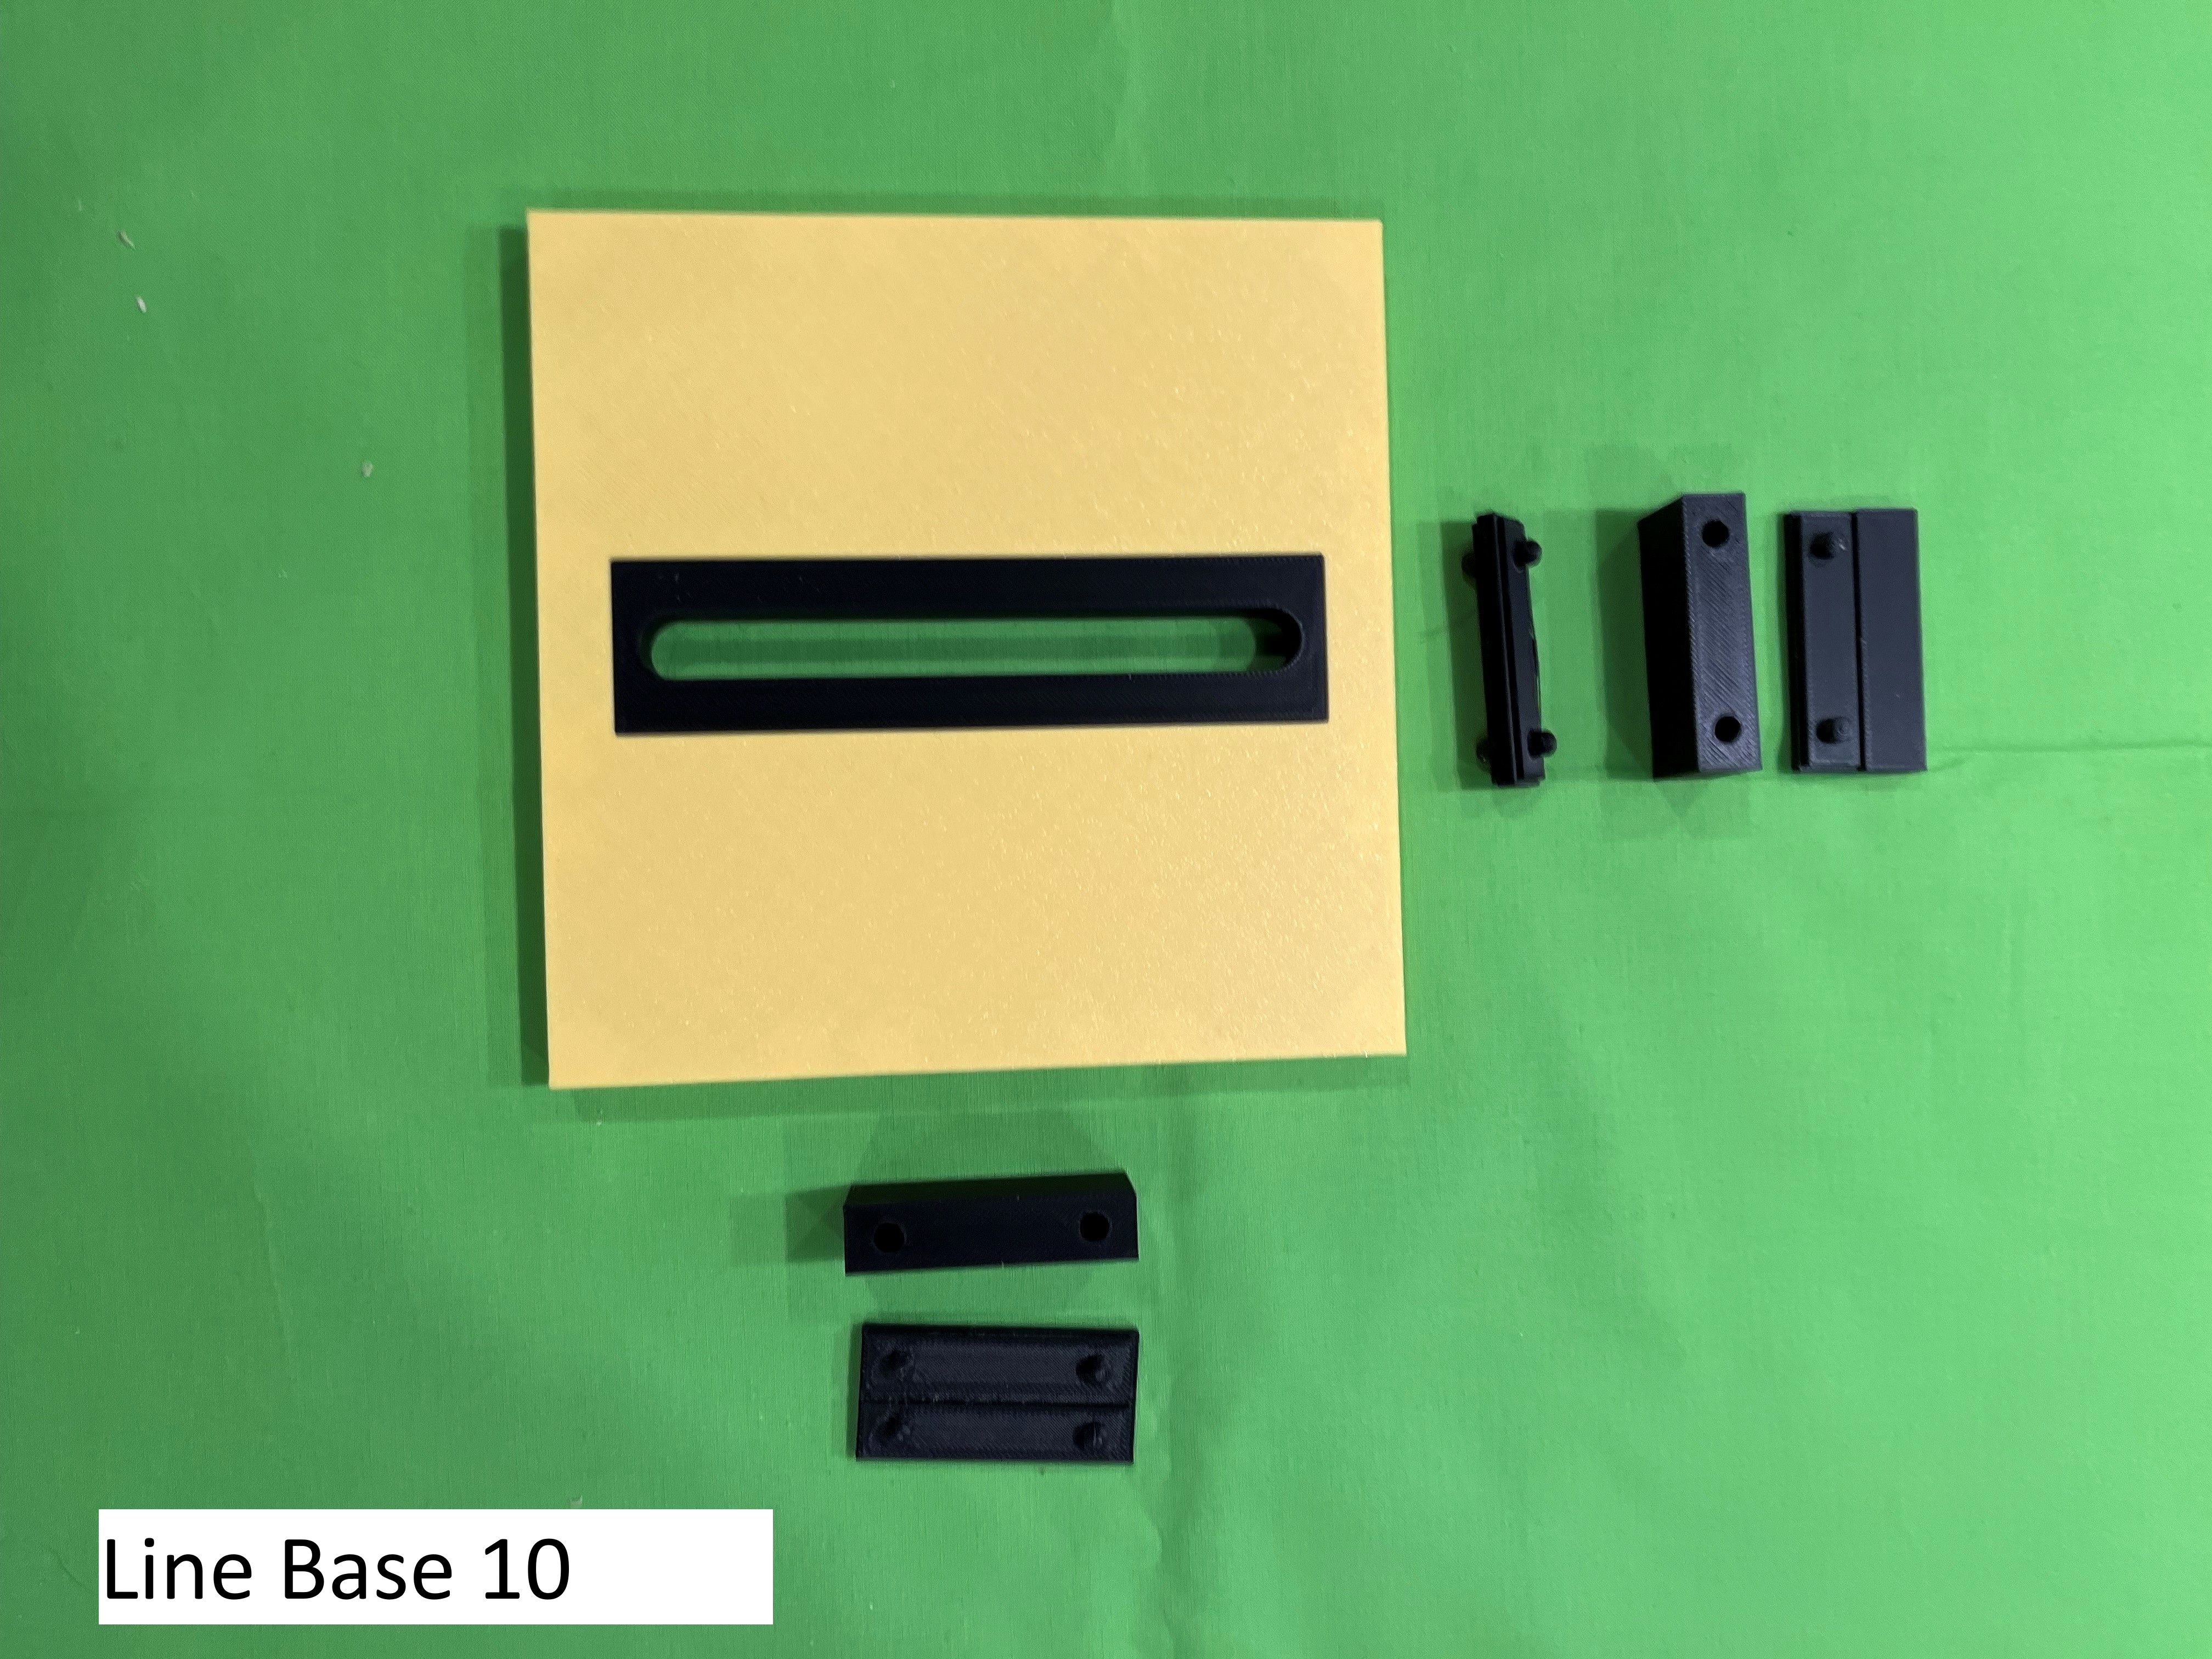
Line Base 10 – same as ‘Line Base 9’ but parts separated.
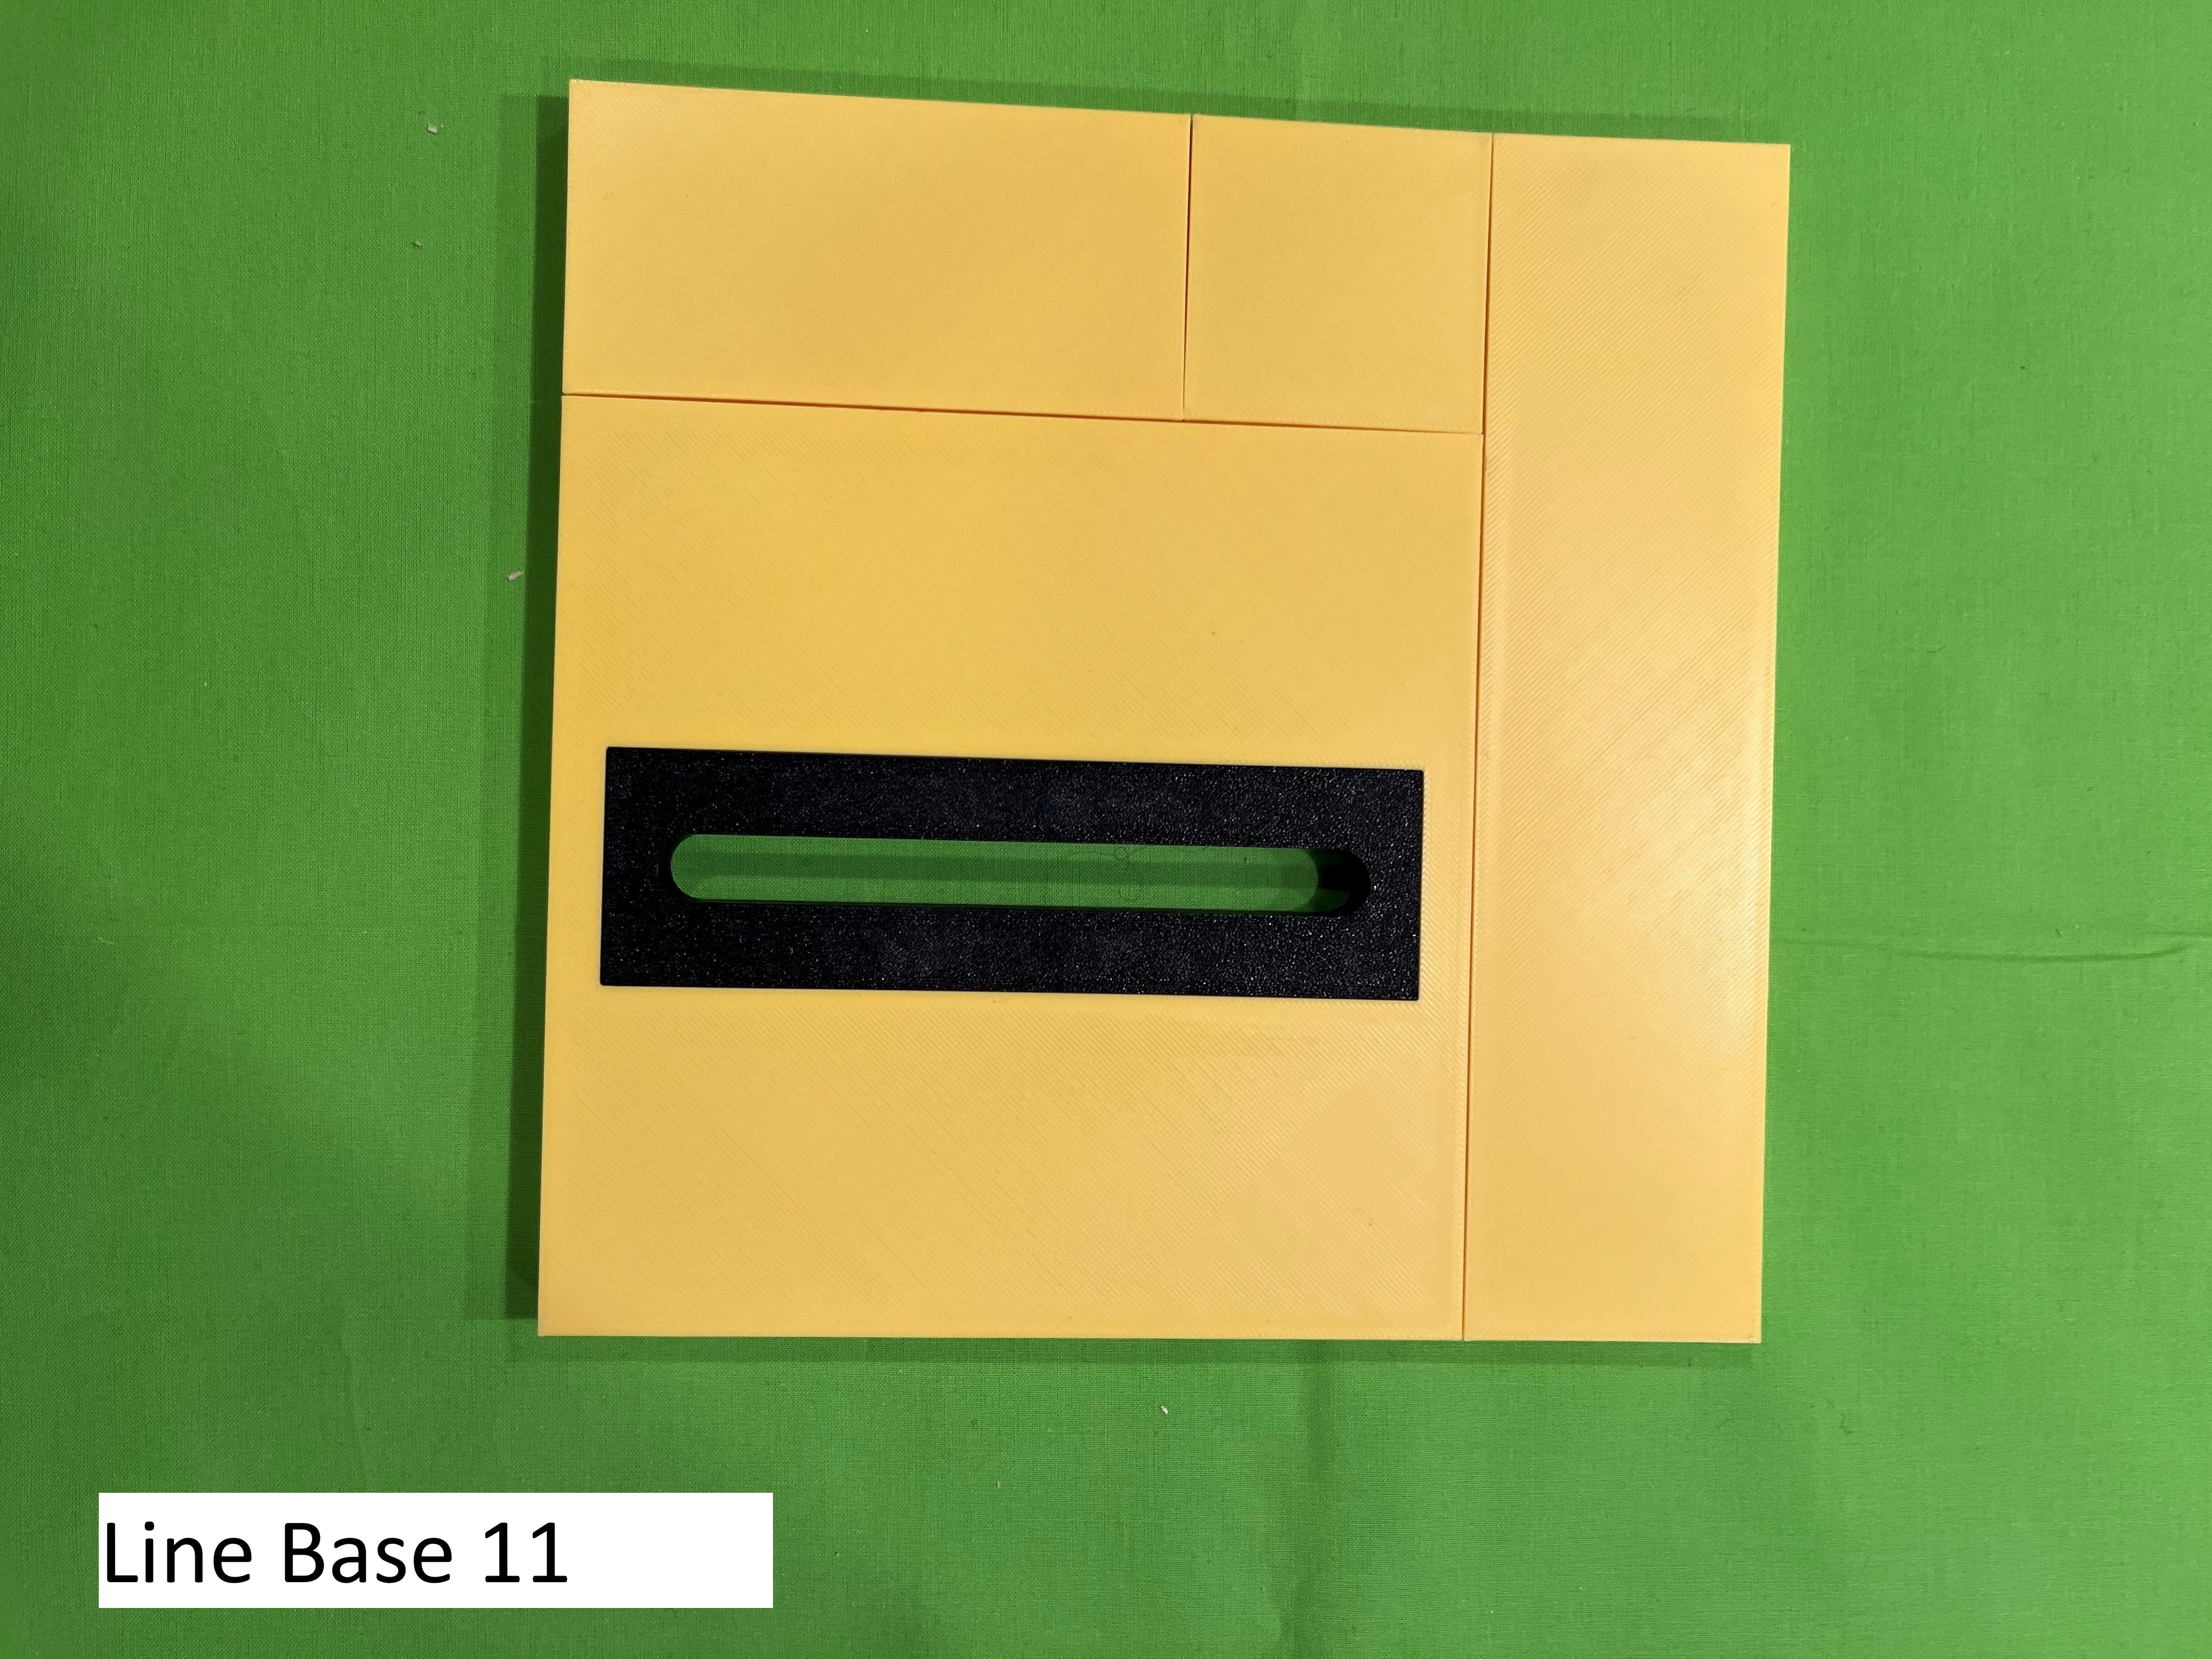
Line Base 11 - shows the ‘line’ base plate with a bushing insert in place with a 100mm ‘Base Plate Extender’ attached to the 50mm ‘Base Plate Extender’ on one edge and then the 200mm ‘Base Plate Extender’ attached to the other edge.
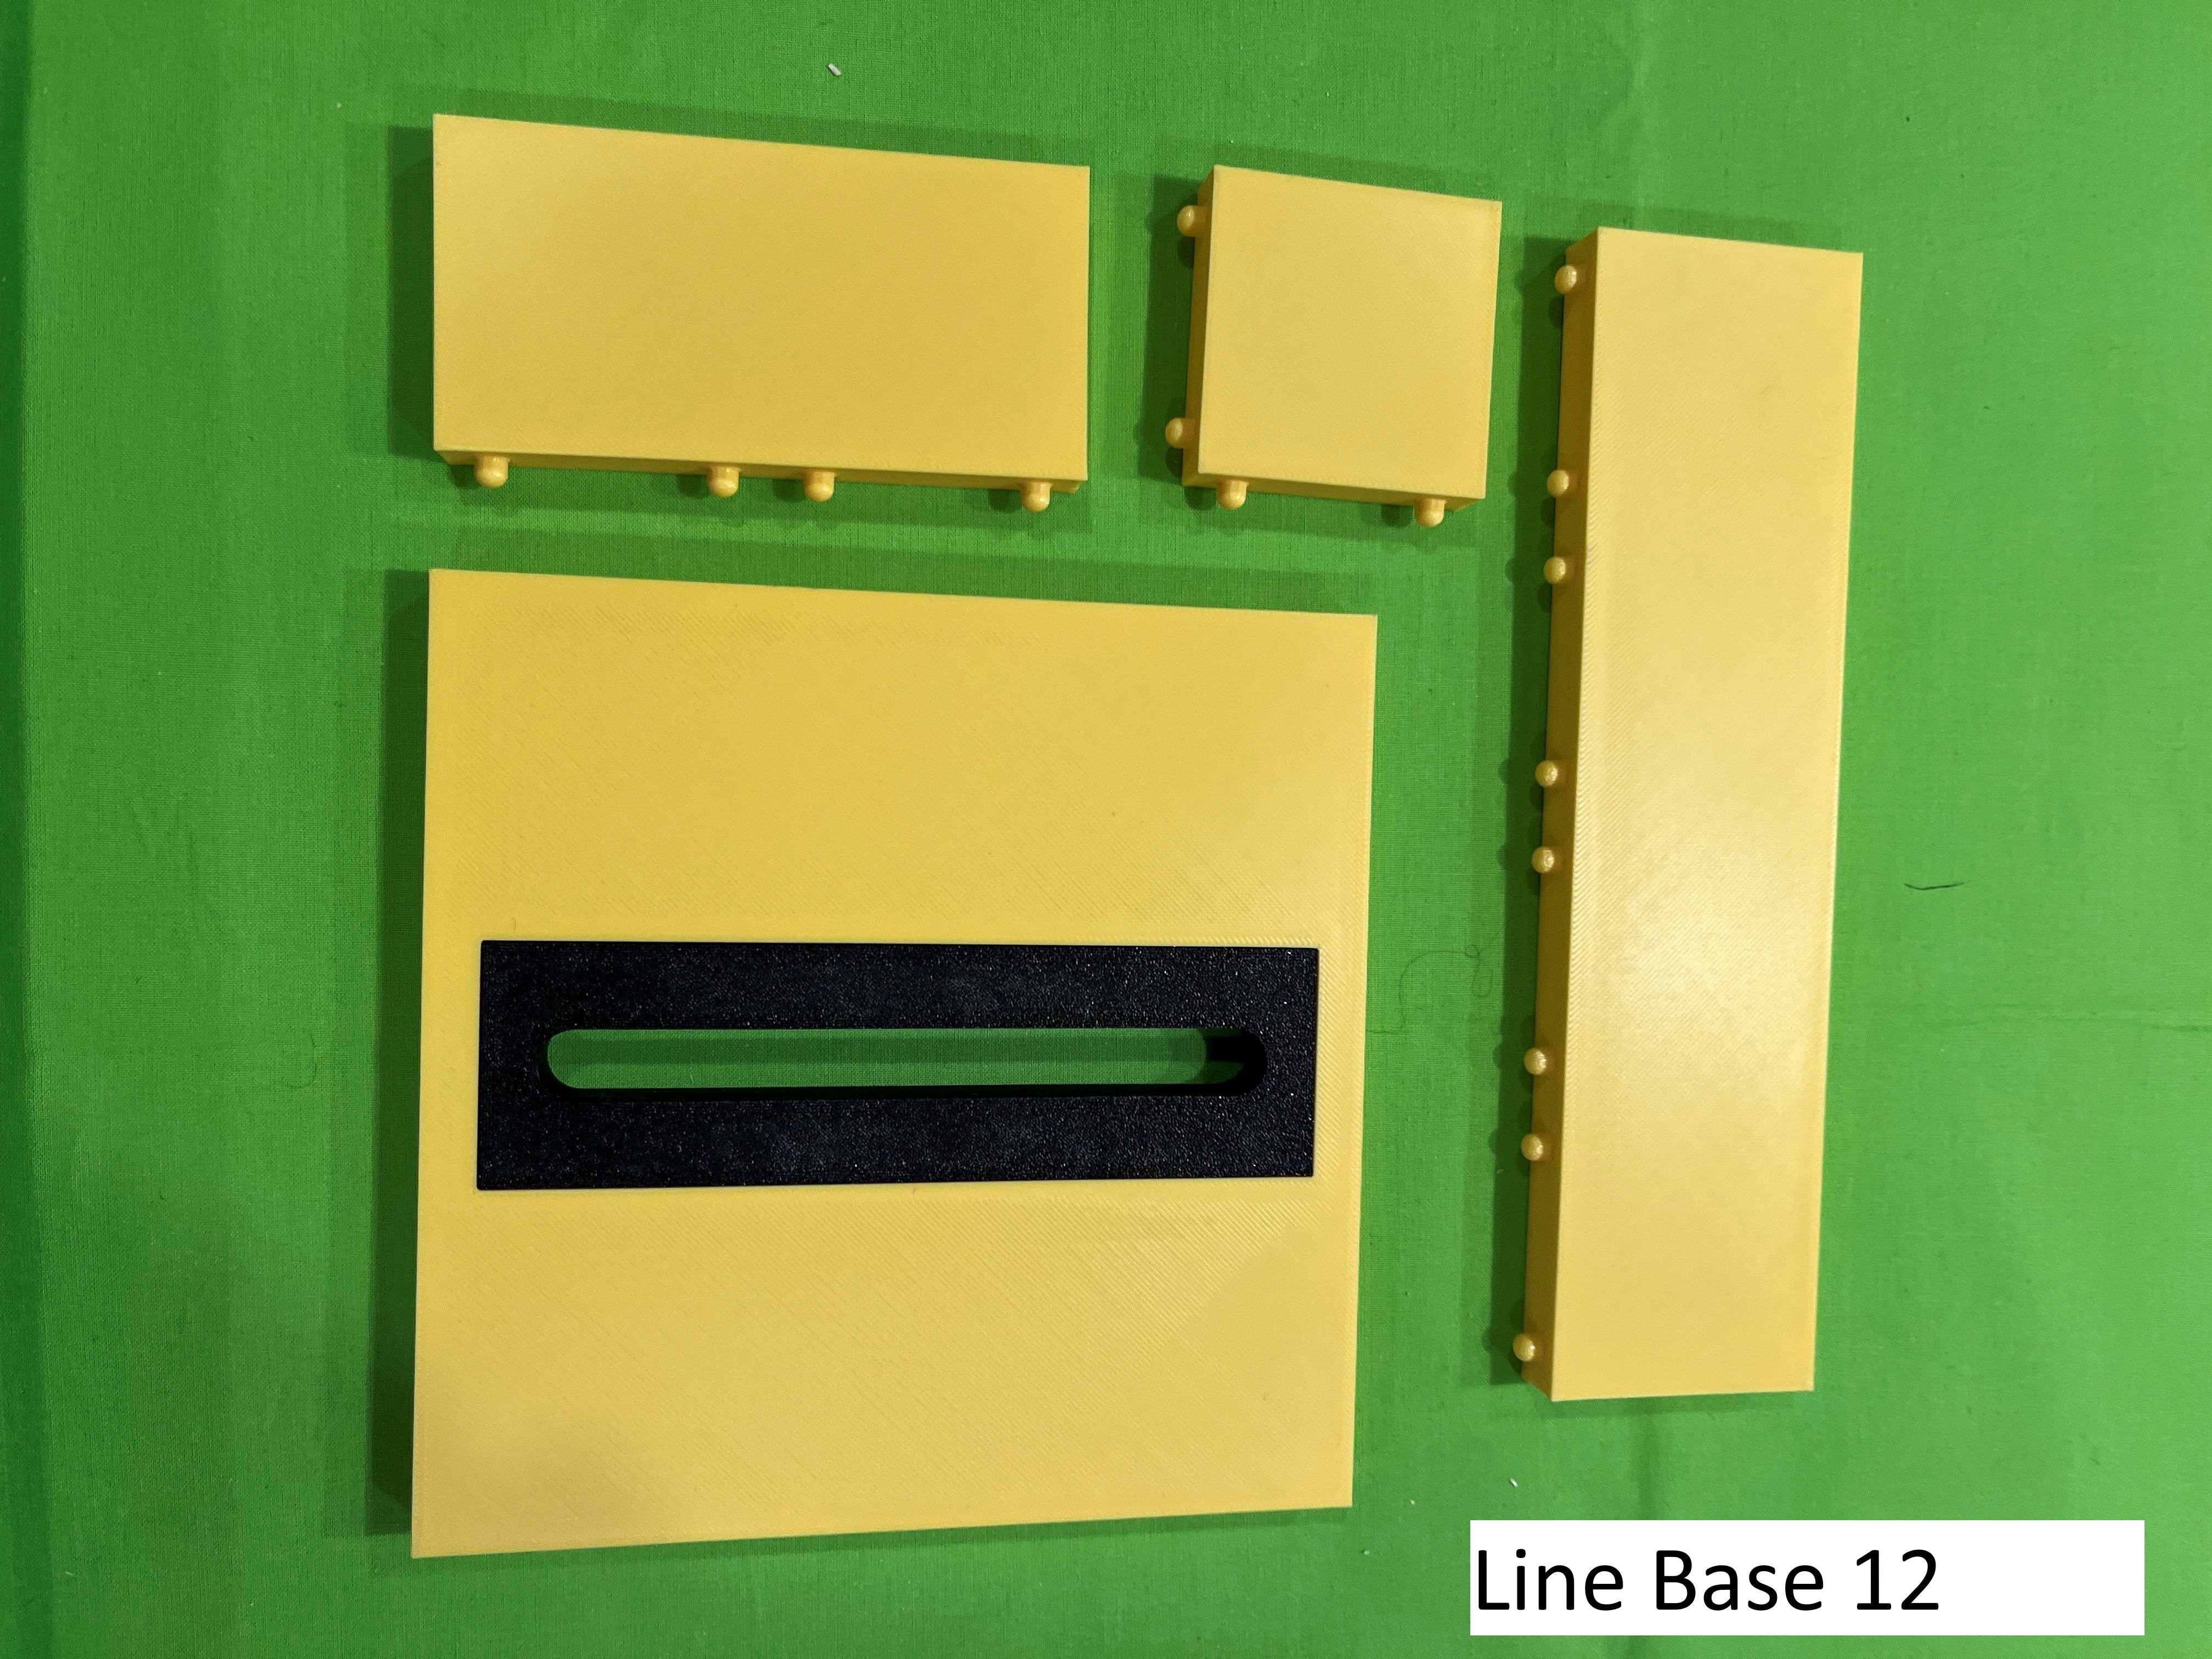
Line Base 12 - same as ‘Line Base 11’ but parts separated.
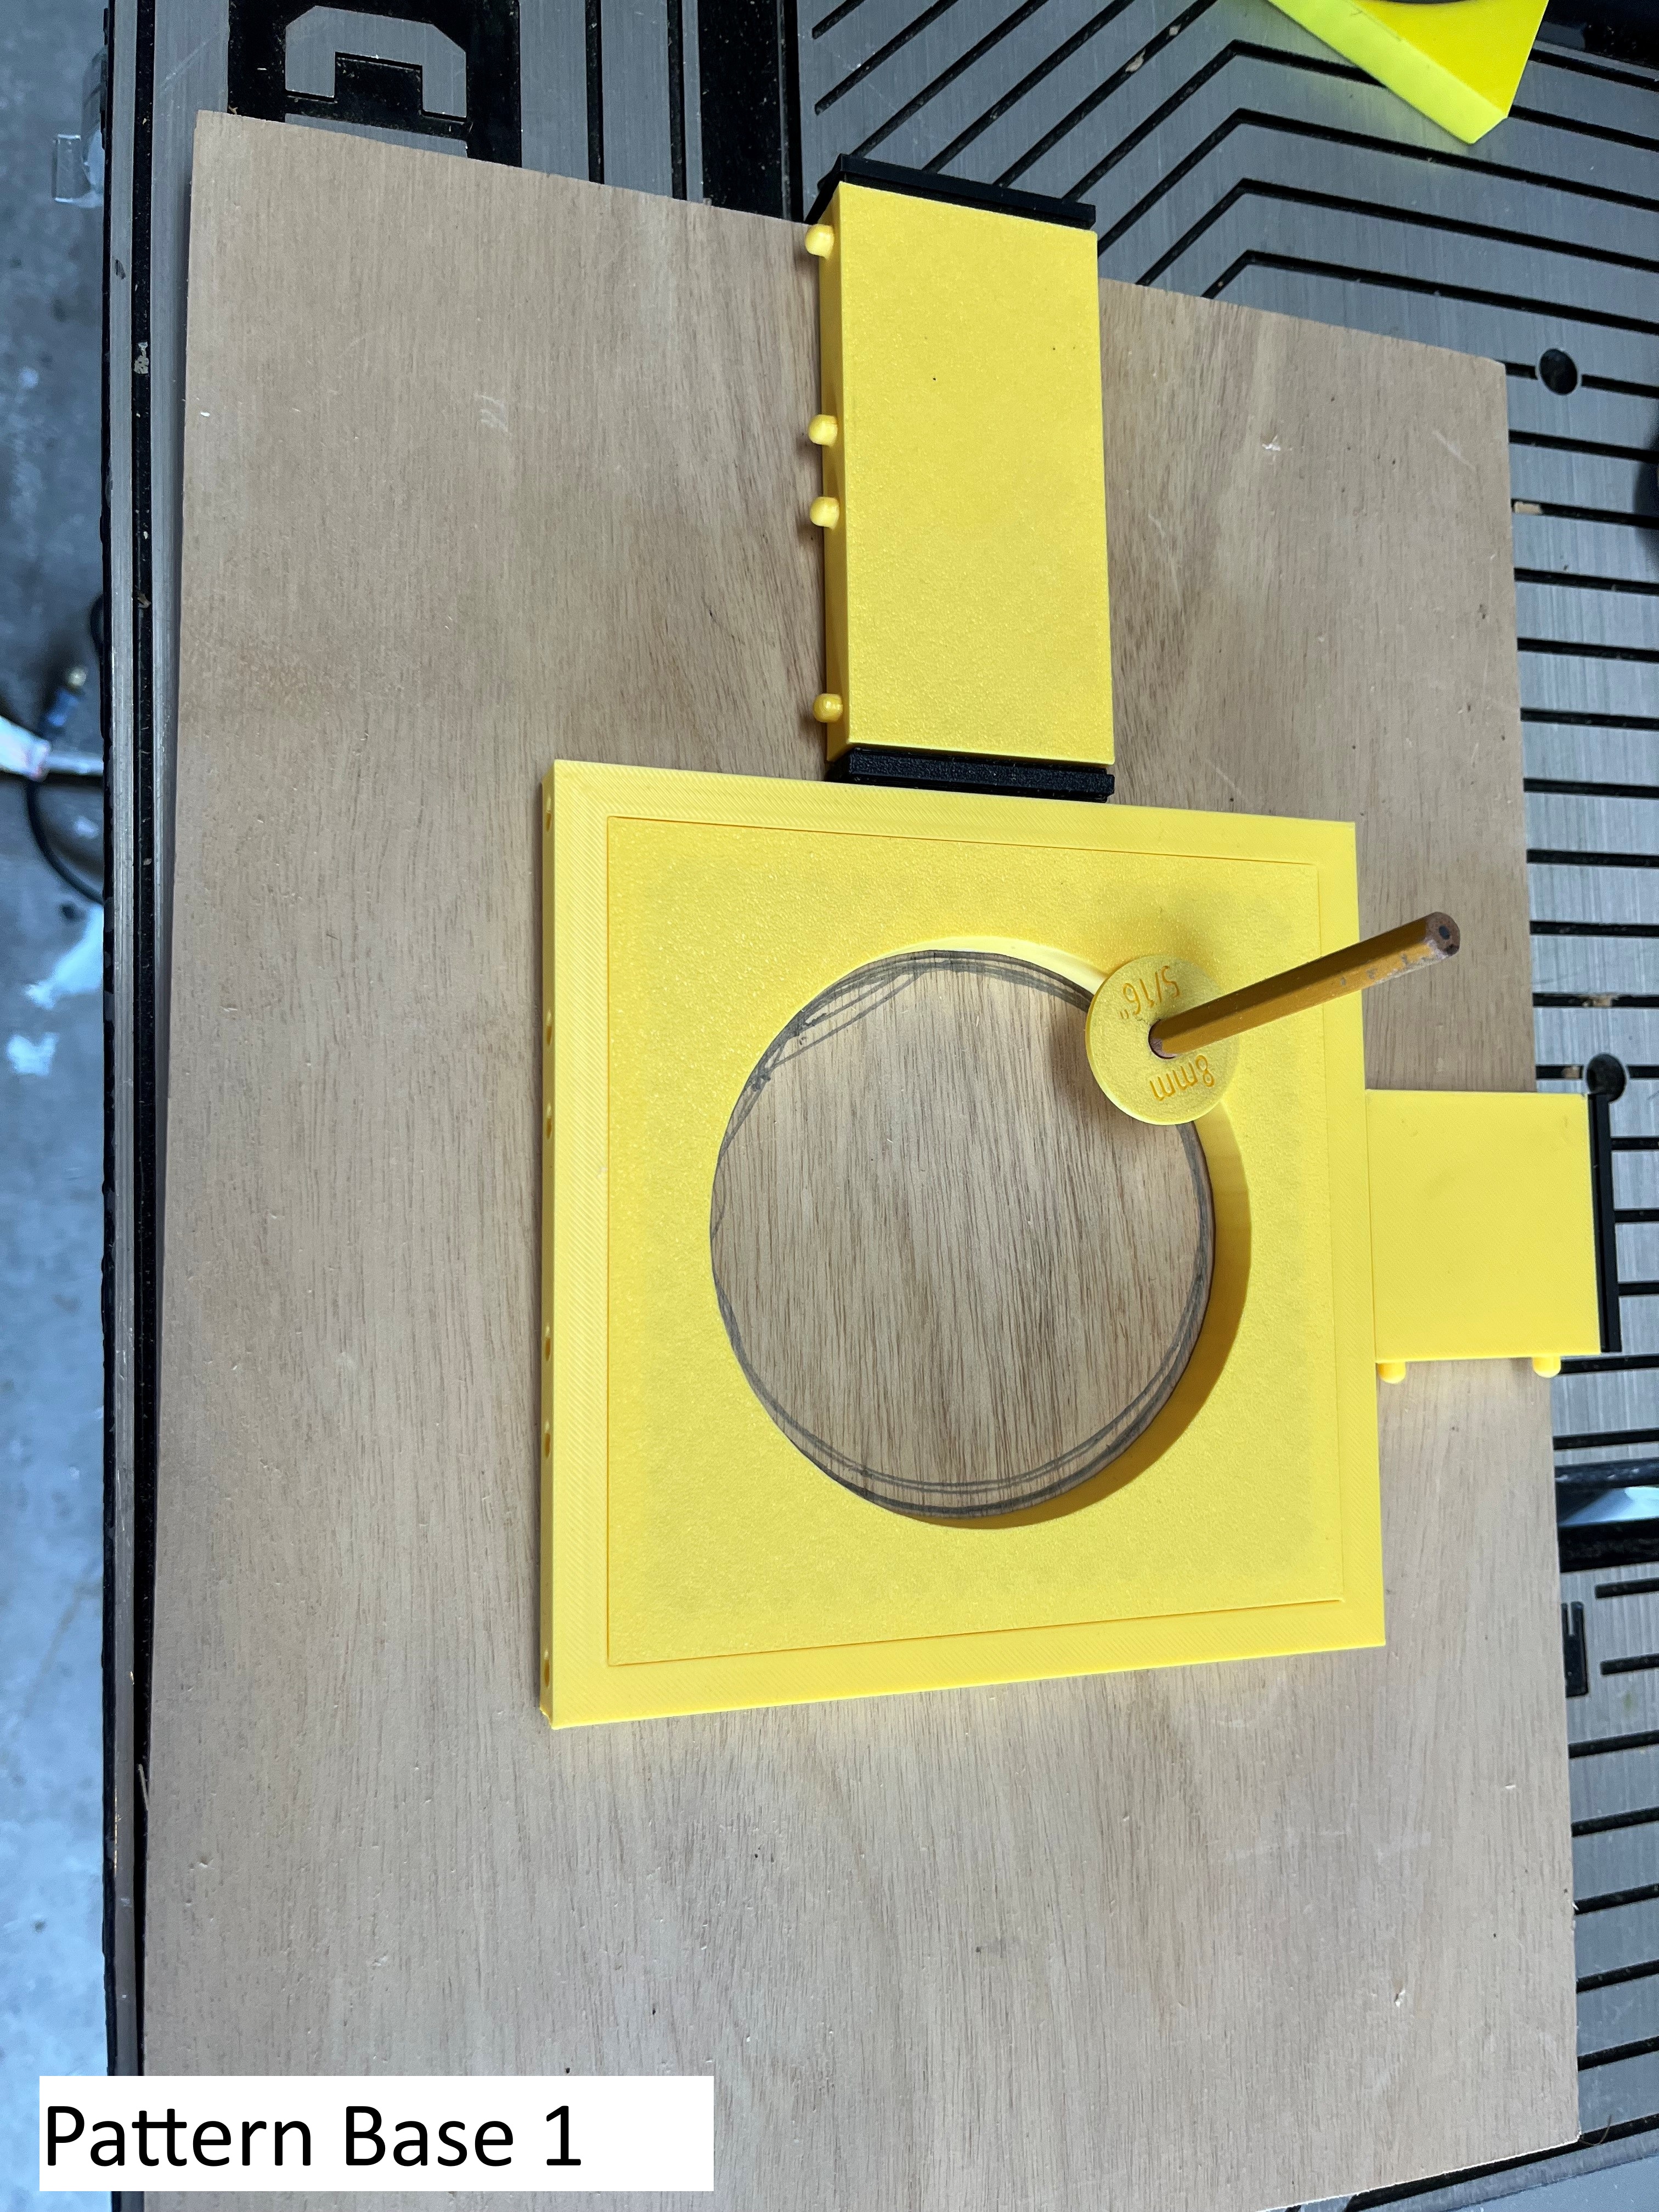
Pattern Base 1 – shows the ‘pattern’ base plate with an insert with a circle in it on a board. It has a 100mm ‘Base Plate Extender’ attached to one side using an ‘Outside Connector’ and aligning to the outer edge of the board with an ‘Alignment End Cap’. It has a 50mm ‘Base Plate Extender’ attached to the other side and is aligned to the board edge with an ‘Alignment End Cap’. It shows a ‘Dummy Bushing’ / pencil used to draw where the center of the router bit would go.
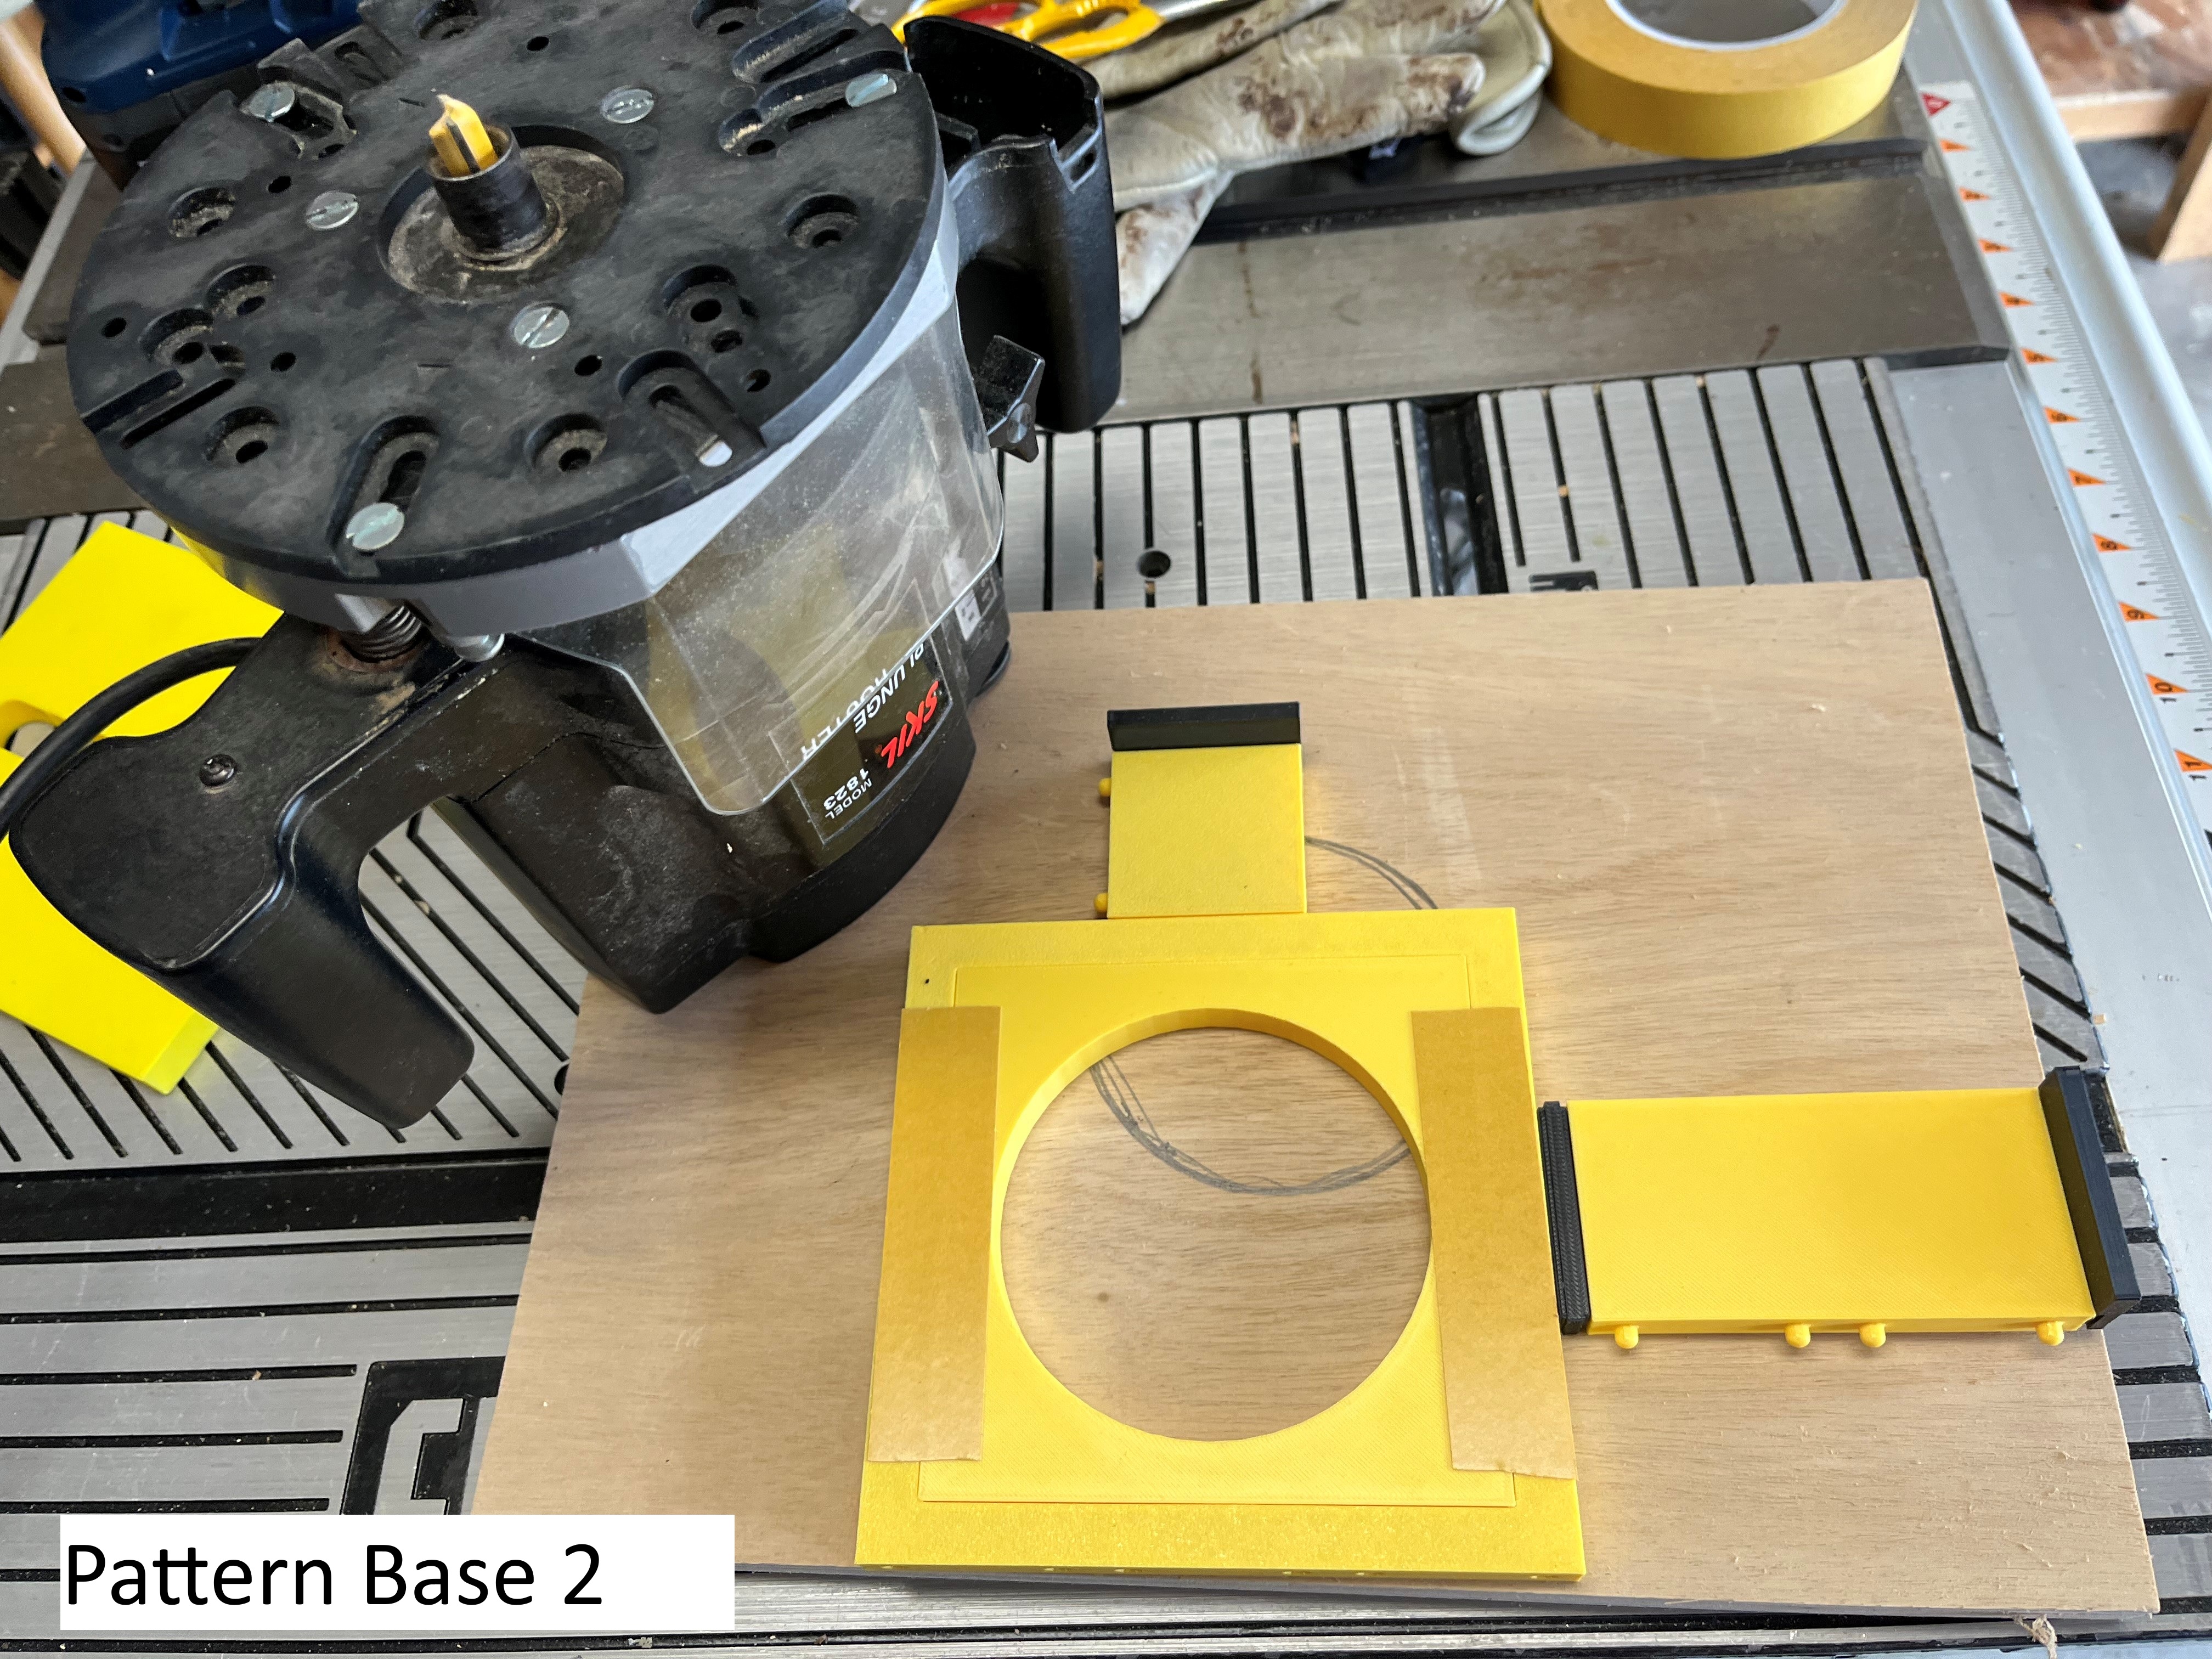
Pattern Base 2 – shows the same alignment configuration from underneath. You can see the double-sided tape ready for use and my plunge router (bit extended) with router base plate / bushing.
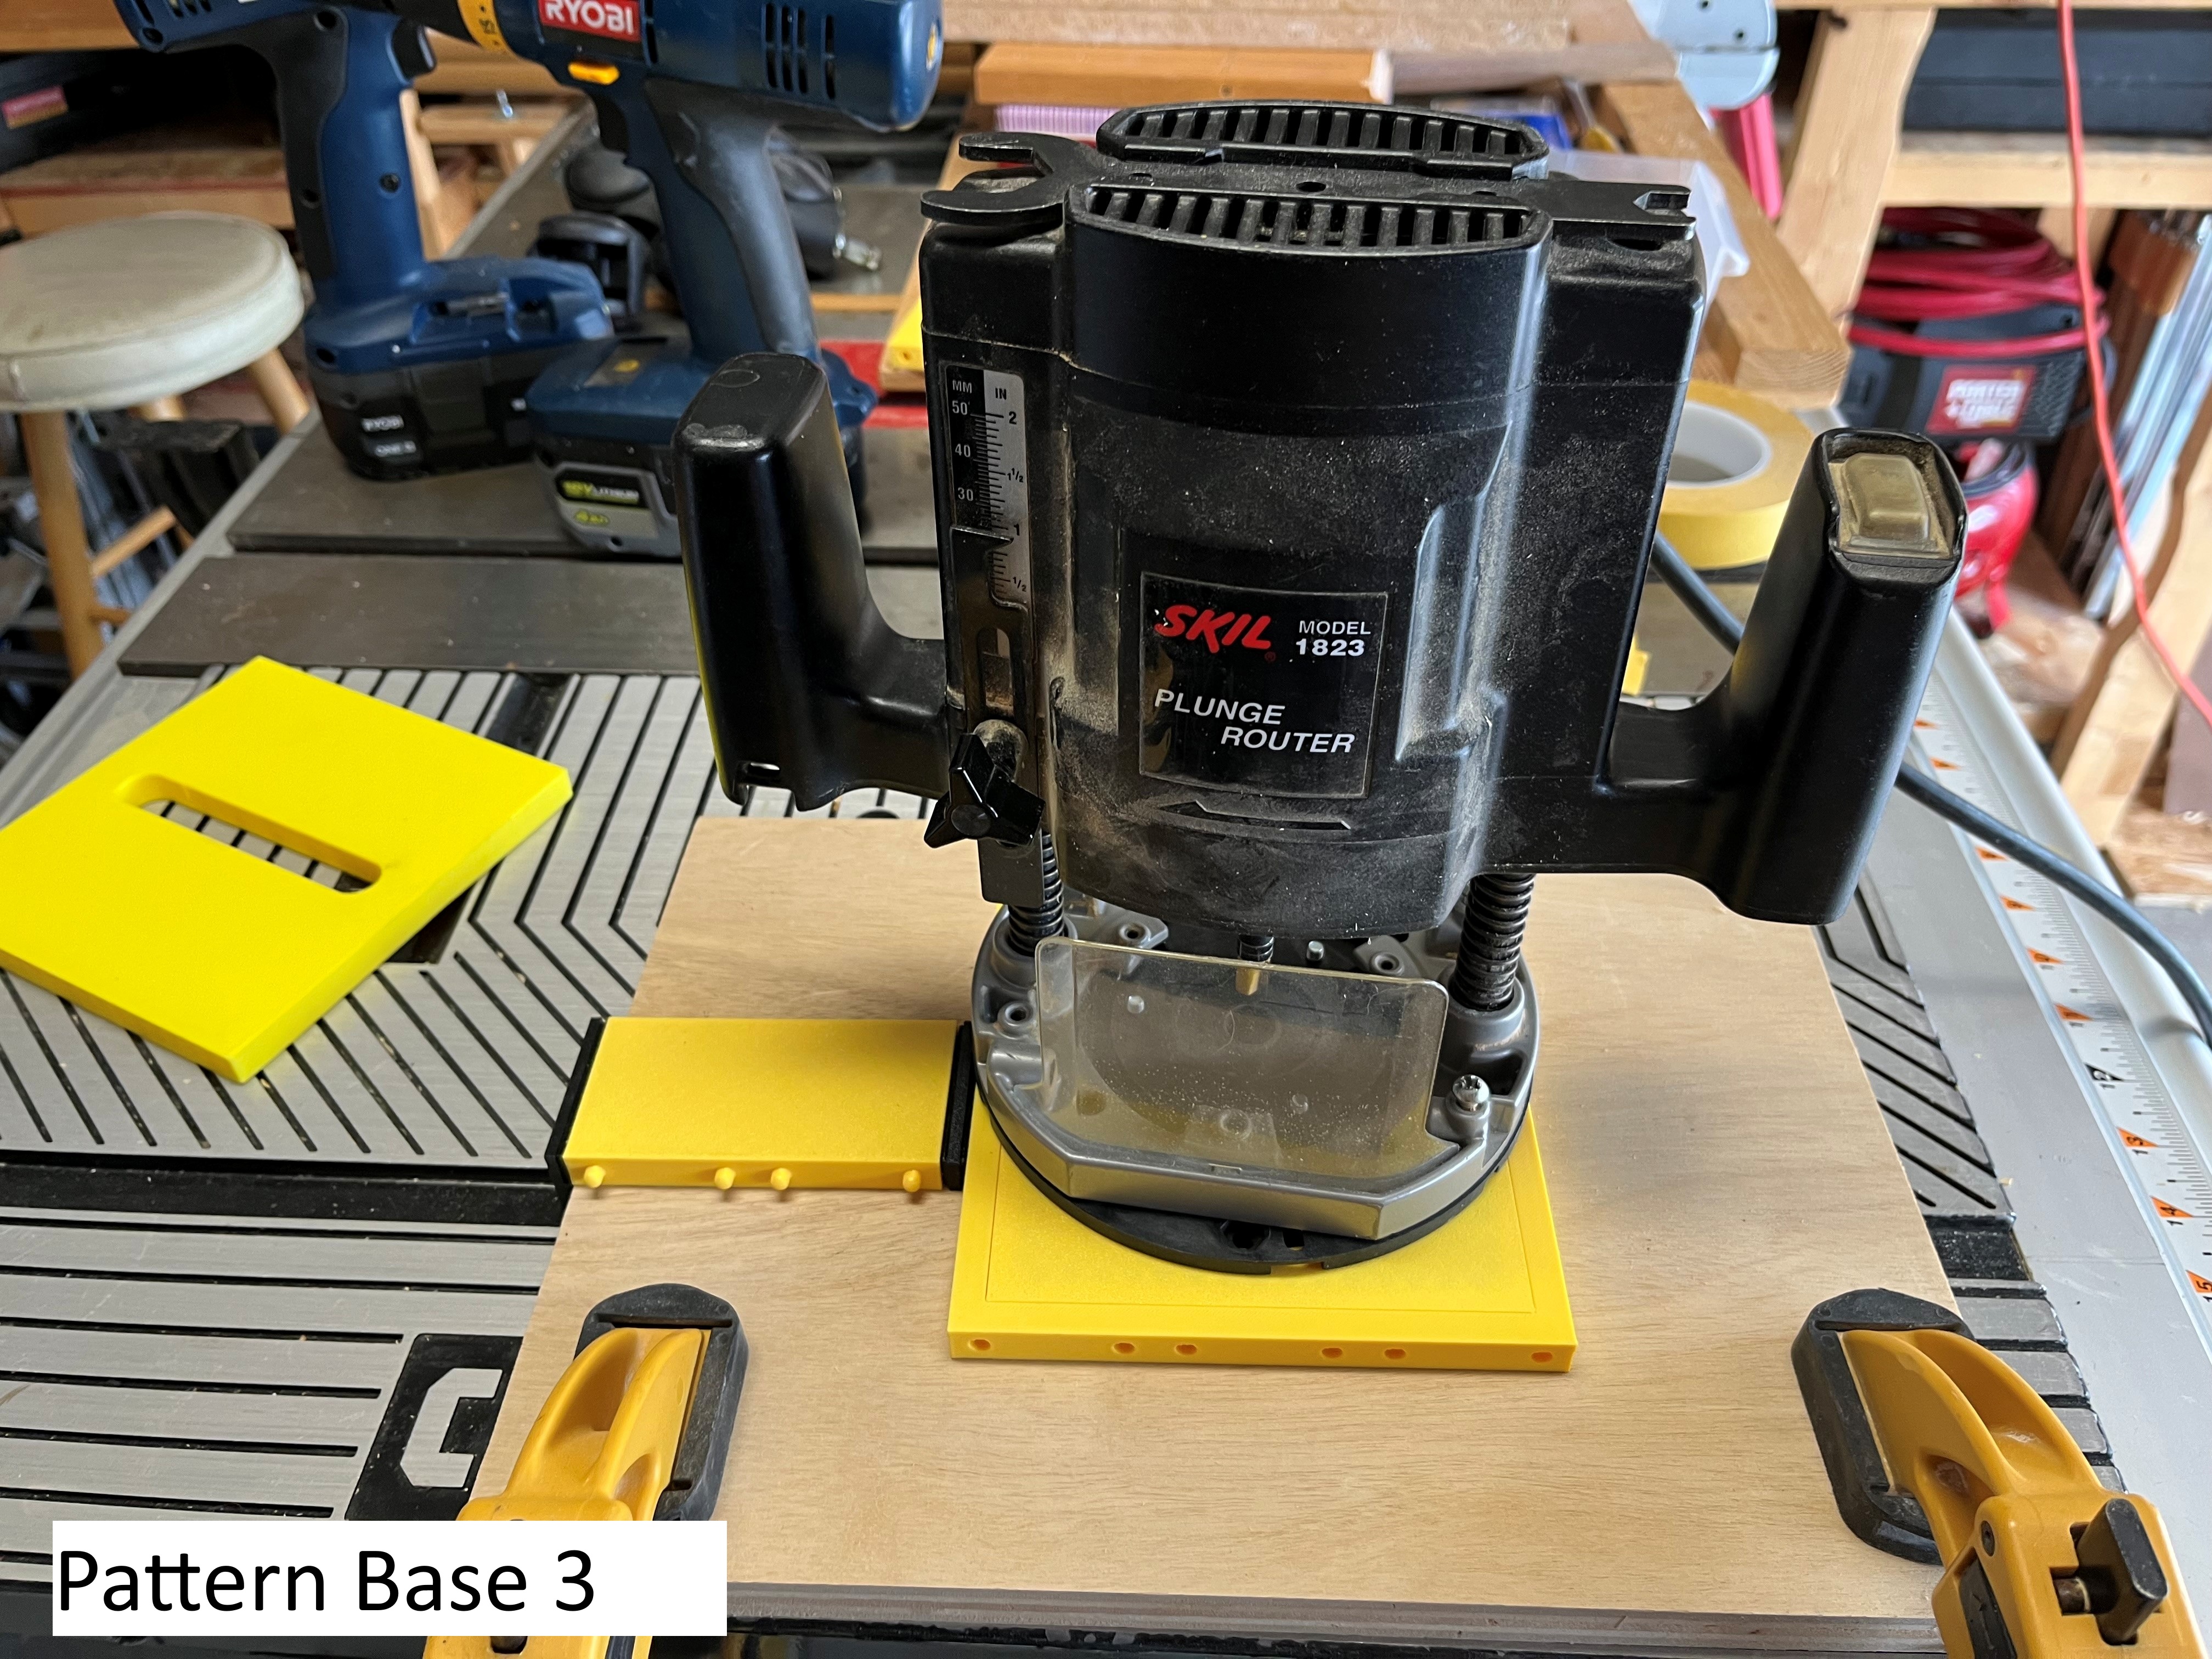
Pattern Base 3 – ready to go.
Pattern Base 4 – mission accomplished. Shows the alignment parts separated from the base plate.
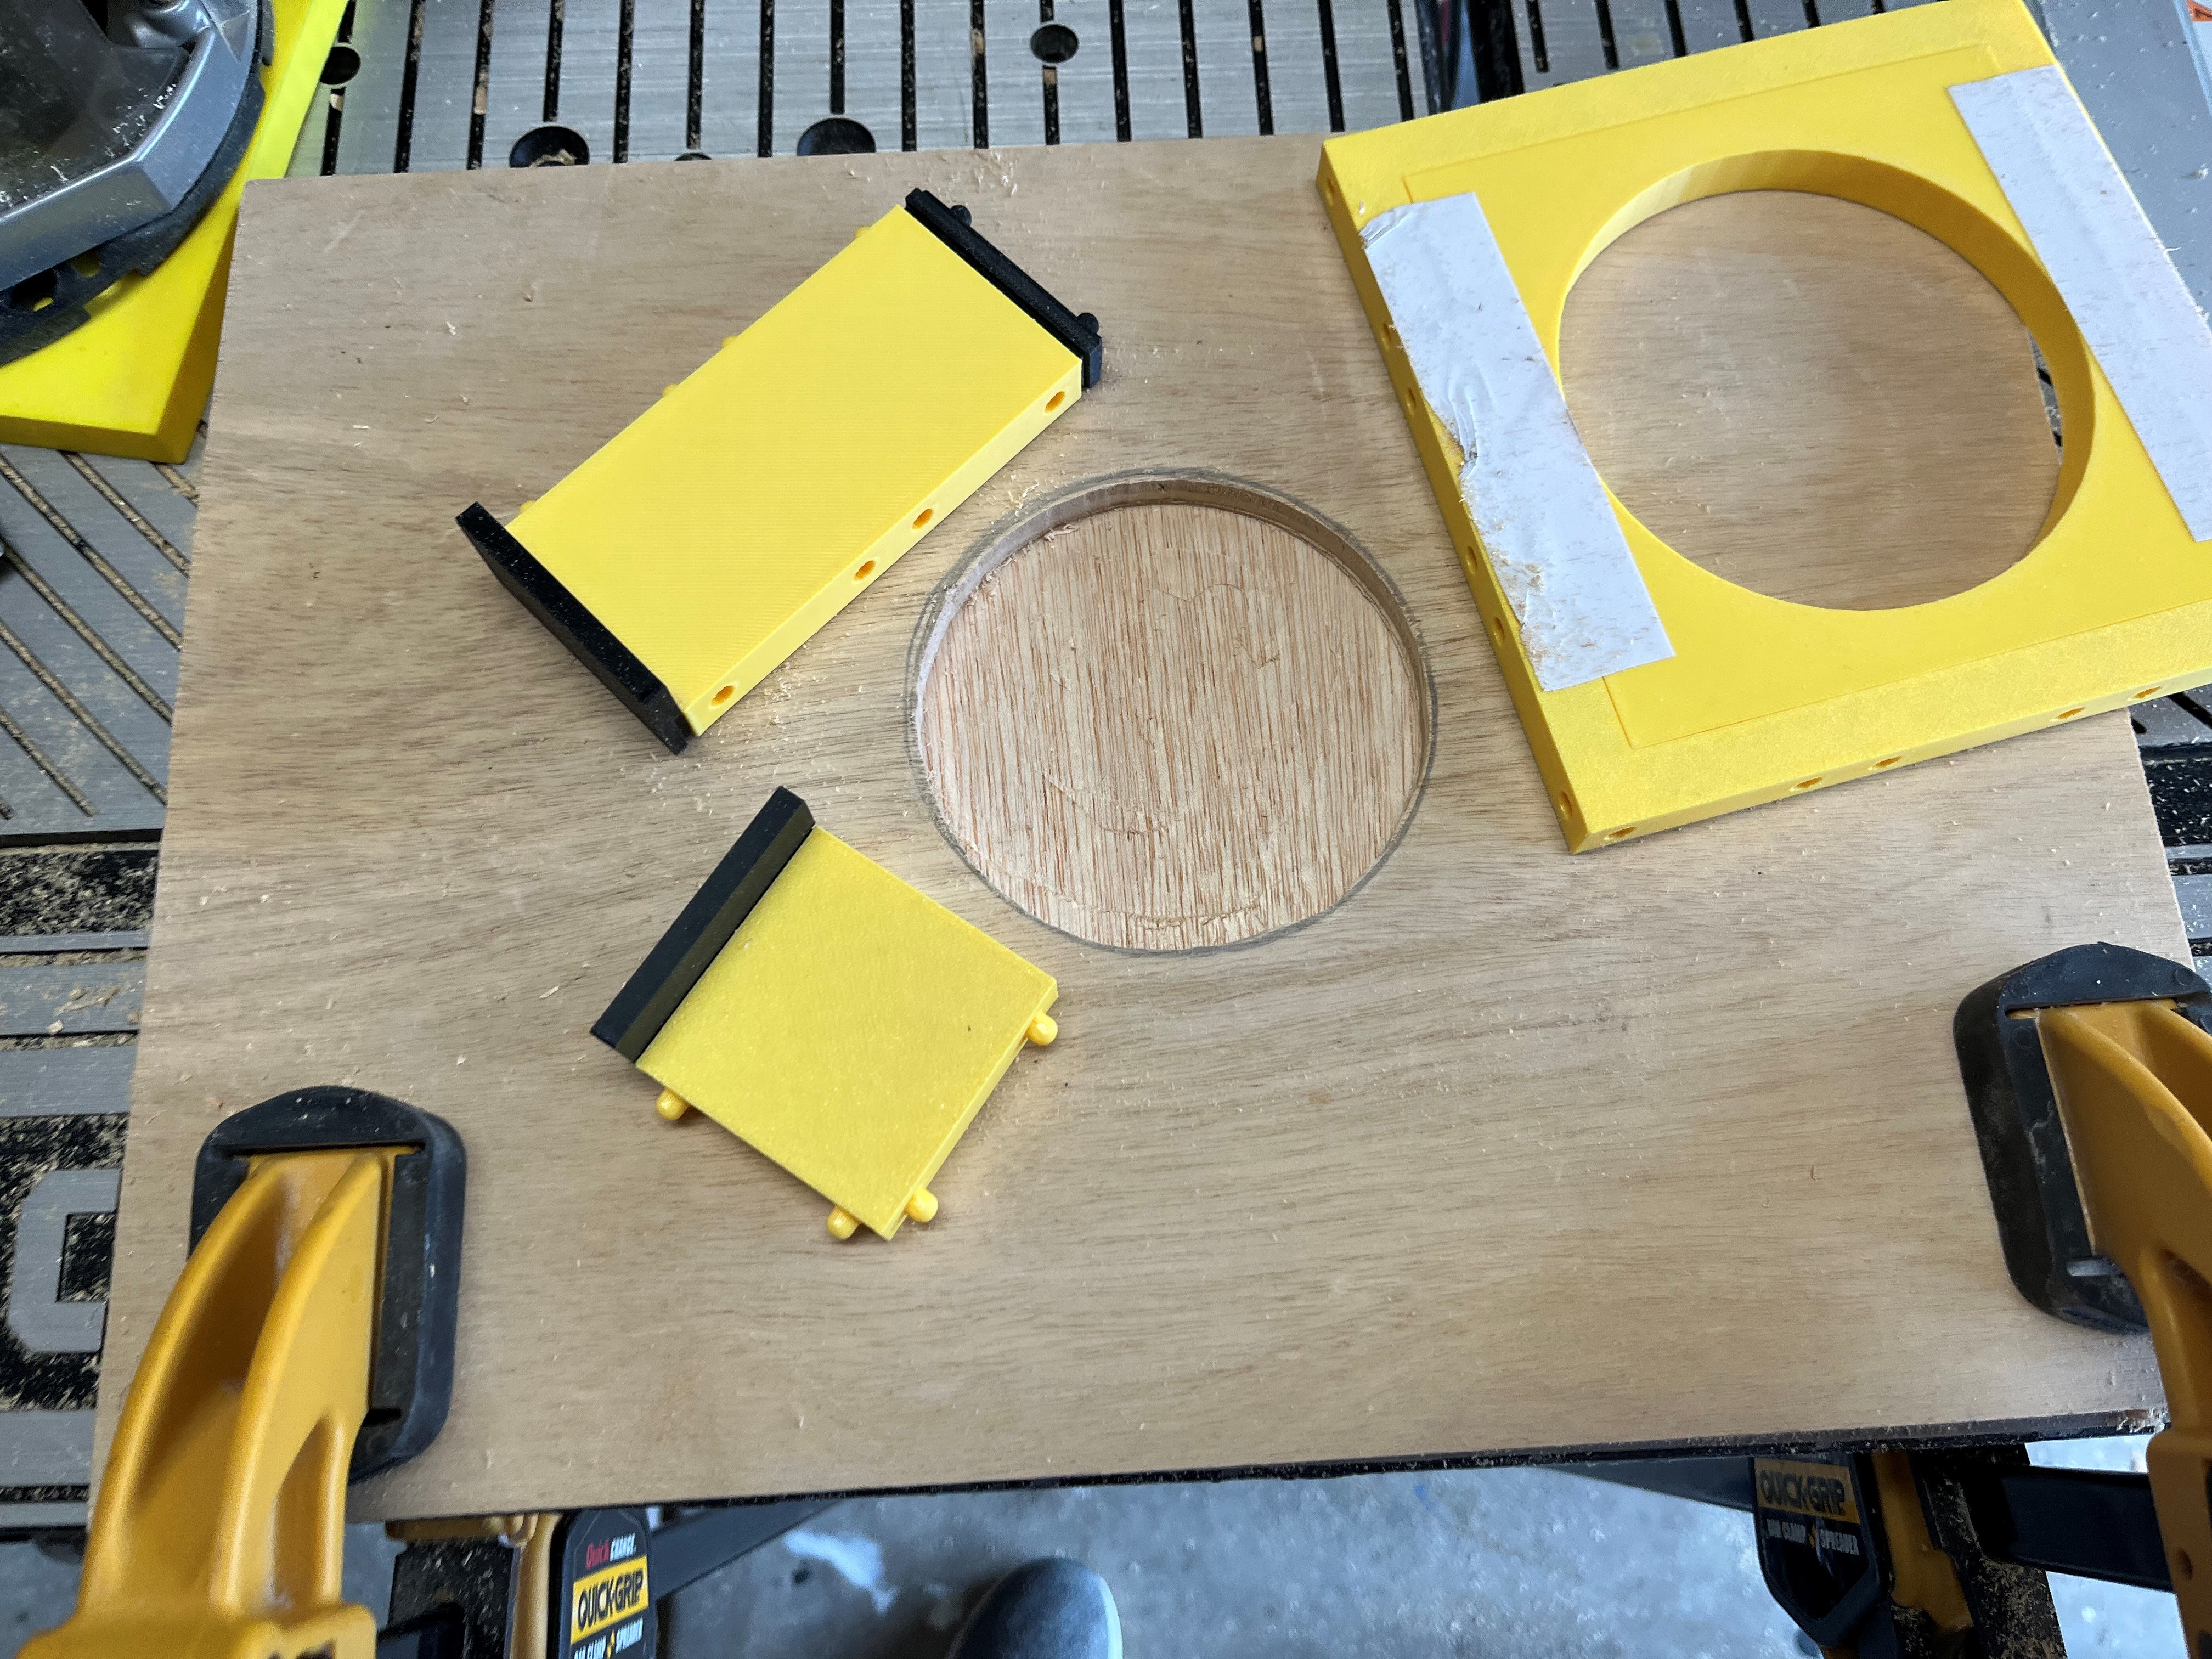
Pattern Base 5 – shows the ‘pattern’ base plate and the circle insert.

Gostou deste modelo? Crie uma conta grátis para salvar seus favoritos e voltar a eles depois.
Criar conta