Description
⌨️KeyboaStick Series🕹️
KeyboaStick is a new name for a joystick that can be easily attached to a keyboard.
Clicking on a character inside the table opens the page of the corresponding design.
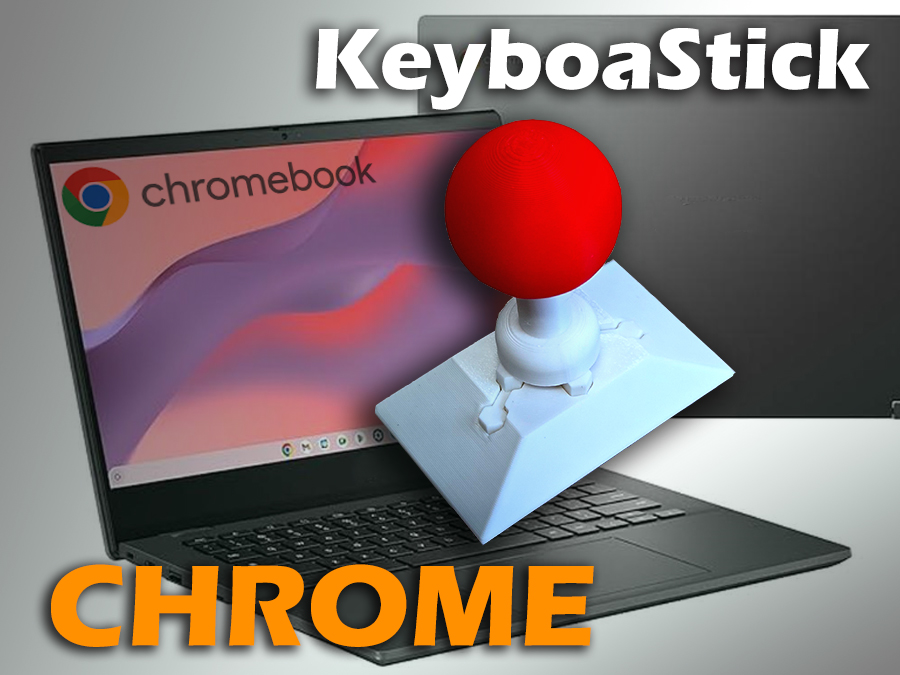
KeyboaStick Chrome is ready
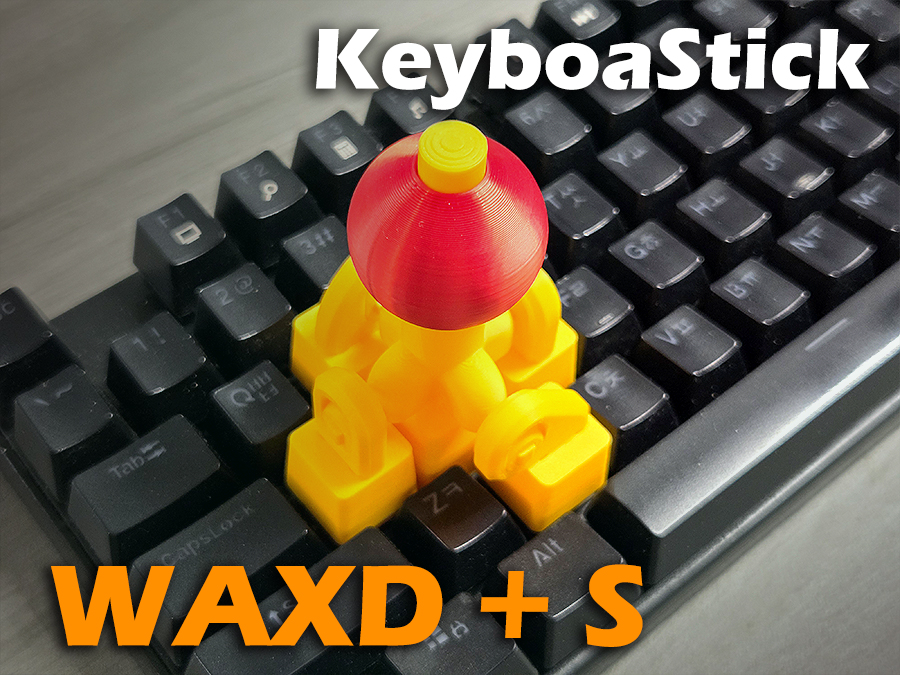
KeyboaStick WAXD+S is ready
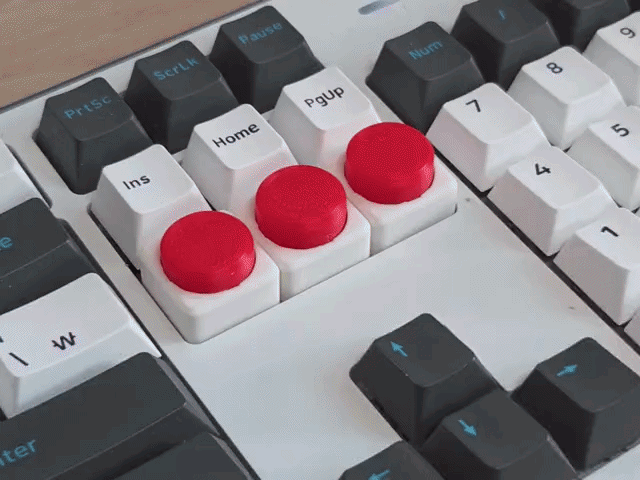
KeyboaStick Button is ready
The new NUM model released
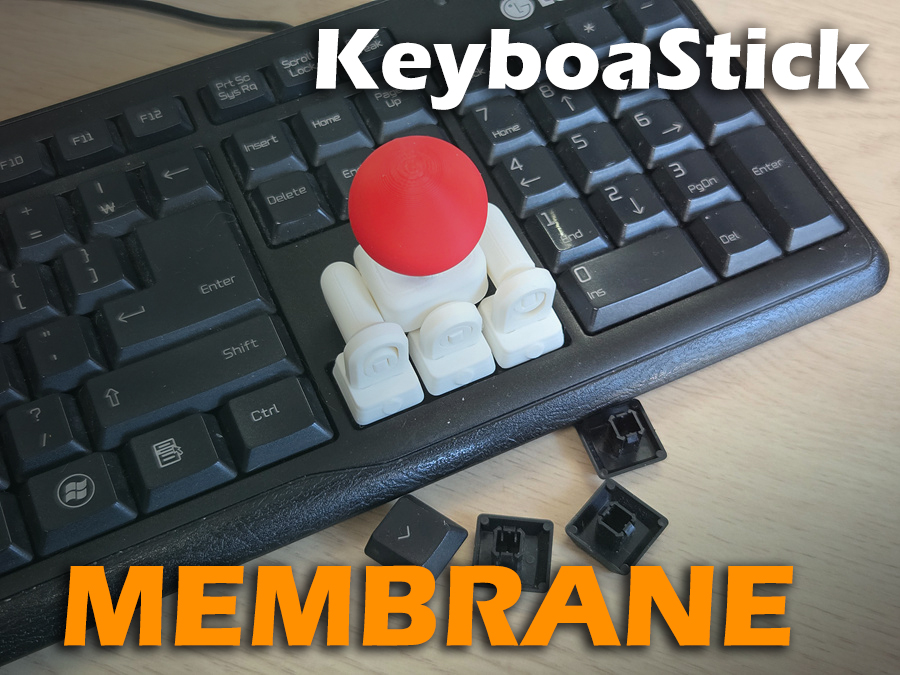
KeyboaStick Membrane is ready for those who don't own a mechanical keyboard
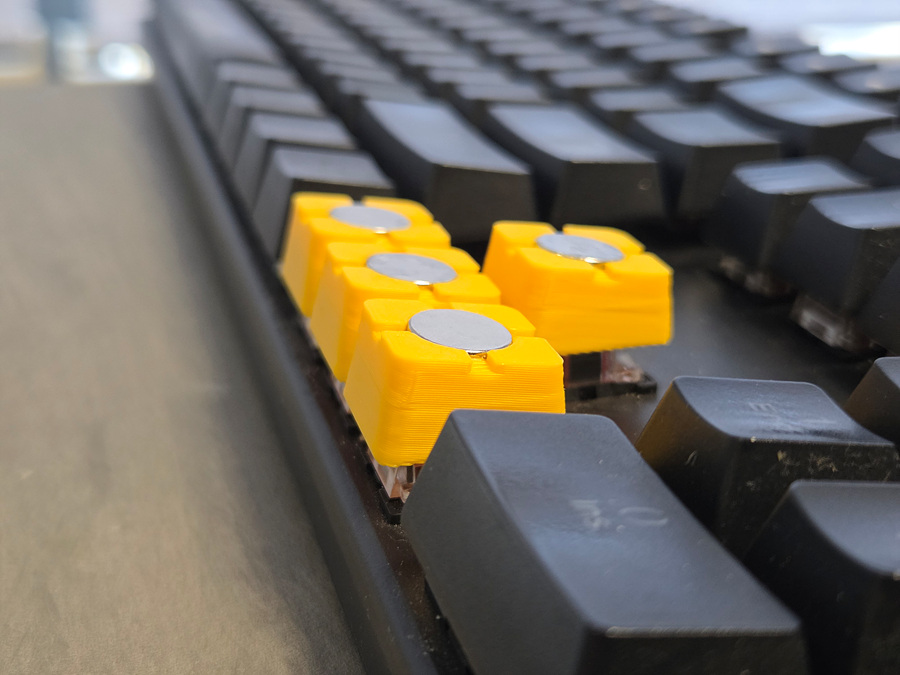
KeyboaStick MAGNET for WASD is ready
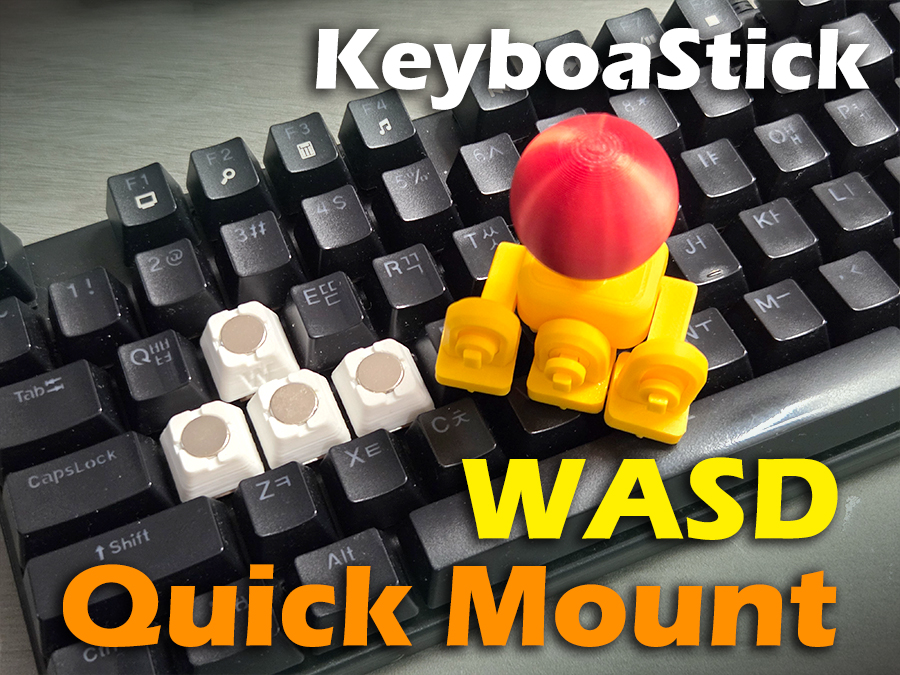
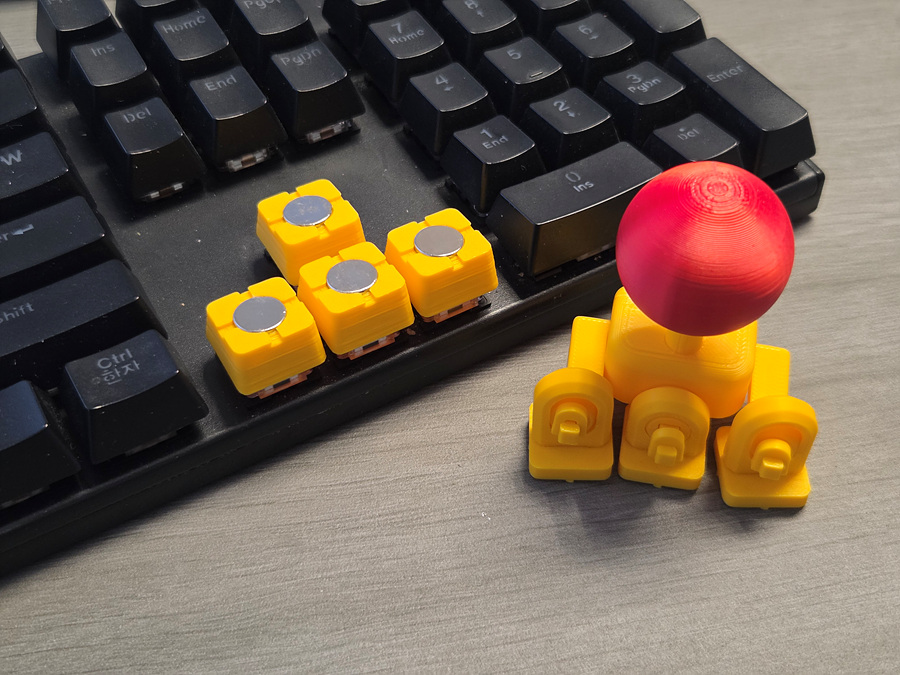
⌨️🕹️KeyboaStick MAGNET
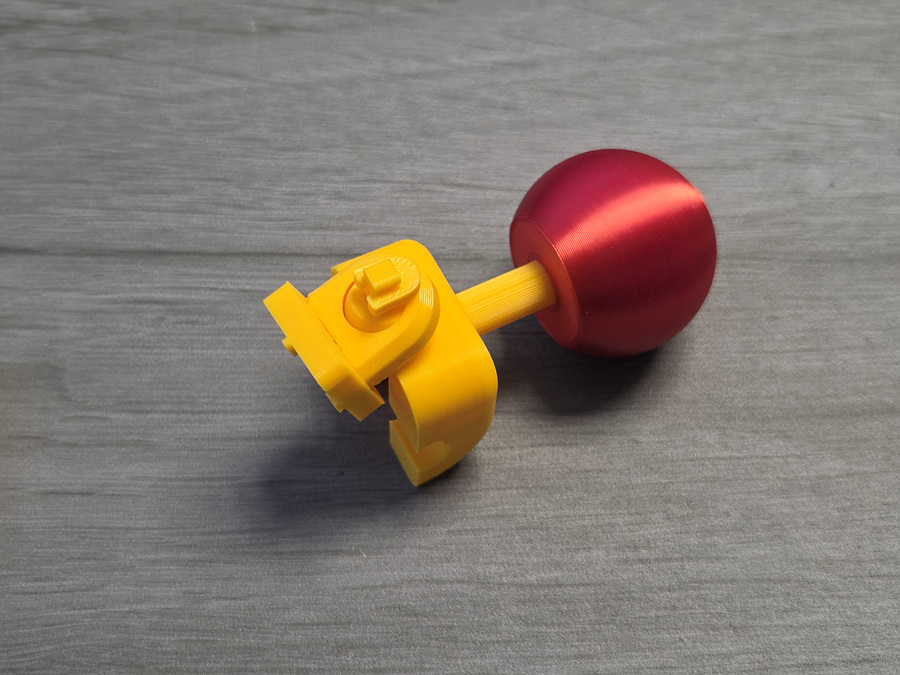
Full functional Joystick Keycap : 4-Way Mechanical Keyboard Controller
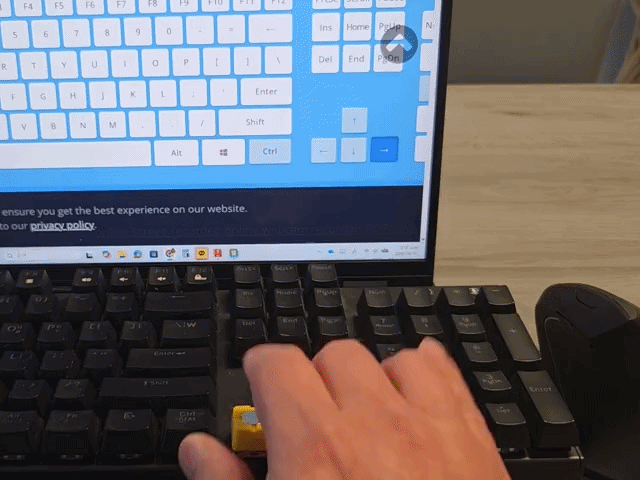
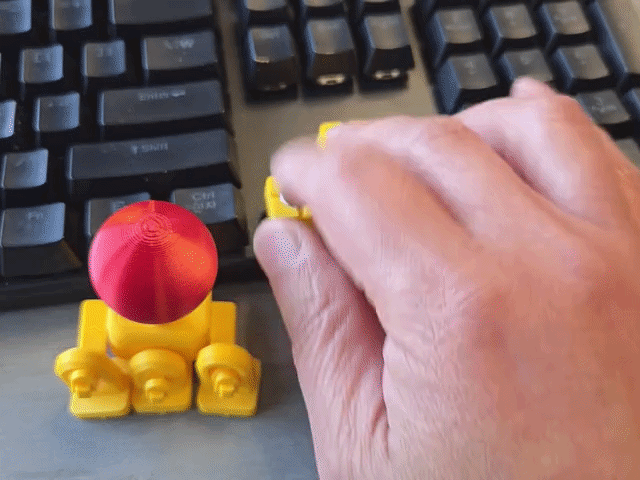
This model is designed using magnets so that it can be used as a standard keyboard and instantly attach a joystick, and conversely, instantly detach the joystick.
Since it attaches by magnetic force, it will detach if excessive force is applied. However, it immediately reattaches to its original position due to the magnetic force.
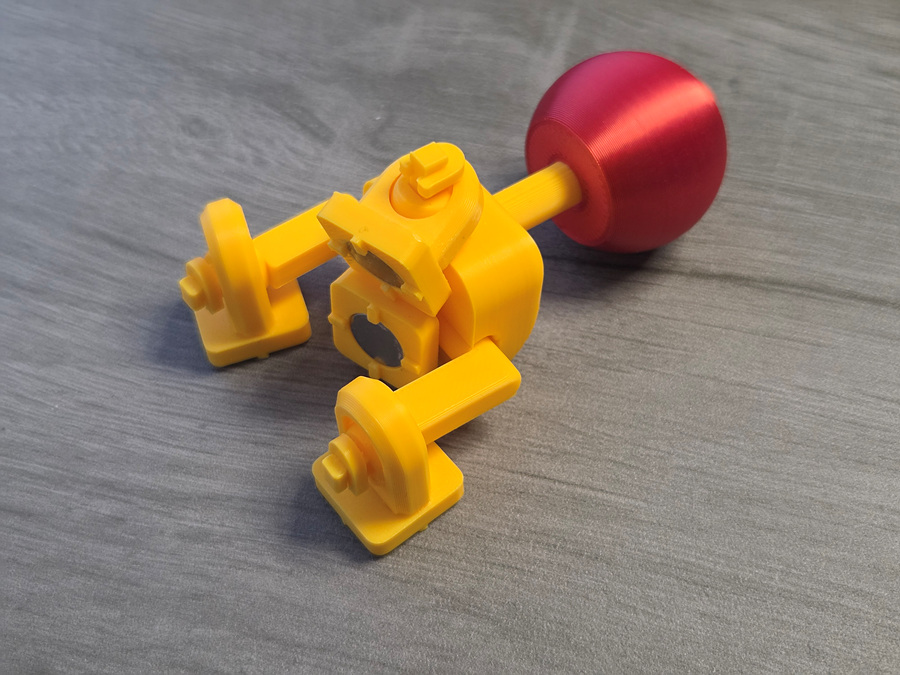
This model has a naturally raised height due to the use of magnets, so it can be used normally even if there are other keys near the arrow keys, such as on a 65% keyboard.
A quick-mount model for WASD will also be added upon request. For the WASD model, an asymmetrical part is required, and since the angle of the keycaps differs from that of the arrow keys, all keycaps must be designed separately.
Comparison with the previous models without magnets.
Pros: It can be attached and detached very easily if desired.
Cons: This model is heavier due to the addition of 8 magnets, so the switch is slightly more prone to being pressed. Therefore, more careful operation may be required.
If you are using Hall-Effect keybords.
Since magnets are attached to the keycaps of this model, errors may occur if used with Hall-Effect keyboards that utilize magnetism. Therefore, users of such keyboards are advised to use a different model that does not use magnets.
8 EA 10x2 round magnets are necessary for this model.
After testing with magnets of various sizes, we selected a specification that provides sufficient magnetic force while allowing the switch to withstand a certain weight. While larger magnets would offer better stability, the switch would not be able to support the weight in that case.

The list below shows places where you can enjoy games for free using this model.
General Licensing Statement
This model is copyrighted and its commercial use is strictly prohibited.
This falls under the Non-Commercial (NC) condition of the Creative Commons license.
If you would like to sell printed materials of this design, please sign up for a membership. Please do not become a thief.
Assemble Guide
Check if the balls in the center of the joints moves well.(The large joint is for both Side arrows; please be careful as the ball may fall out before assembly.)
Attach both arms to the one of the small keycap joints (Use glue at joint hole). Check direction as below.
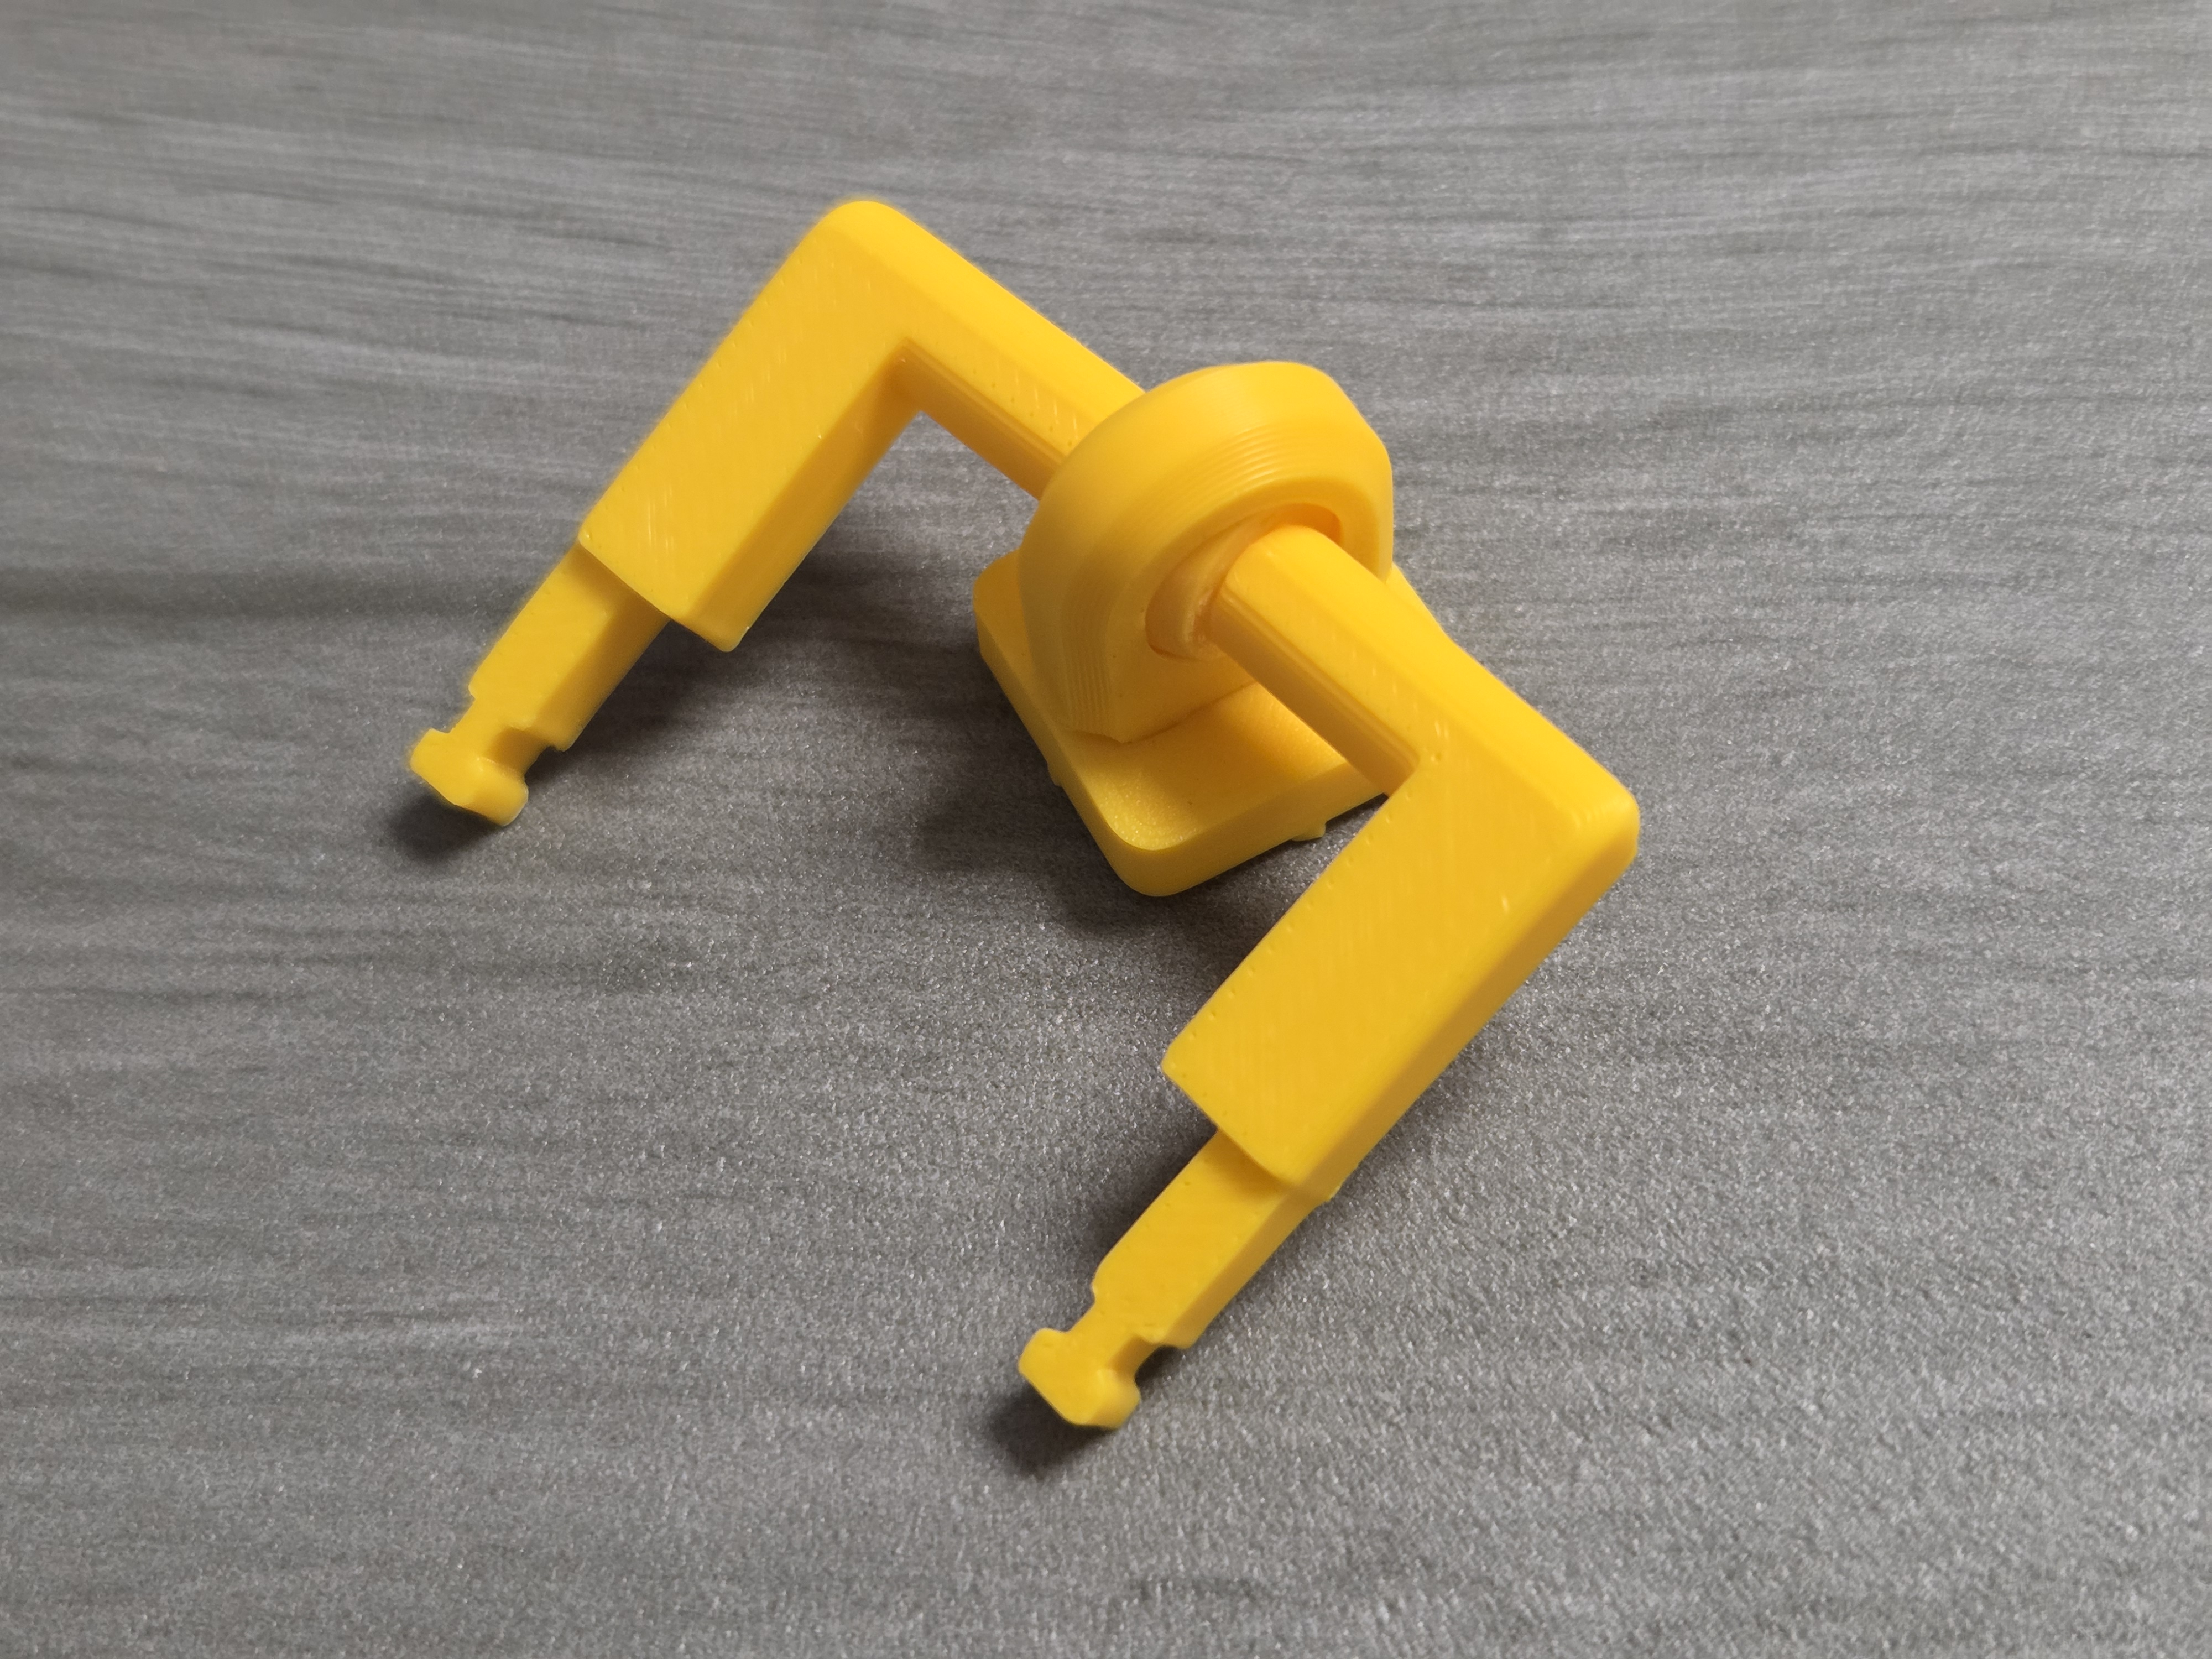
Assemble the lever and the four joints as shown in the photo below.
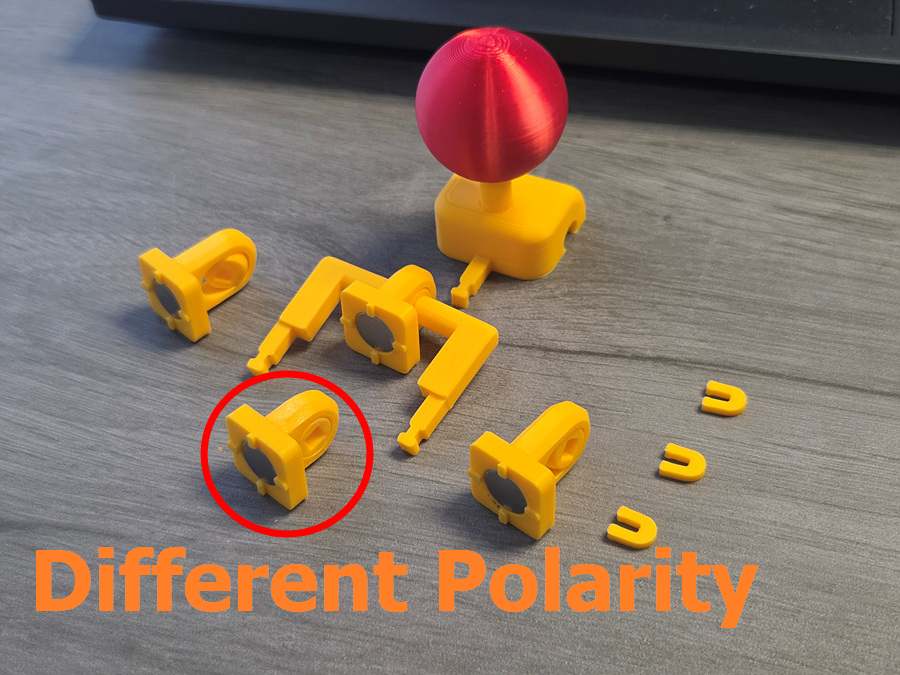
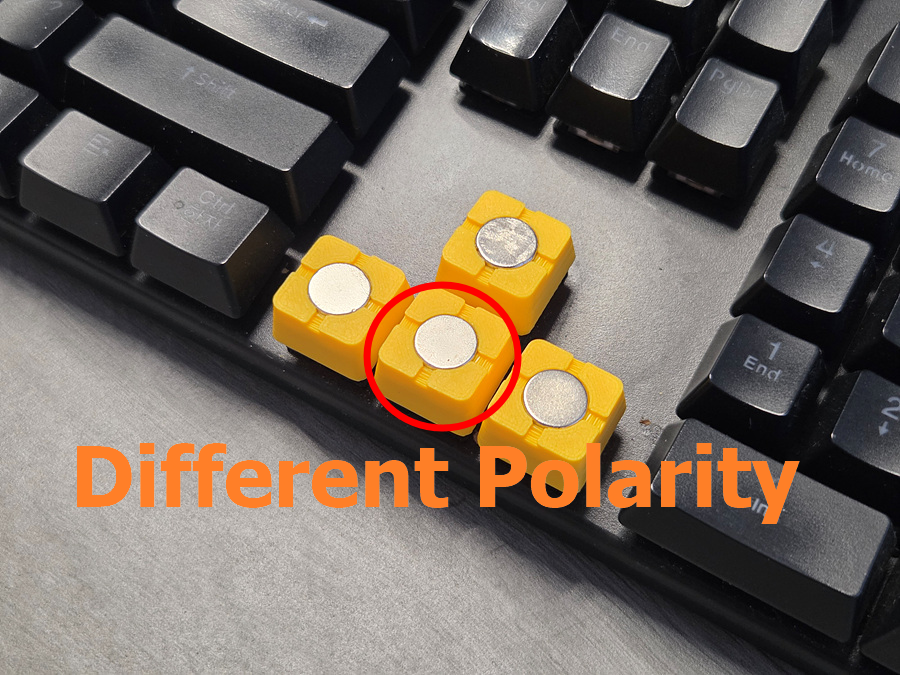
The important thing is to make only the part corresponding to the downward arrow have the opposite polarity from the other magnets.
Attach the magnets using adhesive.
There are two reasons for reversing the polarity of the magnet only in the part corresponding to the downward arrow. First, attaching magnets in a direction where they repel each other can weaken the magnetic force over the long term. Second, it automatically and quickly finds the correct mounting position when attaching the joystick module rapidly.
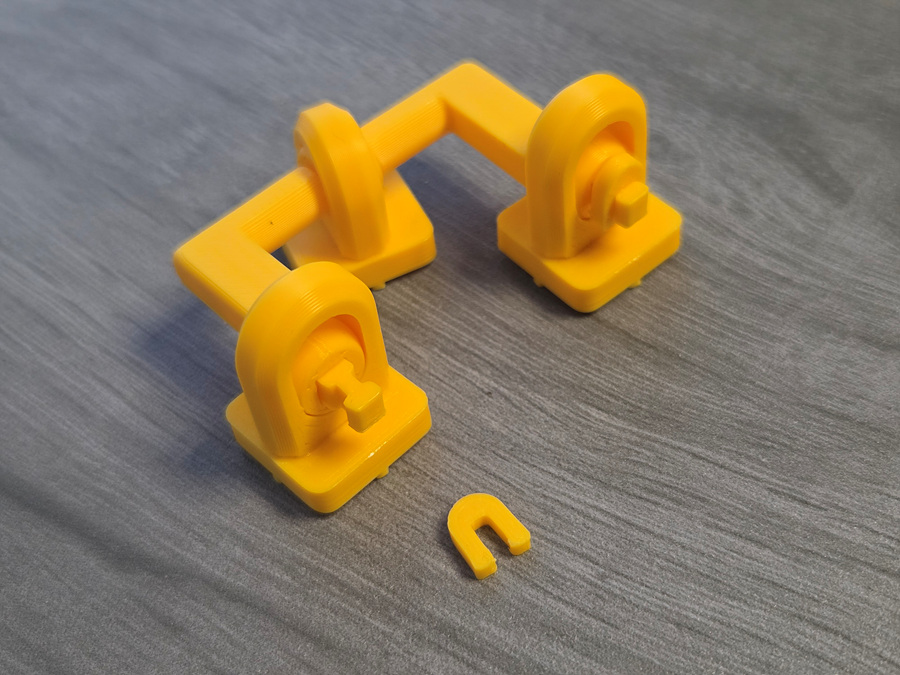
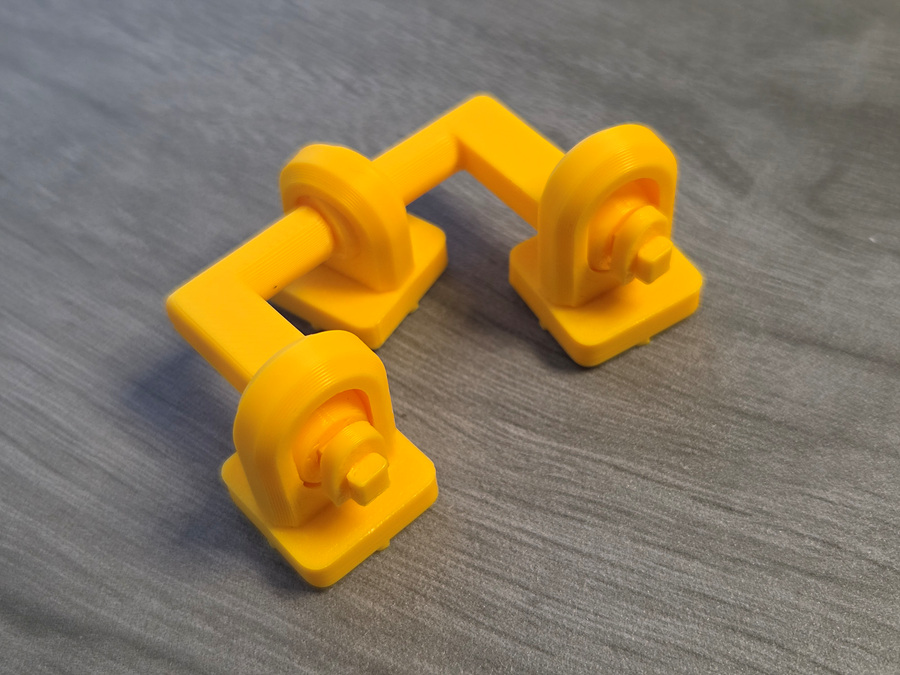
After attaching the remaining keycaps to the left and right arms, insert it into the keyboard. (Don't glue joint hole)
The joints on both sides and the joint for the down arrow are secured with clips to prevent them from coming loose when the joystick module is detached. (No adhesive required.)
Assemble the down arrow keycap as shown in the photo below. (Don't glue joint hole)
Insert lever as below picture (No glue)
The important thing is to make only the part corresponding to the downward arrow have the opposite polarity from the other magnets.
Attach the magnets using adhesive.
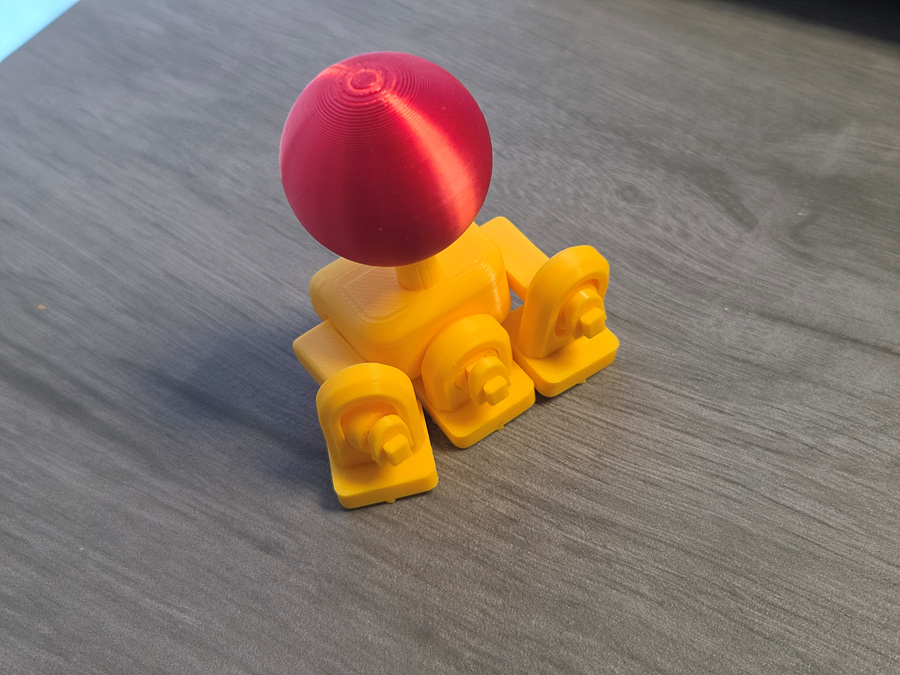
Congratulations. You now have the perfect joystick.
🛠️ For a Perfect Fit: Troubleshooting Guide
The KeyboaStick series is designed to fit standard MX-style switches perfectly. However, depending on your printer’s calibration or filament shrinkage, the fit may occasionally feel loose.
If you experience a loose connection, please try the following simple solutions:
1. Slicer Adjustment (Recommended)
You don't need to change your entire profile. Just adjust this single setting to tighten the fit:
- Setting: Hole Horizontal Expansion (in the Precision/Quality tab)
- Value: Input -0.05mm or -0.1mm
- Effect: This slightly shrinks the inner dimensions of the cross-stem hole, ensuring a tighter grip on the switch.
2. Fine-tune Flow Rate
Increasing the flow rate slightly can help bridge the gap:
- Adjustment: Increase your Flow Rate (Extrusion Multiplier) by 1–2% (e.g., from 0.98 to 1.0).
- Effect: This thickens the walls of the stem mount, making the connection more secure.
3. Quick Physical Fix (No Re-print Required)
If you've already printed the model and it feels a bit loose:
- The Plastic Wrap Trick: Place a tiny piece of thin plastic wrap (clinging film) or a small scrap of paper over the switch stem before pressing the KeyboaStick on. This instantly eliminates any wobble.
- Coating: Apply a tiny drop of superglue inside the cross-hole of the KeyboaStick. Let it dry completely before mounting it to create a thin, grippy internal layer. (Warning: Do not mount while wet!)
_______________
You may also like…
3 in 1 Laptop Stand

Overflow Keycap
Chainsaw Fidget
Joystick Keycap - KeyboaStick MAGNET

Published on Apr 5, 2026