Você está no 3DFinder
Buscamos em Thingiverse, MakerWorld e Printables ao mesmo tempo para te dar o melhor de cada uma.
Descrição
🥕 Before you print: Please read Special Considerations below 🥕
🧼 Clean build plate is a must 🧼
This kit card builds an adorable mini Easter basket. Capacity is 3 jelly beans or 7 “micro” eggs.
- Easy to build* with printable instructions
- Print single colour or multicolour
- Sized for batch printing: can fit x4 on the A1 mini and up to 8 on P-series and X-series
- Title text is customizable in Bambu Studio
- Great for party favours, gifts, or group activities!
* Recommended unassisted build age 10+, otherwise adult assistance is required, always do a test build yourself to gauge suitability
Print in the style you want:
- Single colour → Makes a fun trading activity when printed in a variety of single colours
- Multicolour → Ready-to-build in 2- or 4-colours! Pair one with some “micro” Easter eggs for a last minute gift
🐰 Single Colour | 🐰🐰 Multicolour (AMS) | |
| Print Time x1 card* | 30 min
| 60 min (2-colour) 78 min (3-colour) 98 min (4-colour) |
| Print Time x4 cards* | 1.9h | 2.3h (2-colour) 2.6h (3-colour) 3.0h (4-colour) |
* Approximate, does not include any prepare time, based on X1C printer with Bambu filament profiles

🐇 Table of Contents 🐇
Most people don't have problems with my models as I rigorously test everything I create. But for the few that do, having solutions and tips ready-to-go is quicker than waiting for me to answer ☺️
If you're already familiar with printing kit cards, you can skip most of the following (except Special Considerations) and go straight to section 2 for the assembly guide.
- Special Considerations – if you read nothing else, please read this section
- Assembly – diagrams and building tips
- Print Information – best practices, tips, process settings, filament recommendations
- Text Customization – how-to for those who haven't done it before
- About – design inspiration, commercial licensing, etc.
1. Special Considerations – please read before printing
- ⚠️ Small parts. Choking hazard. This is a miniature. It is not suitable for young children.
- ⚠️ Flush cutters or sharp pointed scissors required. If you don't want to cut out parts, print the separate parts instead.
- ⚠️ Adult assistance required for assembly. Kids ages 10+ should be able to assemble unassisted on their own. Always test build beforehand.
- ⚠️ Clean build plate required. Small details will get dragged if the plate isn't clean. Print profiles contain settings which will help adhesion but cannot perform miracles 😥. Please see this wiki article for correct plate washing procedure.
- If you scale up the models yourself, I make no guarantees of model quality or fit as I haven't tested it myself.
- The parts are snap fit though some glue may be advisable for certain parts or if it will be played with.
- Textured build plate recommended when printing kit cards. The sprue points are fragile and can break upon removal from a high-tack plate such as smooth PEI or some of the newer “blue” plates.
2. Assembly
General Tips
|
Assembly Guide is also available as a downloadable paper-printer ready PDF. See the Documentation section below.
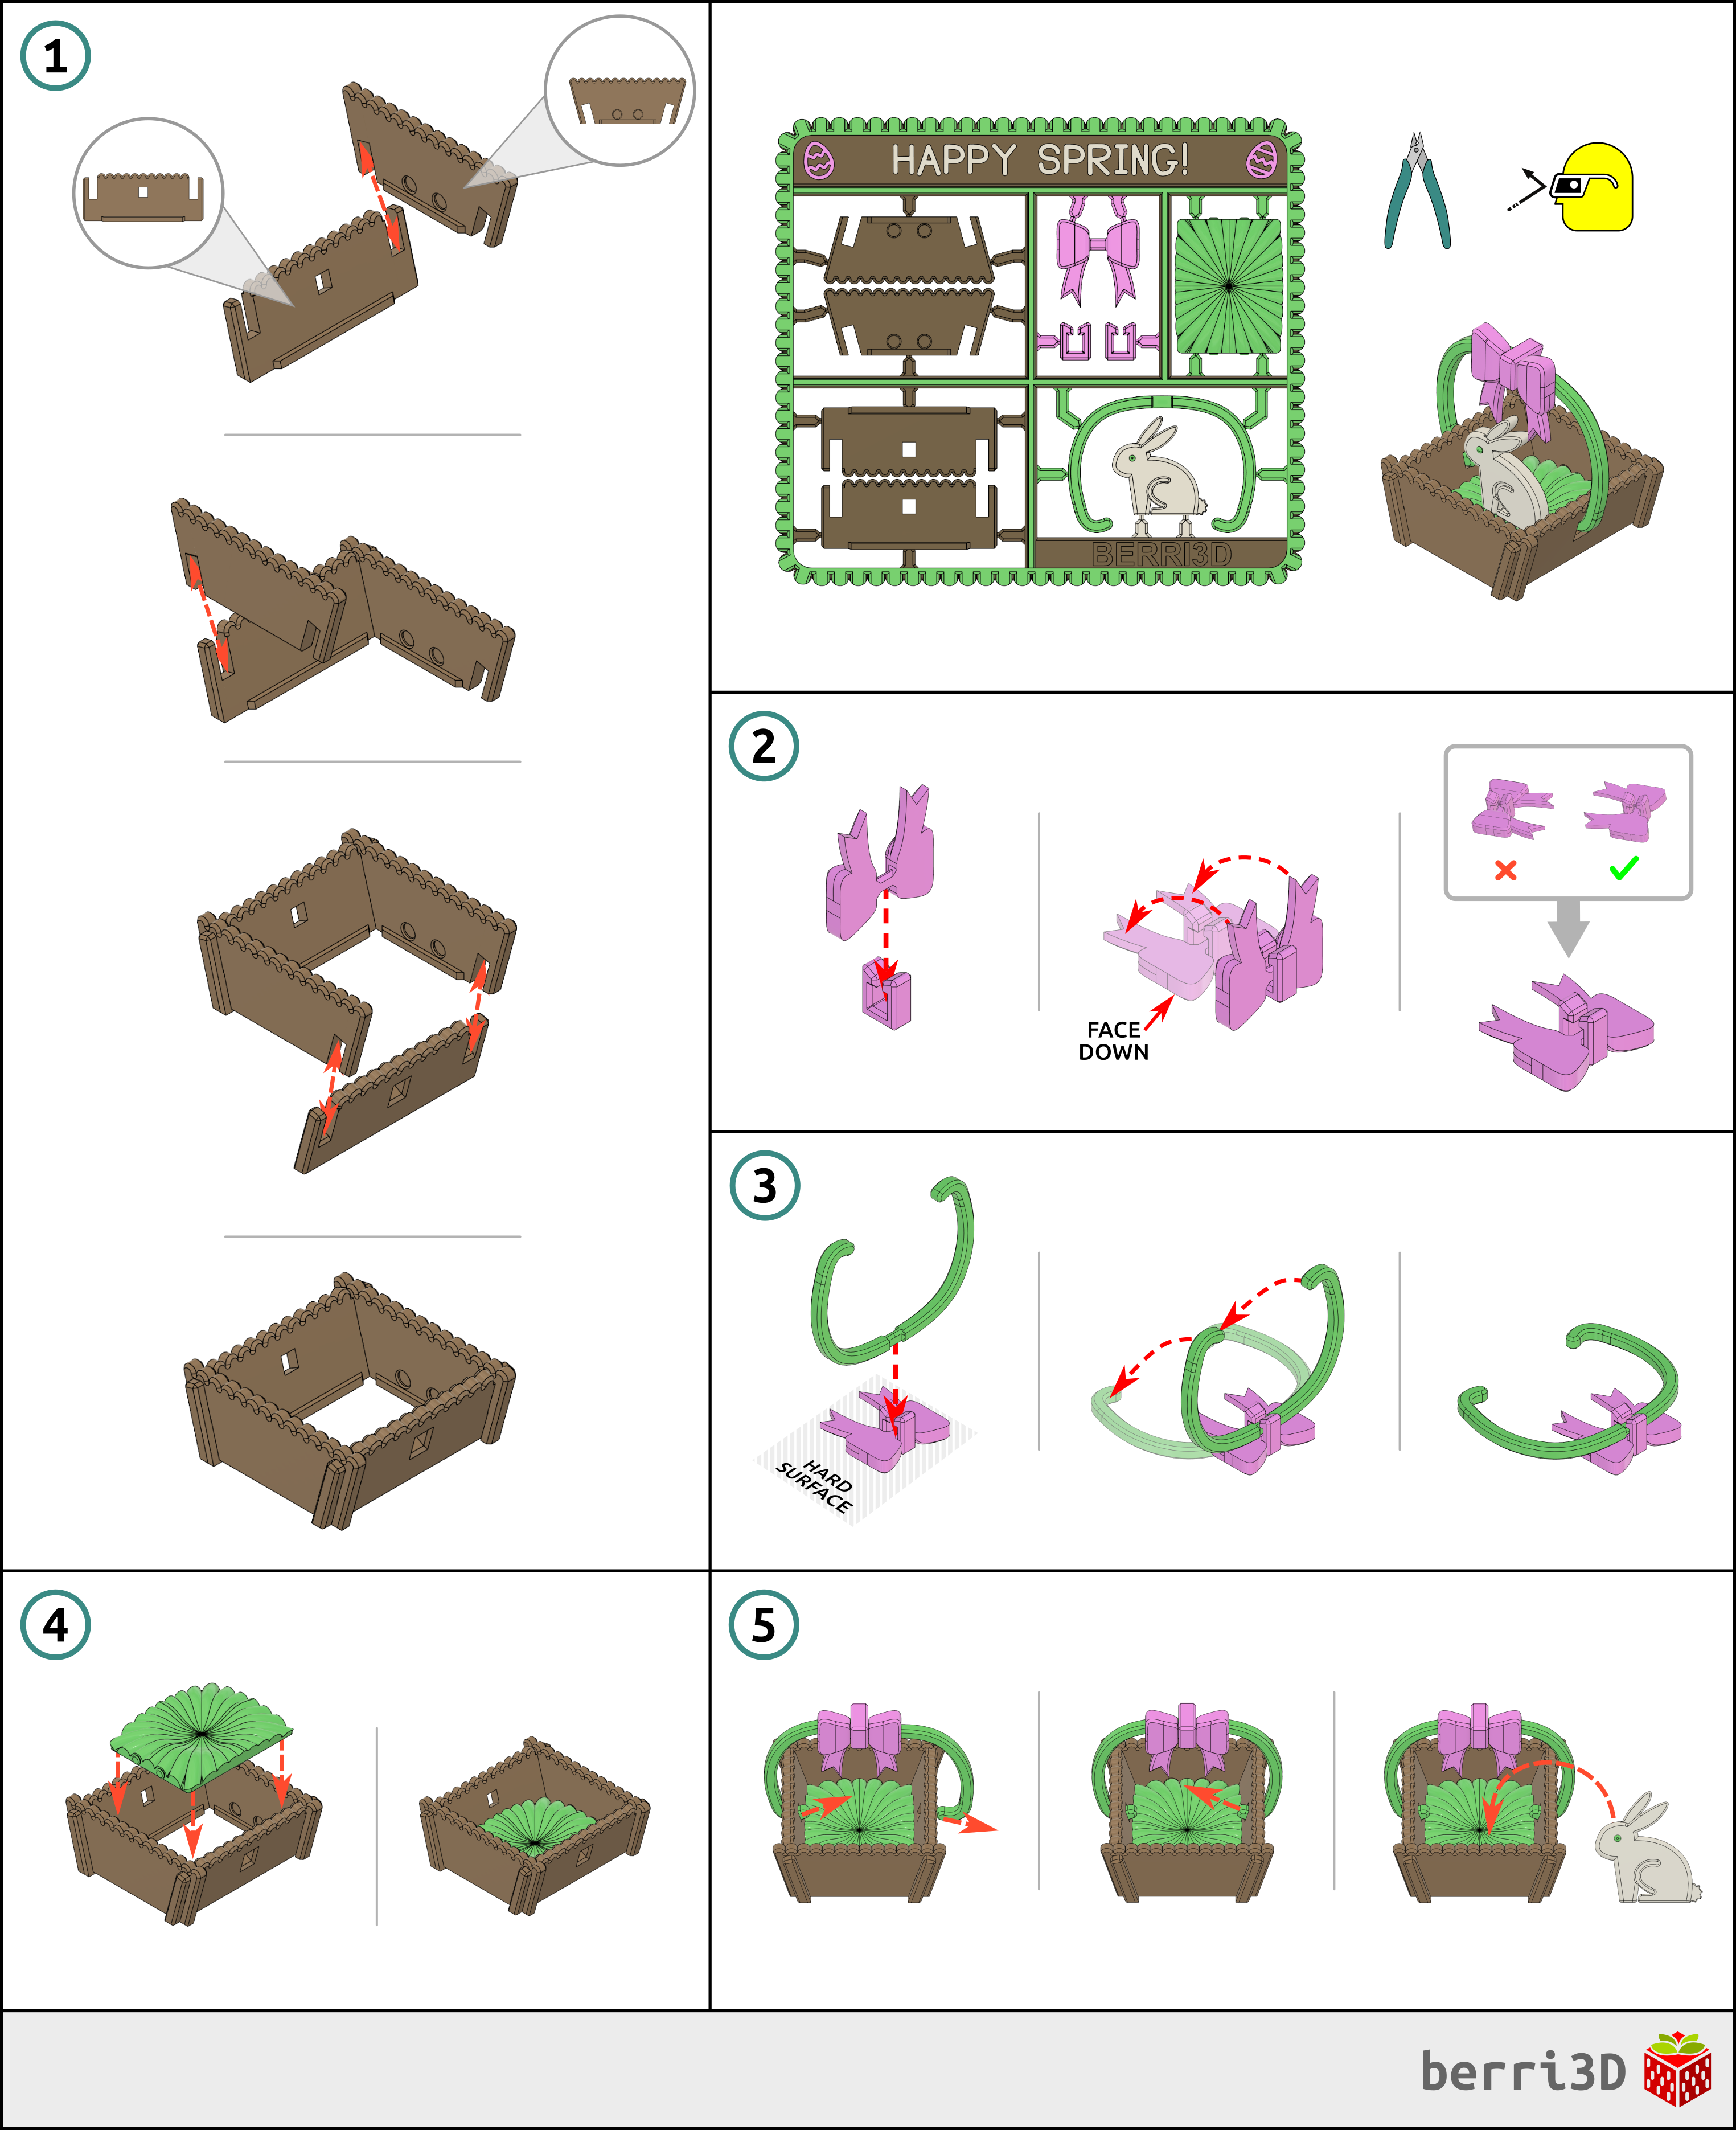
3. Print Information
💡 Best Practices
- A properly cleaned build plate is vital for printing small and detailed items.
- Do not batch print build kit cards without first printing a few smaller pieces to check fit: This will help save you filament by identifying fit issues before committing to a full multicolour plate. Seed packs do not need test prints as they are designed to be loose fitting.
- Be careful when removing kit cards from plate: sprue connectors can break prematurely.
- Use a textured plate. High tack plates often break delicate sprue tips.
- Let the plate cool completely. As parts cool, they contract and will often detach on their own.
- Still attached? Remove the plate and flex it gently by the edges. Go slowly and bend in all directions until they pop off. Don't touch the printing surface of the plate while doing this as skin oils transfer quickly.
🎨 Suggested Filaments
For best results, I recommend basic PLA (not silk or matte) for all parts. Matte filaments produce “softer” parts which may deform or bend where they shouldn't. Silk filament can be brittle or have fit issues.
I’ve tested this model extensively using the following filaments. Test prints were made using calibrated and non-calibrated (default) profiles on a Bambu X1C and were found to have a good fit between parts. Your results may differ due to filament colour/type/brand, and printer.
| Brand | Type | Colour(s) |
| Bambu | PLA Basic |
|
🖨️ Print Process Settings
Models were prototyped on a Bambu X1C with a 0.4mm nozzle. These are the process settings I used and which are contained as part of the print profiles. Please note that changing layer height, using a smaller nozzle, or scaling models up may result in poor print quality such as parts not fitting together.
| Setting | Value | Reason |
|---|---|---|
| Layer height | 0.2 | Part fit and colour swaps were designed with this value. Changing this value will throw off colour changes and part fit. |
| Seam placement (all parts except for grass, bunny, and sprue) | Manually painted | I've painted “do not put seam here” to areas where a seam placement would weaken the part. Overriding this placement will result in parts more likely to bend or break. |
| Wall generator | Classic | Prototyped with this generator. Changing to Arachne may make parts not fit. |
| Wall order (first layer modifier only) | outer/inner | Printing the outer wall first gives any tiny inner walls something to stick to. Only applied to the first layer as it's inadvisable to use for the entire model. |
| Only one wall on top surfaces | Not Applied | Results in a nicer top surface to the parts. |
| Elephant Foot Compensation | 0 (off) | Chamfers have already been applied to the parts. This setting shrinks the first layer too much on top of the chamfers so it should be off. |
| Wall loops (all parts except handle) | 2 | Default. These do not need strength. Increasing this value may affect fit. |
| Wall loops (handle) | 3 | Increases strength for this part |
| Sparse infill density/type | 10% / gyroid | As this isn't a weight-bearing model, less infill results in faster printing. |
| Object flow ratio (only applied to the “eggs” in the corner of the sprue) | 0.9 | This extra small mesh benefits from reduced flow (less “blobby”) |
| First layer speed | 20 mm/s | Slower speed allows complicated first layers enough time to cool and adhere. |
| Outer wall speed (all parts except handle) | 100 mm/s | Slower outer wall speed is better for overhangs and overall surface quality. You can increase this speed but the quality may not be as nice. |
| Outer wall speed (handle) | 50 mm/s | Forces tiny bridge in the middle of the handle to print slowly, will also create a stronger part. |
| Prime Tower Rib Wall (batch print plates only) | Disabled | Disabling this allows for resizing of the prime tower so as to fit more cards per plate. |
| Print Tower width (batch print plates only) | Various | Sized as needed to fit on batch printing plates. |
📏 Adjusting Fit of Build Cards
How well a build card fits together depends heavily on your machine, filament brand, and filament type/colour. I do my best to make models that assemble smoothly across a range of filaments, but as there are too many variables to account for, tuning by the end user (that's you) may be required.
There are two ways to adjust fit of cards but it depends on the type of model that you're printing.
- Multicolour kit cards → Adjust flow rate up or down.
- Separate parts → change X-Y contour compensation by ± 0.03
Note: these values are guidelines only and may need further tweaking.
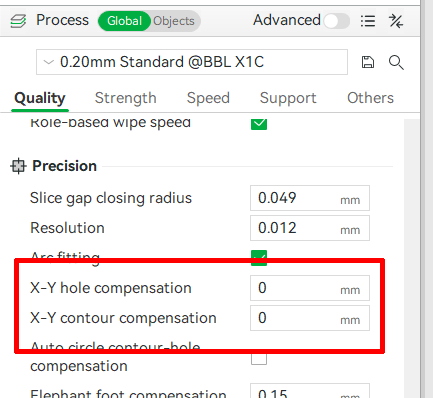
4. Customizable Text
The text on all the kit cards in this set can be changed within Studio. Make your own greeting or even translate it into a different language! You will need to download it into Bambu Studio (not Handy) to change it there. If you've never done it before, this video is a good all-round primer on how to do it. Just remember to check the Preview tab to see how the sliced font looks. If it doesn't look good on-screen, it won't print any better 😥
5. About
I love creating kit cards that are a little out of the ordinary. This little basket came about because I wanted something to go with a package of "micro" chocolate eggs I was gifting to my nieces. Since they also love their auntie's kit cards, it was a natural leap to make a little basket as the little extra something! Lastly, the bunny's name is Jujube; it's an homage to my mother who loved the candy of the same name and would have also appreciated the off-beat stuff I make ❤️
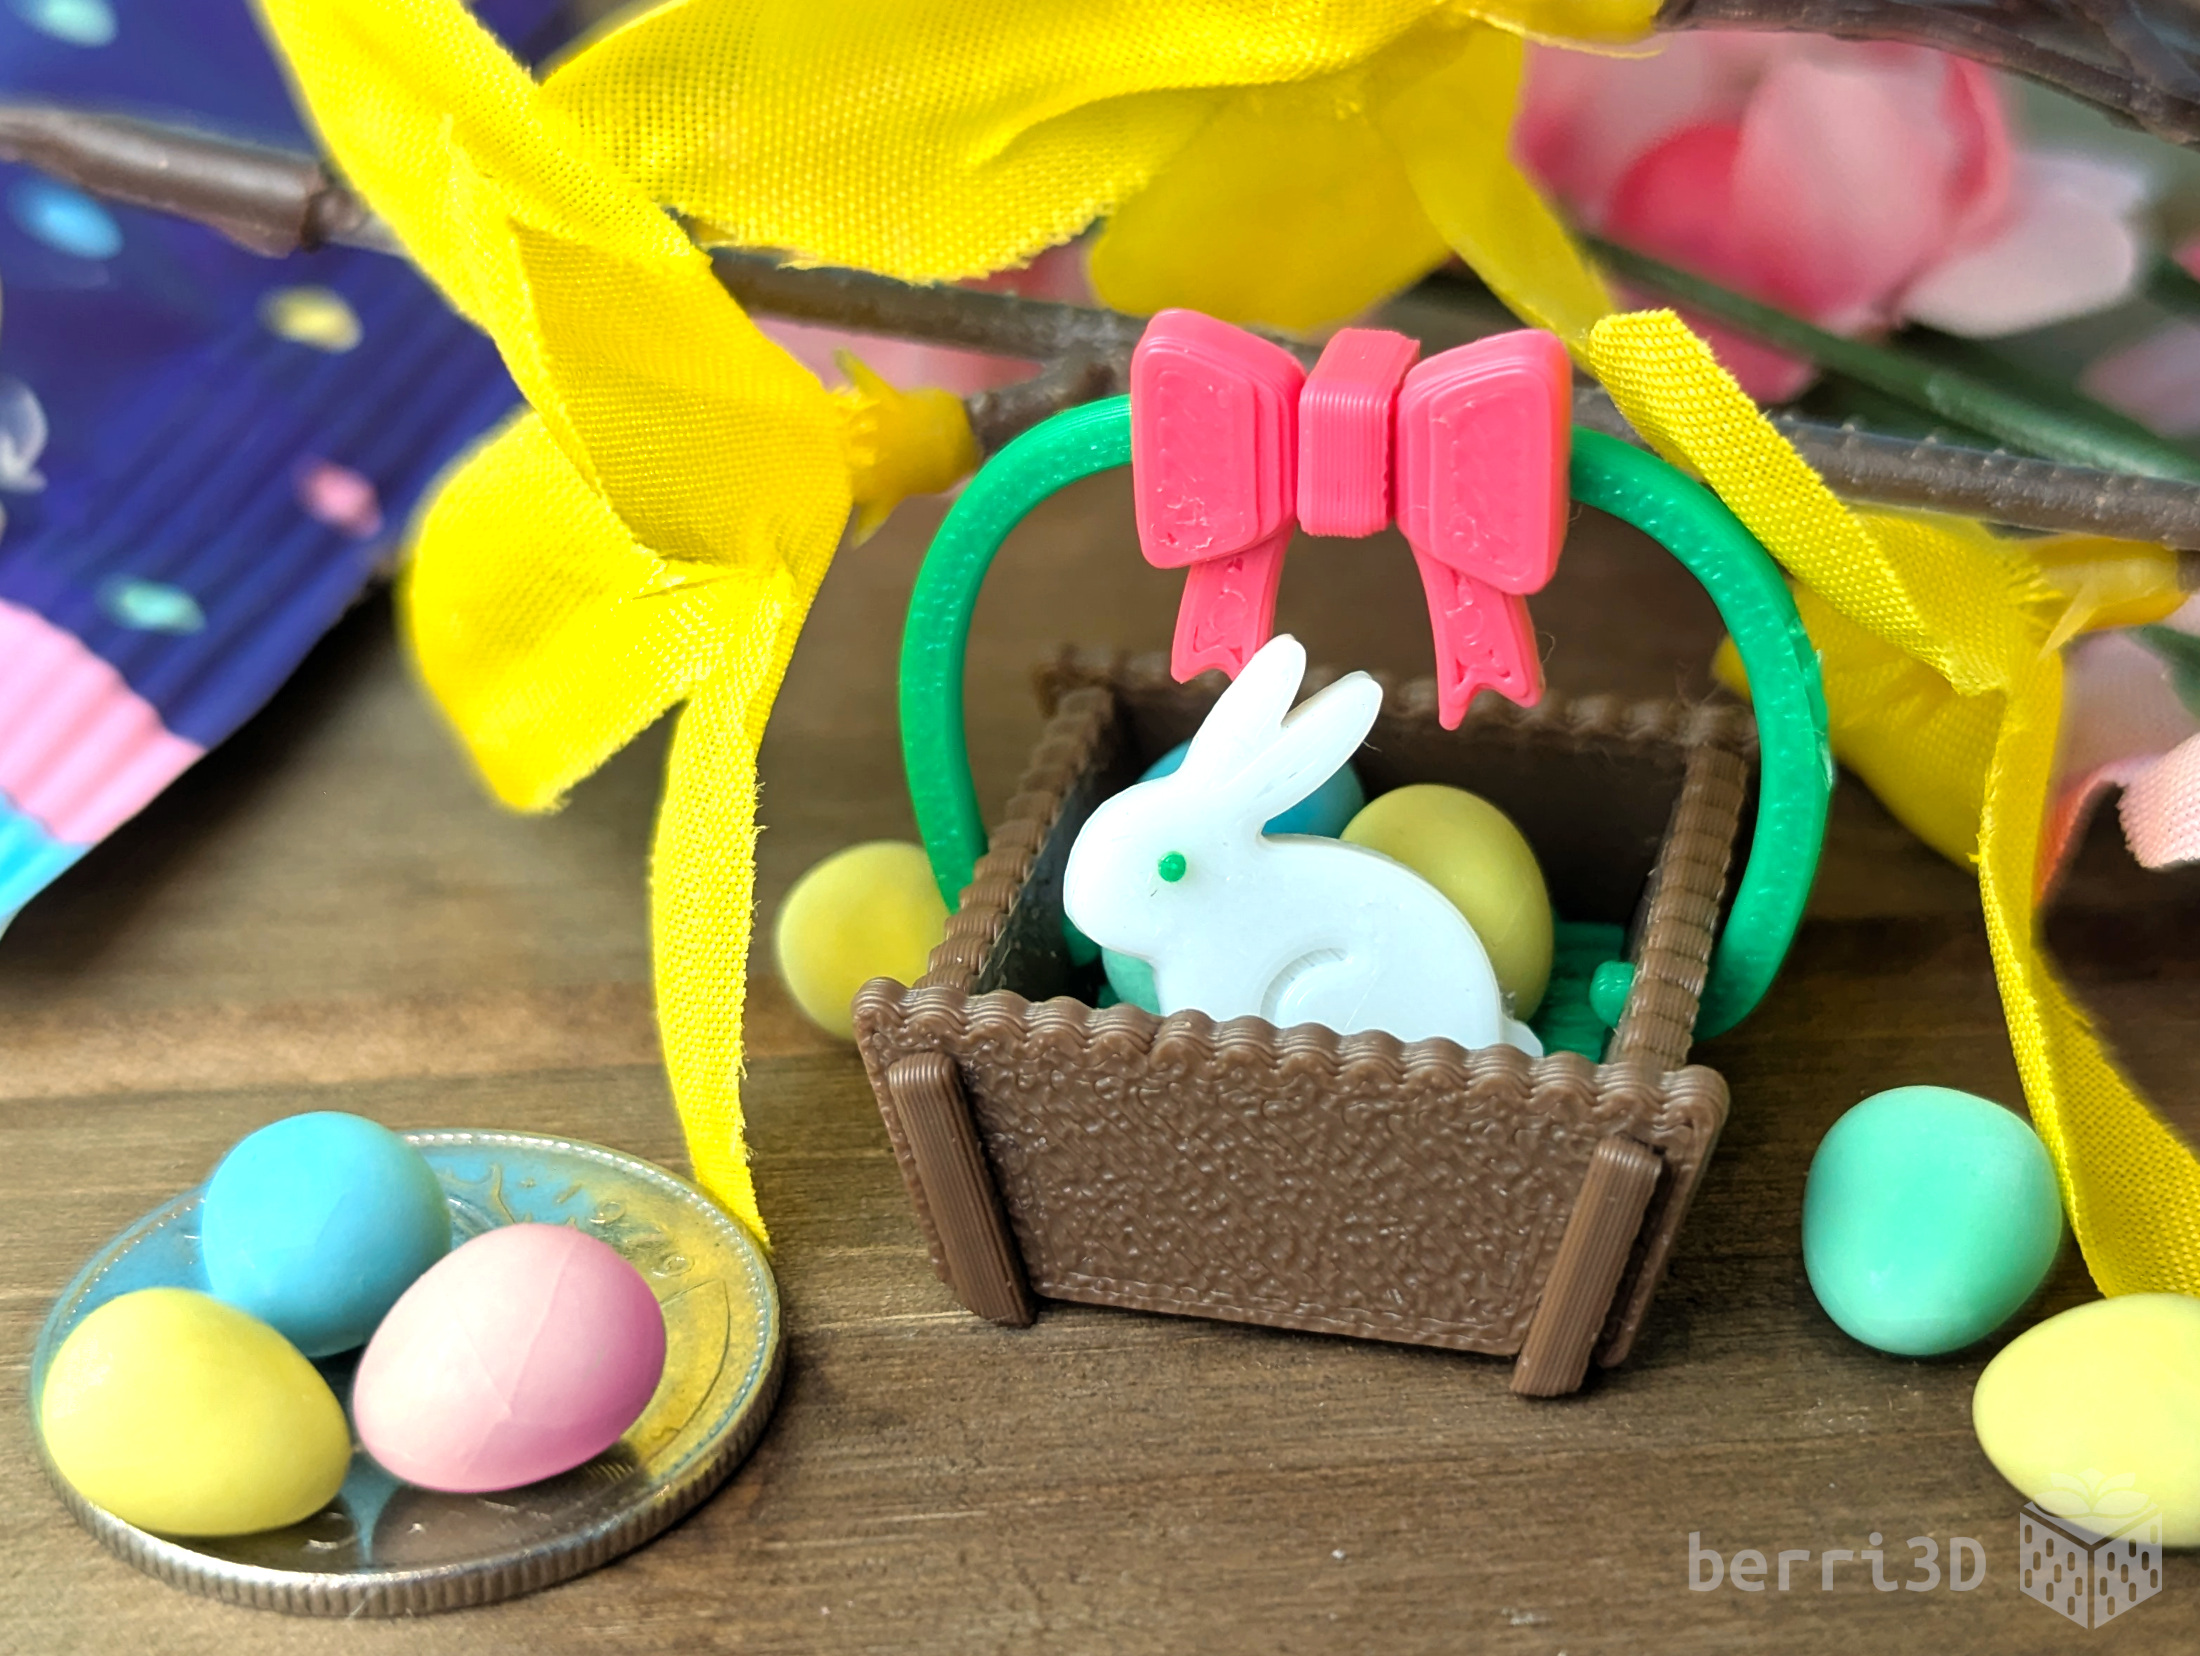
Jujube chilling in the basket. “Micro” eggs for scale.

Gostou deste modelo? Crie uma conta grátis para salvar seus favoritos e voltar a eles depois.
Criar conta