Você está no 3DFinder
Buscamos em Thingiverse, MakerWorld e Printables ao mesmo tempo para te dar o melhor de cada uma.
Descrição
Elevate your next game night with this versatile, 3D-printed playing card holder. Engineered for maximum convenience and a perfect grip, this holder is the ultimate accessory for both casual players and serious strategists.
Key Features
- Snap-and-Play Assembly: No tools, screws, or glue required. The smart design allows for a seamless, tool-free assembly right off the print bed.
- Integrated 3D Spring: Features a built-in tension system that provides an "ideal grip." It is secure enough to hold a single card upside down, yet flexible enough to hold a full hand of up to 16 cards.
- Four-Way Versatility: Whether you need to hide your hand or rest your wrists, choose from four distinct positions:
- Angled: For a comfortable viewing slope
- Upright: To save space on a crowded table
- On Table: Your cards hidden from other players but still organized - perfect for a short break
- In Hand: Small enough to easily fit in your hand
- Space for personalizing: You can add your own design in the front for a more personal experience
- Dimensions: 70x57x42mm
Who Is It For?
- Children: Perfect for small hands that struggle to fan out a large deck
- Adults: A premium comfort feature that reduces hand fatigue during long sessions
Why this Card Holder in particular?
With this project I didn't want to compromise and design a card holder that is easy to use, small, versatile and of good quality!
Other playing card holders I tried always had some downsides:
- The rail type holders (e.g. this)
- + easy to use
- + hands free is possible
- - very long
- - a flat table is necessary
- - straight rails are prone to tipping over and do not hold the cards
- Two disks type (e.g. this)
- + slim design
- + easy to use
- - mostly still need hand pressure to hold the cards firm
- - can't really place the cards on a table
- - sometimes a metal spring is needed
- This design
- + slim two disk design
- + with a stand to set the cards on the table (hands free use)
- + The integrated printed spring grips all cards, no matter how many
- + can also be held in hand easily
- - assembly needed
Assembly
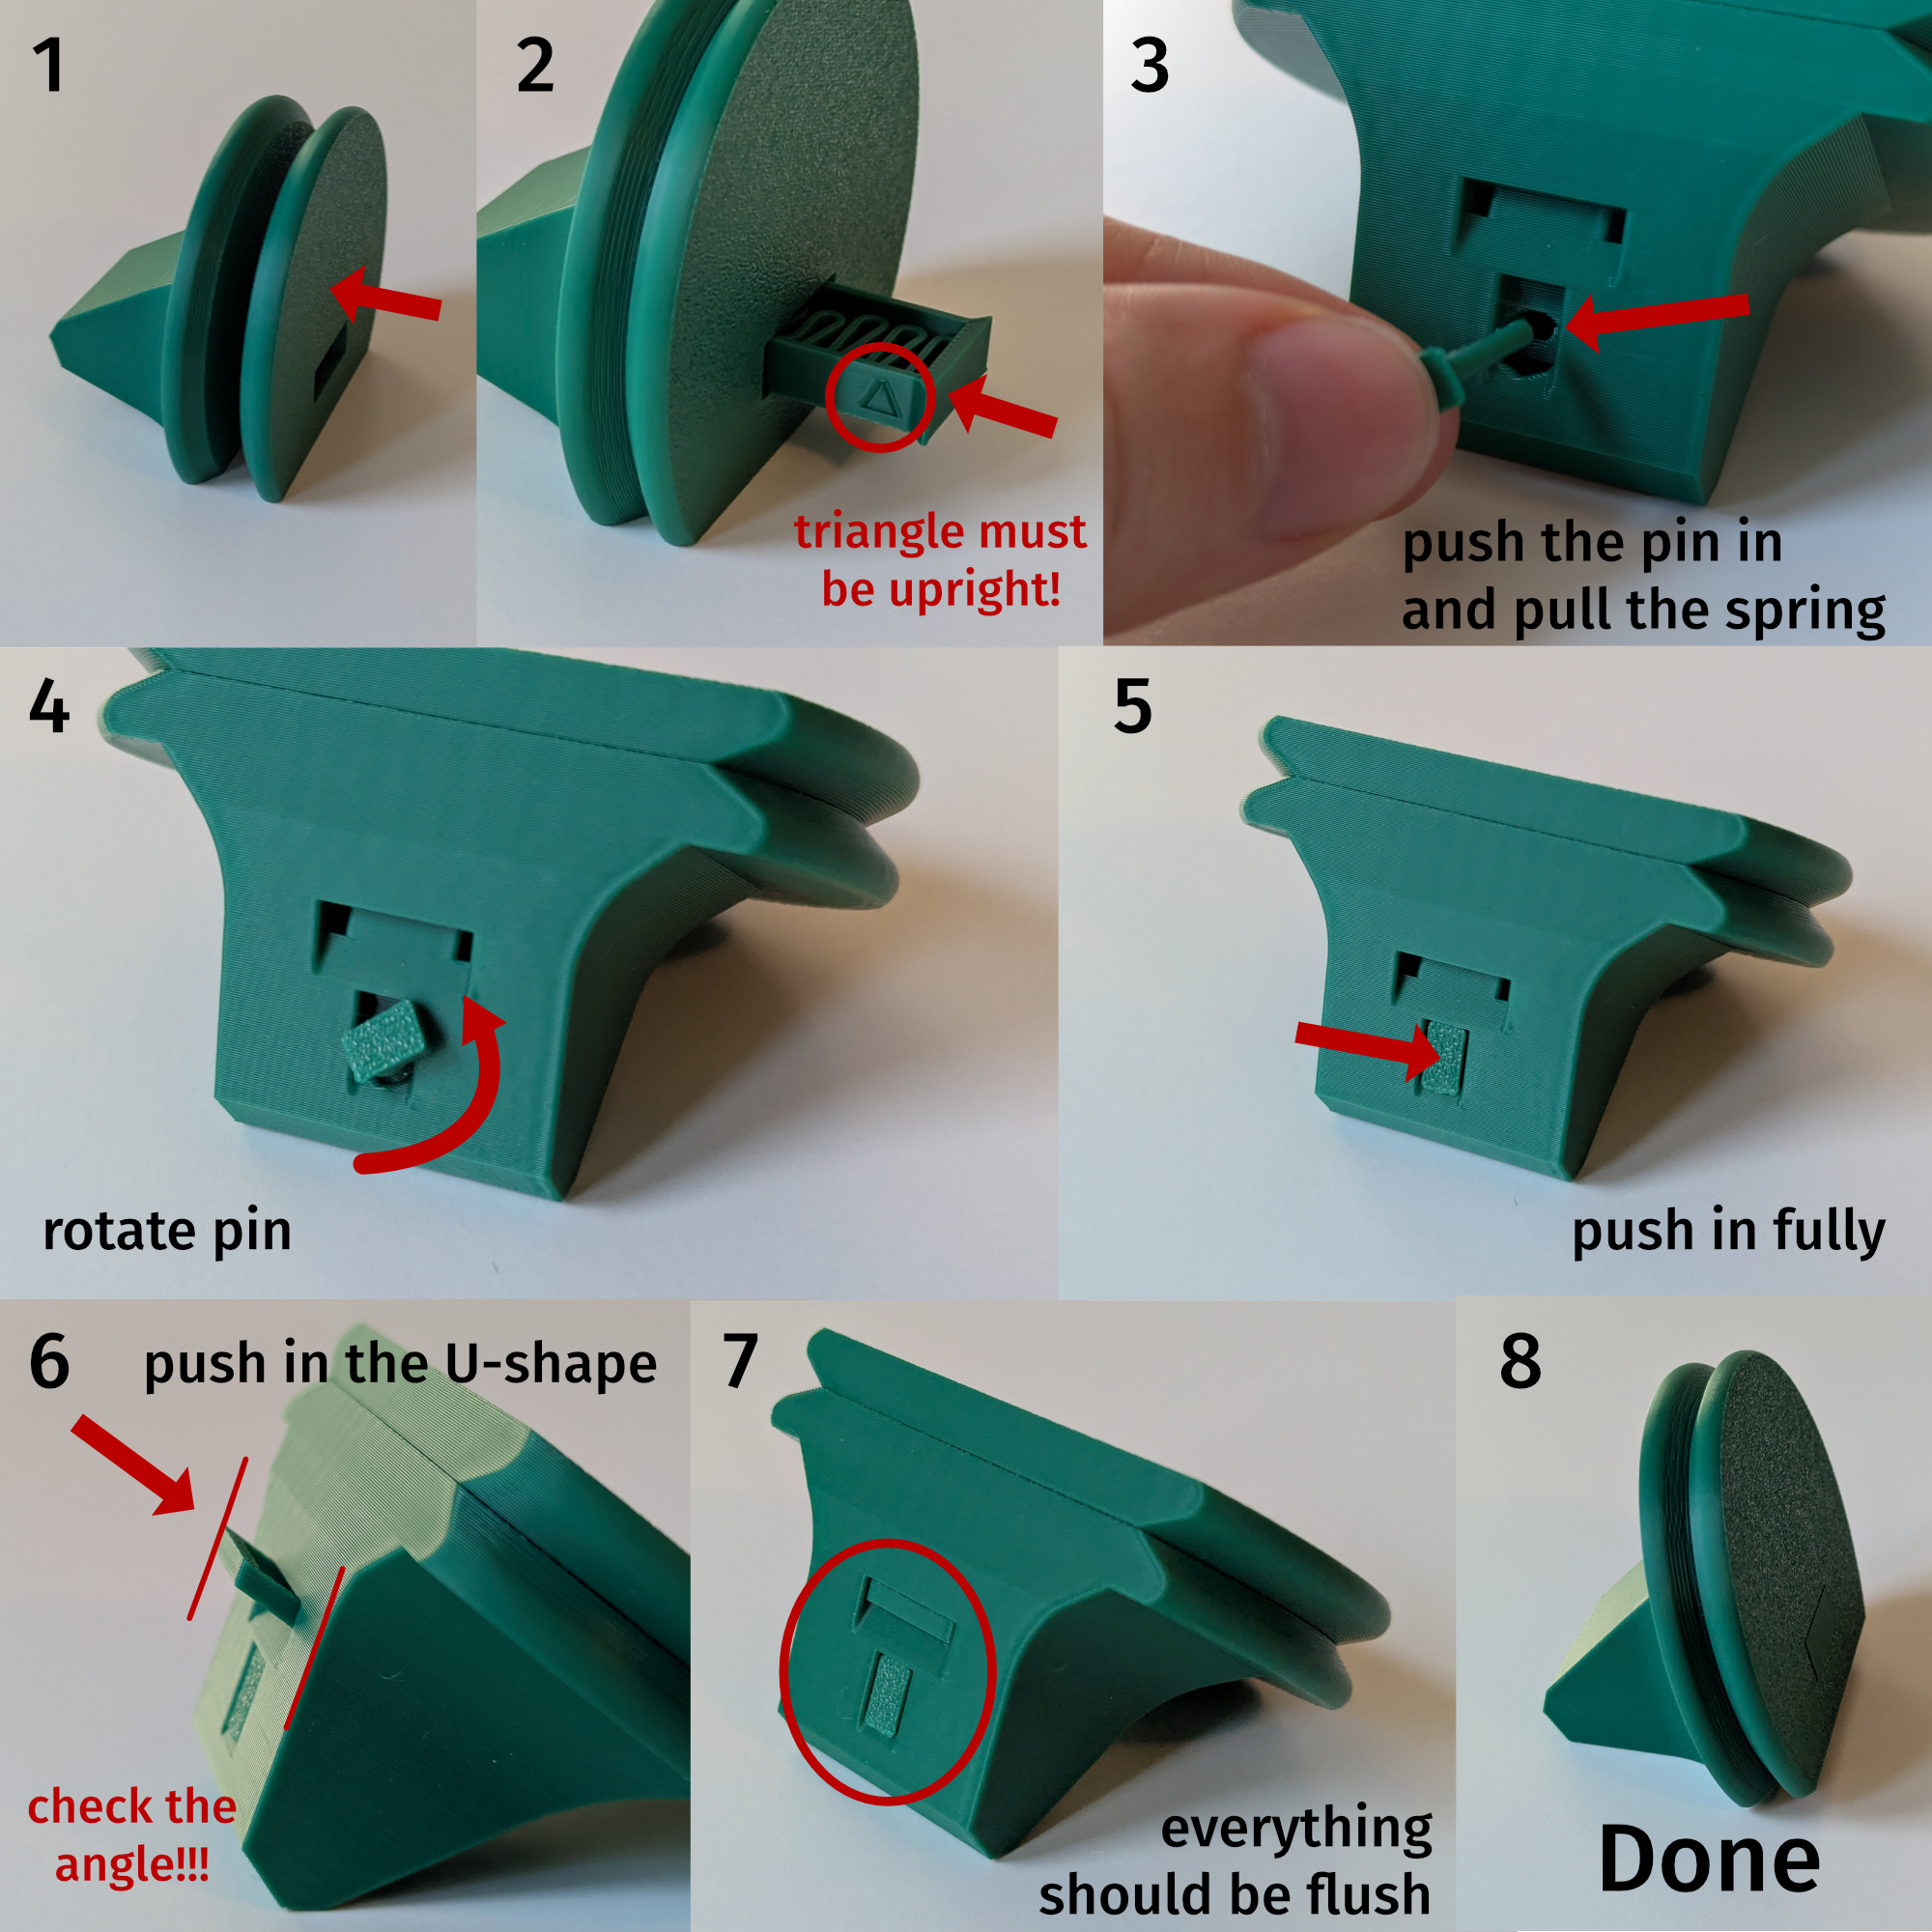
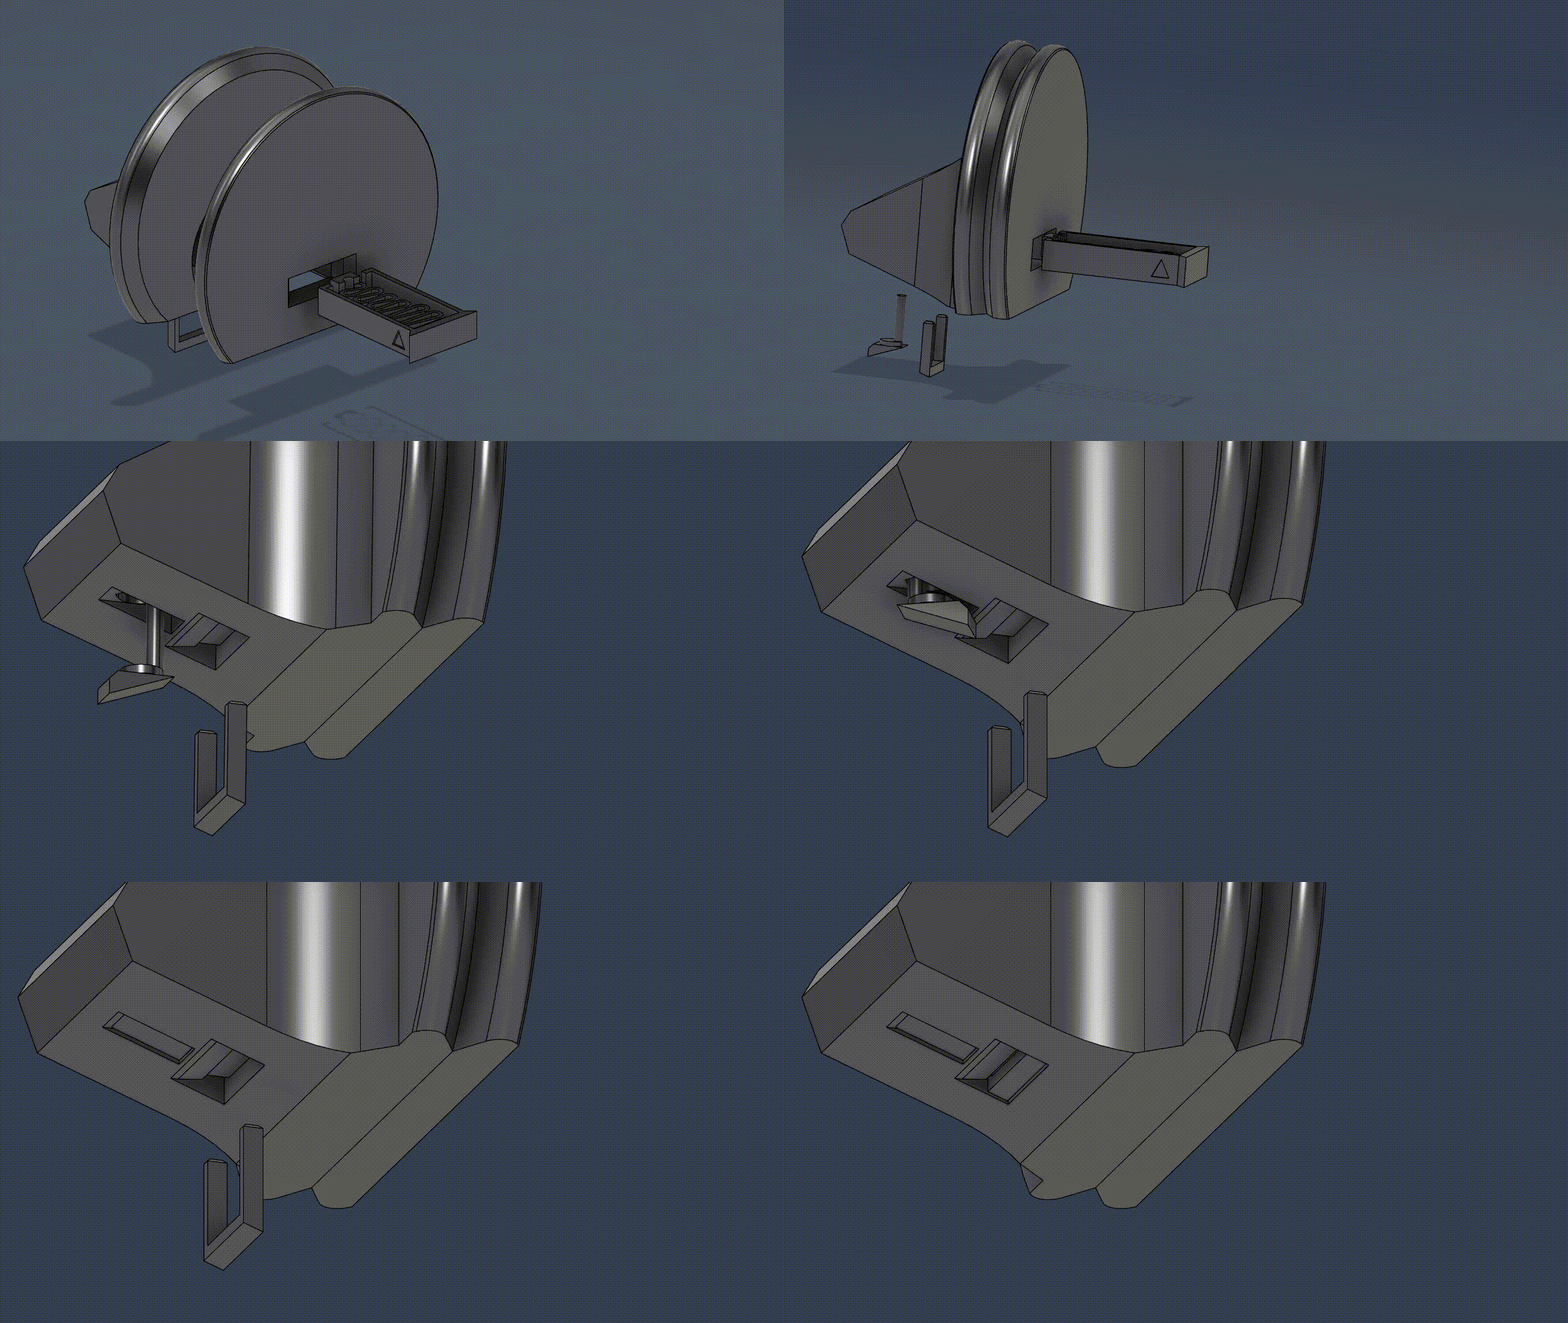
- Push the front plate into the back plate
- Insert the Spring fully (check that the triangle points upwards)
- Turn around and insert the pin. Pull the spring with the pin back while inserting the pin (only then the pin can enter fully)
- Check out details below regarding this step if you have trouble
- Rotate the pin so it can sit flush and
- Fully push the pin in
- Now take the U-shape and insert it in the two holes (check the angle of the base)
- This U-shape protects the spring from over extending if for example a child pulls the front disk
- Check that everything is flush and
- You are done! 🙂
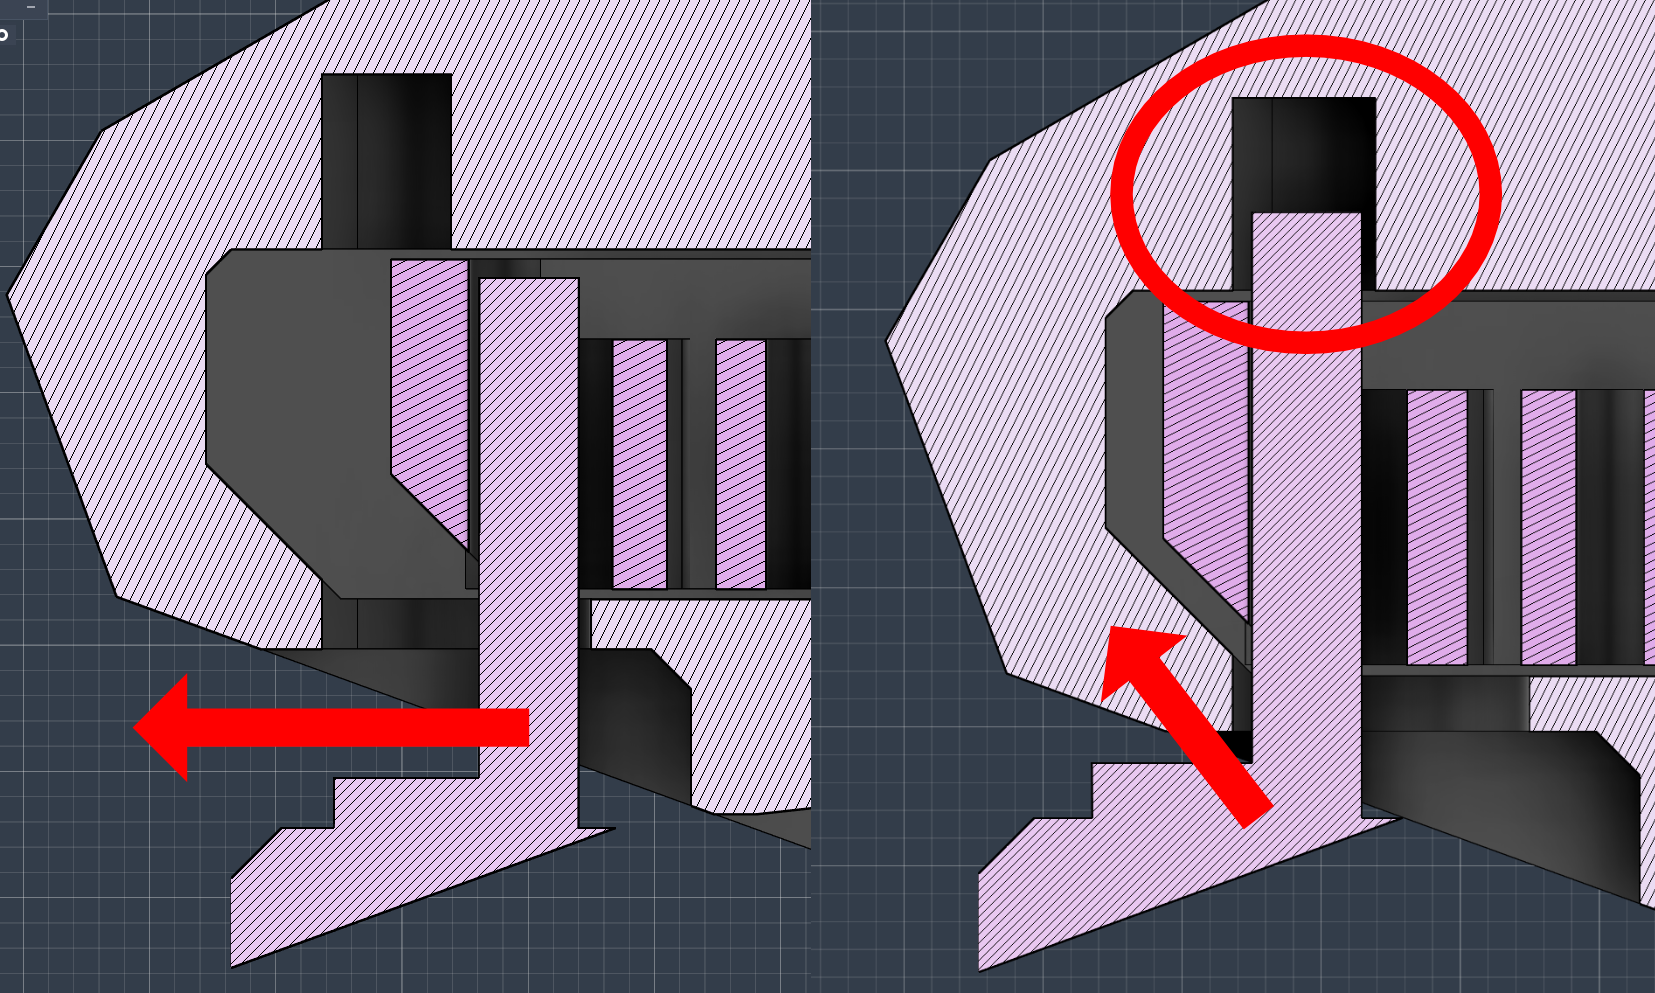
Step 3 explained in more detail (since the pin broke for some users)
3.1 Catch the spring with the pin
3.2 Pull back the pin and try to press it in slightly (you can try to angle the pin a bit to get the pin into the retaining hole)
3.3 It should sit in the retaining hole before trying to turn it
3.4 Now turn the pin carefully (you can pull it out a bit but it should not slip out of the retaining hole)
Video:

Gostou deste modelo? Crie uma conta grátis para salvar seus favoritos e voltar a eles depois.
Criar conta