Você está no 3DFinder
Buscamos em Thingiverse, MakerWorld e Printables ao mesmo tempo para te dar o melhor de cada uma.
Descrição
Want a chess set that doesn't fling all the pieces all over the place every time the board is moved? If so, this snap variation of the classic chess board is for you. Simply press the chess piece onto a tile until a ‘snap’ is heard, and voilà! The piece is now ‘locked’ to the board. To remove the piece, simply rock the piece, as if to knock it over, and the piece pops out.
This model is a travel version of a chessboard with custom chess pieces that are stored in the chessboard when folded. When unfolded, the chess set is approximately the size of the bed of the A1, P and X series printers, resulting in a very comfortable size for playing that folds to a portable size for travel.
Features
✅ Snap tiles for pseudo-magnet effect without need of magnets
✅ Locking latch to keep the chessboard folded shut for travel
✅ Locking latches on side to keep the chessboard open when playing
✅ Storage for chess pieces inside board for travel
✅ No AMS Required
✅ No Glue/Post-Processing Required
Customization
Select one of the chess pieces print profiles available. Note the pieces are printed solid for a more premium feel, but this can be changed if desired by lowering the sparse infill density. If the print profile is a non-AMS variant, note that there will be automated pauses to assist in manual swapping of the filament.
For the chess board print profiles, there are two variants; a chess ‘box’ and chess ‘case’ variant. The ‘box’ variant prints faster and can be quickly cleaned up after a game, whereas the ‘case’ variant keeps the pieces neatly organized and visually presentable. Pick whichever one tickles your fancy. Also feel free to experiment with different top and bottom surface patterns!
Printing/Assembly
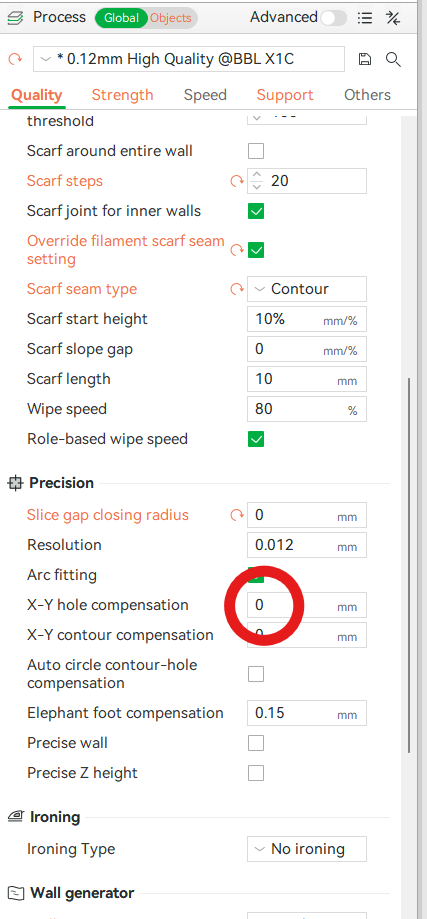
First, print whichever of the chess pieces print profiles you prefer in both colors. Once the chess pieces are printed, open a chessboard print profile and print the ‘Test Tiles’ plate in both colors you intend to use for the tiles. These test tiles will be used to fine-tune the tolerance for the snap action, as even changes in filament or printer can affect the snap action. Using the printed chess pieces, check the snap fit of the test tiles and decide which has the best fit. Note that the desired snap merely needs to prevent the piece from unintendedly falling out and making the snap too tight can result in wear and/or breaking of the tile. Whichever tile you find to be the best fit, read the number printed on the side. This number is the X-Y hole compensation value to be used to print the Tiles plate. This setting is found under the Quality tab, as shown in the image below.
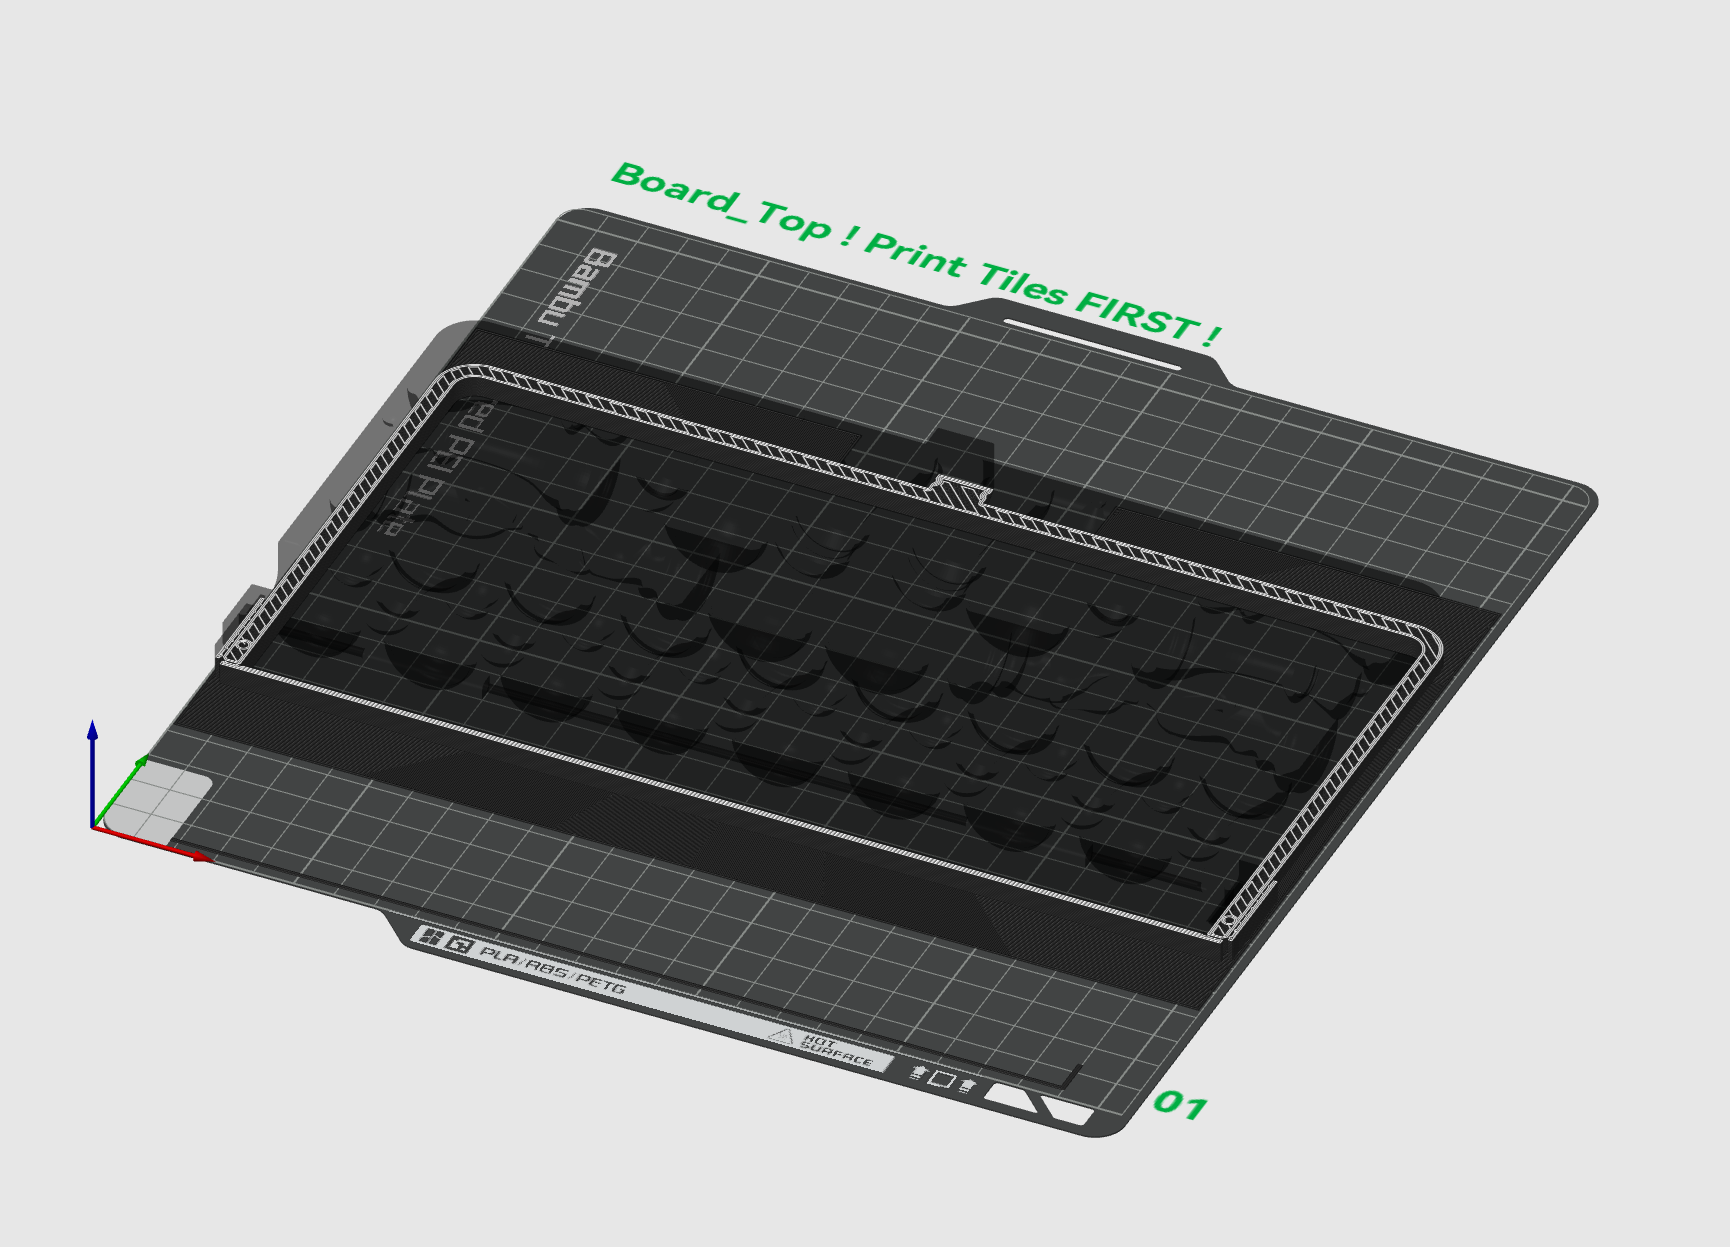
When the board halves are paused at the stage shown in the image below, insert the tiles, with the flat side face-up, ensuring the tiles are flush with the paused print. When done, resume print.
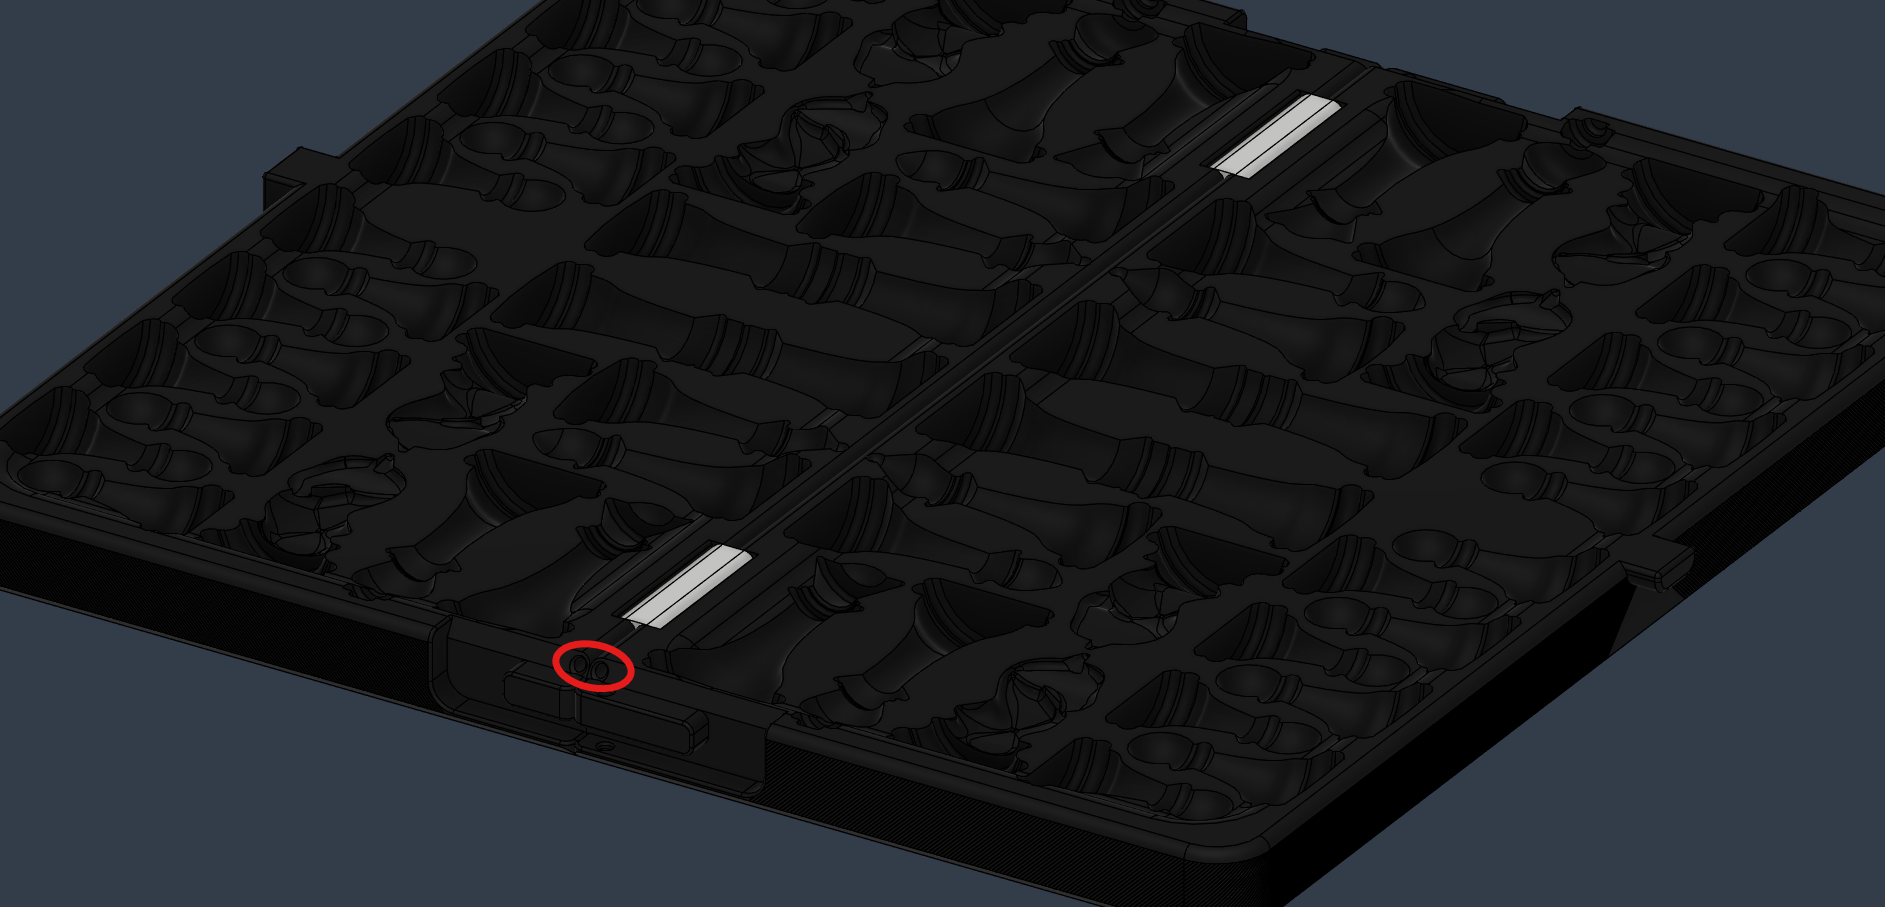
Once both board halves and the hinges are printed, arrange the two board halves and hinges as shown below (hinges shown below in white). Thread a strand of filament through one of the holes circled in red below until the filament is flush at the other end of the board. Cut off any excess filament such that the filament is flush with the board. Repeat this for the other hole.
Latches
To install the front latch, align one of the bumps on the front latch with one of the spherical dents on the front of the top board half, as shown below, with the bottom printed surface of the front latch facing away from the chess board. From there, manipulate the other end of the front latch to get the bump on the latch properly seated in the dent on the board. This will take some effort.
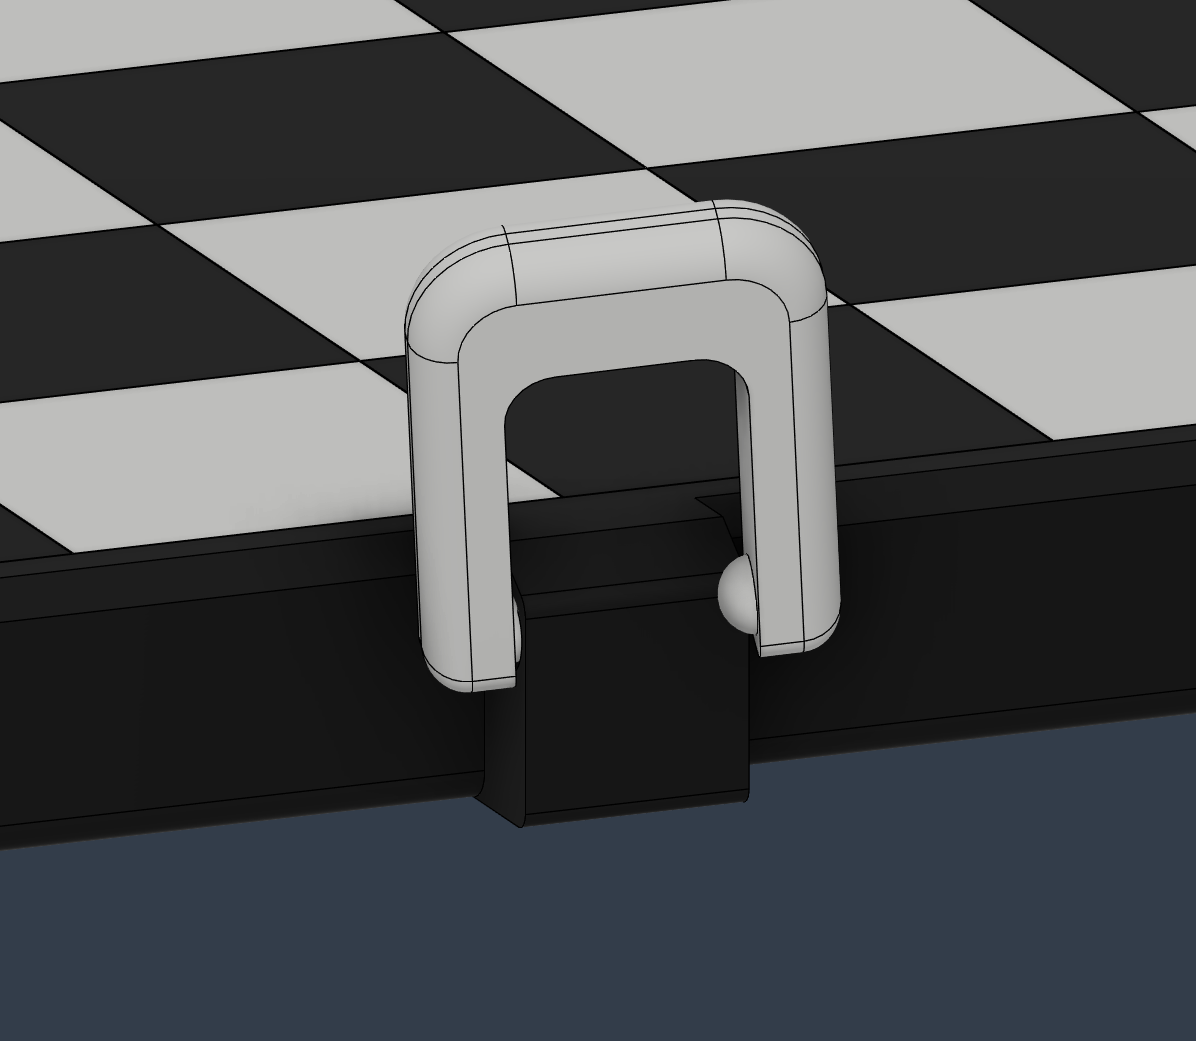
To install the smaller latches, put one latch in the location as shown below, ensuring the rounded edge of the latch is facing upwards. Once in position, thread filament through the hole in the latch, circled in red below, until it can go no further and cut off the excess filament. Repeat this on the other side for the other latch.