Você está no 3DFinder
Buscamos em Thingiverse, MakerWorld e Printables ao mesmo tempo para te dar o melhor de cada uma.
Descrição
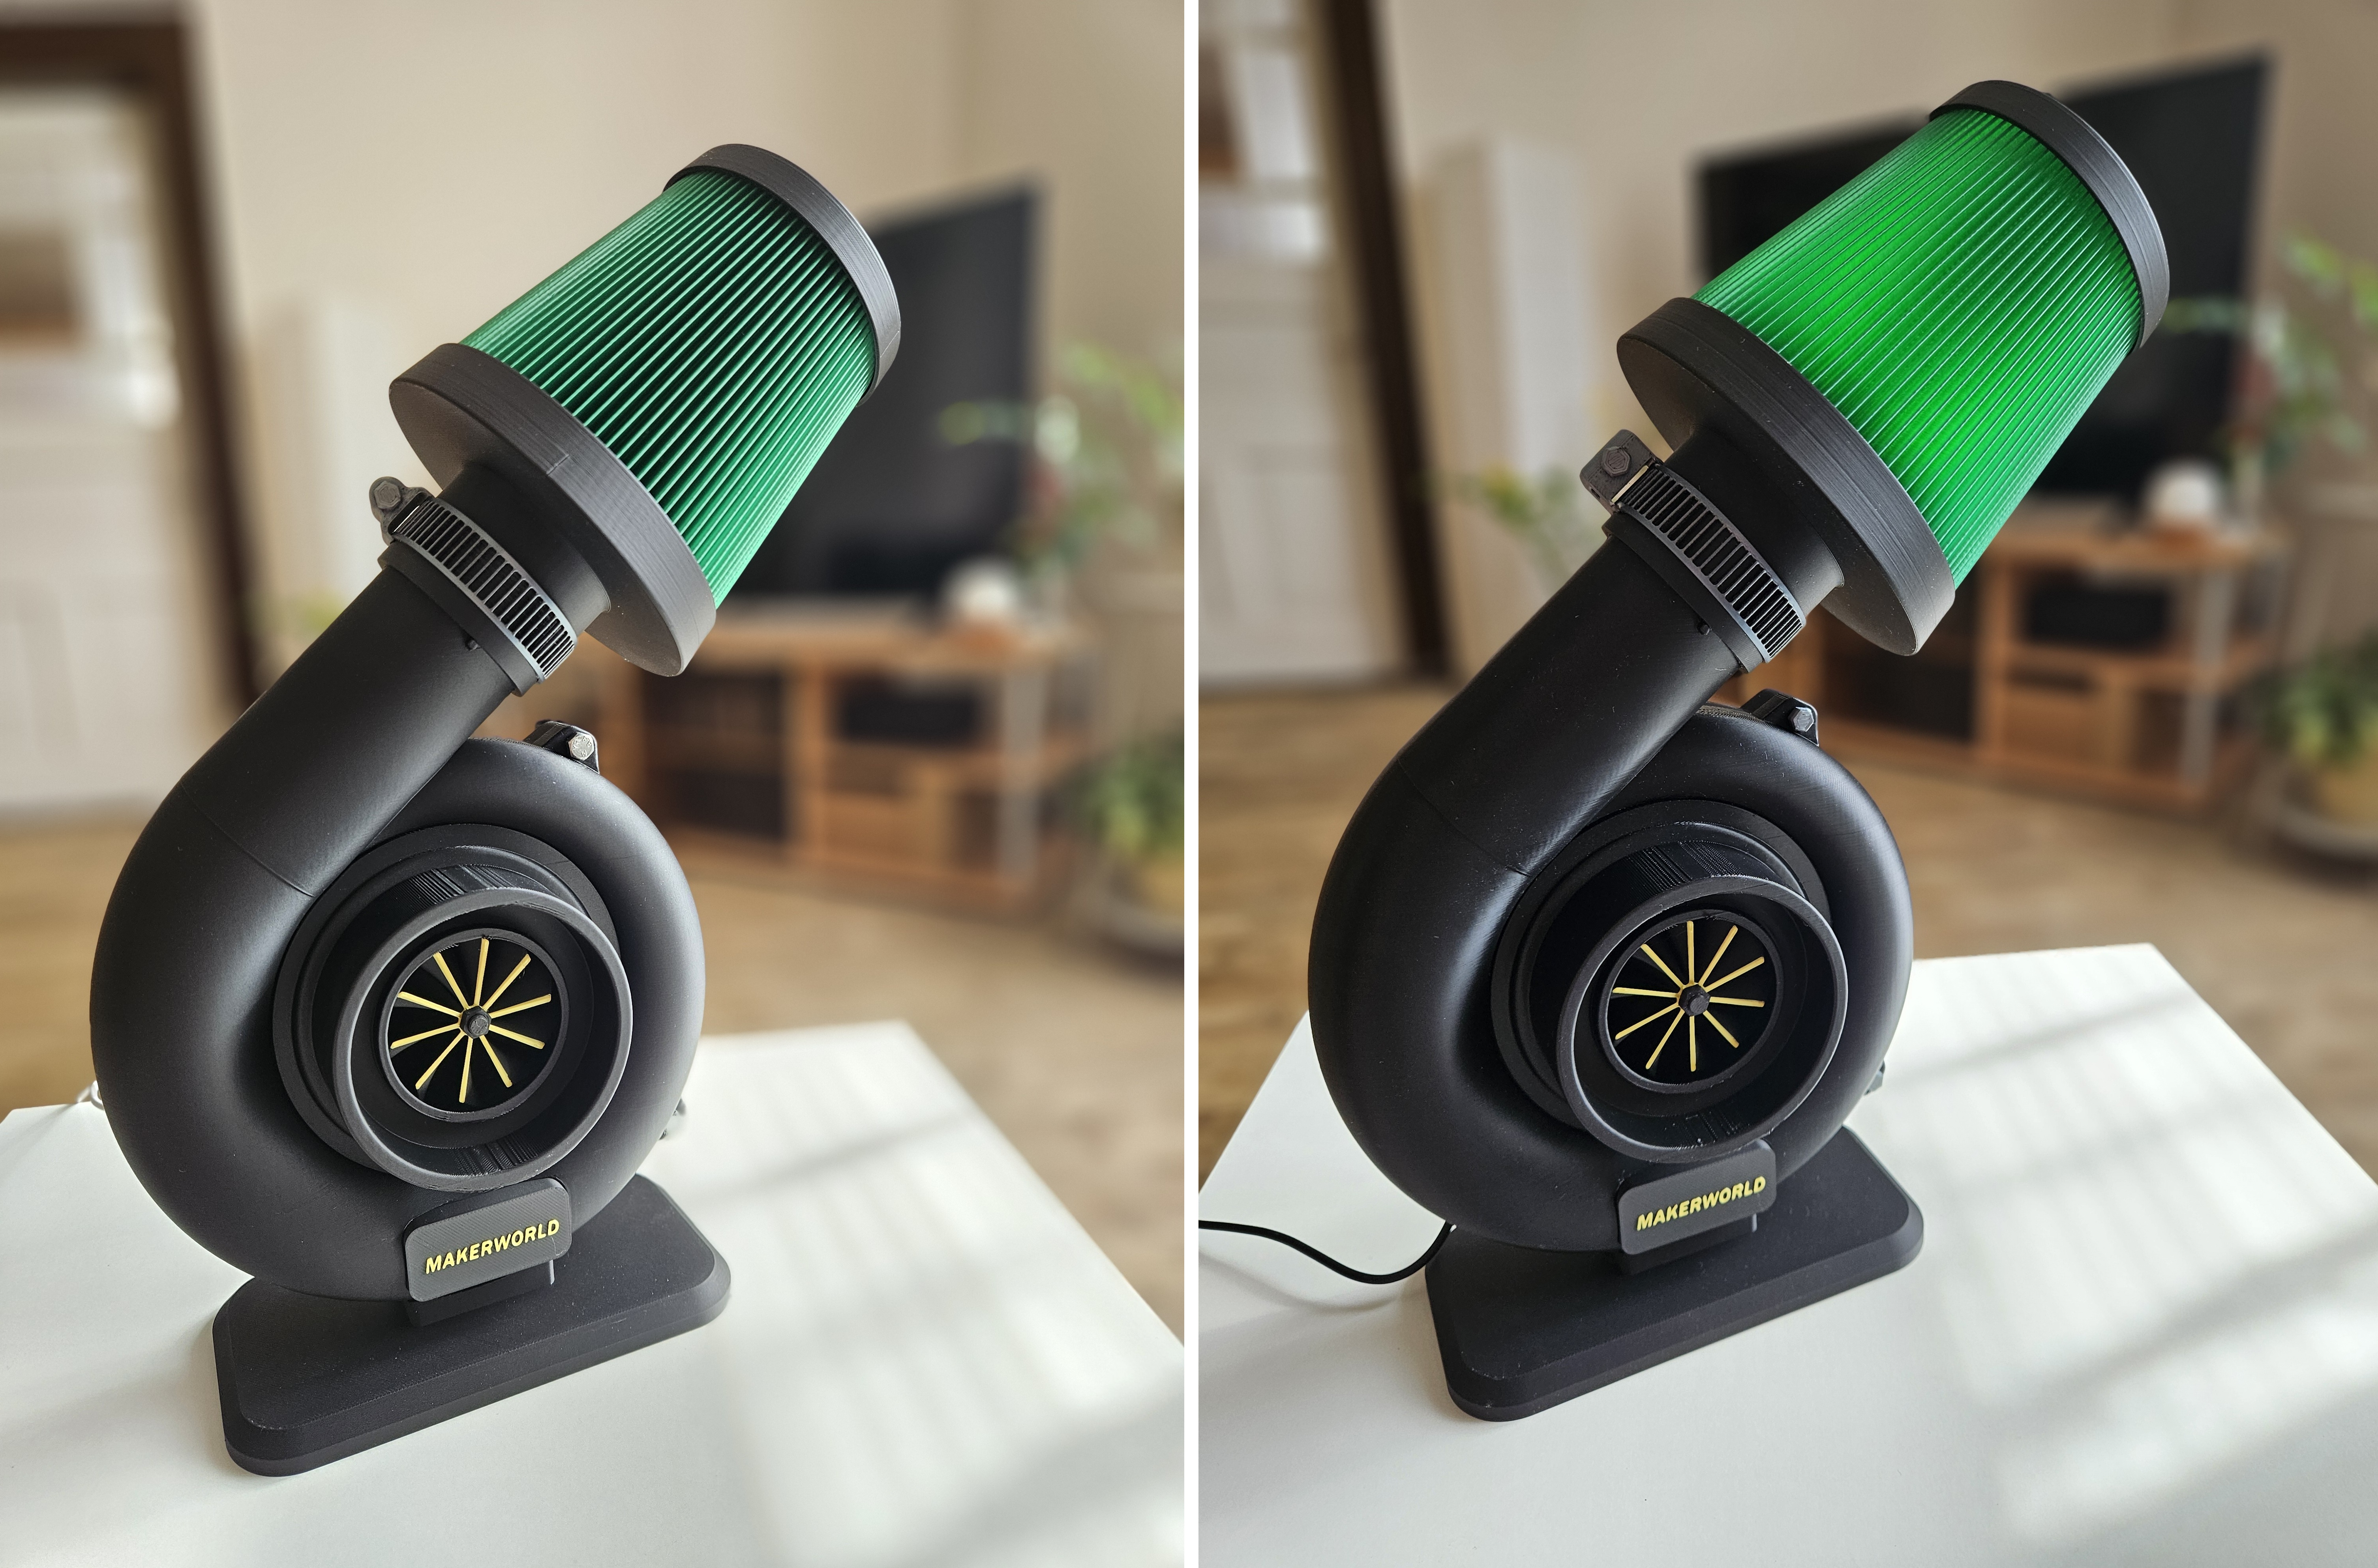
🔥 Turbo Charger Desk Lamp – Boost Your Setup! 🚀 - LED Lamp Kit - 001
Got gasoline in your veins and an empty spot on your desk? ⛽
This isn't just a 3D print; it’s a piece of mechanical art that brings the racetrack atmosphere straight to your home! 🏠🏁 Whether you're a fan of JDM, American muscle, or European classics, this turbo is the missing "part" your setup needs.
🌟 Why download this model?
- 🏎️ Authentic Design: A faithful replica of a turbo housing with a detailed compressor wheel and iconic air filter.
- 💡 Ambient Lighting: Designed to let light glow through the filter. No glare, just pure style!
- 🛠️ Easy Assembly: No mechanical engineering degree required (even if it looks like it! 😉). Just print, insert your LED, and snap it together.
- 🎁 The Perfect Gift: The ultimate present for your boyfriend, husband, or anyone who spends their weekends in the garage.
💬 A Note from the Creator:
Built for the community that loves the sound of a blow-off valve and the smell of burnt rubber. 💨 If you like this model, please don't forget to hit the Boost 🚀 button and share a photo of your "beast" in the comments! 📸
Happy printing and keep the boost high! 🏁🔥
💵 Parts to need buy:
- LED Lamp Kit - 001
- 2x M4x25mm screws and nuts
✍️ Personalize Your Turbo Plate!
Want to add your own name, nickname, or your favorite car's brand? It's easy! 🏎️✨
Step-by-Step Guide:
- 🖱️ Select: Click on the object on the build plate named "Universal Plate".
- 📝 Tool: In the top toolbar, select the "Text Shape" function.
- ⚙️ Parameters: Enter your custom text. I recommend setting the text height (thickness) to 0.5 mm for the best look and readability.
🖨️ Print Settings: Ensure your print settings are correctly set for both the plate and the text (perfect for two-color effects even without AMS).
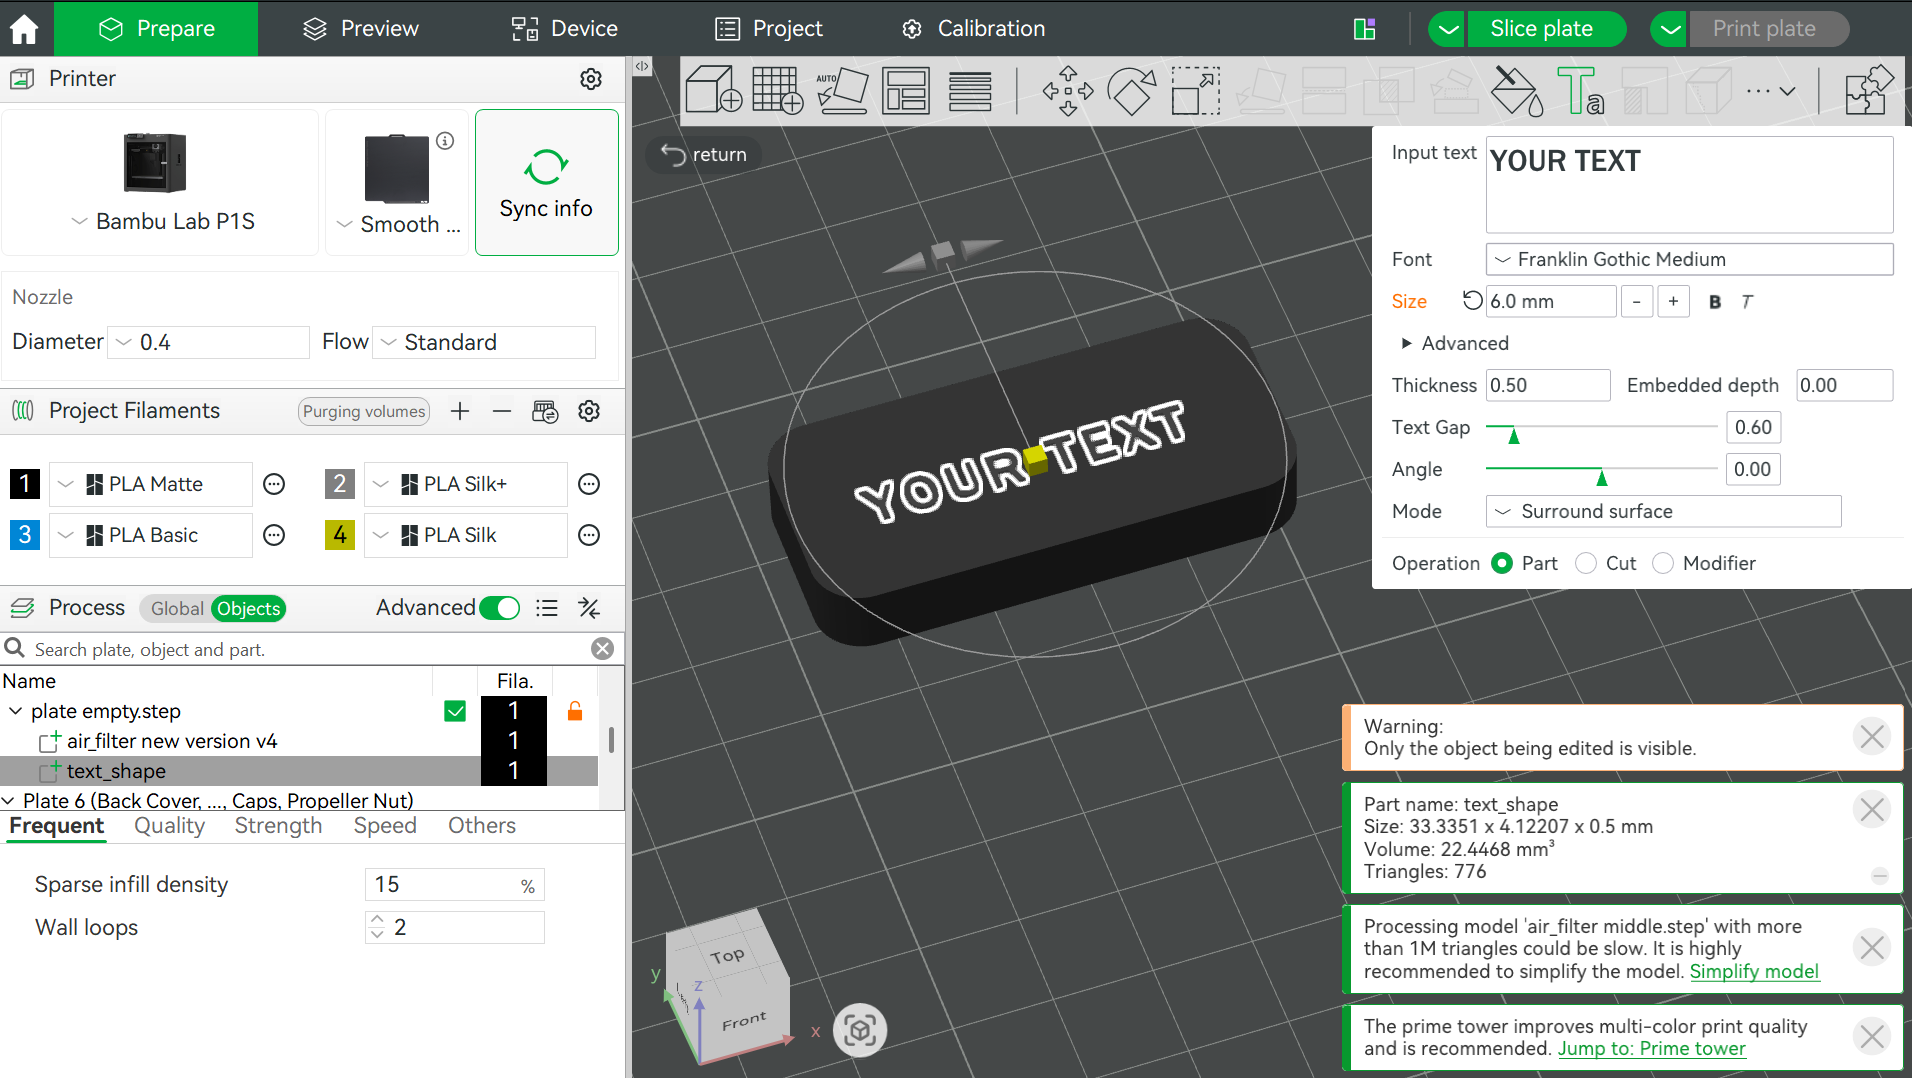
🛠️ Assembly Guide: Step-by-Step 🔧
Follow these steps to get your Turbo Lamp up and running smoothly:
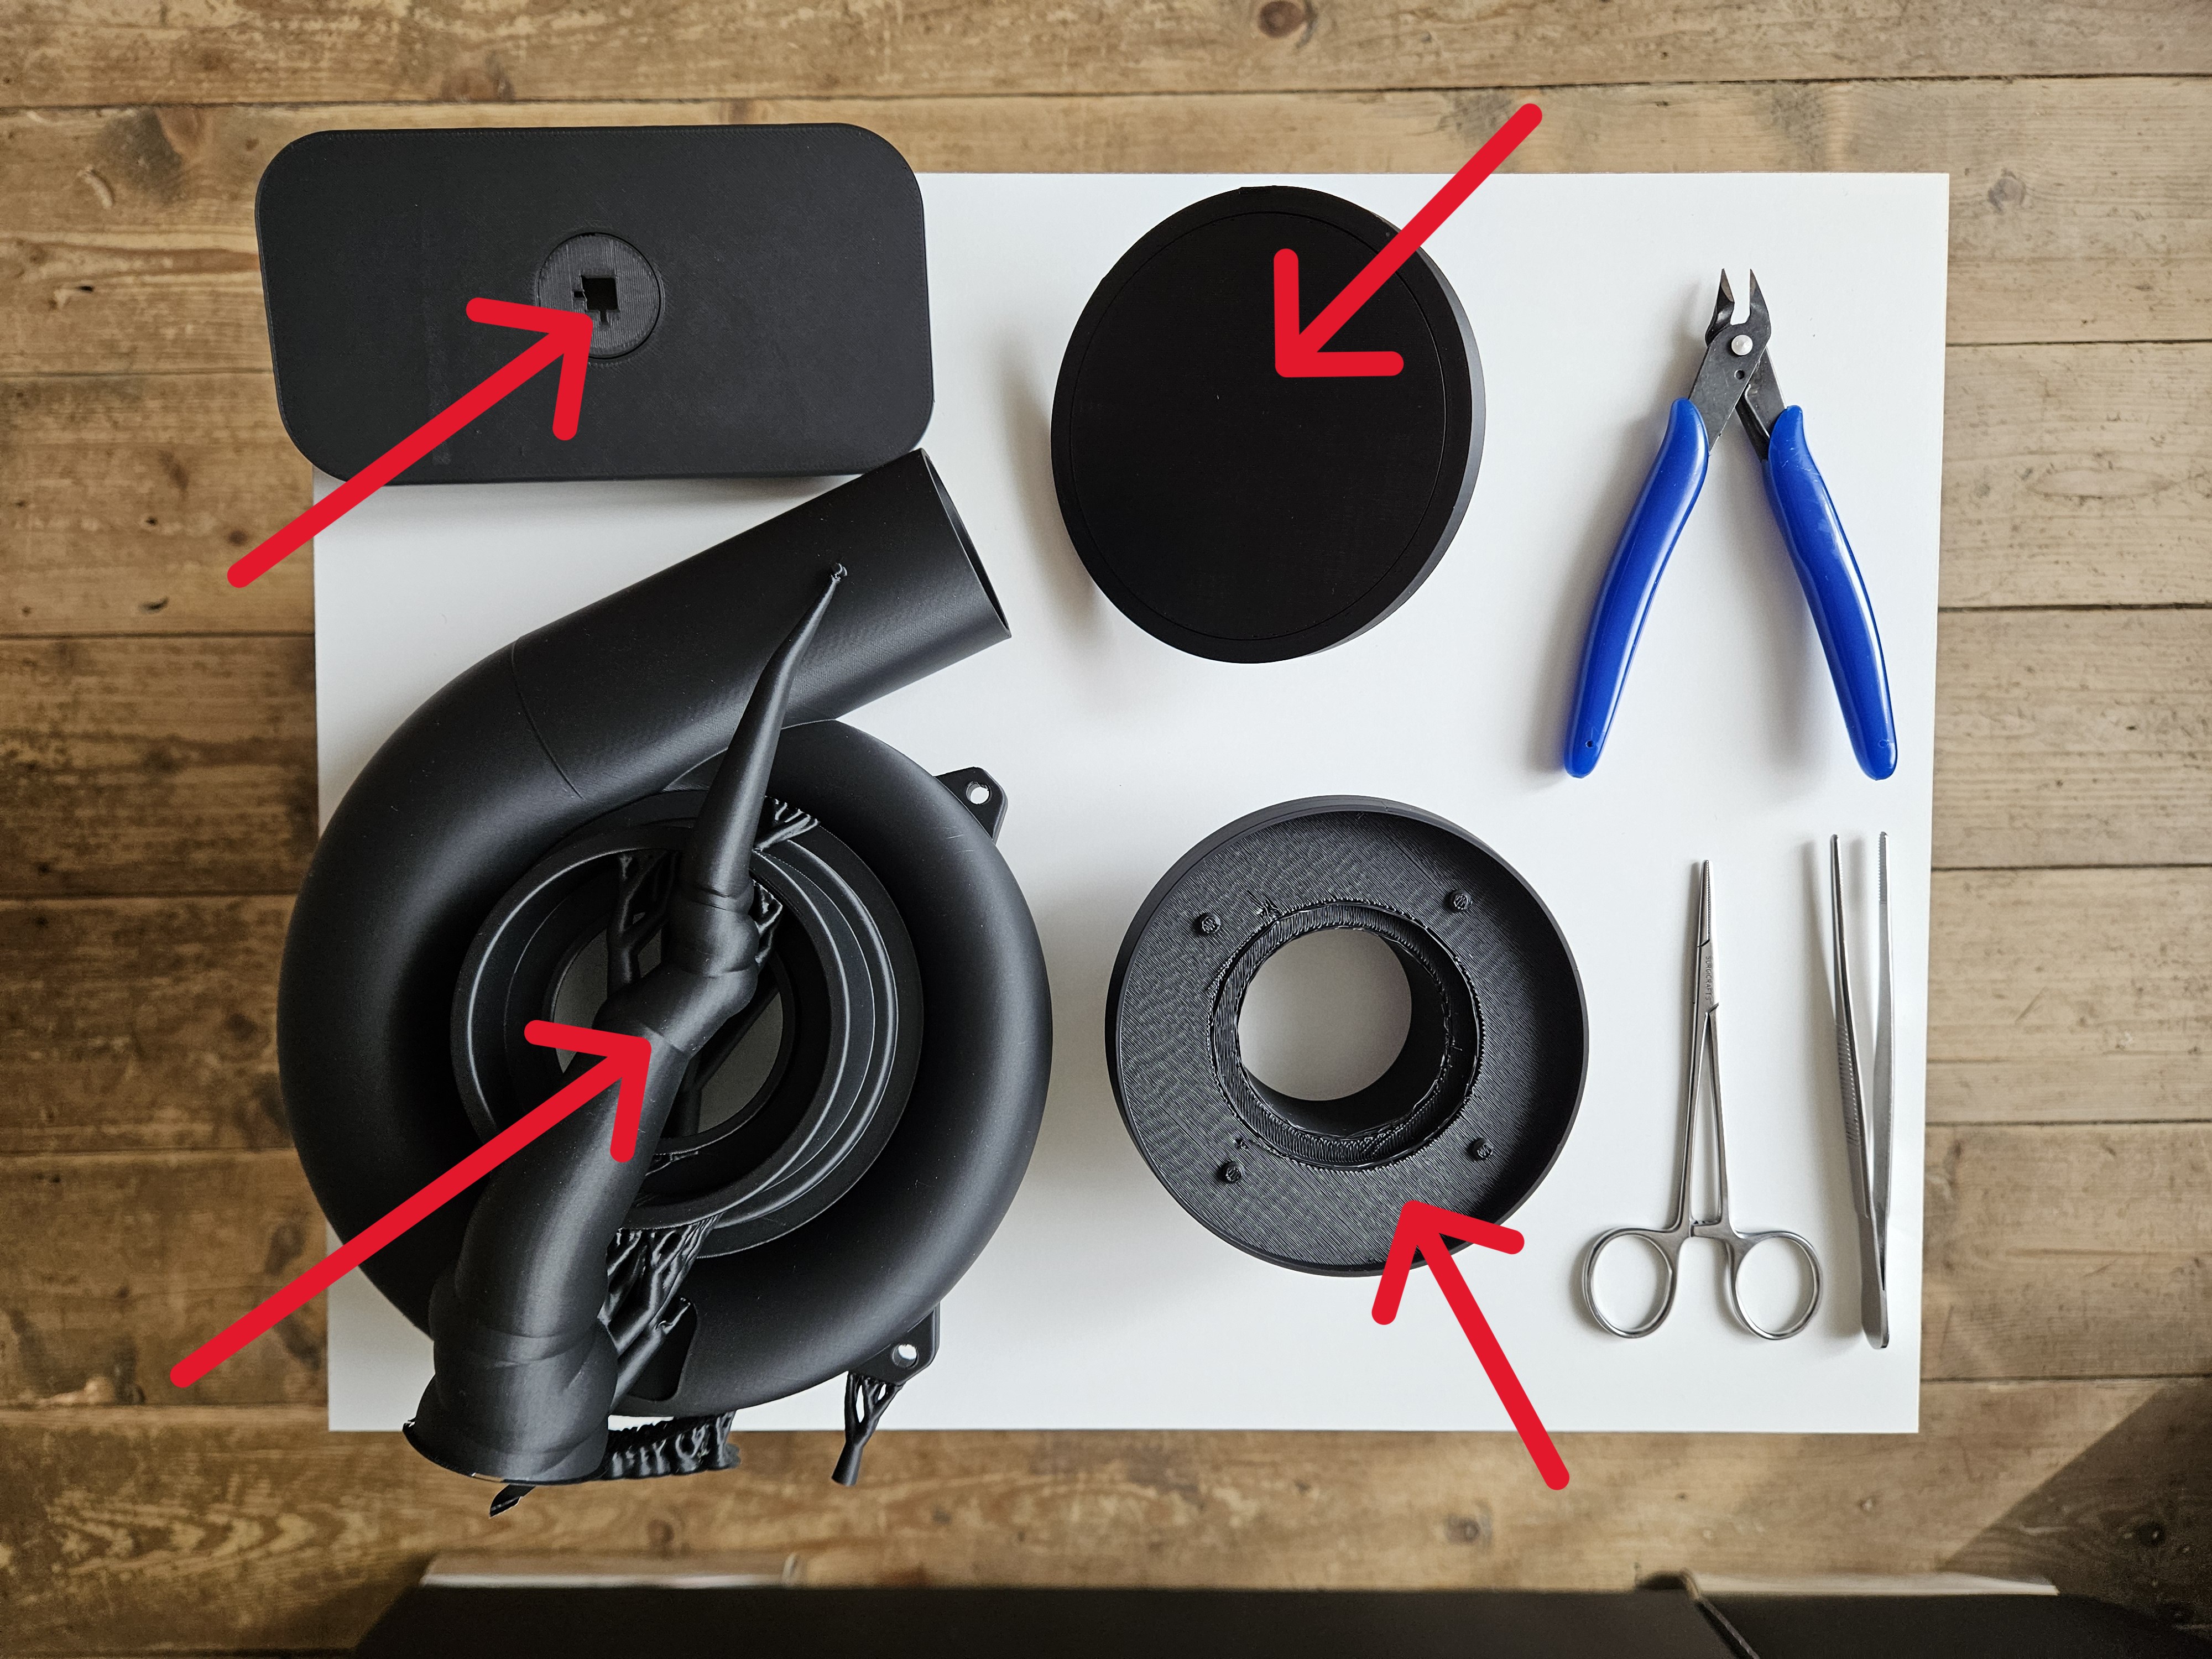
🖨️ Preparation: Print all parts and carefully remove all supports from every component.
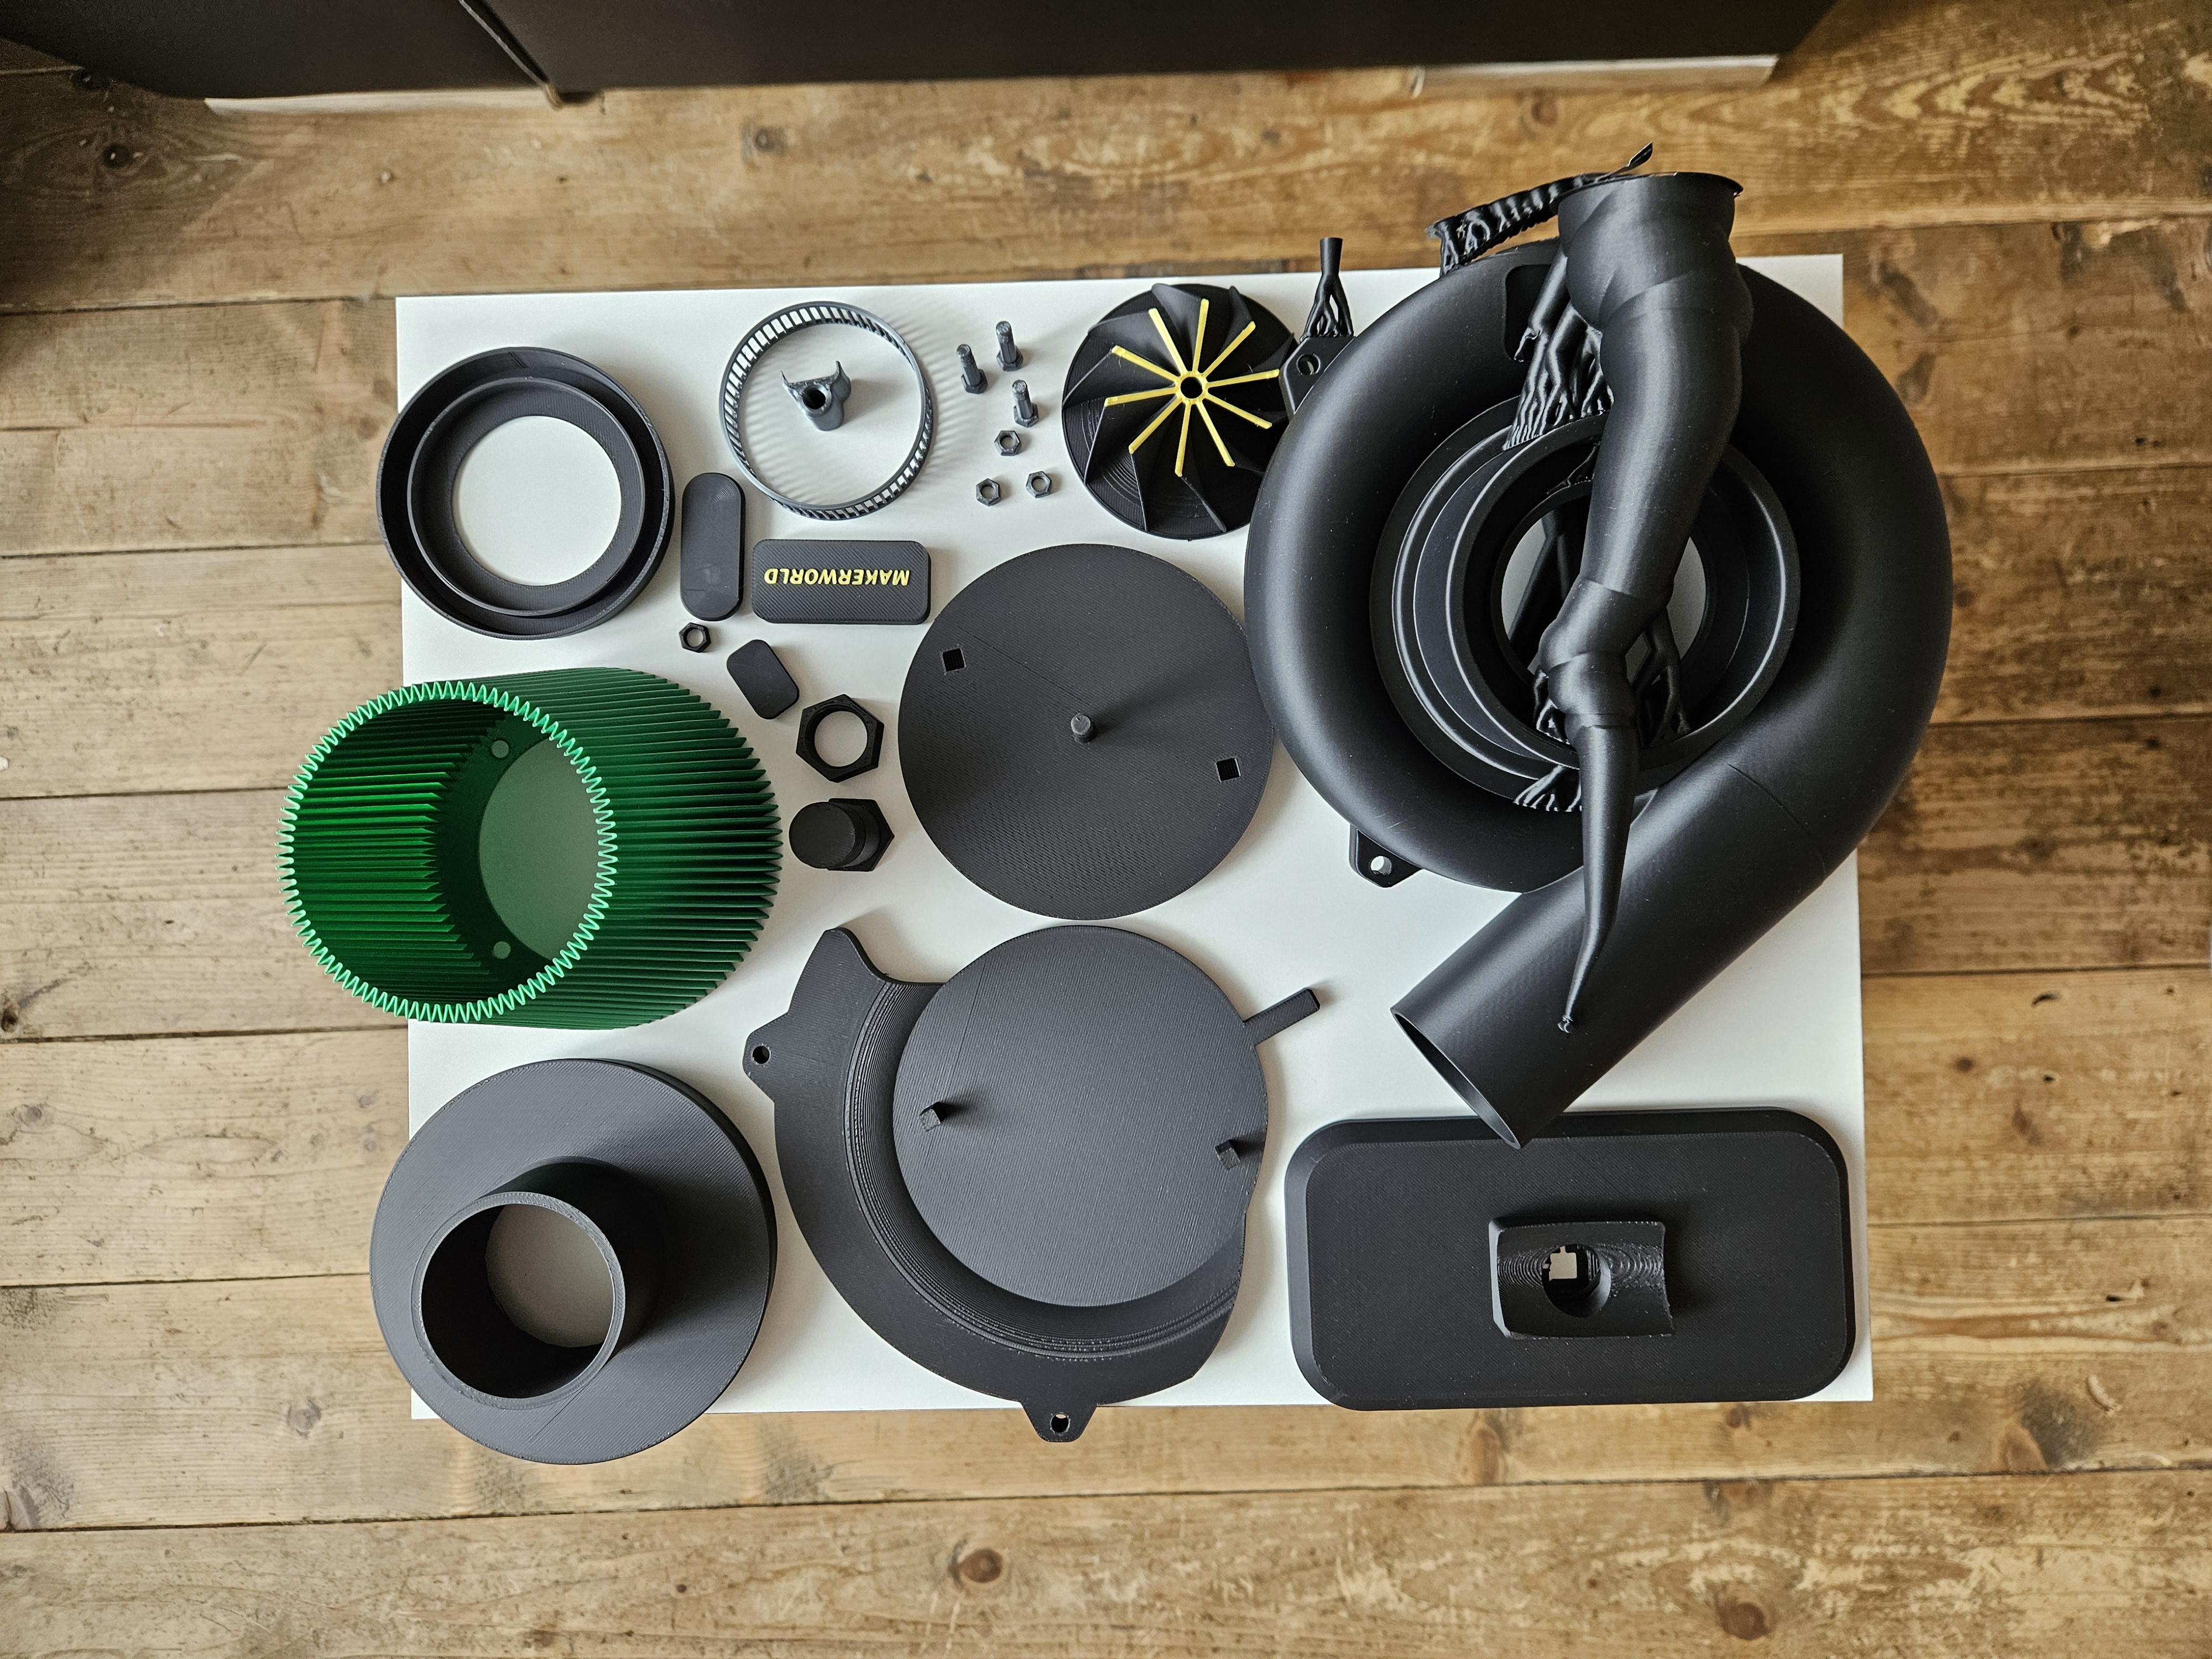
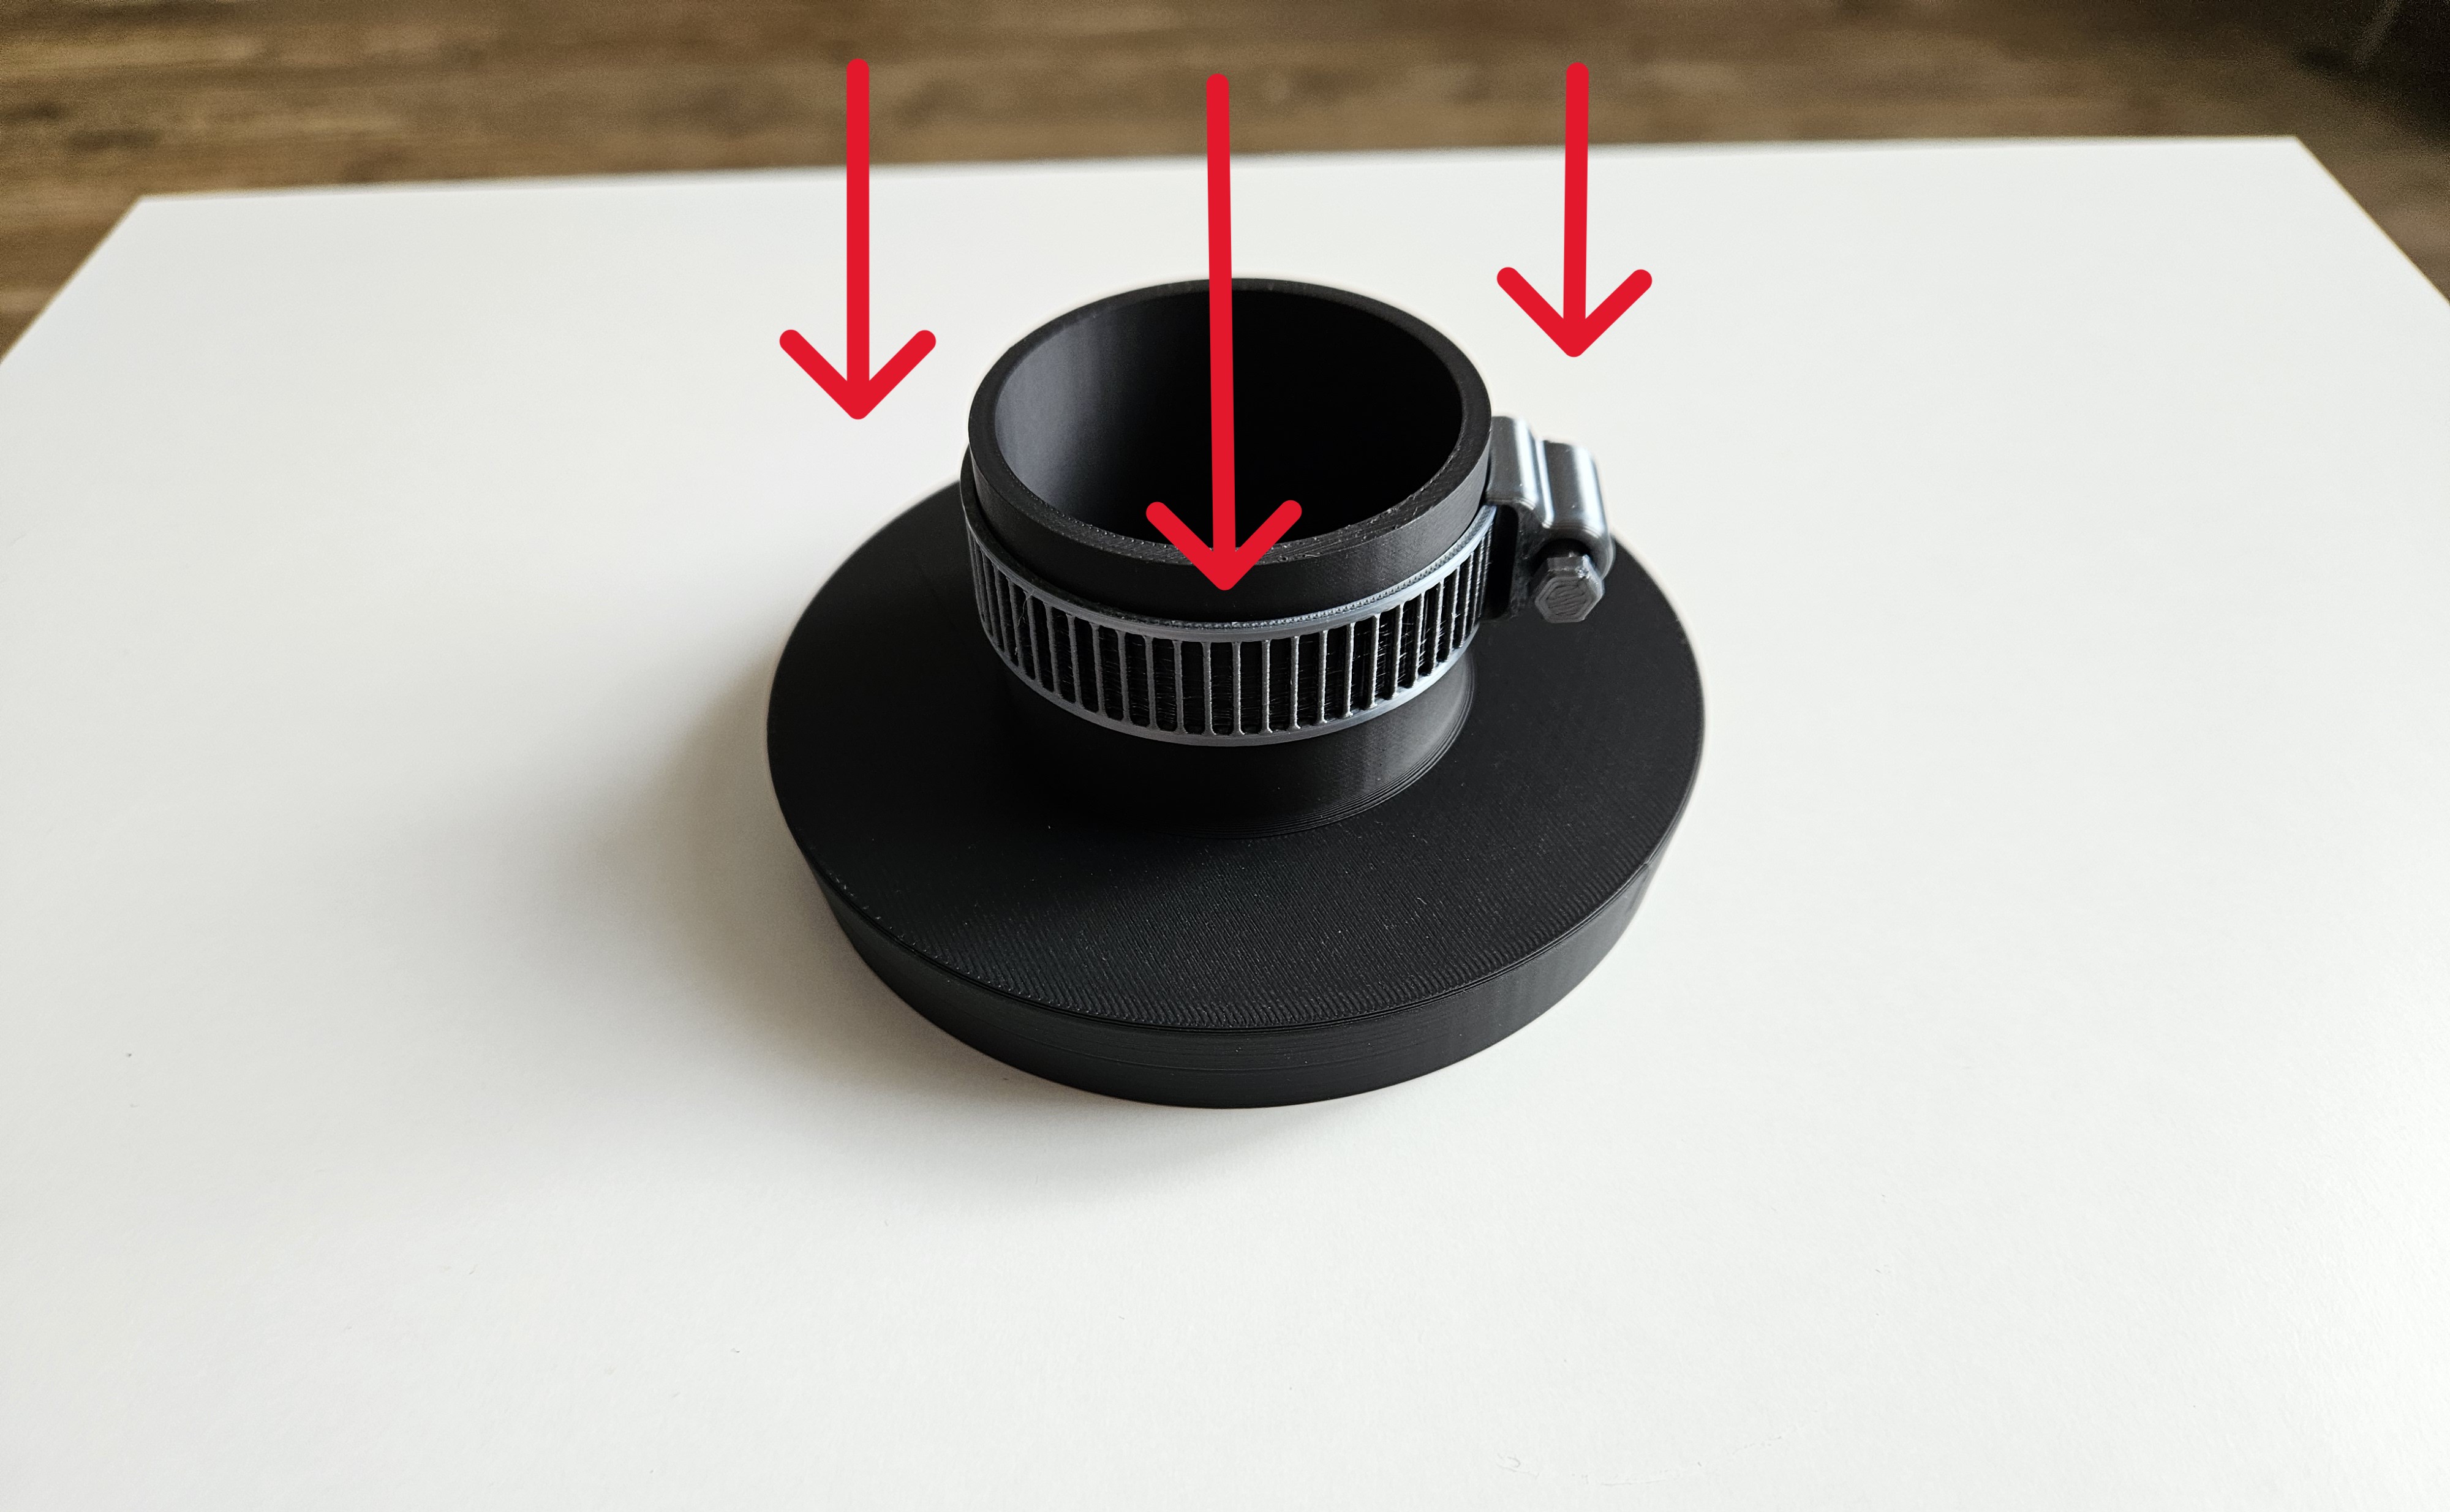
🔧 Clamp Mechanism: Insert the screw into the hose clamp (hose clip) mechanism, tighten the nut from the other side, and fix the mechanism onto the ring.
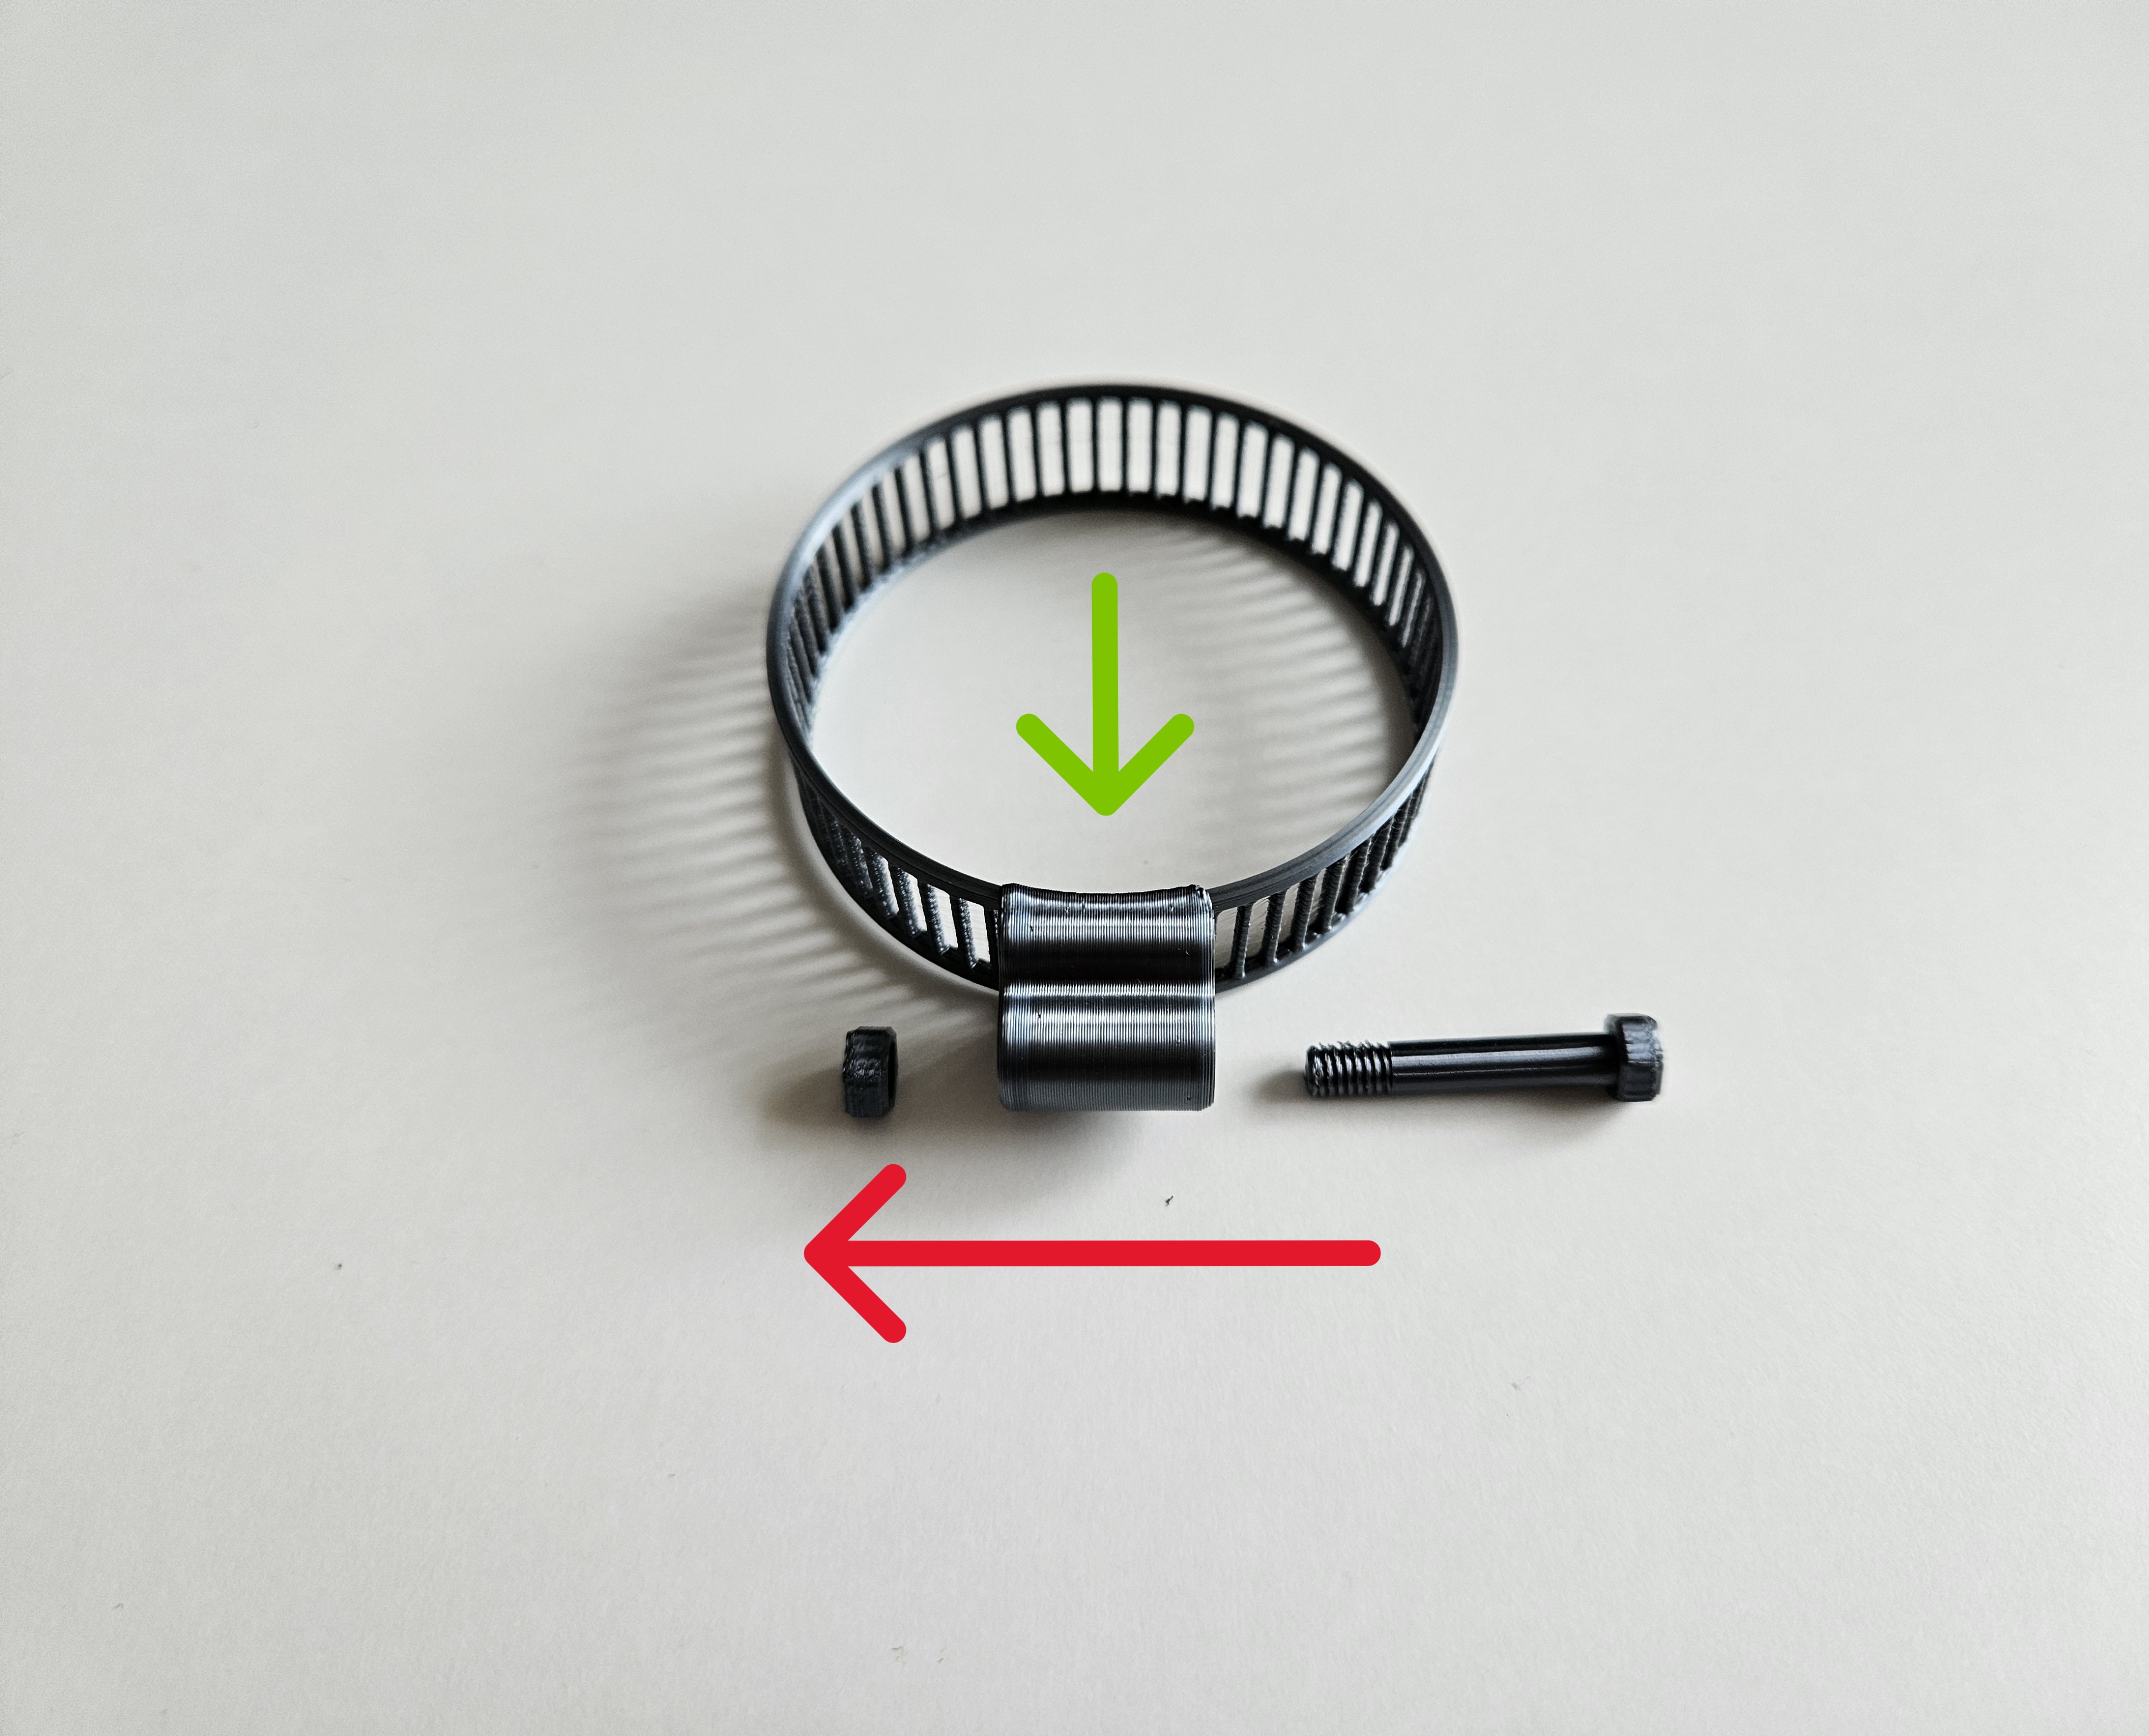
🌀 Filter Base: Slide this assembled hose clamp onto the bottom section of the air filter.
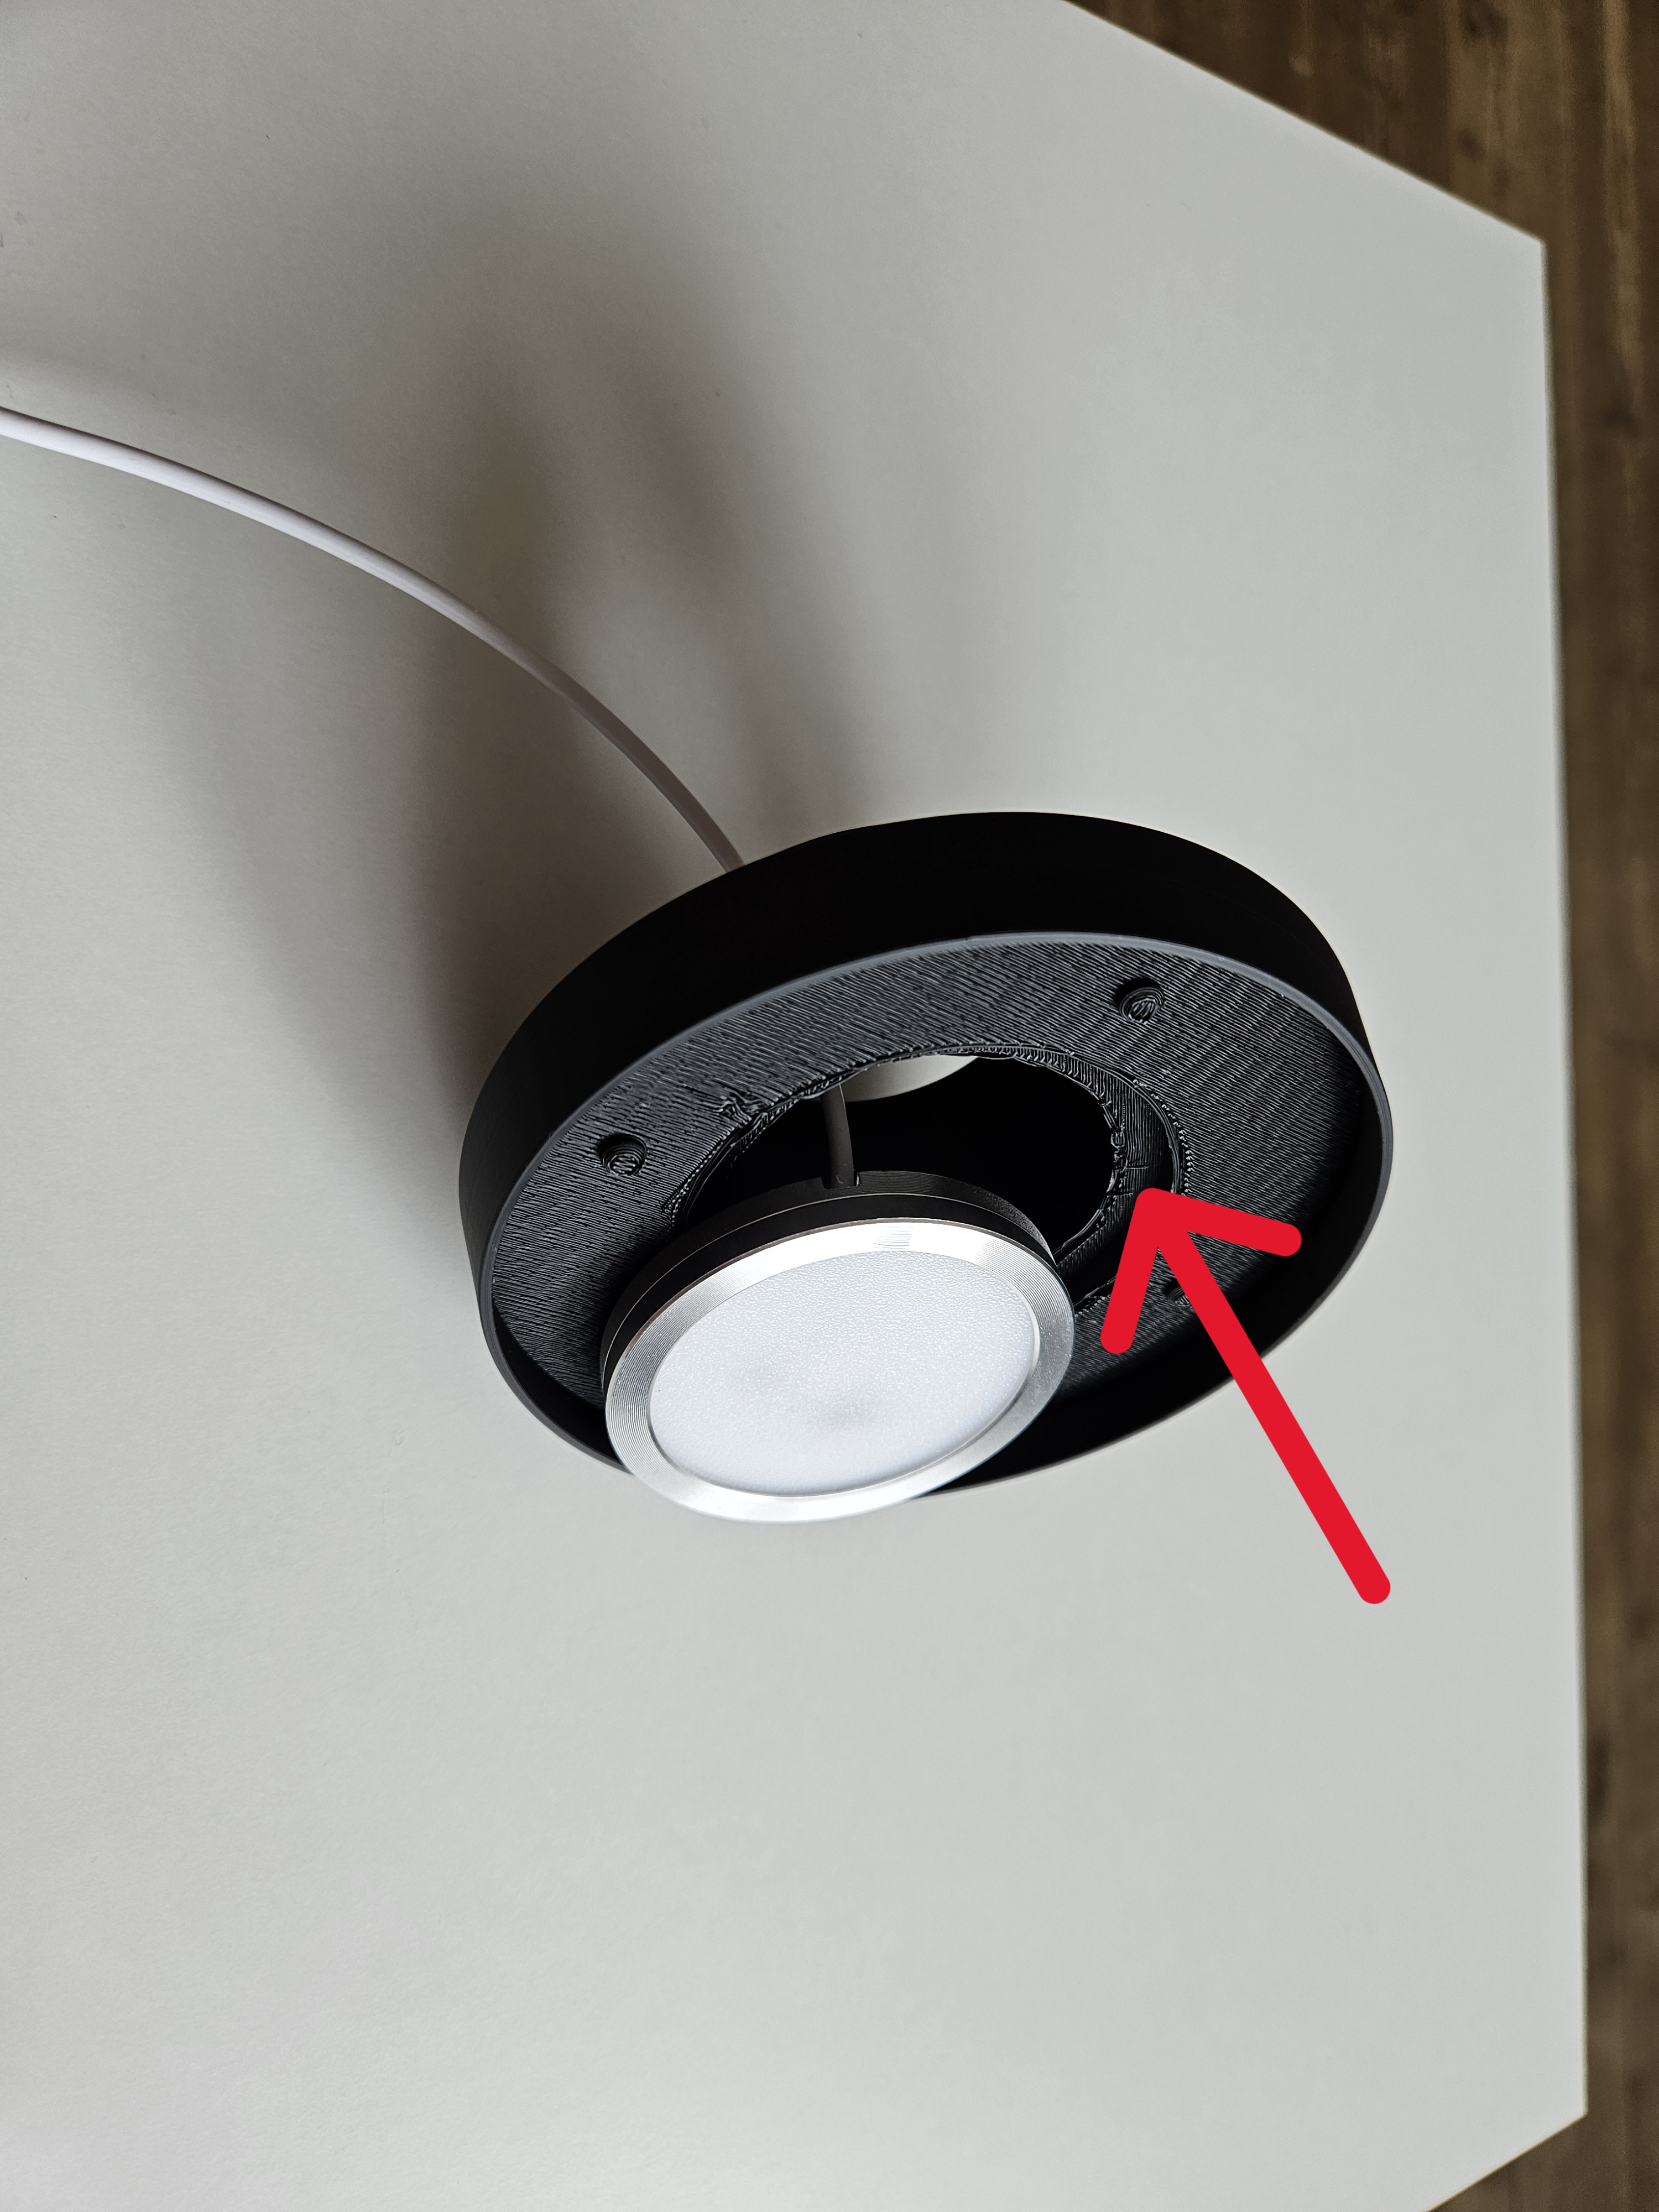
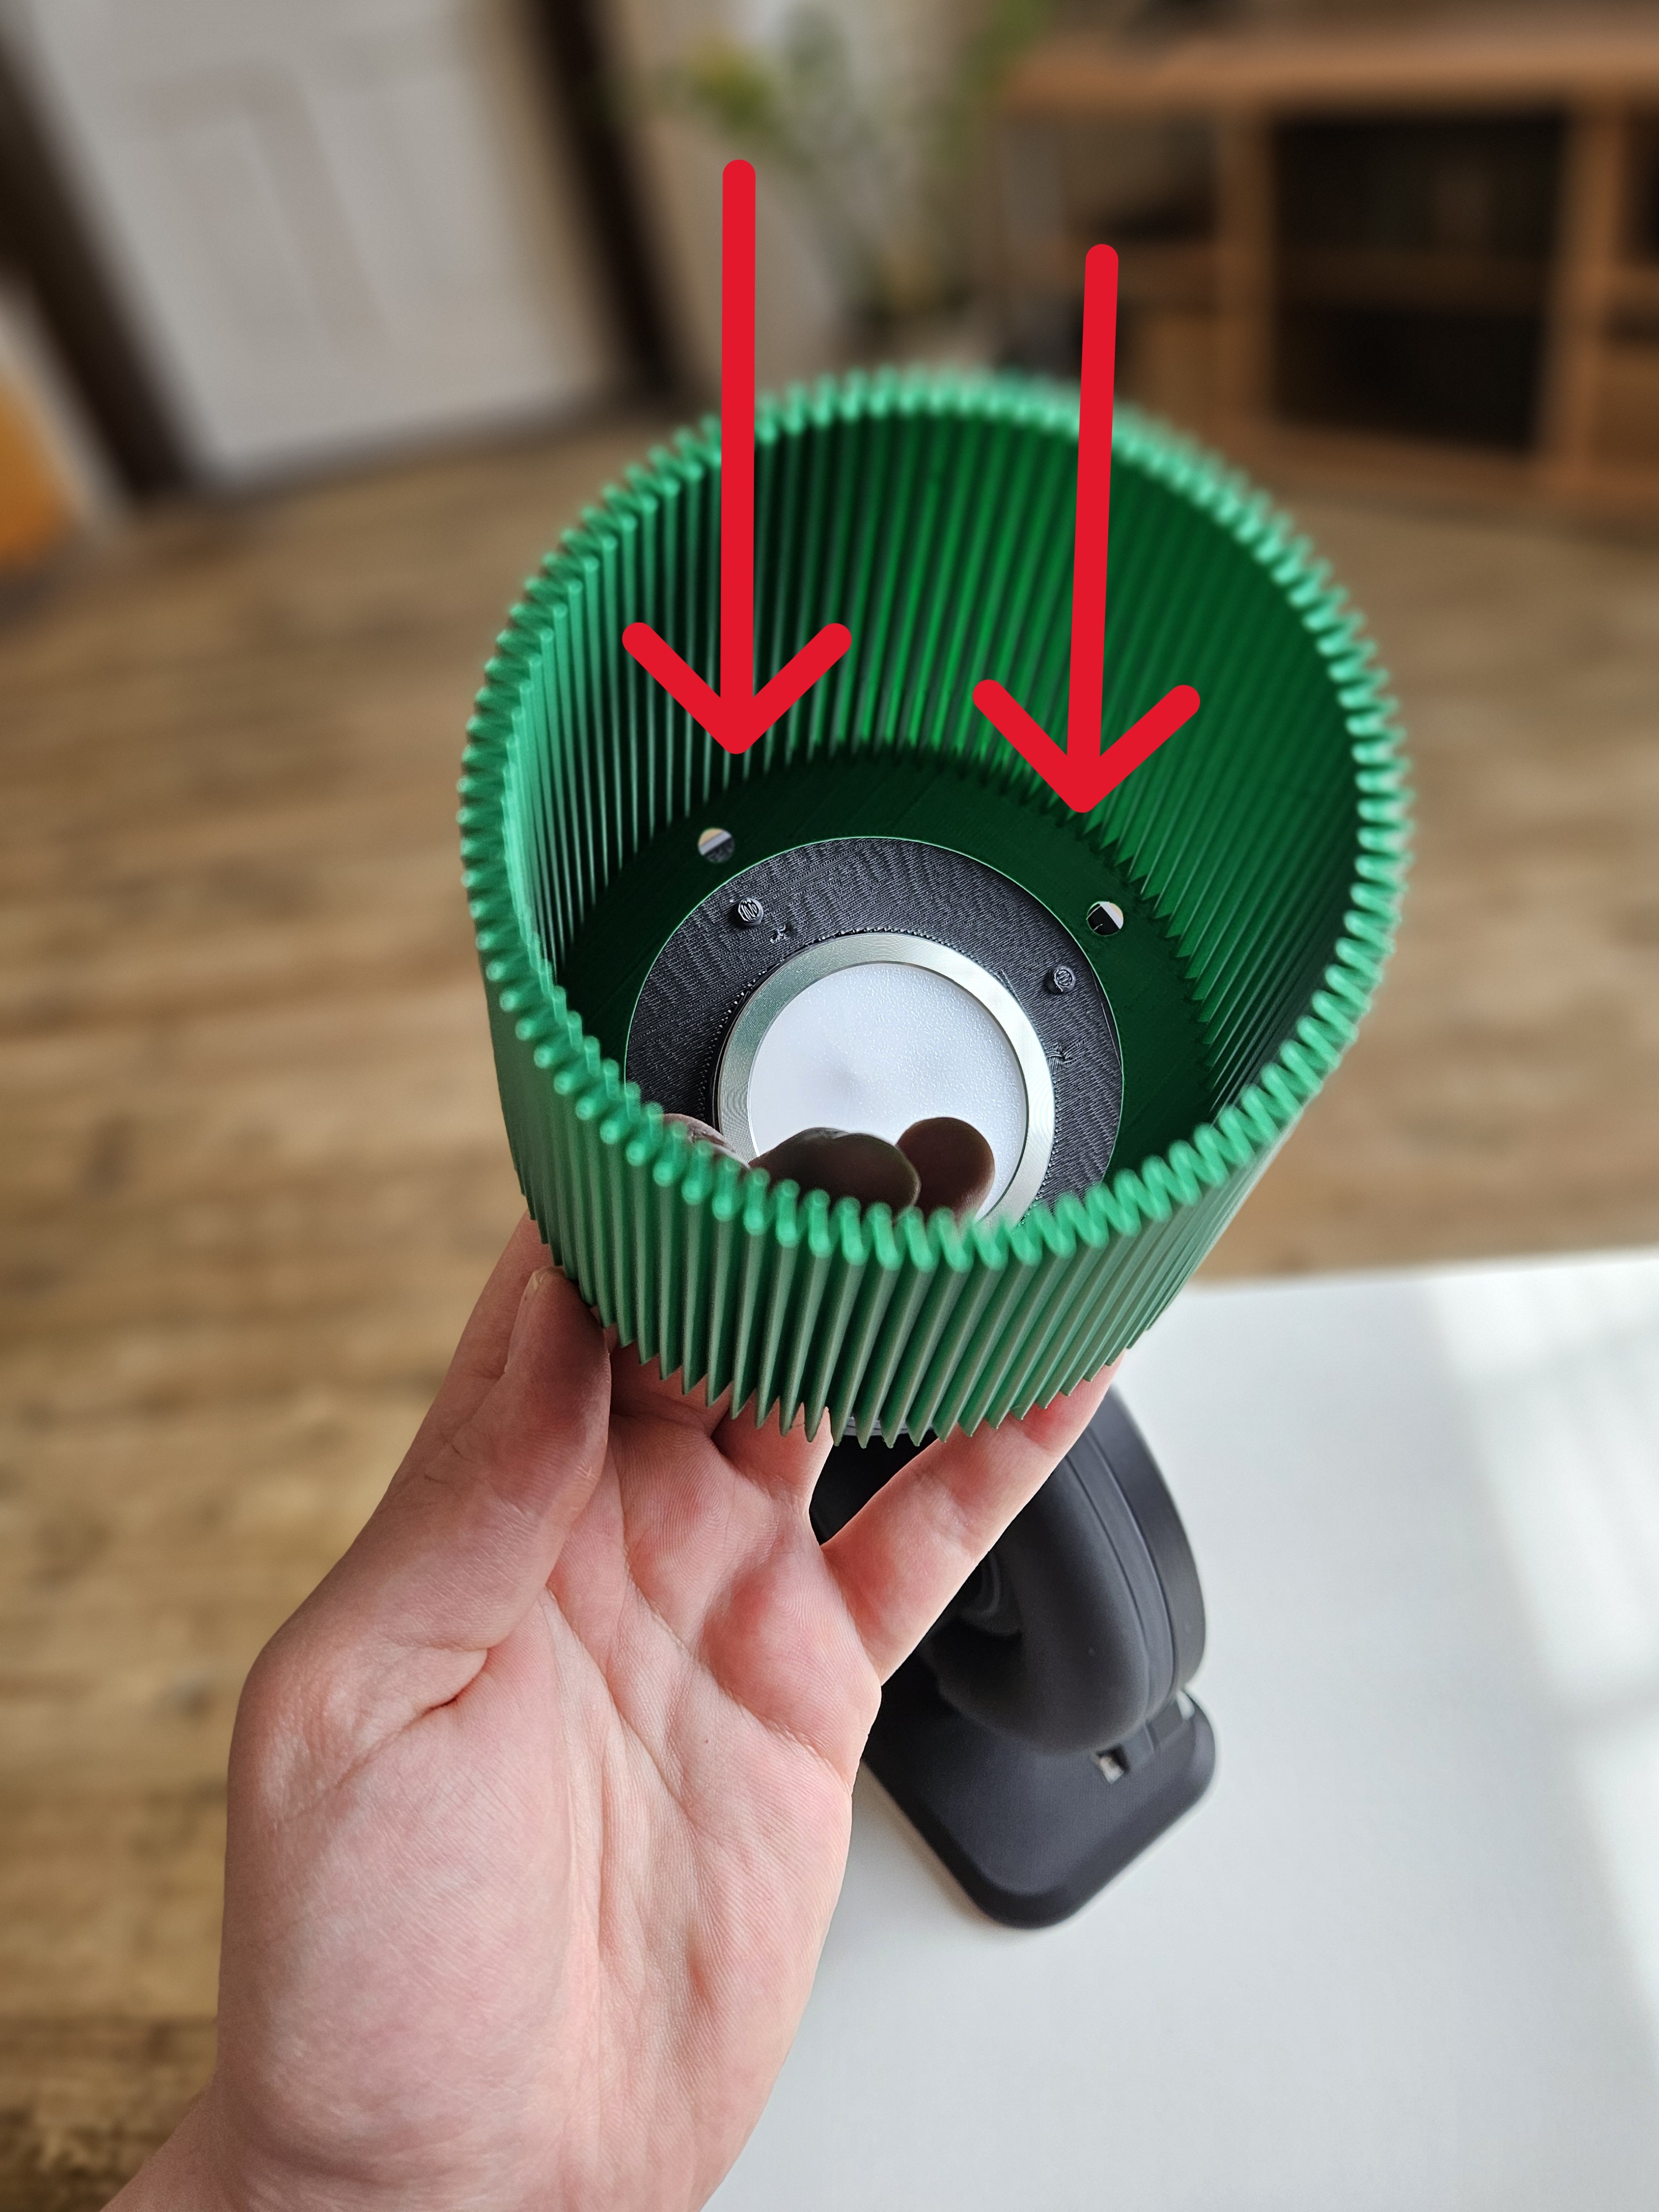
💡 Lighting: Thread the LED cable through the bottom part of the filter and place the LED light into the circular frame.
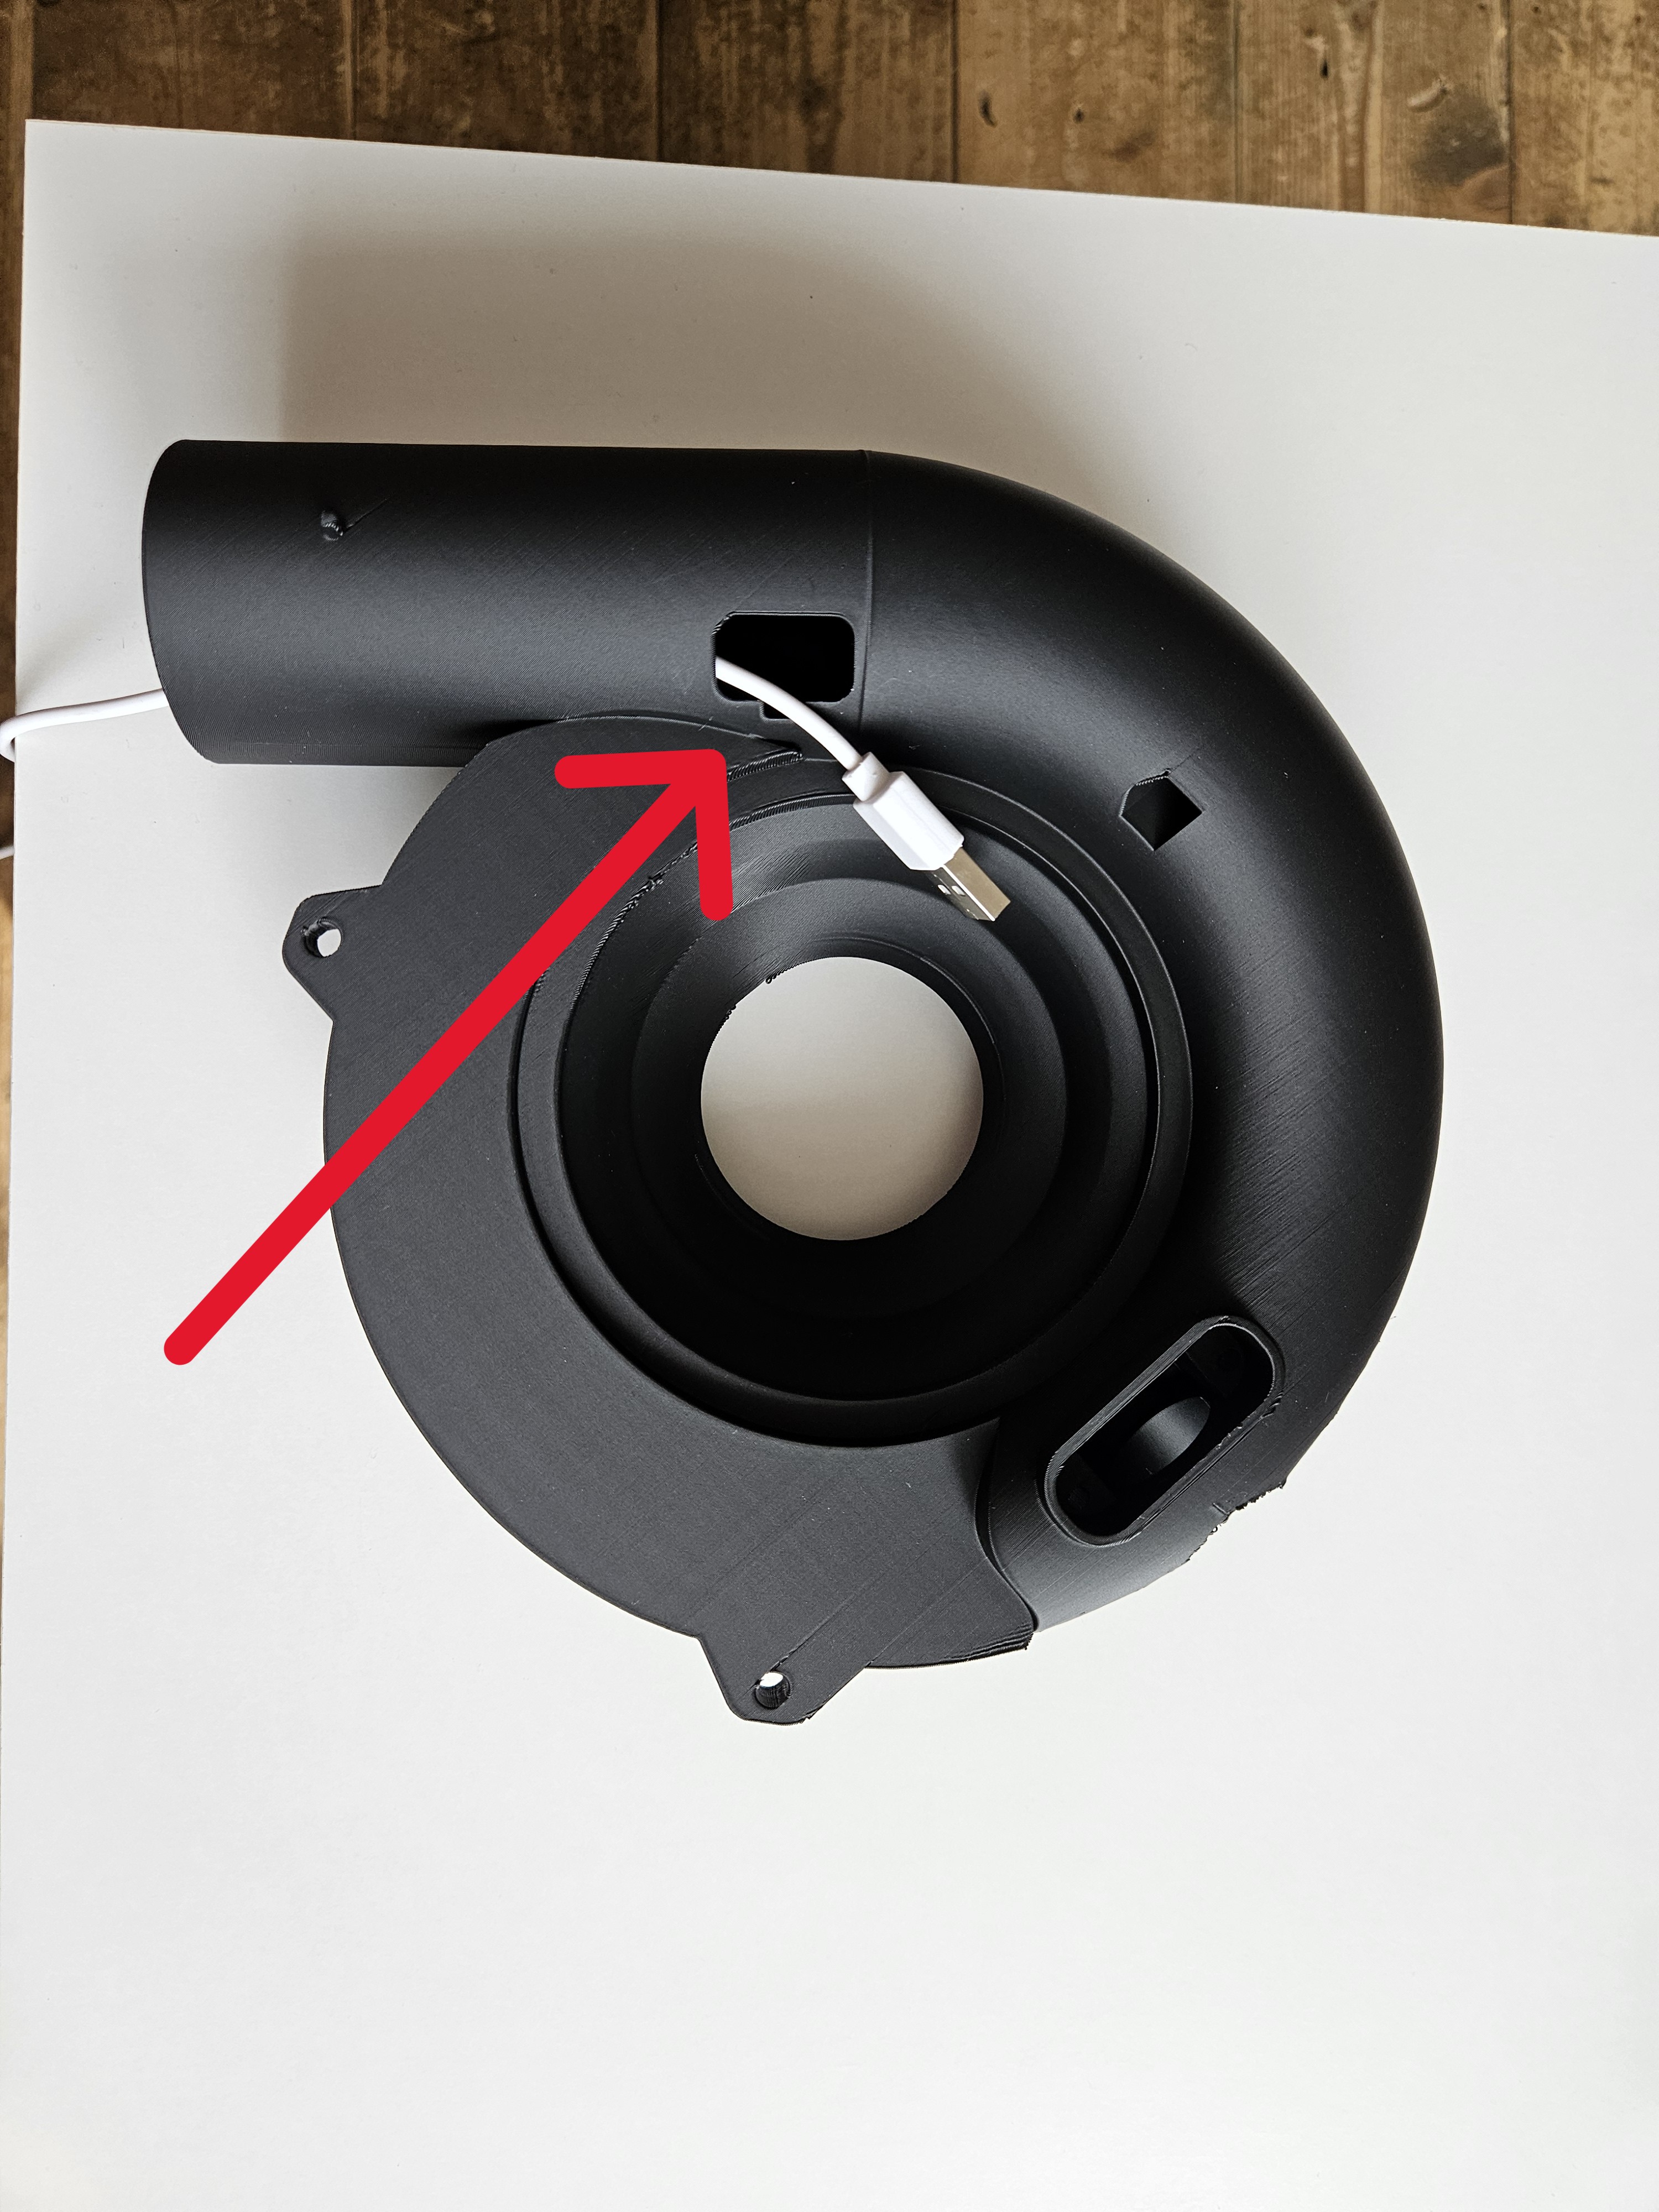
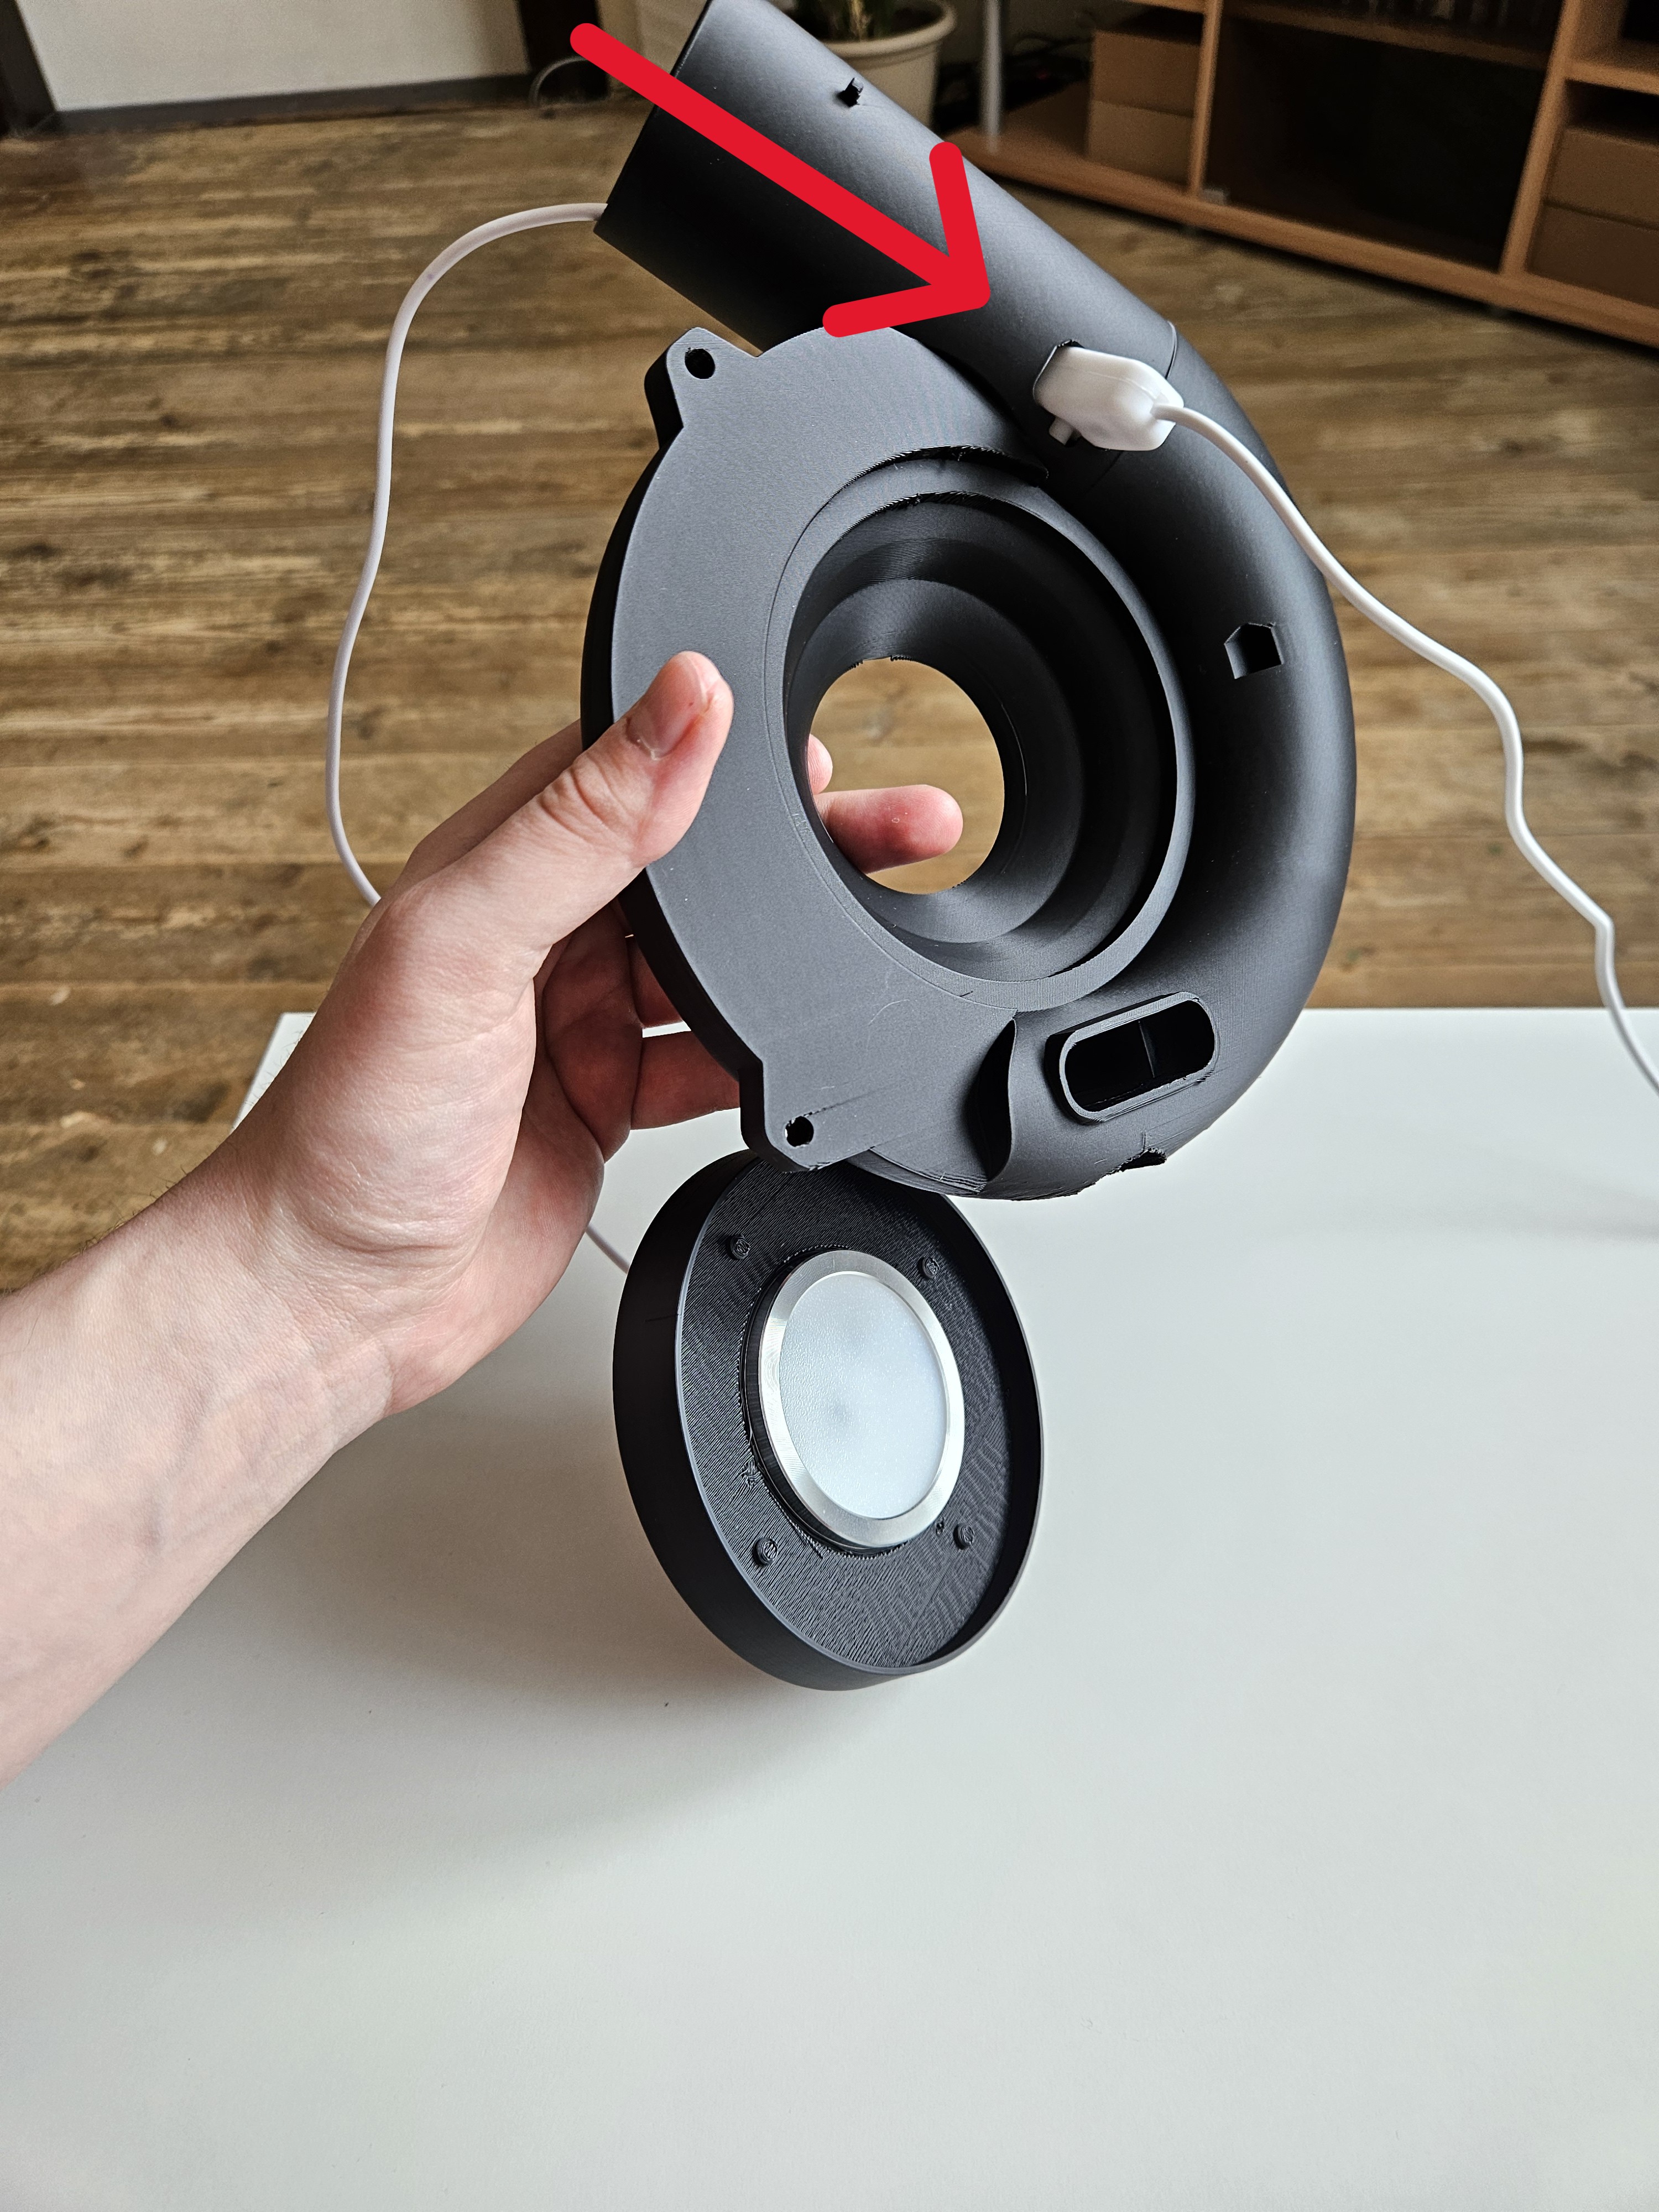
🐍 Cable Routing: Feed the cable through the turbo tube using the assembly hole, then slide the bottom part of the filter onto the turbo body.
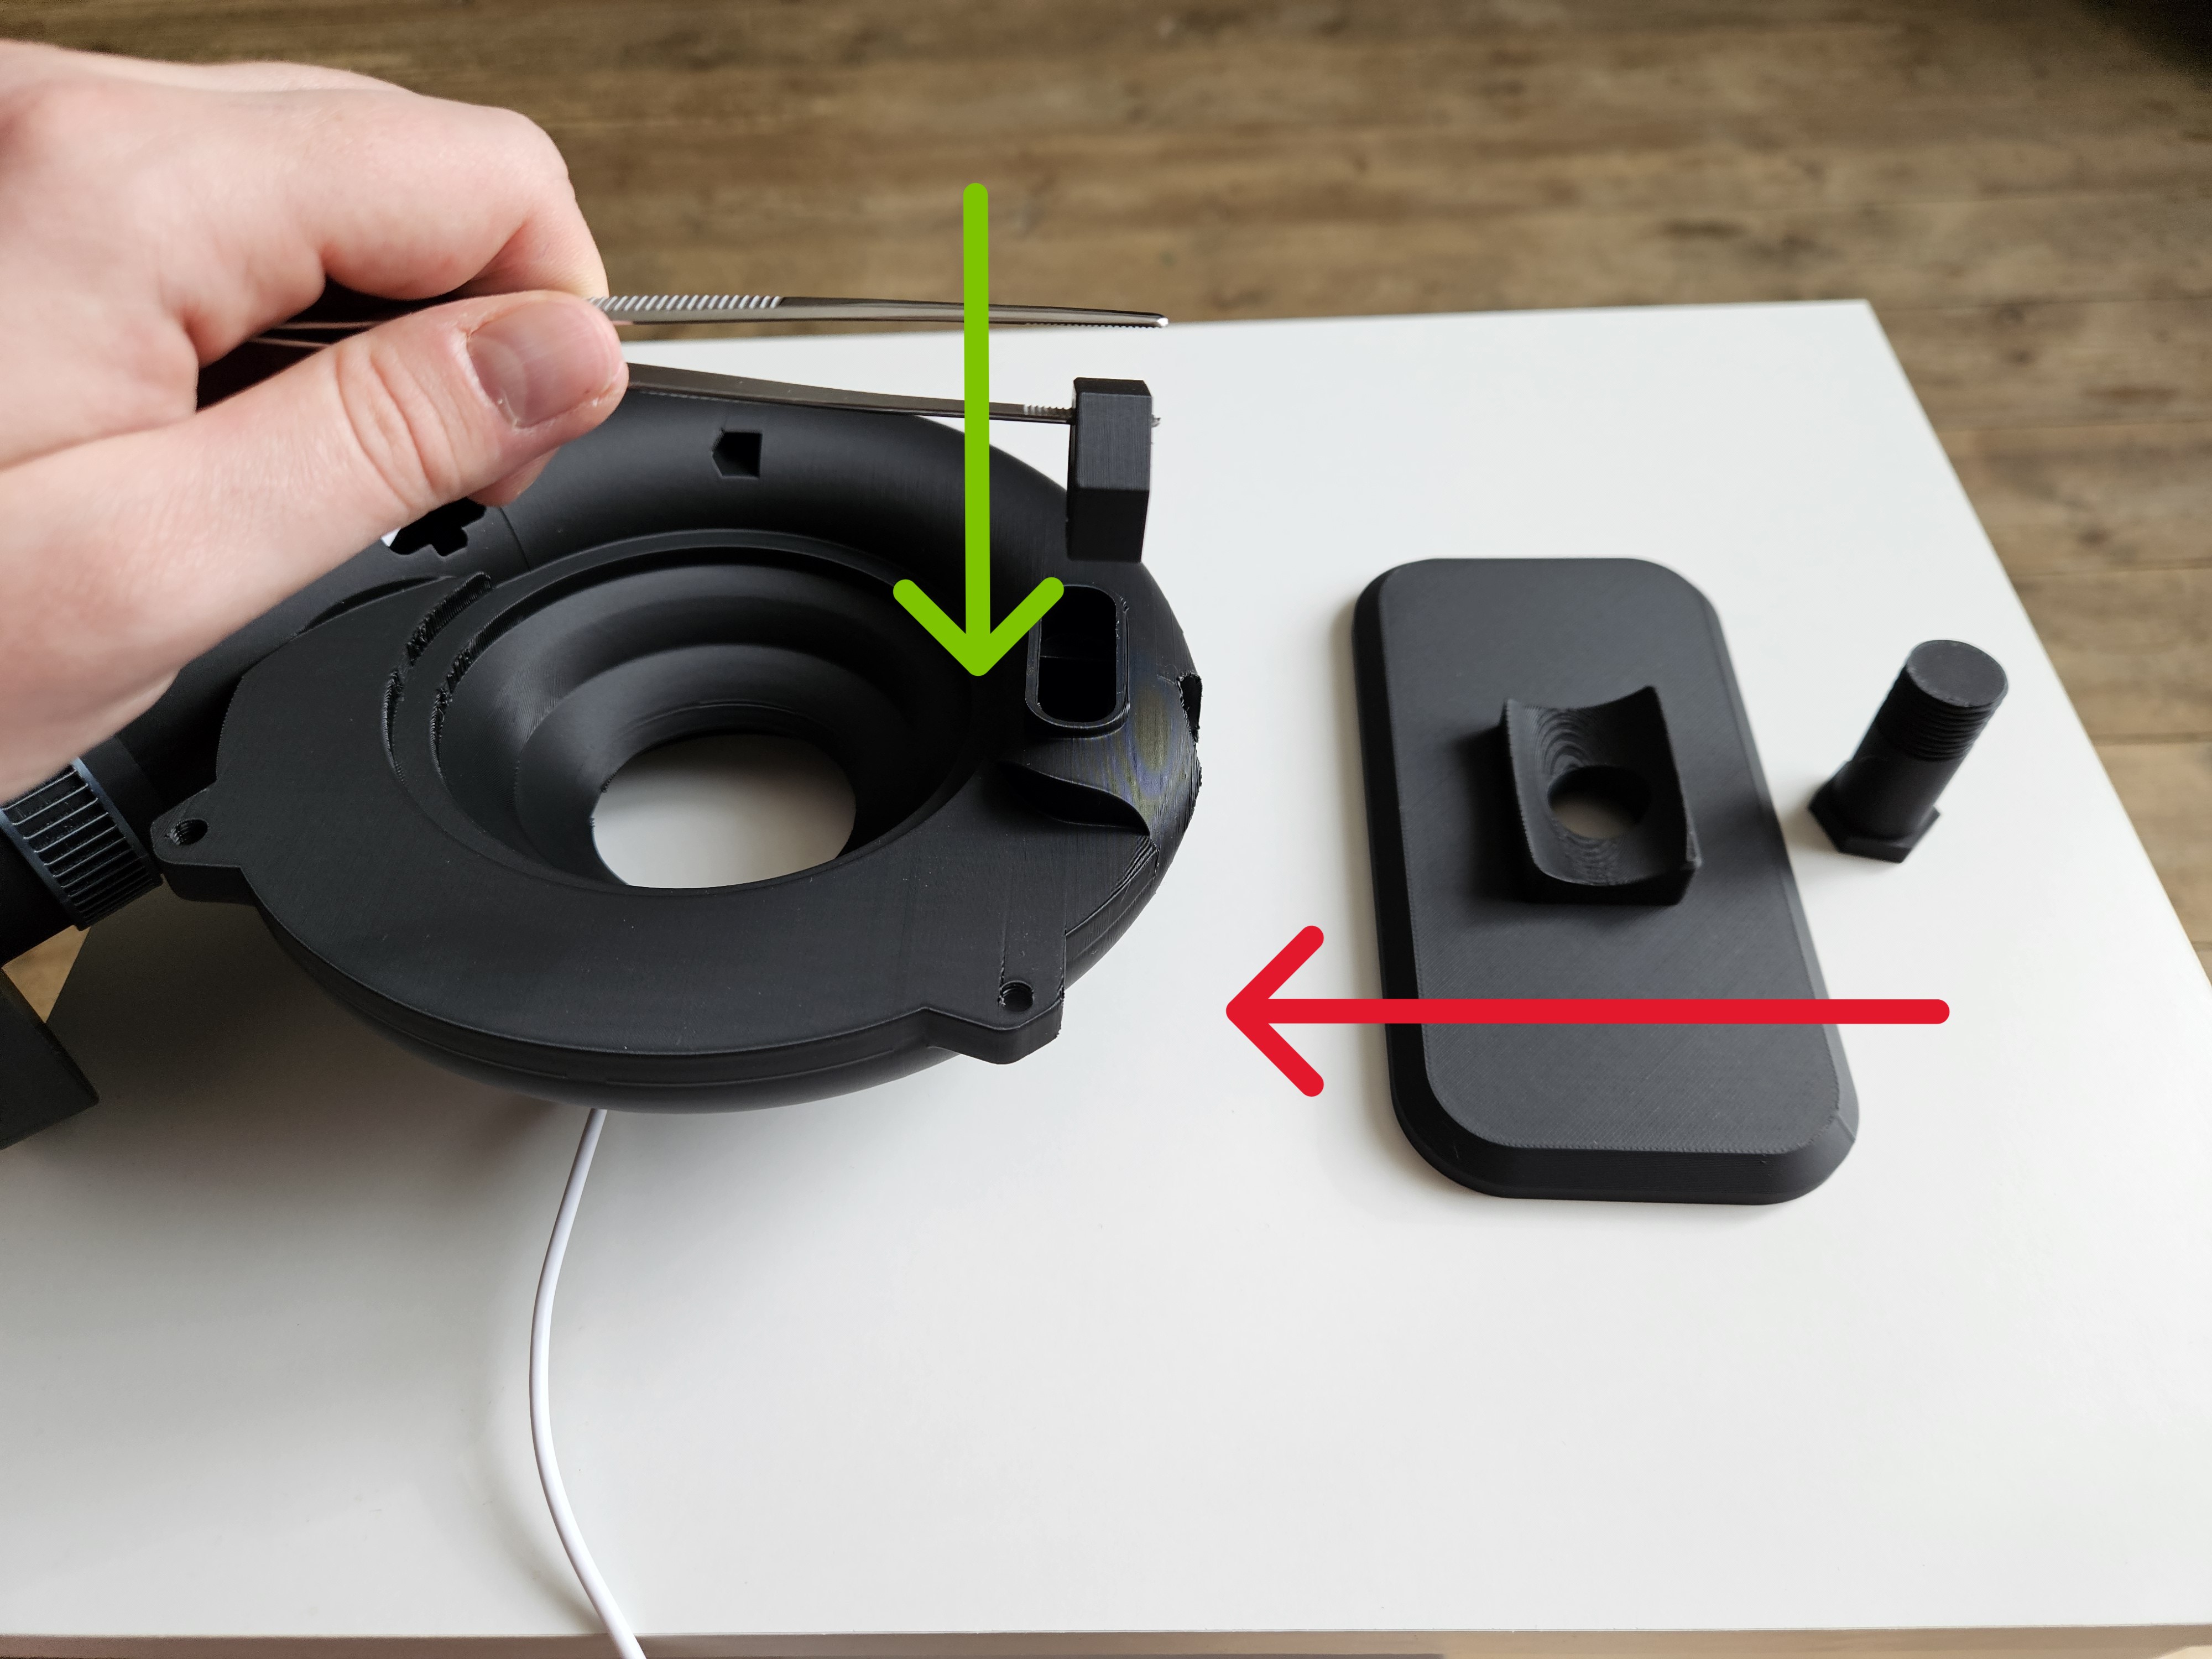
- 🏗️ Stand Mounting: Secure the turbo to the stand using the large screw and nut.
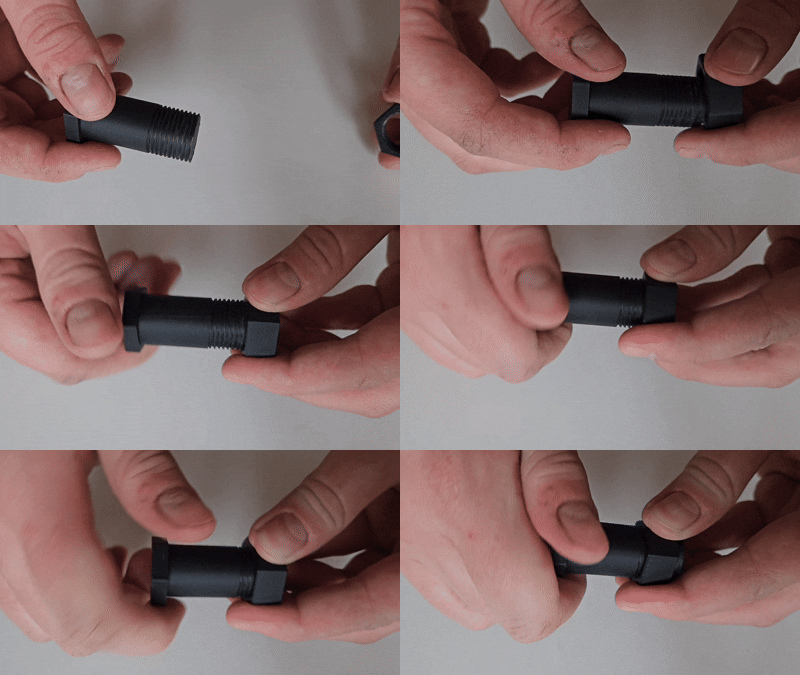
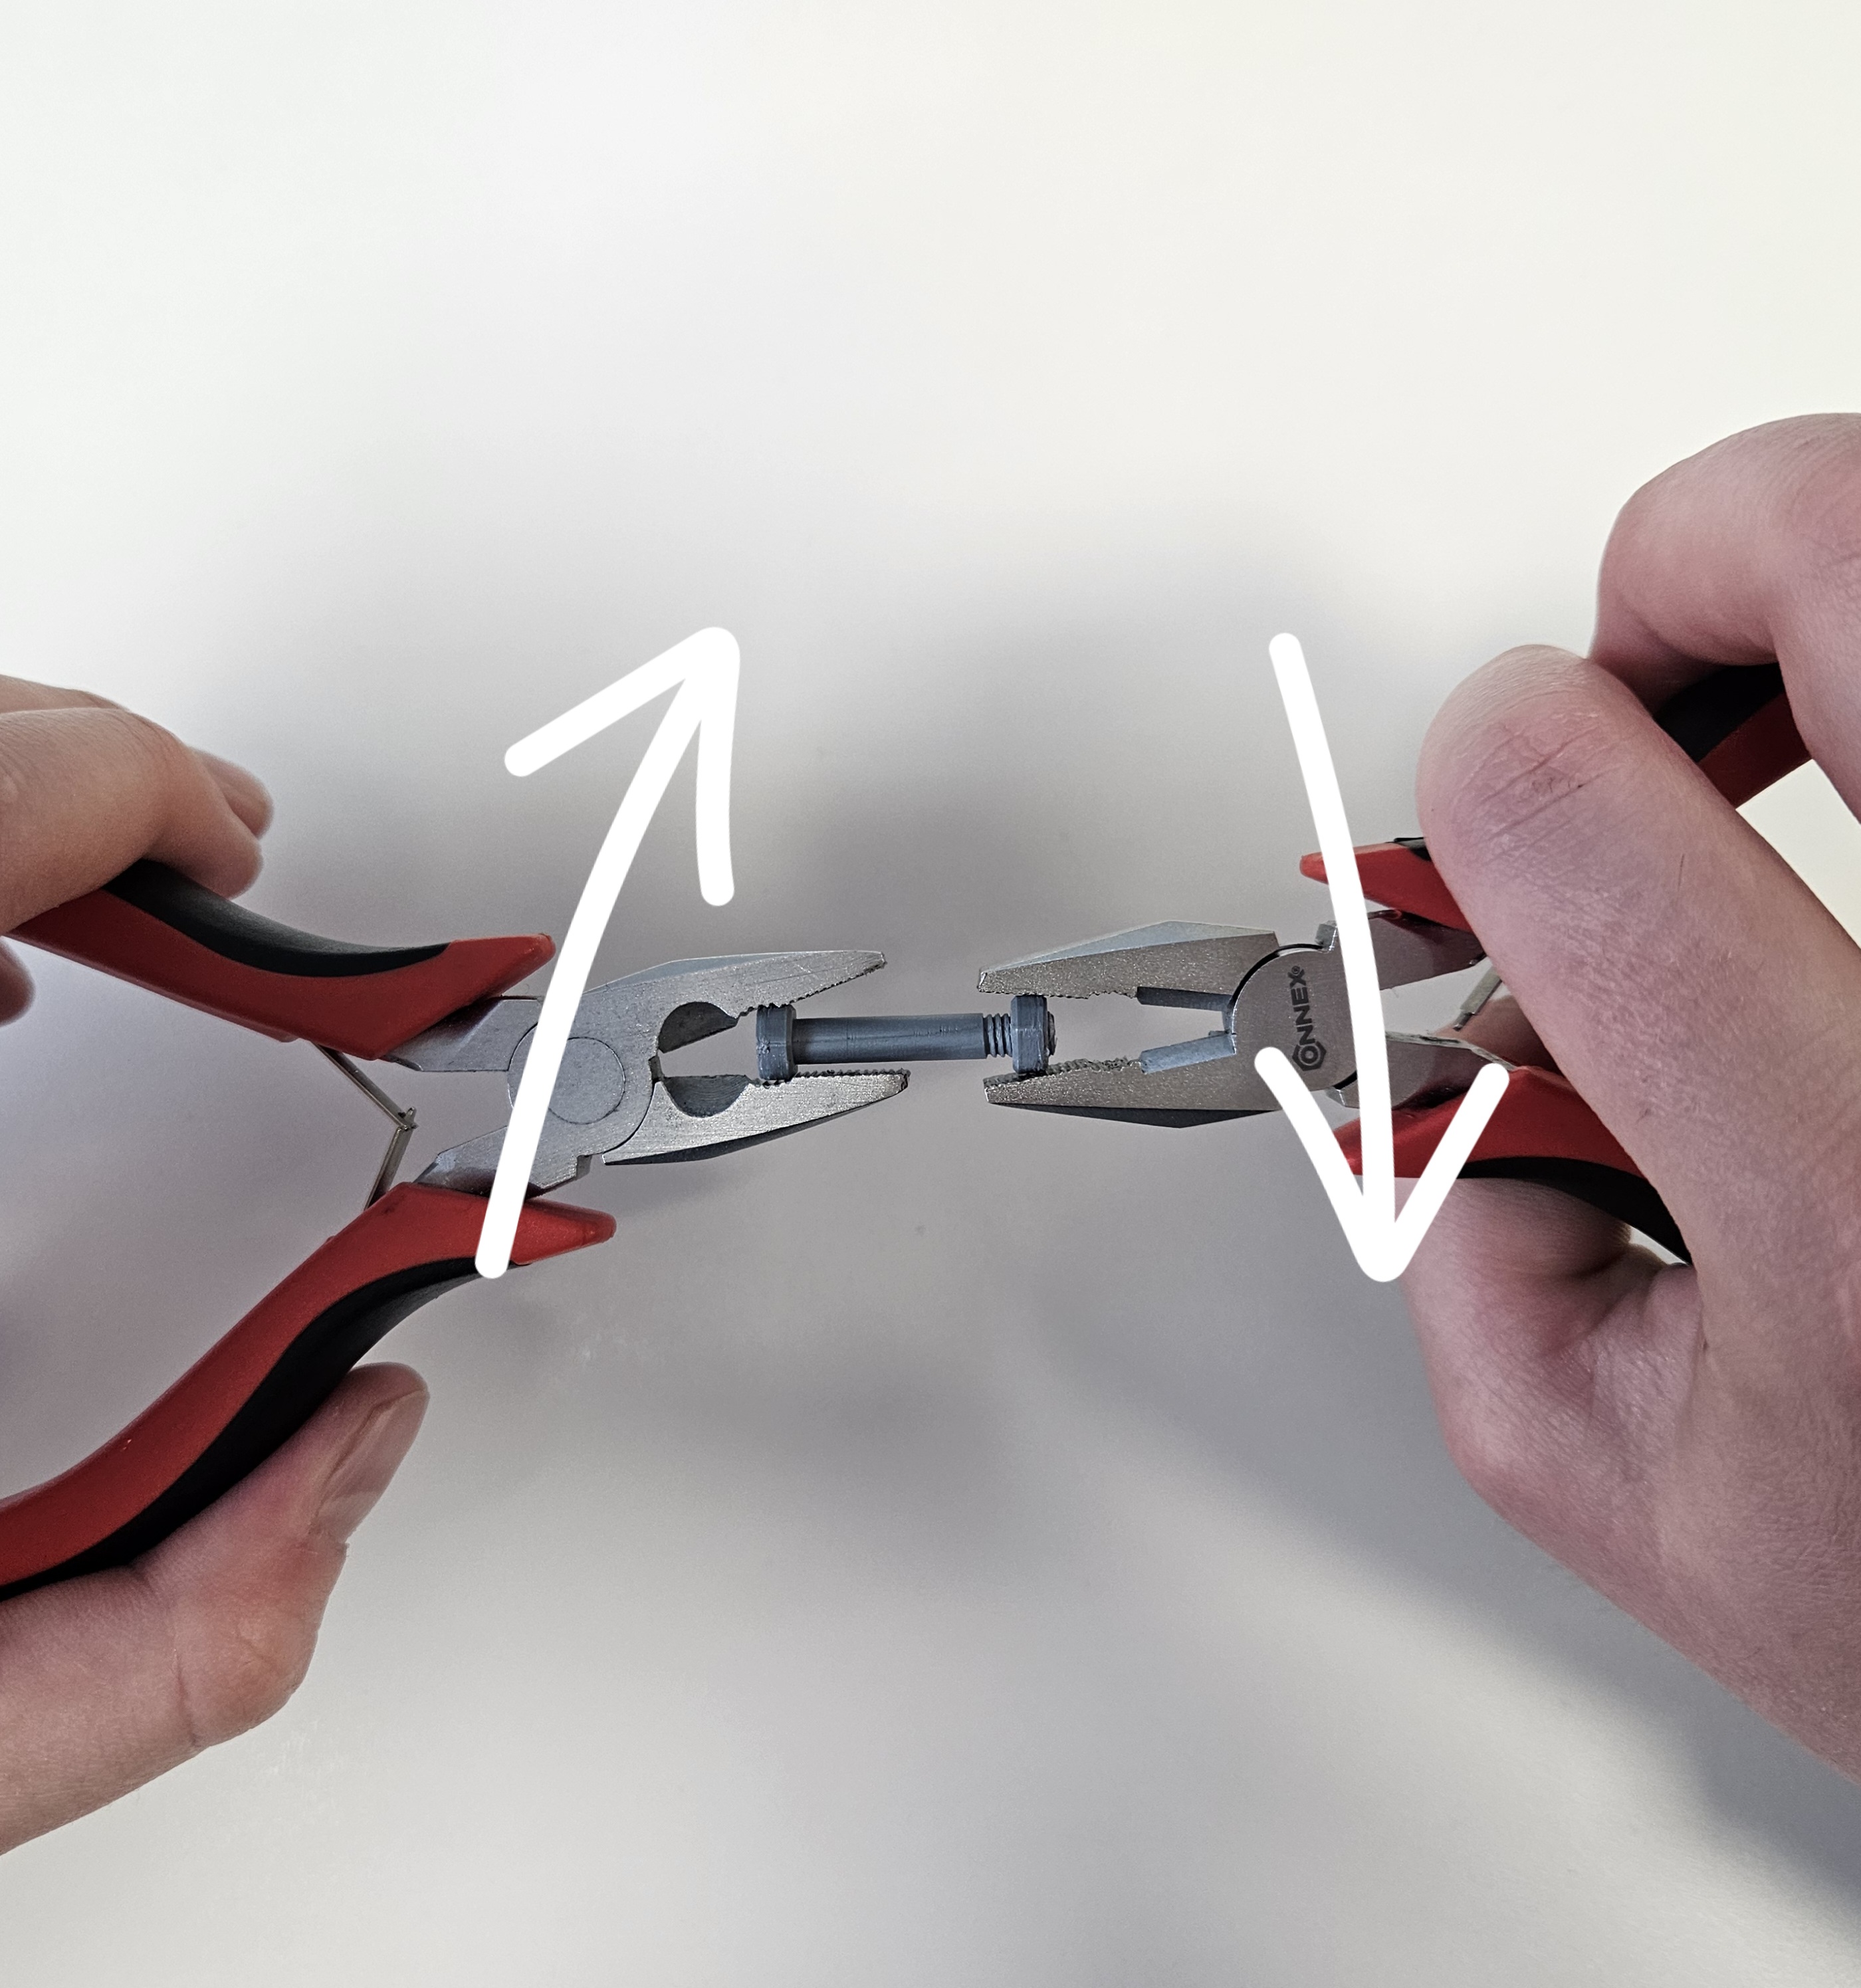
- Pro Tip: If the nut doesn't move smoothly on the thread, I recommend loosening it up first using a ratchet and a wrench.
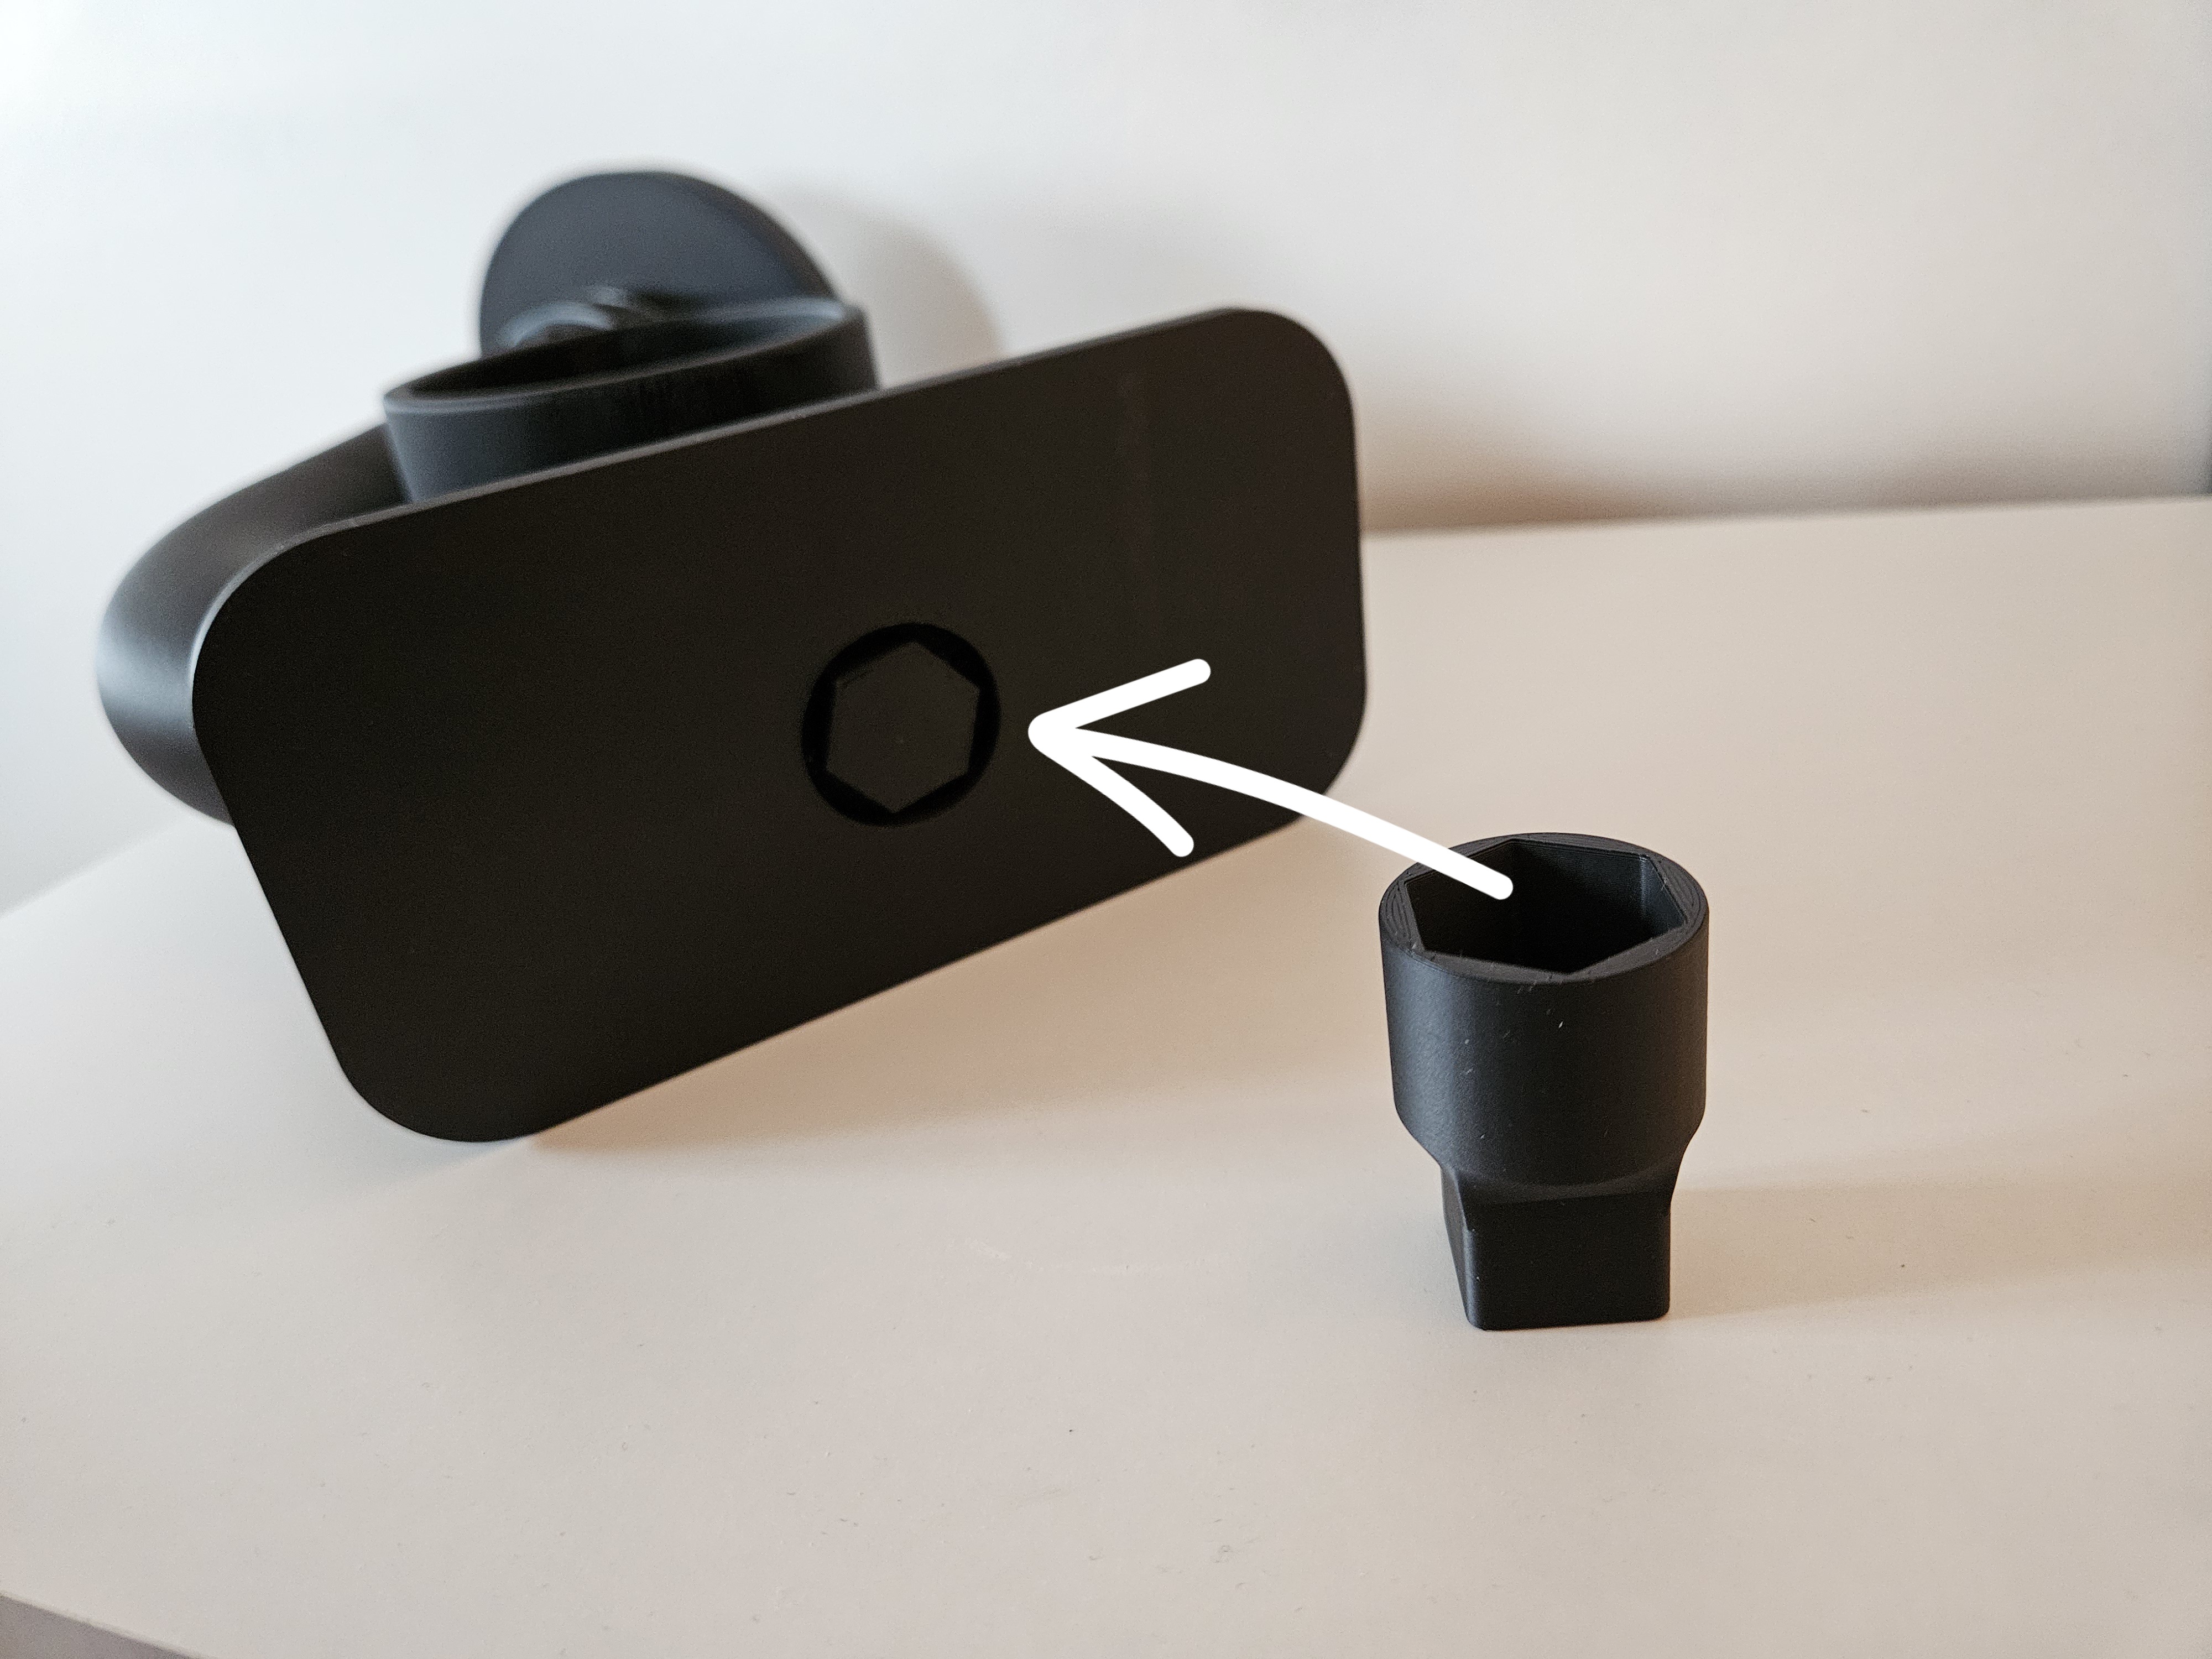
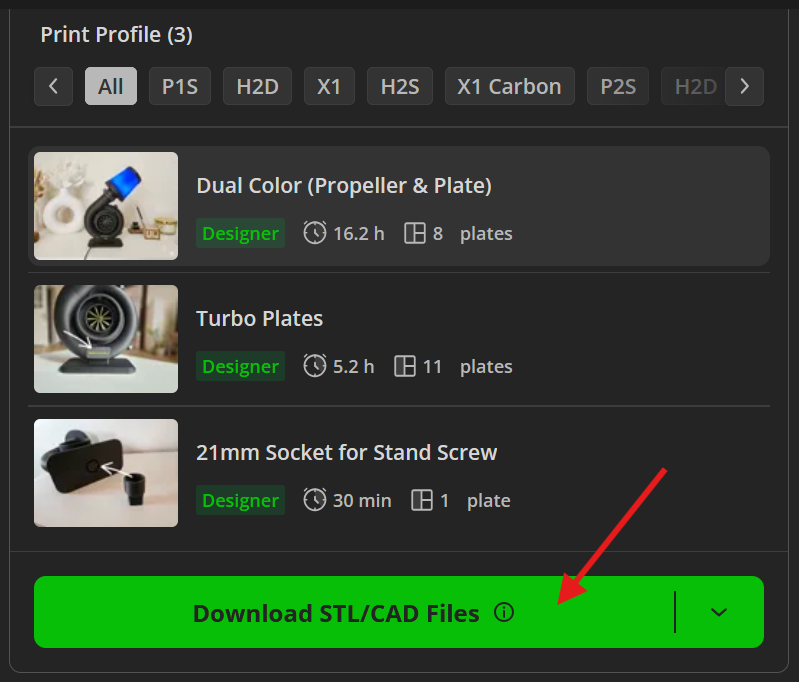
Attention: Tighten this screw GENTLY using a 21mm socket! 🛠️ - If you don't have this socket, simply print it from my print profile “21mm Socket for Stand Screw”.
- 🎡 Turbine Spin: Place the impeller onto its base and tighten the nut so the impeller doesn't slip off.
Important: Do not over-tighten! Leave enough clearance so the turbine can spin freely. 🌬️
Tip: If the propeller mounting nut does not fit the thread, I recommend increasing the nut scale by 1-2% (depending on the filament used).
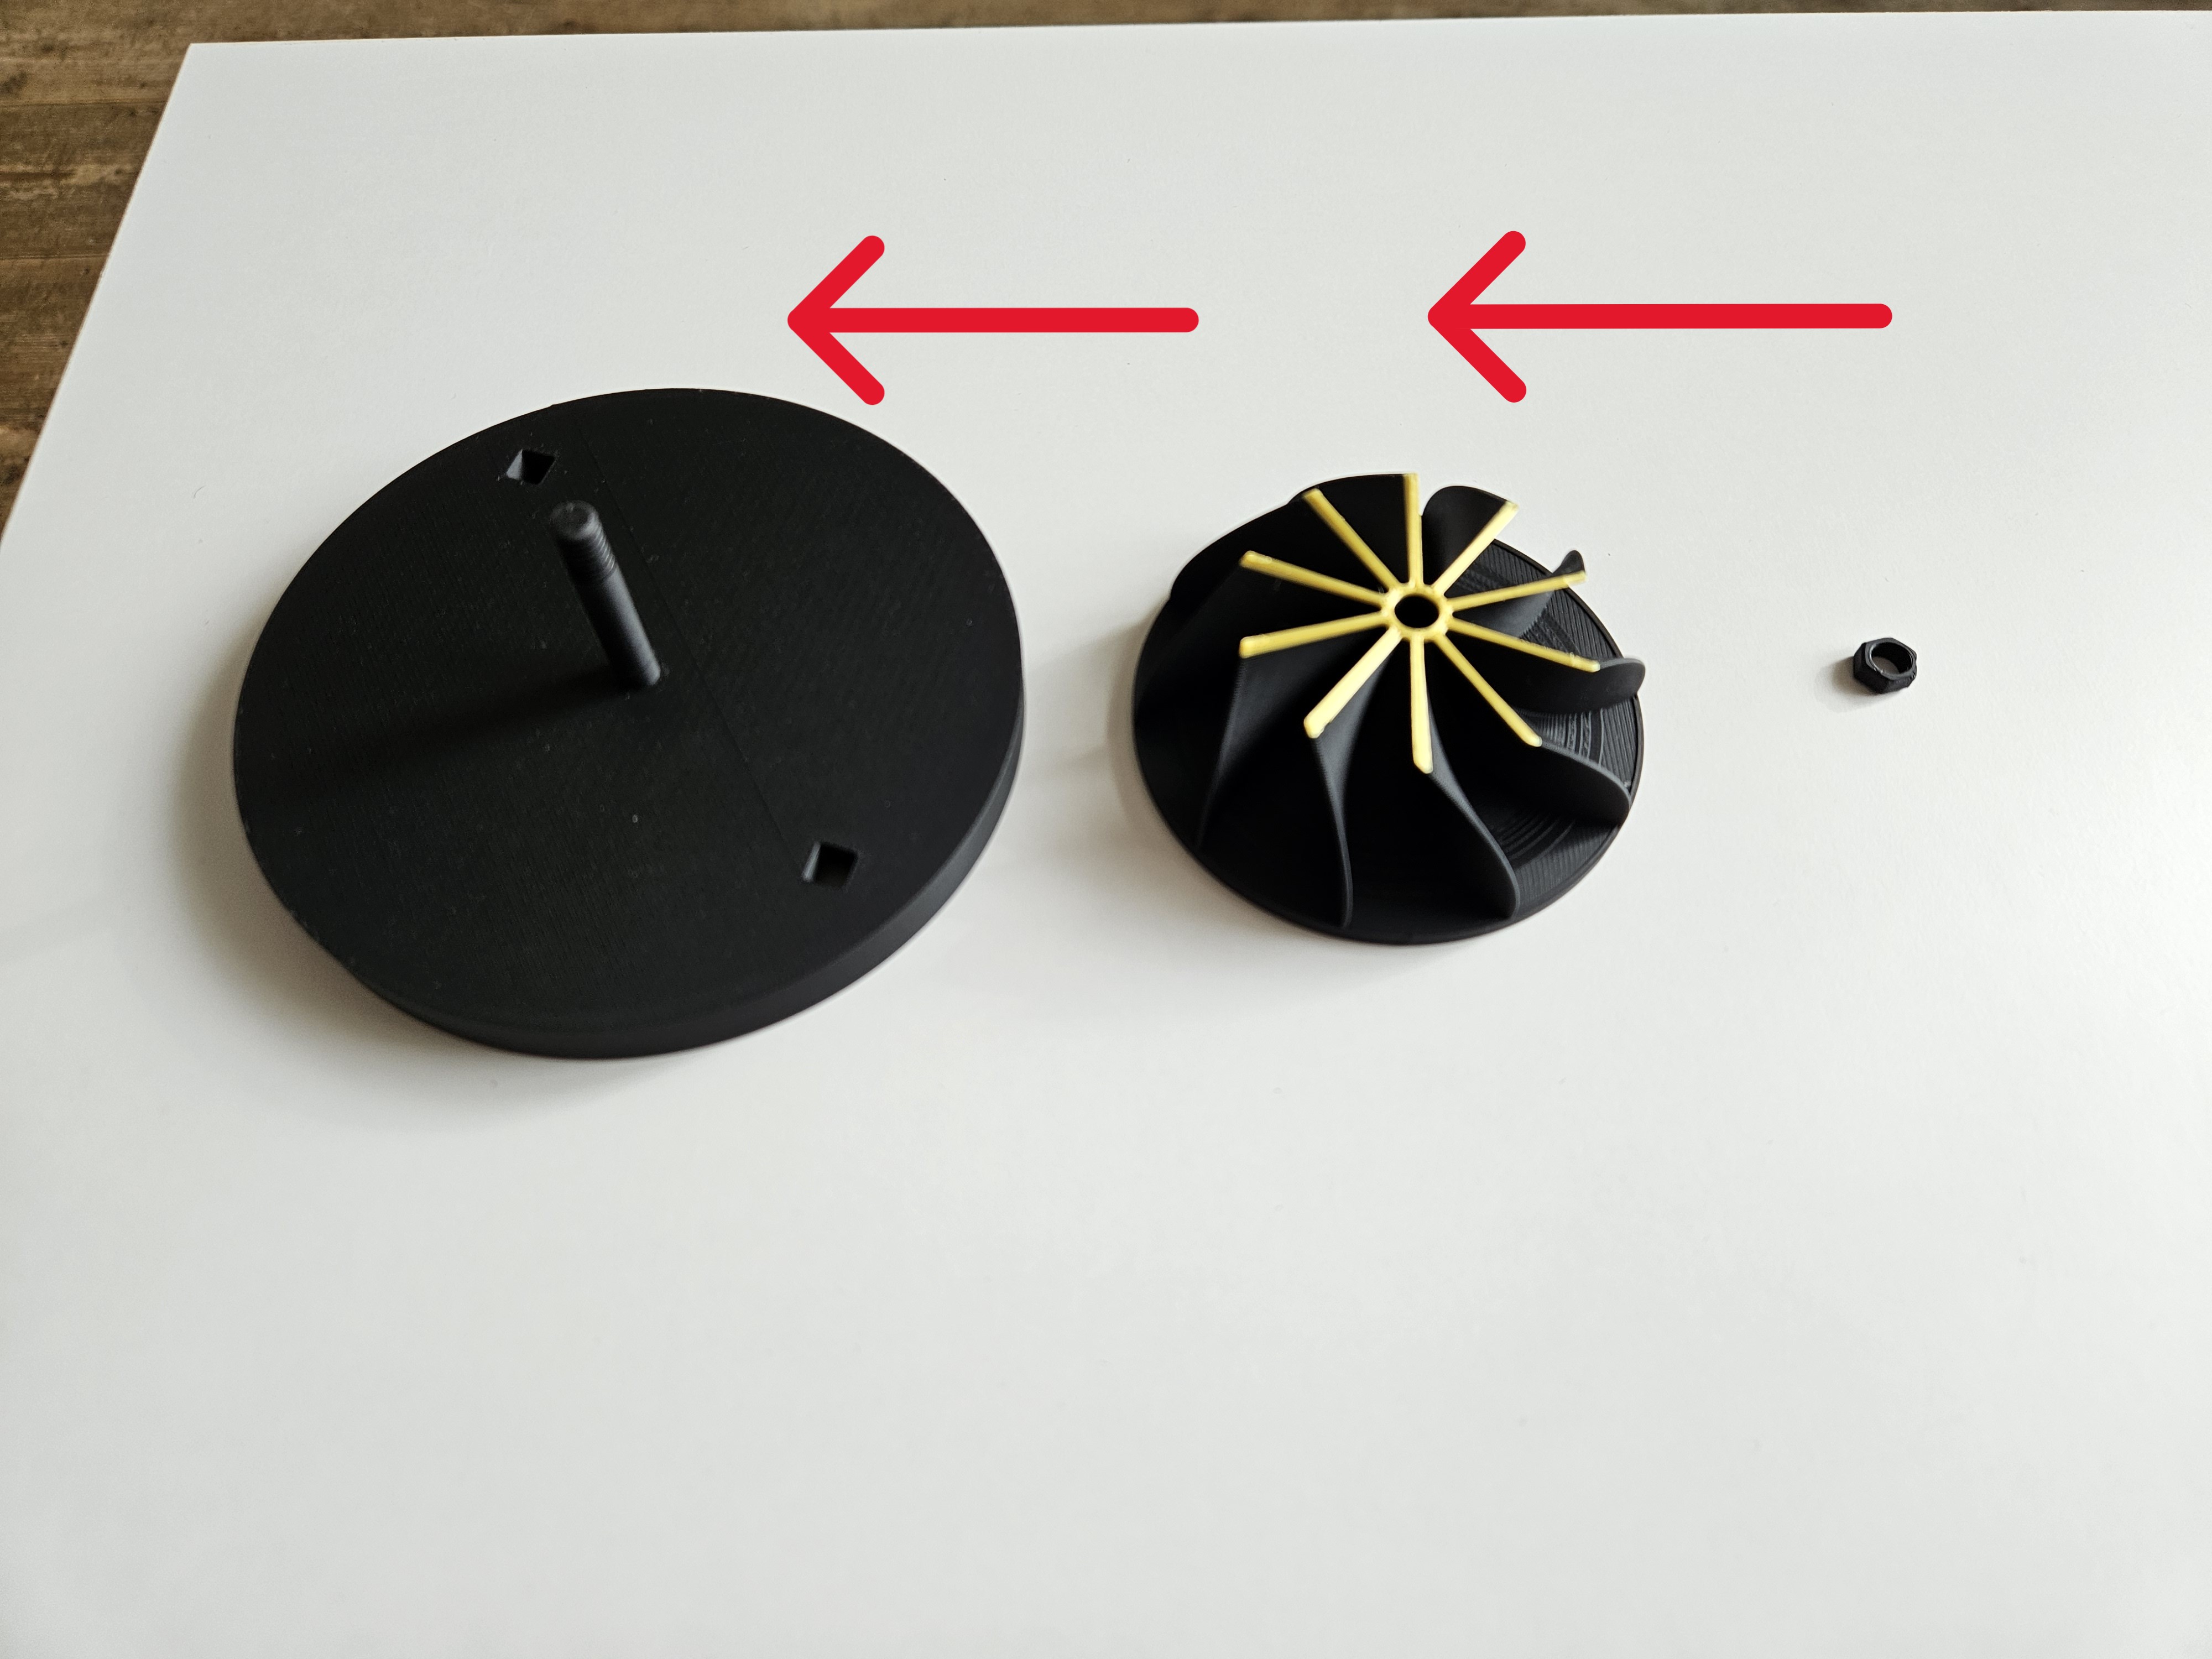
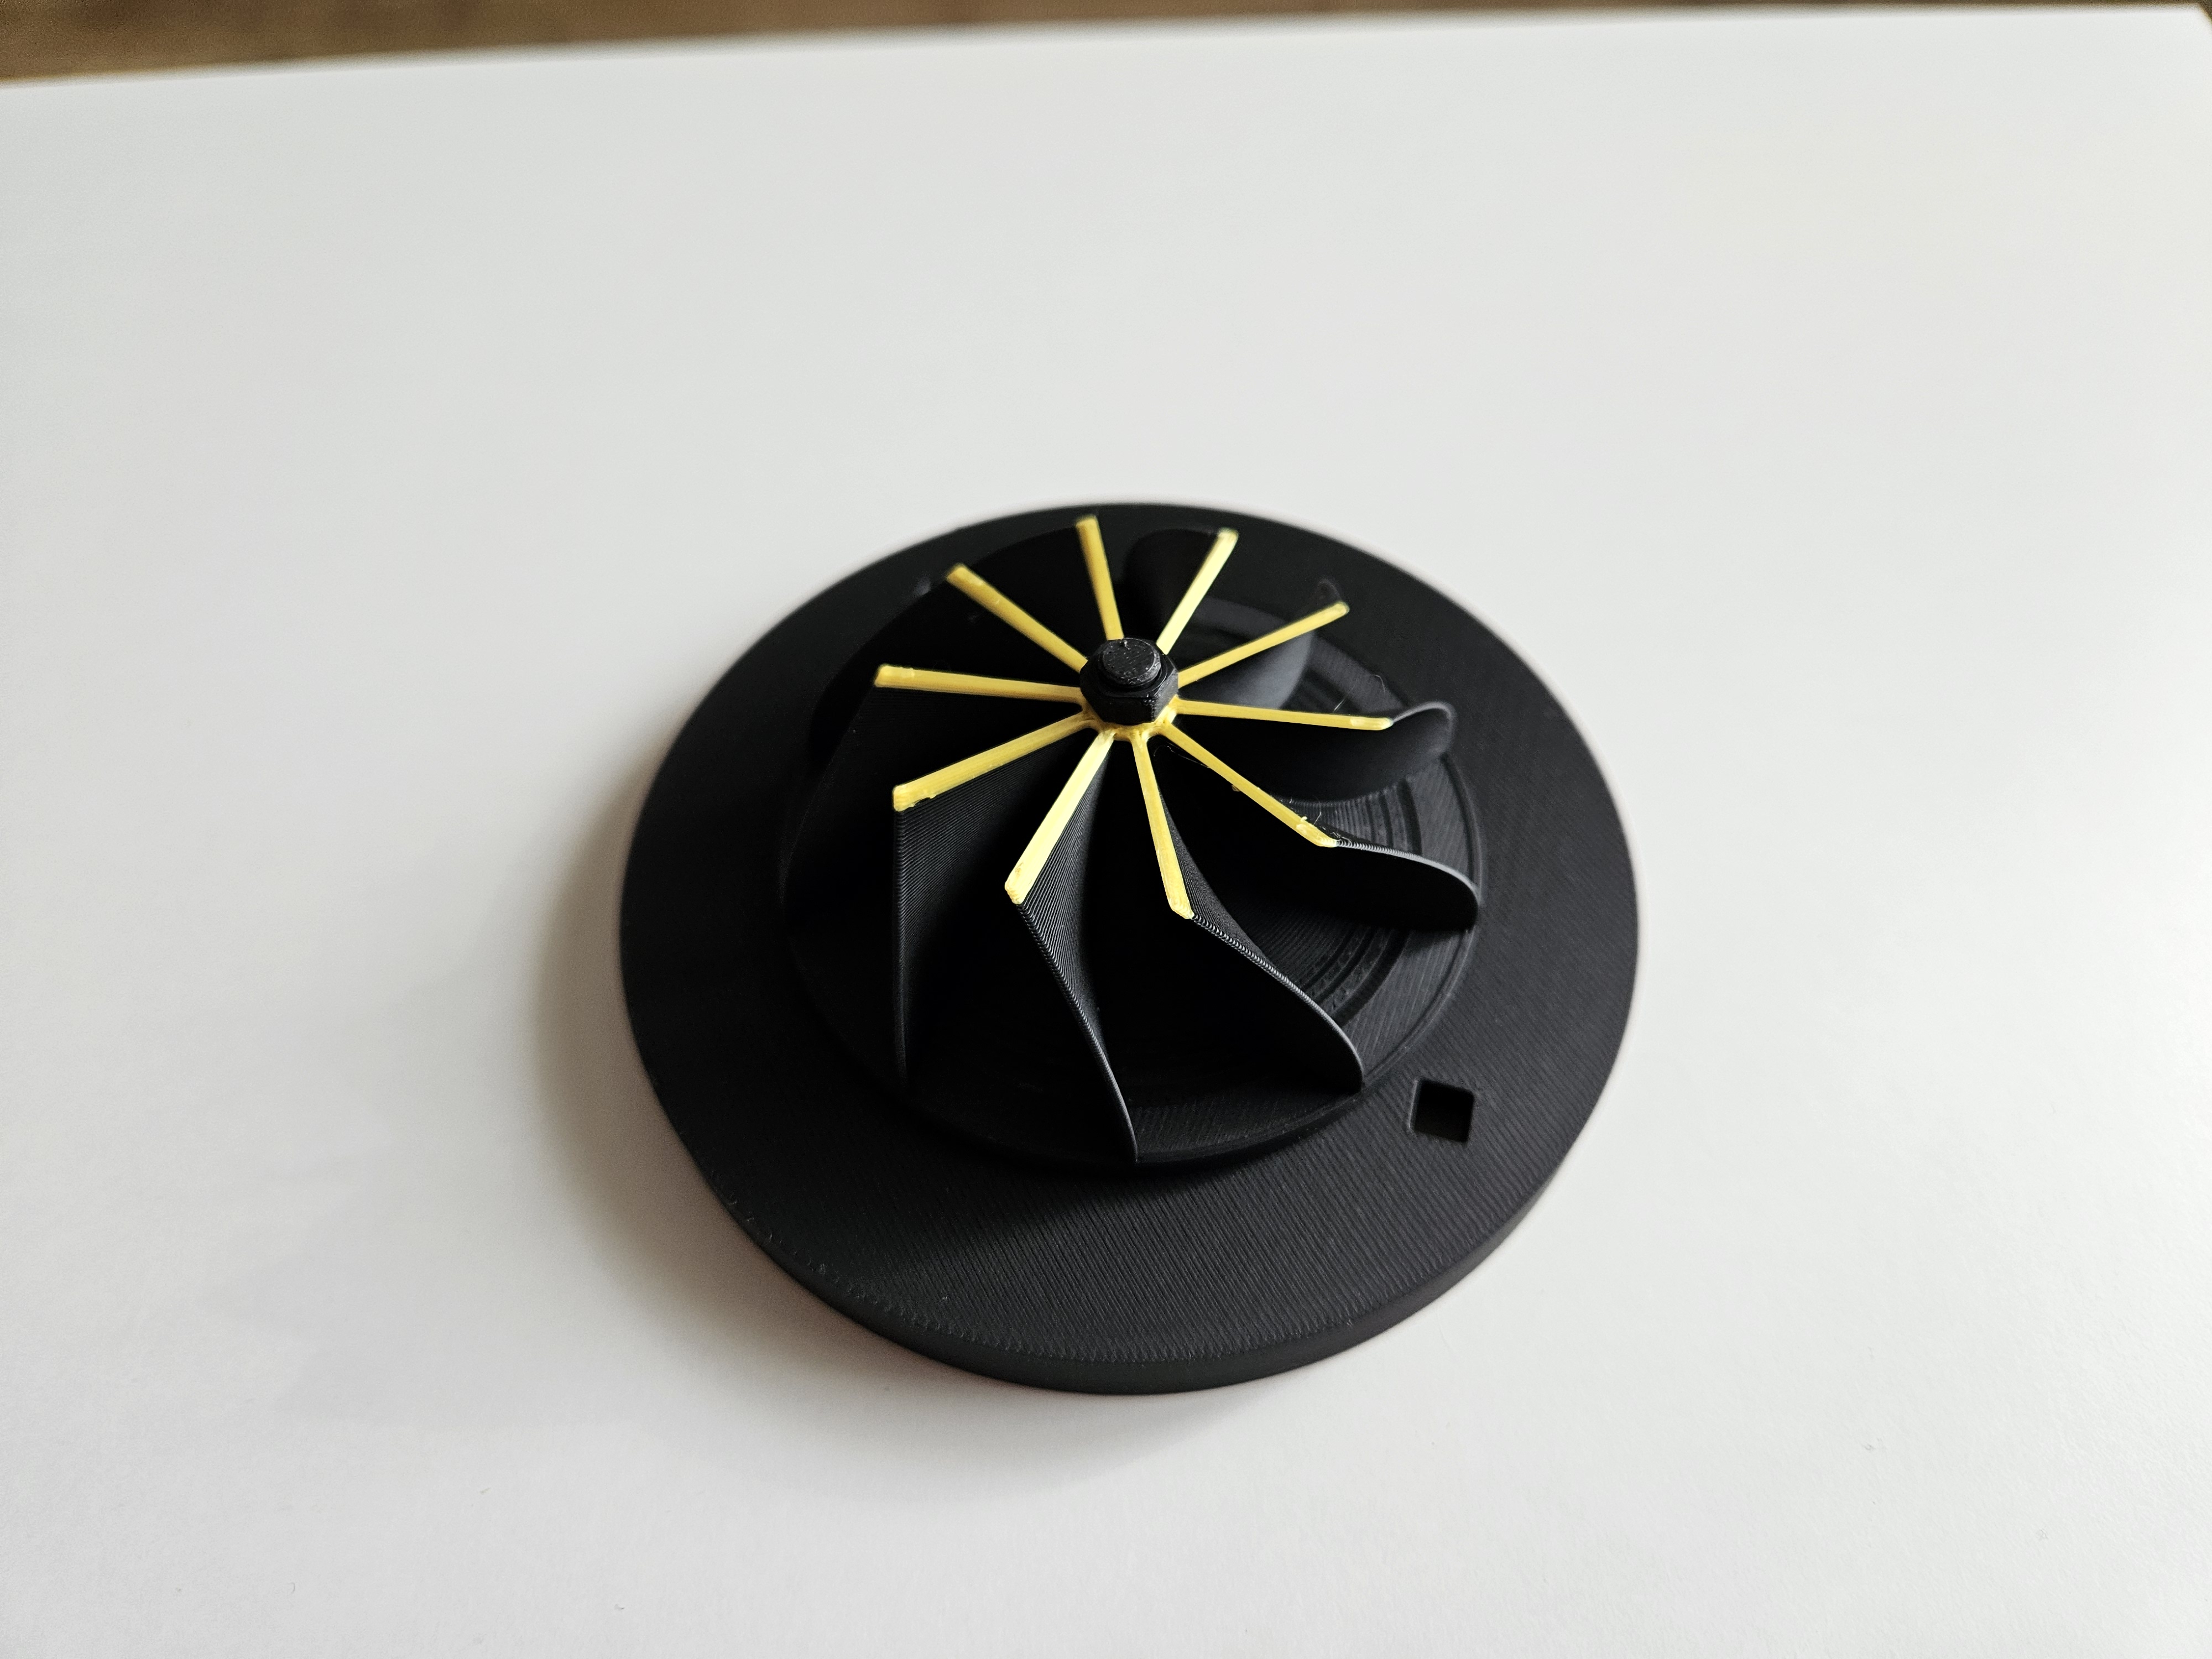
⚙️ Internal Fit: Mount the impeller with its holder onto the designated spot on the turbo's rear cover.
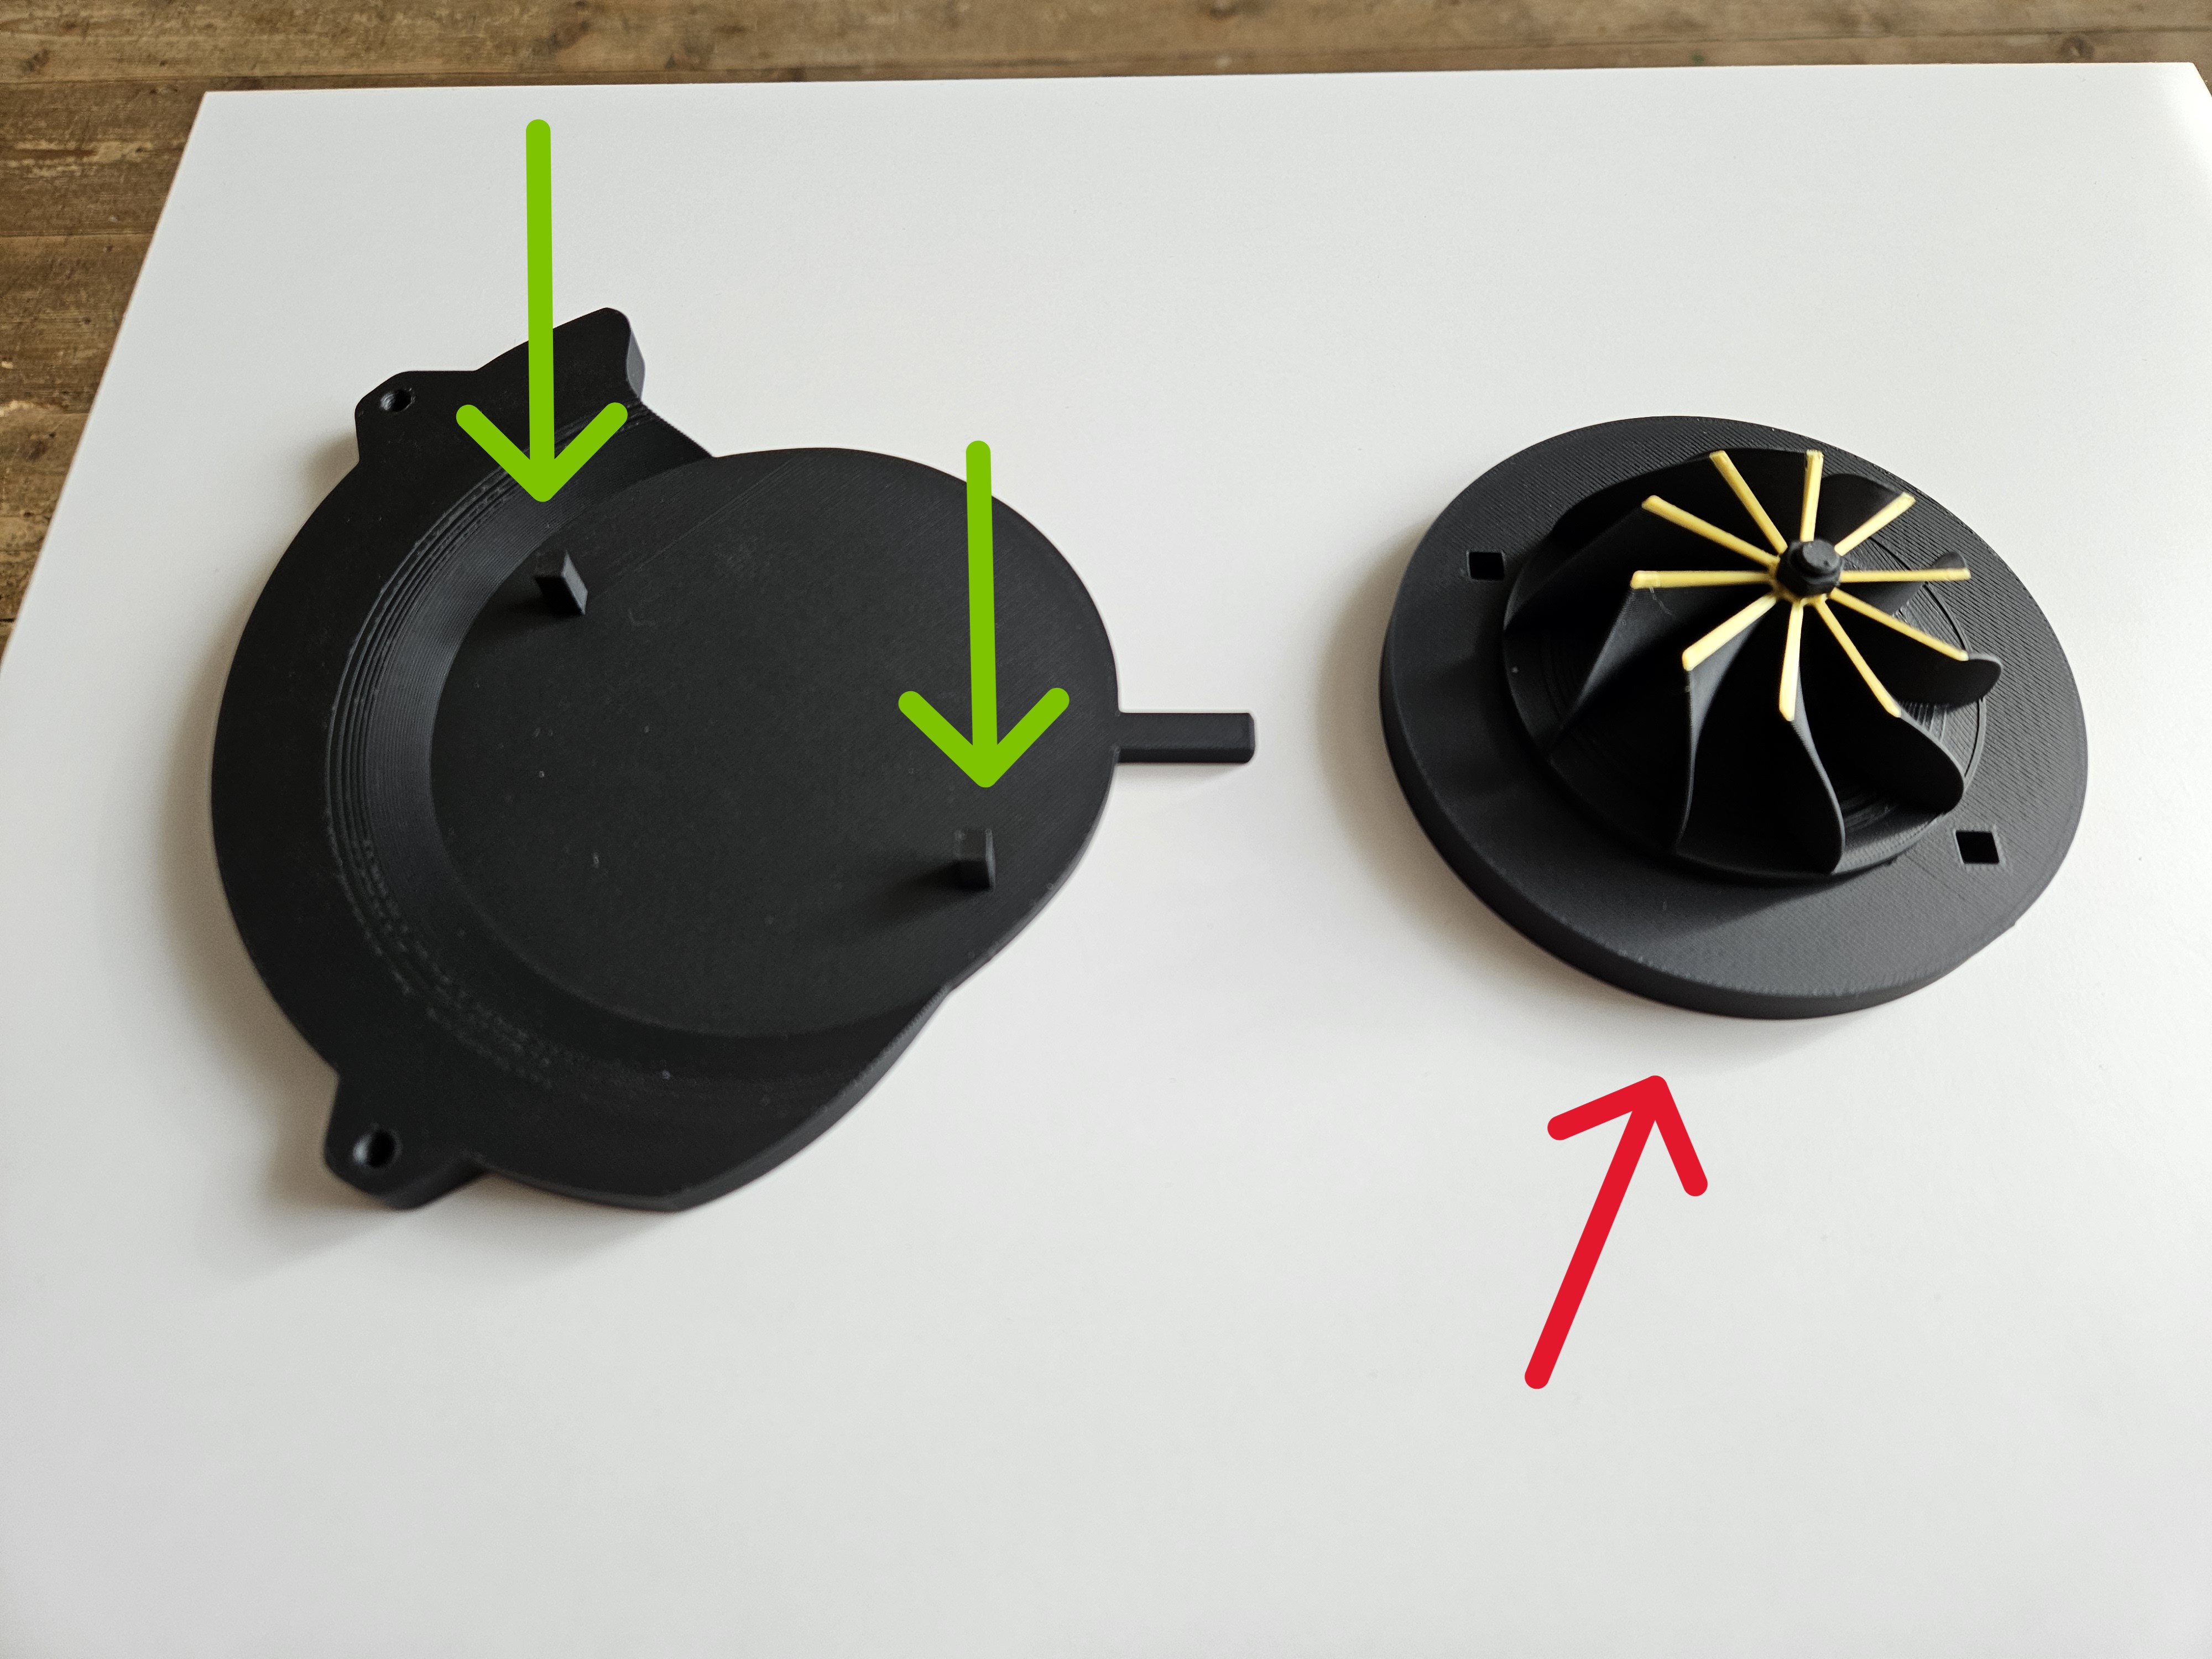
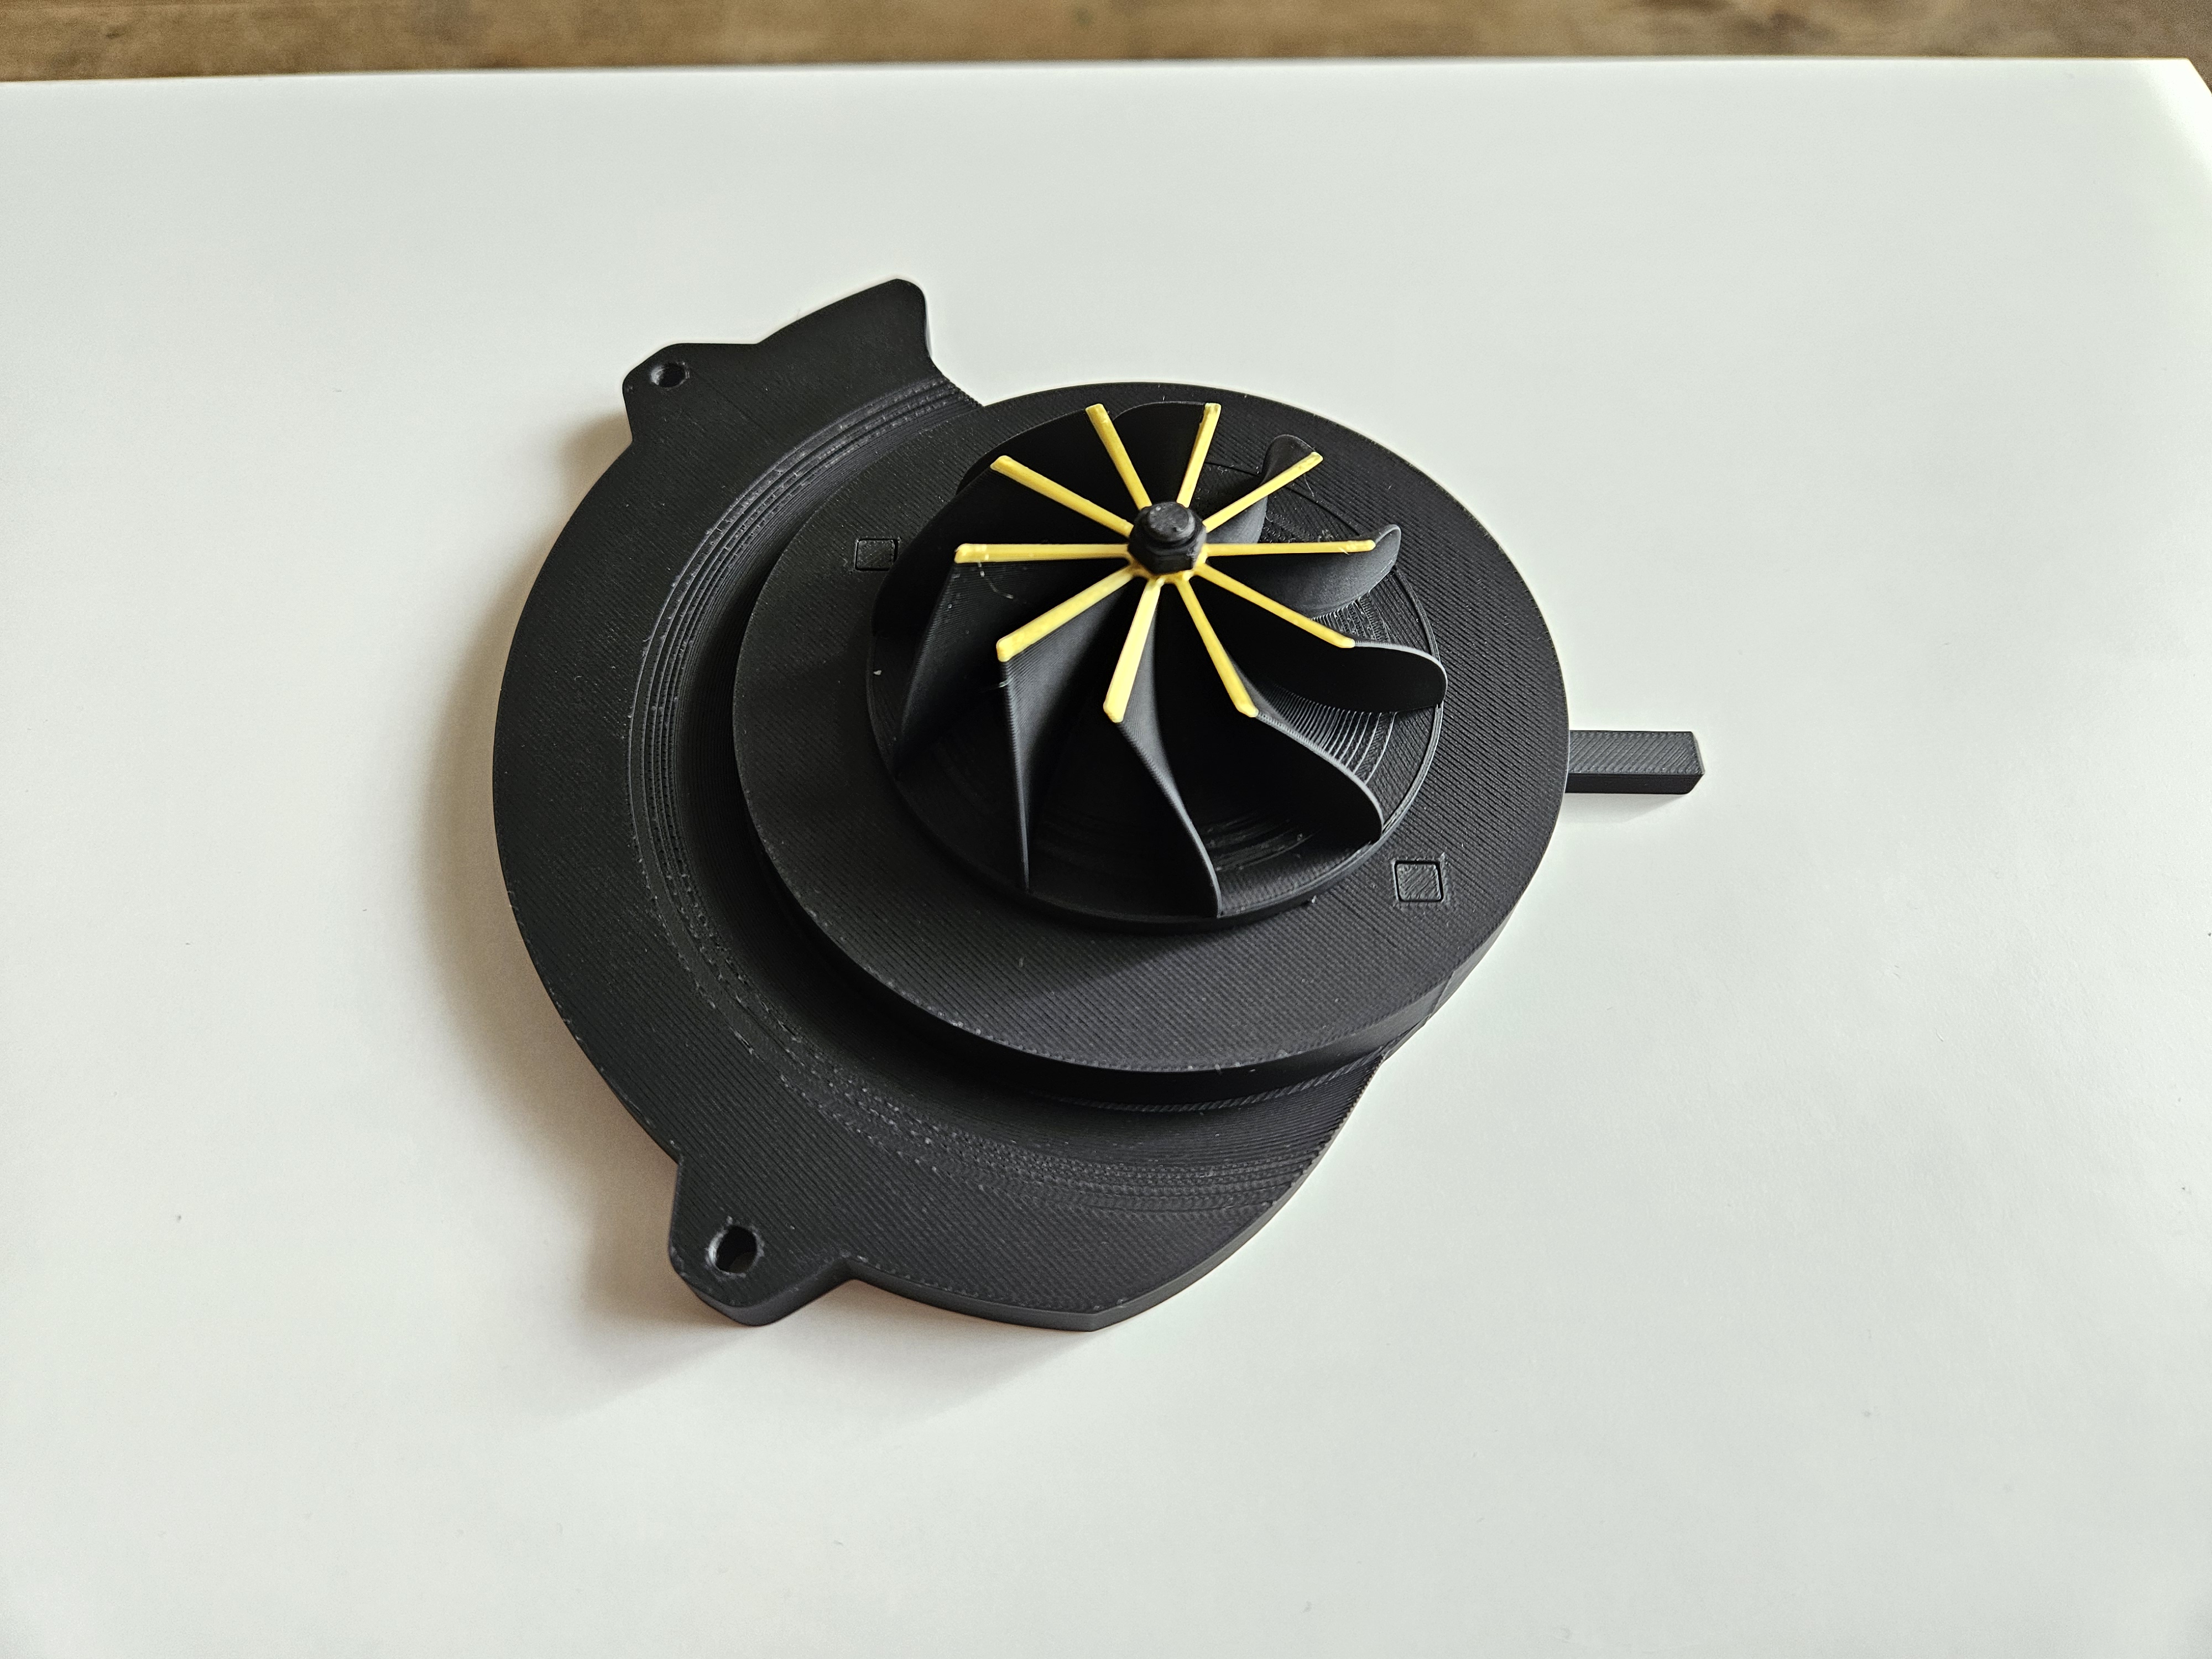
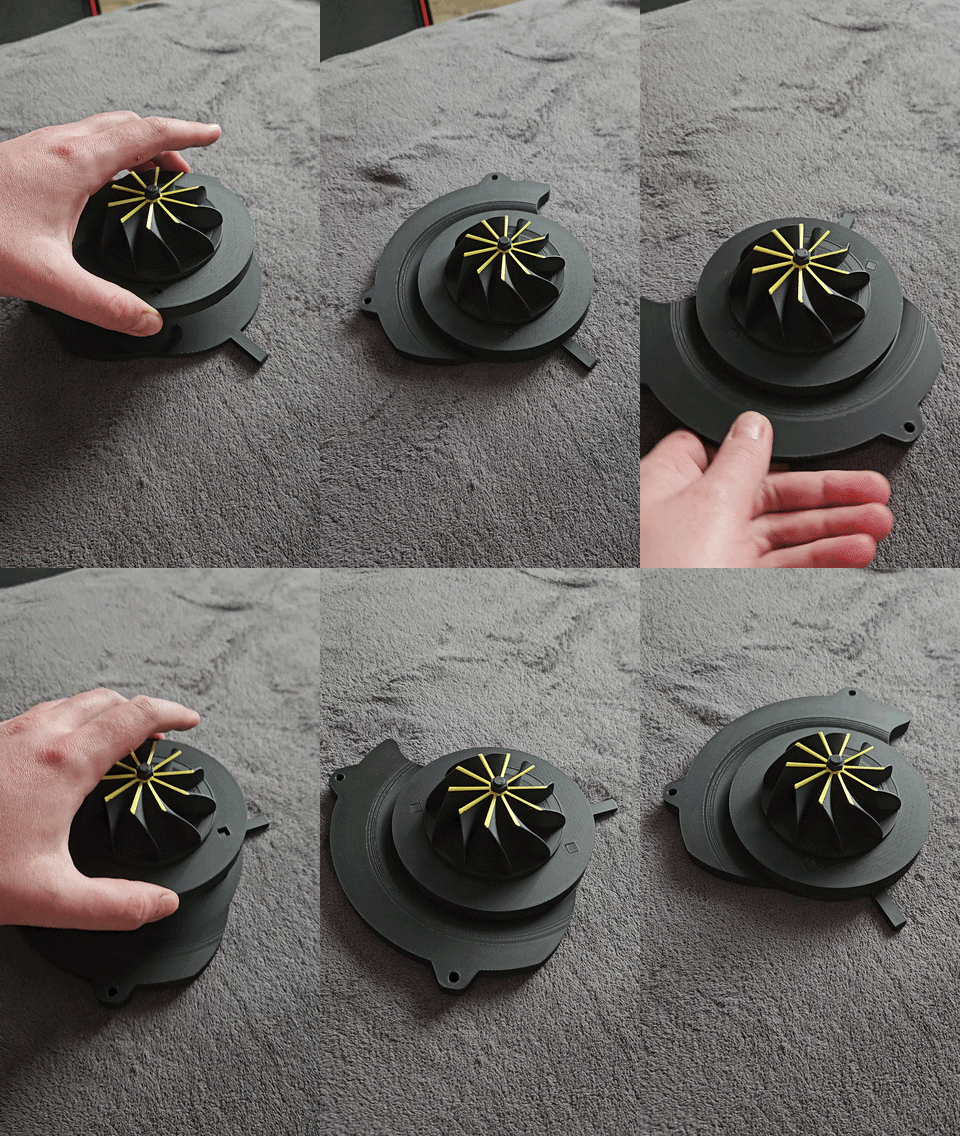
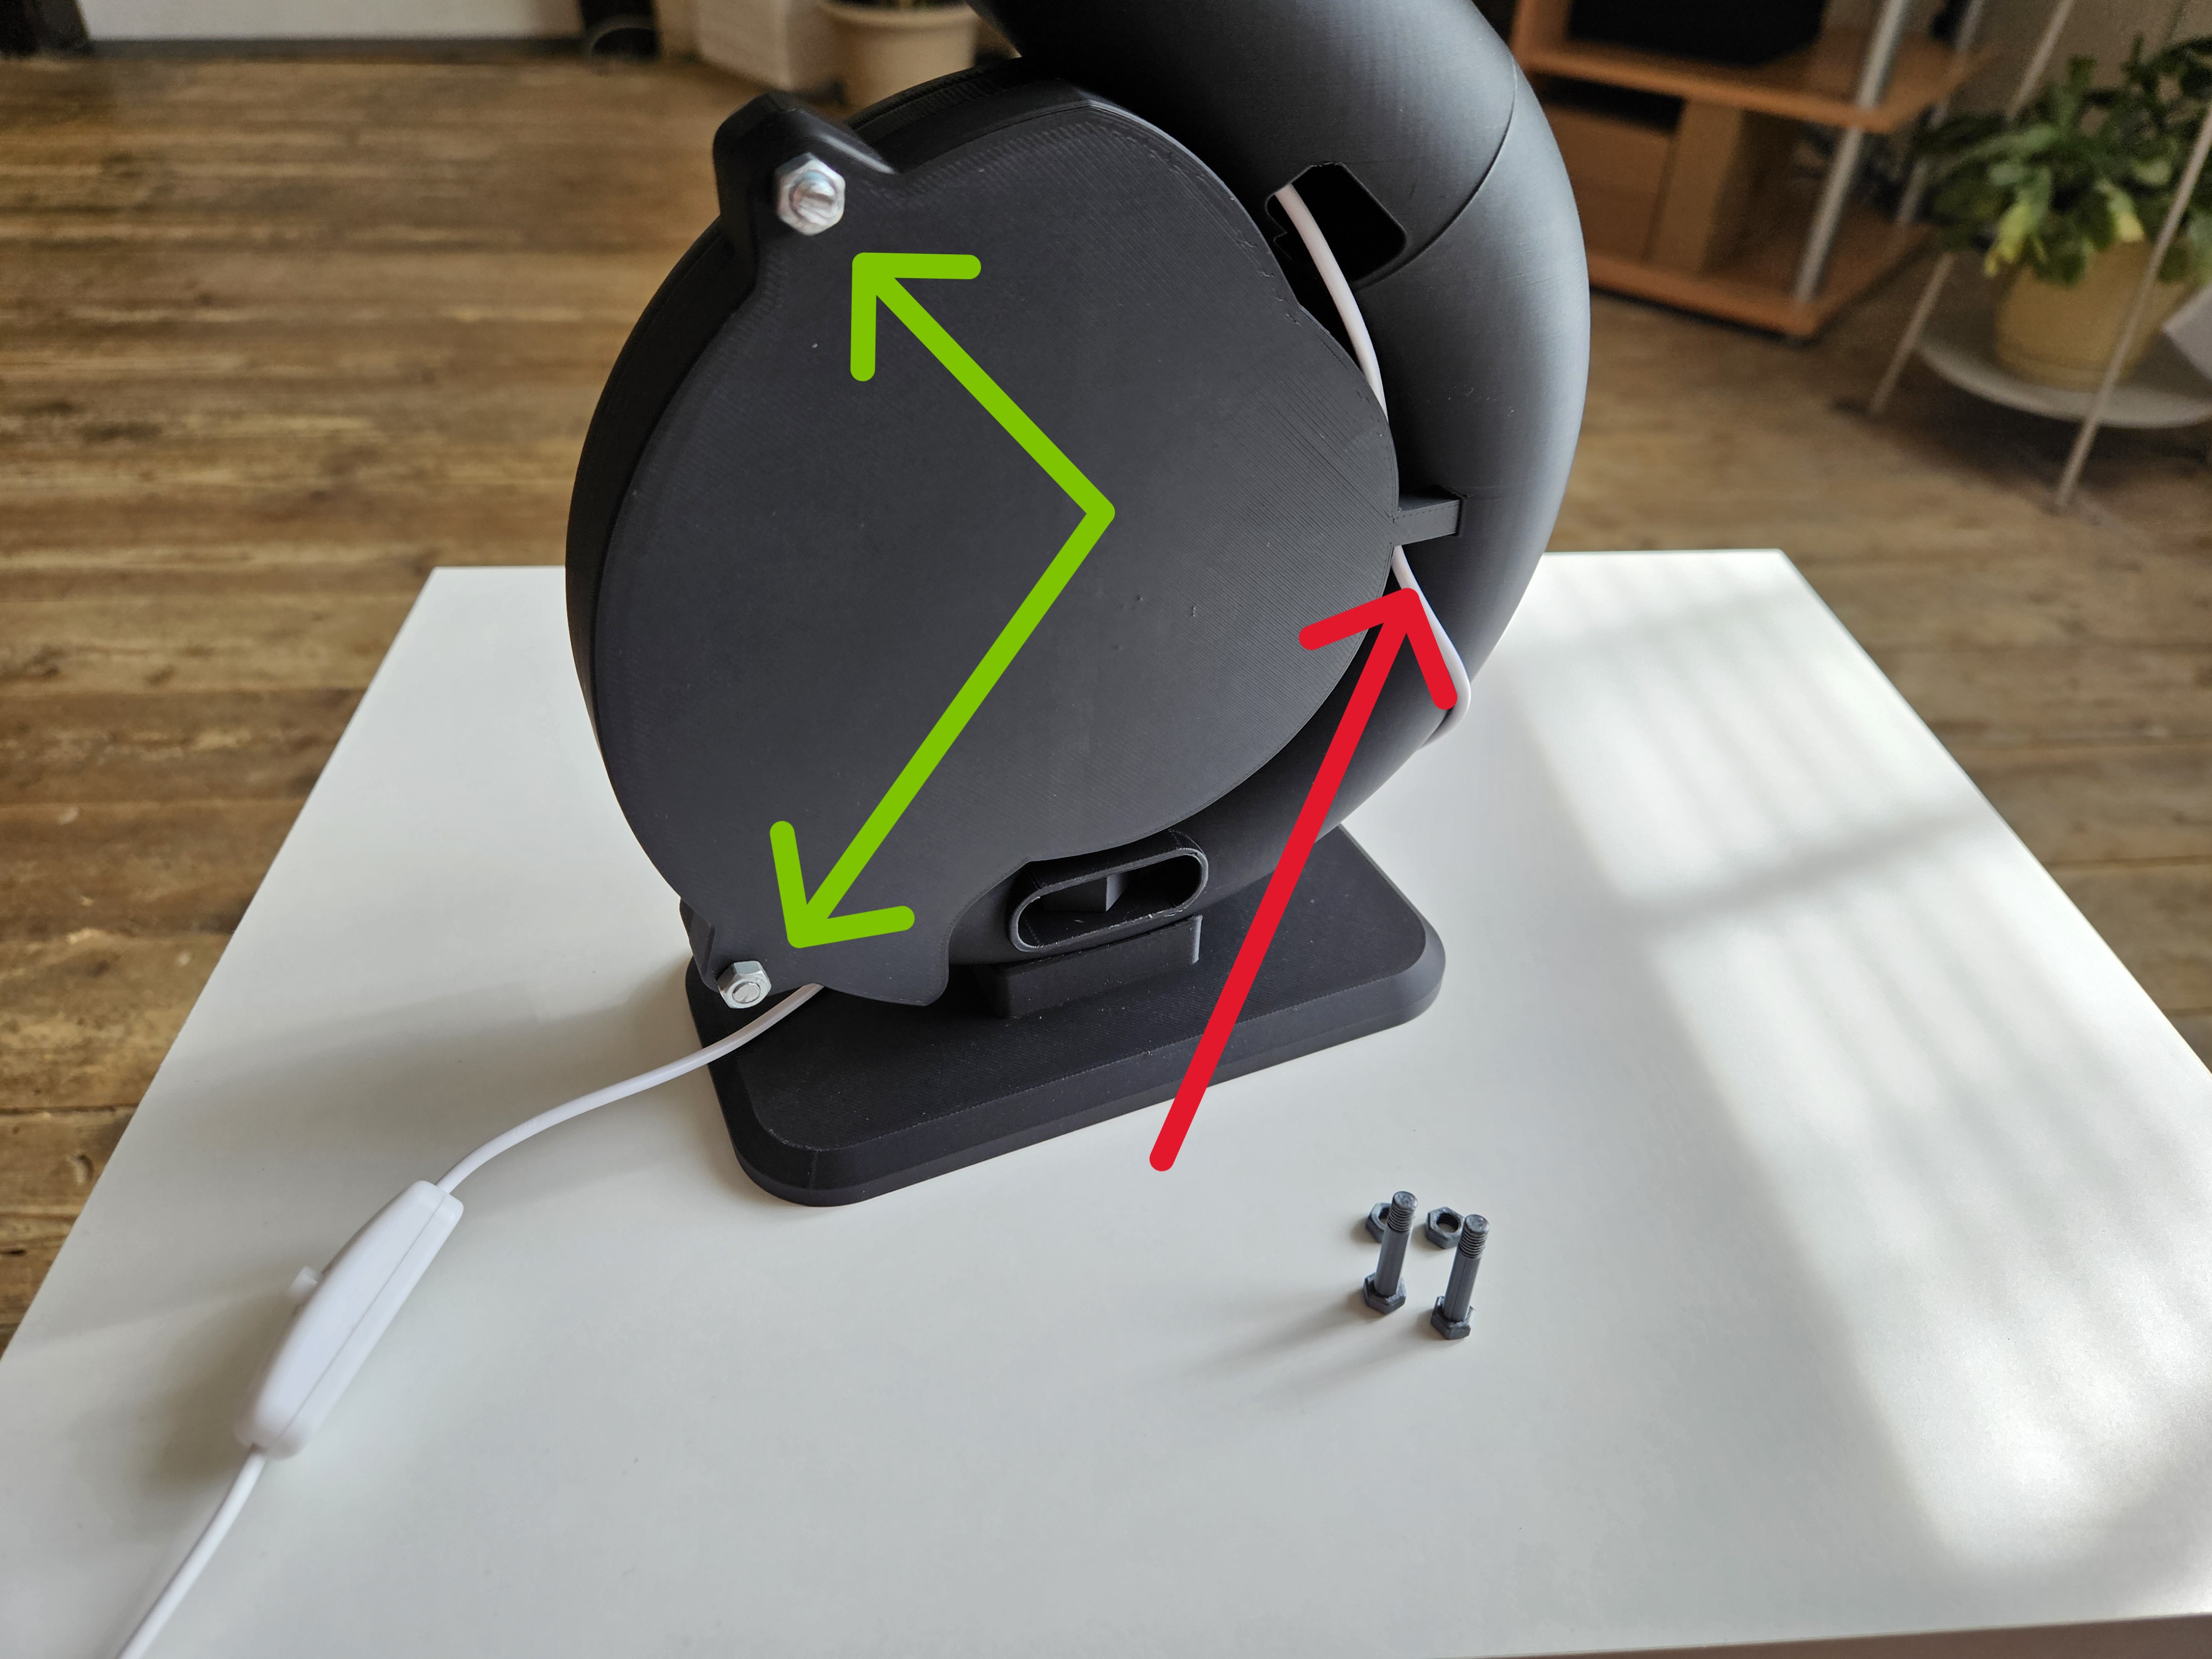
- 🐌 Closing the Housing: Insert the rear cover into the turbo body. Use M4x25mm screws for the mounting holes around the edge (either store-bought or the 3D-printed ones).
Tip: If the printed screws don't hold well, apply a small drop of superglue behind the nut on the thread.
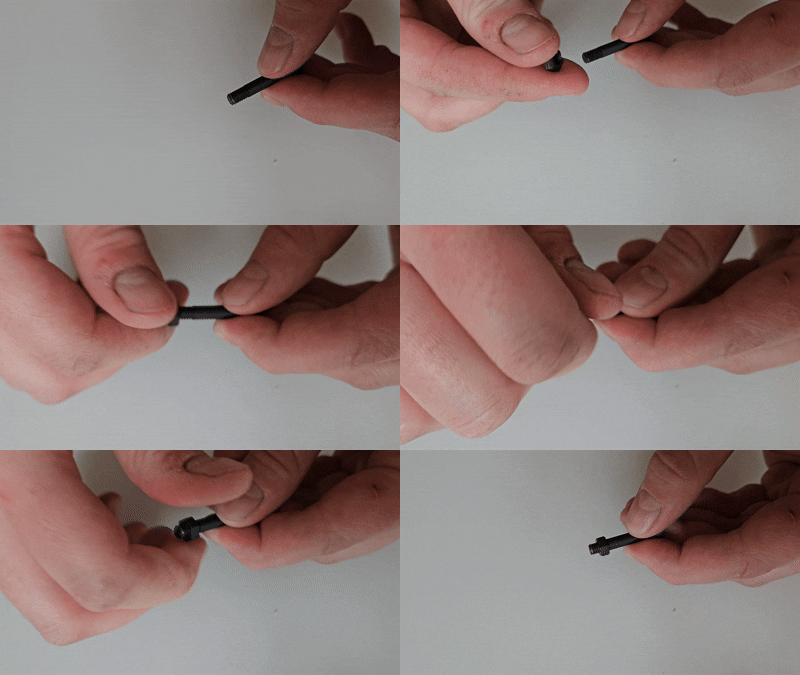
- Before attaching the turbo it is necessary to "stir up" the thread on the screws.
💎 Filter Housing: Place the body and the top cap of the air filter into their final positions.
Tip: If the filter body is not displayed correctly in the slicer (it can only print the bottom layers), you need to turn on Spiral Vase Mode.
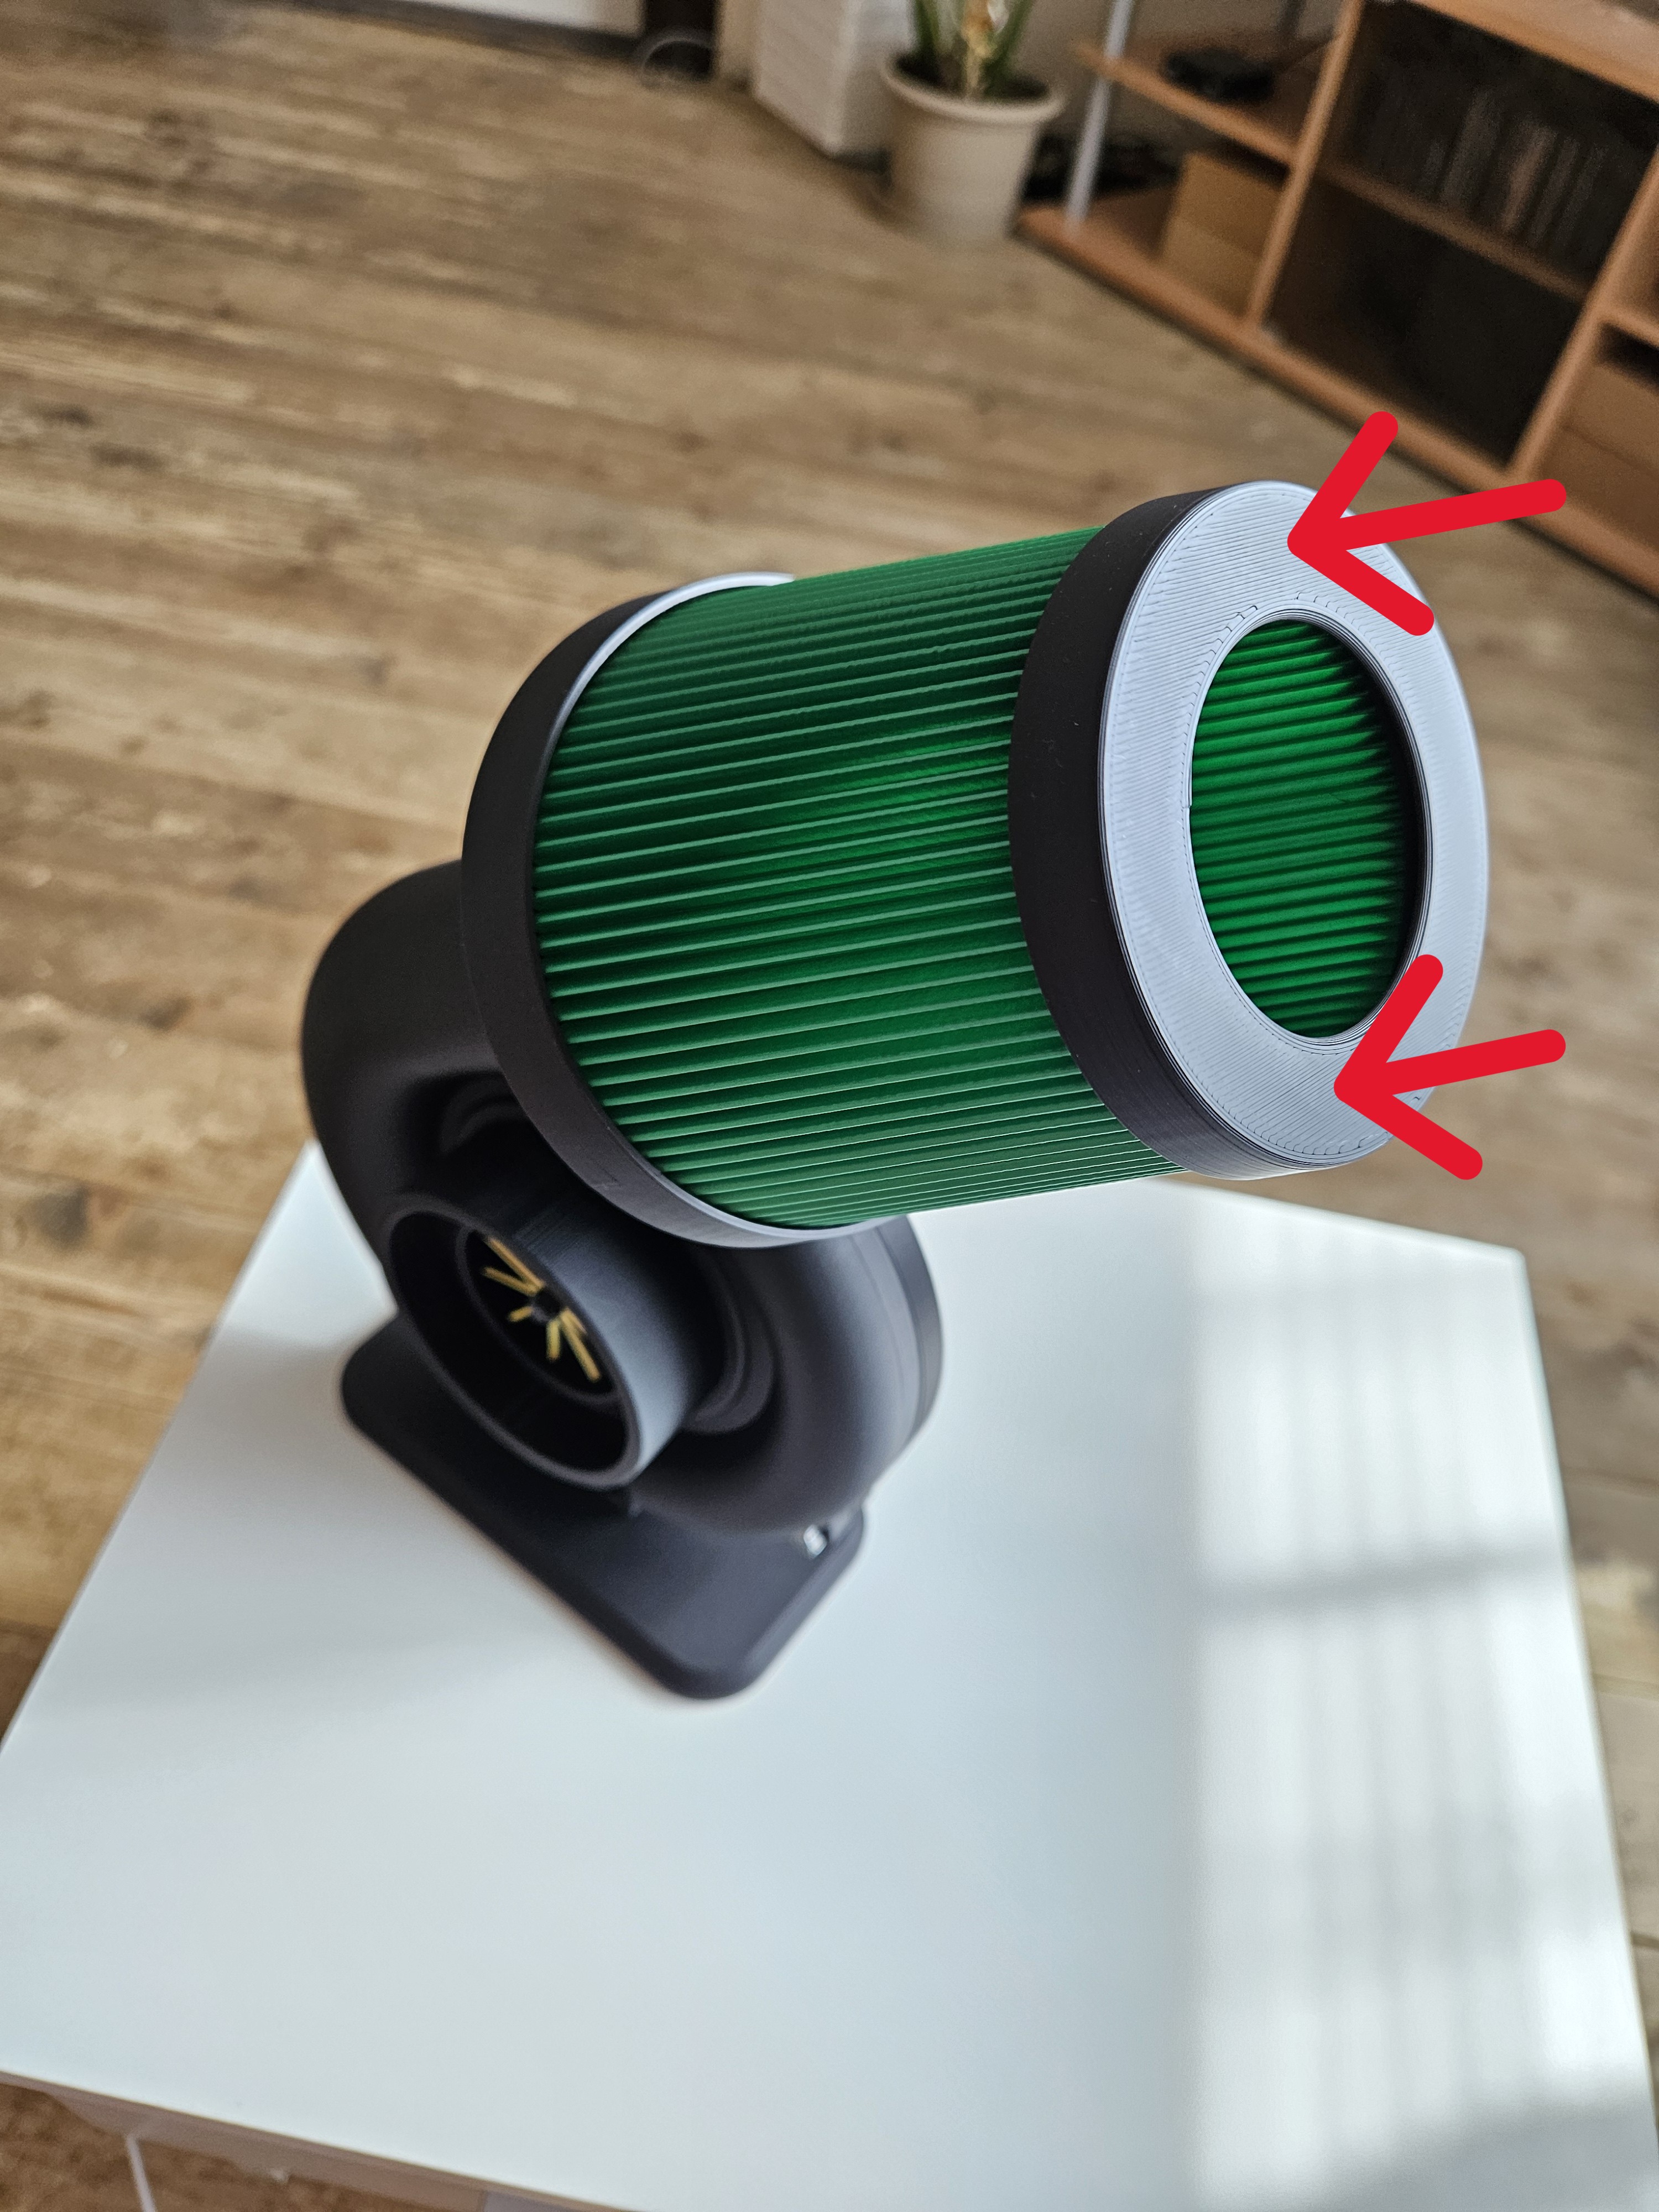
🏁 Final Touches: Snap on the "Turbo" nameplate, the stand's nut cover, and the cable entry cover for a clean, finished look.
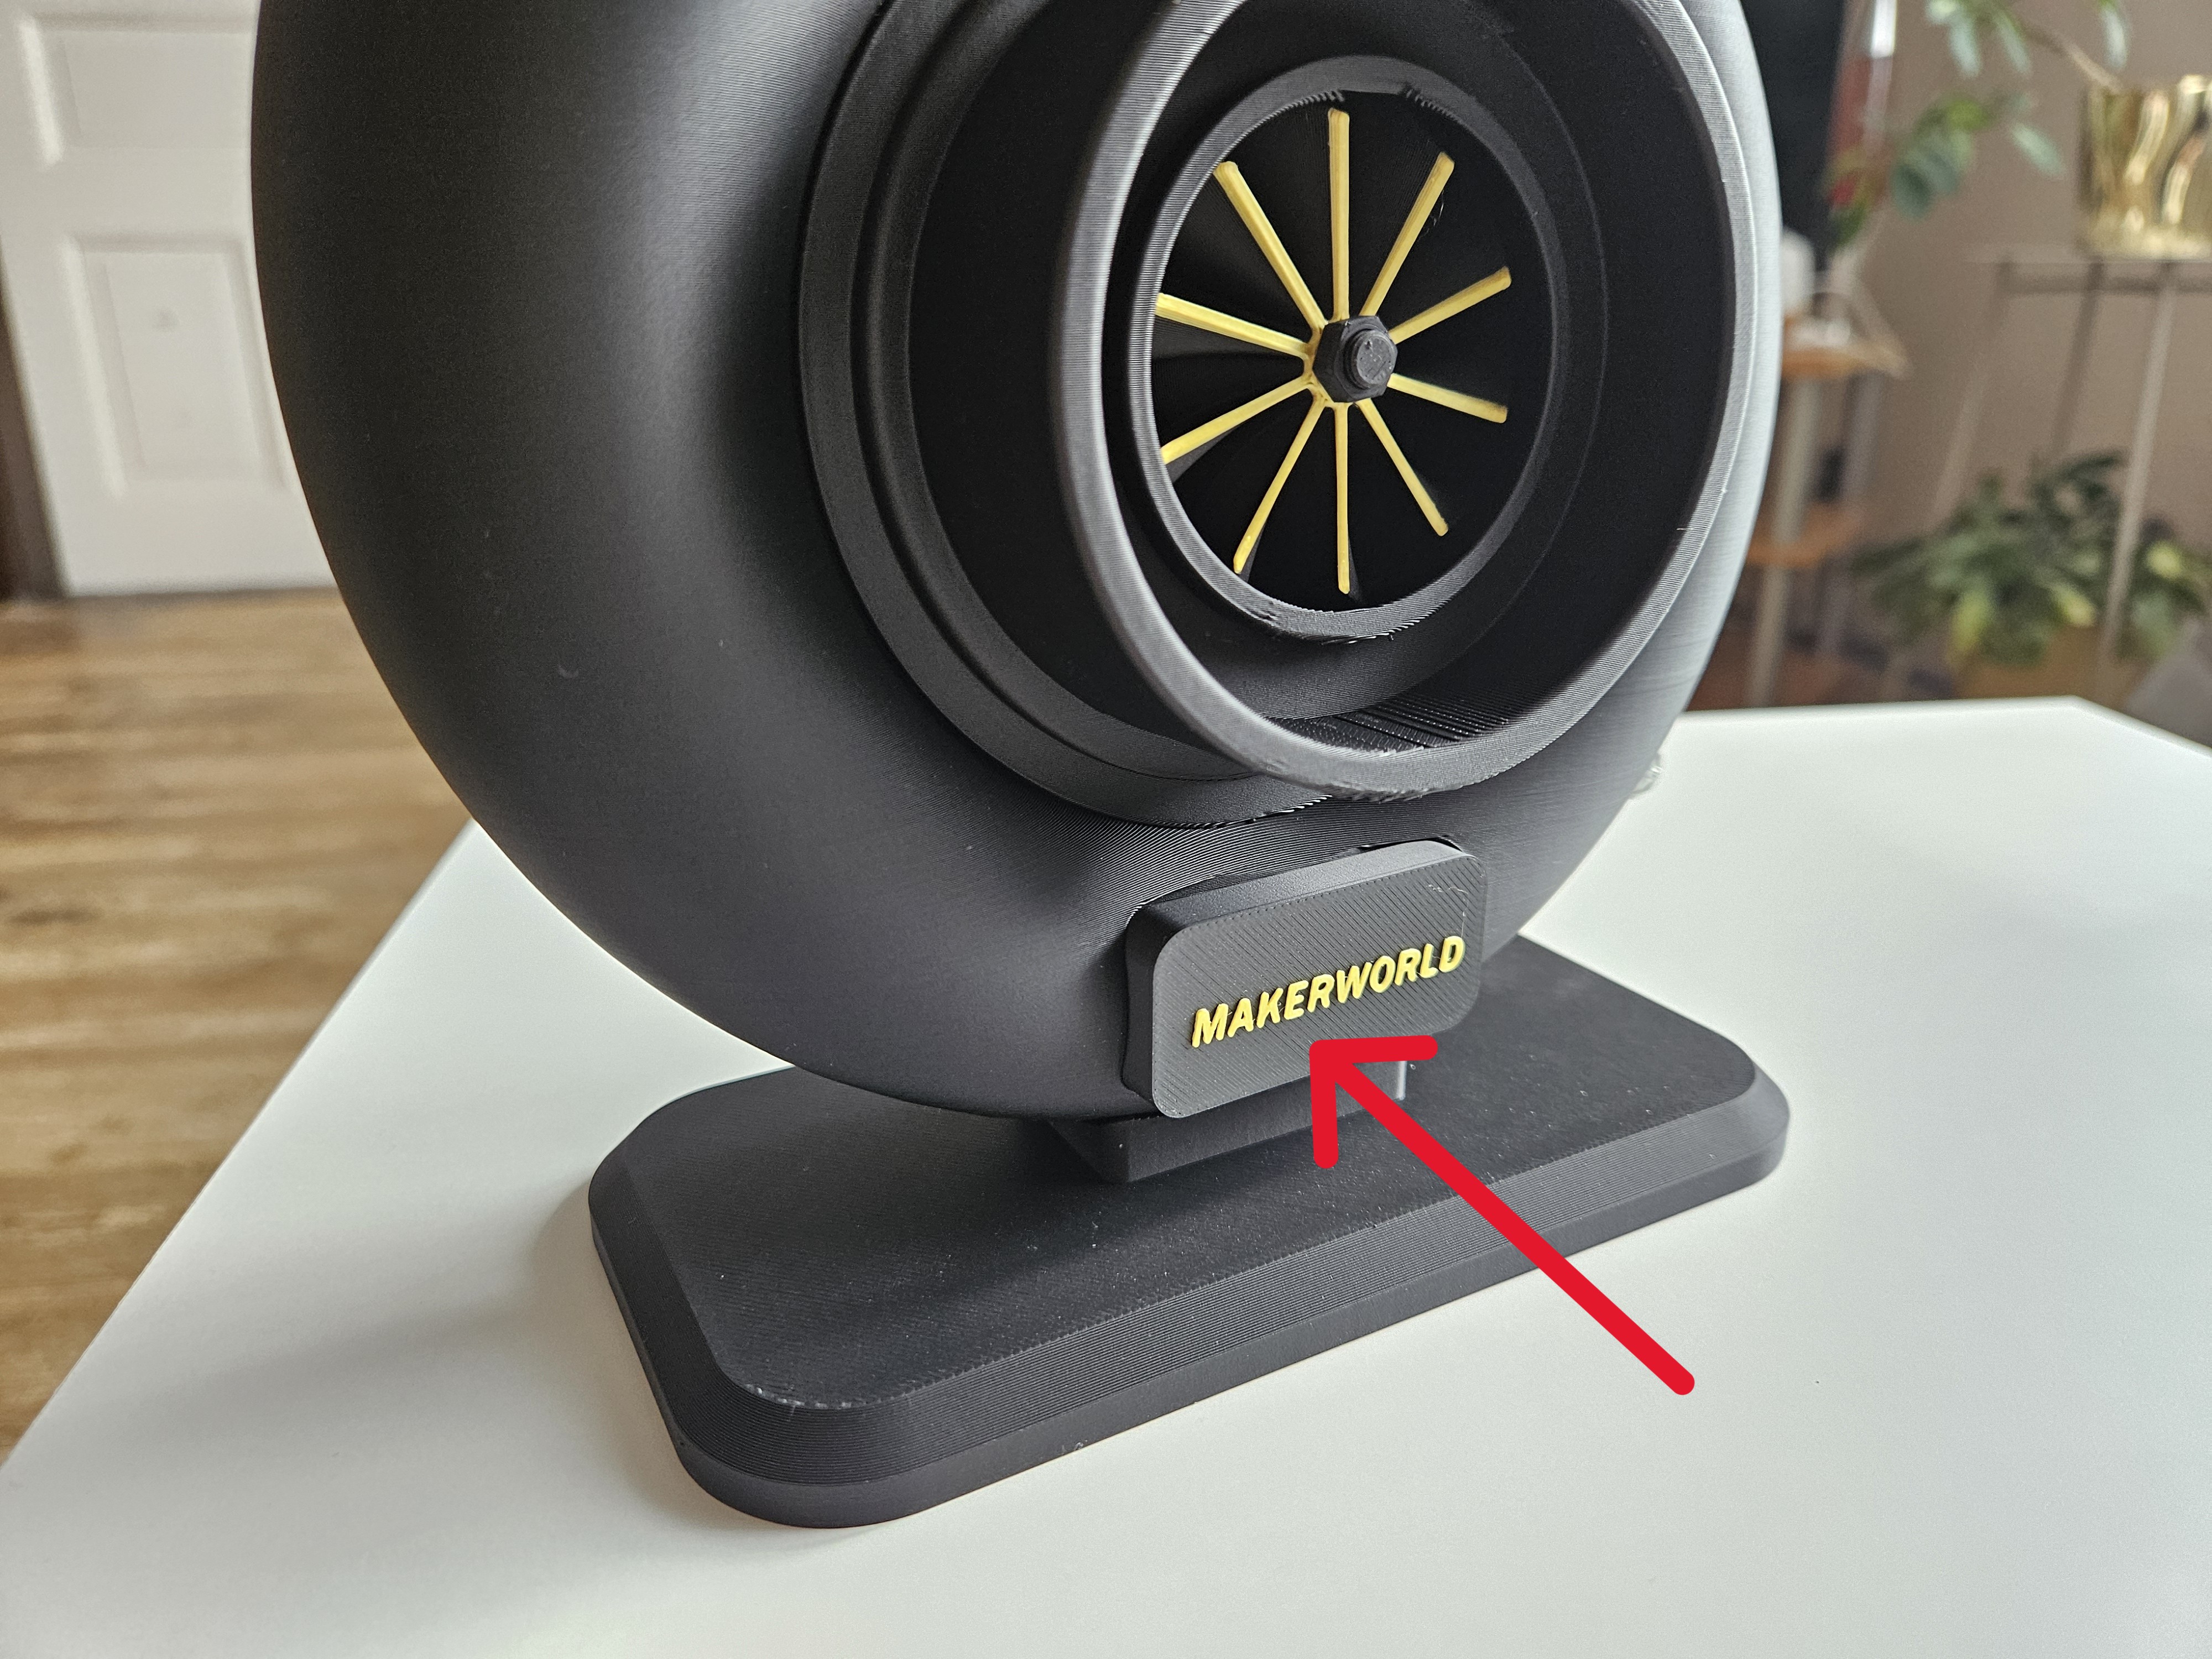
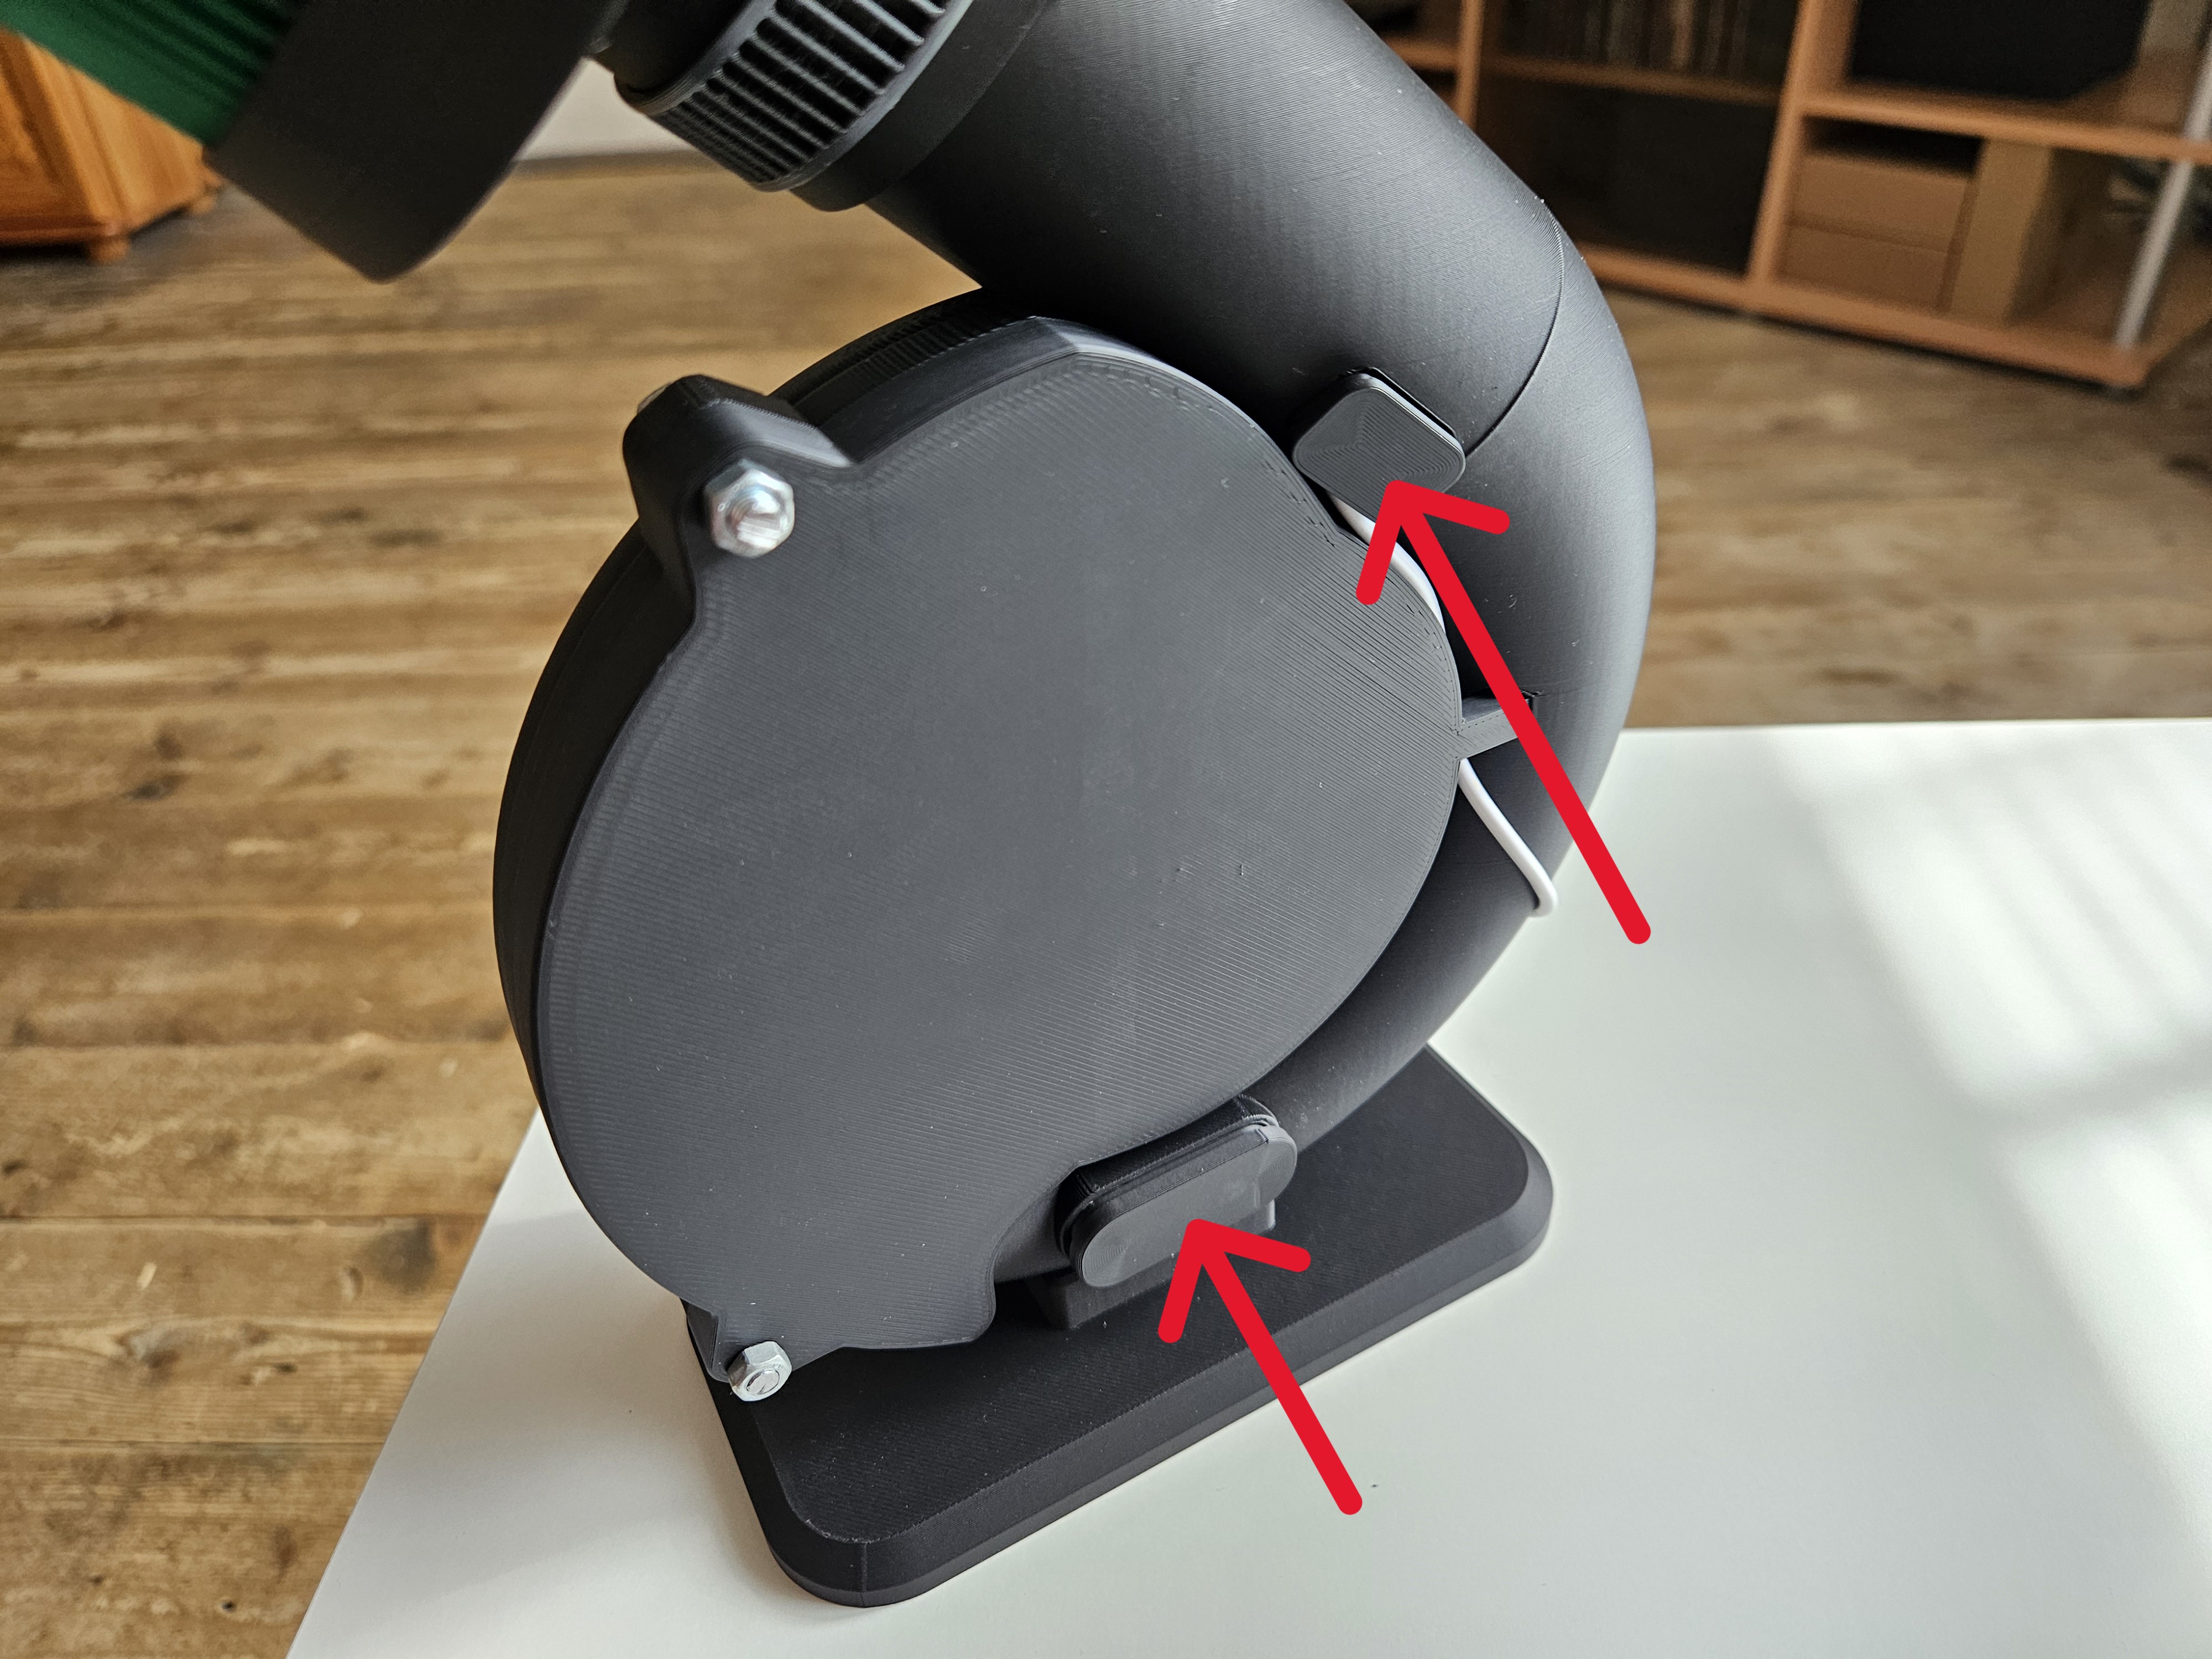
🛠️ If any of the parts have any looseness, a drop of superglue at the joint is enough. 🛠️
Done! Your Turbo Lamp is ready to boost your room's style! 🚀✨
⚠️⚠️⚠️ SHARING FILES IS STRICTLY PROHIBITED AND LEGAL CONSEQUENCES WILL BE INCURRED IF VIOLATED. ⚠️⚠️⚠️
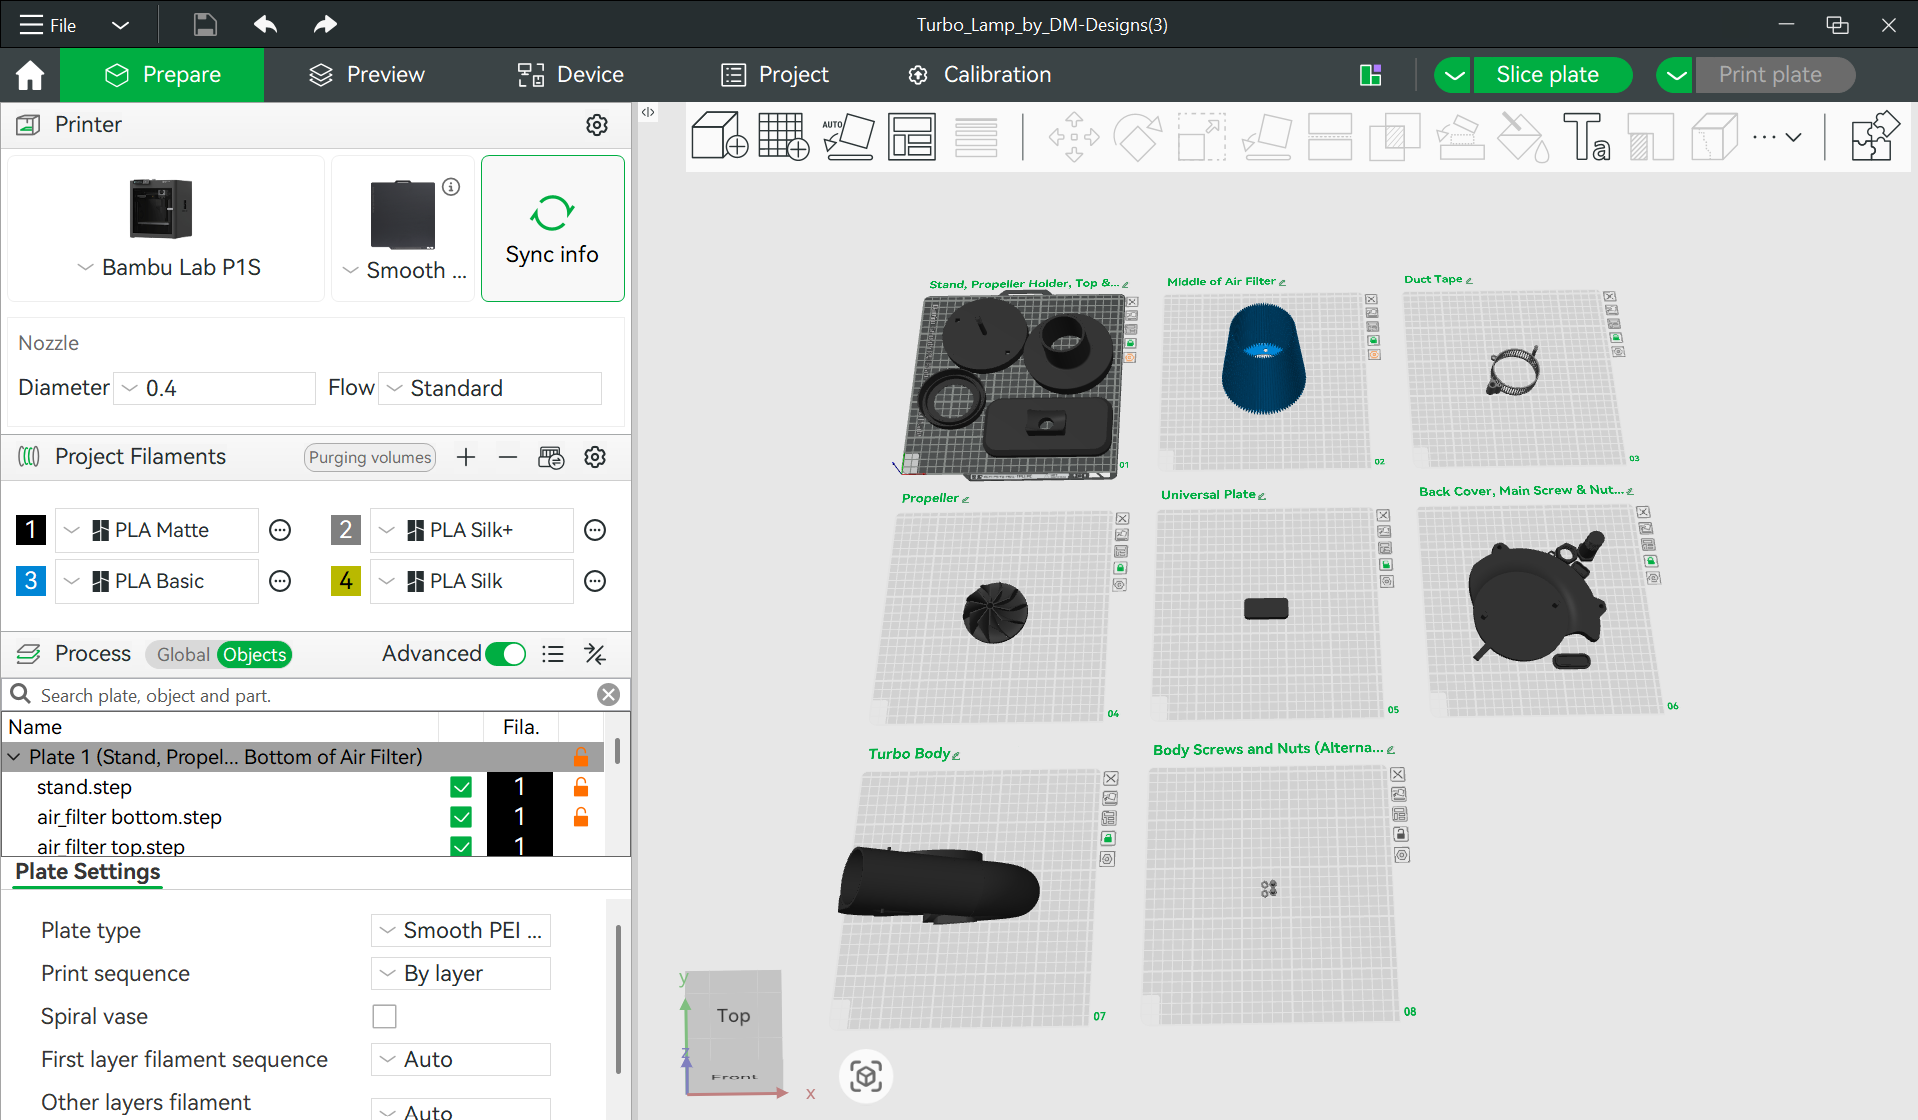
If you are using a slicer other than Bambu Studio and you don't see all the objects as in the attached image, I recommend downloading the individual objects and importing them into your slicer, remember to keep the same print settings!

Gostou deste modelo? Crie uma conta grátis para salvar seus favoritos e voltar a eles depois.
Criar conta