Você está no 3DFinder
Buscamos em Thingiverse, MakerWorld e Printables ao mesmo tempo para te dar o melhor de cada uma.
Descrição
USB MIDI Fader controller
This compact MIDI controller provides direct control of MIDI channels using two faders with LED indicators and two buttons.
Note
Highlights information that users should take into account, even when skimming.
| ⚠ Code release |
|---|
2025-12-15 V1.0: First publication
2025-12-18 V1.1: MIDI values are no longer transmitted continuously, but only when the fader is moved. |
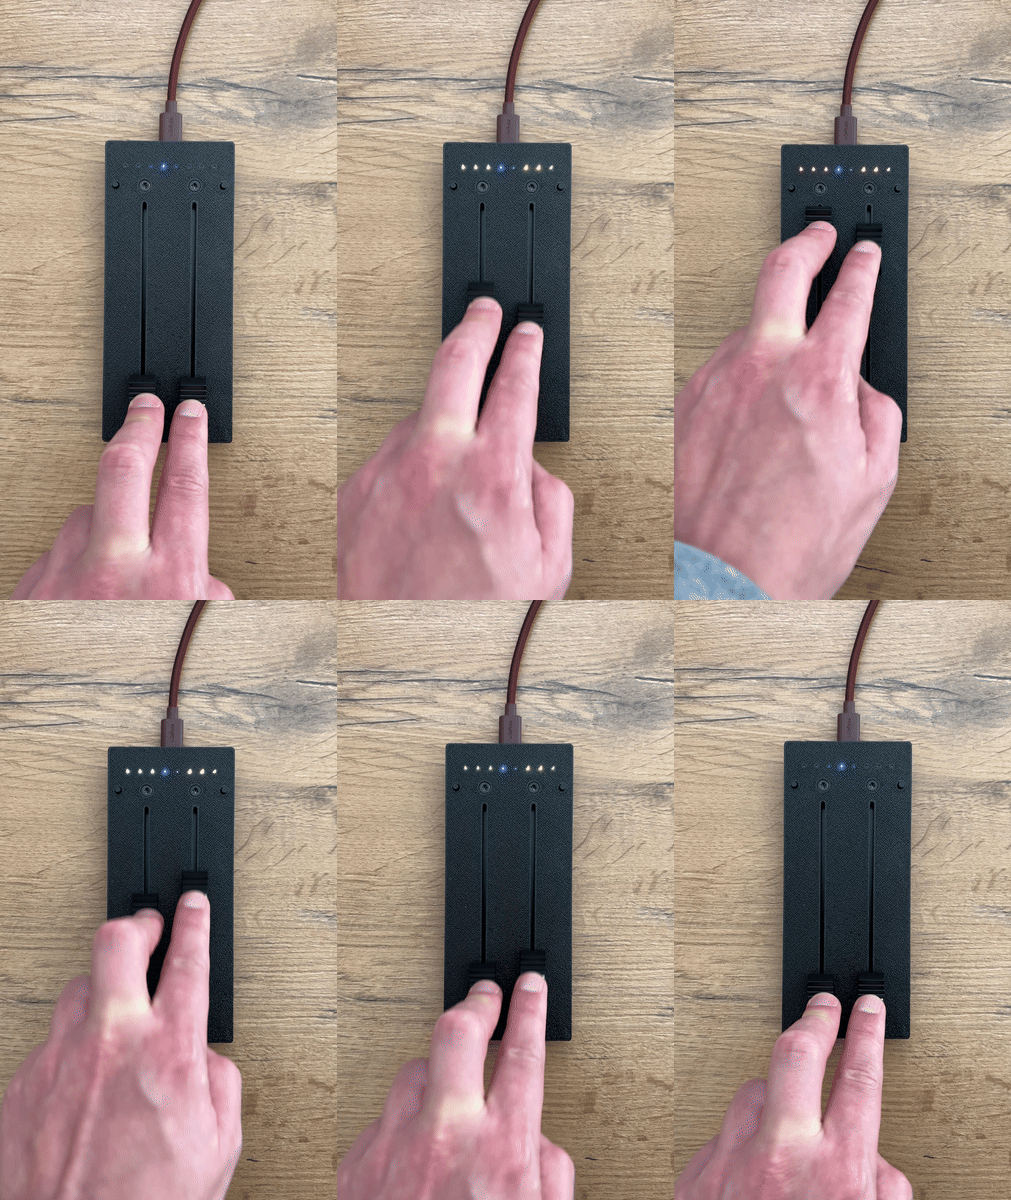
Functions
- Fader 1: MIDI CC11 (Dynamics)
- Fader 2: MIDI CC1 (Expression)
- Fader 3: MIDI CC7 (Main Volume)
- Fader 4: MIDI CC21 (Vibrato)
- Left button: MIDI CC85 (freely assignable in the DAW, e. g. record start)
- Right button: Switches between Bank 1 and Bank 2
LED indication
- Color-coded intensity display (green to red)
- Blue LEDs indicate the active bank / layer
- Red LED indicates left button press
Required parts
- 1 x Raspberry Pi Pico, RP2040
- 1 x NeoPixel Stick with 8 RGB LED
- 2 x ALPS linear slide 10 kΩ potentiometer (travel range: 100 mm)
- 2 x Capacitor 100 nF (recommended)
- 1 x 330 Ω resistor (recommended)
- 2 x 150 Ω resistor (recommended)
- 1 x 5.1 kΩ resistor (recommended)
- 2 x fader knob
- 4 x Countersunk screws – 5 mm (preferably in black)
- 4 x Countersunk screws – 8 mm
- 2 x Tactile push button (6 x 6 x 9 mm)
- 1 x USB Type C Plug jack with 6 Pins
- some 10 mm wide rubber strip for a non-slip grip
Hardware
Insert the buttons and fix them in place with a small amount of glue.
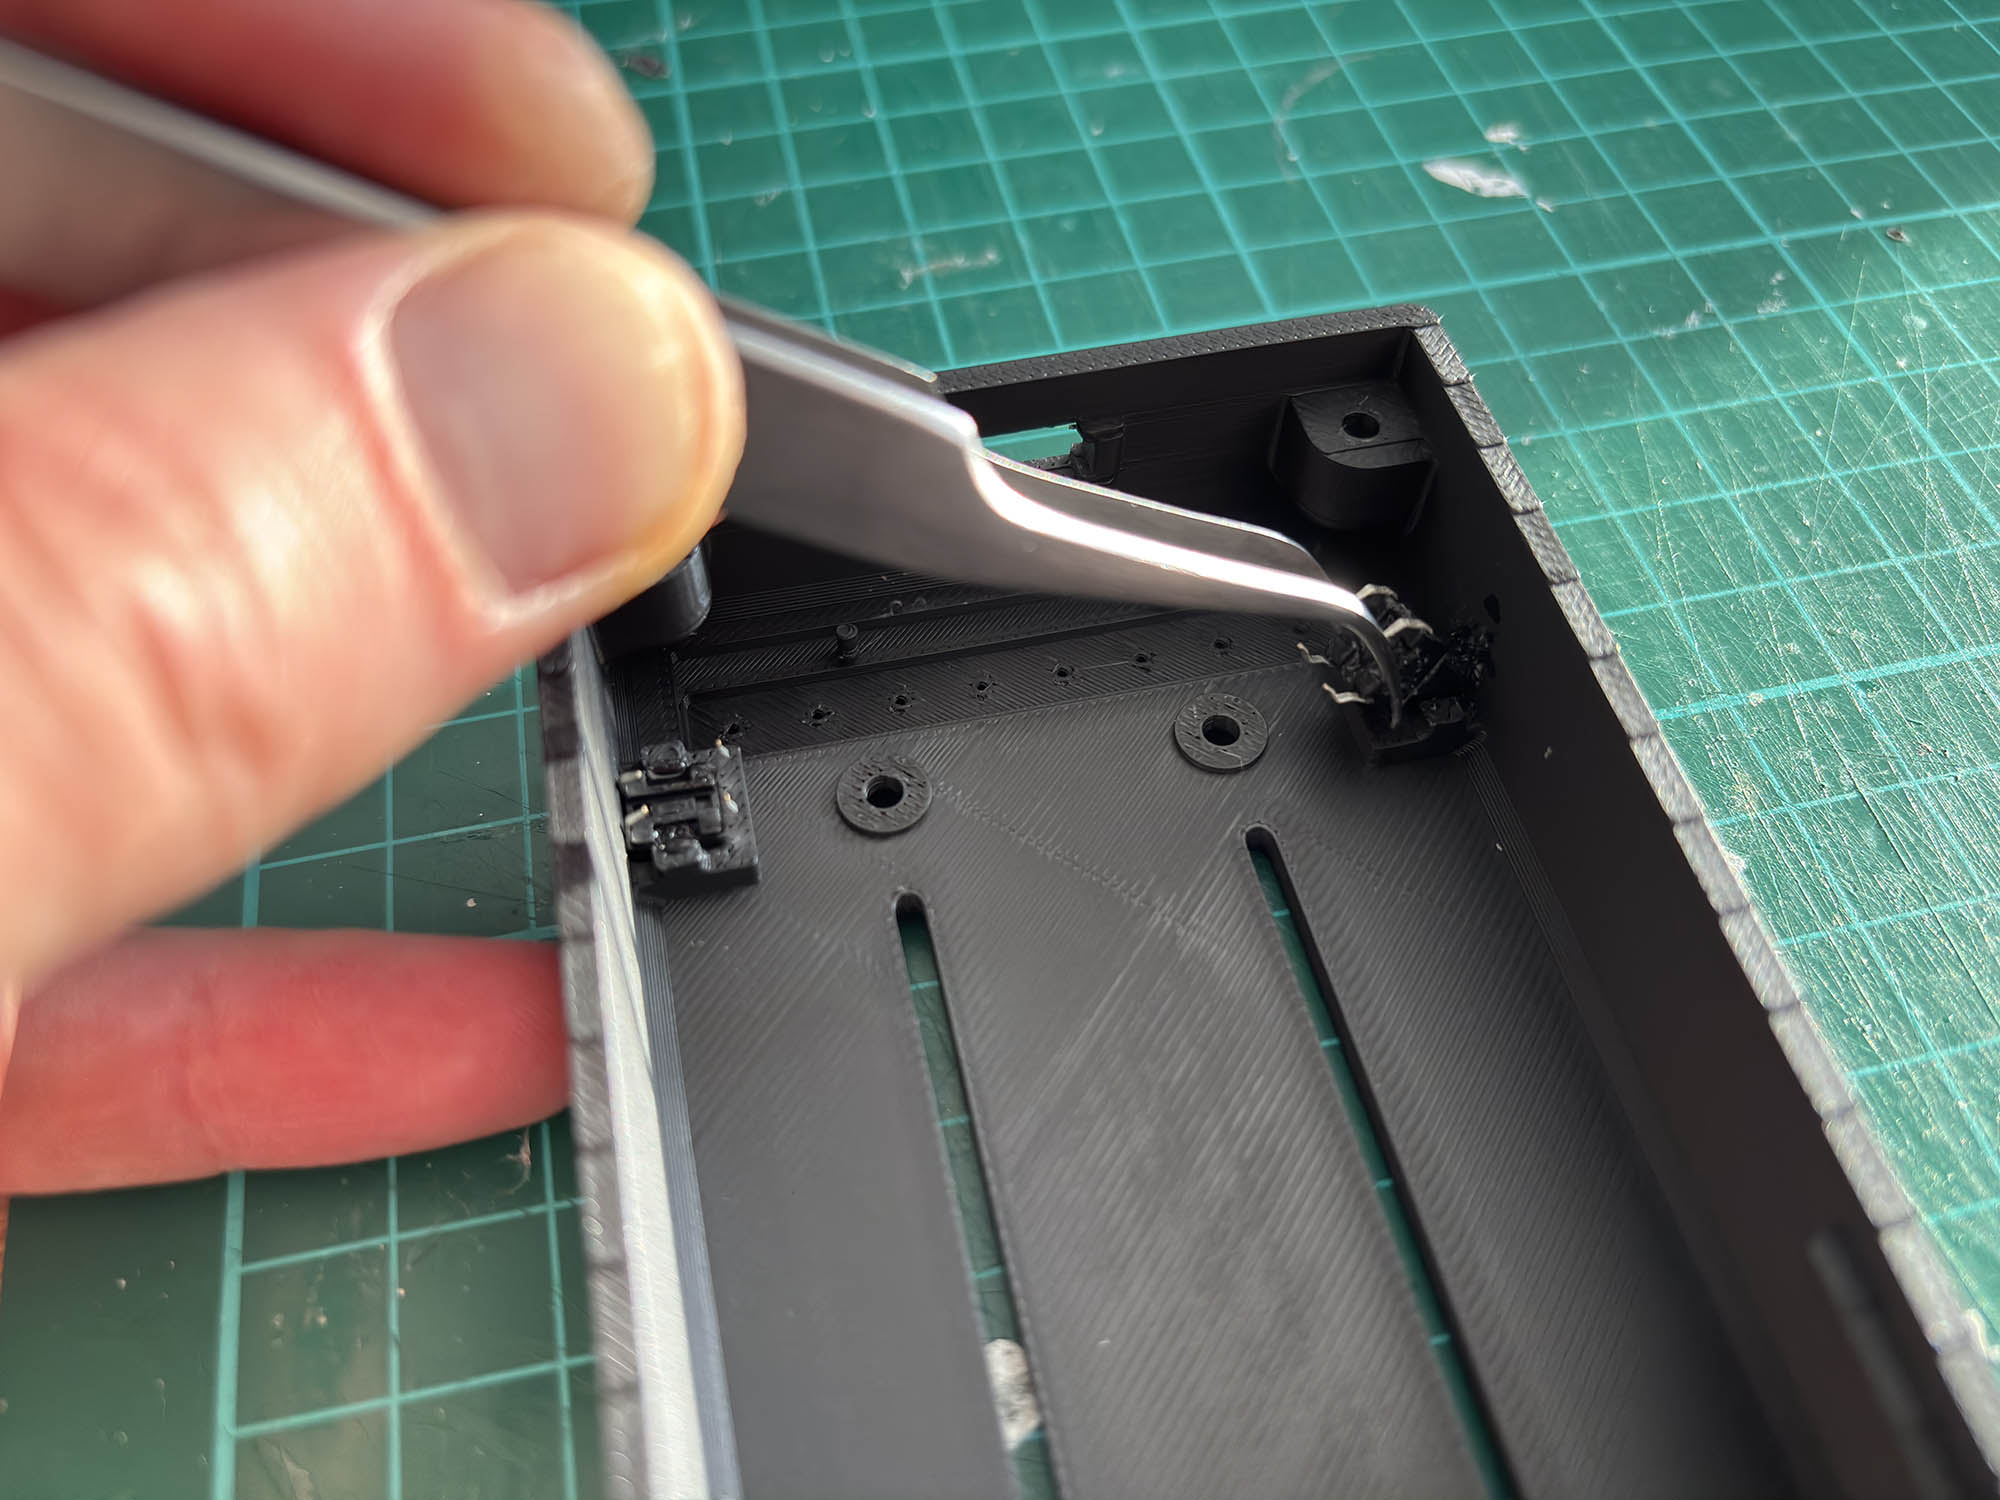
Insert the diffusion foil (one layer white PLA or alternatively a piece of paper) and glue it in place.
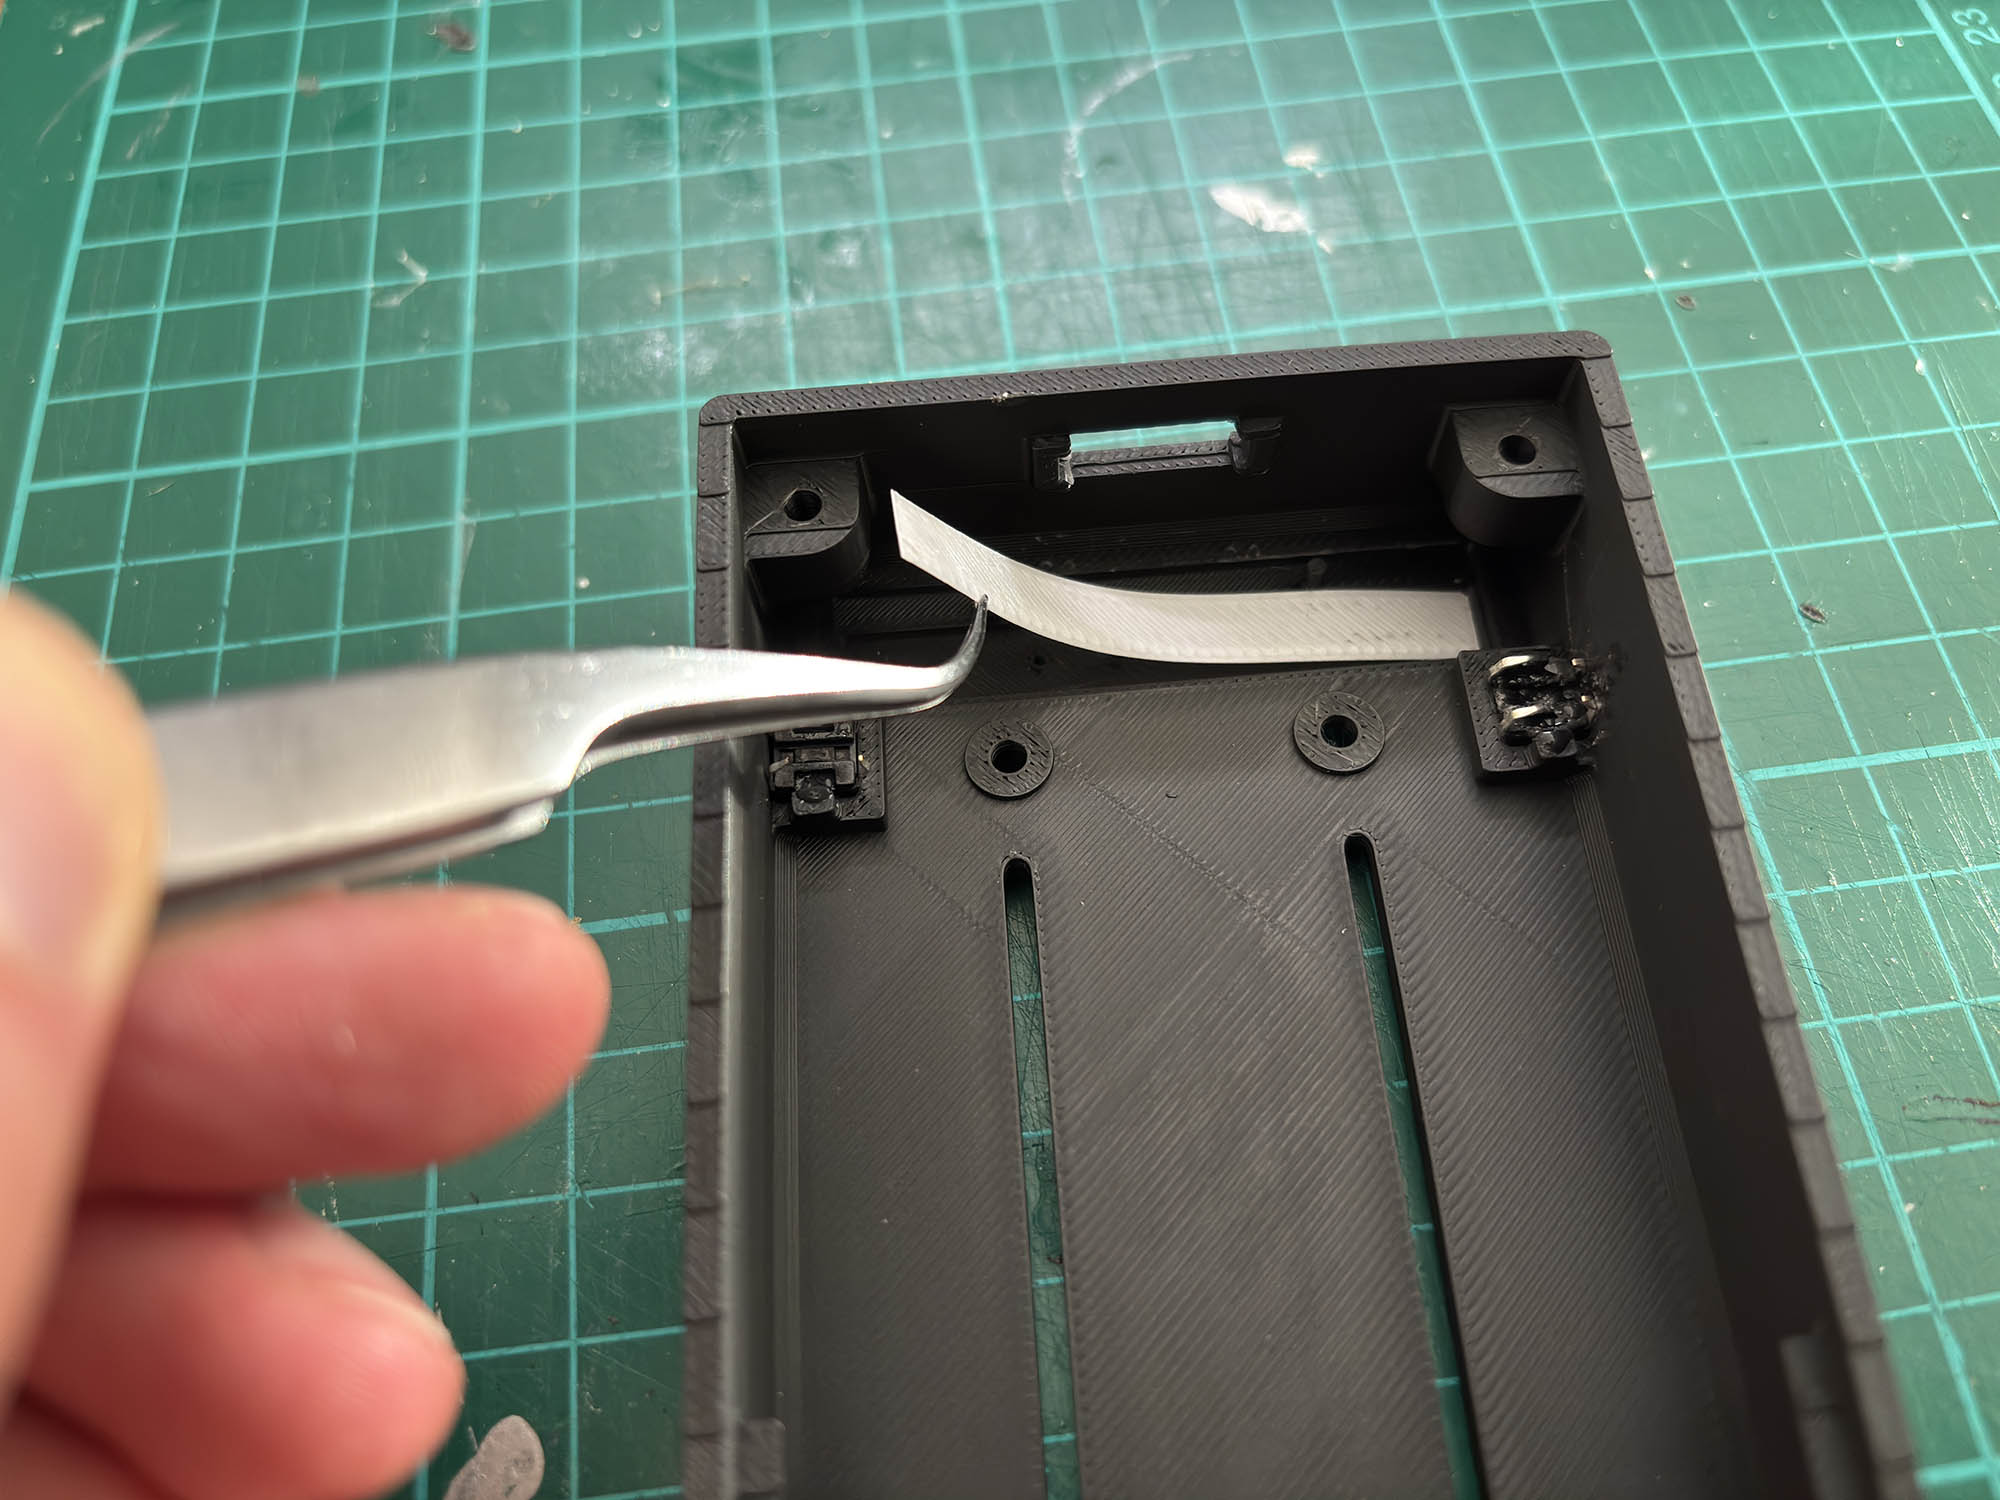
Position the LED strip and secure it with hot glue.
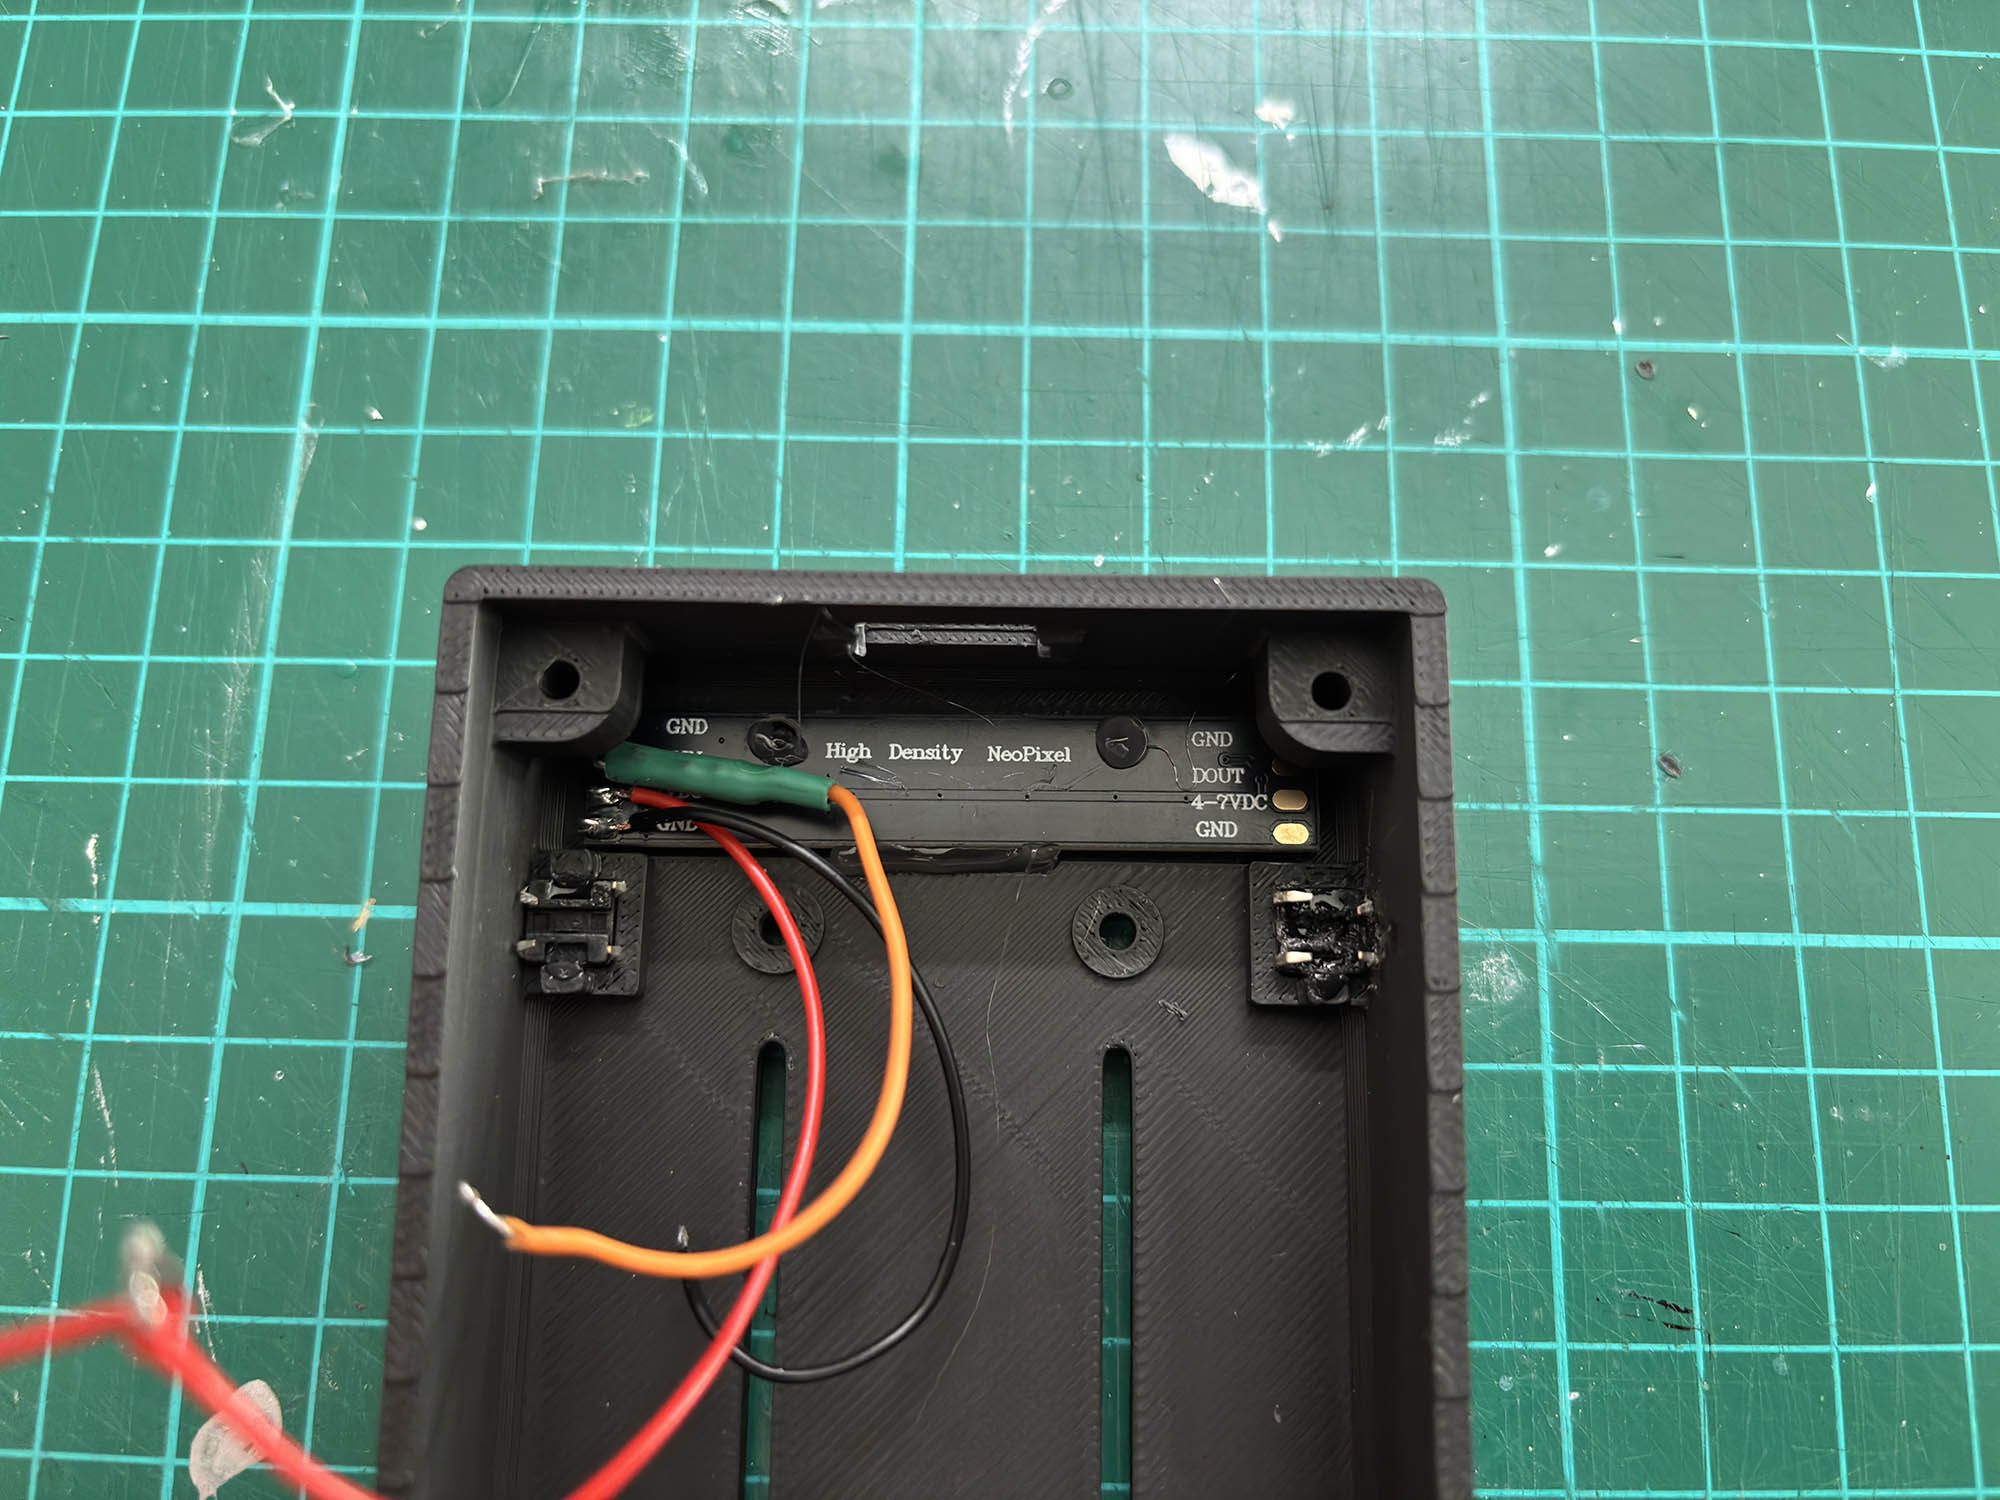
- Screw the faders into the enclosure.
Connect all cables according to the pin assignment below.
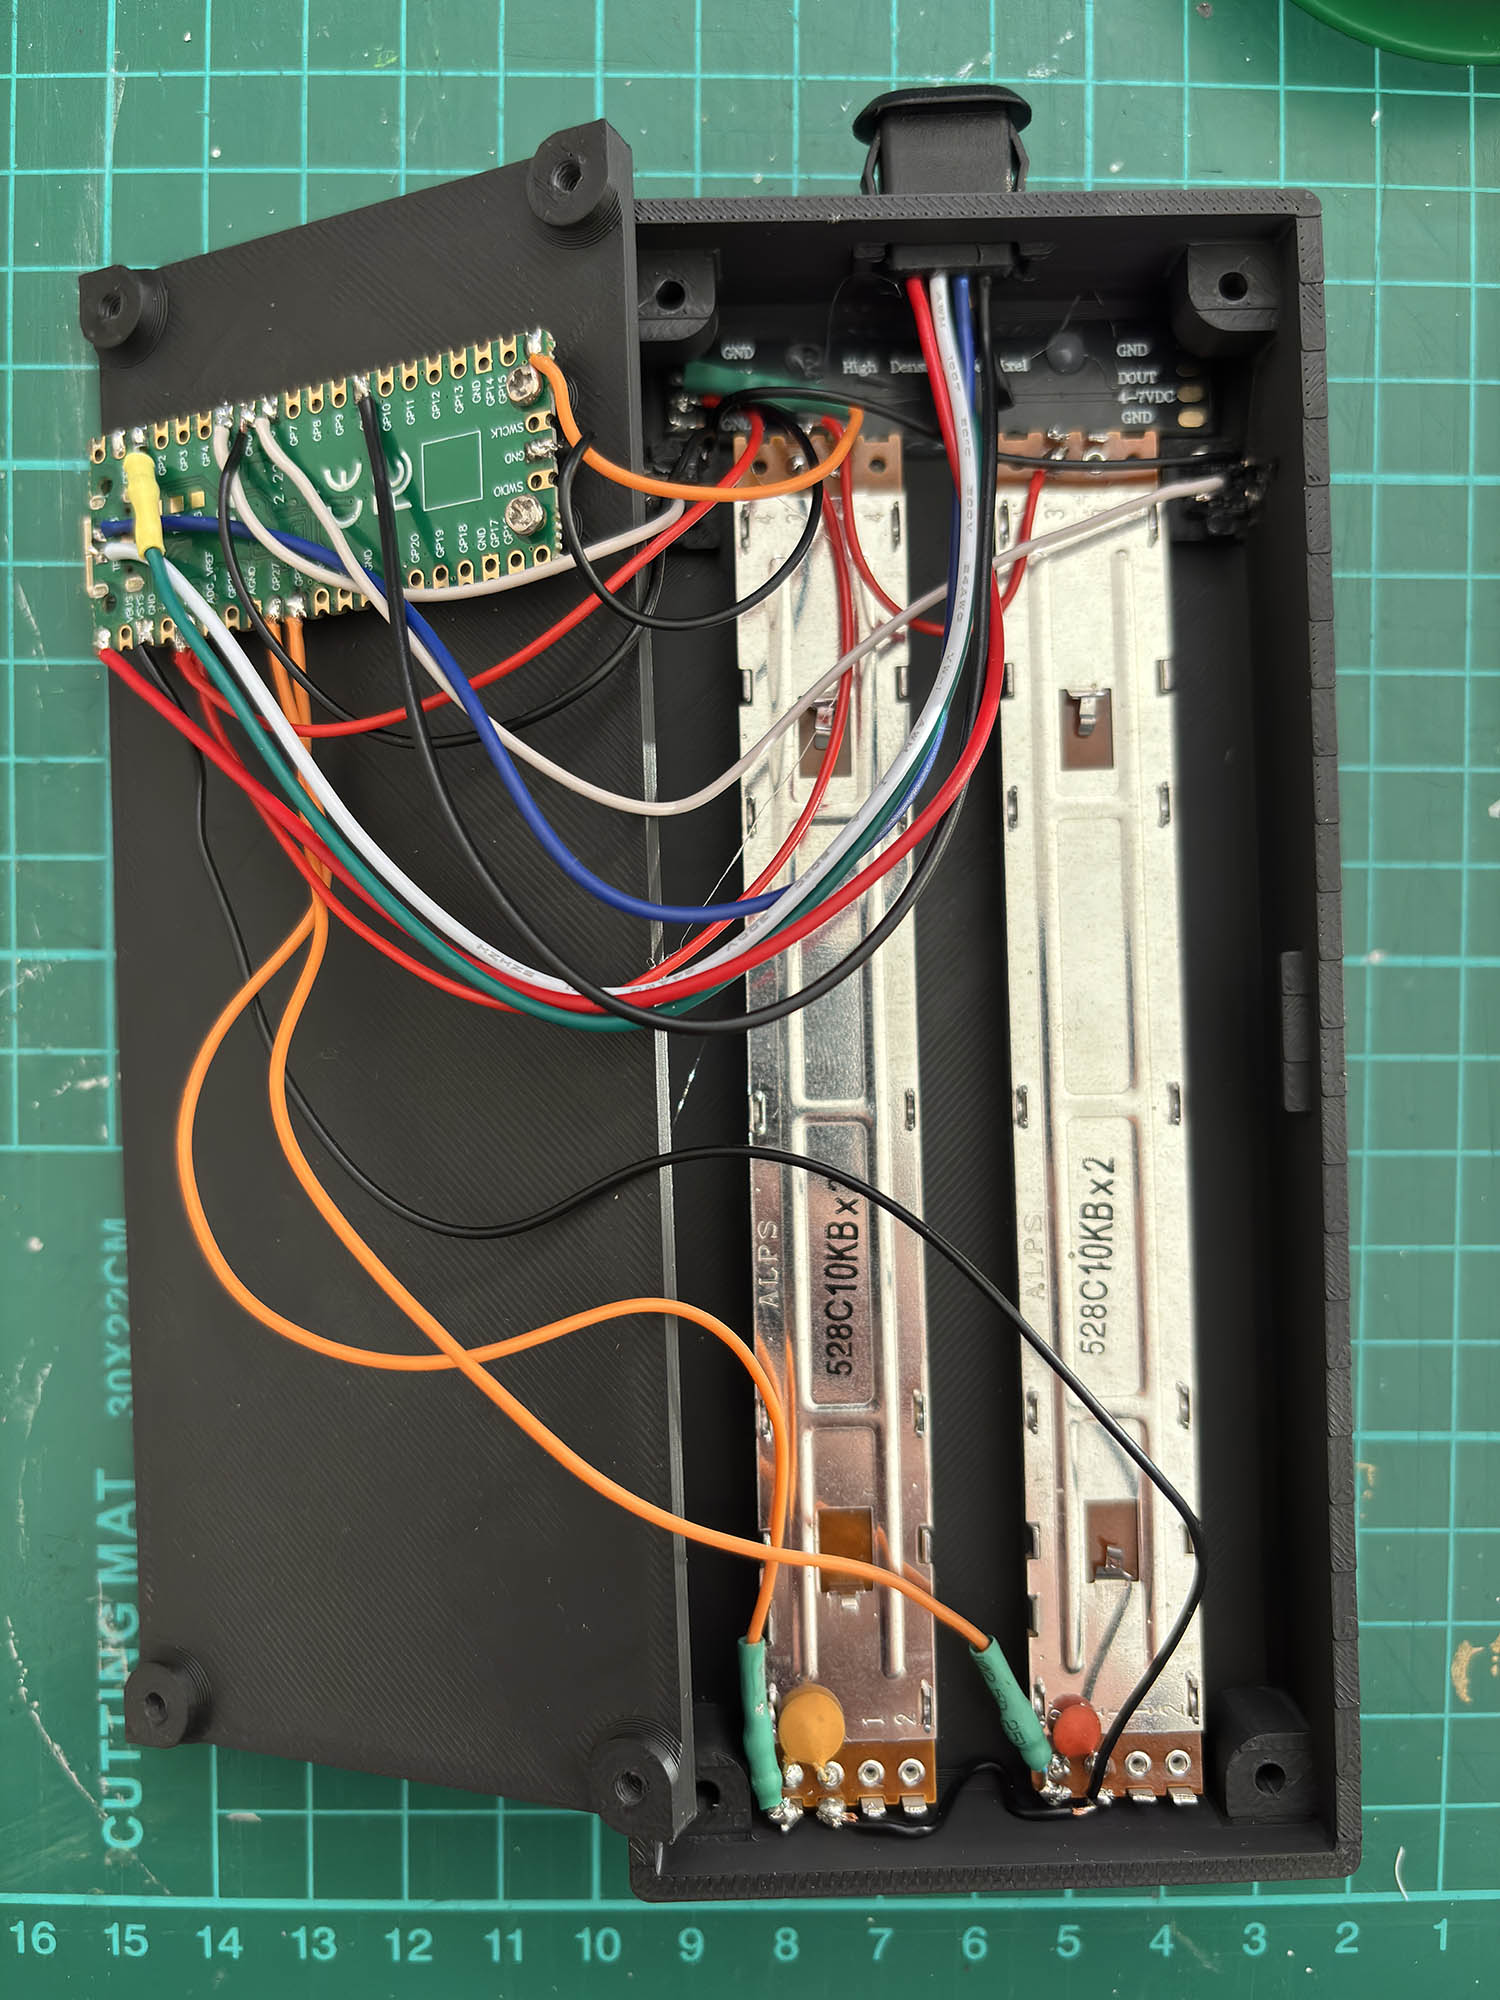
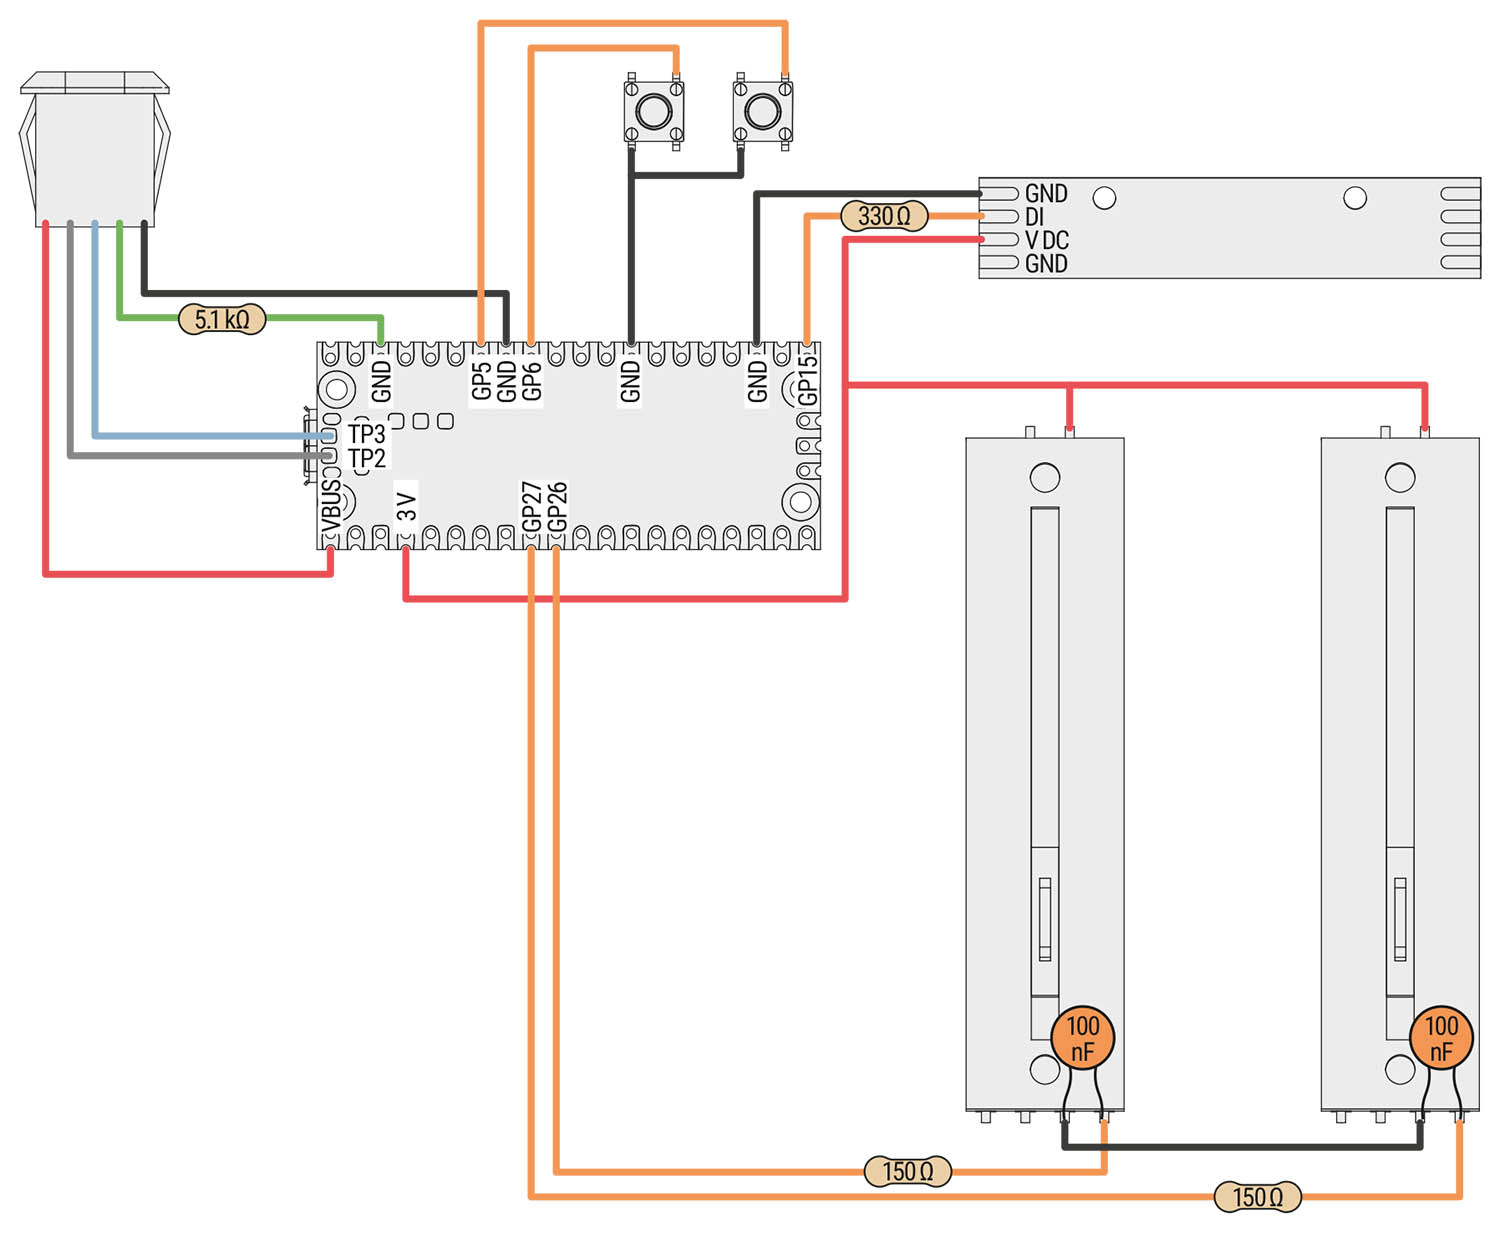
Fader 1 / 2:
Signal → 150 Ω → GPIO26 / GPIO 27
VCC → 3.3 V
GND → GND
Capacitor 100 nF between Signal and GND
- Button left / right:
One side → GPIO6 / GPIO 5
Other side → GND
- NeoPixel LED strip:
DIN → 330 kΩ → GPIO15
VCC → 3 V
GND → GND
- USB-C:
VCC (red) → VBUS
GND (black) → GND
D+ (blue) → TP3
D- (white) → TP2
CC1 (green) → 5.1 kΩ → GND
Software
- Install Visual Studio Code.
Install the PlatformIO extension.
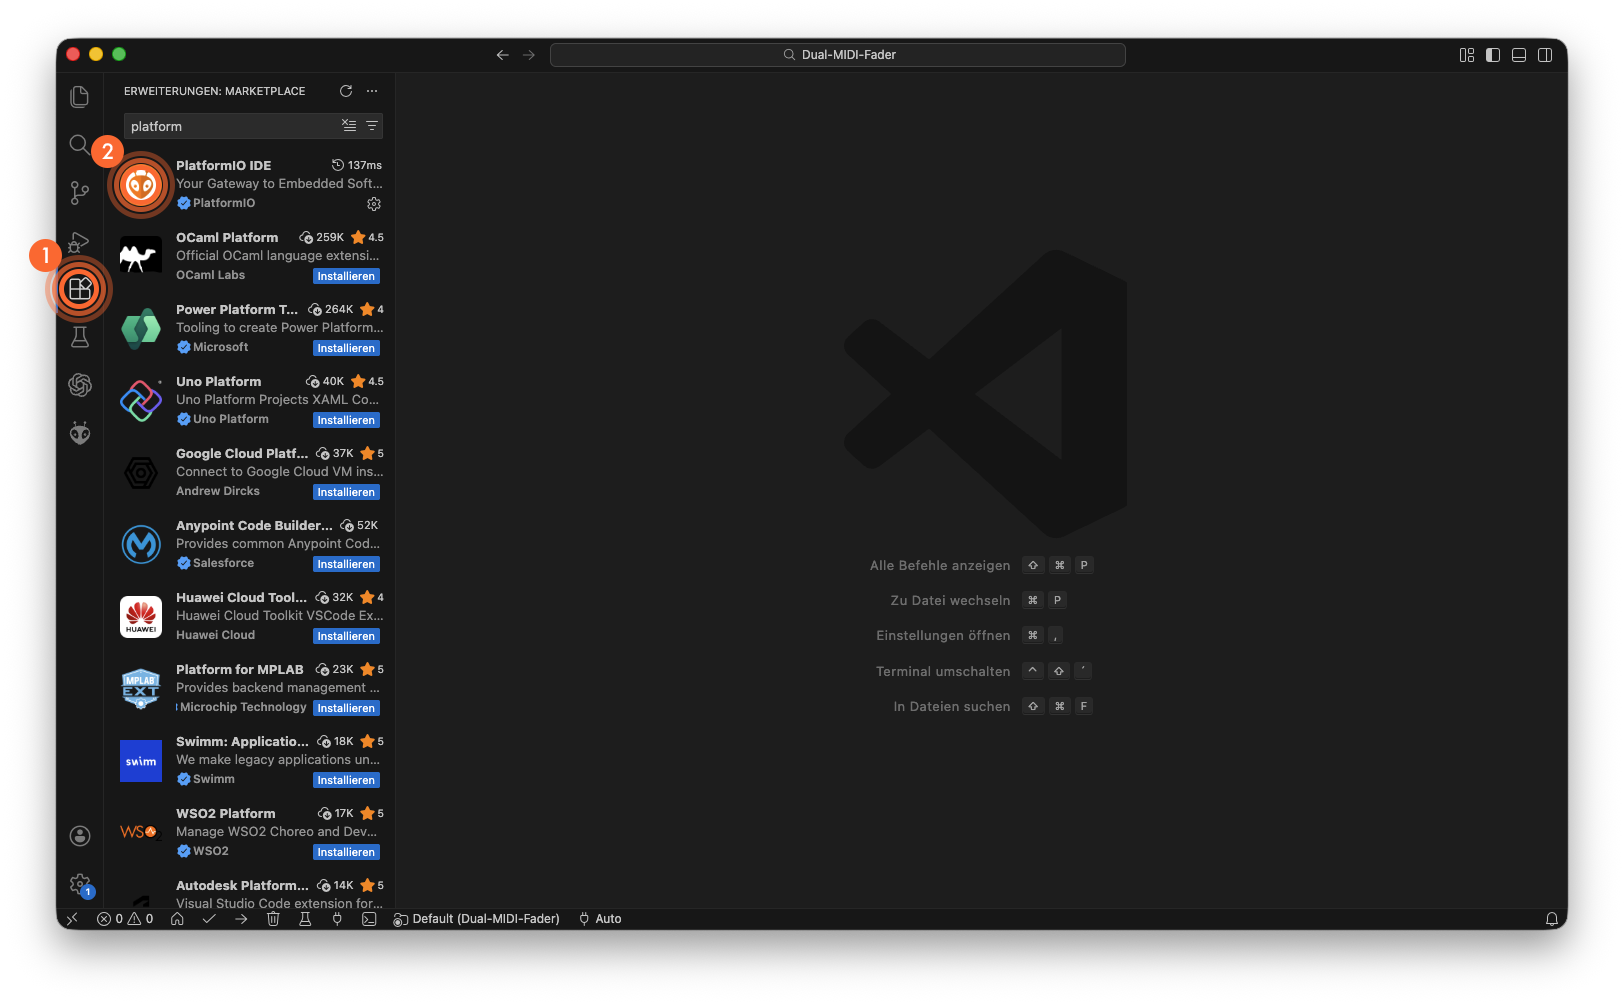
- Download the source code from printables.com
Extract and open the project folder in Visual Studio Code.
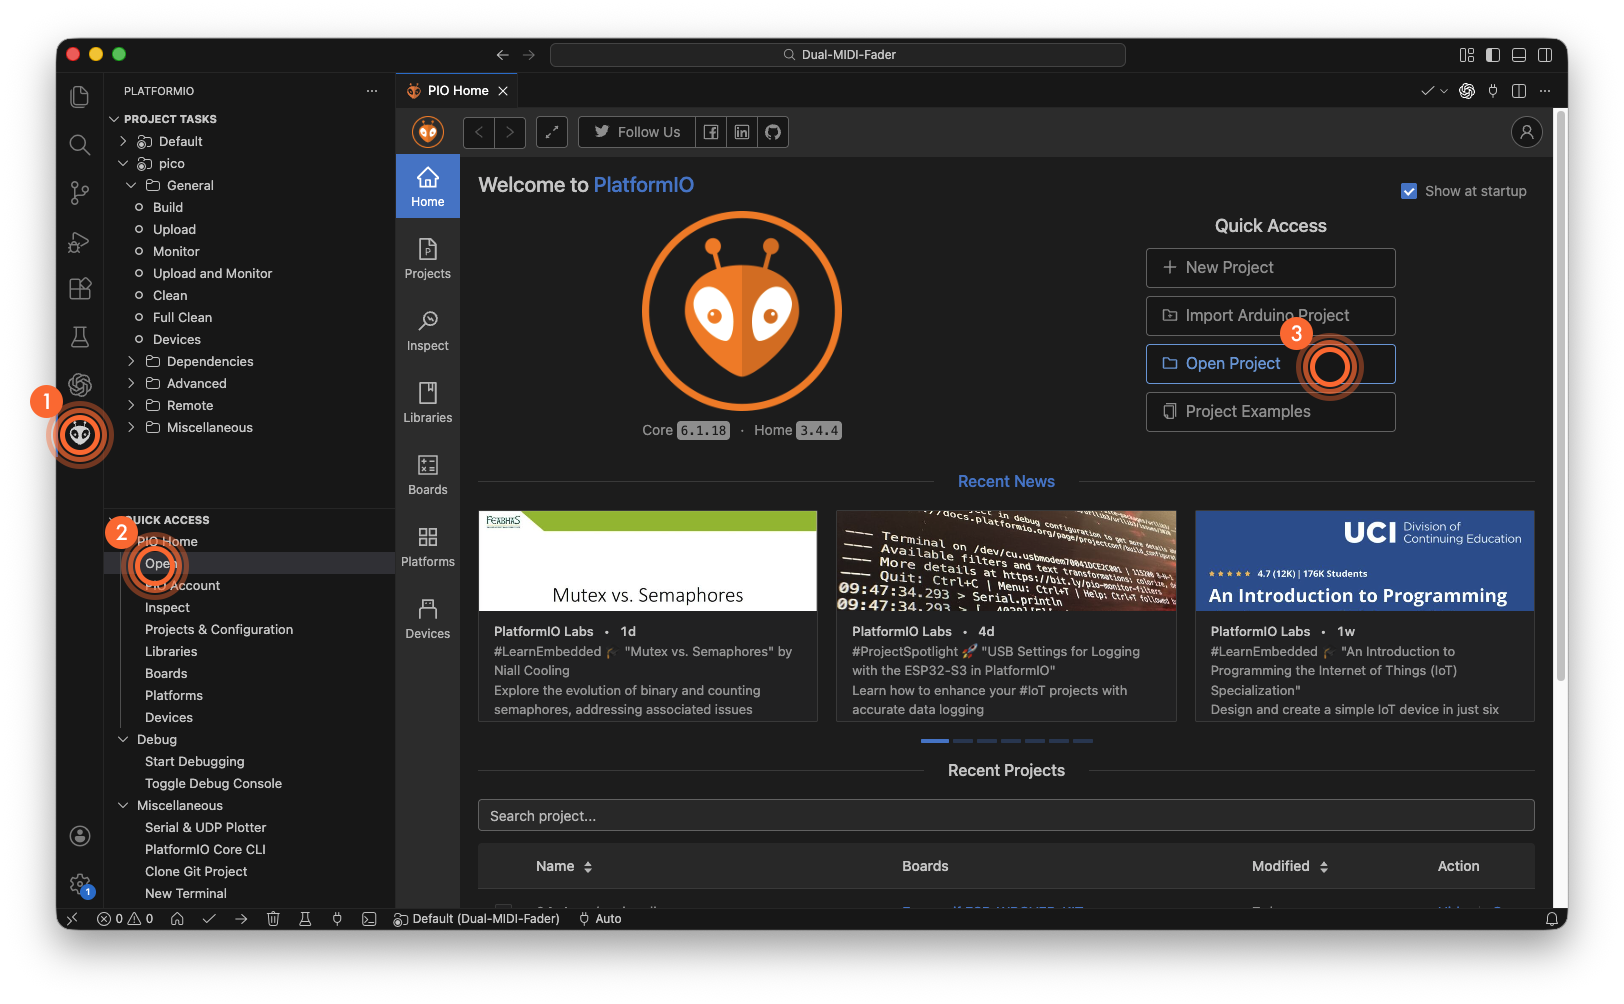
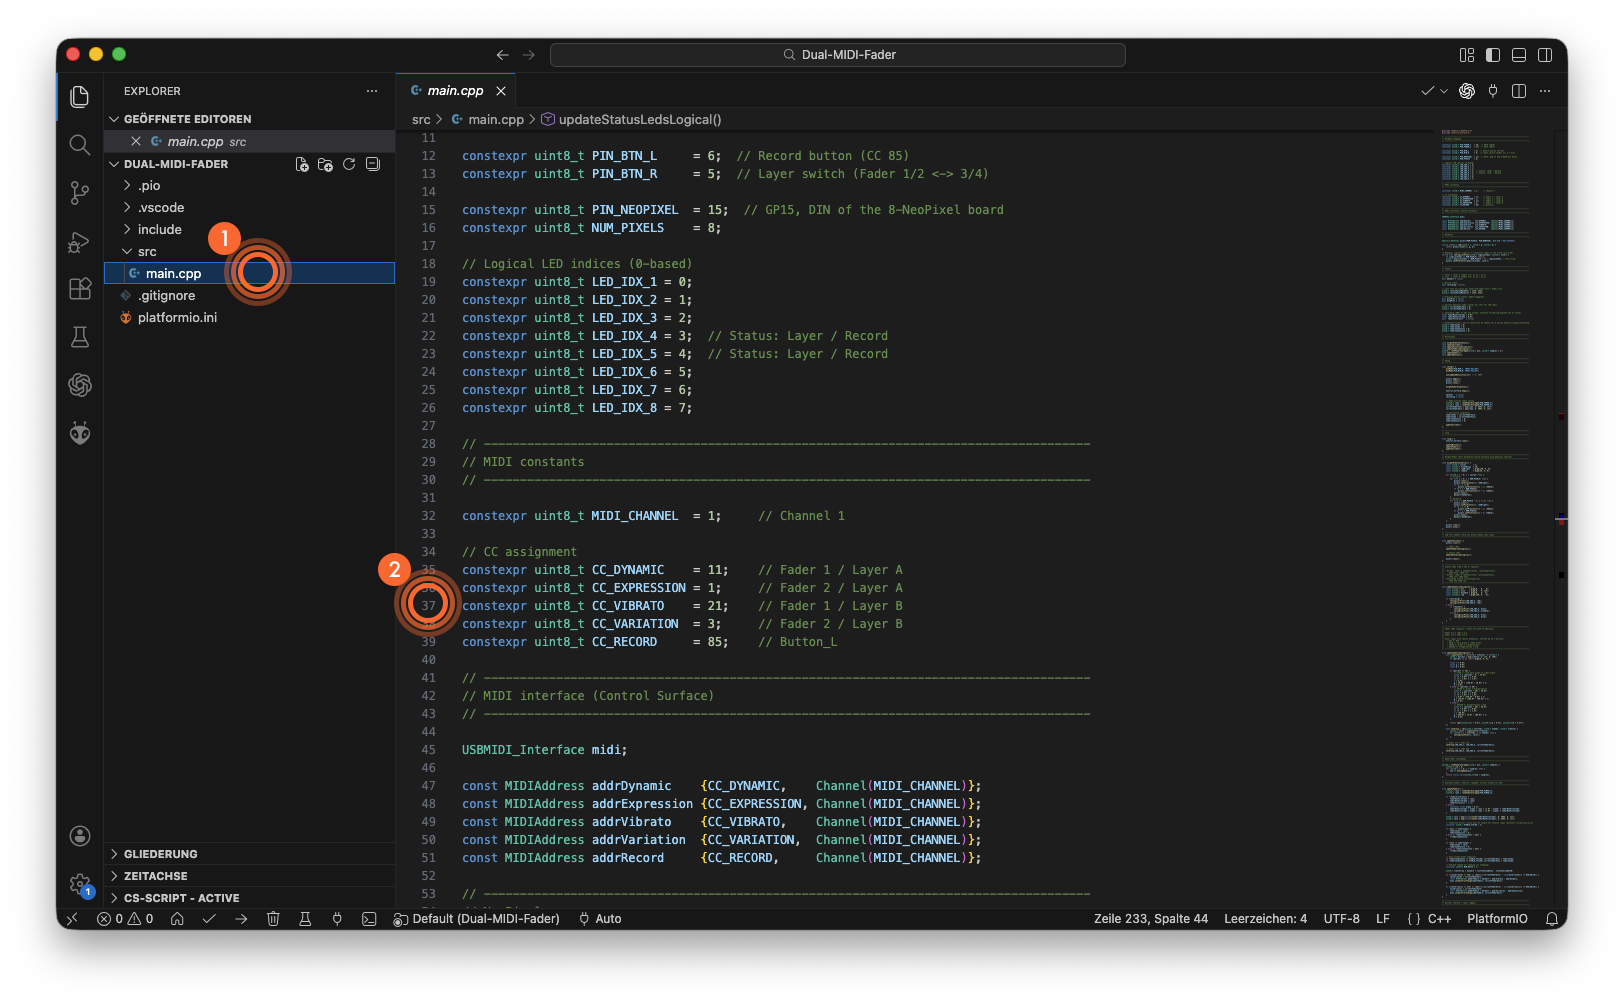
If required, adjust the MIDI CC mapping in src/main.cpp (CC11/CC1/CC21/CC3 and CC85).
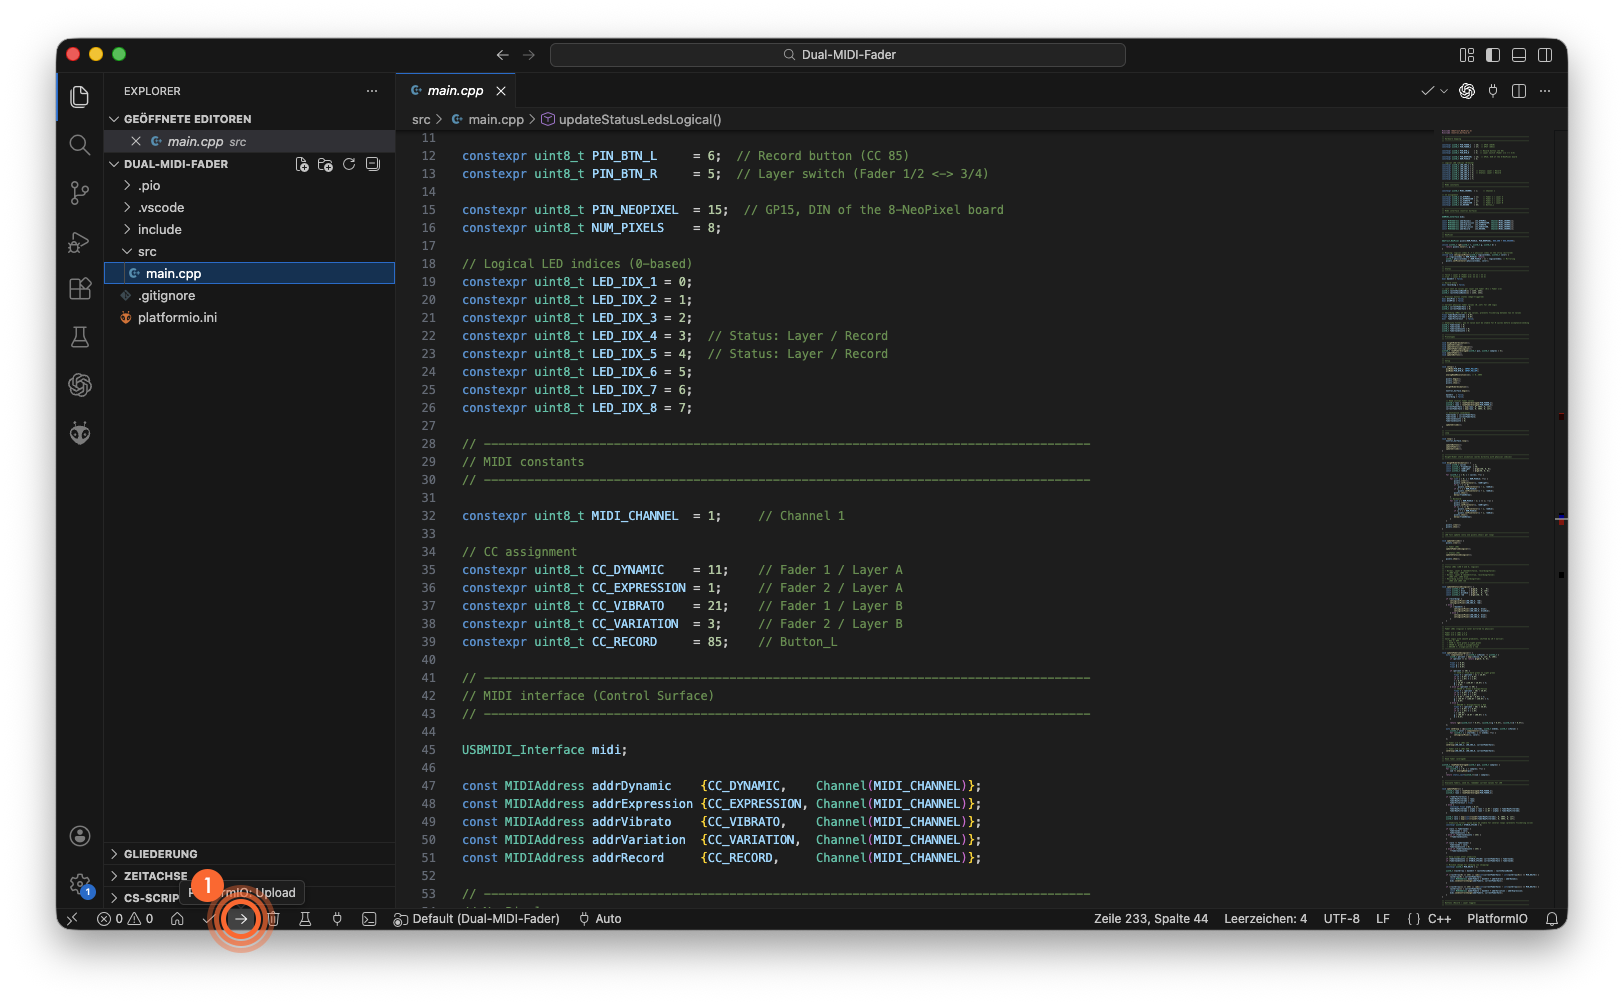
Build and upload the firmware to the Raspberry Pi Pico using PlatformIO.
Please note regarding the software: I am not a programmer and used AI to create the code. It runs reliably for me, but I cannot rule out errors or sloppy programming.

Gostou deste modelo? Crie uma conta grátis para salvar seus favoritos e voltar a eles depois.
Criar conta