Você está no 3DFinder
Buscamos em Thingiverse, MakerWorld e Printables ao mesmo tempo para te dar o melhor de cada uma.
Descrição
🔁 Transfer Spool – Modular Refill Transfer Tool
Transfer Spool is a tool designed for users who work with filament refills but own only a few reusable spools.
It allows you to easily transfer a spool from one refill to another, keeping the filament perfectly wound and ready for printing.
It’s a simple and practical solution to avoid rewinding, mess, or complicated operations when changing refills.
💡 Why I designed it
Transfer Spool was born from a real situation:
many makers own several refills but only a few reusable spools.
Managing refill changes can be inconvenient and often requires extra attention to prevent the filament from unwinding.
This tool makes it easy to transfer and manage refills, keeping filament organized and ready to print.
🎨 Design
Even though it is primarily a functional tool, I still tried to give it a clean and well-designed look, with simple lines and a solid structure.
⚙️ How it works
🔁 Removing a Refill from the Spool
| 1️⃣ Insert the two Transfer Spool blades inside the refill spool. | 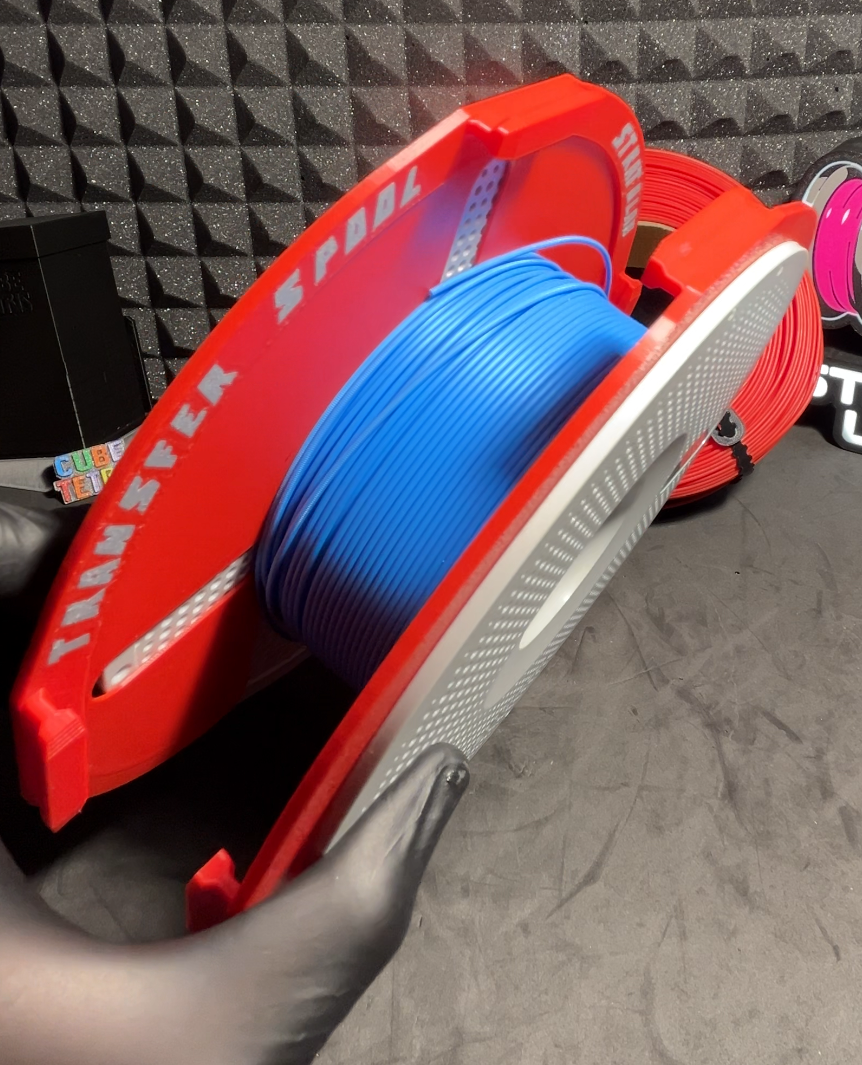 |
| 2️⃣ Once properly positioned, secure them using the 3 locking blocks. | 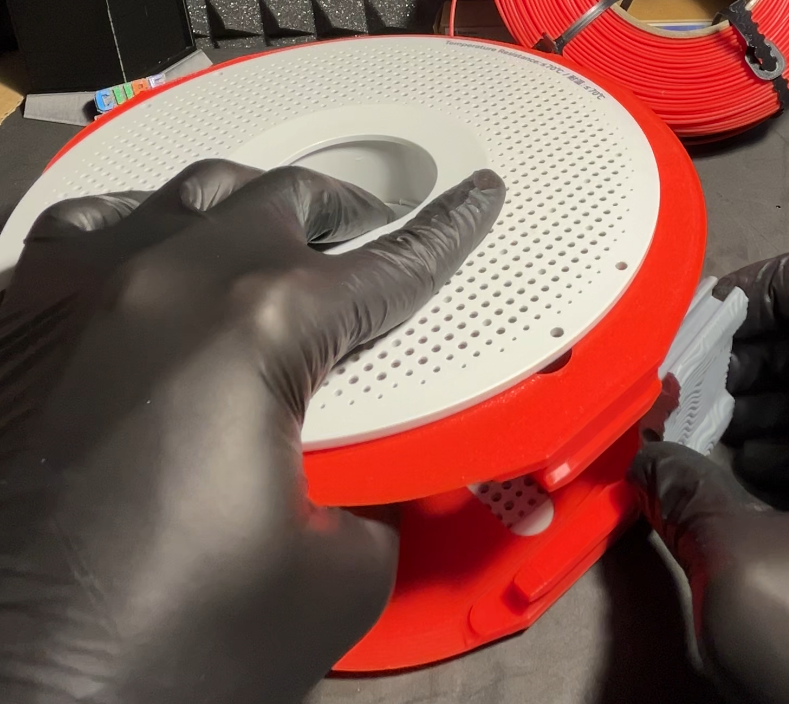 |
| 3️⃣ Insert the starting end of the filament into the hole of one of the three locking blocks. | 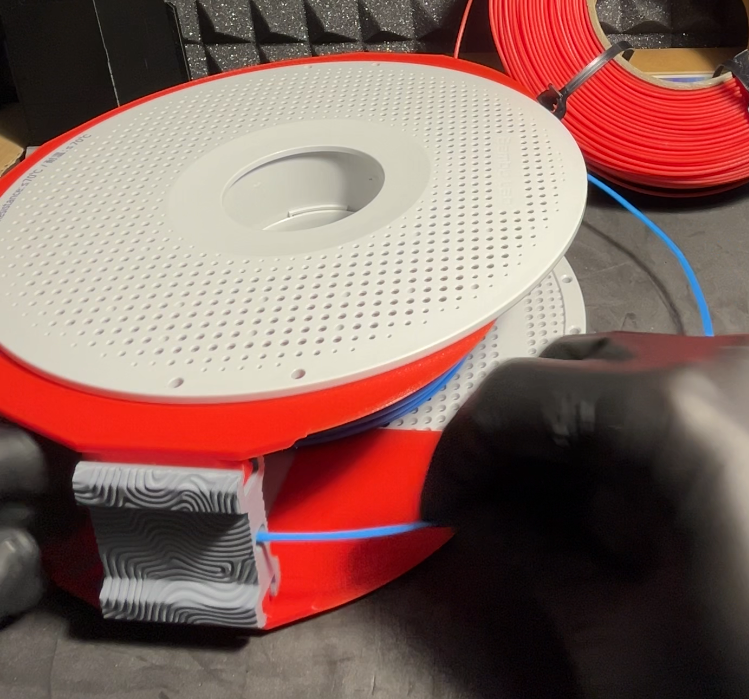 |
| 4️⃣ At this point you can unlock the spool and remove it from the refill, leaving the filament supported by the Transfer Spool. Then install the circular support ring. | 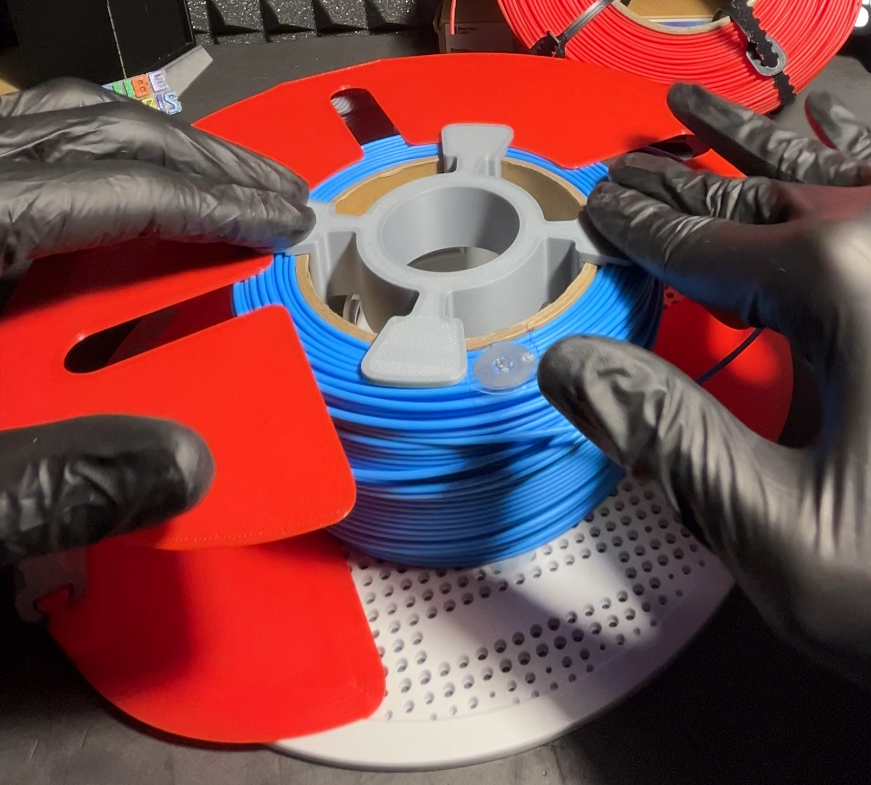 |
| 5️⃣ The circular ring keeps the refill centered between the blades and allows you to place the Transfer Spool vertically, making the next steps easier. | 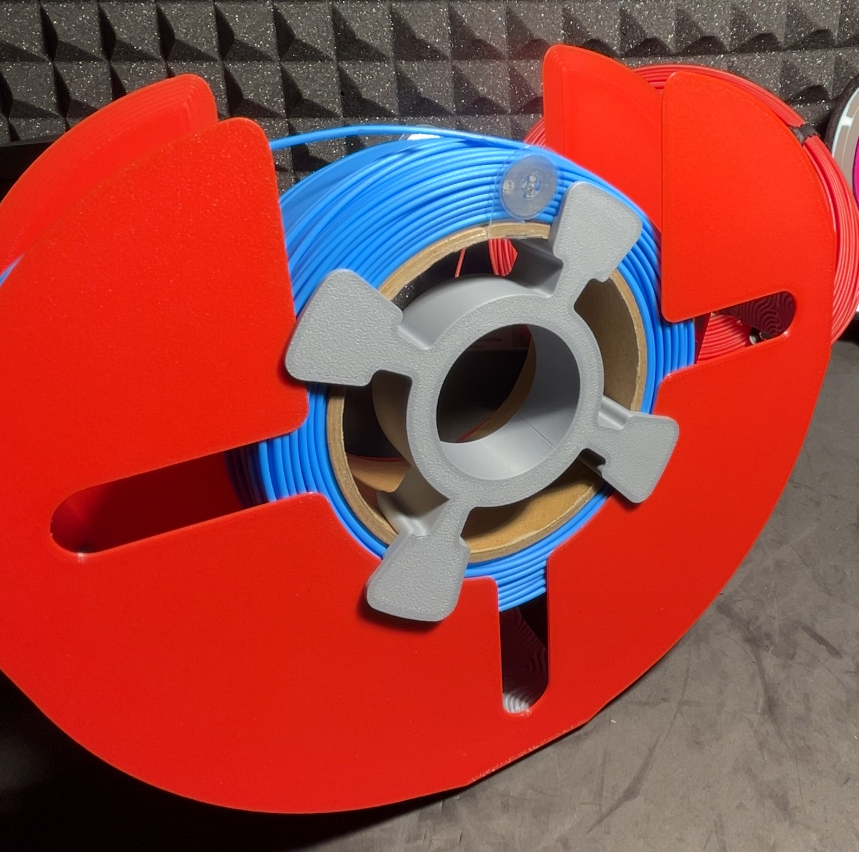 |
| 6️⃣ Insert and tighten zip ties in the grooves designed on the refill to completely secure the filament. | 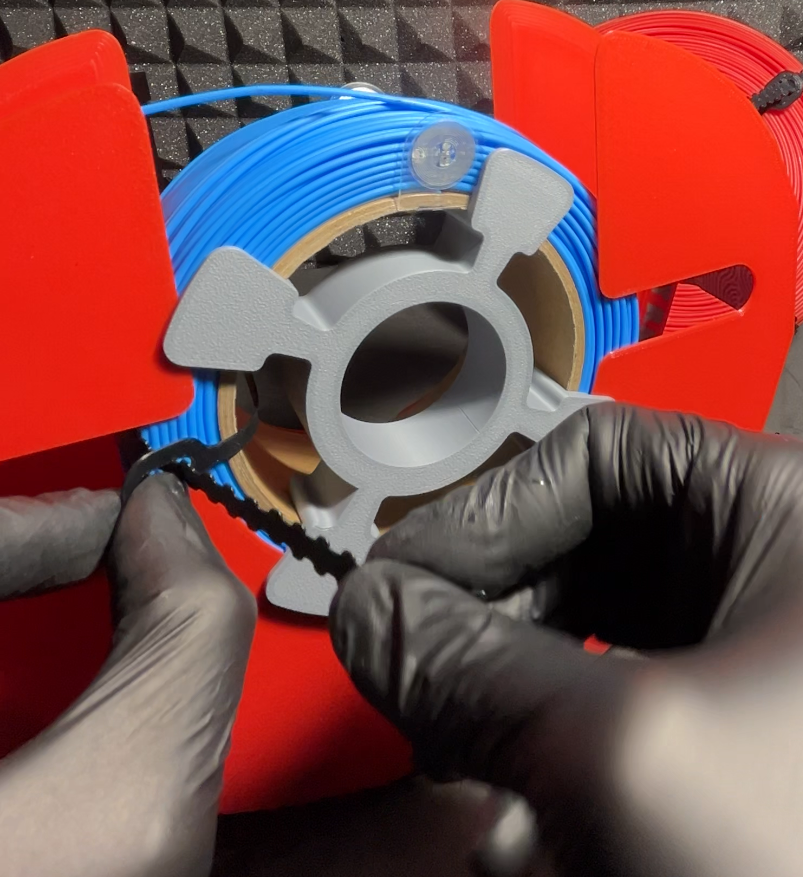 |
7️⃣ Once the refill is secured, remove the Transfer Spool:
| 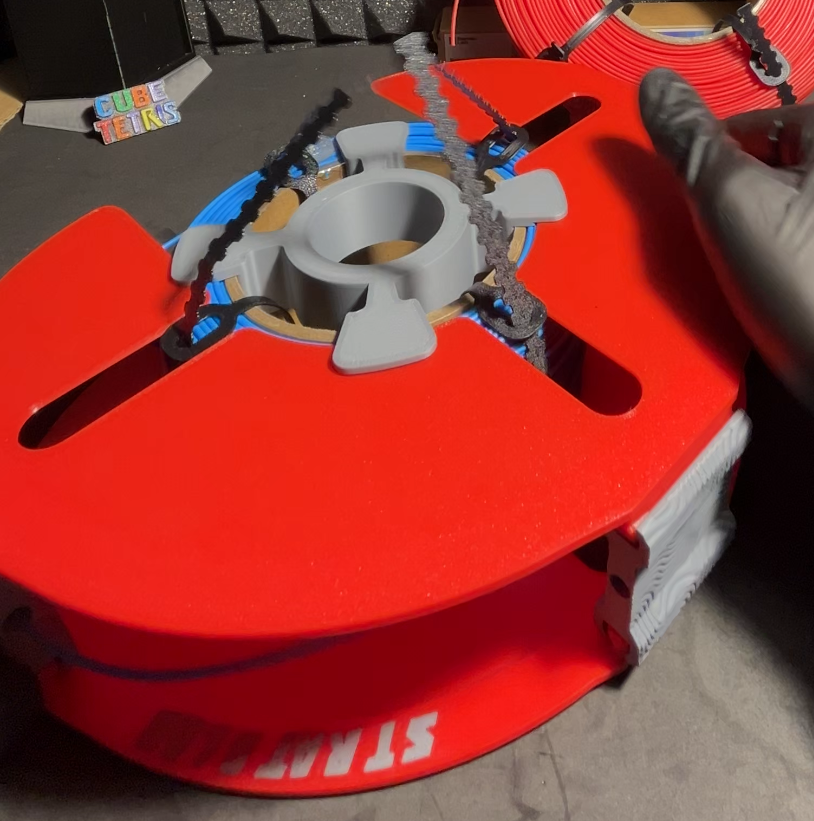 |
| 8️⃣ The refill is now secured and ready to be stored. | 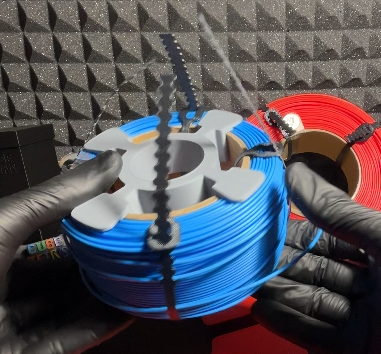 |
🔄 Mounting a New Refill onto the Spool
| 9️⃣ Take a new refill and place it on one blade of the Transfer Spool. | 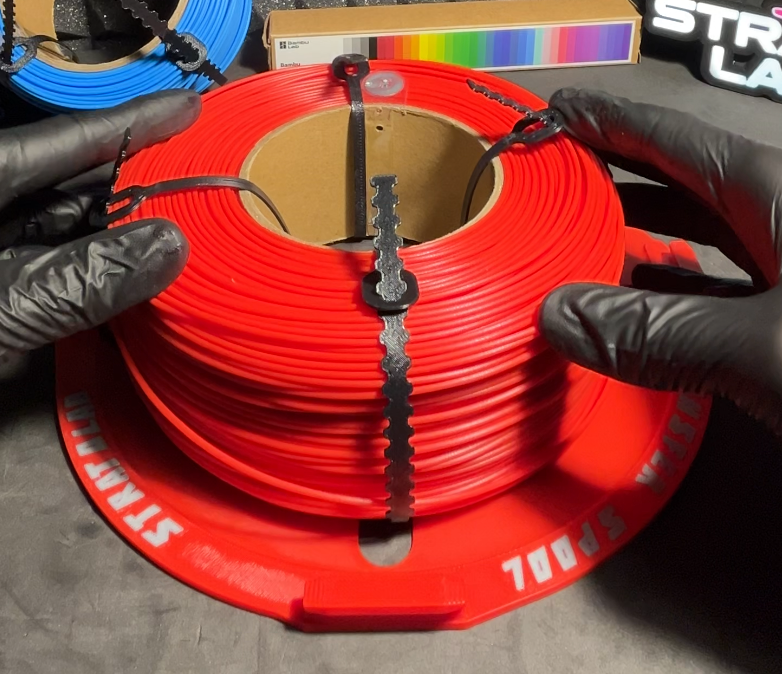 |
| 🔟 Place the second blade on top of the refill. | 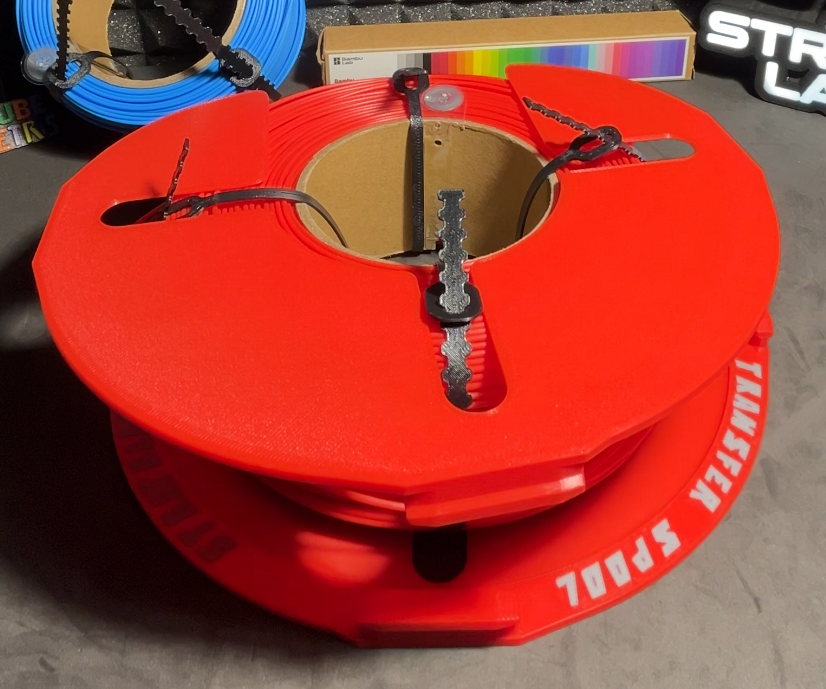 |
1️⃣1️⃣ Install the circular support ring. | 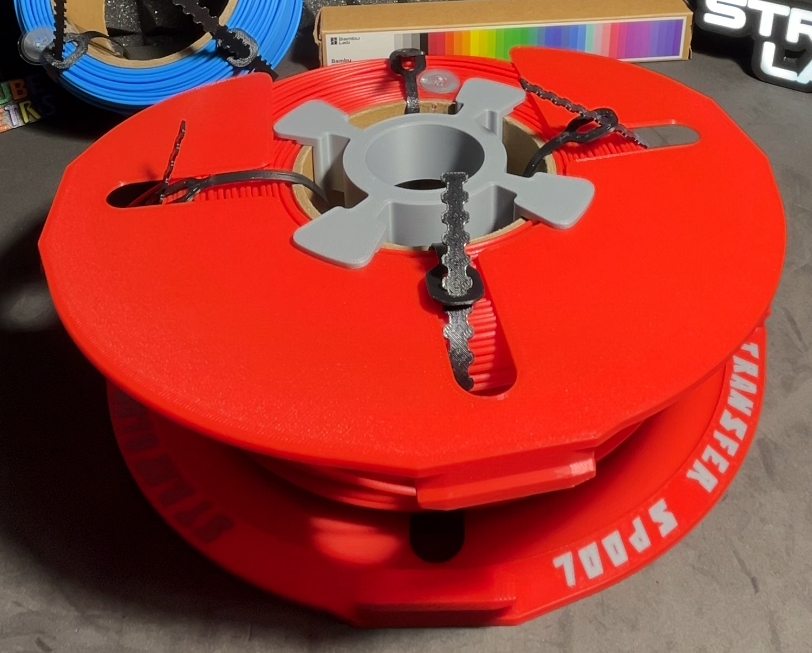 |
| 1️⃣2️⃣ Insert and tighten the three locking blocks. | 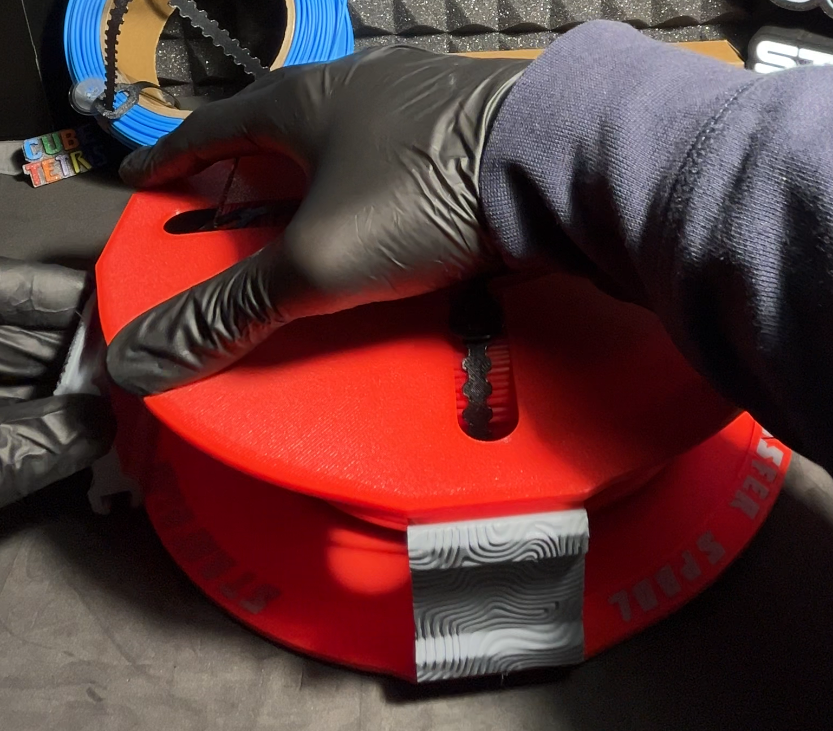 |
| 1️⃣3️⃣ Place the Transfer Spool vertically. | 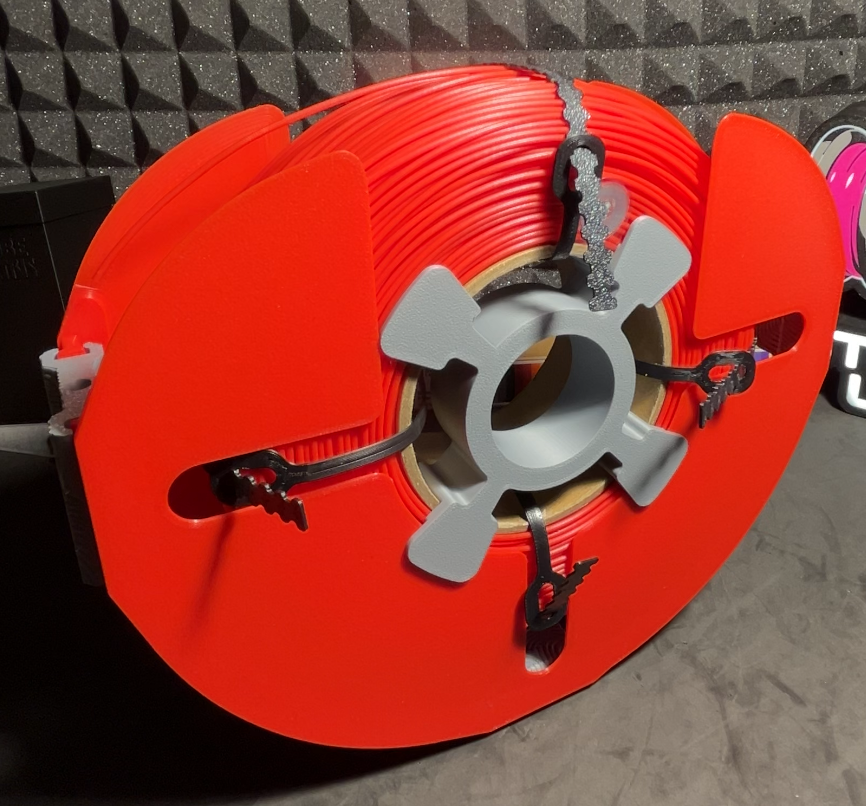 |
| 1️⃣4️⃣ Insert the filament end into the hole of one of the locking blocks. | 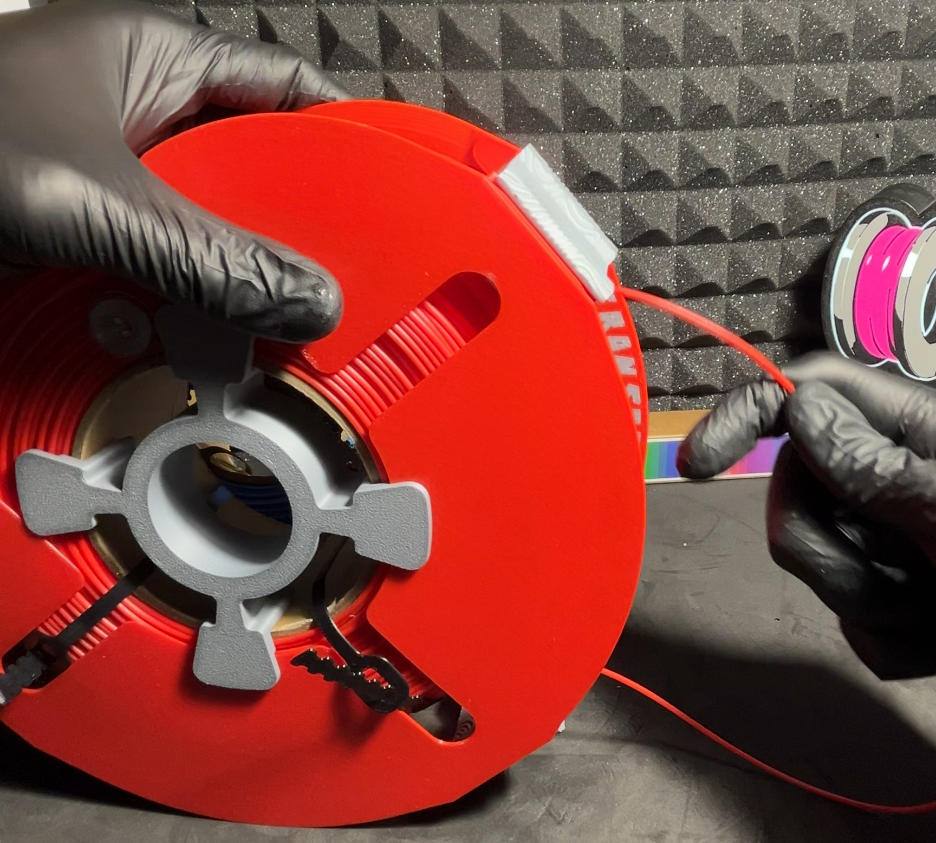 |
| 1️⃣5️⃣ Remove all zip ties from the refill. | 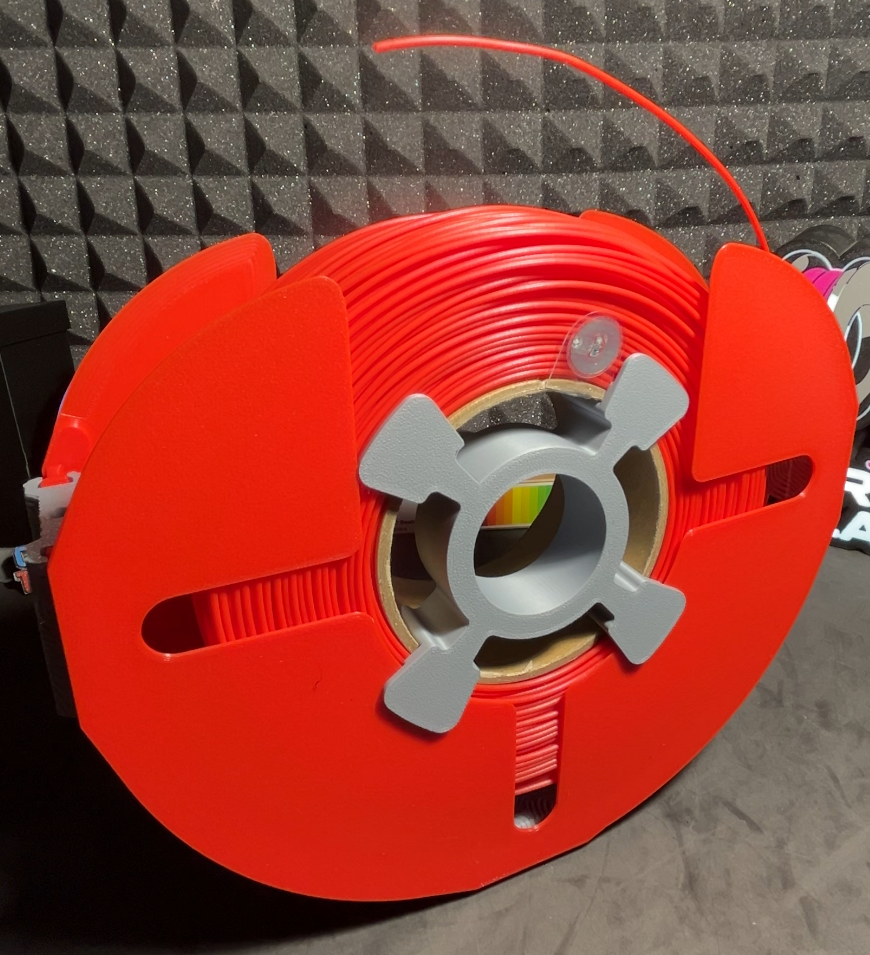 |
| 1️⃣6️⃣ Insert the first half of the Bambu Lab spool, aligning the locking tab with the cardboard core of the refill. | 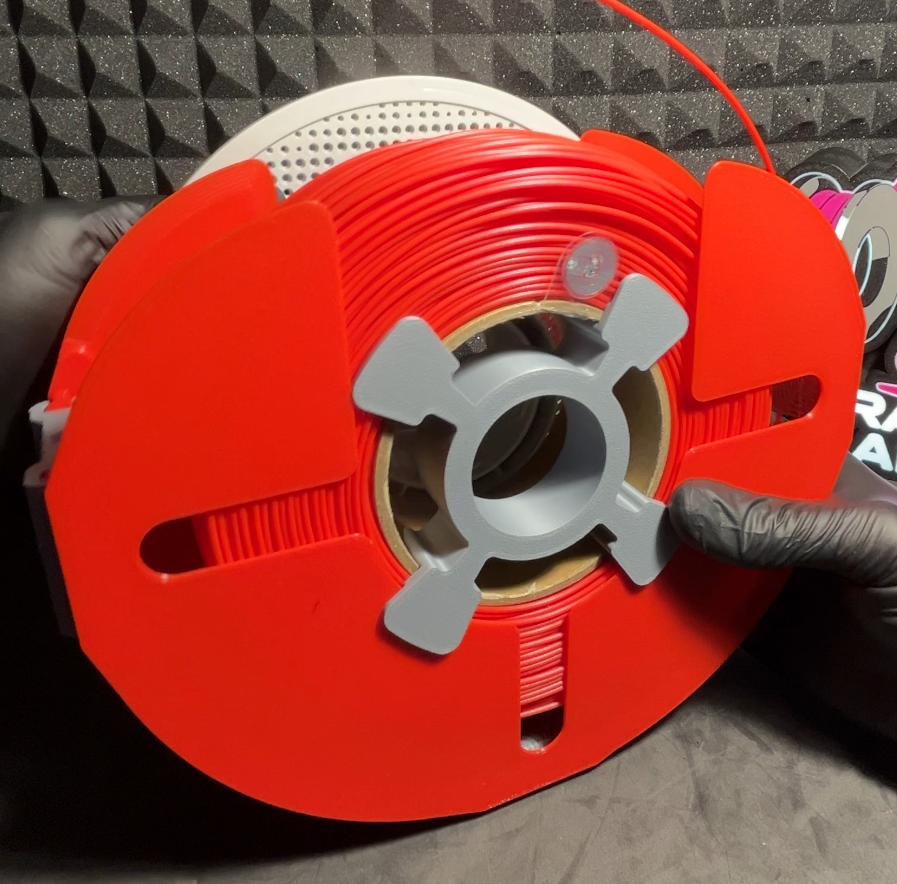 |
| 1️⃣7️⃣ Place the second half of the Bambu Lab spool and screw it in place to close the spool. | 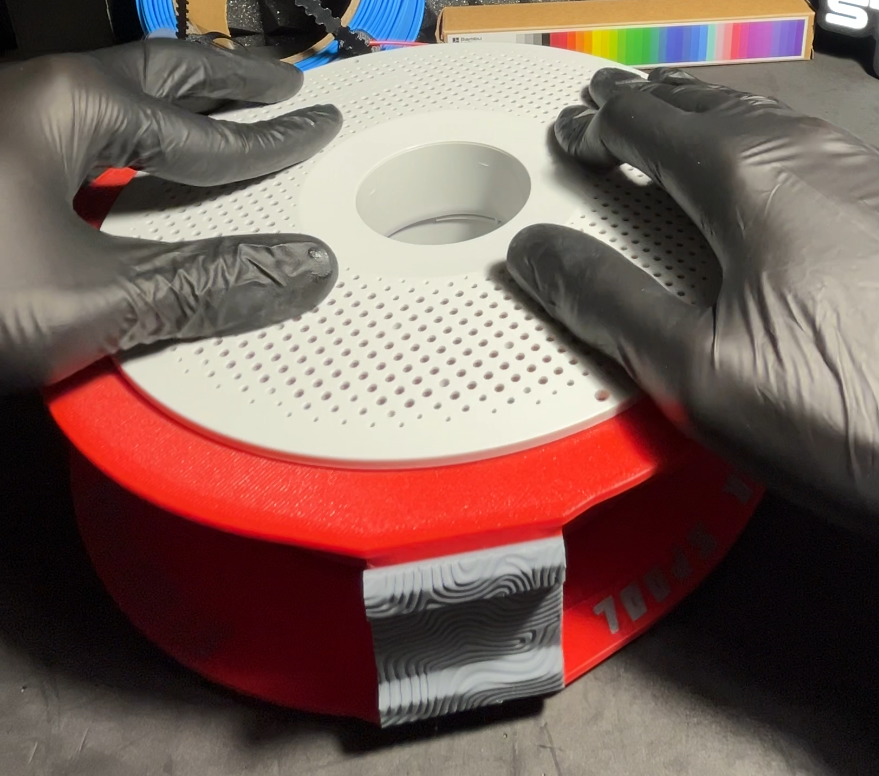 |
| 1️⃣8️⃣ Remove the Transfer Spool — the spool is now ready to be used in the printer. |
🖨️ Ideal for
- users who work with filament refills
- makers who have more refills than spools
- better organizing filament management
- anyone who wants to avoid rewinding filament
