Você está no 3DFinder
Buscamos em Thingiverse, MakerWorld e Printables ao mesmo tempo para te dar o melhor de cada uma.
Descrição
The Cola-Matryoshka: A 5-Level Mechanical Build
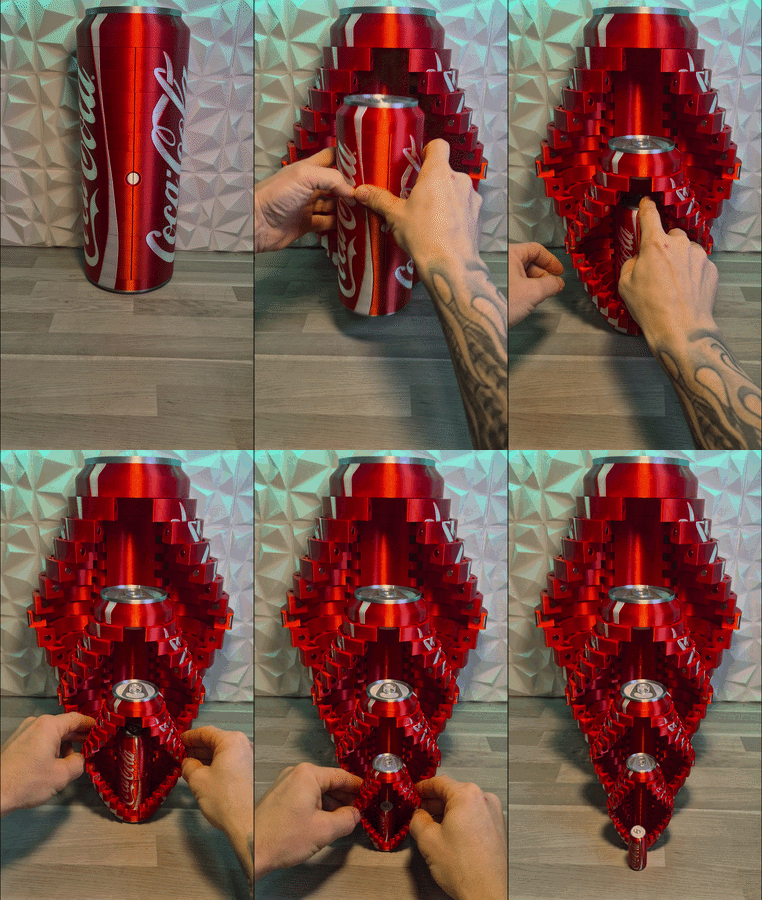
I’ve had a lot of people ask for different sizes of the folding box, so I decided to go all out and make a full nesting "Matryoshka" set.
This isn’t just a simple scale-down—I had to re-calculate the hinges and magnet pockets for every single layer to make sure the tolerances felt right at every size.
What’s in the box(es): The set comes with 5 different sizes. The four largest feature the full segmented folding door mechanism, while the tiny 5th one is a solid "mini-cola" center to finish the set. Everything fits perfectly inside the next layer, making it a pretty satisfying desk piece or a long-term printing project.
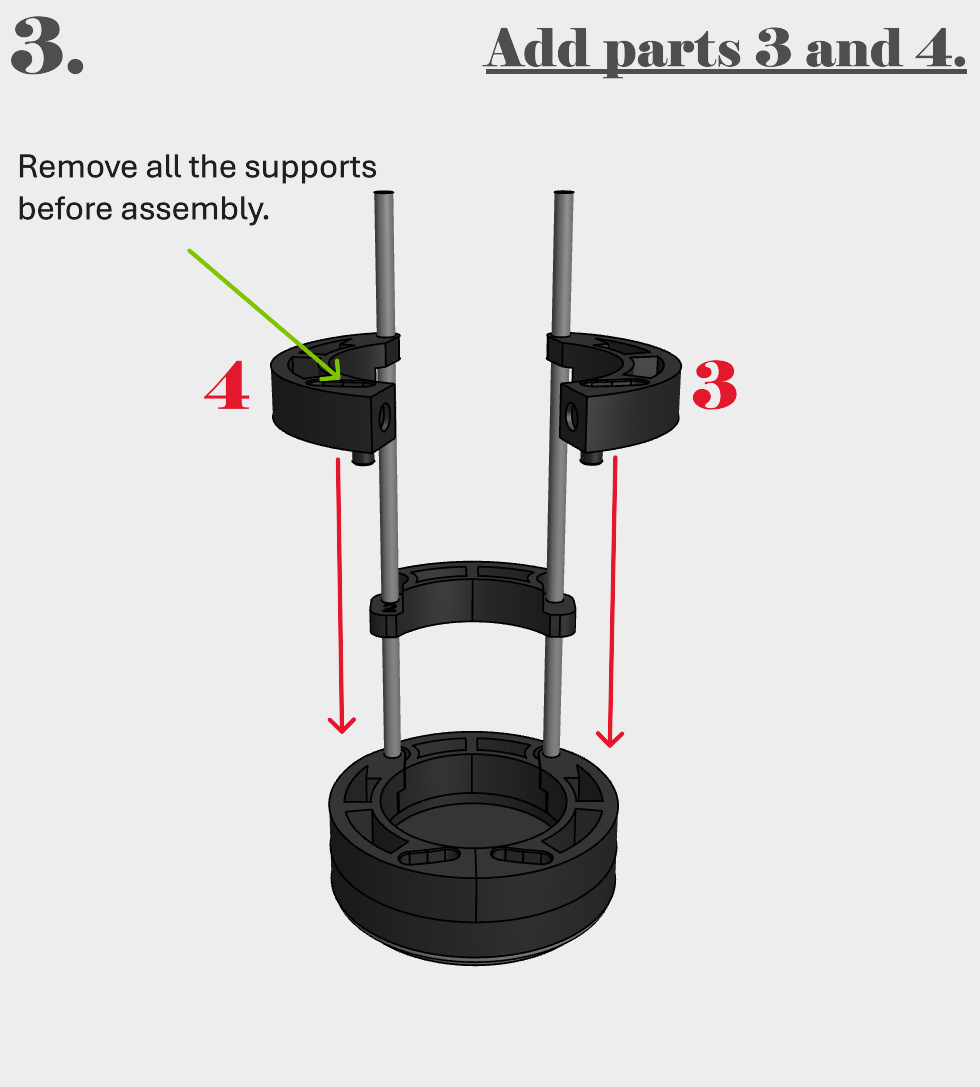
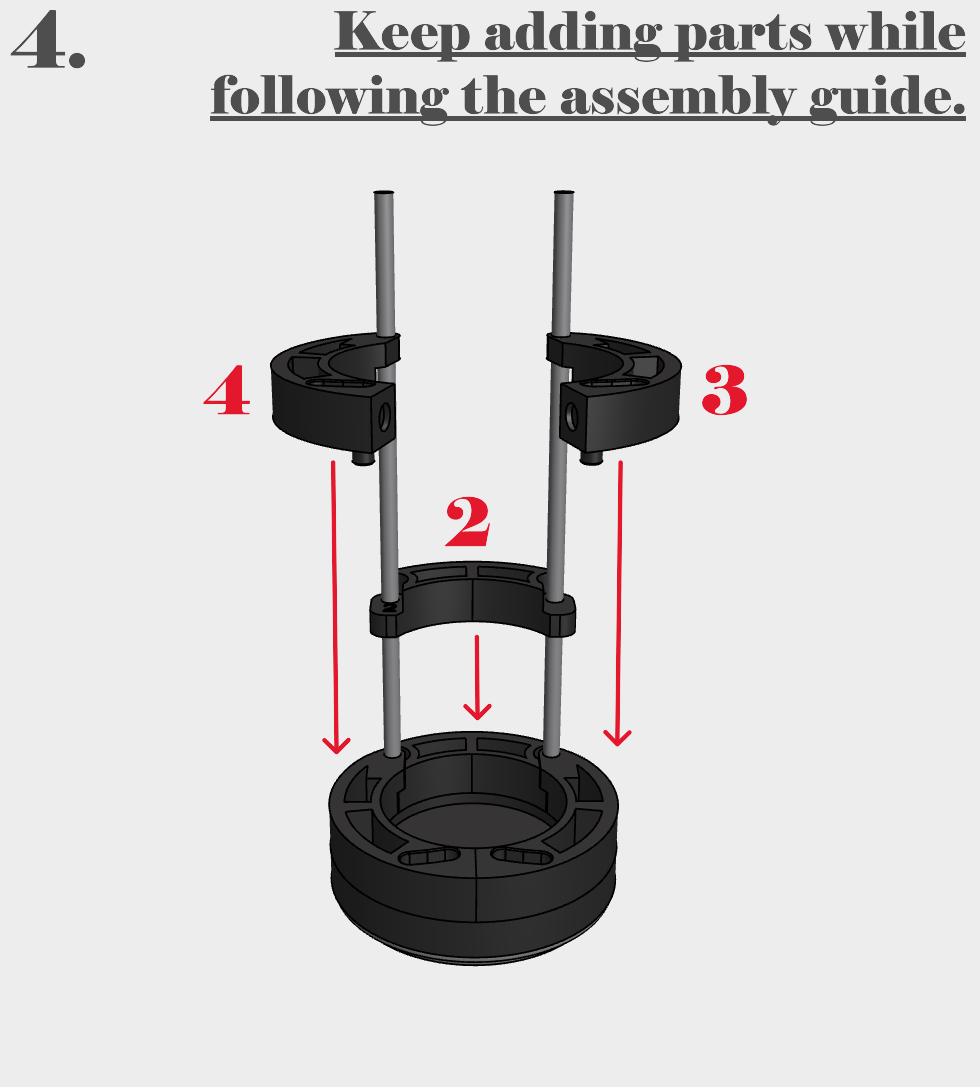
The Build: This is definitely a "hardware-heavy" project. Because each layer has its own specific needs, you’ll need a variety of rods and magnets (check the list below). I’ve marked every part with numbers to make the assembly as easy as possible.
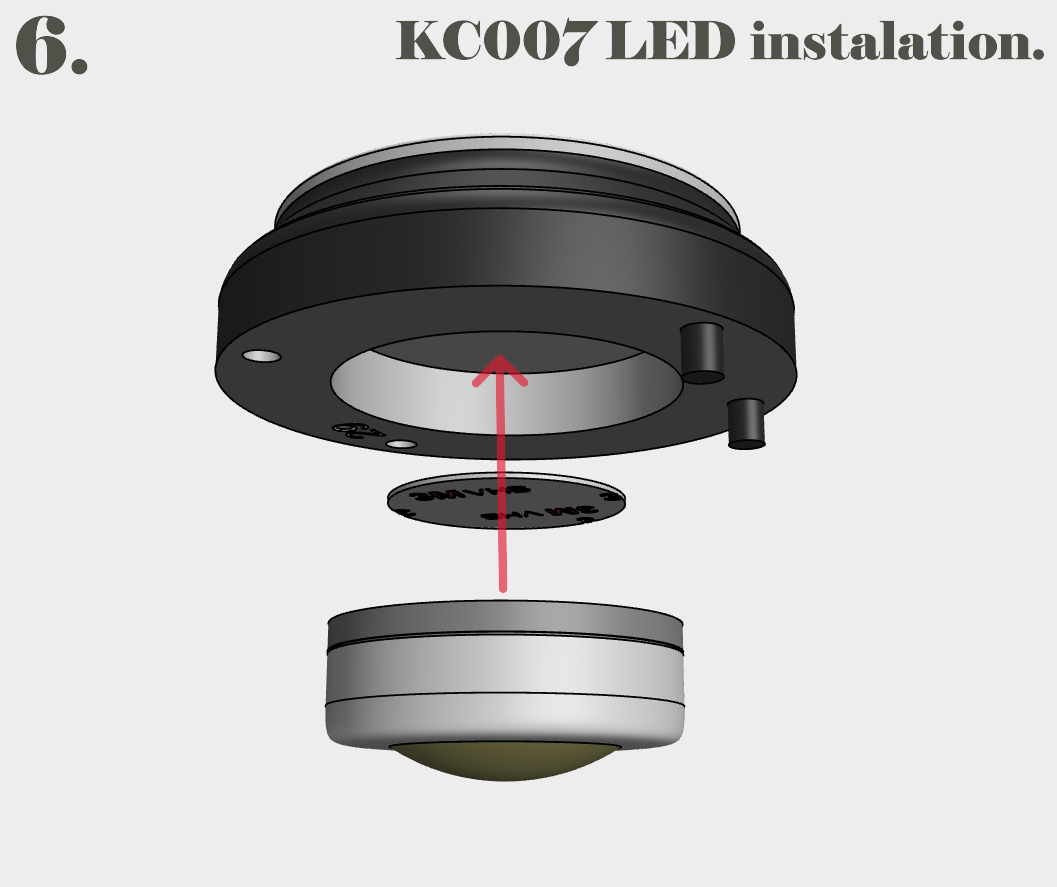
Tip: If you want that classic "neon" glow, I’ve included LED-ready lids for the larger sizes!
Want it to look just like my printed model? Use these filaments. Buy through BOM.
- Bambu White PLA silk+
- Bambu Candy red PLA silk+
- Bambu Silver PLA Silk+
3D printed parts for each box (except the tiny one):
I've separated the individual boxes in five different print profiles.
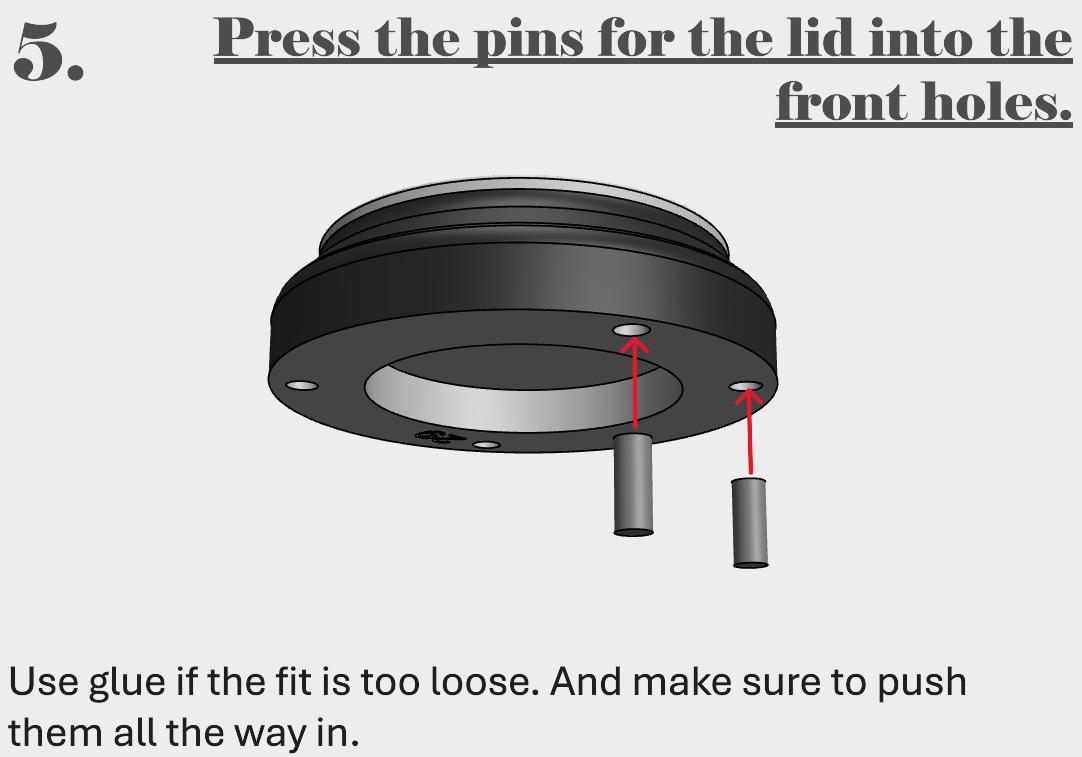
- Top pins x 2
- Base x 1
- Top x 1
- Back pcs x 13
Door parts x 26
Hardware needed for each box :
| Part | Layer 1 (Giga) | Layer 2 (Regular) | Layer 3 (Small) | Layer 4 (Mini) |
|---|---|---|---|---|
| Steel Rods | 2x 6mm (400mm) | 2x 6mm (250mm) | 2x 4mm (160mm) | 2x 4mm (99mm) |
| Magnets | 26x 10x2mm | 26x 8x2mm | 26x 6x2mm | 26x 4x1mm |
#Hardware You'll Need :
This is a 5-layer build that requires specific rods and magnets. I've put together a complete shopping list so you don't have to hunt for them individually:
👉 Get the Full Matryoshka Hardware Kit Here (Amazon)
As an Amazon Associate, I earn from qualifying purchases.
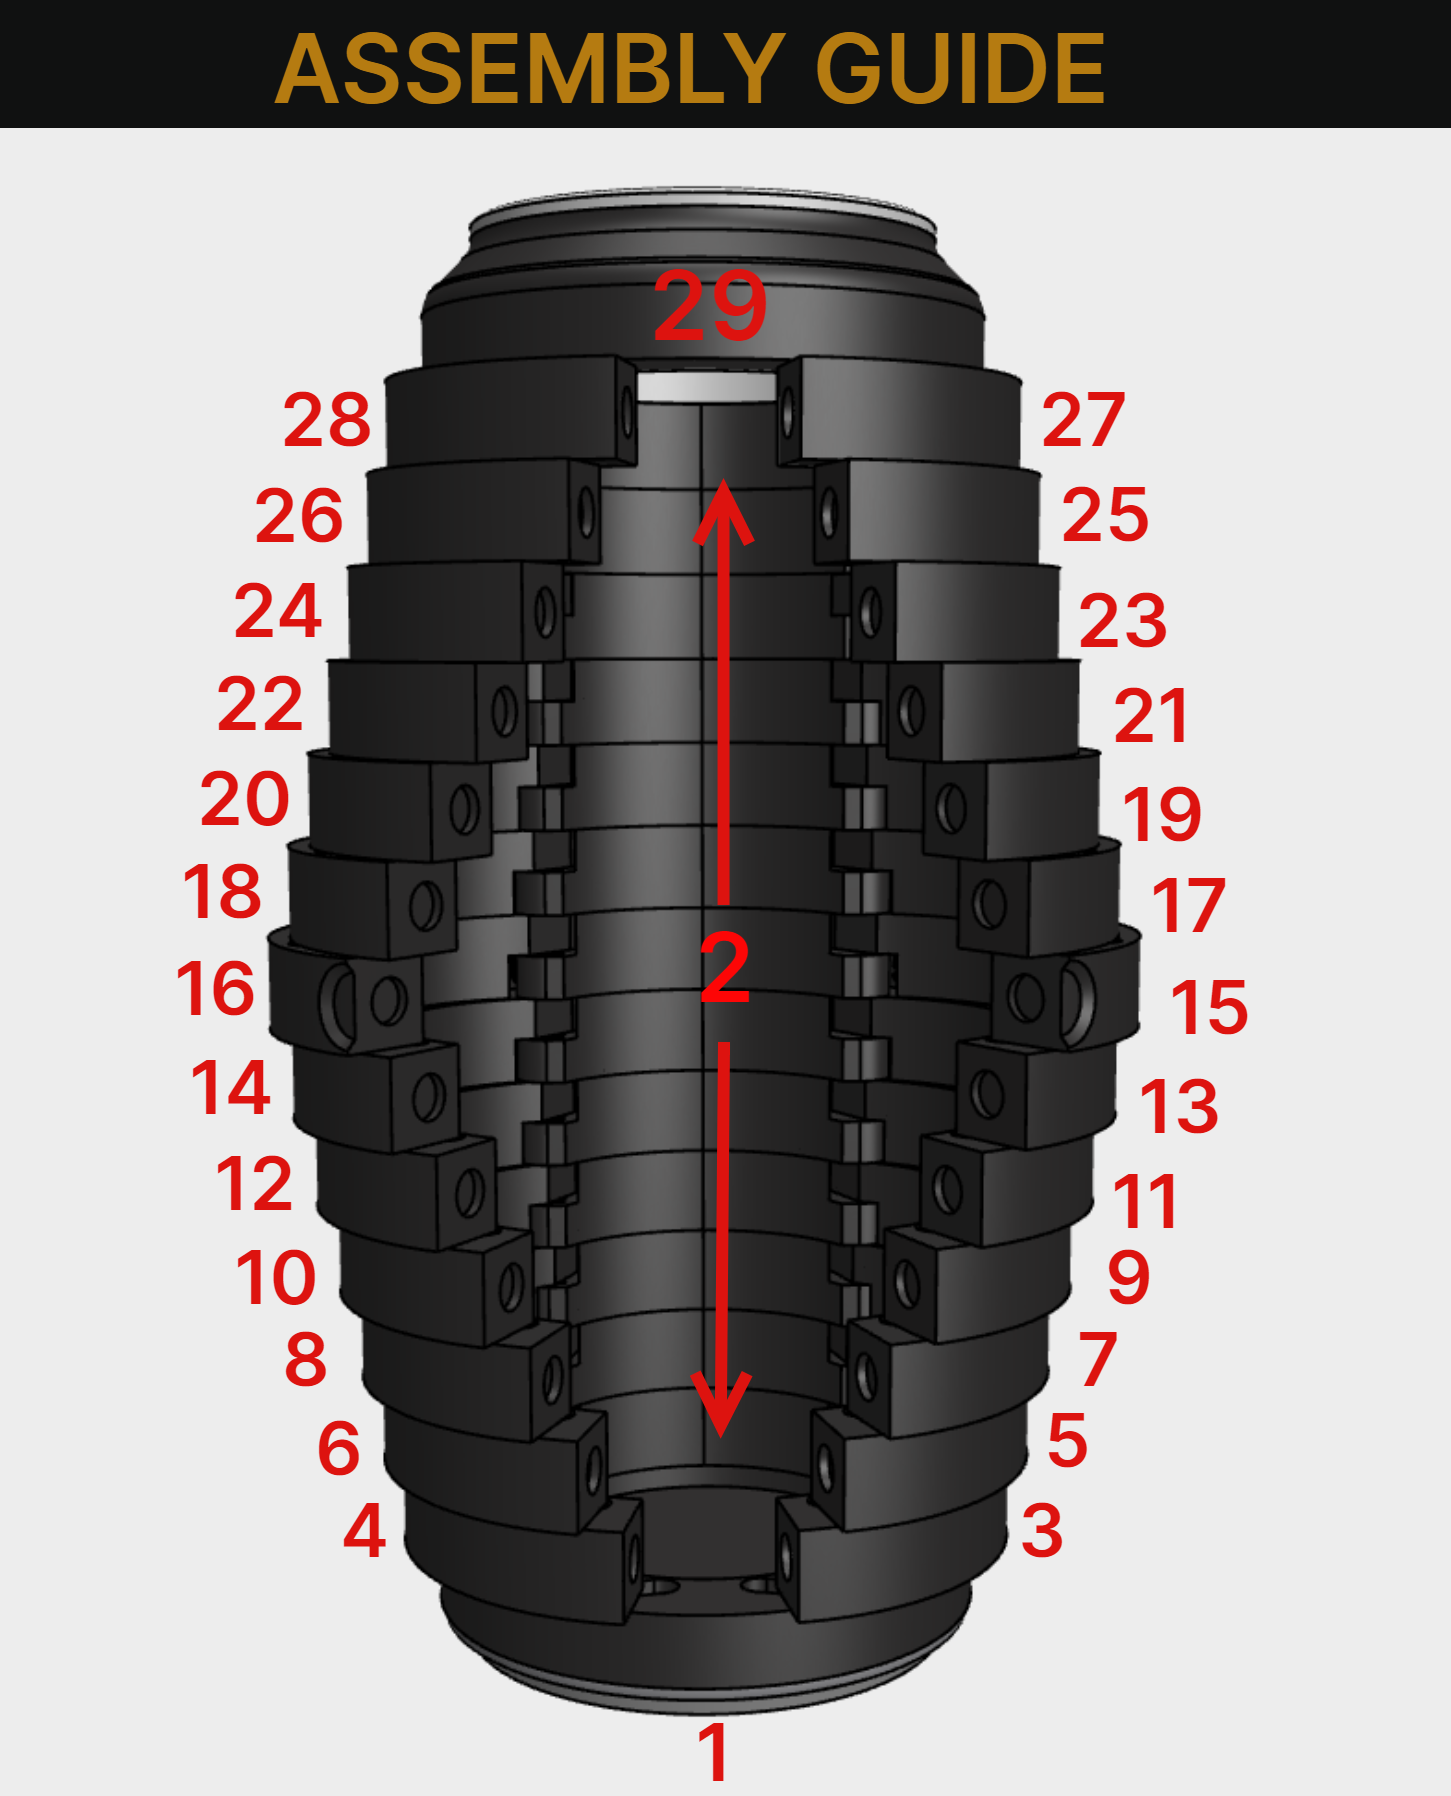
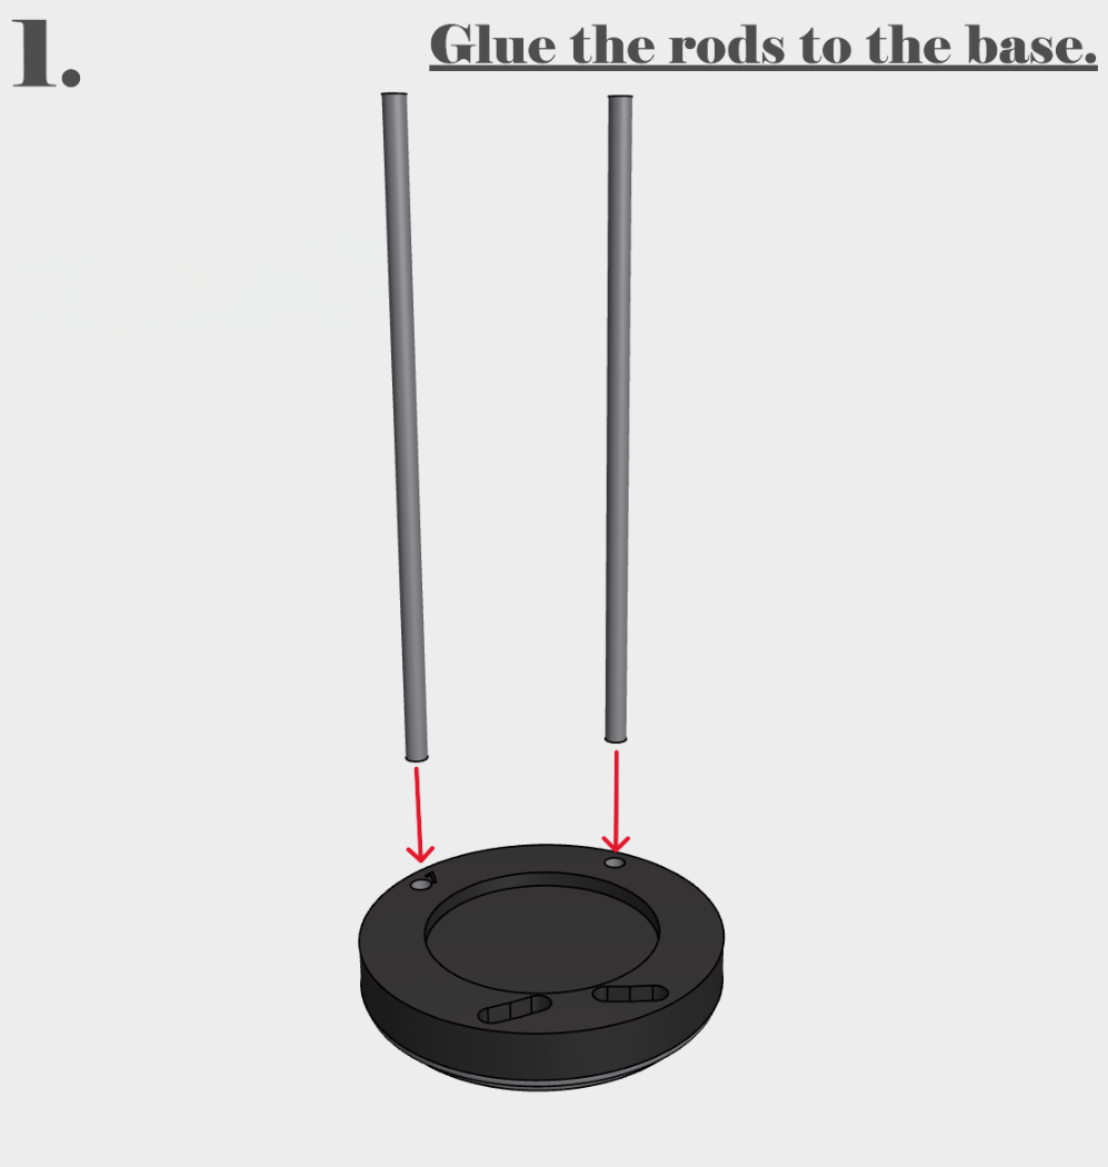
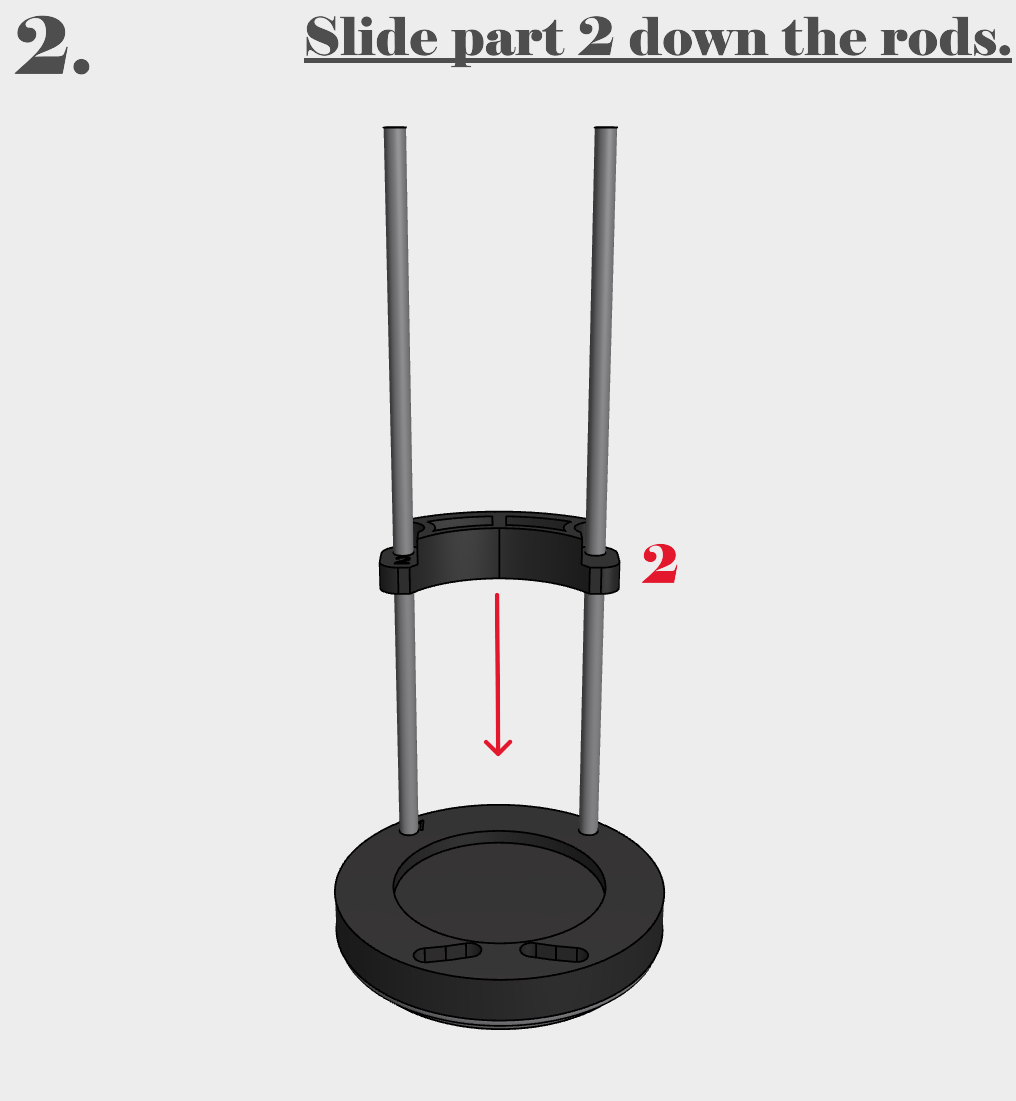
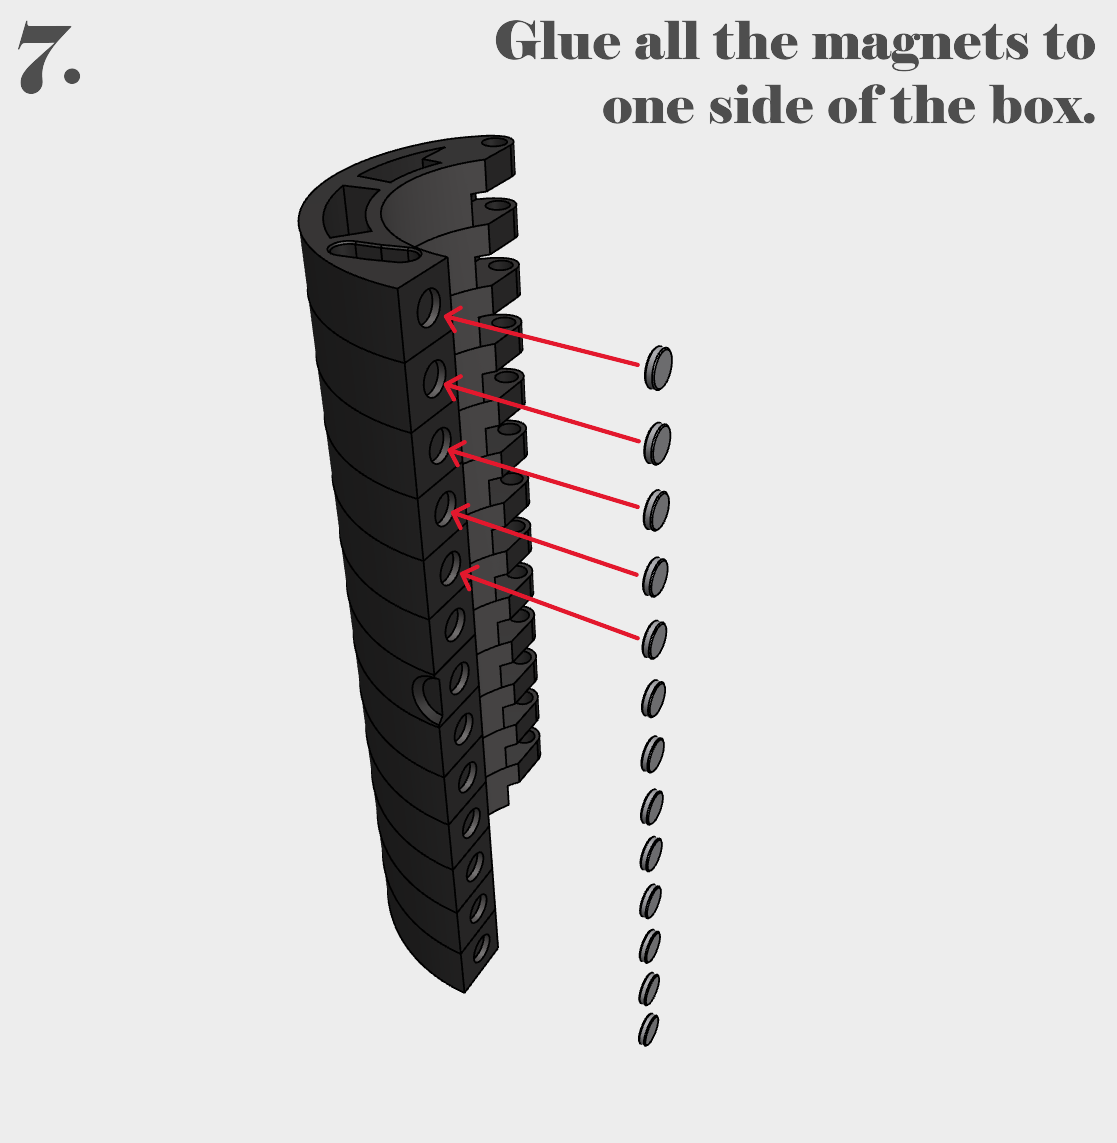
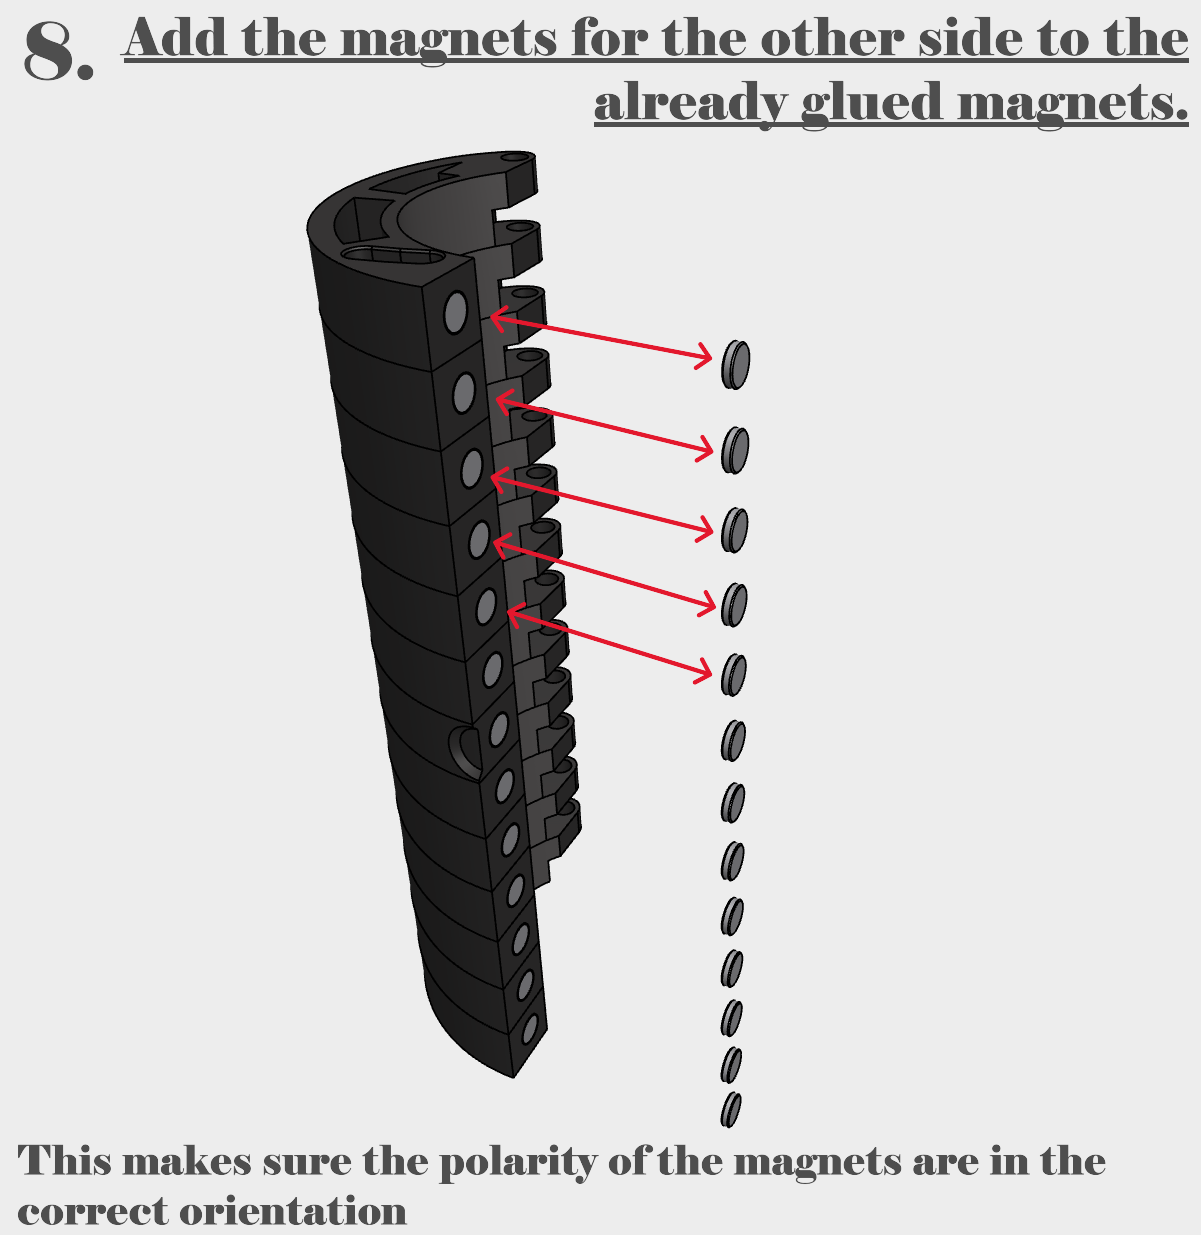
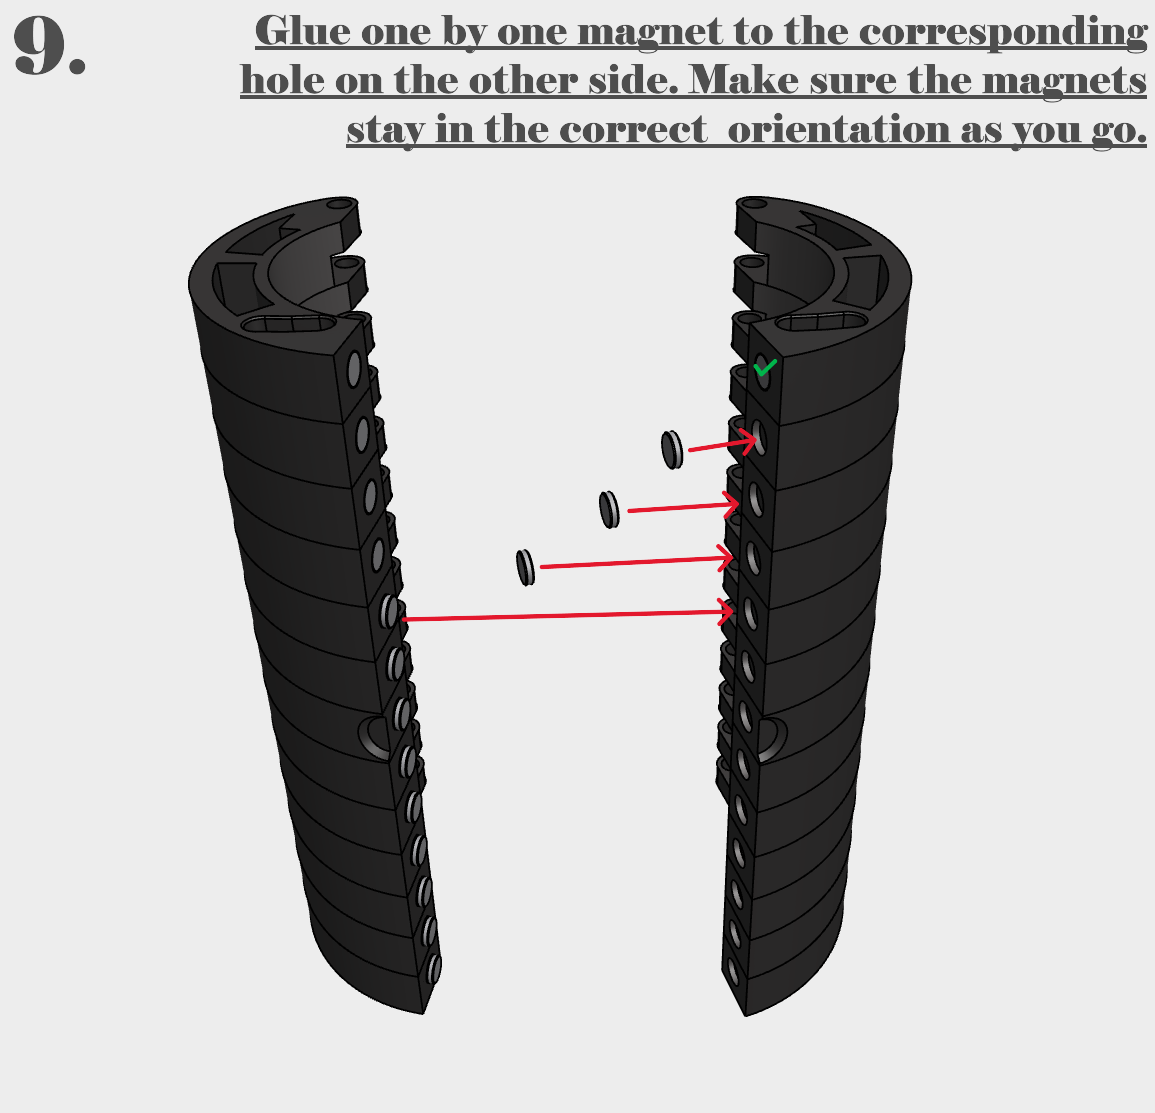
One's you have printed all the parts and acquired the accessories you need, just follow the assembly guide down below.
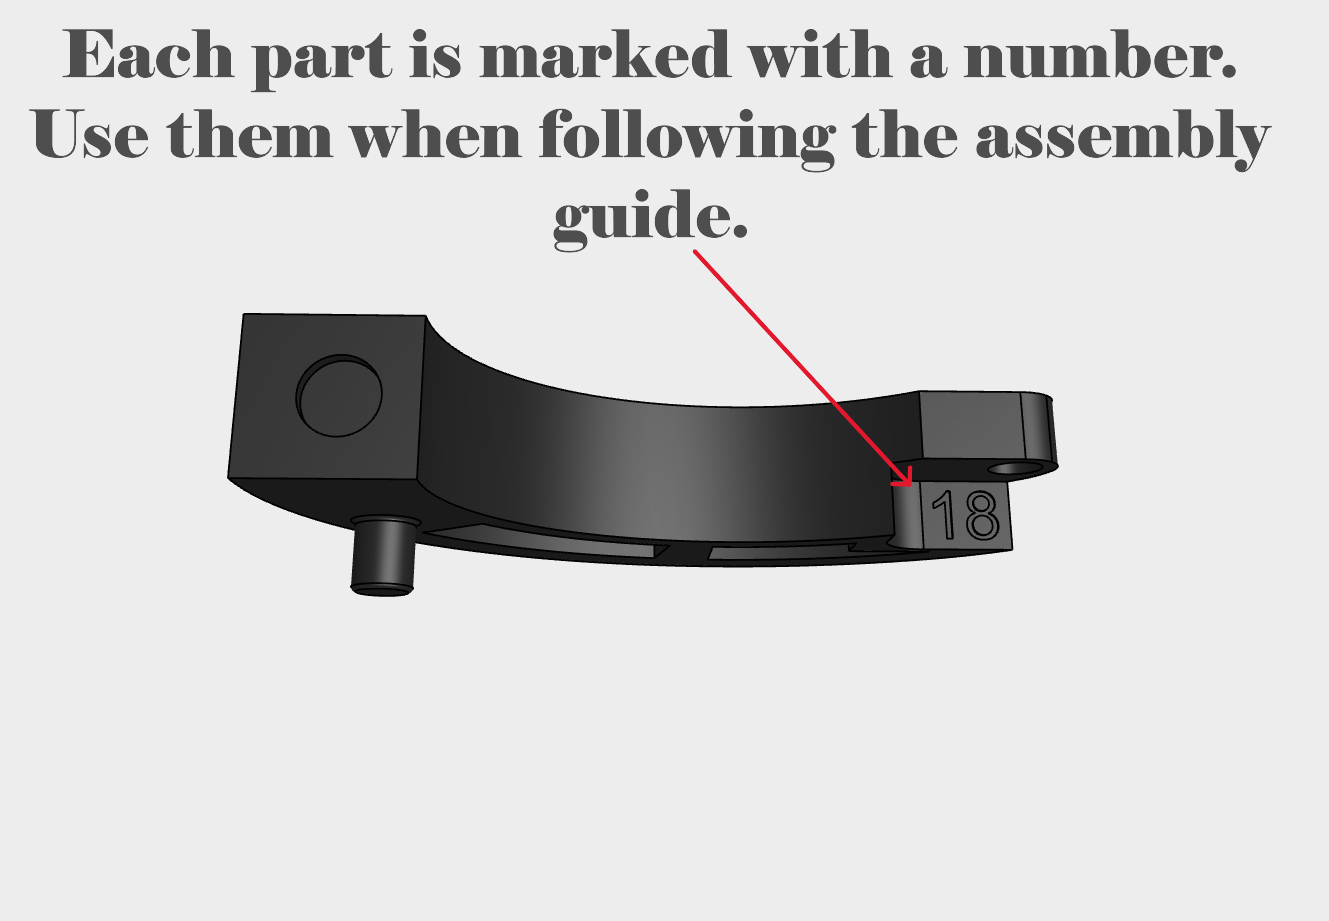
Each individual part is marked with a number, making it very easy to assemble.

Gostou deste modelo? Crie uma conta grátis para salvar seus favoritos e voltar a eles depois.
Criar conta