Você está no 3DFinder
Buscamos em Thingiverse, MakerWorld e Printables ao mesmo tempo para te dar o melhor de cada uma.
Descrição
- This clock is specifically designed to fit the Bambu Lab Clock Components Kit.
- Tool-Free Assembly: The 3-part design (Main Dial, Threaded Back Lid, and Docking Stand) clicks and screws together effortlessly—no glue or extra hardware required.
- Integrated Docking System: The back lid serves as a bridging connection to the custom table stand.
- Clean Aesthetic: All mounting points are hidden within the "dock" design, trying to maintain a clean look.
Description / Disclaimer
Fan Art Tribute: This table clock is a fan-made design inspired by the Millennium Falcon from the Star Wars universe.
Intellectual Property: All rights to the Millennium Falcon and Star Wars trademarks belong to Lucasfilm Ltd. / Disney. This model is not an official product and is not endorsed by the copyright holders.
Non-Commercial Use: This 3D model is provided for personal, non-commercial use only. I do not authorize the sale of this digital file or any physical prints of this design on any platform.
License: This work is shared under a Creative Commons - Attribution - Non-Commercial - No Derivatives (CC BY-NC-ND) license.
3D printing settings (If printing with your own settings):
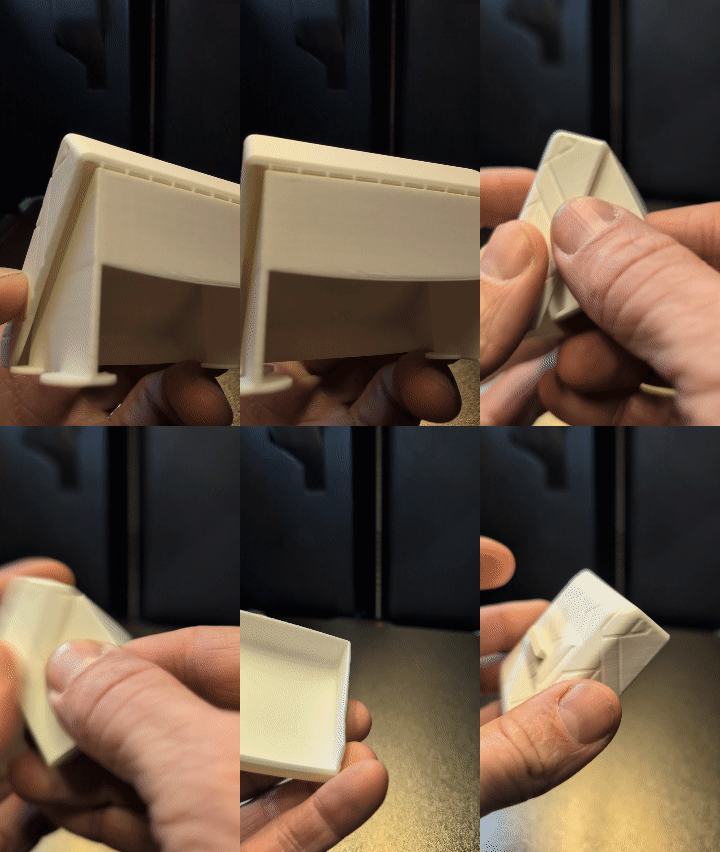
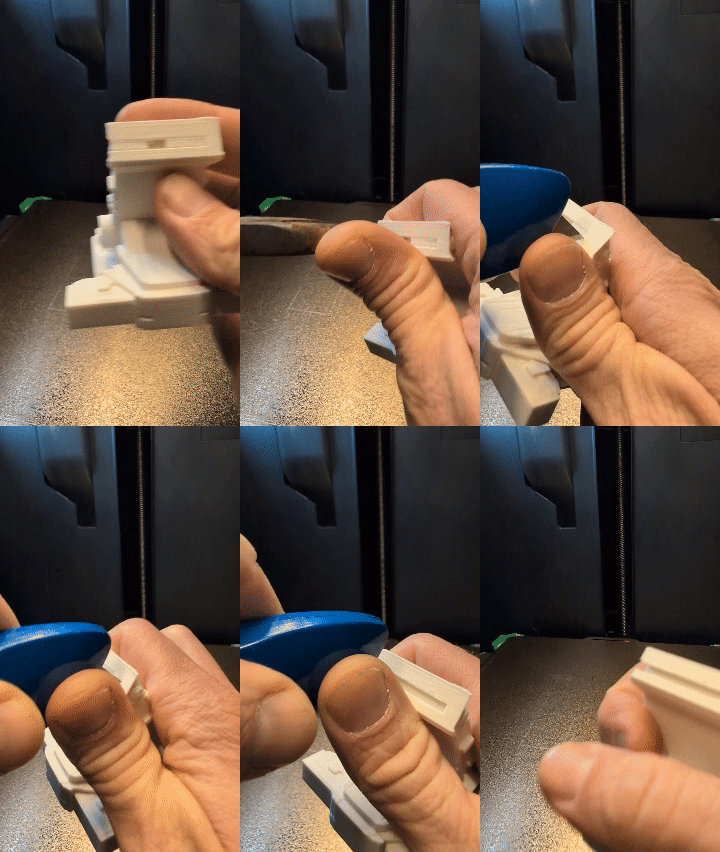
The Back Lid and Table Stand Dock has custom supports. The Dock has supports in the dovetail cavities with a 0,2mm gap ( shown in .gif below to the right). The Back Lid has support scaffolding underneath it ( shown in .gif below to the left). Print in the recommended orientation (see screen captures from slicer). Print these with Layerheight 0,2mm (or submultiple/multiple of 0,2) otherwise there is a big chance The supports won't come loose and the mating dovetail parts will not fit properly.
Assembly Quick Guide
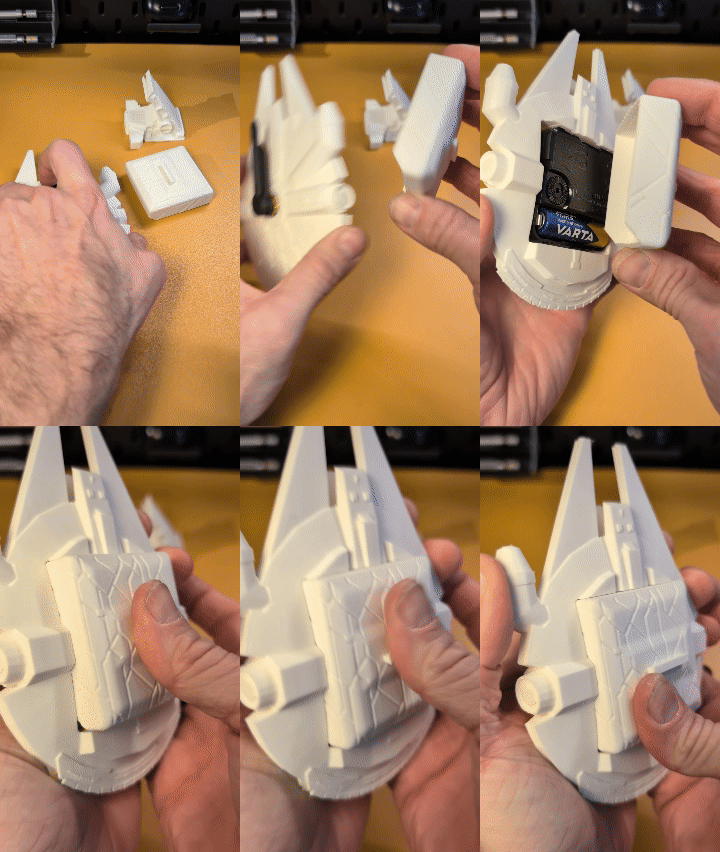
Insert the Bambu Lab Clock Kit into the Main Dial Body, ( shown in .gif 1)
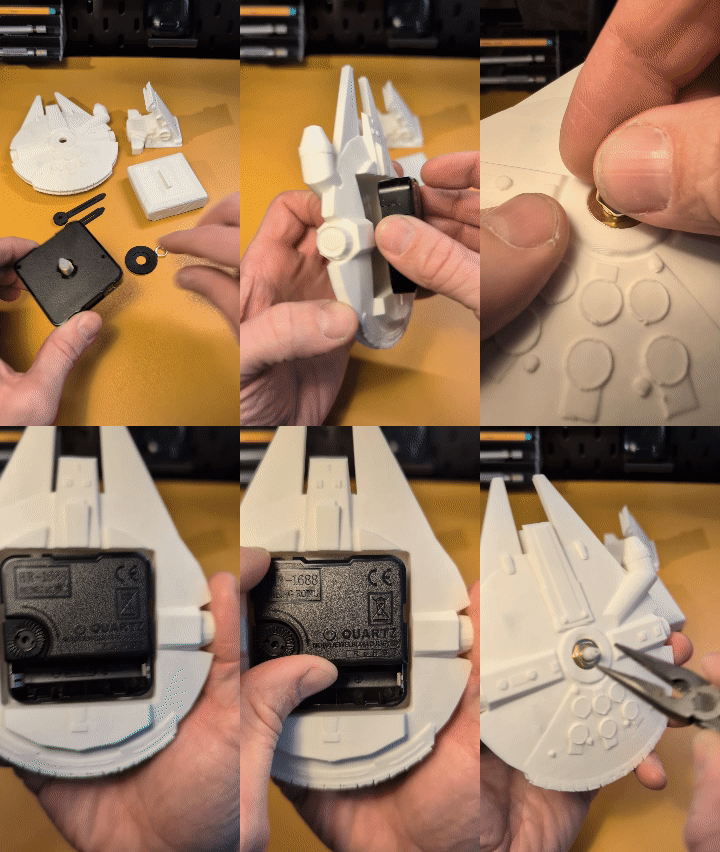
- Thread on the washer and nut, but don't tighten the nut fully yet! ( shown in .gif 1)
- Align the clock mechanism so its sides are parallel to the inner cavity walls of the body - Check so that you have a fresh battery installed in the correct orientation ( shown in .gif 1)
- Tighten the nut - you might need a needle-nose plier ( shown in .gif 1)
Put on the Minute- and hour hand indicators. Mount the indicators by pushing the hands with your thumb from one side and applying counter pressure by pushing on the clock mechanism from the other side with your indexfinger, i.e. pinch them together. ( shown in .gif 2)
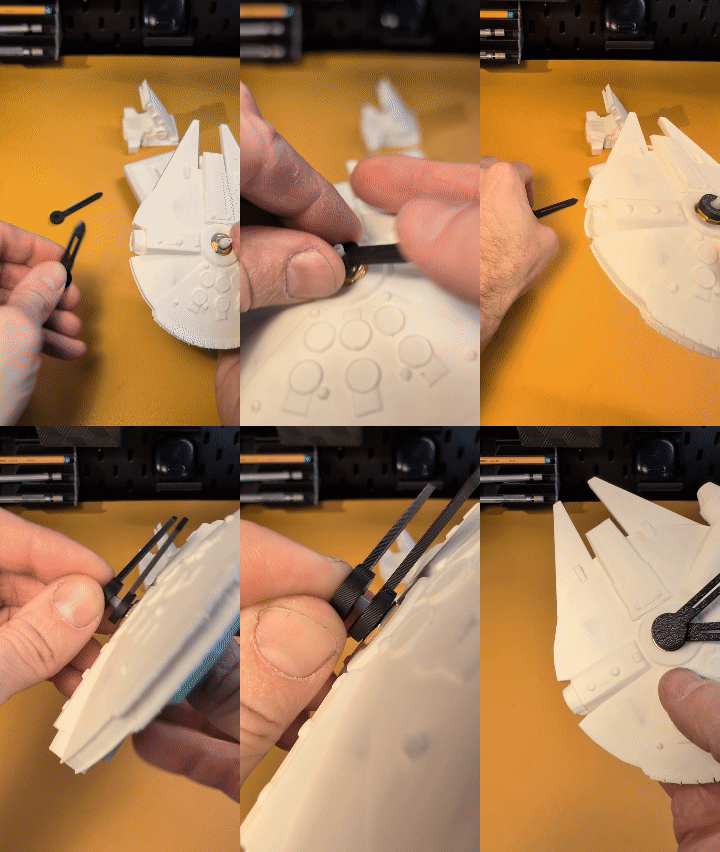
- Set the clock to current time ( not shown)
Thread the Back Lid onto the Dial Body (the Faclon) in place. ( shown in .gif 3)
Snap the assembly onto the Table Stand Dock by gently sliding the male- and female dovetail parts together. There should be a slight “click” when they are fully assembled ( shown in .gif 4)
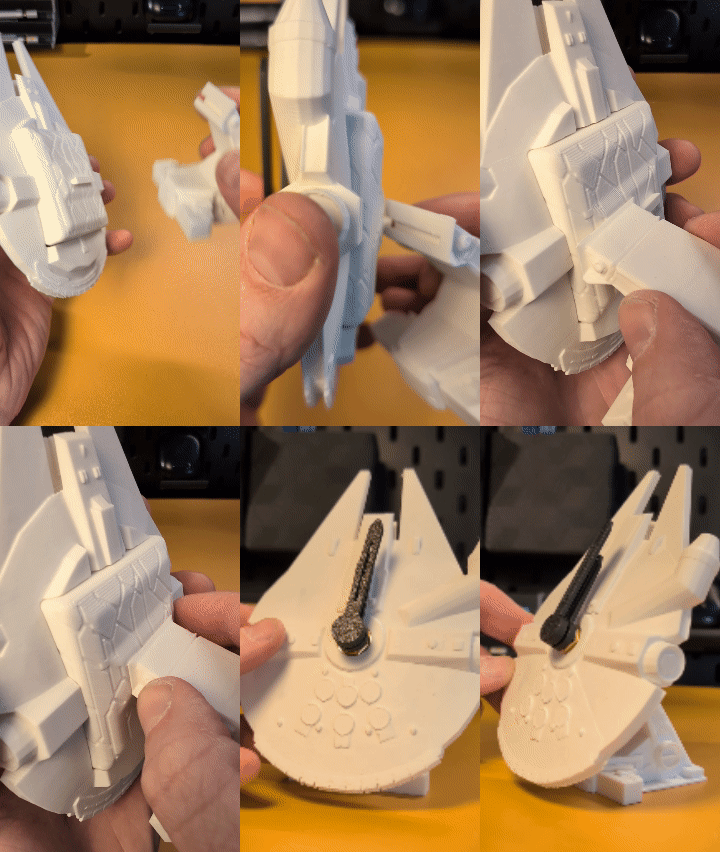
- - finished!
[pssst!] my Instagram might be worth a look: (@makers_designjournal)
….or just swing by to see what I've been up to lately. I post most of my projects there. [https://www.instagram.com/makers_designjournal/](https://www.instagram.com/makers_designjournal/)
Please kindly take a moment to show your support by giving this a LIKE! If you download this it would be really cool to see photos of your make(s). =D
3D Designed with: Fusion 360
All objects are designed by me!
THIS 3D OBJECT HAS BEEN PRINTED AND TESTED
If you have any questions, concerns as well as suggestions for improvements regarding this model please do not hesitate to contact me.
If you managed to read this far - yeah for you! 💪
Once Again: please kindly take a moment to show your support by giving this a LIKE and I also hope you find it interesting and valuable enough to boost it! If so: thank you so much for your support and I hope you enjoy it. 🙏 This support is truly appreciated and will greatly help me in my future endeavors! 😊
Falcon Dock Desk Clock

Publicado em 16 de fev de 2026
Gostou deste modelo? Crie uma conta grátis para salvar seus favoritos e voltar a eles depois.
Criar conta