Você está no 3DFinder
Buscamos em Thingiverse, MakerWorld e Printables ao mesmo tempo para te dar o melhor de cada uma.
Descrição
original made by josedelamora_1146755
UPDATE: I uploaded the v2 of this model, easier to print and assembly. Compatibility with 3 fans 92 and 80 mm (SFF Mini ITX Case v2 by jagondela | Download free STL model | Printables.com)
UPDATE: Fixed some dimensional issues in the case model.
I designed this case thinking only the necessary in a reduced form factor and models which are compatible or made around the RTX 4060 LP. I must recommend at least PETG, I used PLA but is not the safest one.
For this you need:
- Screws 6#32, I recommend buy long screws and cut them with tweezers or dremel:
- 8 for fans (13mm long)
- 4 for motherboard (5mm long) standard long screws works
- 2 for pcie riser cable (5mm long)
- 4 for PSU (5mm long)
- 1 for GPU backplate hold (3mm long)
- 16 magnets (3x10mm)
- PCIe riser cable 180 degrees both connectors and 185mm long, I designed around this [https://es.aliexpress.com/item/1005006000973971.html?spm=a2g0o.order_list.order_list_main.5.2bd2194dgvI5wu&gatewayAdapt=glo2esp](https://es.aliexpress.com/item/1005006000973971.html?spm=a2g0o.order_list.order_list_main.5.2bd2194dgvI5wu&gatewayAdapt=glo2esp)
- USB 3.0 2x cable, the 0.3m is enough. [https://es.aliexpress.com/item/33046797763.html?spm=a2g0o.order_list.order_list_main.20.2bd2194dgvI5wu&gatewayAdapt=glo2esp](https://es.aliexpress.com/item/33046797763.html?spm=a2g0o.order_list.order_list_main.20.2bd2194dgvI5wu&gatewayAdapt=glo2esp)
- Power led switch button 60cm cable and 19mm diameter. For better fit, weld some different cables or use a low profile button, just needs to be 19mm diameter. [https://es.aliexpress.com/item/1005005585121134.html?spm=a2g0o.order_list.order_list_main.189.2bd2194dgvI5wu&gatewayAdapt=glo2esp](https://es.aliexpress.com/item/1005005585121134.html?spm=a2g0o.order_list.order_list_main.189.2bd2194dgvI5wu&gatewayAdapt=glo2esp)
- 2 80x10mm fans.
[https://es.aliexpress.com/item/1005005952005094.html?spm=a2g0o.order_list.order_list_main.193.2bd2194dgvI5wu&gatewayAdapt=glo2esp](https://es.aliexpress.com/item/1005005952005094.html?spm=a2g0o.order_list.order_list_main.193.2bd2194dgvI5wu&gatewayAdapt=glo2esp) - Flex ATX PSU. I used 400W like this, works really good. [https://es.aliexpress.com/item/10000290089636.html?spm=a2g0o.order_list.order_list_main.224.2bd2194dgvI5wu&gatewayAdapt=glo2esp](https://es.aliexpress.com/item/10000290089636.html?spm=a2g0o.order_list.order_list_main.224.2bd2194dgvI5wu&gatewayAdapt=glo2esp)
- 4 scotch 21mm diameter rubber stops for feet

Print hints:
- For the case use this support configuration, enable the bridge support options
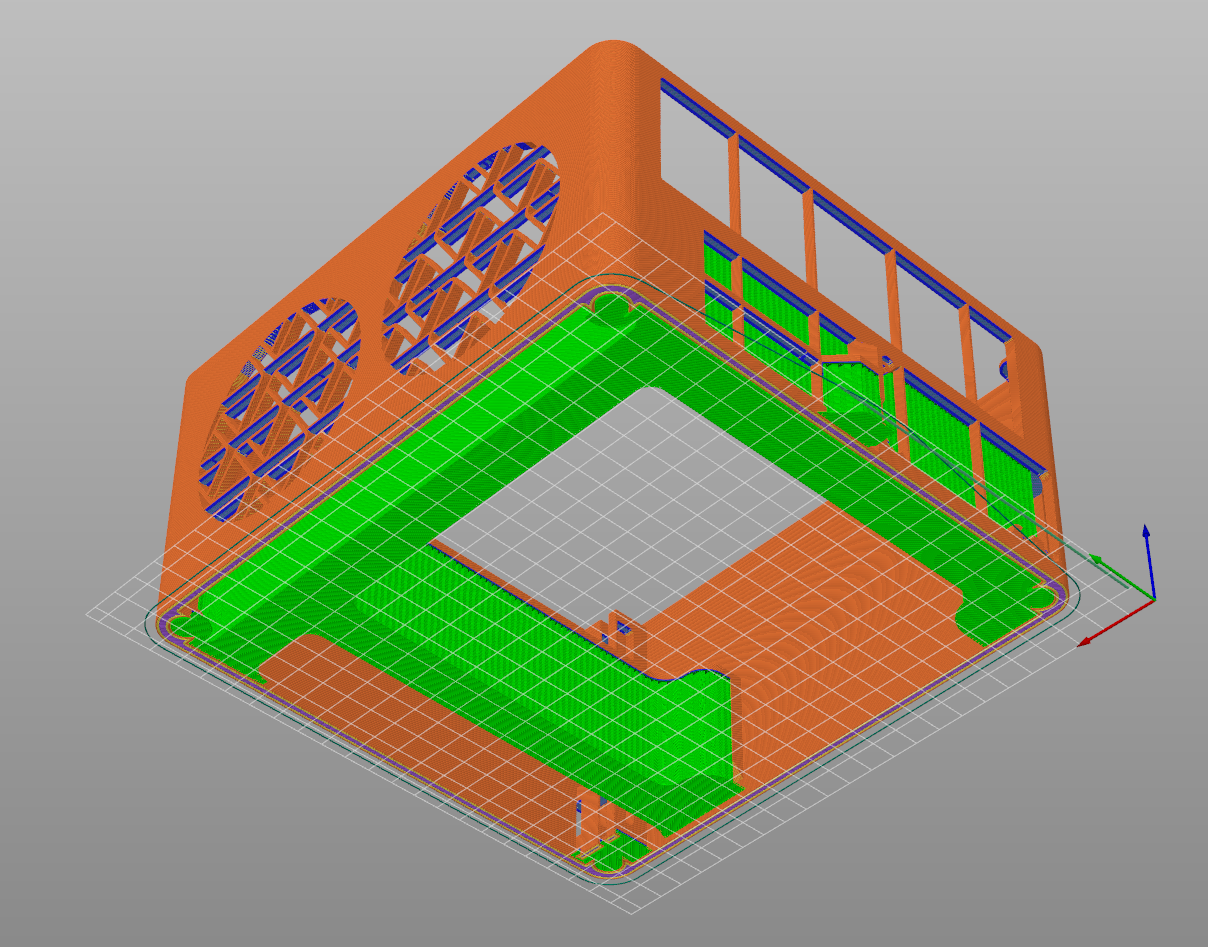
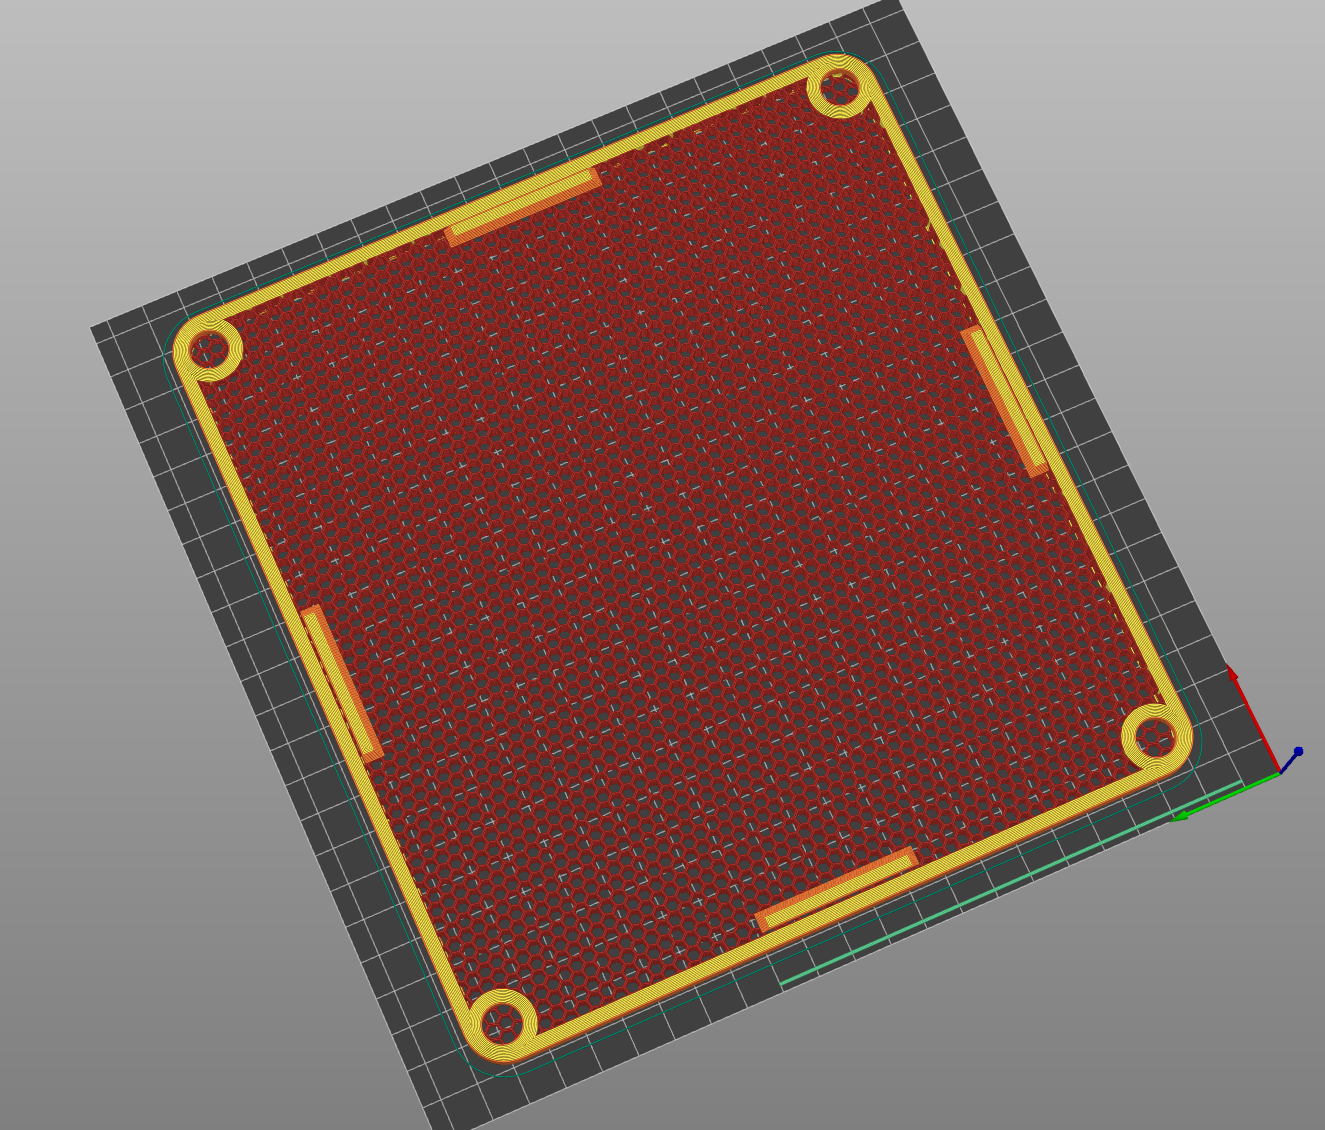
- For side panels use 10 wall count, no bottom and top layers, honeycomb infill at 20%. You can also switch to other infill percentage or pattern
Post processing instructions:
- Remove in print supports with your printing cut tweezers like following pictures
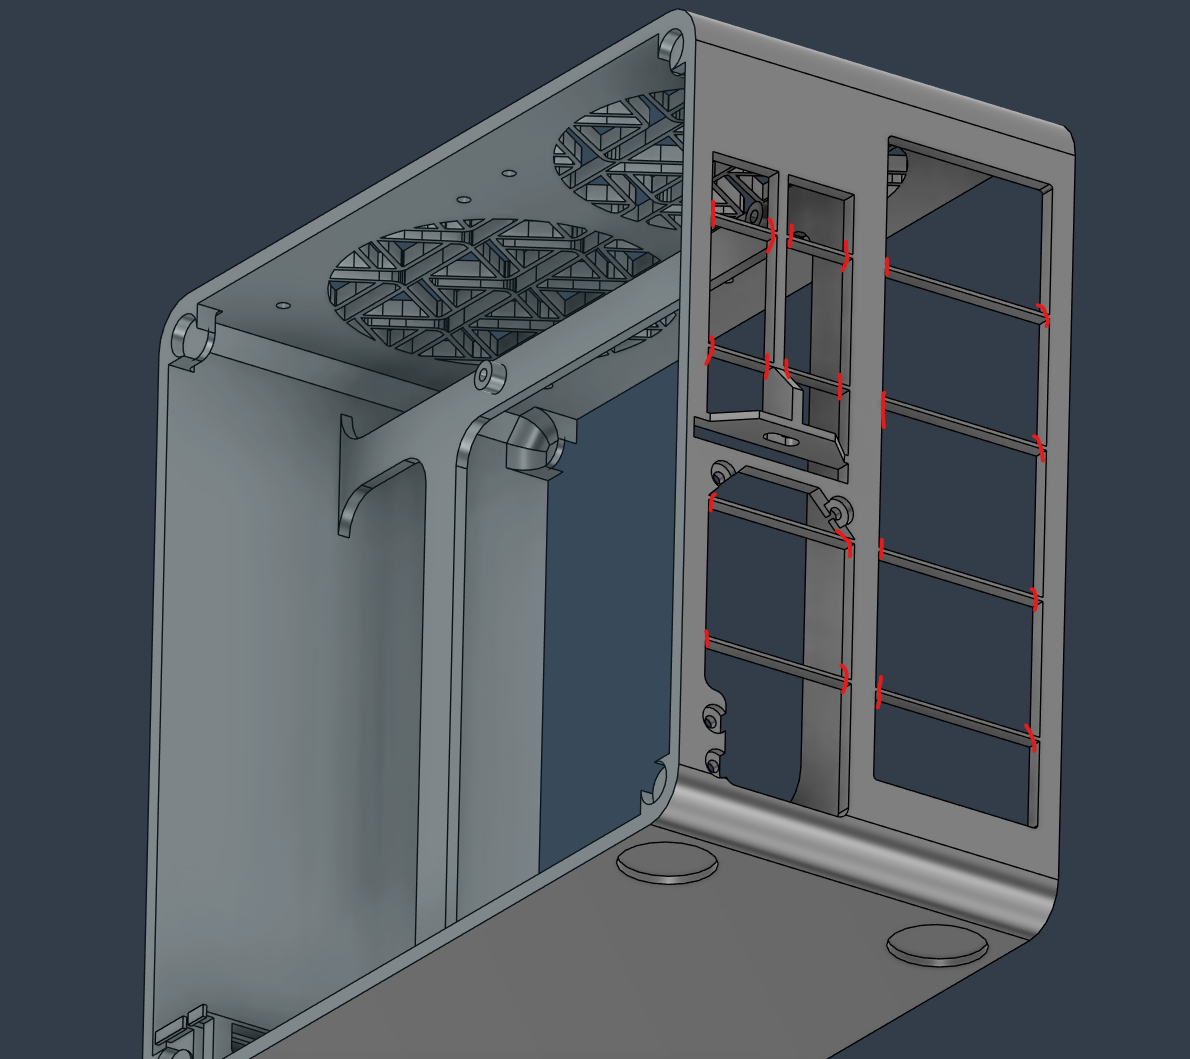
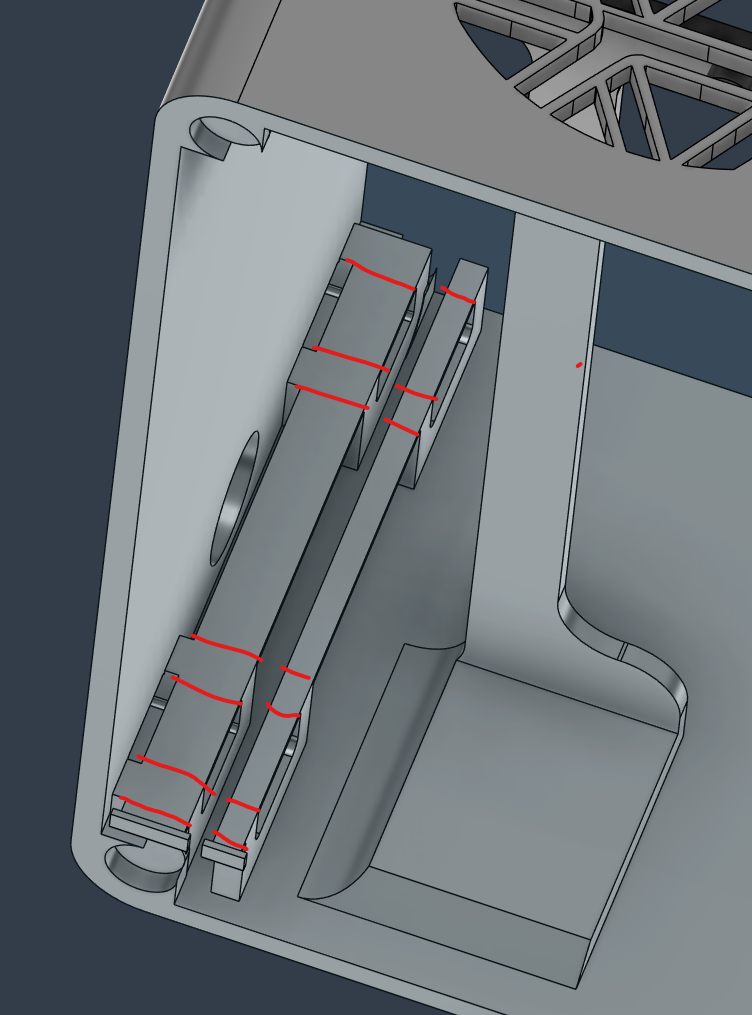
Following cuts are not really necessary, but if you want to maintain the pattern, do it.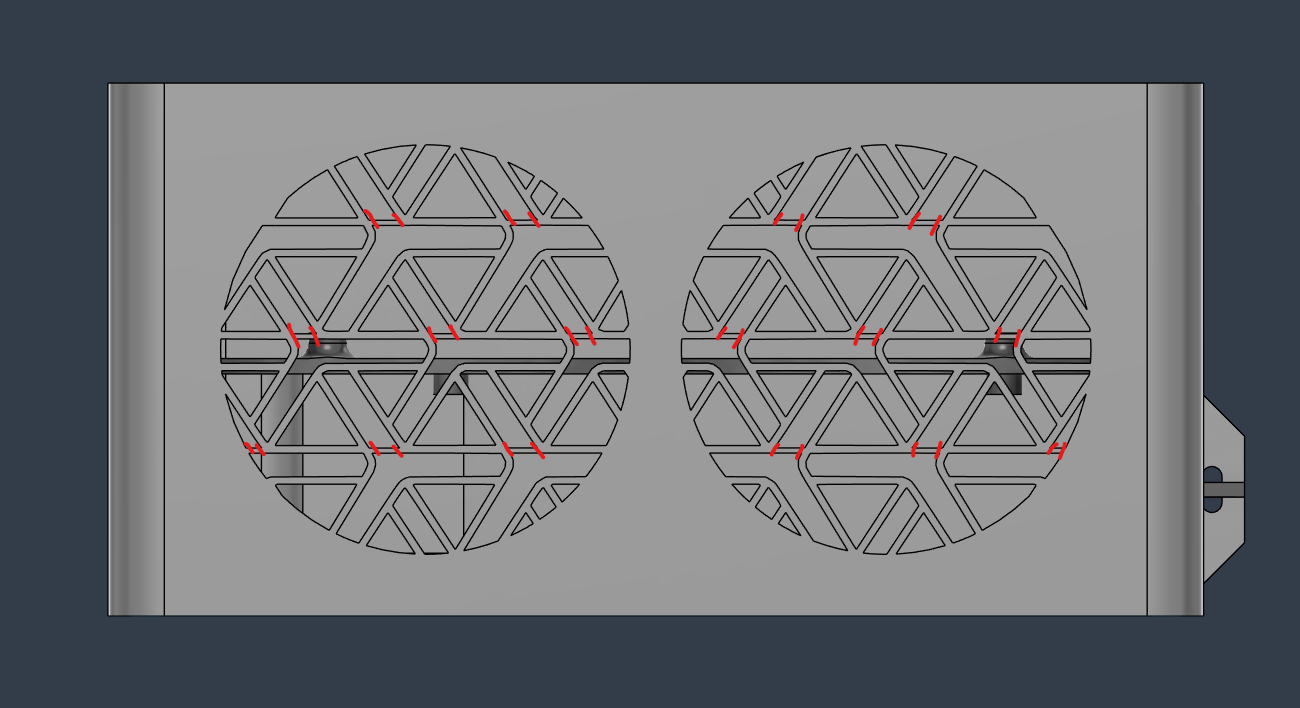

Gostou deste modelo? Crie uma conta grátis para salvar seus favoritos e voltar a eles depois.
Criar conta