Você está no 3DFinder
Buscamos em Thingiverse, MakerWorld e Printables ao mesmo tempo para te dar o melhor de cada uma.
Descrição
This is a slightly simplified version of the quick release Thrustmaster Simtask Farmstick mounts I made for running dual joysticks on my desktop PC. As it's not a dedicate sim rig, I wanted a quick and easy system so utilised a 201B toggle clamp for each. Designed with a range of adjustability in how far off the edge of your desk the joystick will sit. Obviously with some limitations due to the way it clamps. Using a 201BL (longer arm) clamps should give a stronger clamping force if you set the base further out from the desk edge, but I personally haven't tried it. You can also purchase the 201BHB clamps that have a taller base to work with thicker desks (approx 40mm).
This version uses standard hardware with hex nuts pressed into the mounting block so no need for brass heat inserts, and is flexible on the head types used for the bolts. My desk is approximately 25mm thick, on thinner desks, you may run out of adjustment on the clamping bolt. The best option would be to resize the 25mm Block in the Z dimension to your desks thickness. Bolt lengths may vary so change accordingly.
Compatibility -
Simtask Farmstick
T.16000
TCA Sidekick Airbus Edition (excluding Xbox addition)
May fit other models with the same mounting bolt holes, but I can only confirm that the base design of the Farmstick, T16000 and Airbus joysticks fit the cut-outs for the feet.
Required Hardware (for 1x mount assembly) -
- 1 x GH201B toggle clamp ([https://www.amazon.com.au/TING-Toggle-Antislip-Horizontal-Release/dp/B0B3MLLLJQ/ref=sr_1_8?sr=8-8](https://www.amazon.com.au/TING-Toggle-Antislip-Horizontal-Release/dp/B0B3MLLLJQ/ref=sr_1_8?sr=8-8)) (alternatively, the GH 201BL with the longer clamping arm. Other clamps with similar dimensions may be used, but the mounting bolts need a spacing of 27mm)
- 2 x M6 x 25 Countersunk bolts
- 4 x M6 x 20 Cap Screw bolts (can also use socket head bolts)
- 4 x M6 hex nuts (10mm flats)
- 4 x M4 x 20 Cap Screw bolts (can also used socket head or countersunk bolts)
- 6 x M4 hex nuts (7mm flats)
- 10 x 12.7mm Door Buffer (these are optional adhesive backed silicon feat to stick to the base, you can also print the optional TPU ones and glue them, the softer TPU used, the better. You will only need them on the feet that touch the desk surface depending how you have it adjusted. If you use a desk pad/mat, you shouldn't need these)
Parts to Print -
- 1 x Baseplate
- 1 x Block 25mm
- 2 x M6 Knurled Nut Collars (optional)
- 1 x M6 Nut Cap (optional)
- 10 x (or less) TPU Feet (optional)
Assembly -
Remove the tree supports from the holes in the block
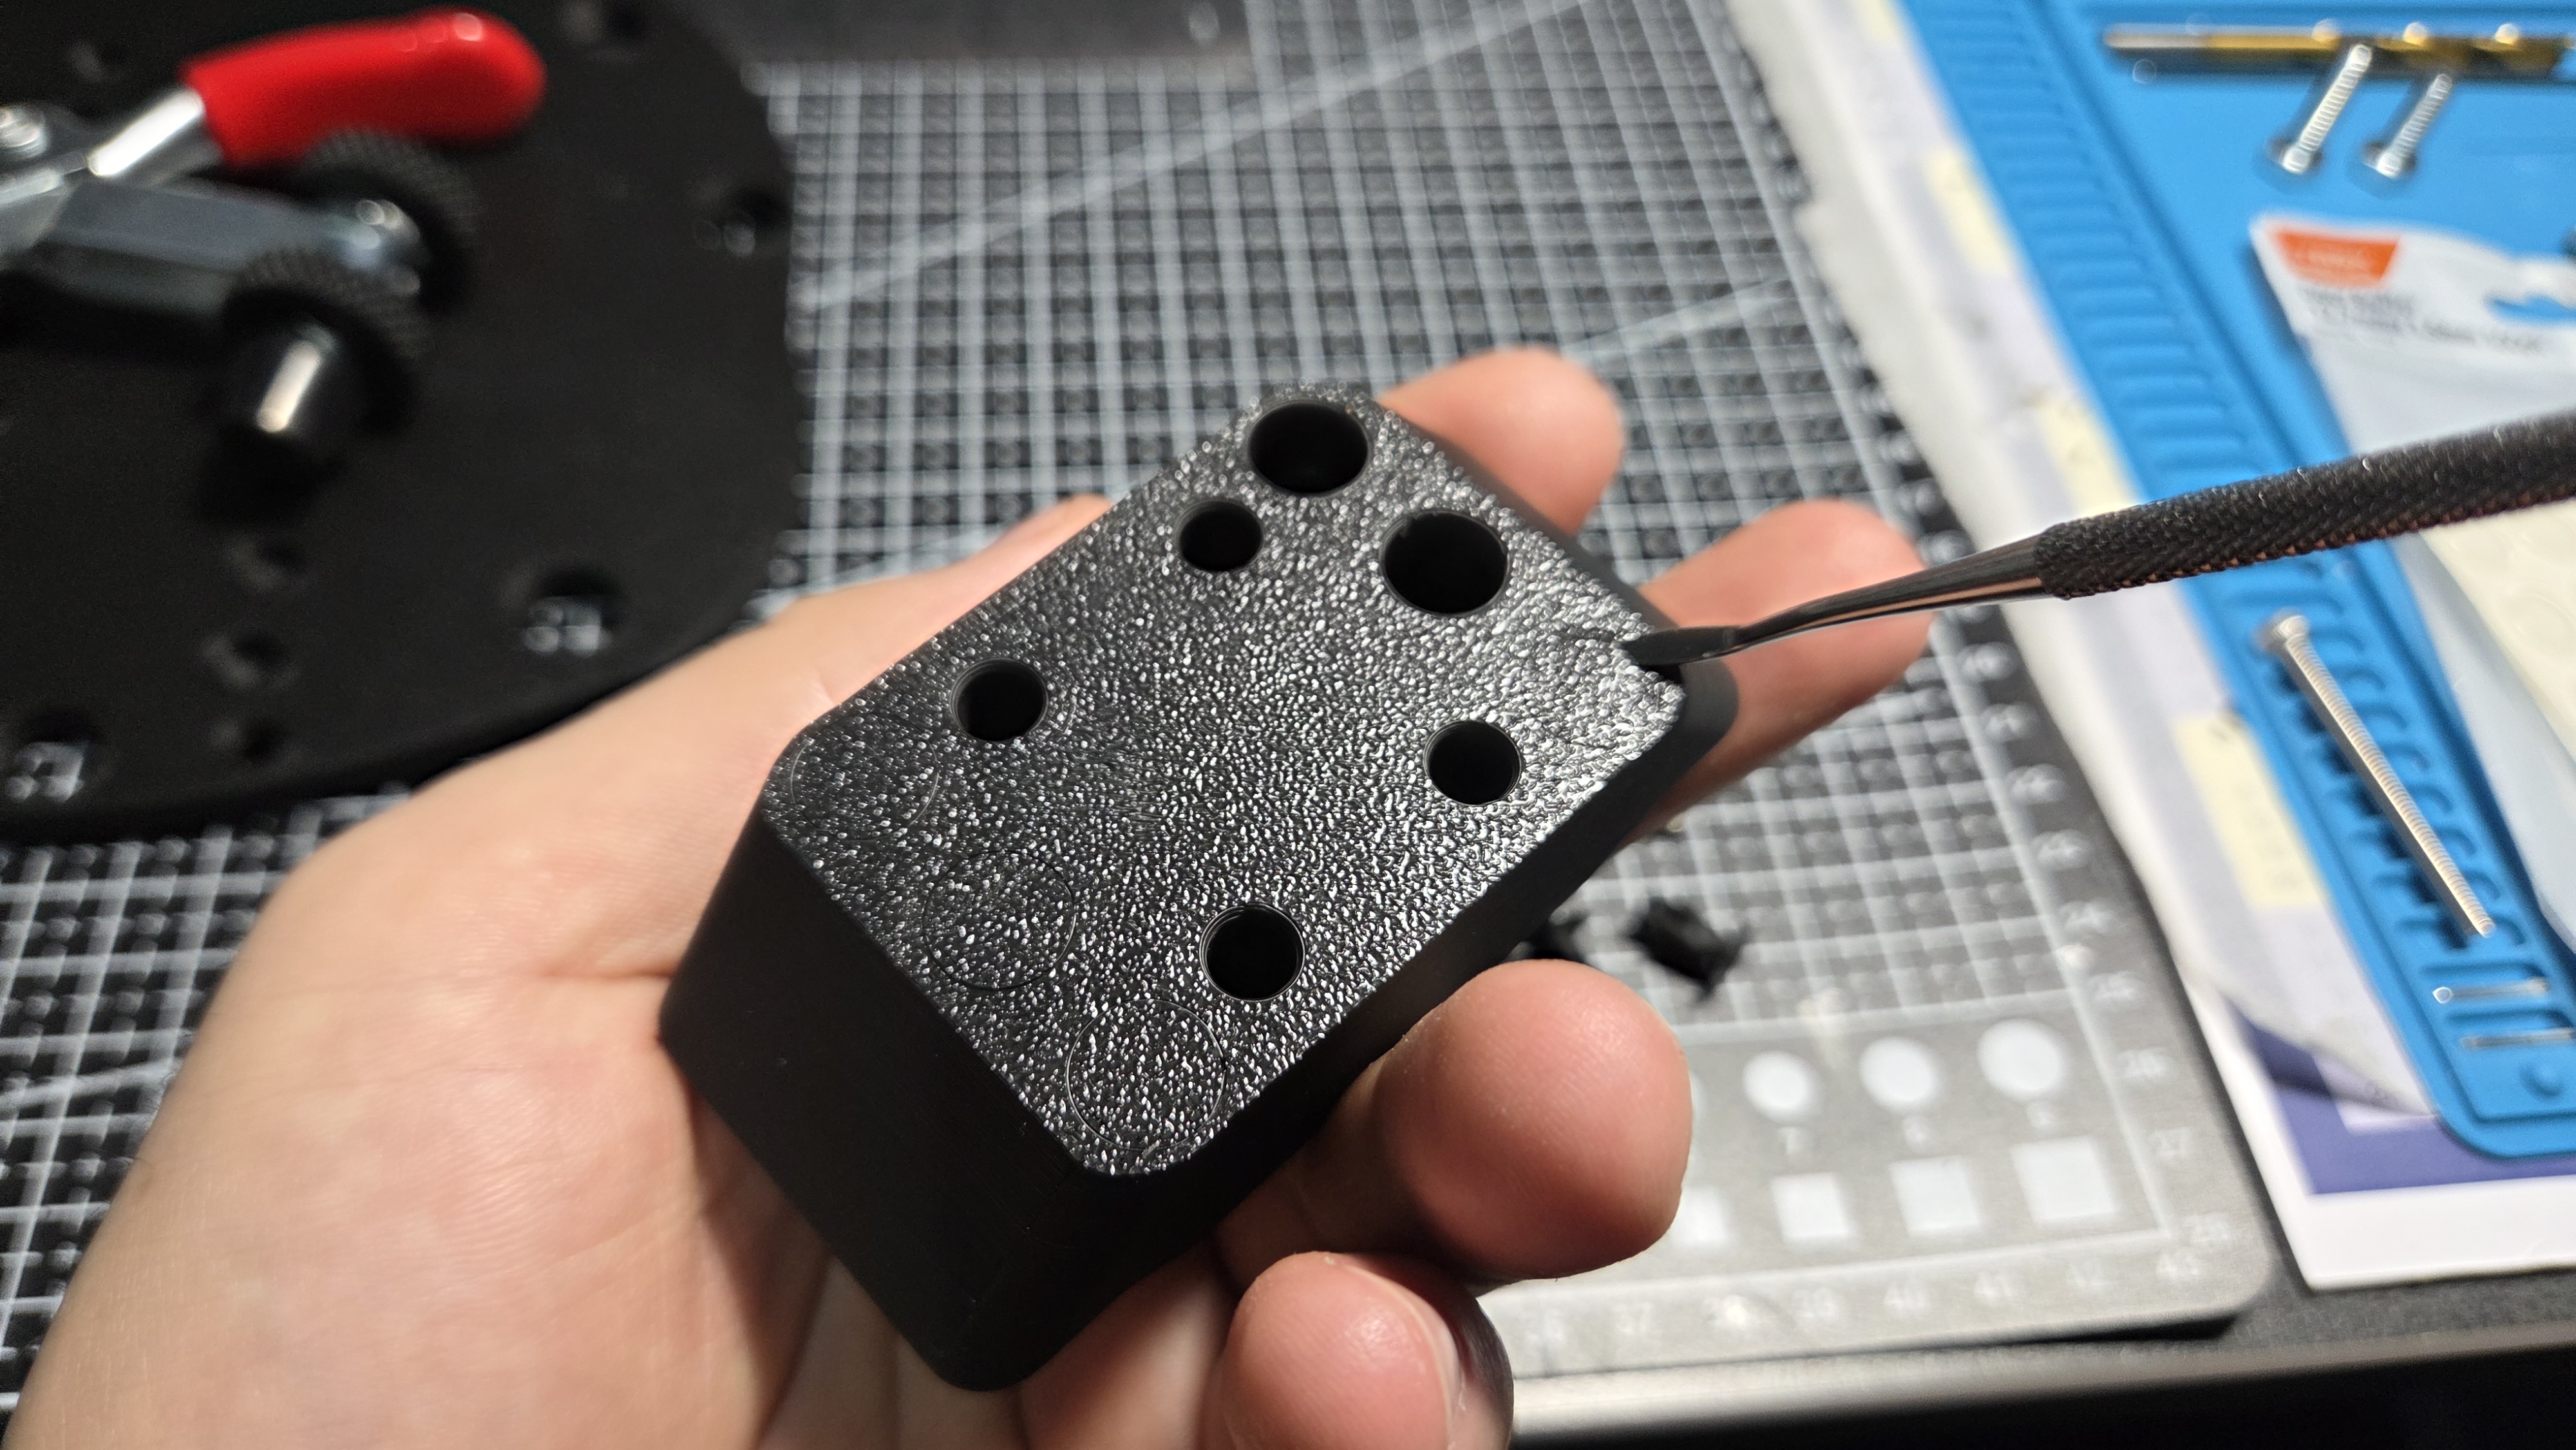
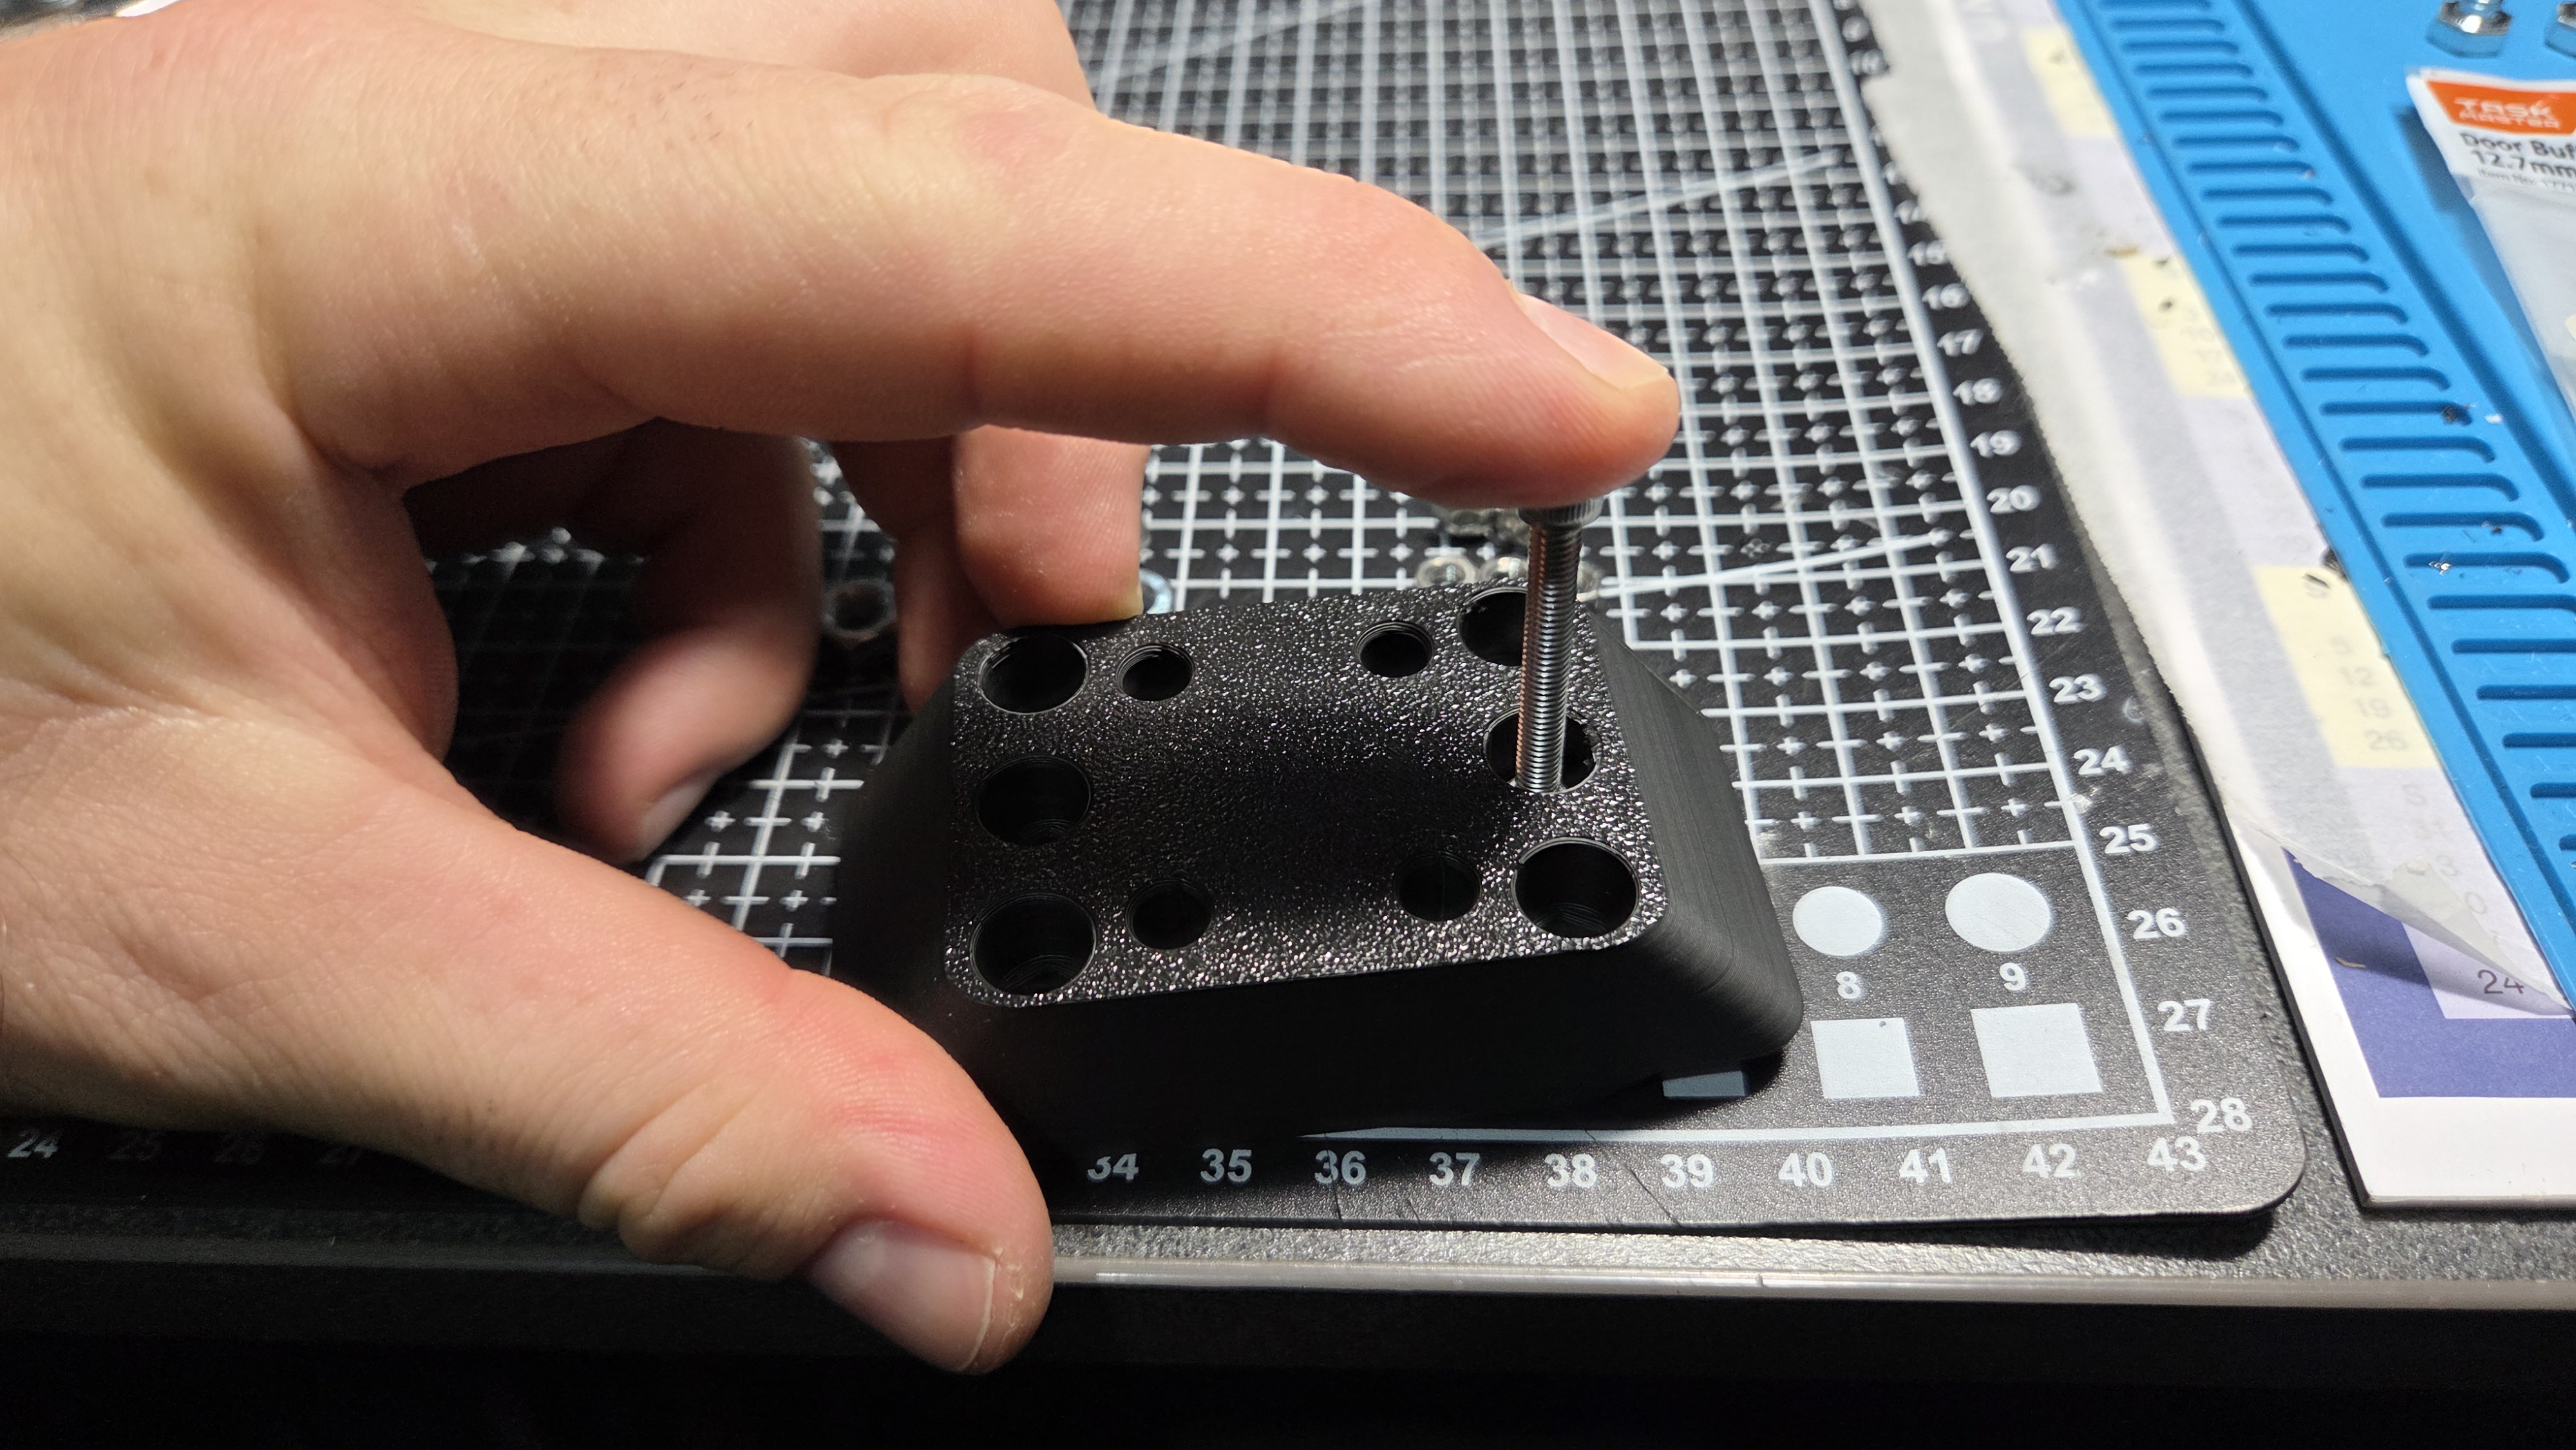
Install at least 4x M4 hex nuts into the smaller holes, I used a longer bolt to threaded into the nut and push it into the recess, then undo the bolt. Installing all 6 just gives more range of adjustment and/or a stronger hold
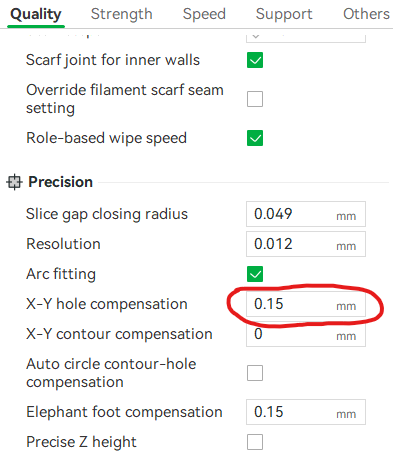
(Note - due to variations in dimensions of hex nuts, you may find that the cut outs are either too tight or too loose. I have included a test file you can print first to see what works with the nuts you have. If the holes need to be made larger, under the quality tab, you can adjust the "X-Y hole compensation". Adding a positive number like 0.15 should be plenty without expanding any other inner holes too much. Alternatively if they are too loose, a negative value can fix this. Some bolt holes may need to be enlarged with a drill bit if too tight. If you need a change to the file, please let me know.
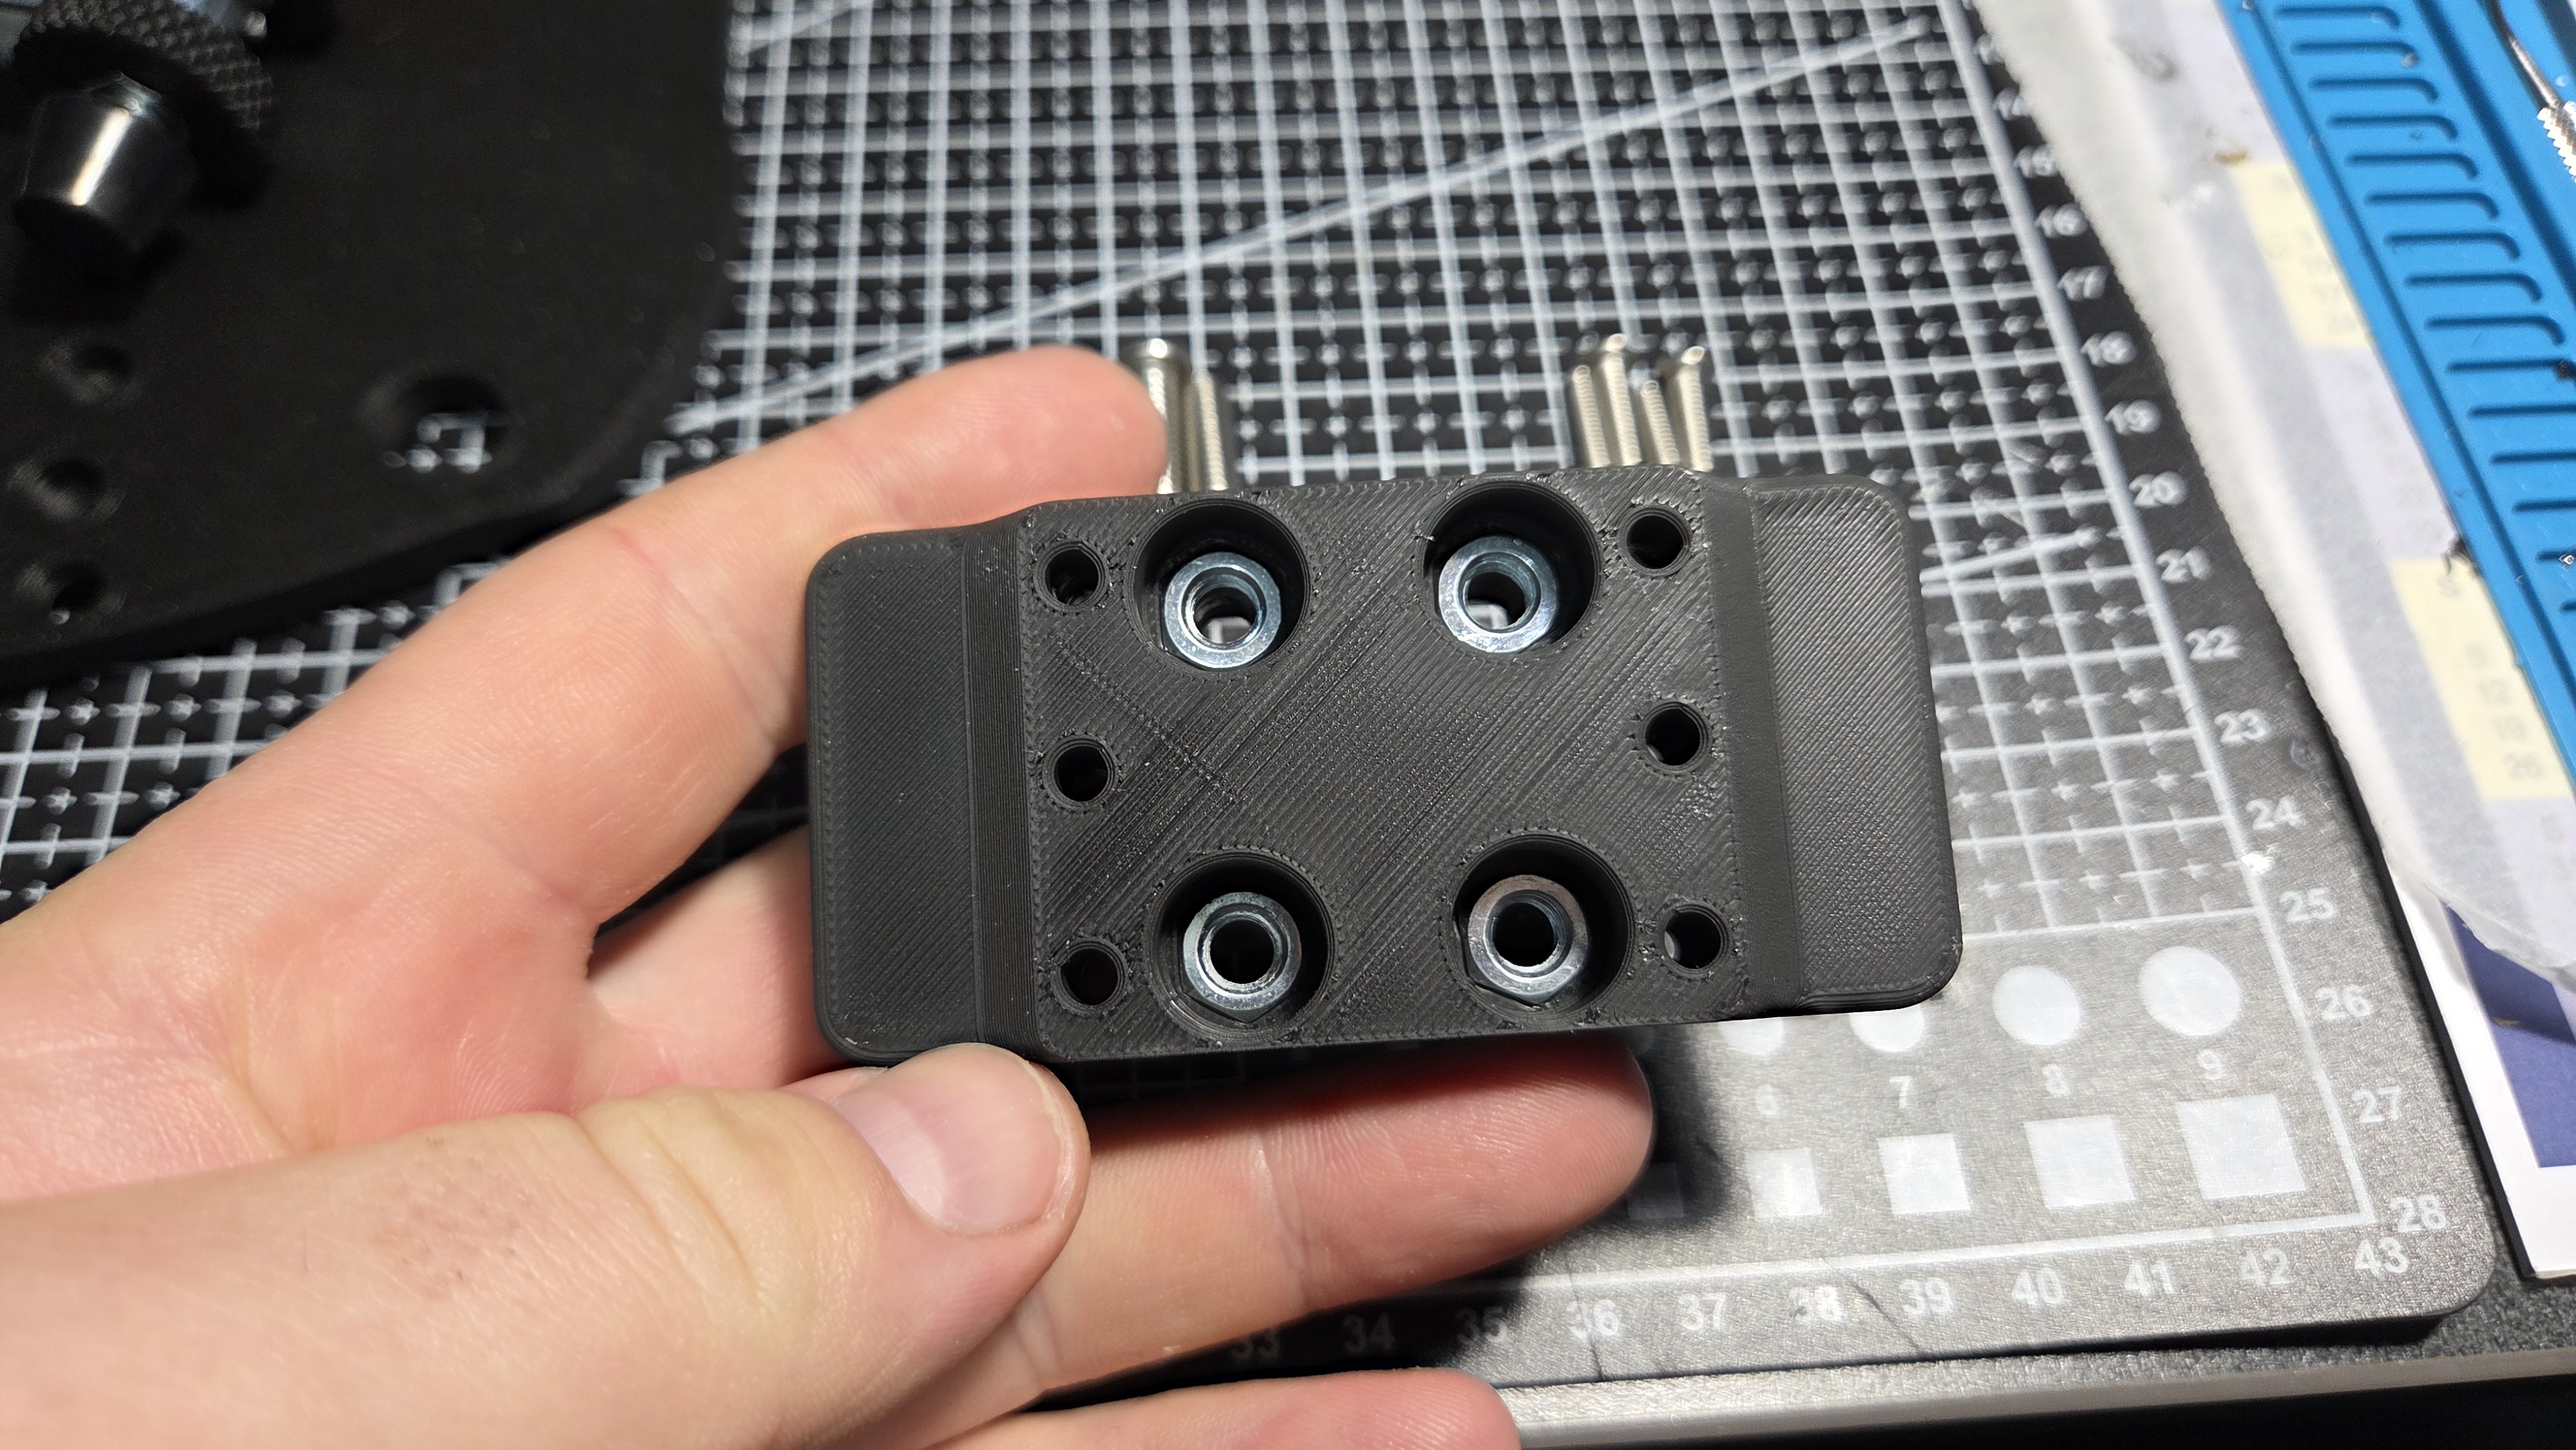
Install the 4x M6 hex nuts into the larger holes, again I used a longer bolt to thread into the nut and push it into the recess.
Install the stick on silicon door buffer feet (or glue the printed TPU options) into the recesses of the new feet locations on the baseplate
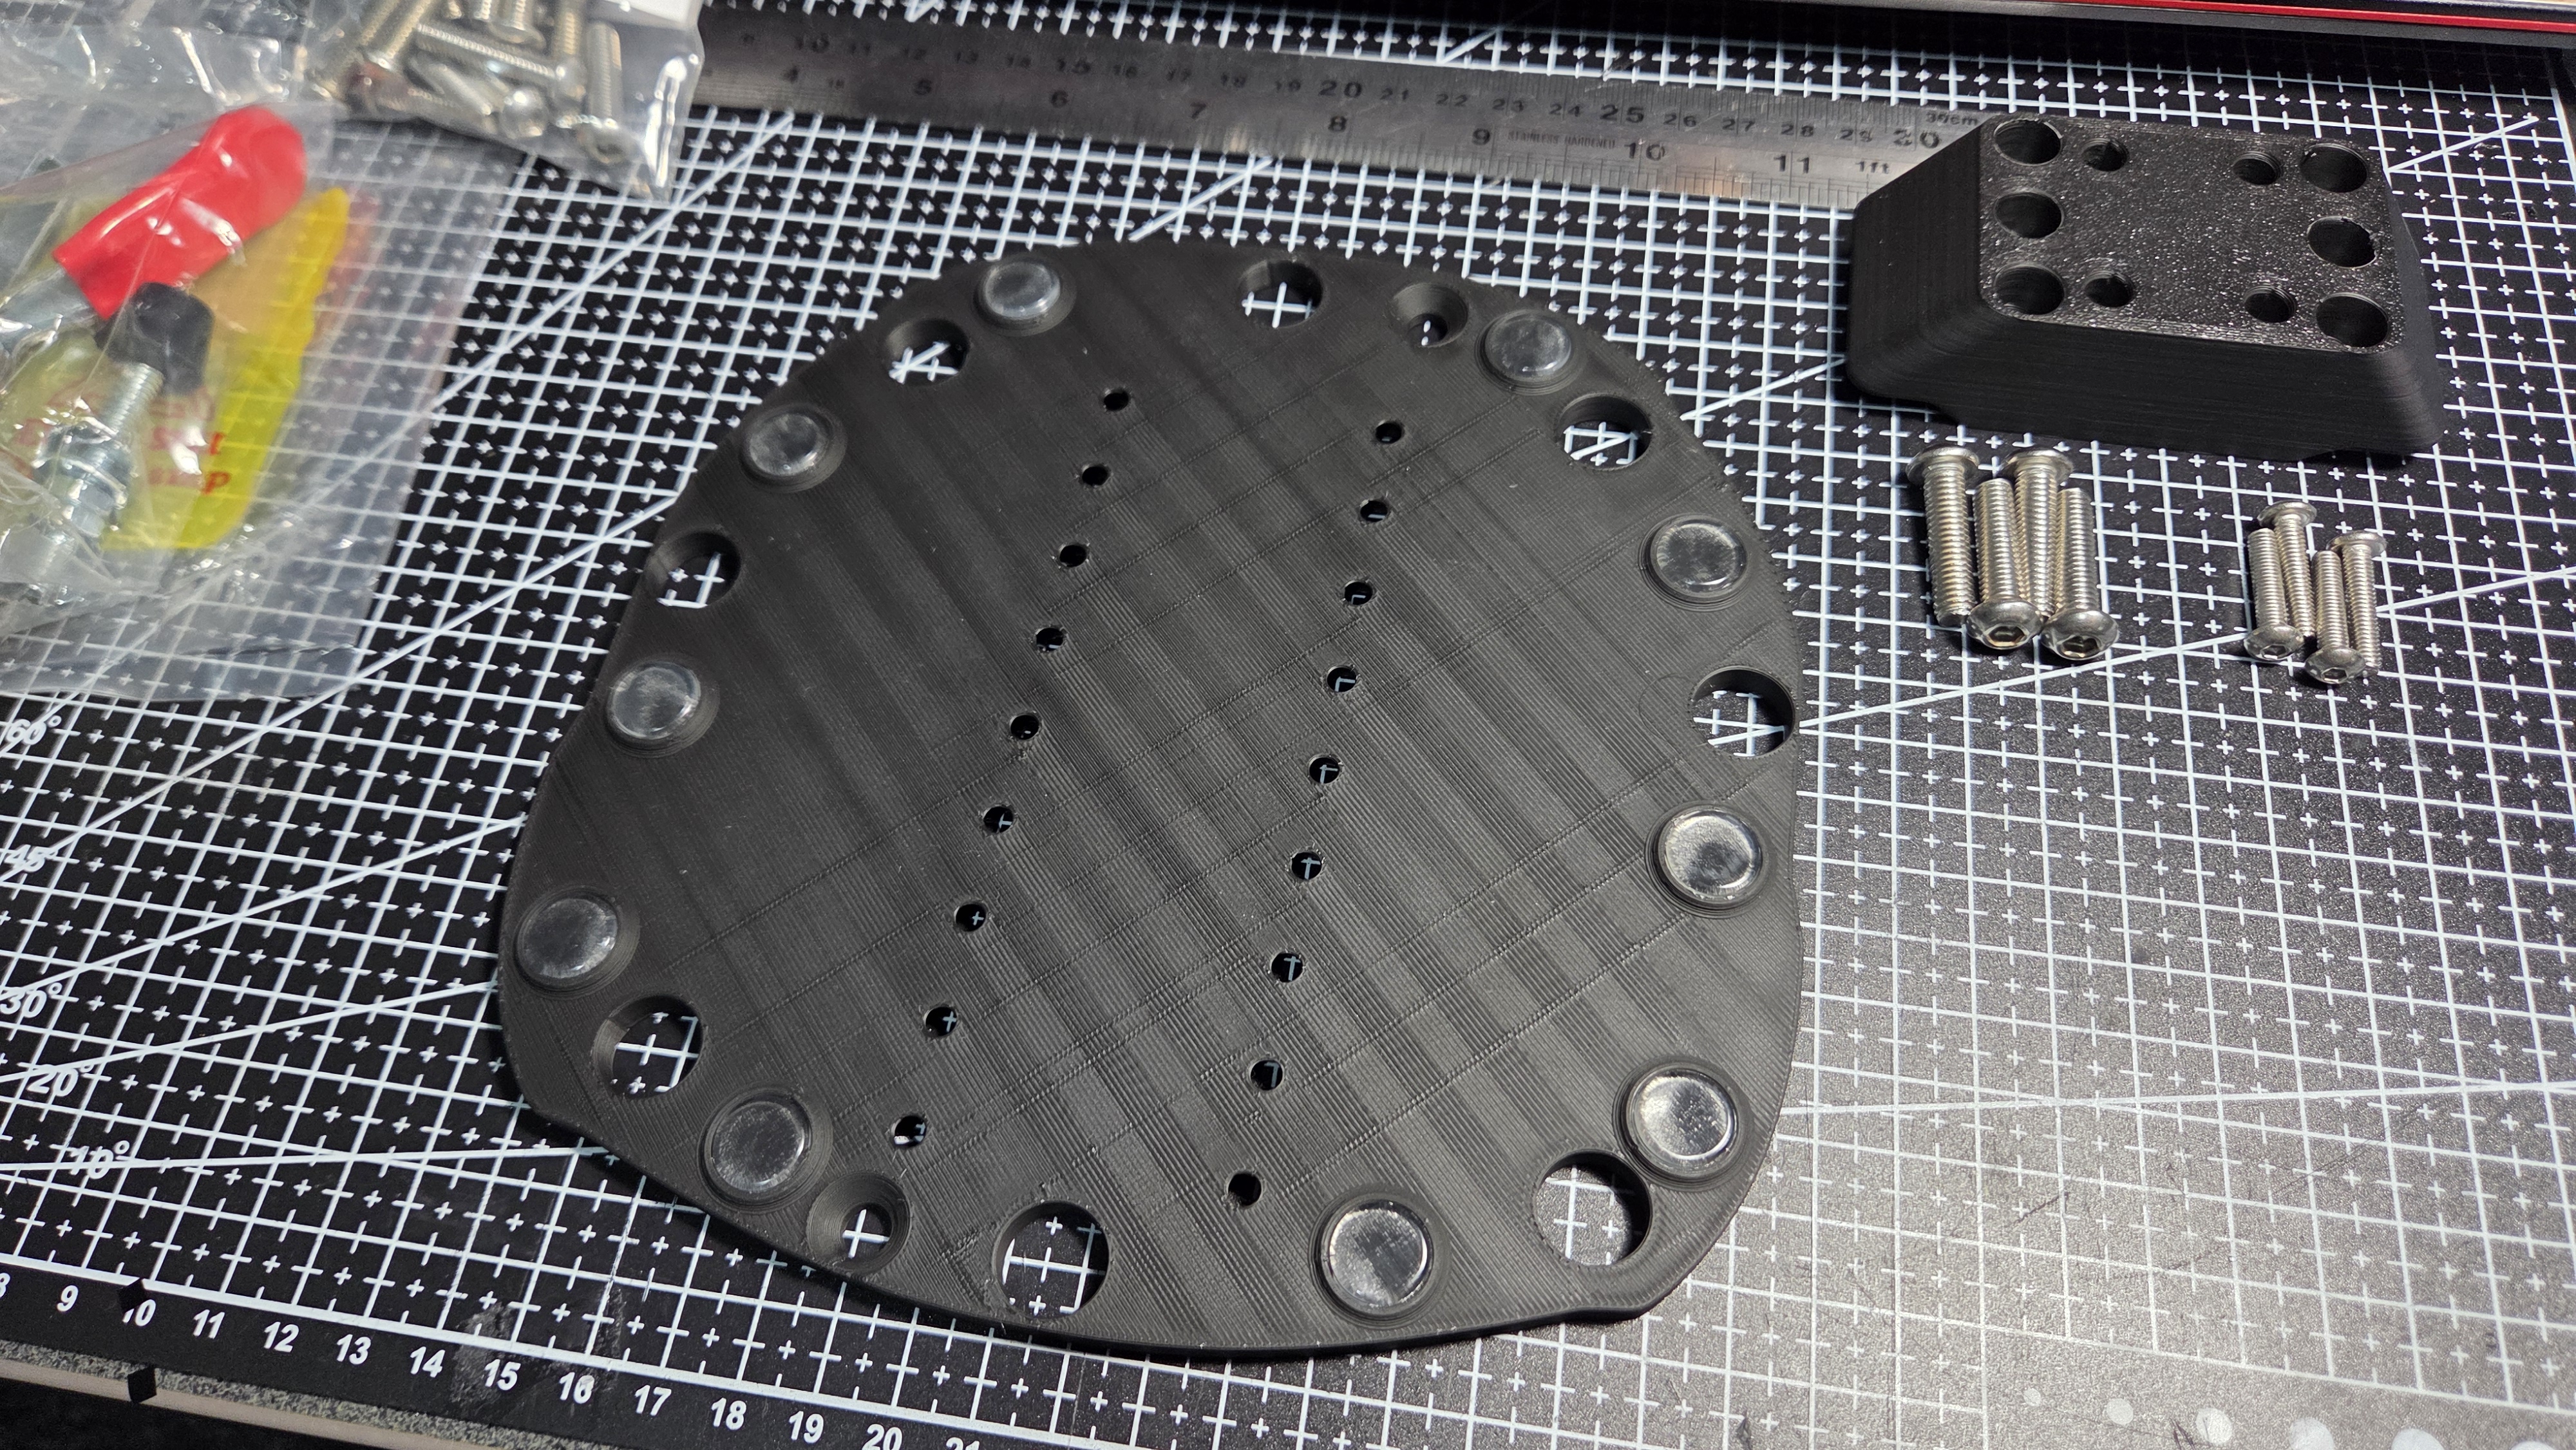
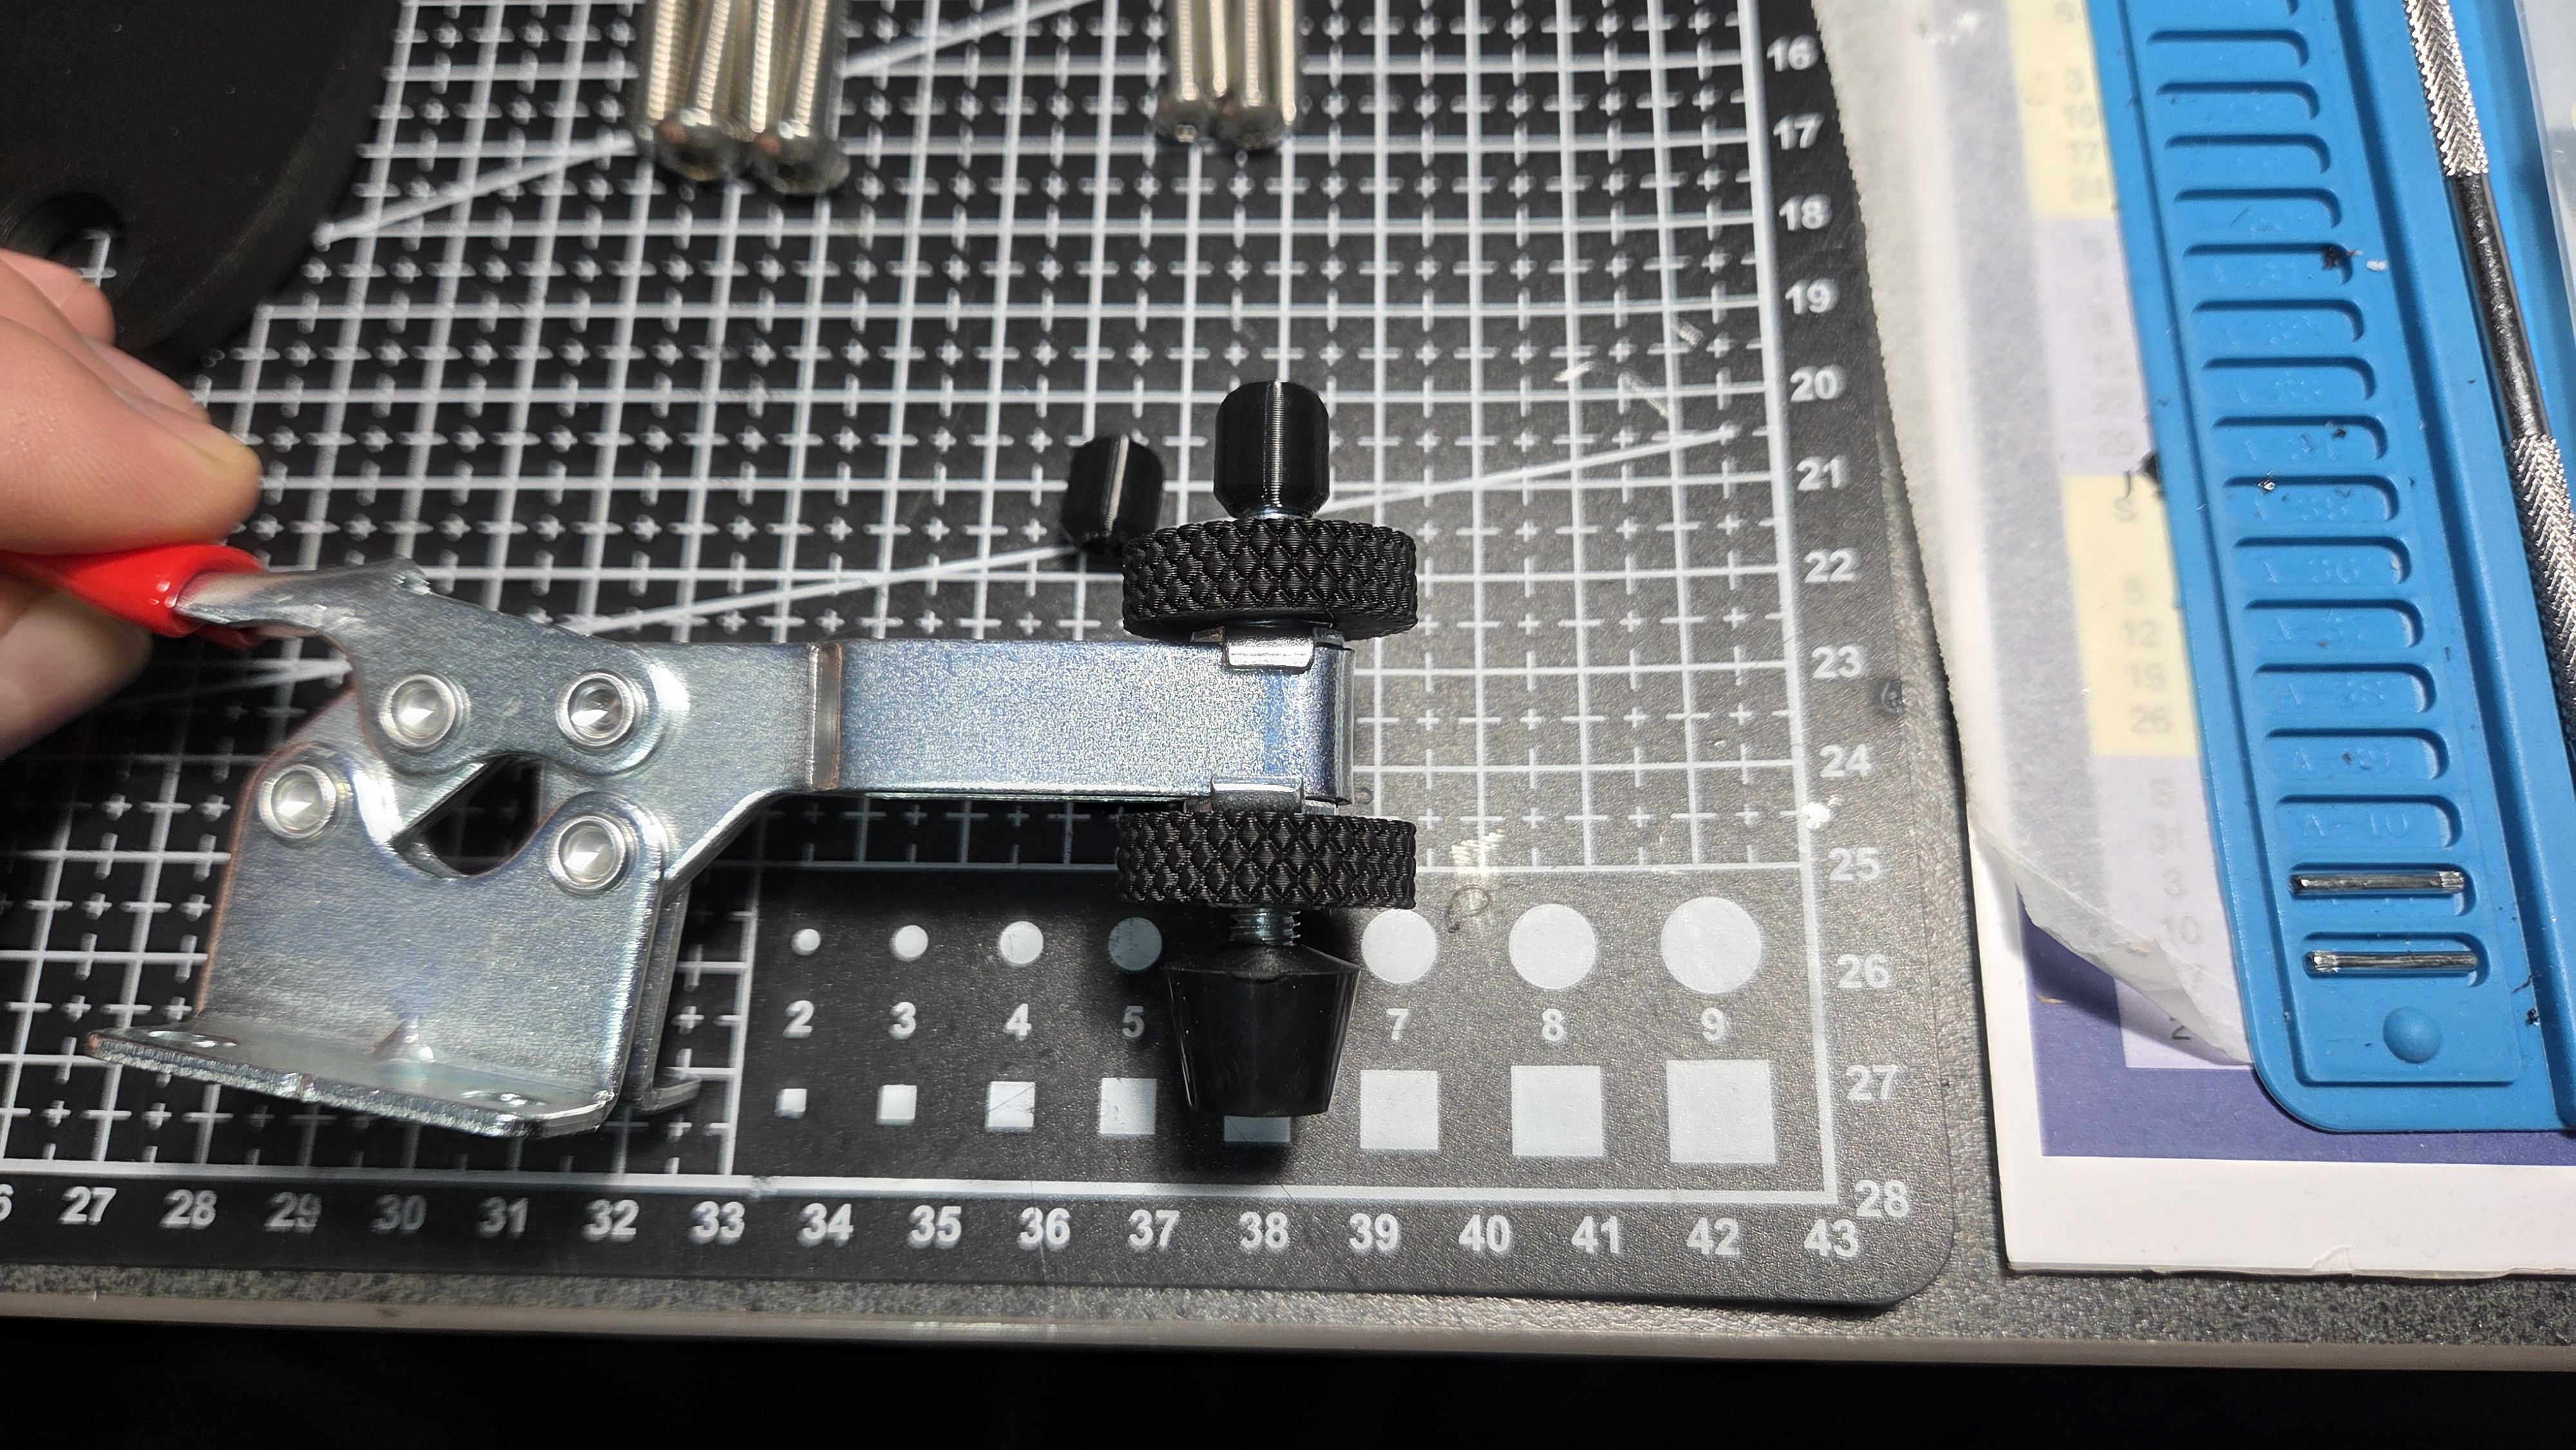
- Remove the M6 hex nuts from the clamping bolt and press the knurled nut collars onto each nut and reinstall on the clamping arm. These are optional, but make adjusting the clamping tension a lot faster and easier with no tools needed. Alternatively, you can use a wingnut etc. You can also add the optional thread cap, saves catching a knee on a sharp thread.
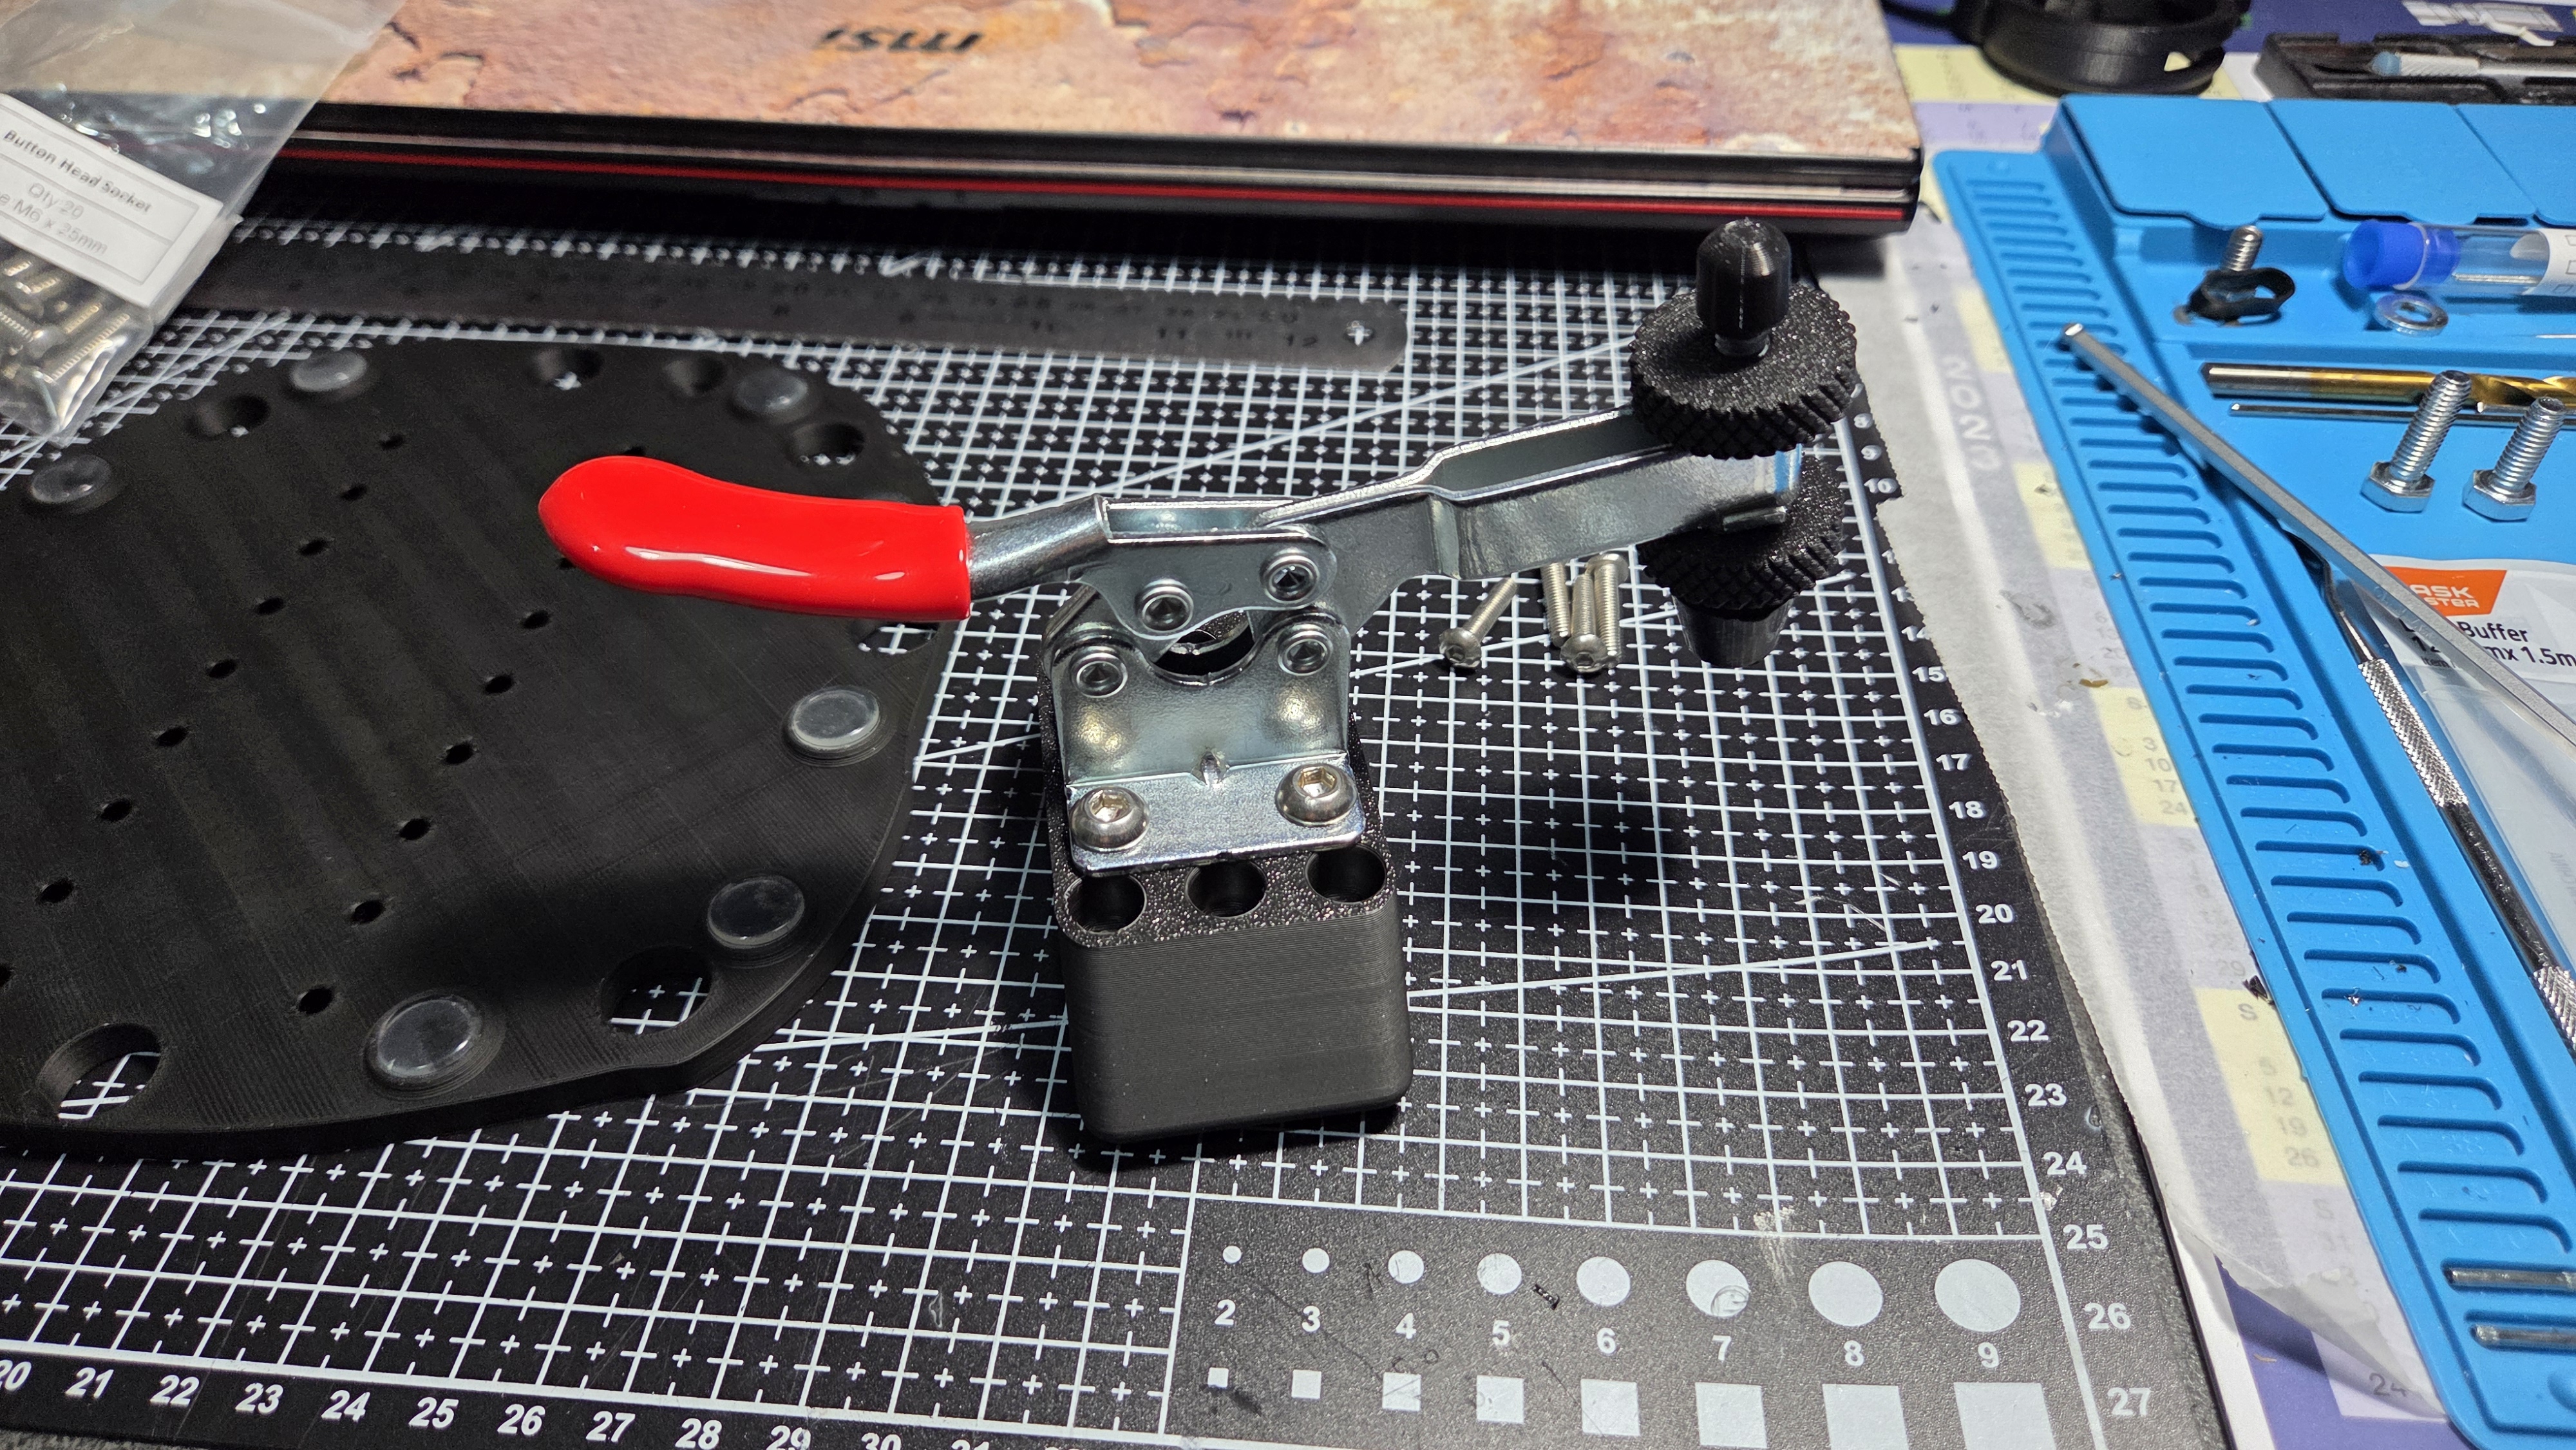
Bolt up the clamp to the block with 4x M6 x 20 (or longer) bolts
Next you can either sit the base on your desk and work out where you would like the joystick to sit and mark the holes used, or just wing it.
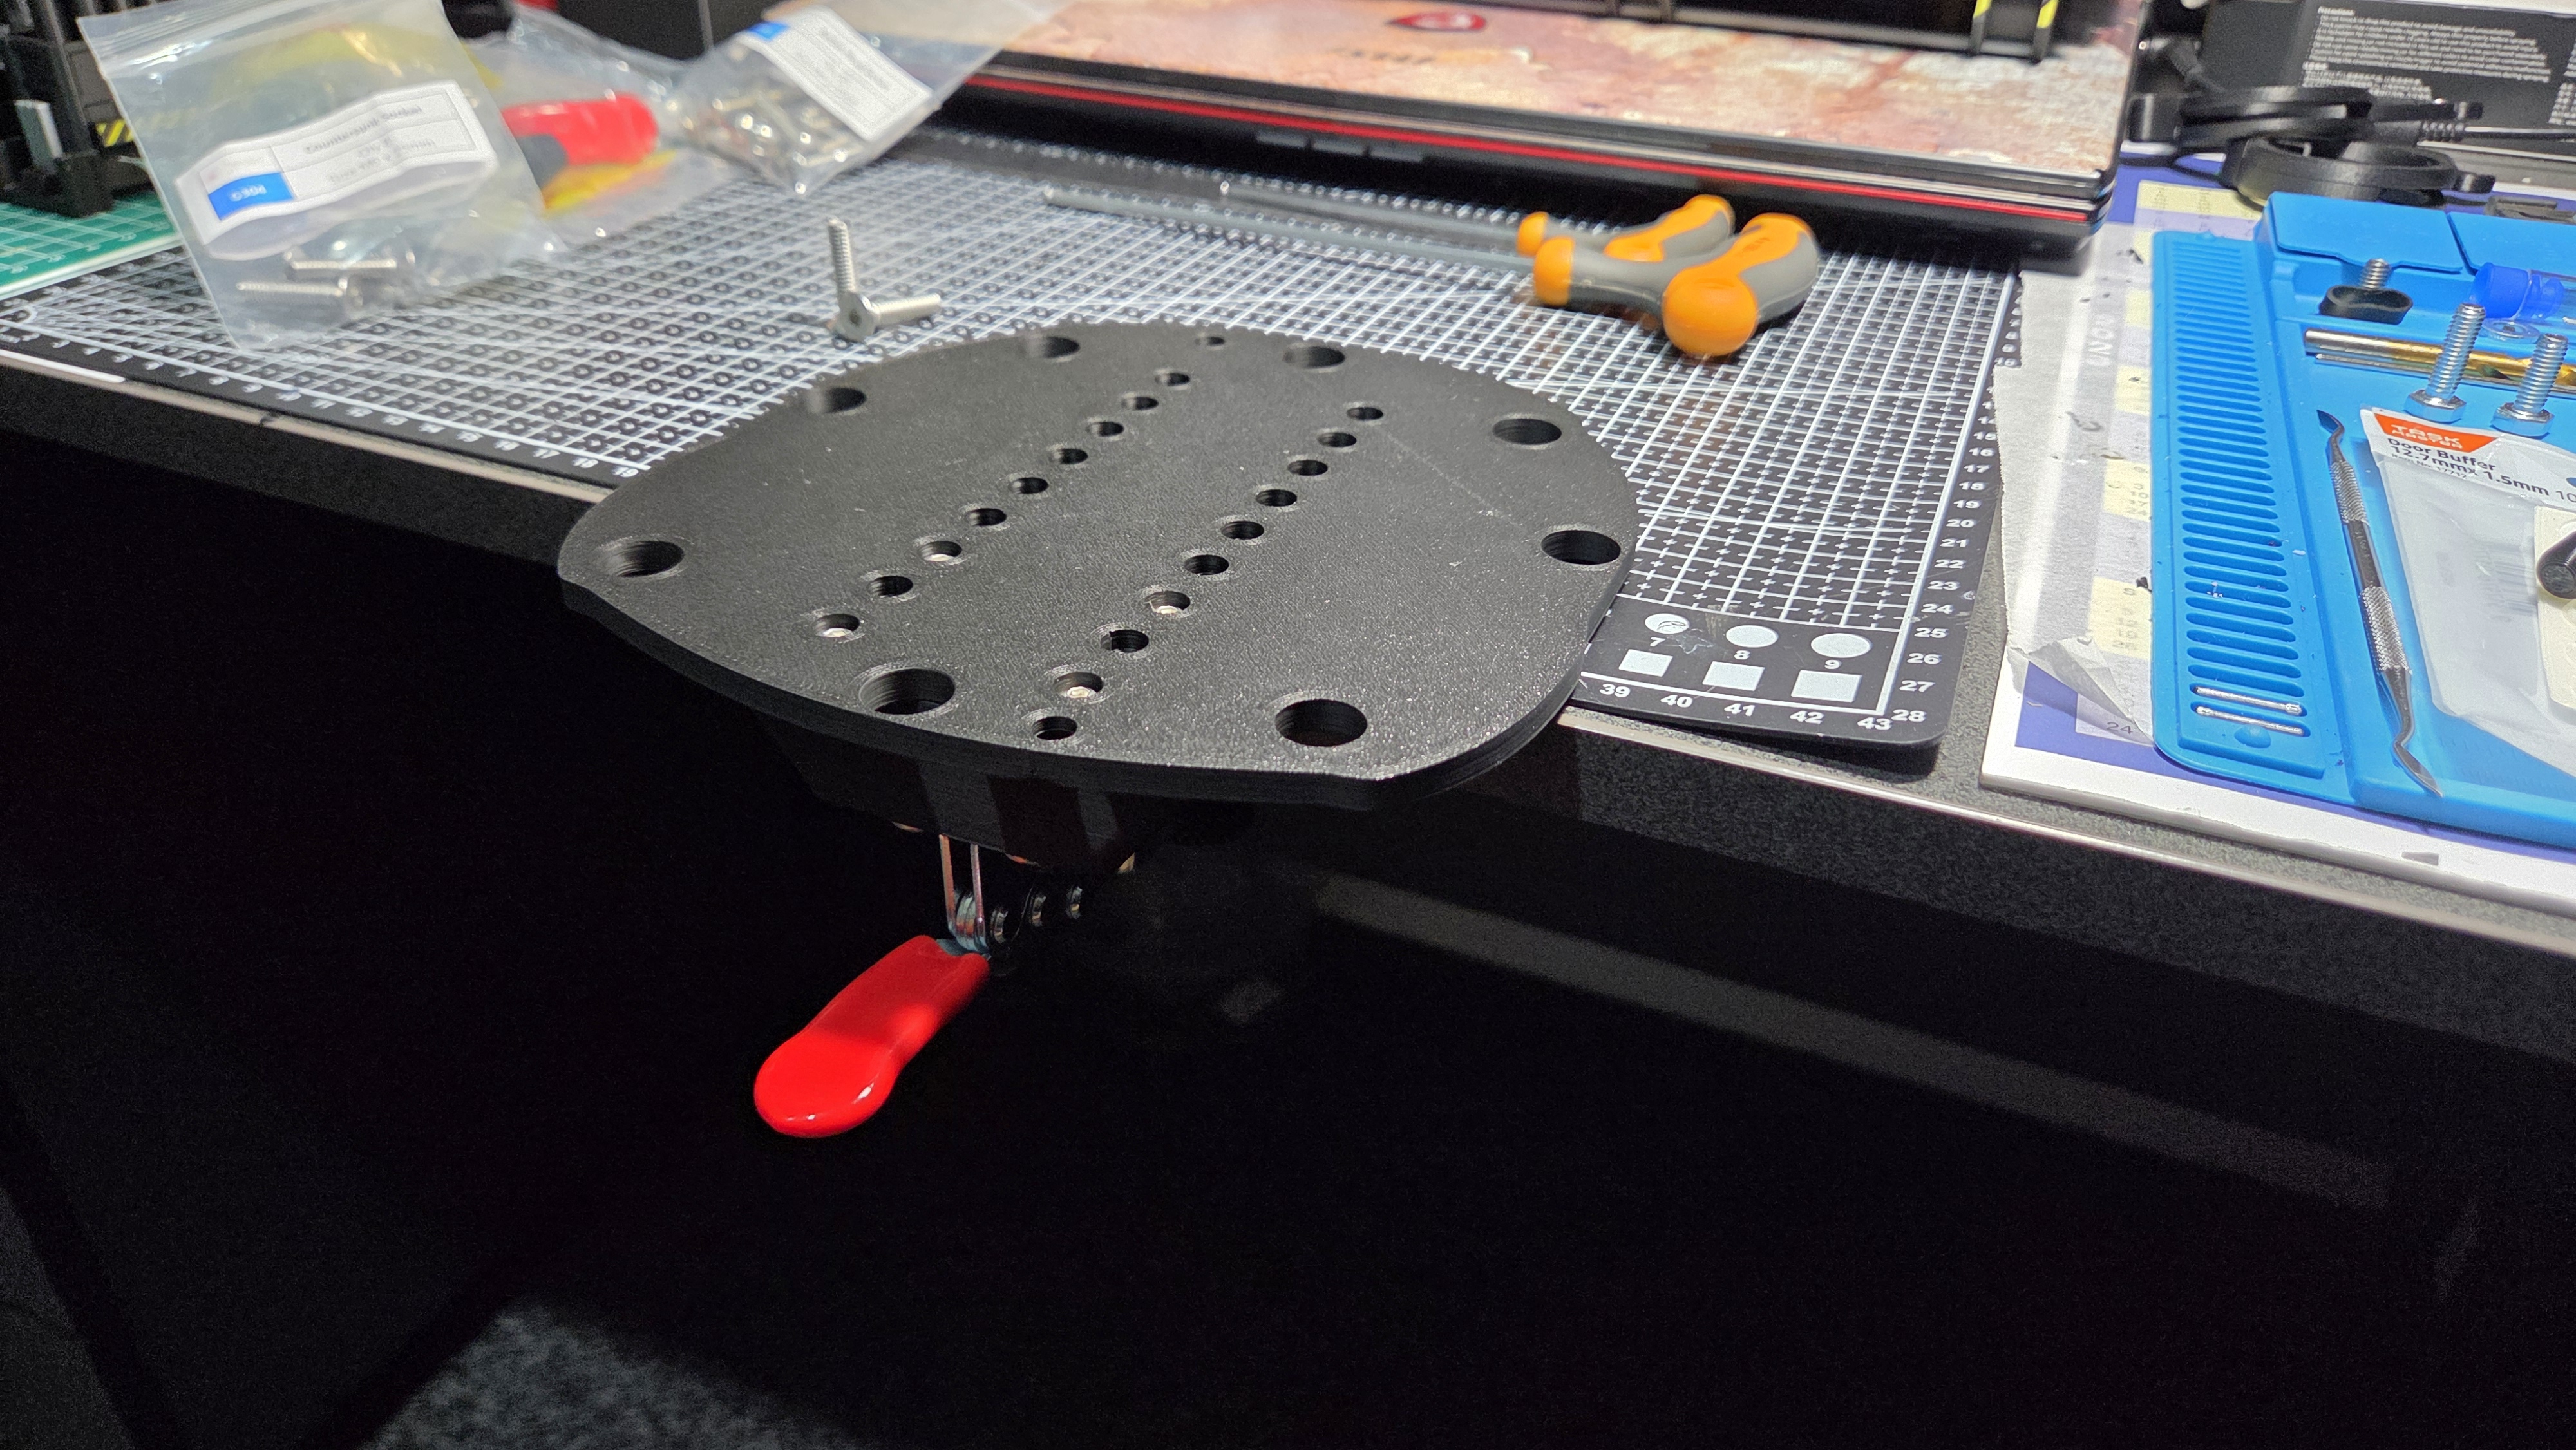
- Bolt the block to the base using at least 4x M4 x 20 (or longer) bolts. The holes have been made for countersunk bolts but I'd run out, so the holes have sized for Cap or socket heads bolts too.
- Bolt the base plate to the joystick using 2x M6 x 25 countersunk bolts
- Clamp your new joystick mount to the desk, adjusting the clamping bolt to achieve a strong enough hold so the joystick wont twist or pull off the desk, but not too tight as to bend the mount or pull the bolts out of the base plate. The below photo is on a thinner (20mm) desk so adjustment has nearly run out on the bolt. I would recommend resizing the Z dimension (as mentioned above) to 20mm.
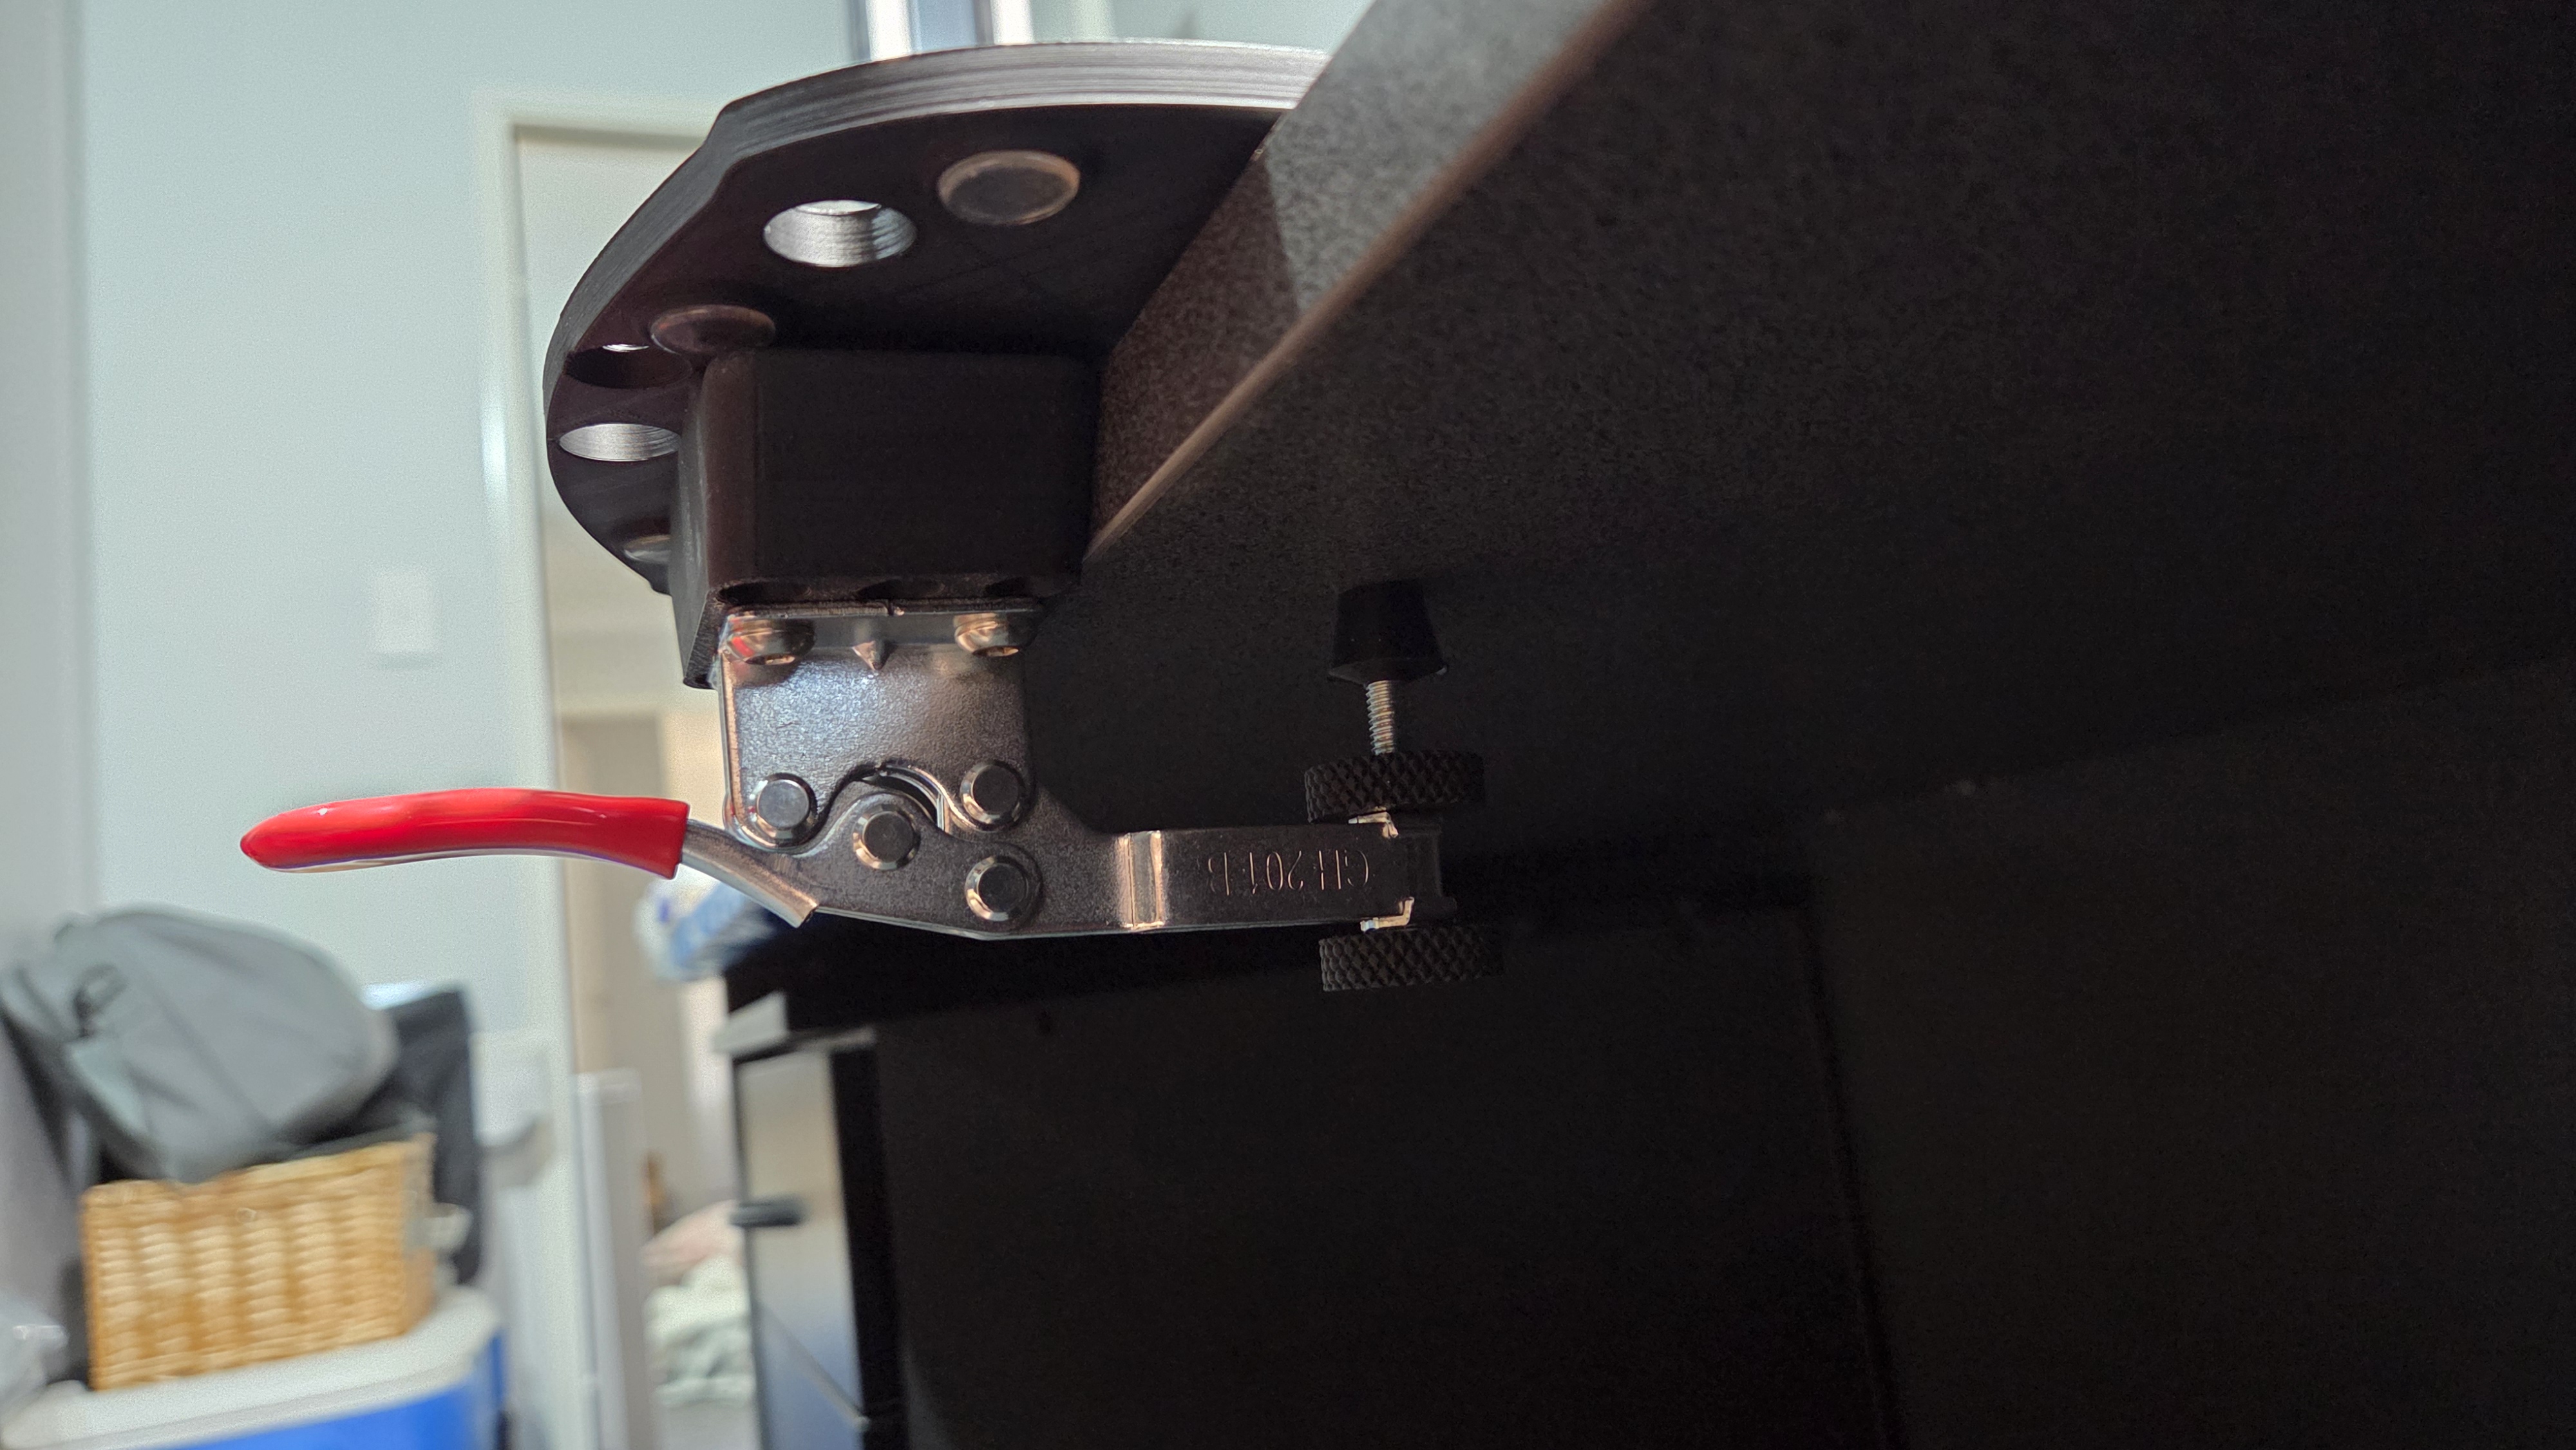
- Plug it in and enjoy!
Filament choice is up to you, but PLA works fine in this instance, as long as you have a sufficient number of walls, I recommend at least 4 as per the uploaded profiles. I have only printed this on my H2C and an earlier version on my P1S, so I cannot confirm the success of other profiles. Particularly the A1 Mini. The base plate seems to just fit, but its very close to the limits.
If you have any issues with assembly, fitment, hardward or profiles, please let me know and I will try to sort it out for you.
Thrustmaster Joystick Quick Release Mount

Publicado em 11 de fev de 2026
Gostou deste modelo? Crie uma conta grátis para salvar seus favoritos e voltar a eles depois.
Criar conta