Você está no 3DFinder
Buscamos em Thingiverse, MakerWorld e Printables ao mesmo tempo para te dar o melhor de cada uma.
Descrição
--ATTENTION--
- This model is not made to play, but to pose and then glue in the pose
- The model in the images is hand painted, and is not present an AMS file
- before printing read the full description
--INFORMATION--
- the antennas must be printed in 0.2mm nozzle, if you don't have the nozzle there is a thunderjaw version whithout them
The ball joints are very delicate, depending on your printer calibration they may or may not fit in the socket, to solve this problem the socket is longer than necessary, for the neck ball joints follow this steps:
- Do a fit test on the joints
- If the joint is loose I advise to put some tape on the ball to add width
- If they don't fit don't force the joint or the socket will break, then cut the socket as shown on the picture
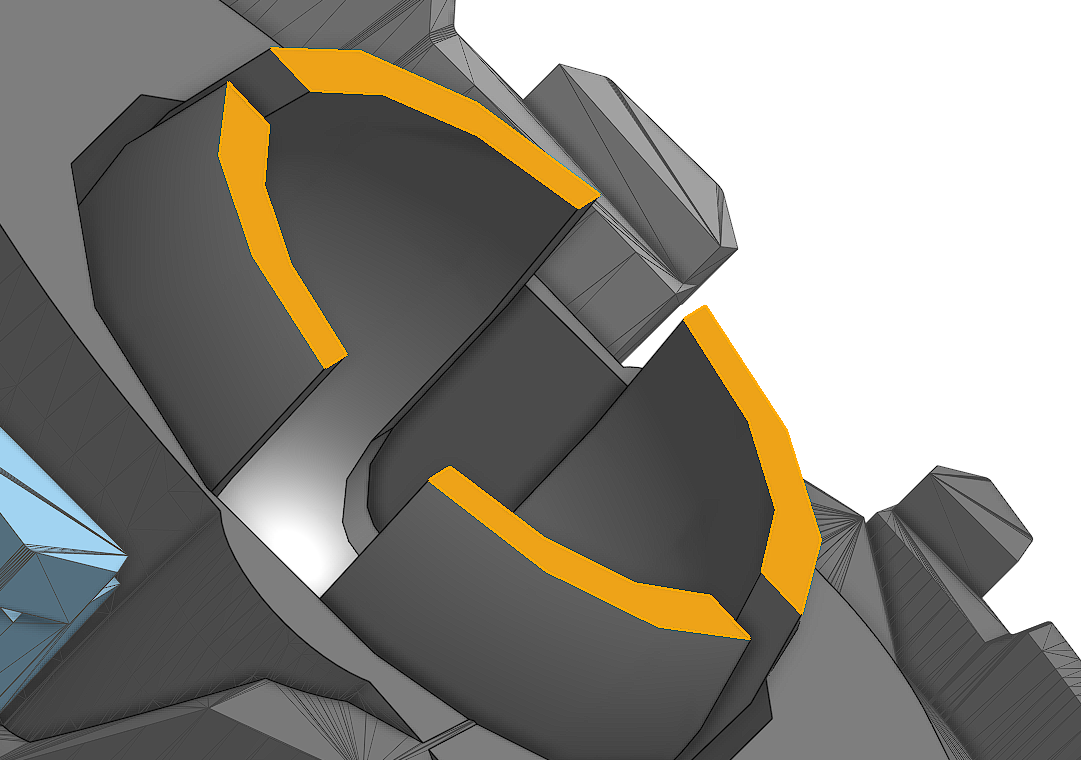
BEFORE
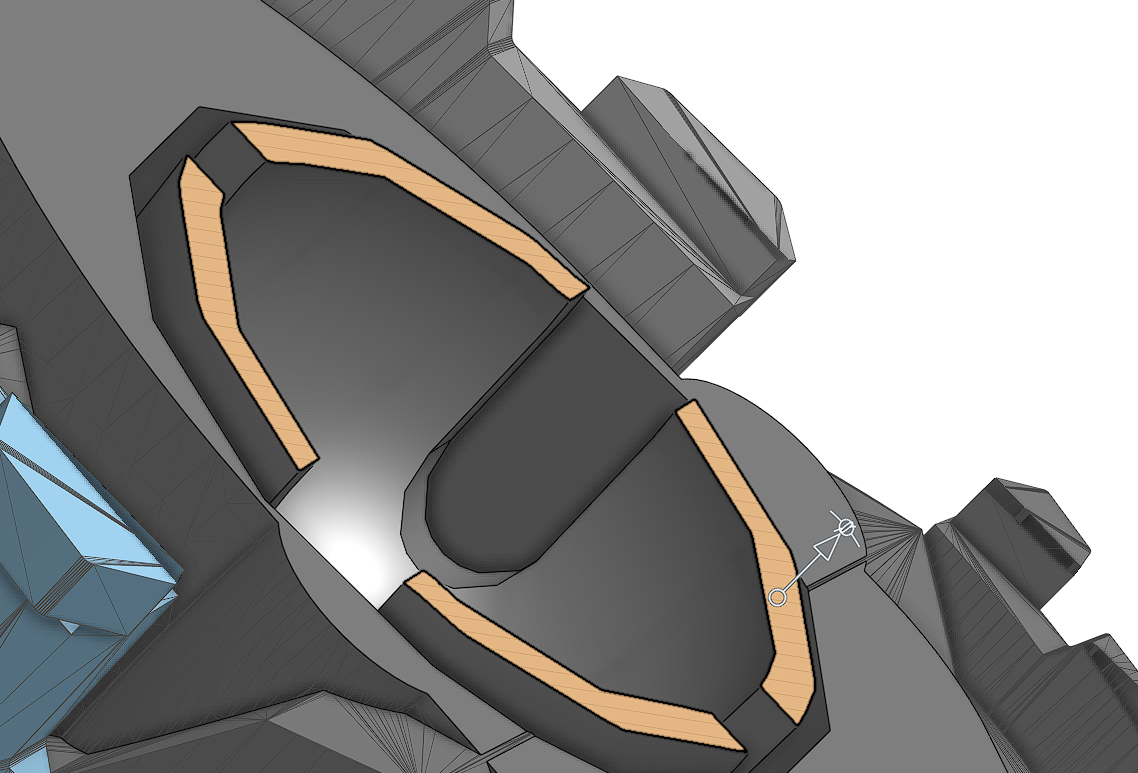
AFTER
If the model is not stable there is a stand, to use it I suggesto to drill a hole in this parti of the model (hole diameter of 5mm)
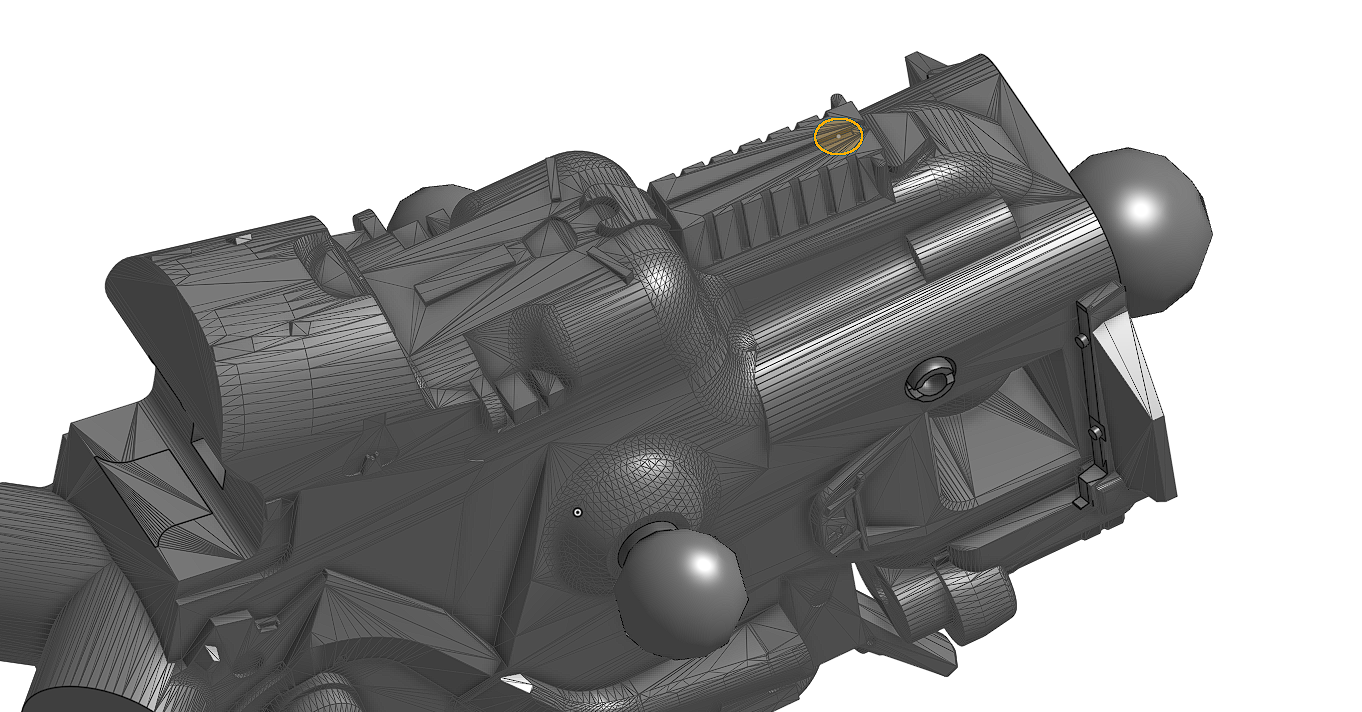
- If the model is printed in PLA do not trust the stability of the joints because in some time the balls will restrict and will become loose, to avoid the problem glue the joints after posing.
- For the painting is advised to print the whole model in black (and the stand in translucent PLA)
--ASSEMBLY INSTRUCTION--
- (PLATE 1) Put the antennas in the antennas suport ( 2 for support )
(PLATE 7 ) take the pin and the tibia and test if the pin passes through the hole, then take the thigh insert the tibia and only when the tibia is in place put the pin and glue the red pin part, the tibia should move, then glue the socket in the apposite place in the thigh, place the feet.
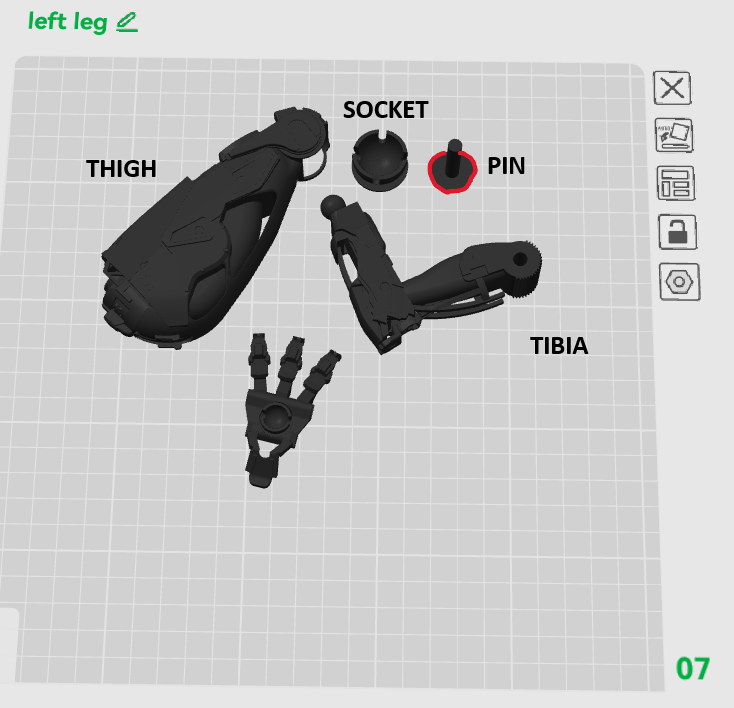
- (PLATE 6) Repeat for the other leg
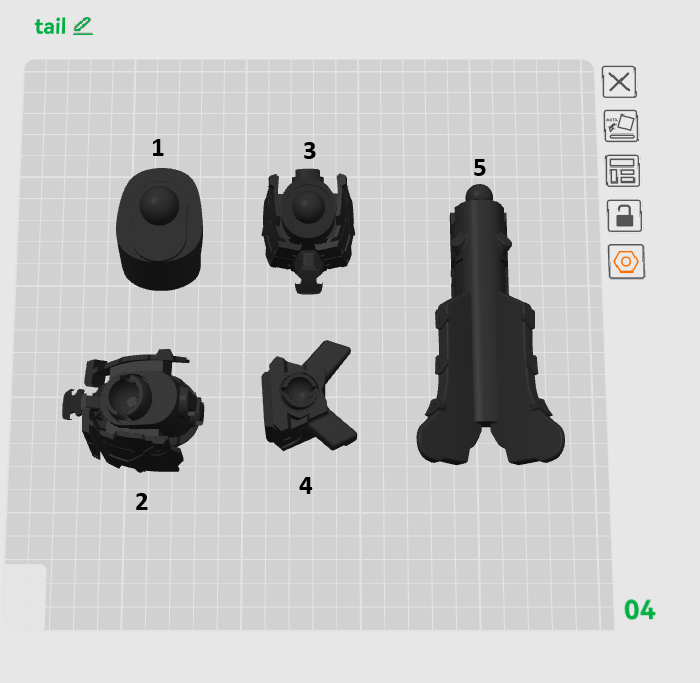
(PLATE 4) Assemble the tail following the number order
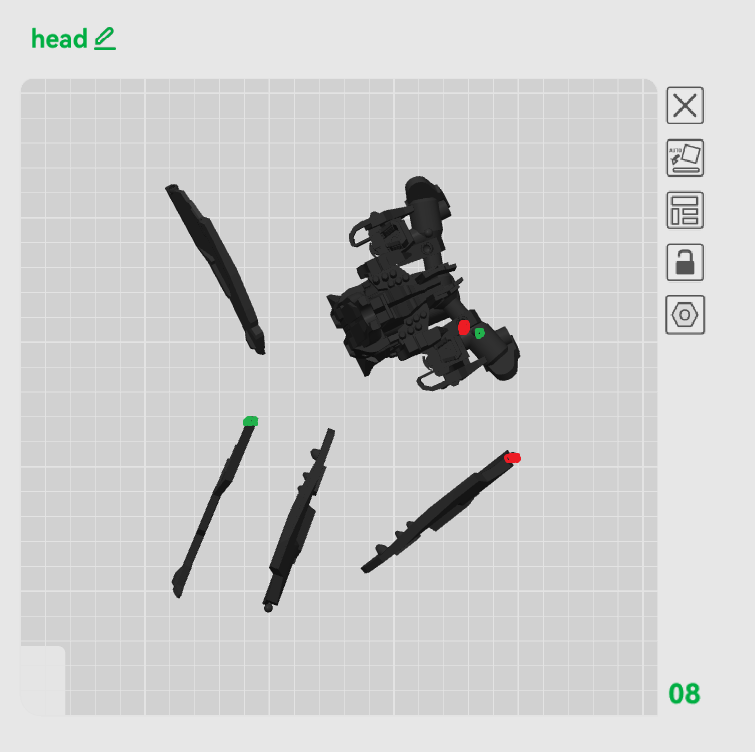
(PLATE 8) Assemble the head following the colours
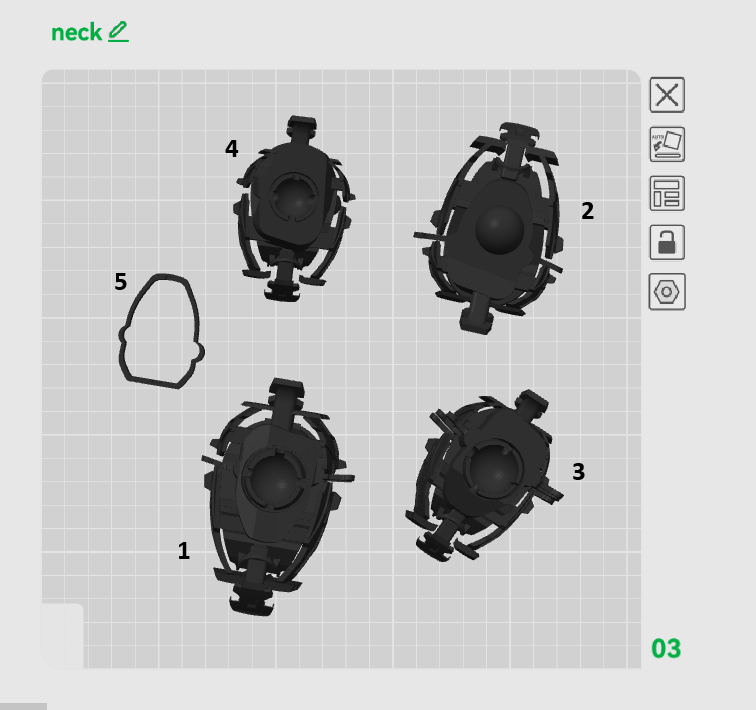
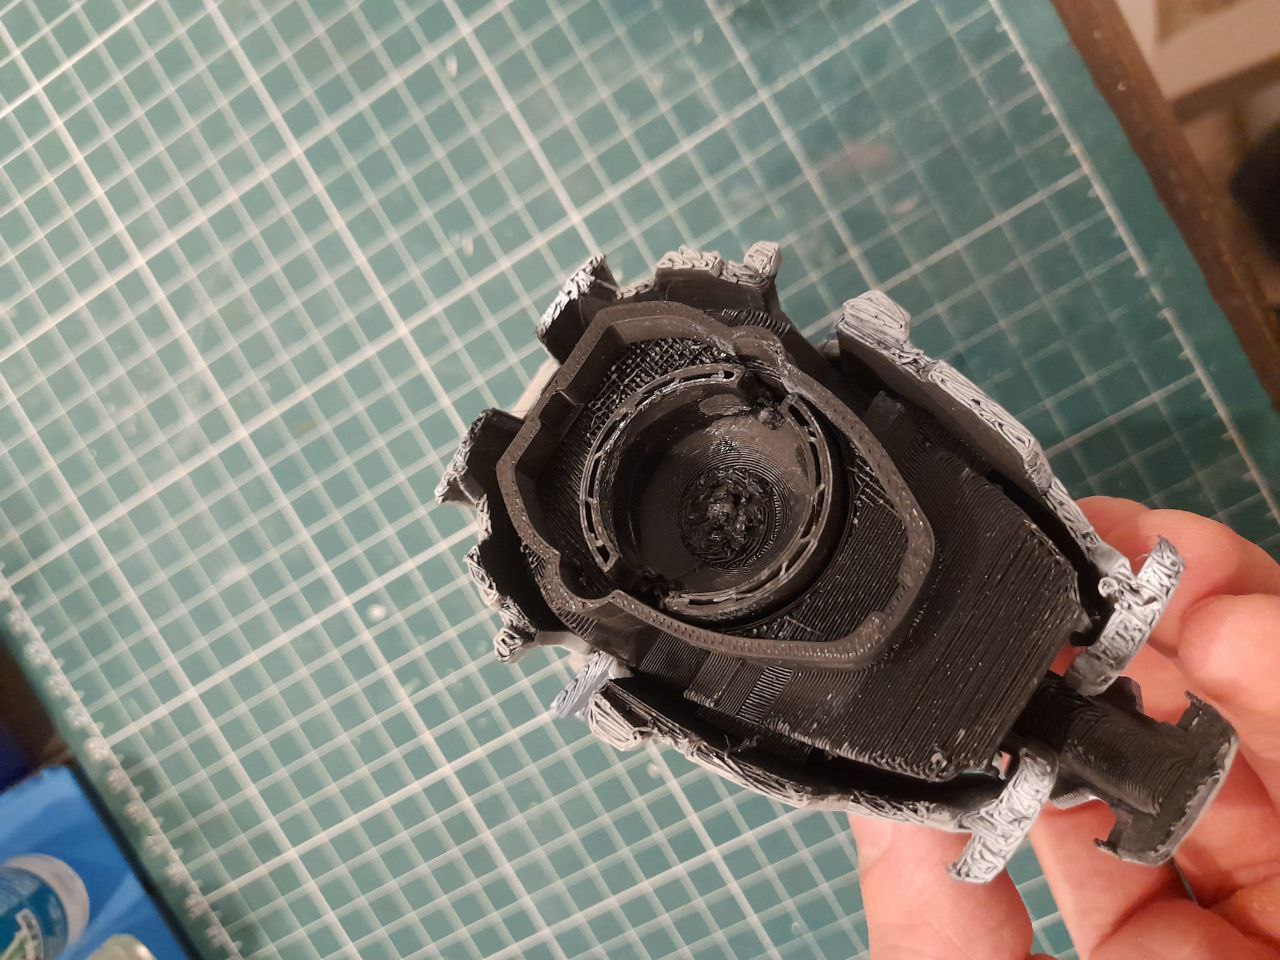
(PLATE 3) Assemble the head following the numbers, the number 5 is a cover for the ball joint that connects the neck to the body, it is optional because it restricts the posability, part 5 needs to be glued to part 1 (photo)
(PLATE 2) Assemble the body following the photos, glue all parts exept for the guns that should be able to rotate on the socket
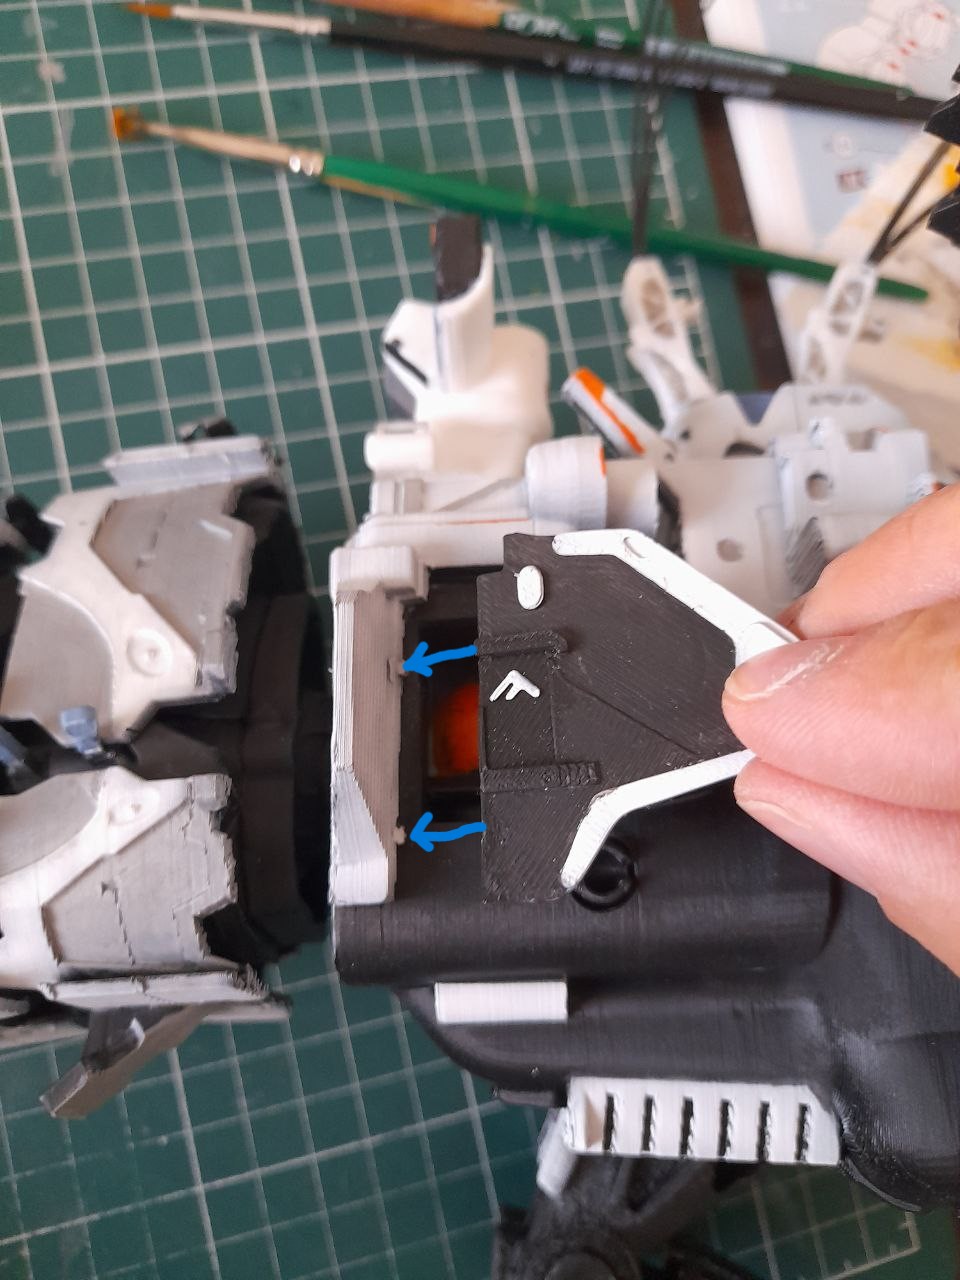
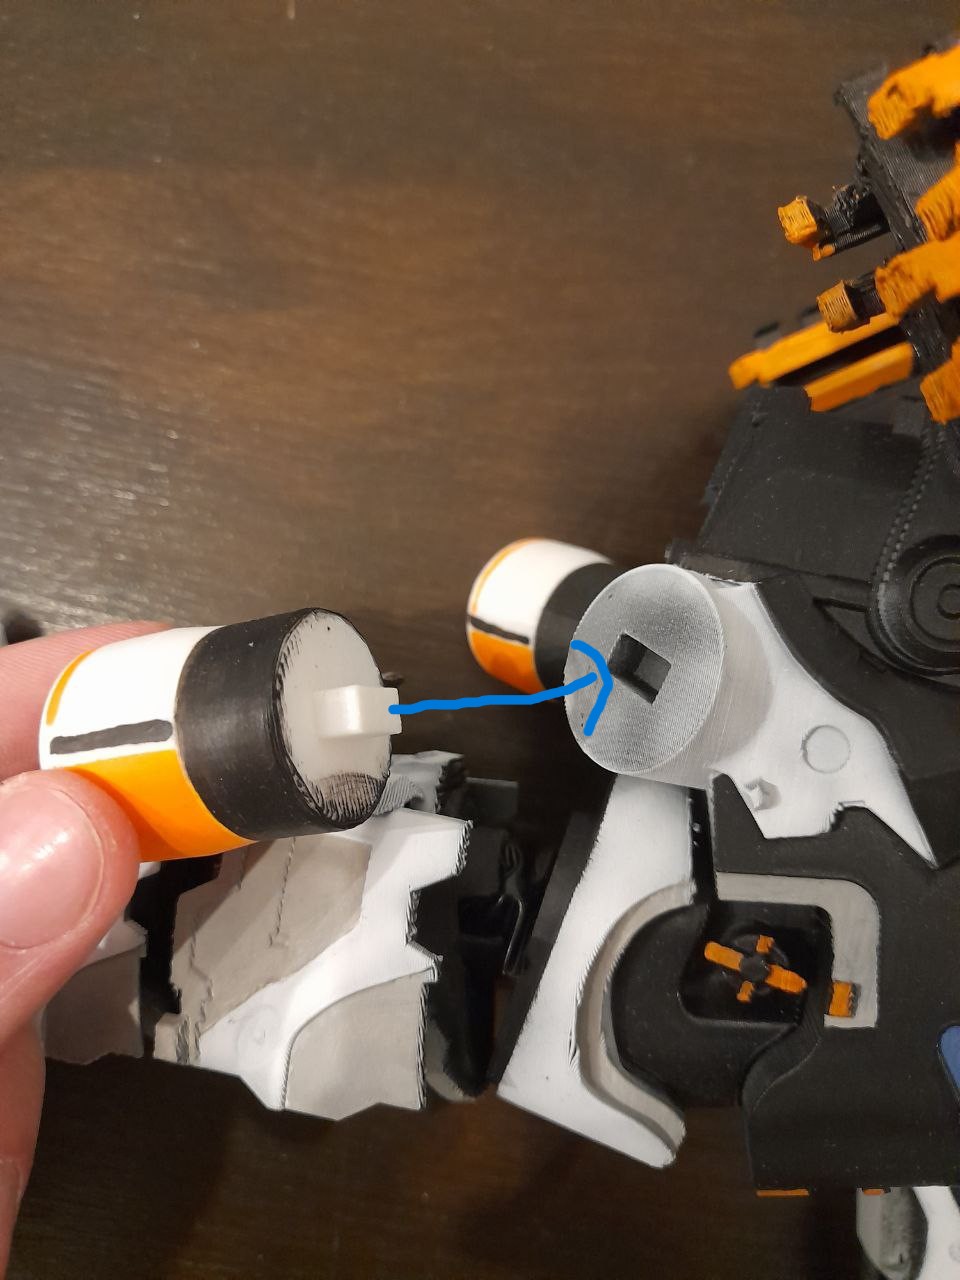
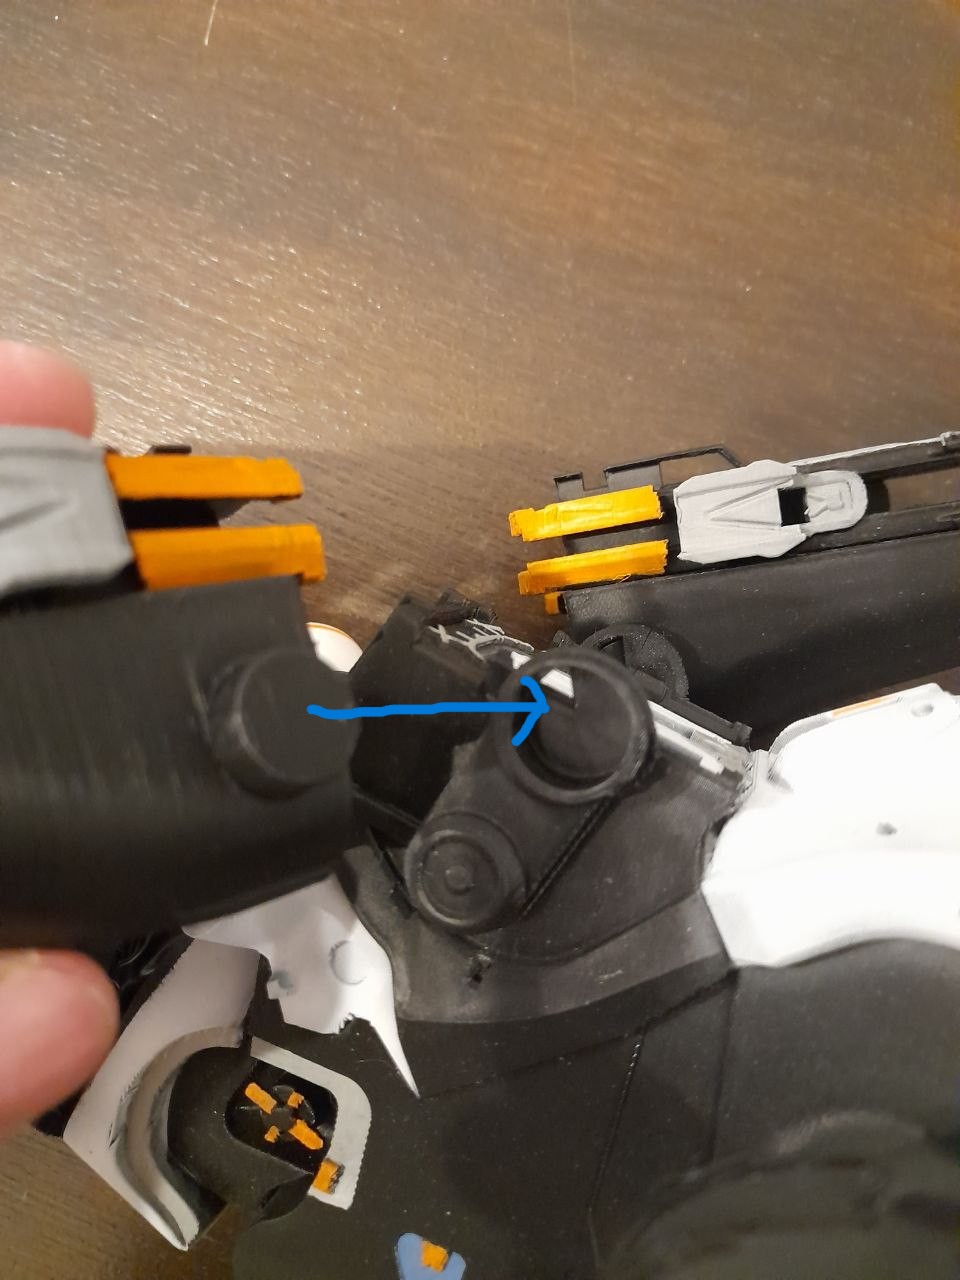
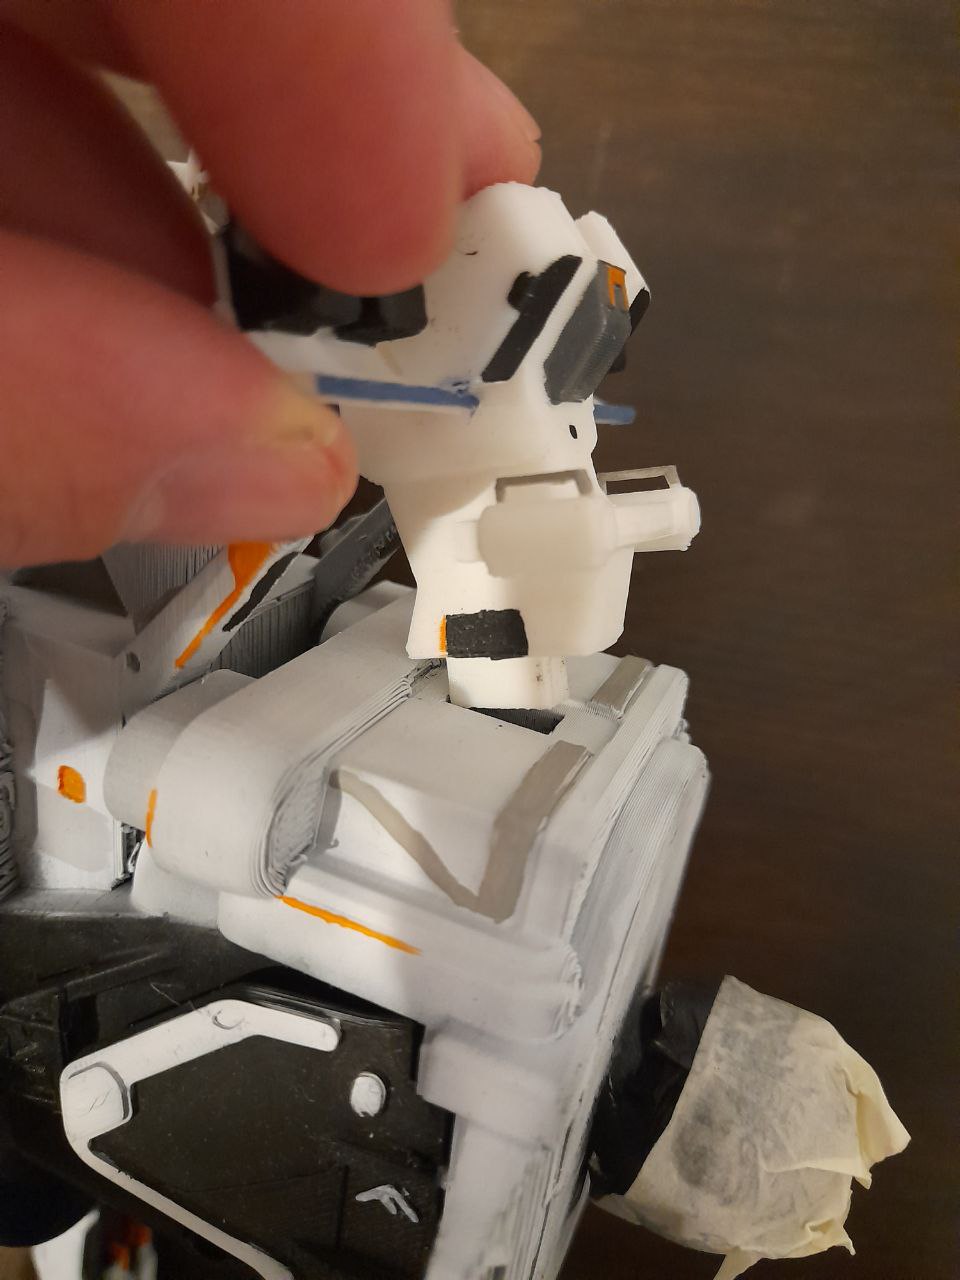
- (PLATE 1 - PLATE 2) Assemble the antennas to the body
- (PLATE 4 - PLATE 2 ) Assemble the tail to the body
- (PLATE 8 - PLATE 3) Assemble the head to the neck
- (PLATE 3 - PLATE 2) Assemble the neck to the body
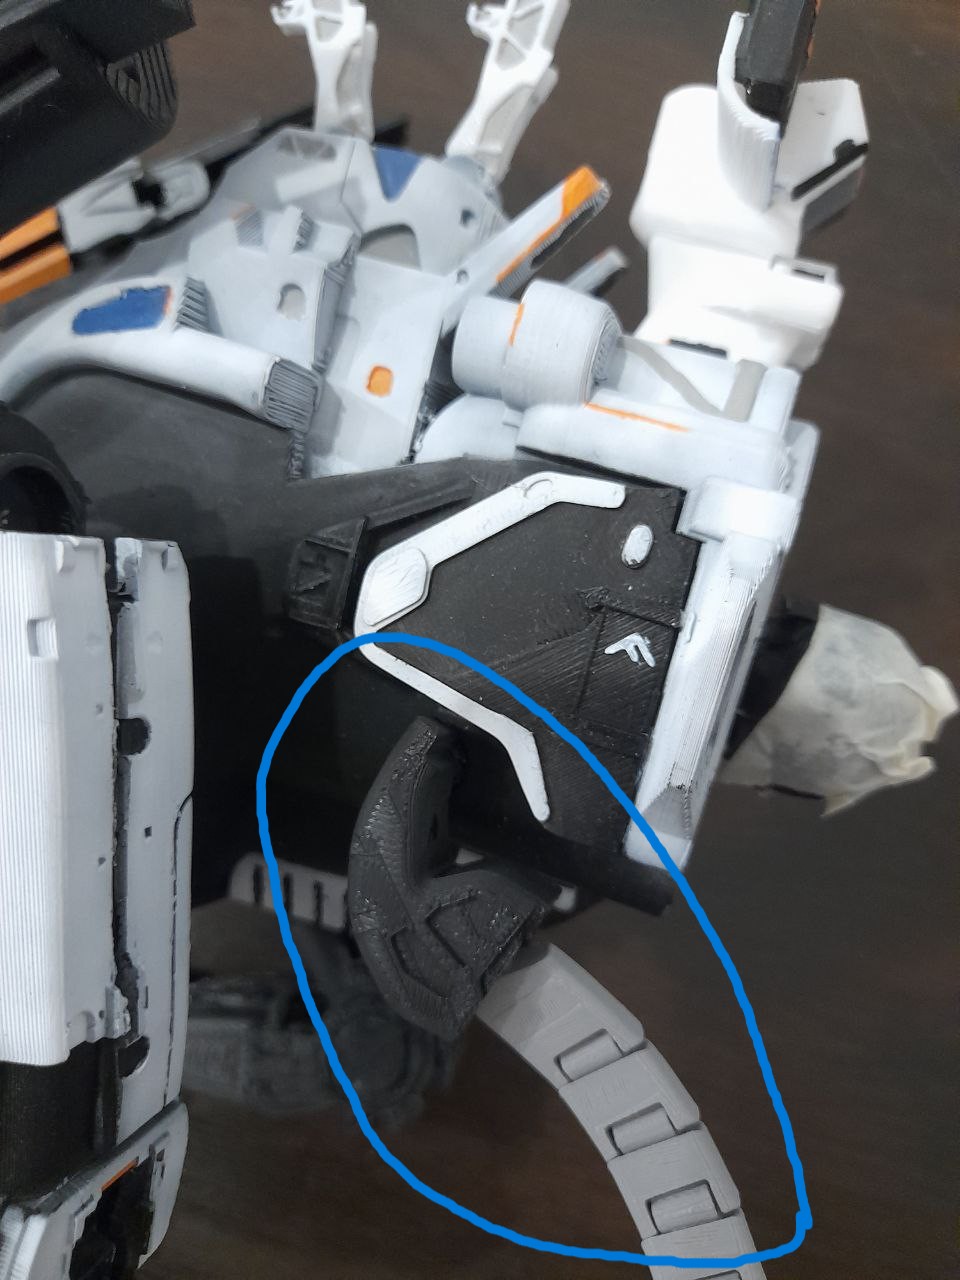
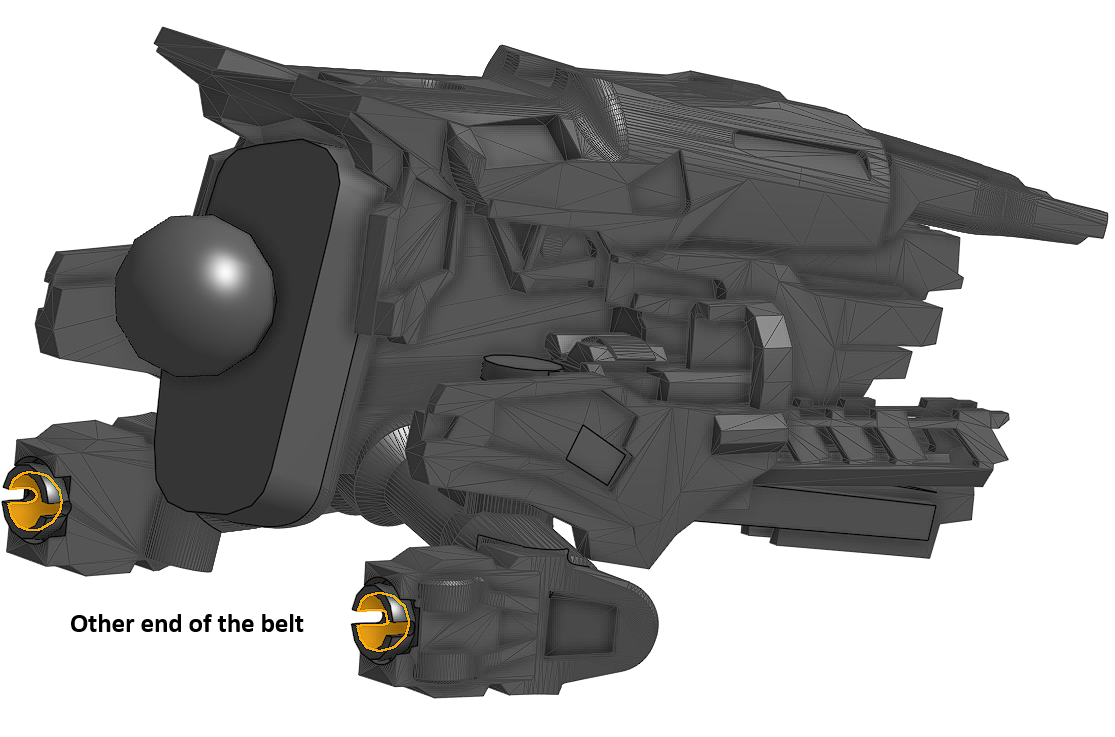
(PLATE 5 - PLATE 2) Assemble the belt to the body, then assemble the other end of the belt on the head
- (PLATE 7 - PLATE 6 - PLATE 2) Assemble the legs on the body
Pose the model then glue the joints
This is a very complex and laborius model to print, build and paint, but i hope you like it!

Gostou deste modelo? Crie uma conta grátis para salvar seus favoritos e voltar a eles depois.
Criar conta