Você está no 3DFinder
Buscamos em Thingiverse, MakerWorld e Printables ao mesmo tempo para te dar o melhor de cada uma.
Descrição
UPDATE 29/04/2026
After user's feedback i introduced:
- YouTube video for assembly (below)
- Bracket to install any AIO
- Changed sheet names to make the print easier
UPDATE 27/03/2026
After some feedback from some user a few modification have been made
- GPU bracket is now stiffer
- A second rear support has been added to make the assembly more sturdy
- PDF assembly guide available (check it!)
- Assembling video on YouTube incoming
UPDATE 15/02/2026
- Improved connection on the back support which was failing some time
- Improved number of walls and fill
- Added a plate (Test coupling) to test if the support is working with your filament
- Base design changed in order to fit more PSUs, also upside down. Added 4 holes for heat insert to attach some risers when needed
The ZioG Frame is here!
I am passionate about PC and 3D printin and i wanted to fit my ATX PC in the Ikea Kallax cube and, believe it or not, there is no ATX option ready to go.
NO PROBLEM!
I designed my own open frame to fit my PC in the Kallax and you know what? I like it! This is why then i went through an iterative optimization until this point. It is not perfect BUT quite ok. And it is also techno viking approved.
Main features:
- good compromise between compact design and aesthetic
- you can hide almost all your cables behind
- the PSU vent gives more support to the mainboard but it is optional
- on top there is a small handle which helps you to move it and to hold some small accessory cable
- the round logo is optional
Requirements
Read carefully!!
- it requires an SFX PSU, a standard one will not fit
- it requires a turning on wired or wireless button (i use a PCI remote)
- once you fit all the M3 heat insert, screw into each one a screw to remove the plastic residuals
Hardware needed
In order to be able to assmble TheFrame you need:
- 8x M3 mobo riser (around 6.5 mm high)
- 15x M3x18
- 3x M3x14
- 3x M3x10
- 34x heat insert M3 (max length 5 mm, a bit less if you use the full cable covers)
Available configuration
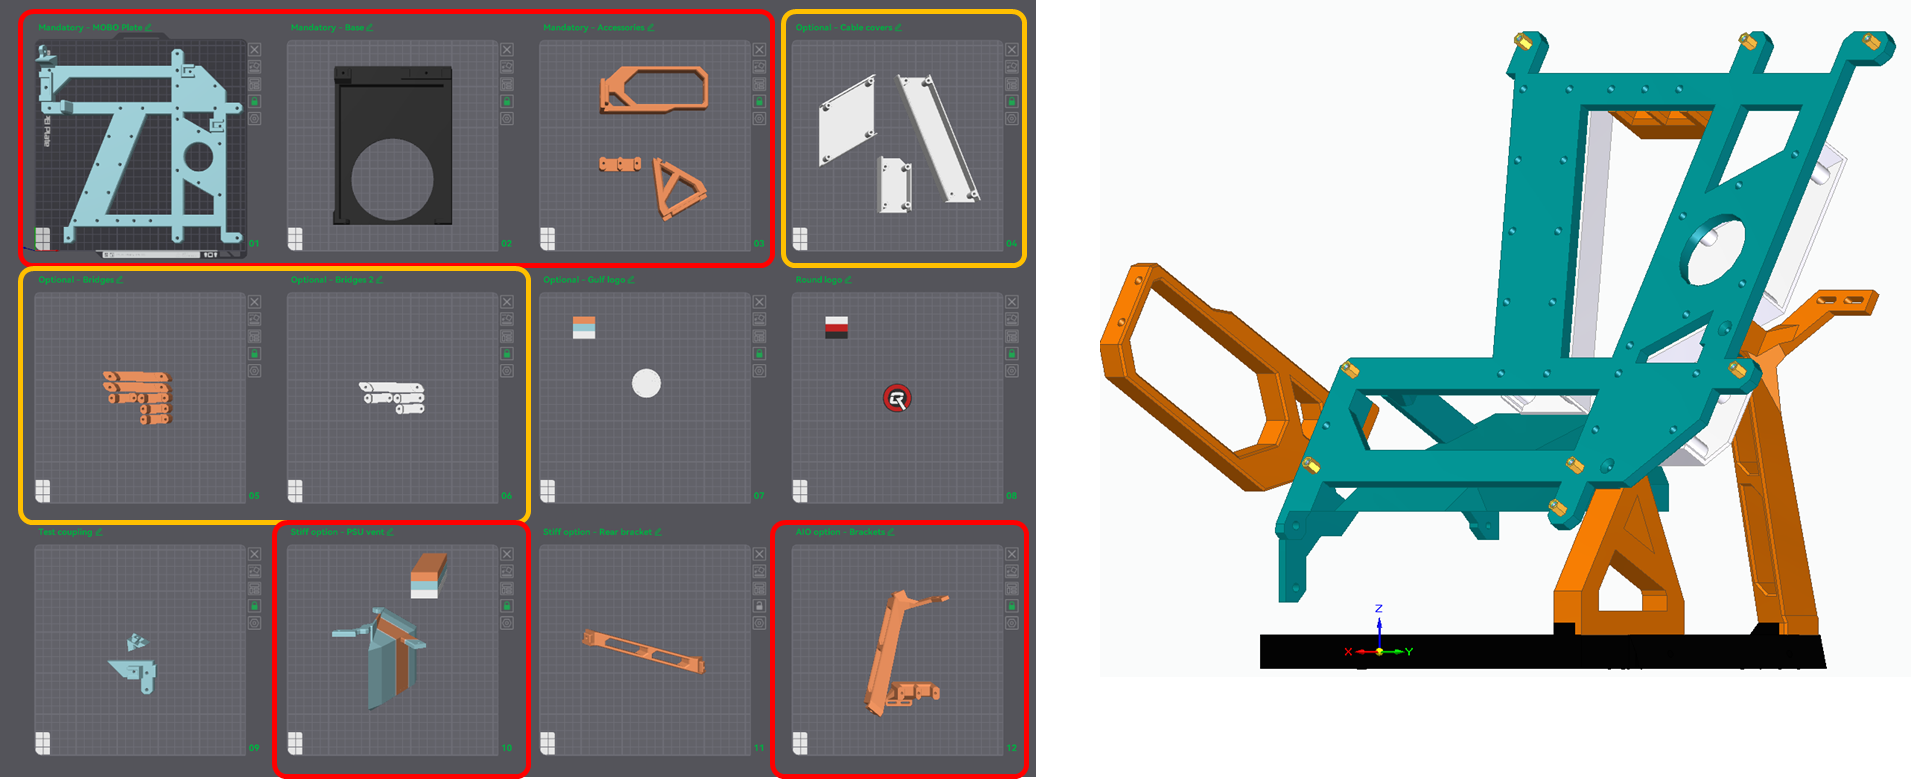
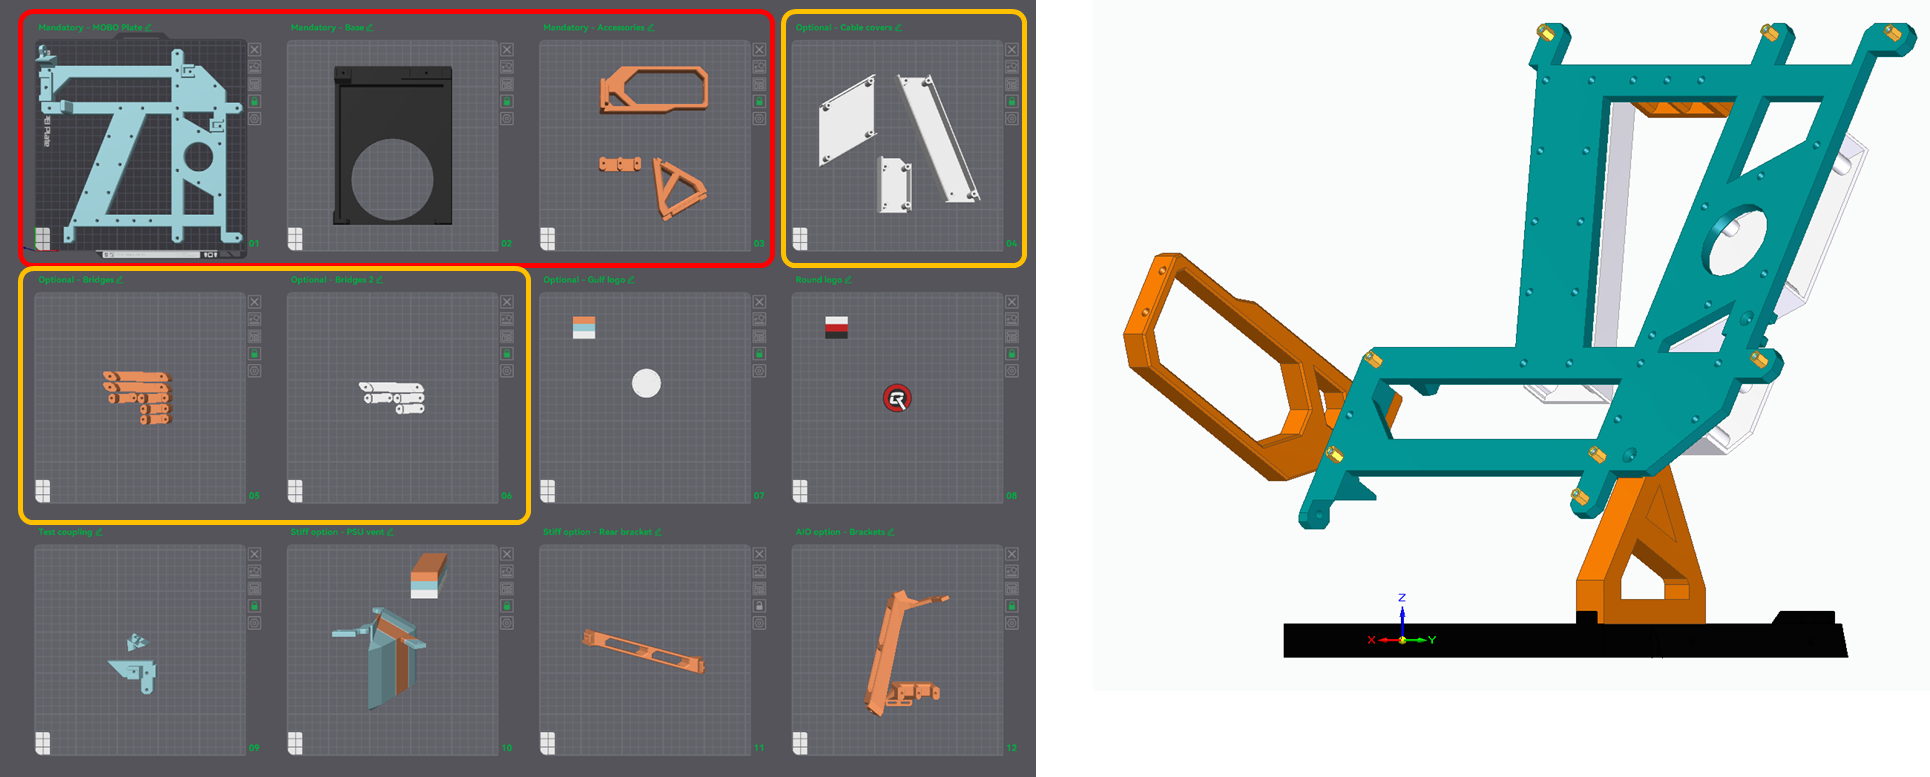
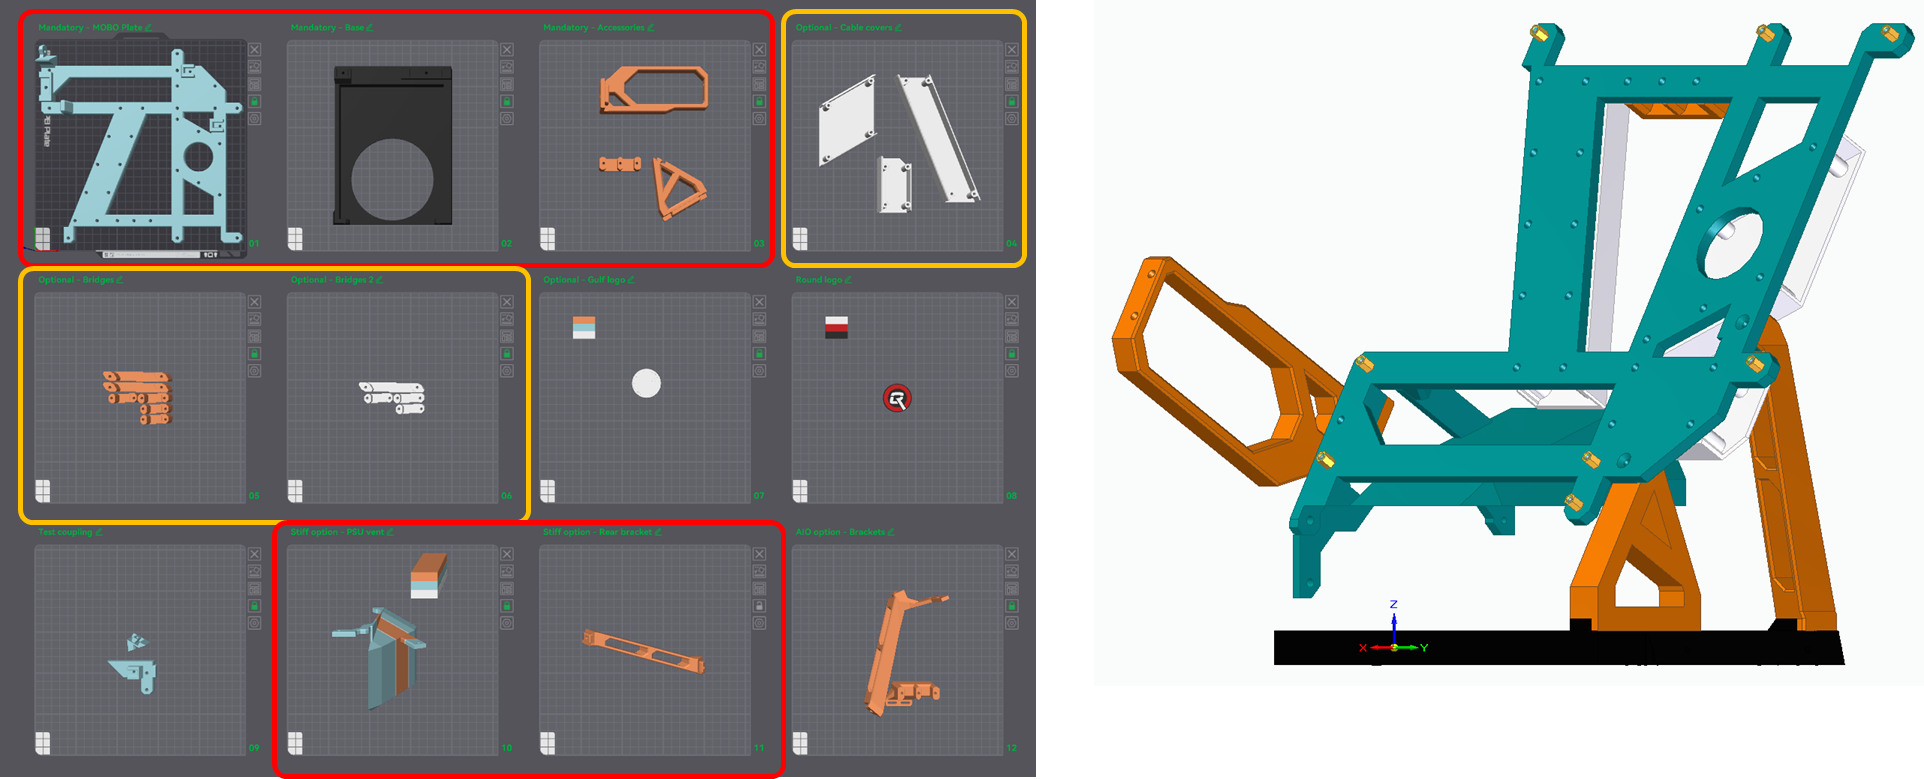
Quick guide on the configurations available (more details in the guide):
BASE configuration, print [01, 02, 03] for the structure plus [04 OR 05 and 06] if you want respectively full cable covers or bridged cable covers:
STIFF configuration, print [01, 02, 03, 10, 11] for the structure plus [04 OR 05 and 06] if you want respectively full cable covers or bridged cable covers:
AIO STIFF configuration, print [01, 02, 03, 10, 12] for the structure plus [04 OR 05 and 06] if you want respectively full cable covers or bridged cable covers: