Você está no 3DFinder
Buscamos em Thingiverse, MakerWorld e Printables ao mesmo tempo para te dar o melhor de cada uma.
Descrição
🛠️ AMS riser with triple drawer storage 🛠️
This AMS riser is designed specifically to be printed on Bambu Lab H series printers and provides a clean, functional way to raise your AMS while adding three built-in storage drawers underneath. It’s ideal for keeping tools, spare parts and frequently used accessories close at hand, without taking up extra desk space.
This is a print-and-assemble project and is sized exclusively for the H series range. Due to the overall footprint of the parts, it will not fit or print correctly on non-H series printers.
Included with the main profile are the standard empty drawers.
Additional optional drawer variants are available as separate print profiles, including:
- H series tools and spare parts tray
- Hot end tool tray (holds up to 12 standard hot ends or 6 pairs of H2D, H2S and H2C hot ends – left side only for now)
- Cutting module tray
More drawer options are planned for future releases.
Assembly is straightforward and uses commonly available BT3x16 and BT3x8 self-tapping screws, all listed with links in the Bill of Materials to purchase directly from Bambu.
·····
🔥 Tips before you start
Having a clean print bed and hot end(s) free from filament is essential in getting that crisp, clean look. Here's some tips on what to do to get the best print possible;
🧼 Cleaning
Clean your plate first, following your usual routine. Dish soap works best, clean and then rinse thoroughly, ensure the plate is dry and free of debris before putting back in the printer.
Leftover filament residue on your hot end can cause unwanted colour streaks. Please inspect your hot end before starting the print, if you spot any clumps or leftover filament, follow Bambu's recommended cleaning guide to remove.
👀 Watch the first layers
Even with the best pre-printing cleaning routine, filament can sometimes surprise you and some small strands can sometimes get dragged into areas they shouldn’t be. I always recommend watching the first couple of layers go down.
·····
🖨️ Printing setup
This model is supplied as fully tuned 3MF print profiles and is intended to be printed exactly as provided.
- Compatible printers: H2D, H2S, H2C only
- Build plate: Any
- Material: PLA
- Colours: Your choice! I've gone for black and contrasting drawers, I can imagine Bambu green being a popular choice for the drawers.
- Nozzle: 0.4 mm
The riser body and drawers are arranged across multiple plates. Do not resize or re-orient the parts, as tolerances and alignment are critical for correct assembly and drawer movement.
Plate 1: Left and middle bottom plate parts and joining connectors (x8 - 4 for the top, 4 for the bottom)
Plate 2: Right bottom plate part and the riser sections, left, right and back centre part.
Plate 3: Top right and middle plate parts
Plate 4: Top left middle plate part
Plate 5: Three empty drawers.
If you only plan on using one empty drawer, you can skip printing the other two, or remove them from the plate in Bambu Studio before printing.
Additional print profiles for different drawer options, including at time of posting, cutting module, hot ends and tools / spare parts tray. Print these as appropriate to your requirements.
·····
🏗️ Assembly
What you will need
- BT3x16 self-tapping screws x2 sets (You could also use BT3x14, or even BT3x12 if this is what you have available).
- BT3x8 self-tapping screws (You could also use BT3x6 if this is what you have available)
- 2mm hex key / Allen key
- Printed riser parts and drawers
All fasteners are listed with direct links in the Bill of Materials for convenience.
Assembly steps
Assemble the top and bottom of the riser first, you will need a left, middle and right part, 4 connector pieces and 8x BT3x8 self tapping screws.
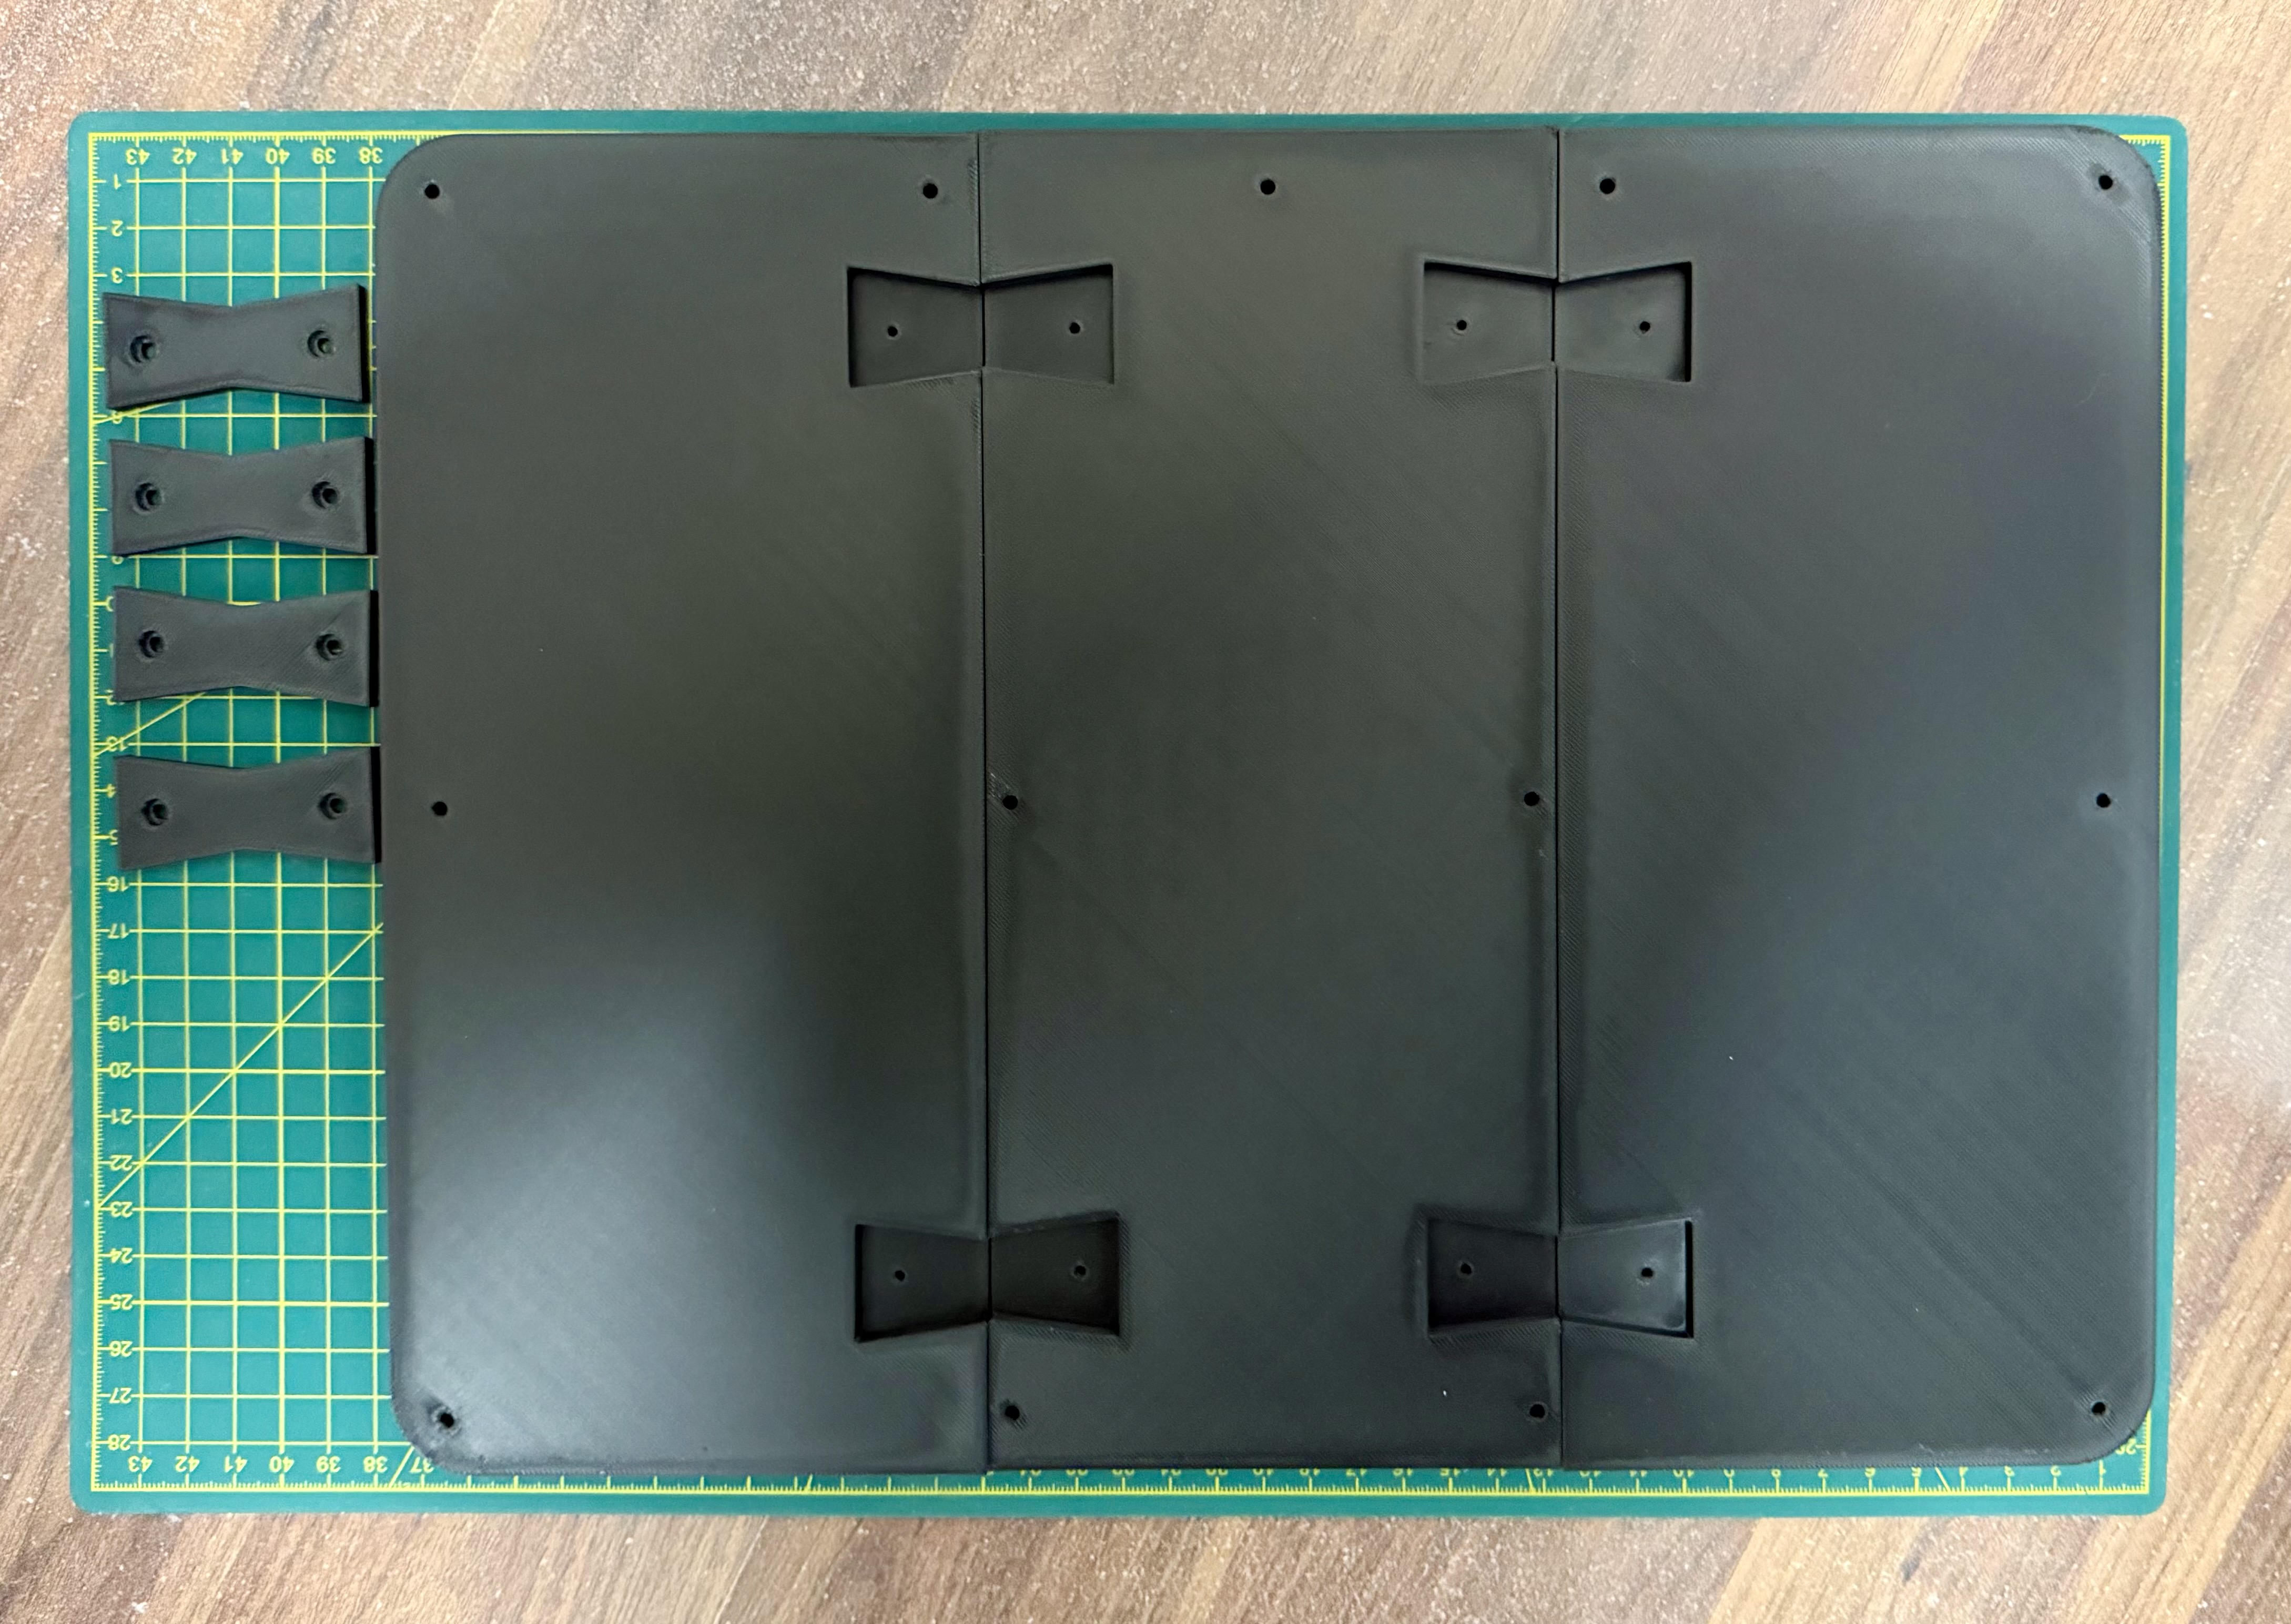
Insert the connector pieces to join the left and right plates to the centre section. Do this on a flat surface.
The connectors are a tight fit by design. Before pressing them in, make sure the larger screw hole is facing upwards, as this determines the correct orientation.
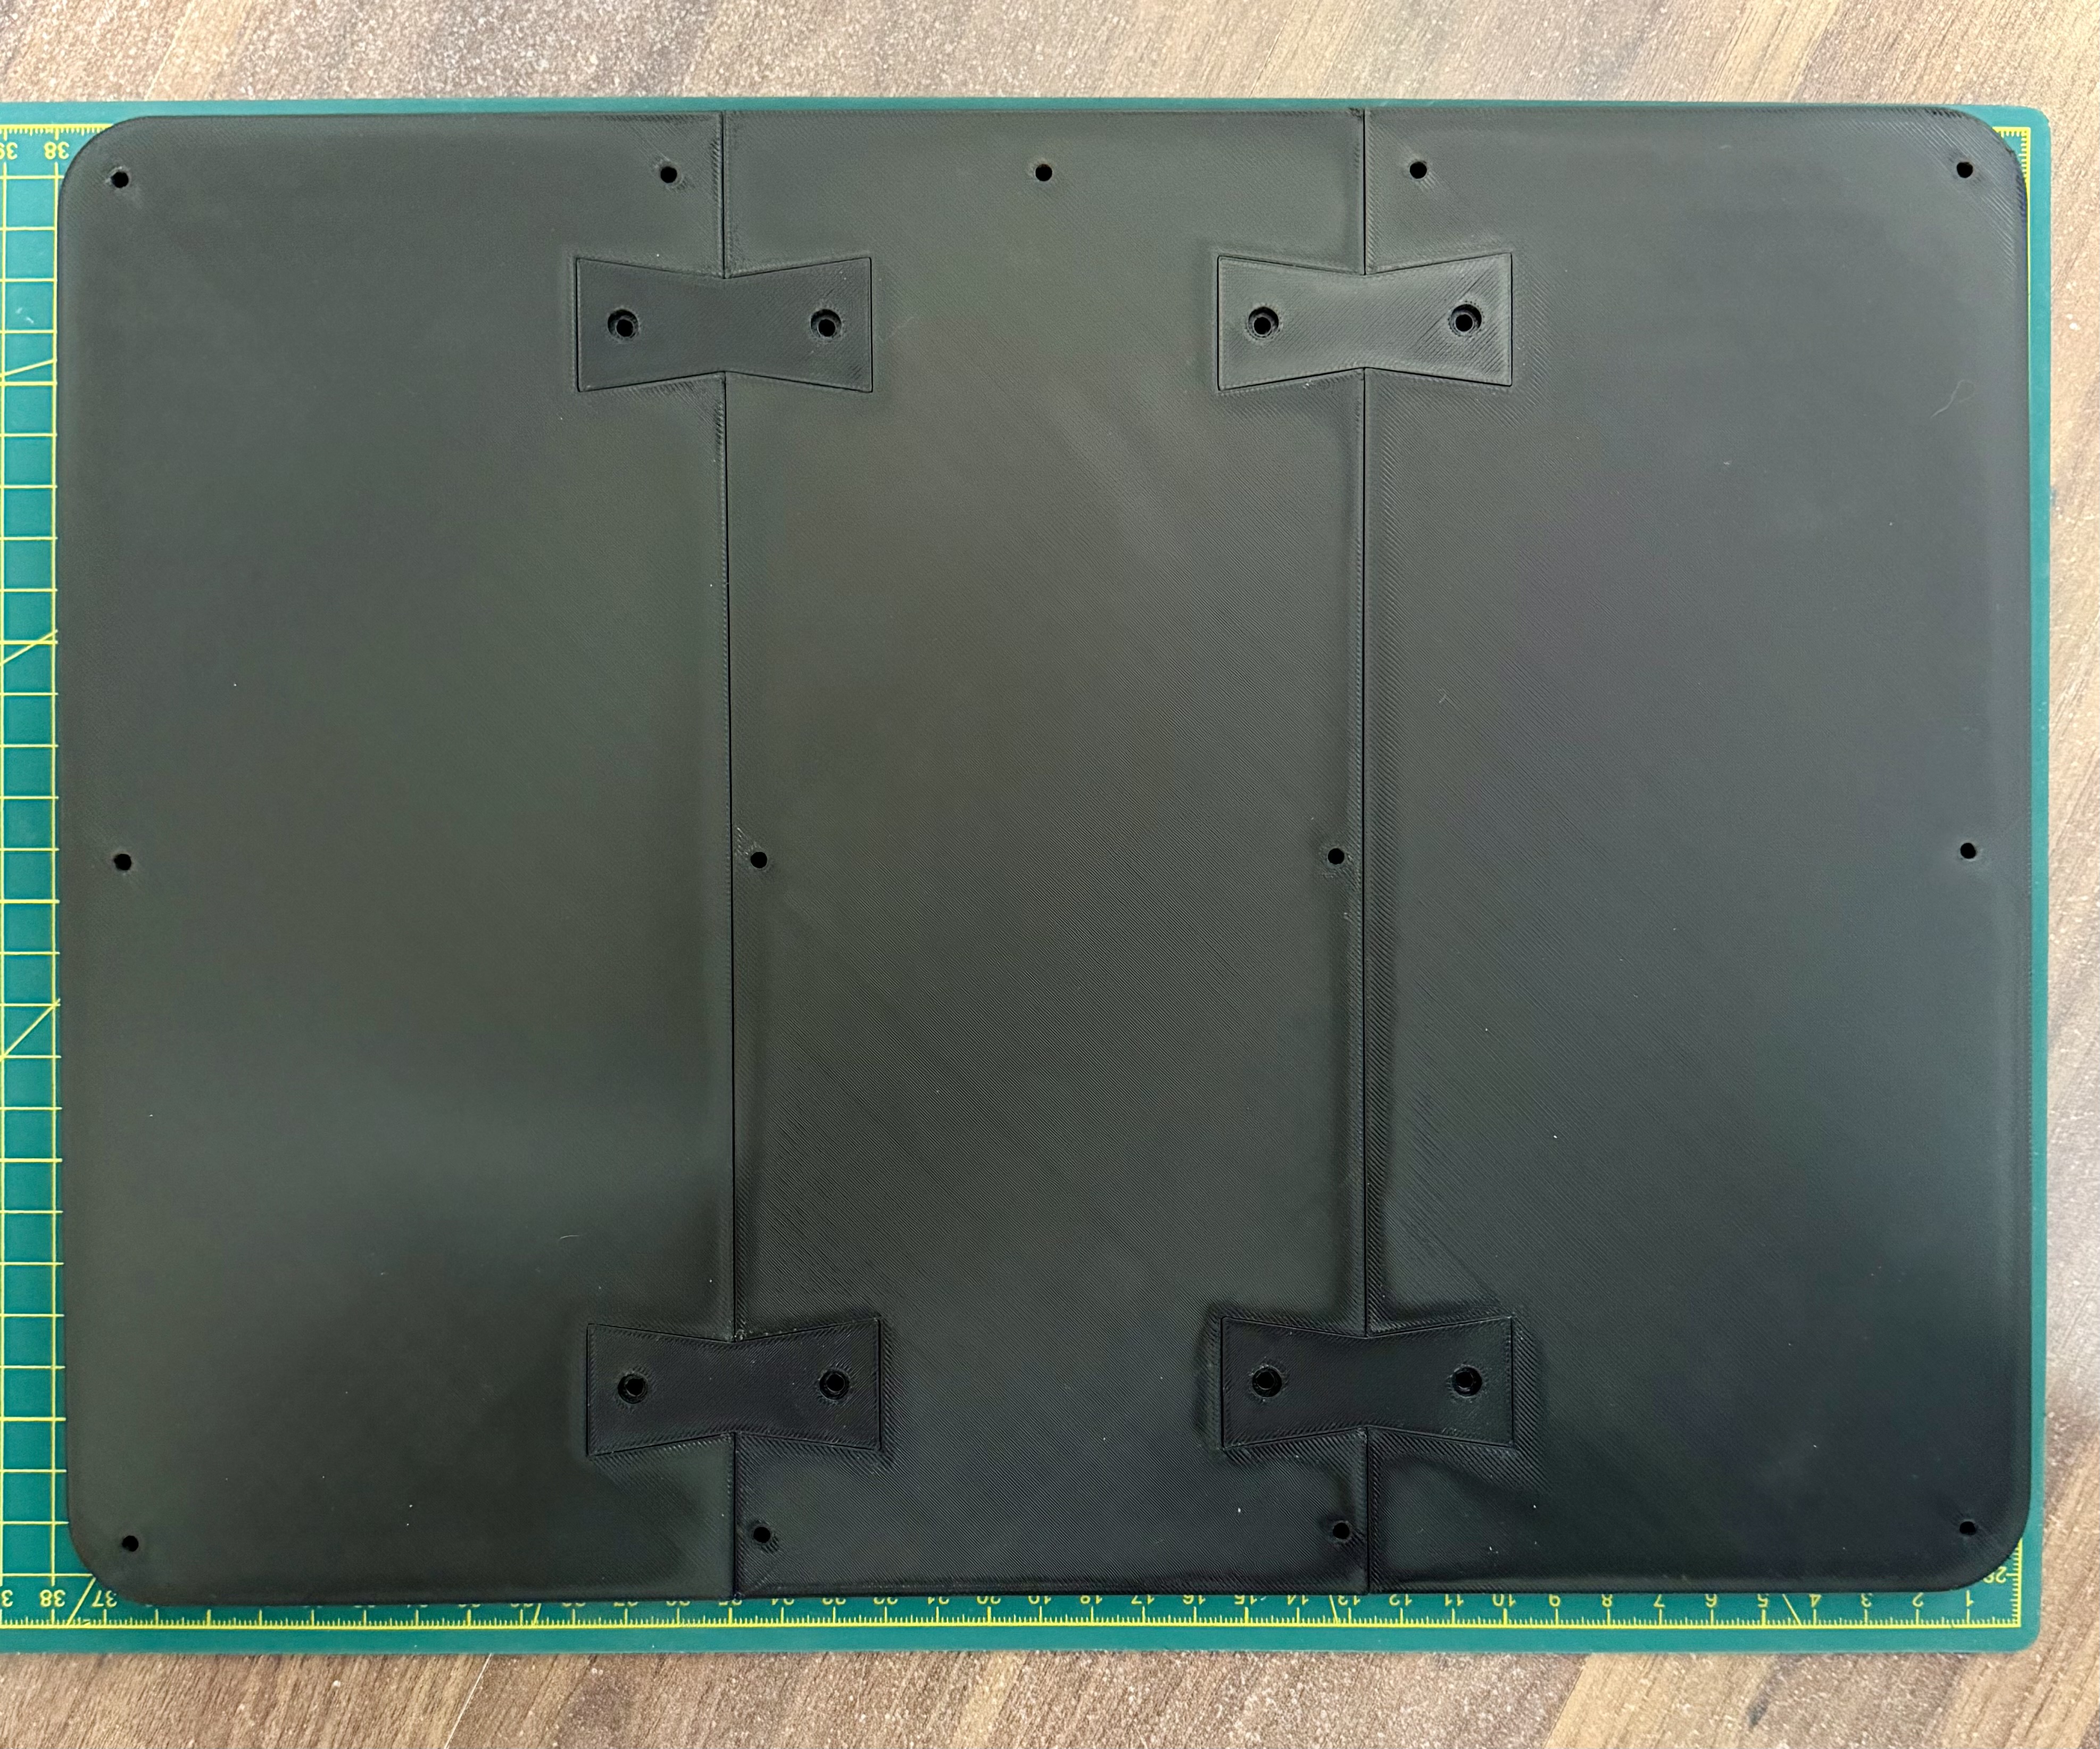
Once the connectors are pushed in flush, screw these in place using the 8 of the BT3x8 screws. Do not use any longer than this, or they will come through the bottom and won't give you a stable base. At a push, you could also use BT3x6 if this is what you have in stock.
Repeat this process again, to give us a top and bottom piece.
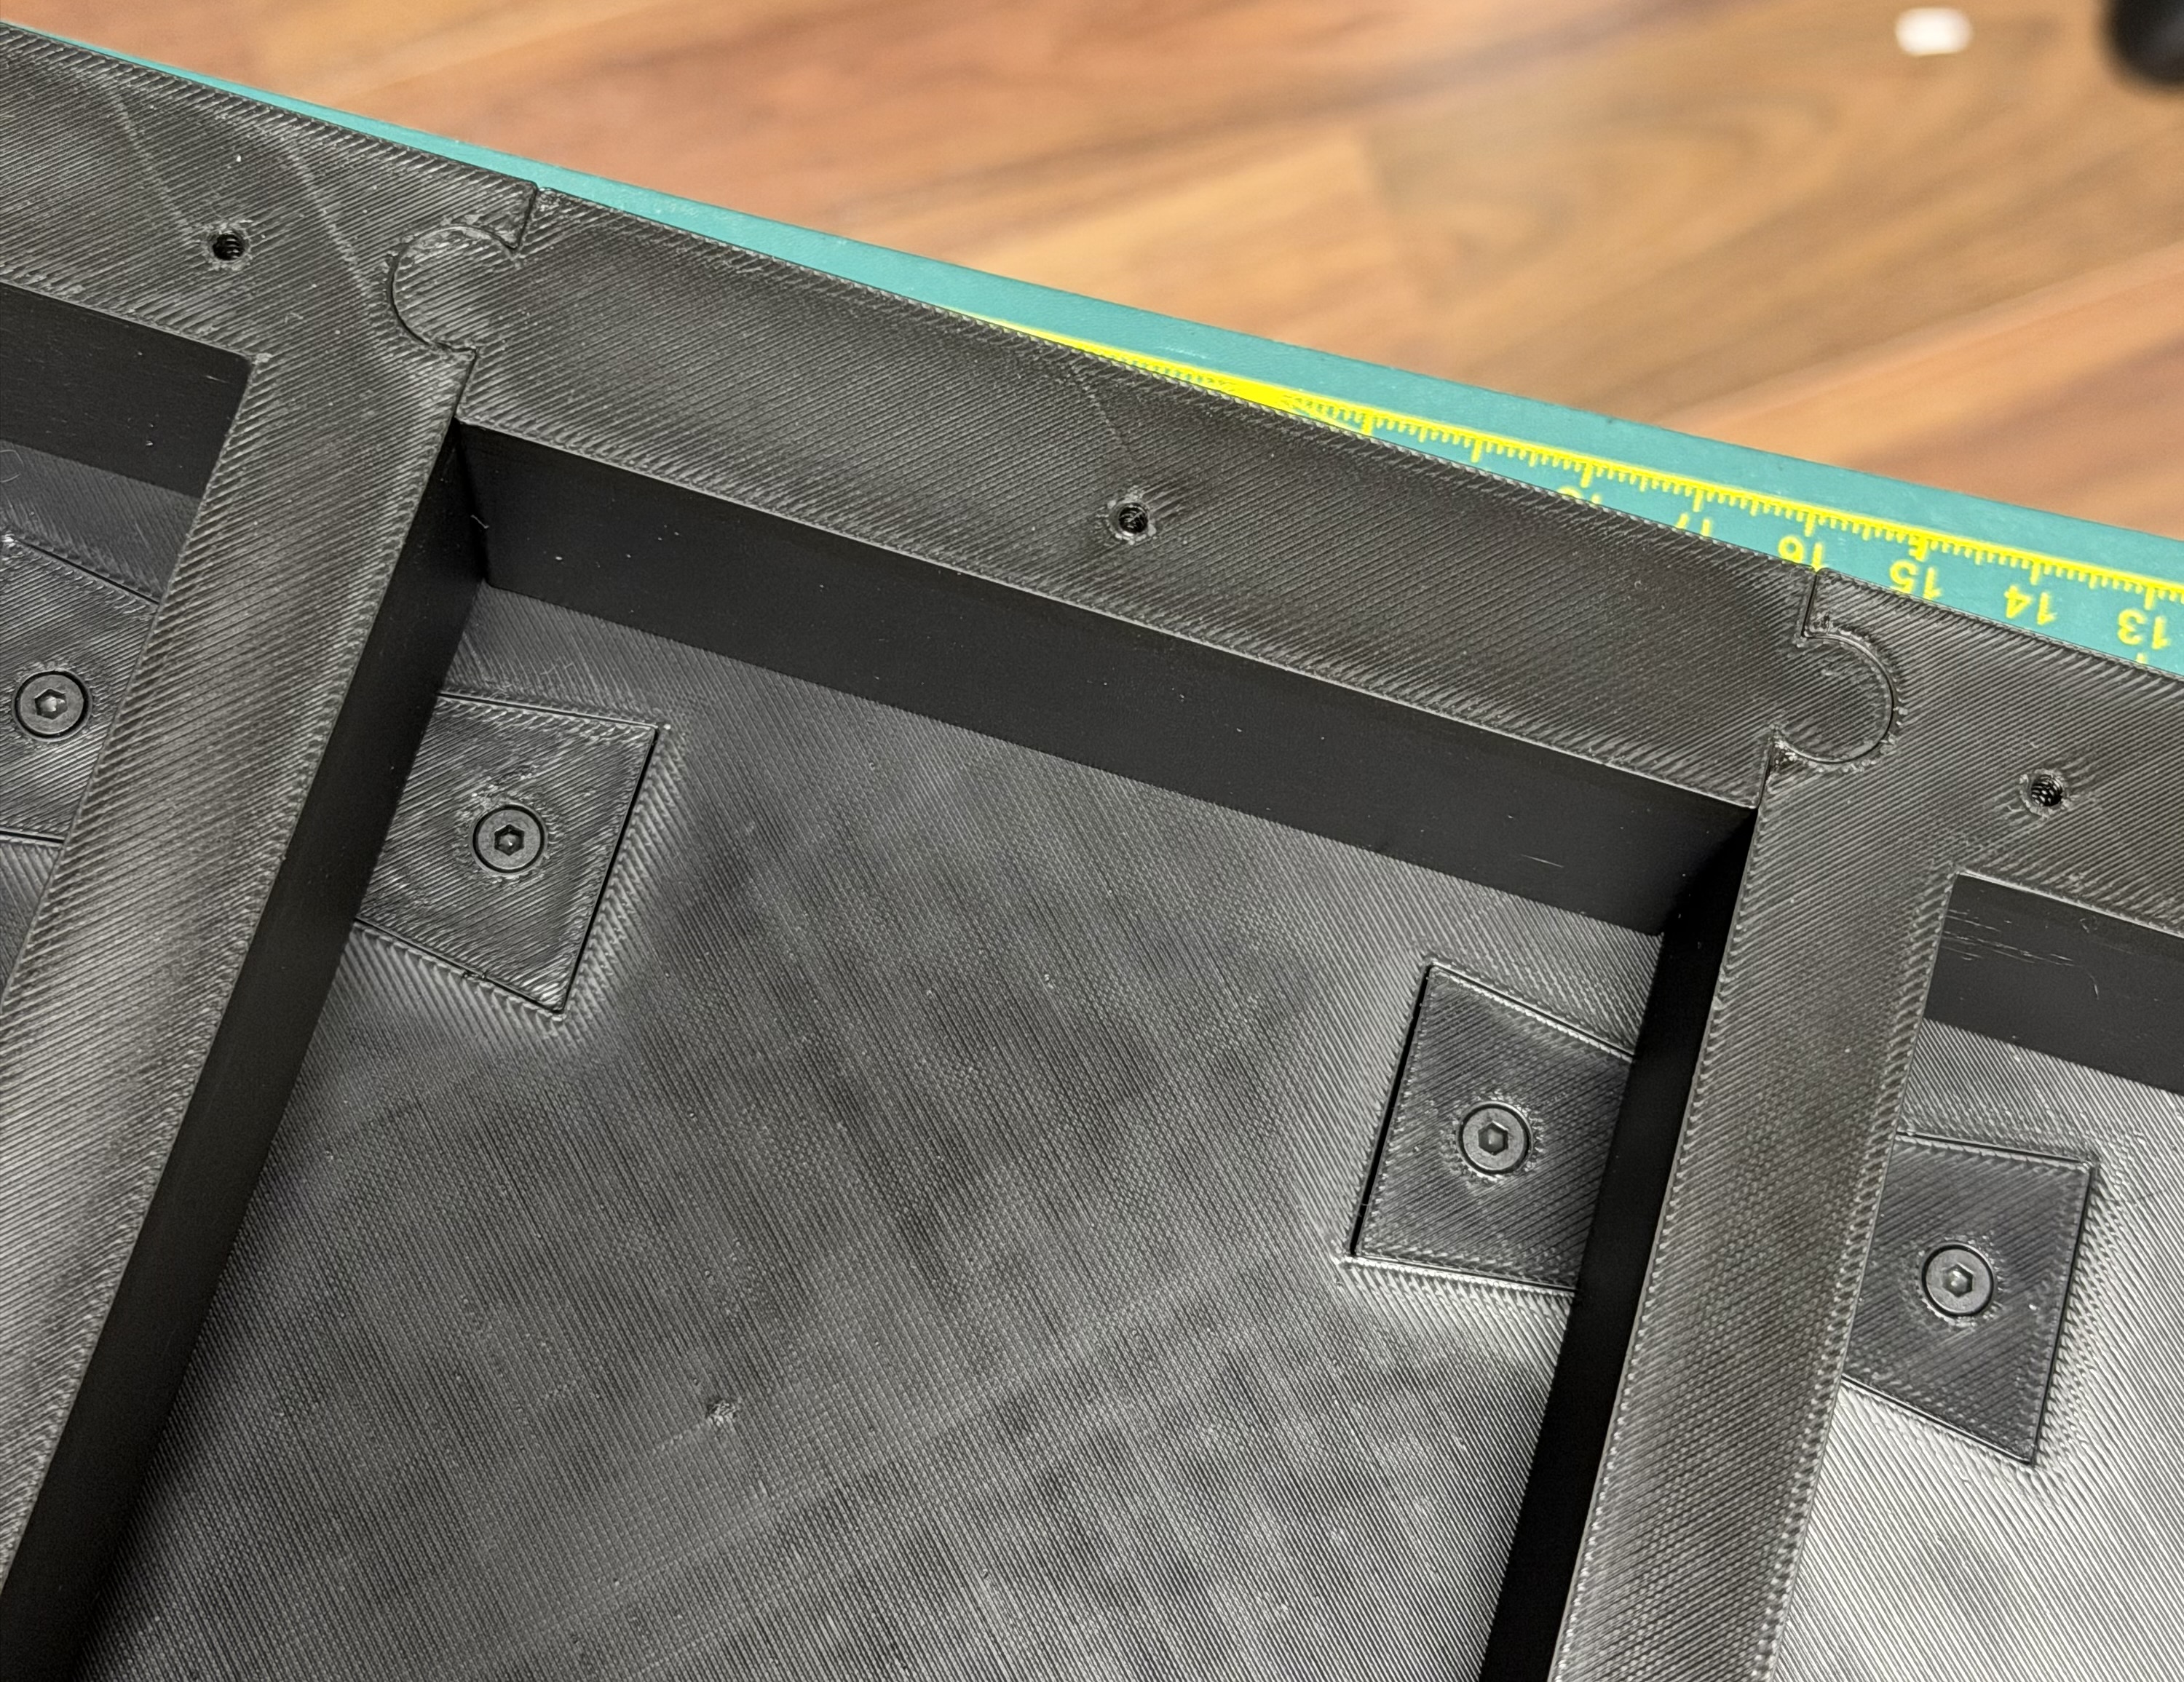
Next, assemble the centre section. Before attaching it to the top or bottom plate, insert the small rear centre piece (from Plate 2) into the left and right assemblies.
This joint is intentionally tight. If needed, place the parts on a flat surface and press down evenly until they seat fully together., it willd then connect like so:
With the three pieces connected, we need to attach the centre piece to one of the top / bottom pieces (they are the same orientation, so doesn't matter which one you choose).
Before trying to thread screws through the top of bottom sections, I'd advise making sure the screw holes are clean, as they can sometimes need some work, having been printed with no supports.
When positioning the centre section, line up the rear middle screw hole with the corresponding hole in the top or bottom plate.
There is no screw hole at the front of the drawer section, which makes it easy to confirm the correct orientation
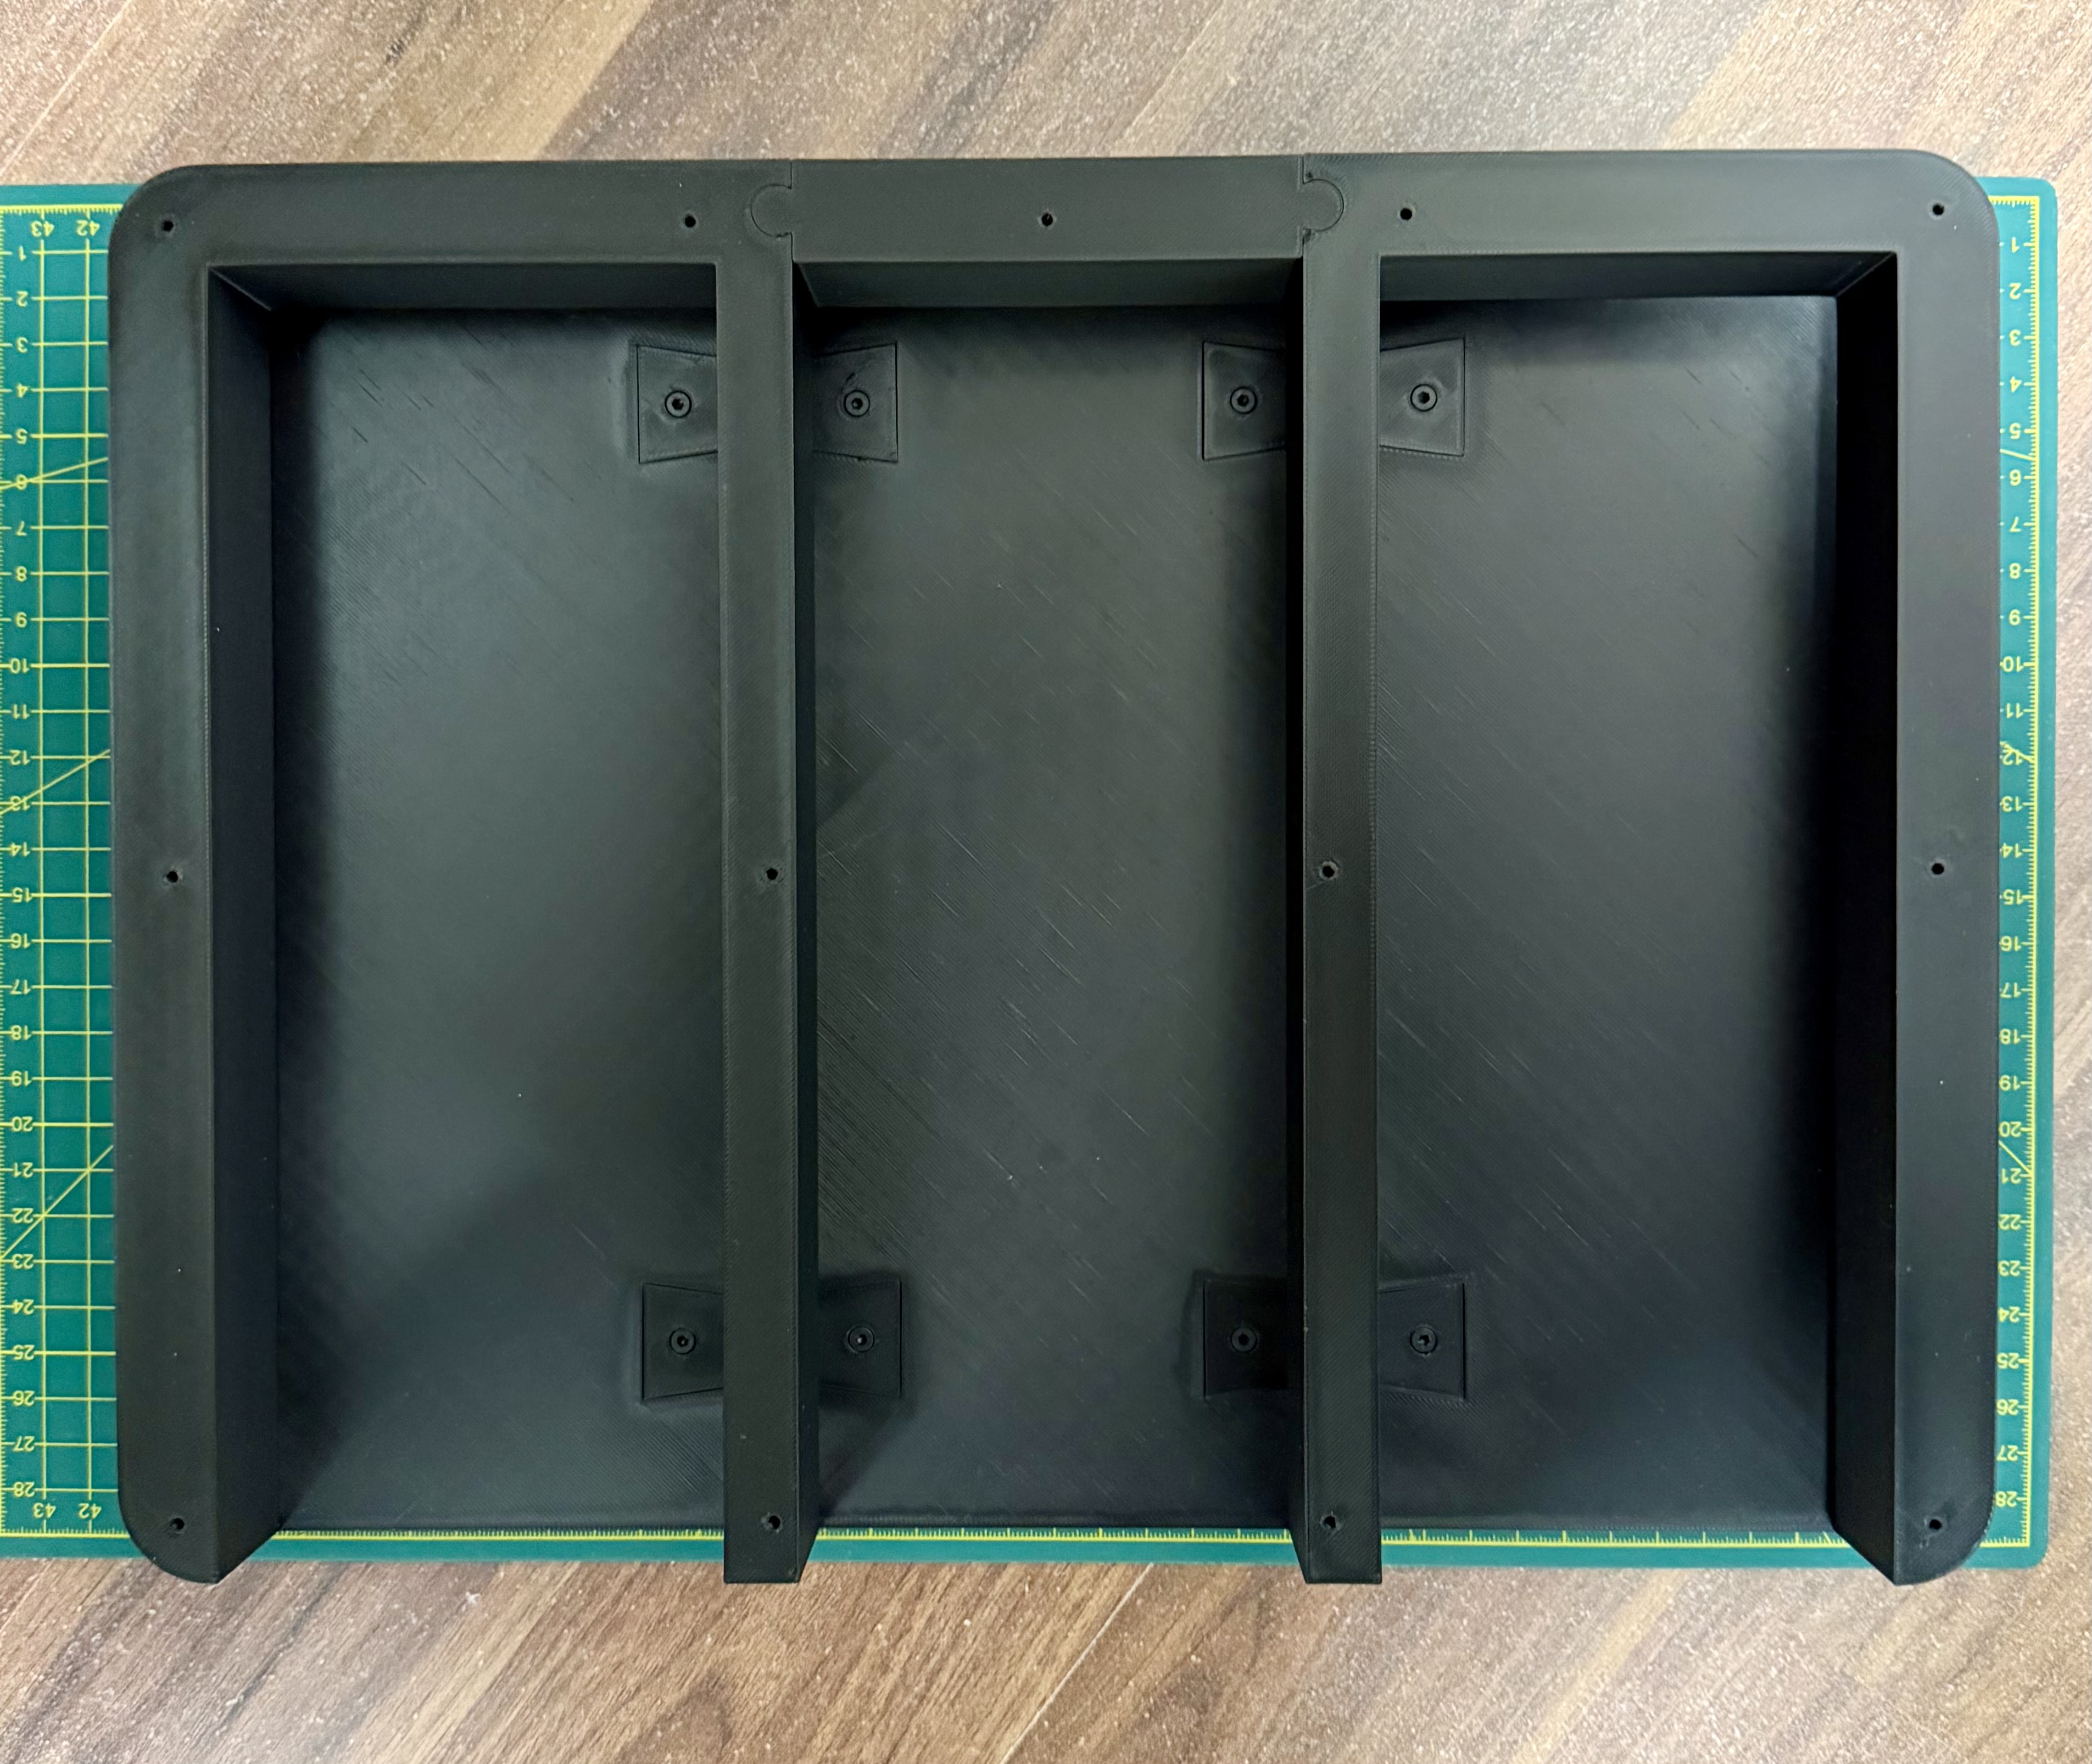
Using the BT3x16 screws, now screw the bottom piece in place.
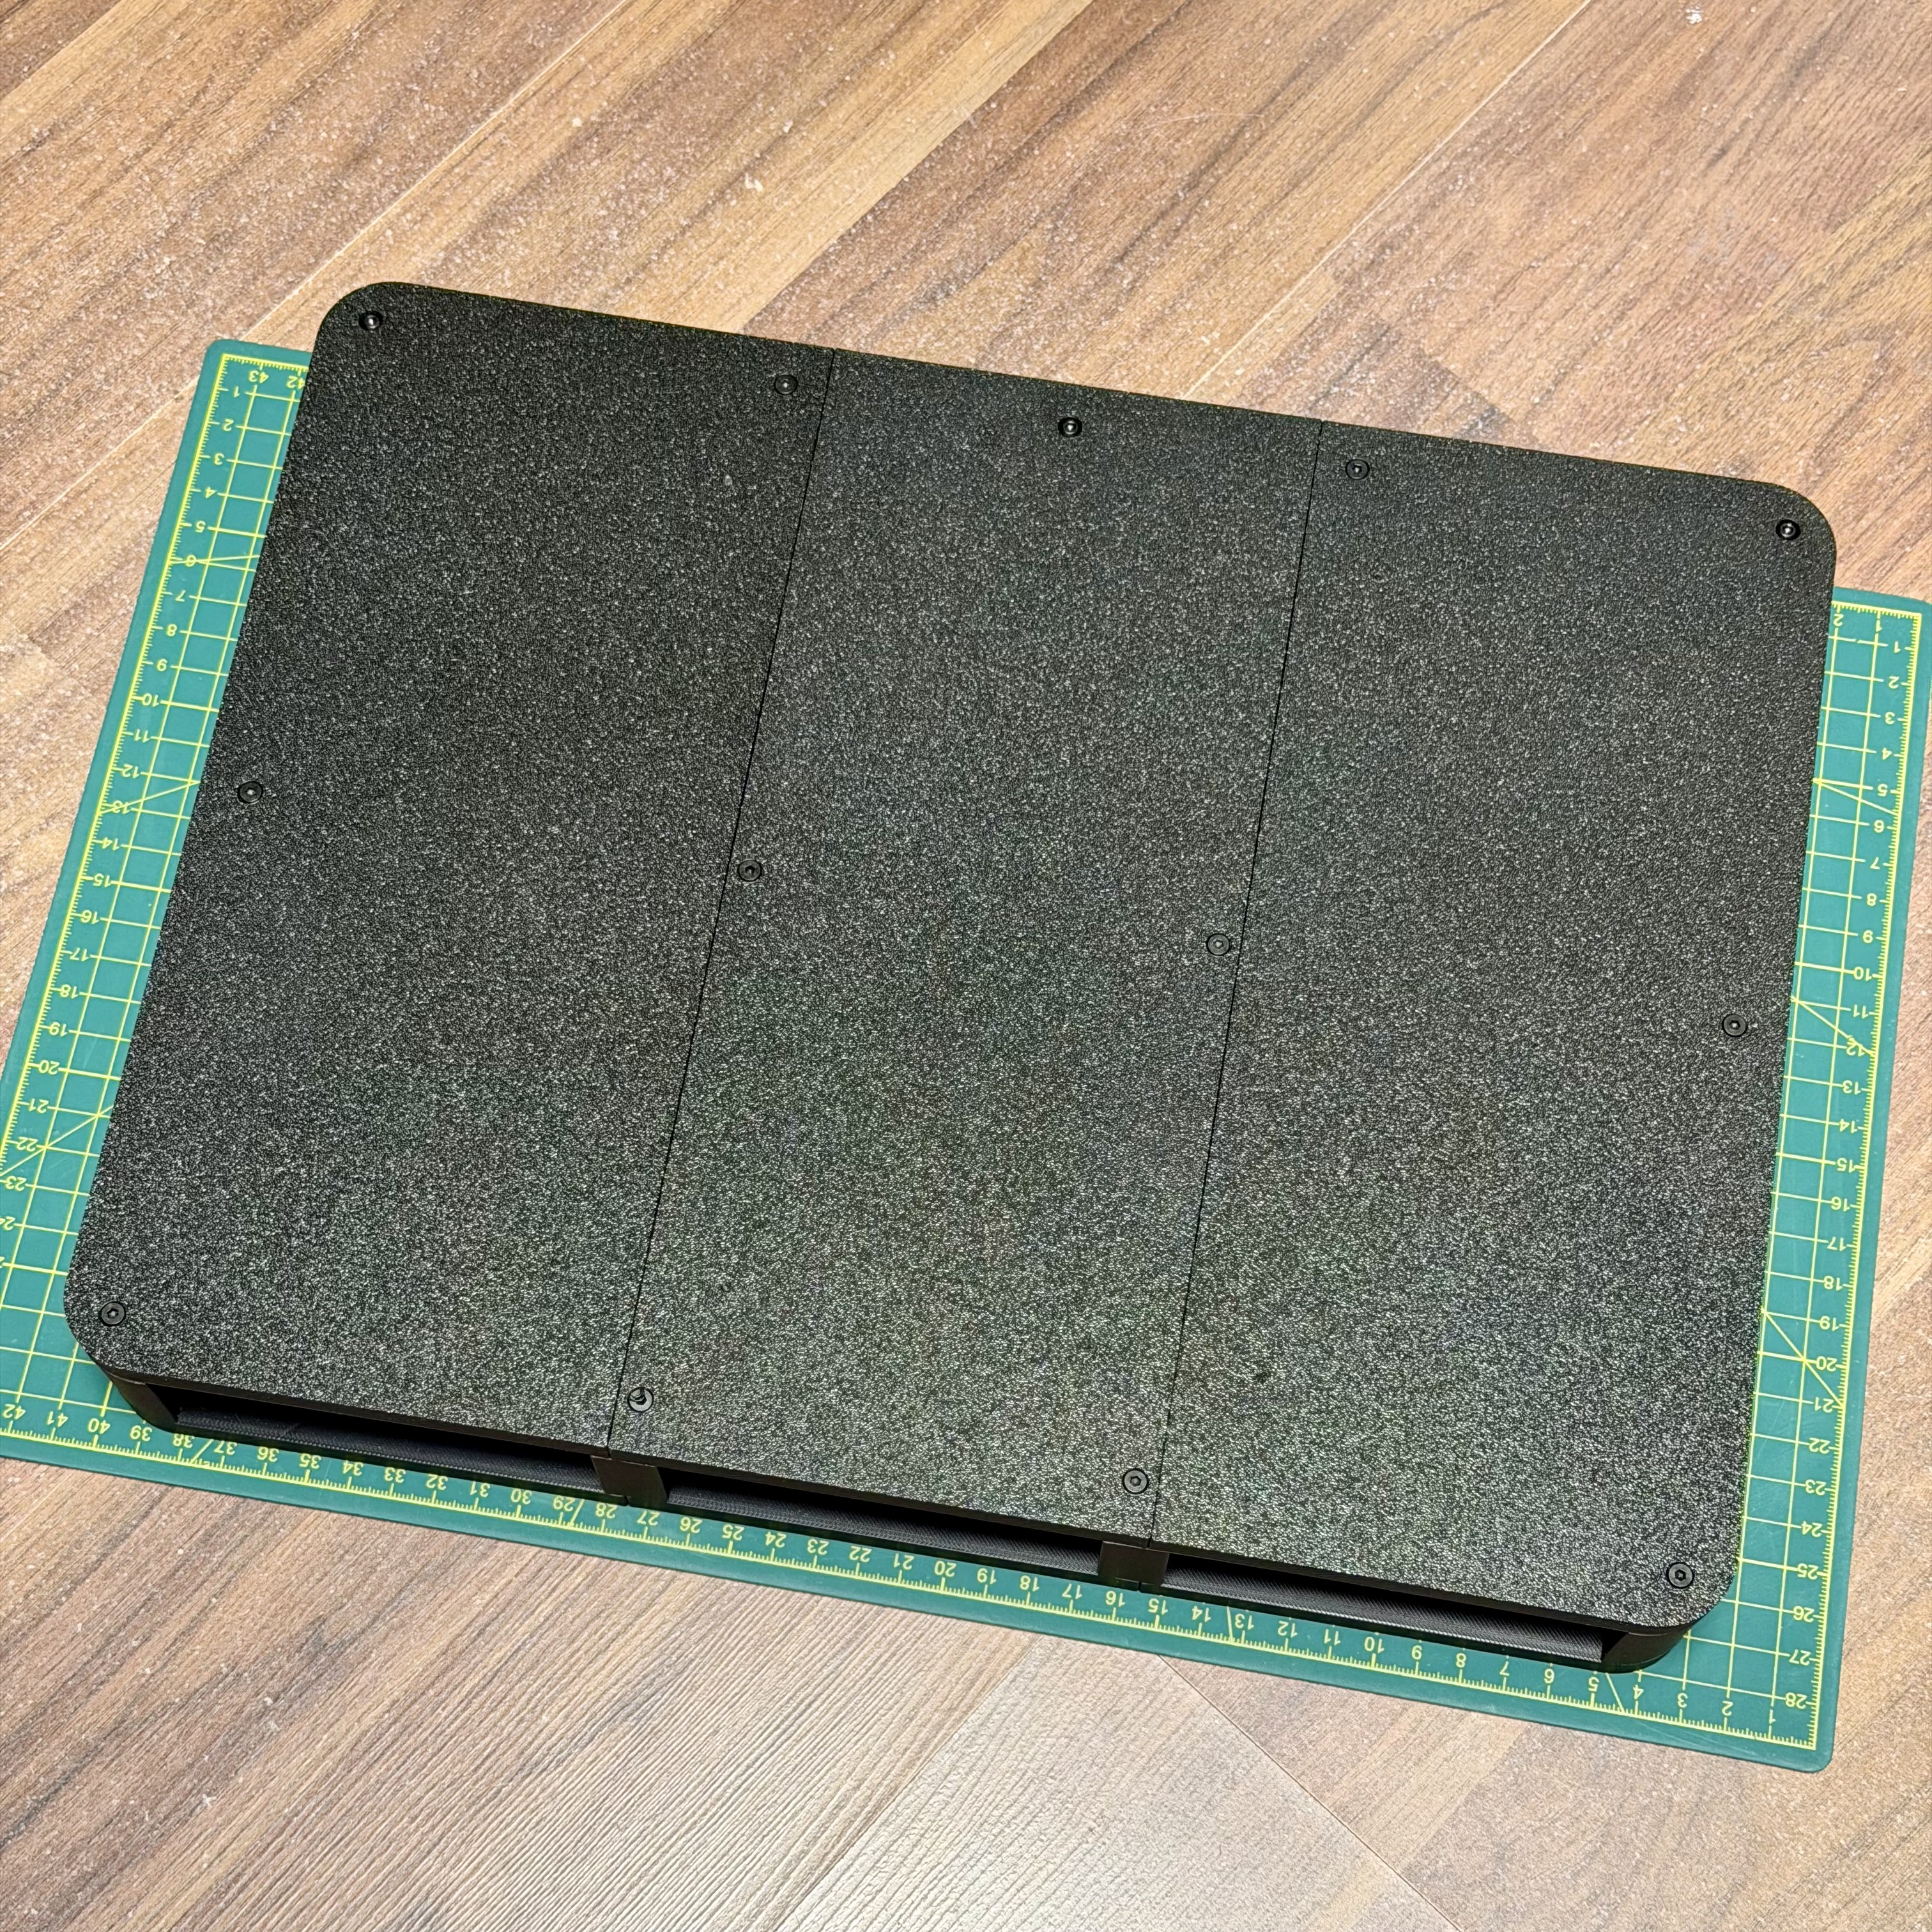
Once done, now screw the top part in place and the base unit is complete. The drawers now simply slide in place.
Once complete, slide the drawers into place.
Position your AMS on top, load up the drawers and enjoy the extra organised storage space.
·····
🧰 Troubleshooting
Model Doesn’t Match Preview / Odd Layout
If your model looks misaligned, missing colours, or prints incorrectly, please make sure you are using the supplied 3MF print profiles, not the raw STL or STEP files.
The 3MF files contain all the model specific tuning, including:
- Correct object positioning
- Print specific adjustments
To use them properly:
- Either click “Open in Bambu Studio” directly from MakerWorld,
- Or download the .3MF file and open it manually in Bambu Studio.
Avoid using the raw STL or STEP files unless you specifically want to rebuild your own profiles, they do not include the tuned print settings.
·····
⚠️ Copyright / Safety / Final notes
This model is intended for personal use. Ensure all fasteners are properly seated before placing your AMS on top of the riser.
Thanks for printing, and keep an eye out for future drawer expansions and updates.
AMS riser with triple drawer storage system
Publicado em 22 de jan de 2026
Gostou deste modelo? Crie uma conta grátis para salvar seus favoritos e voltar a eles depois.
Criar conta