Você está no 3DFinder
Buscamos em Thingiverse, MakerWorld e Printables ao mesmo tempo para te dar o melhor de cada uma.
Descrição
To keep the back of the P2S/X2D neat and organized, I designed this cable management accessory. It effectively fulfills its purpose without requiring any additional parts. Give this clean and simple design a try! 👀
( hi, I am challenging to create 100 practical models. Follow me to get update reminders. )
🧲 Installation steps:
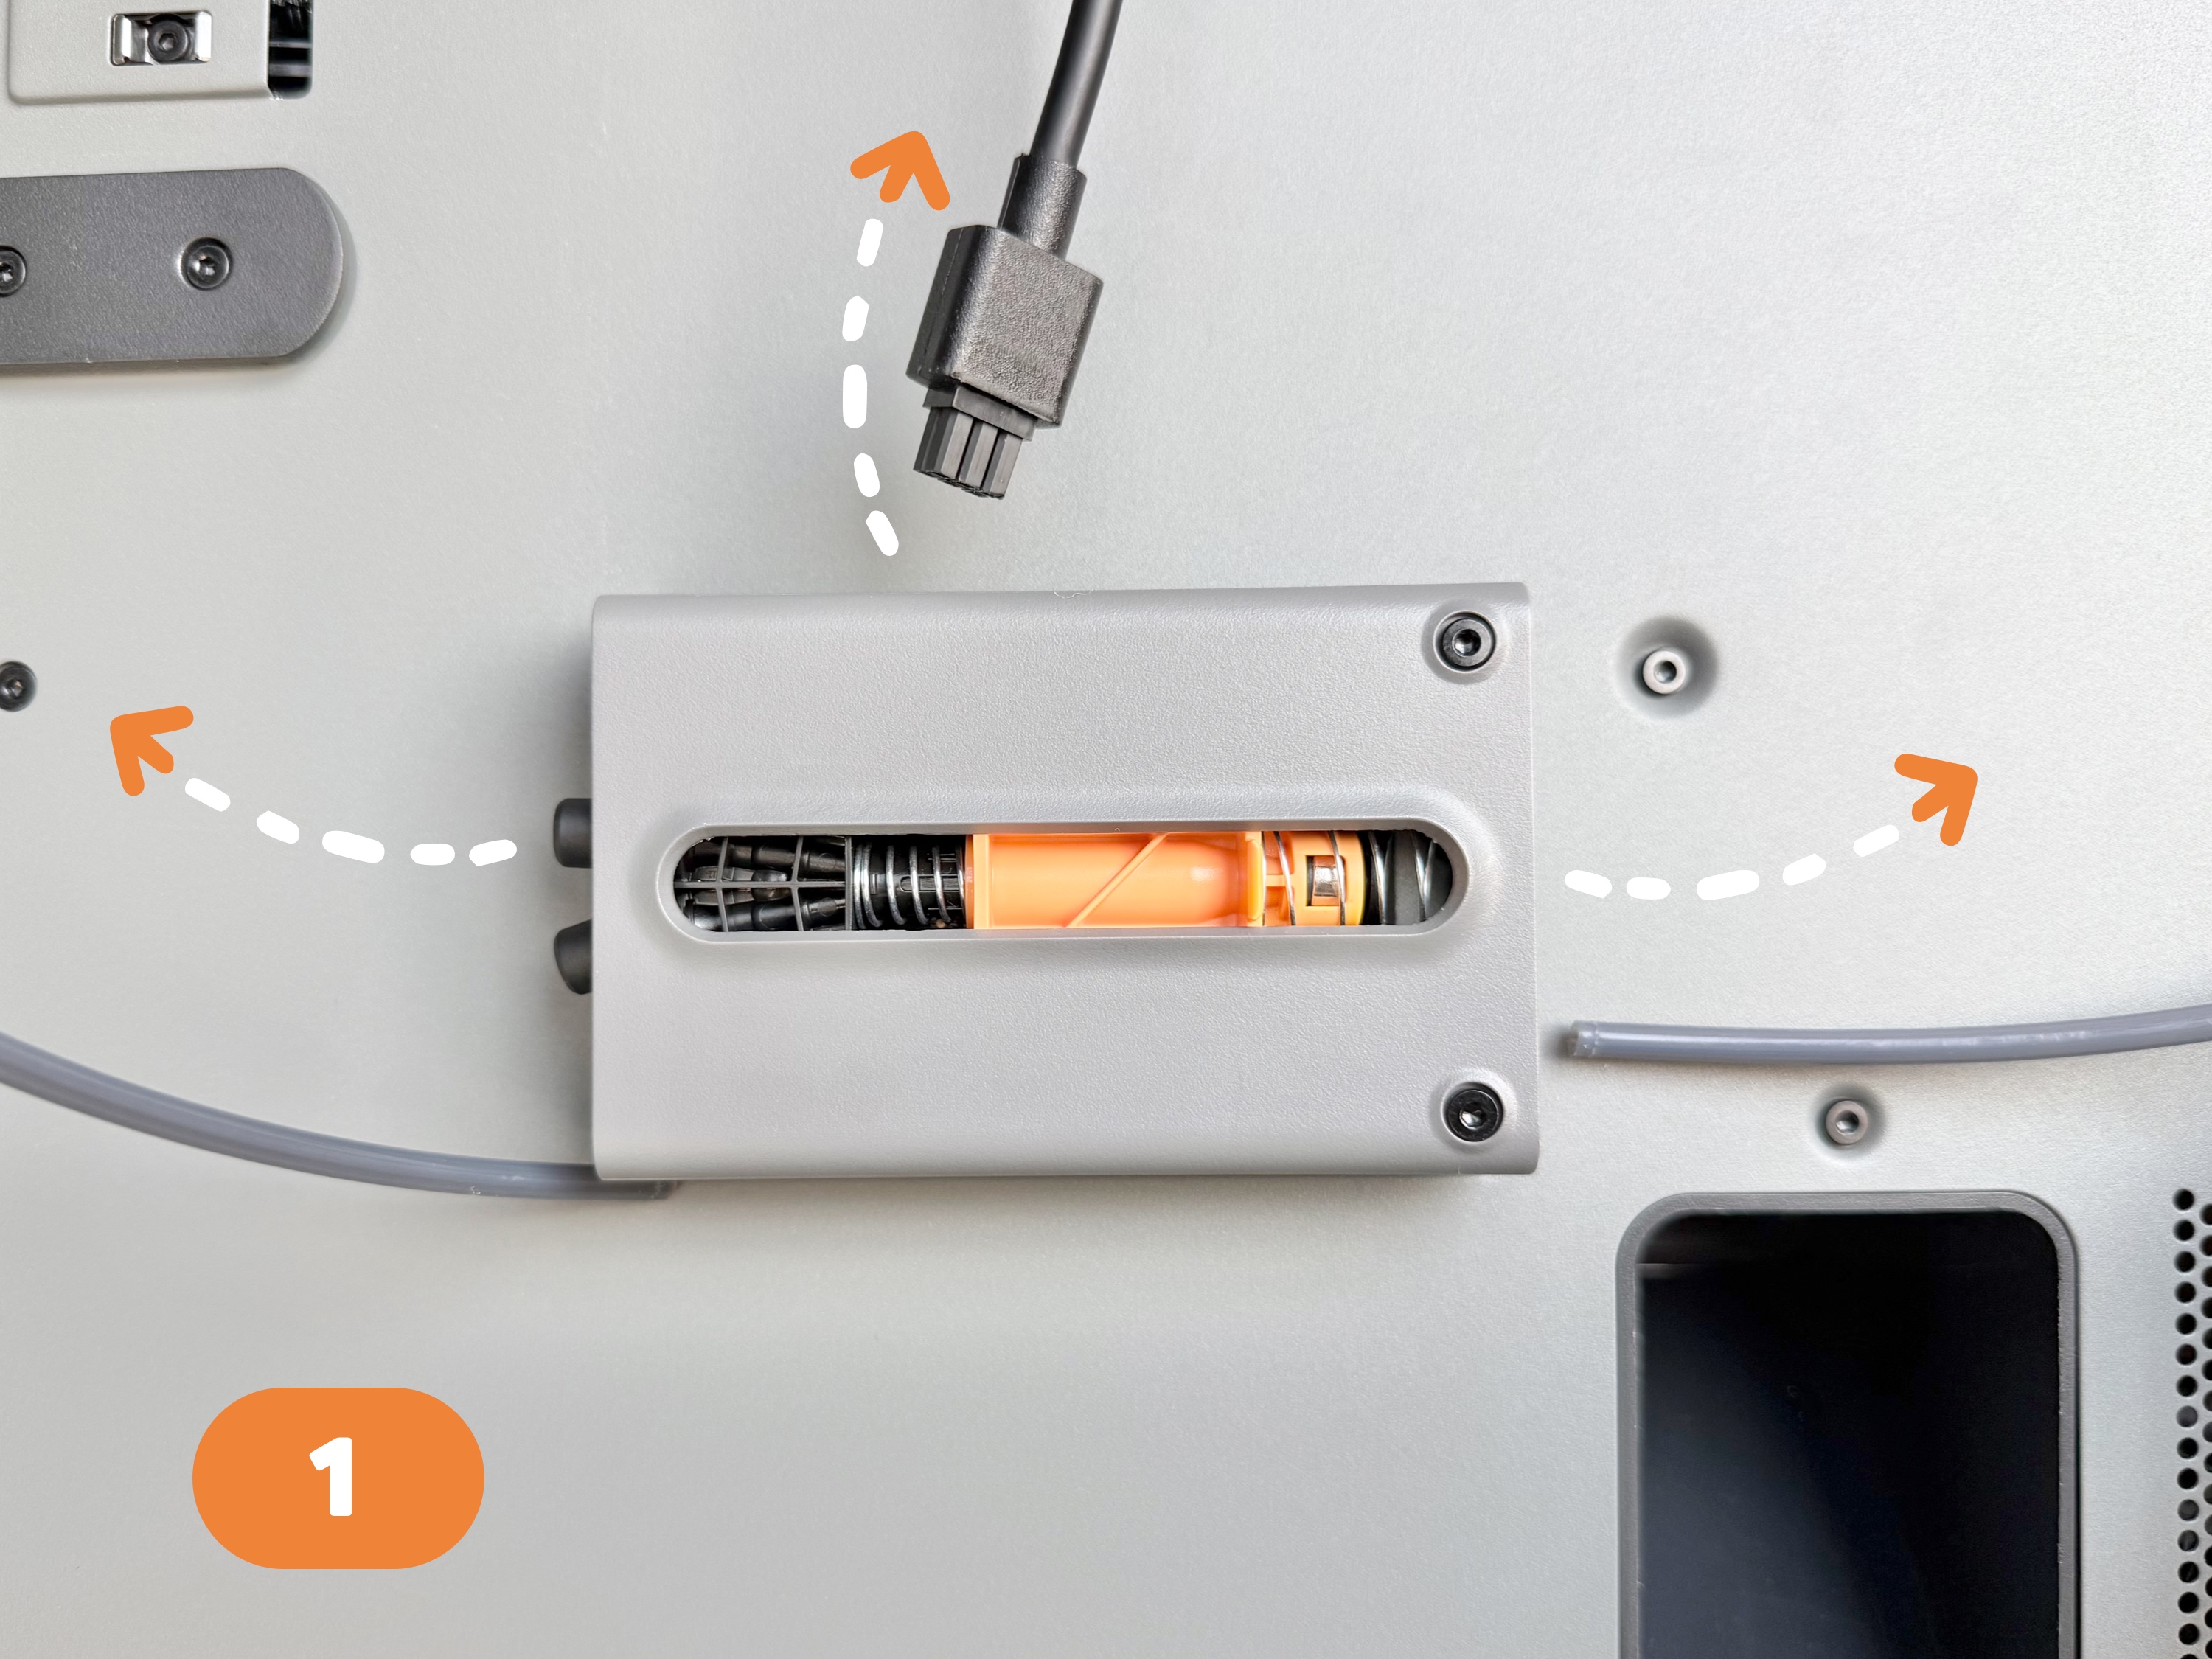
1. Remove the left and right Teflon tubes, and the 6-pin cable above them. (How to remove the Teflon tube on the right: Move the orange part to the far right so that the tube opening is exposed from the right side, and then remove the Teflon tube in the same way.)
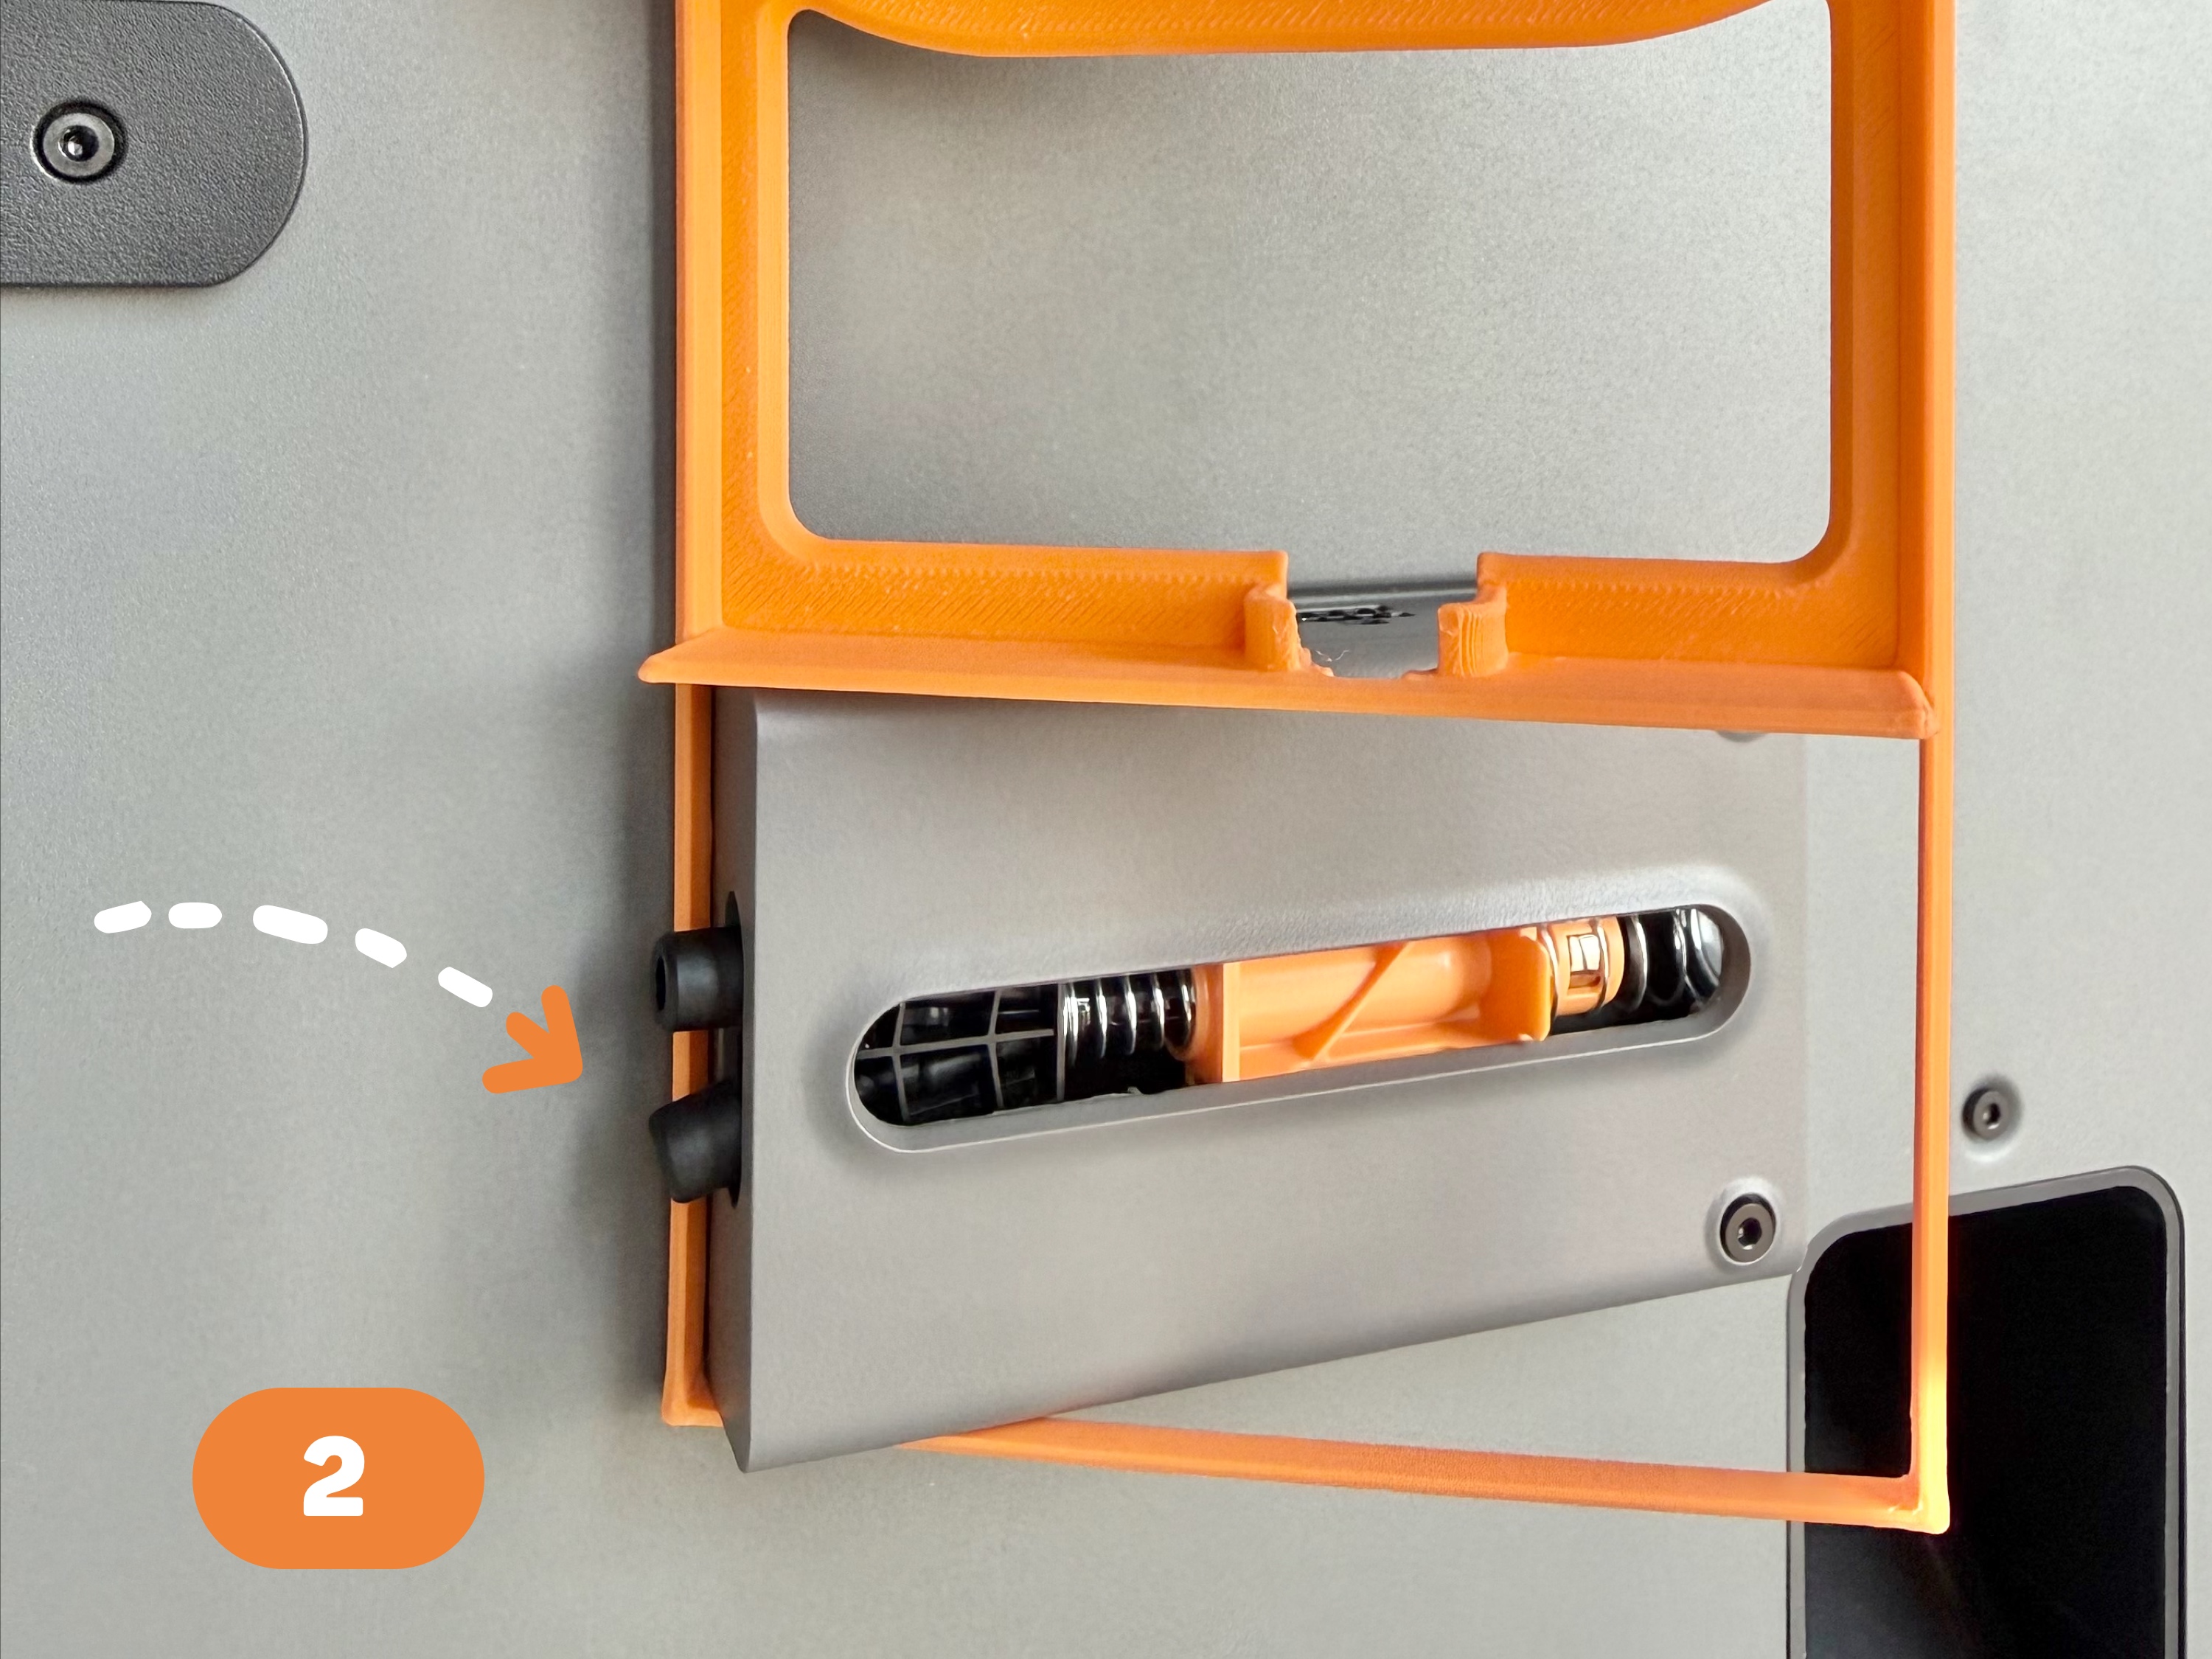
2. Insert the left side of the model into the left side of the AMS buffer.
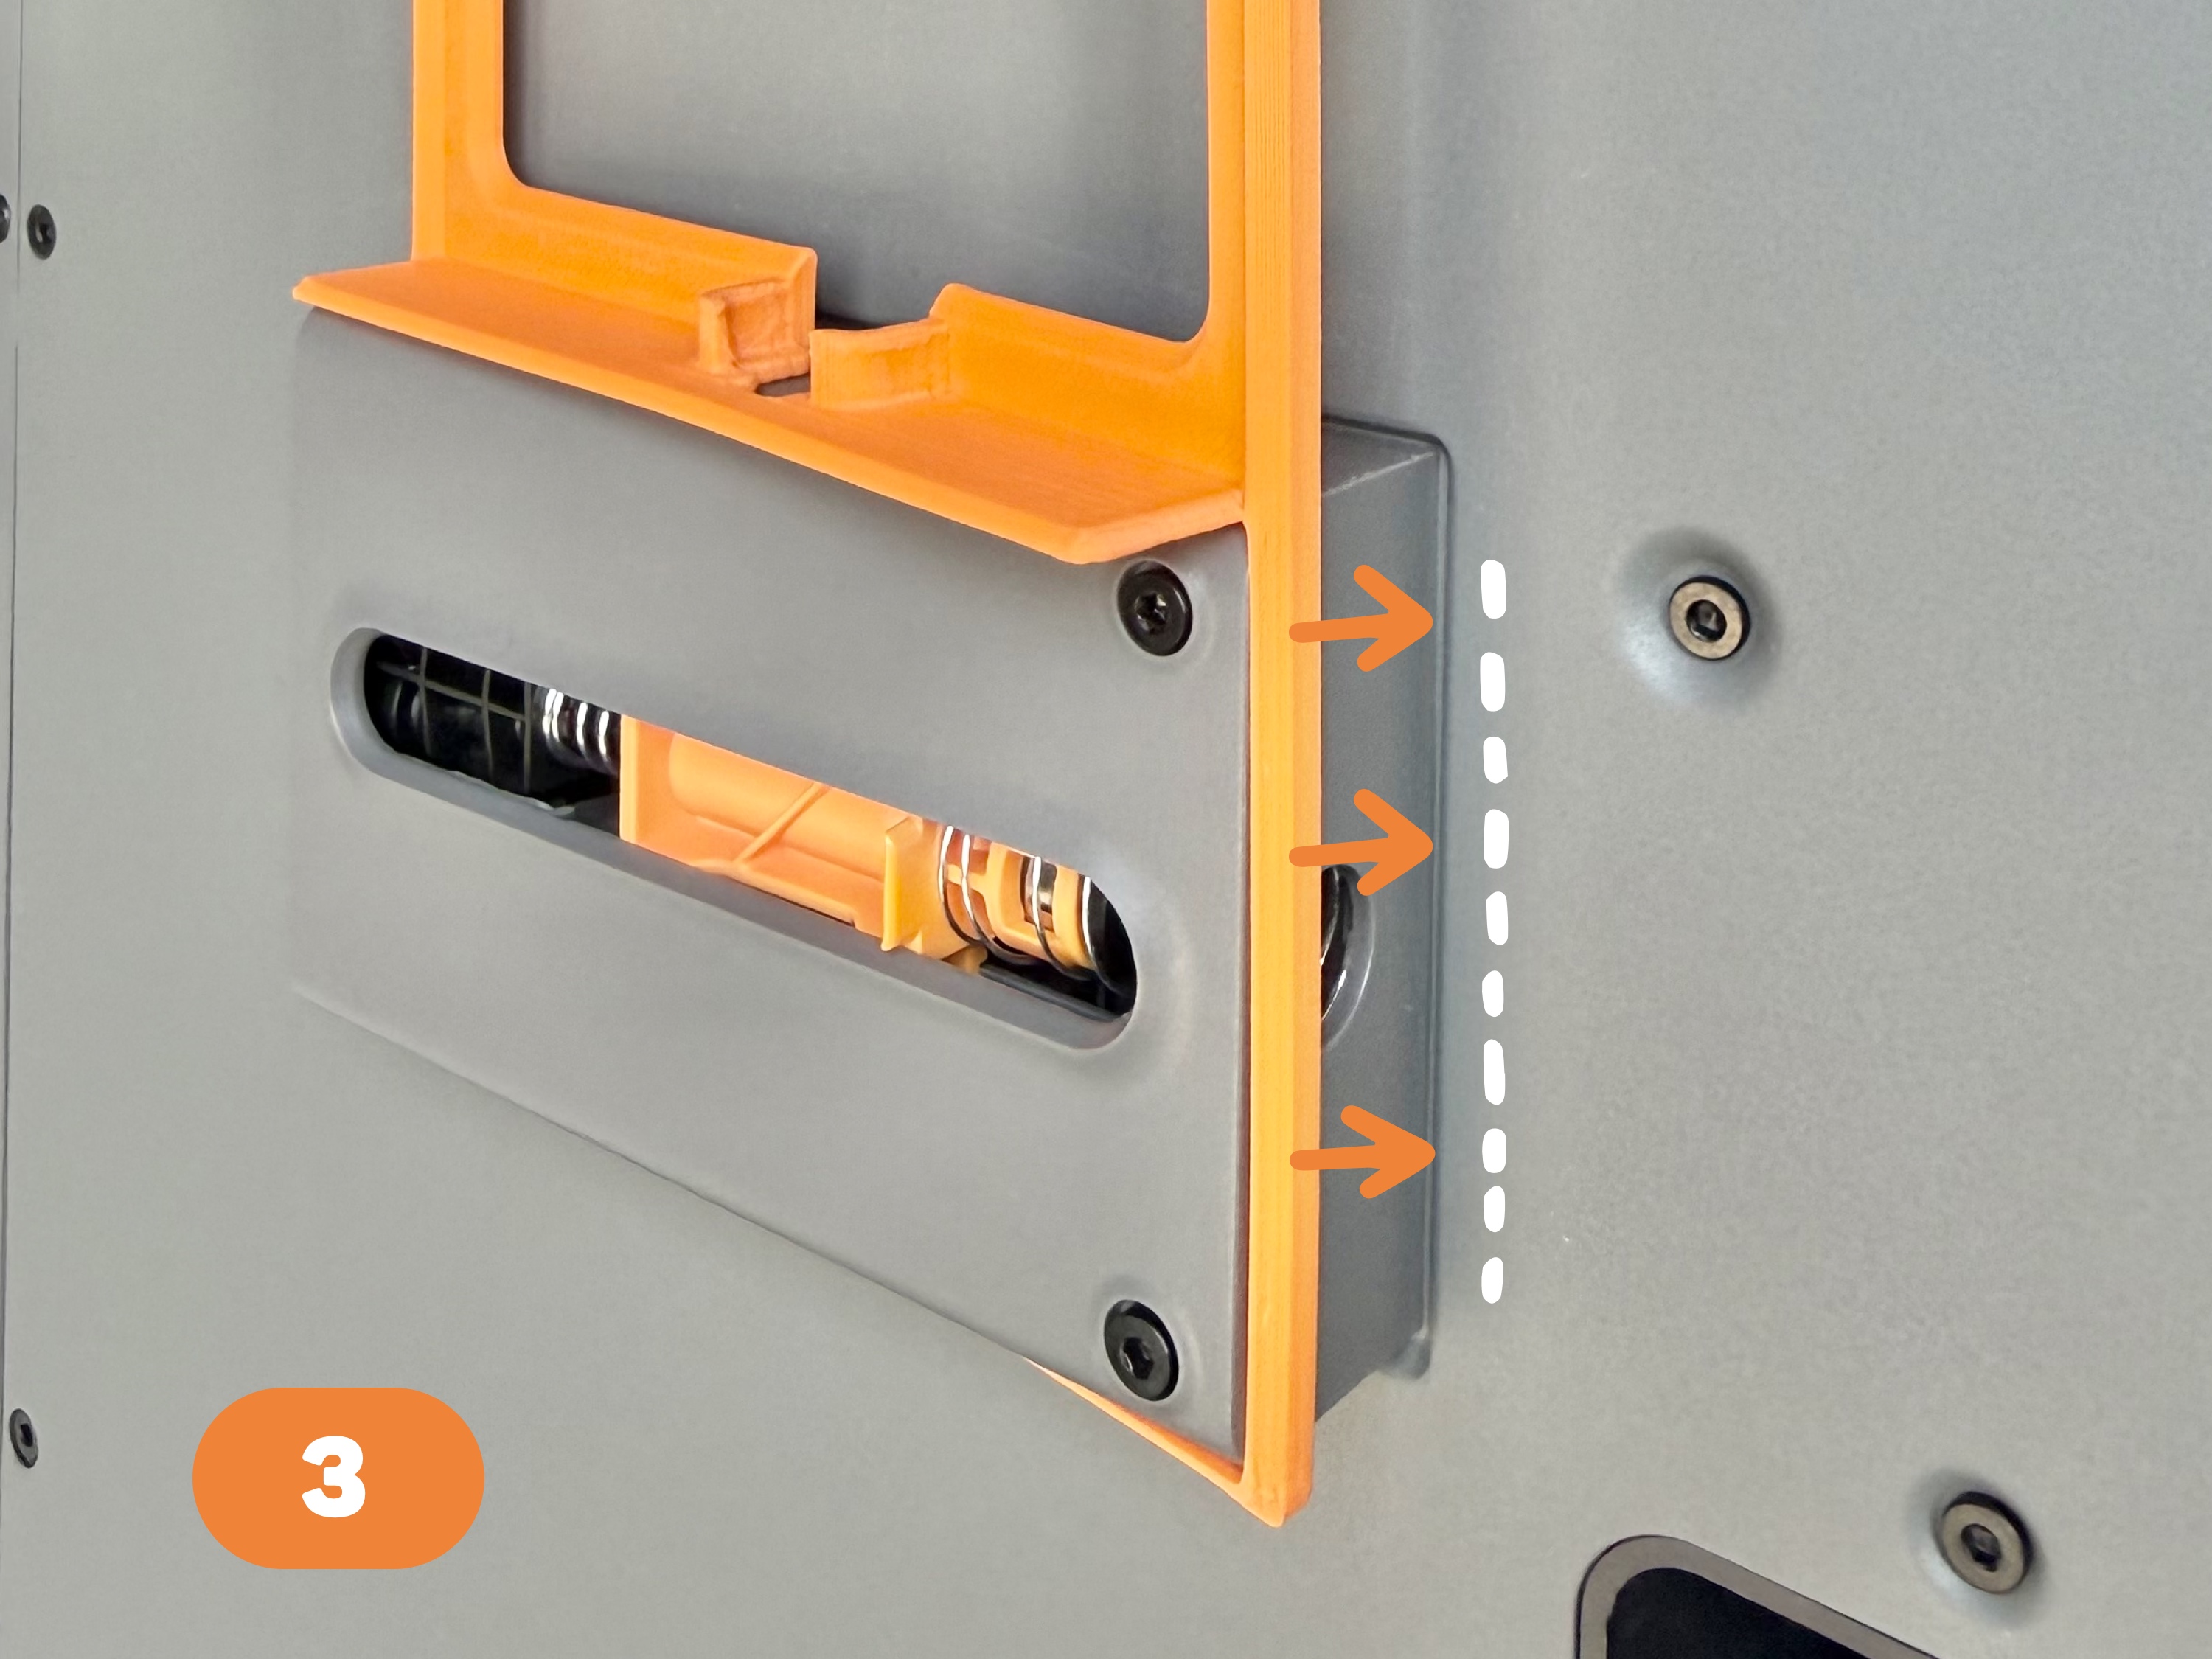
3. Snap the right side of the model into the right side of the AMS buffer.
4. As shown in the image, insert the cables into the cable channel counterclockwise, starting from the right side.
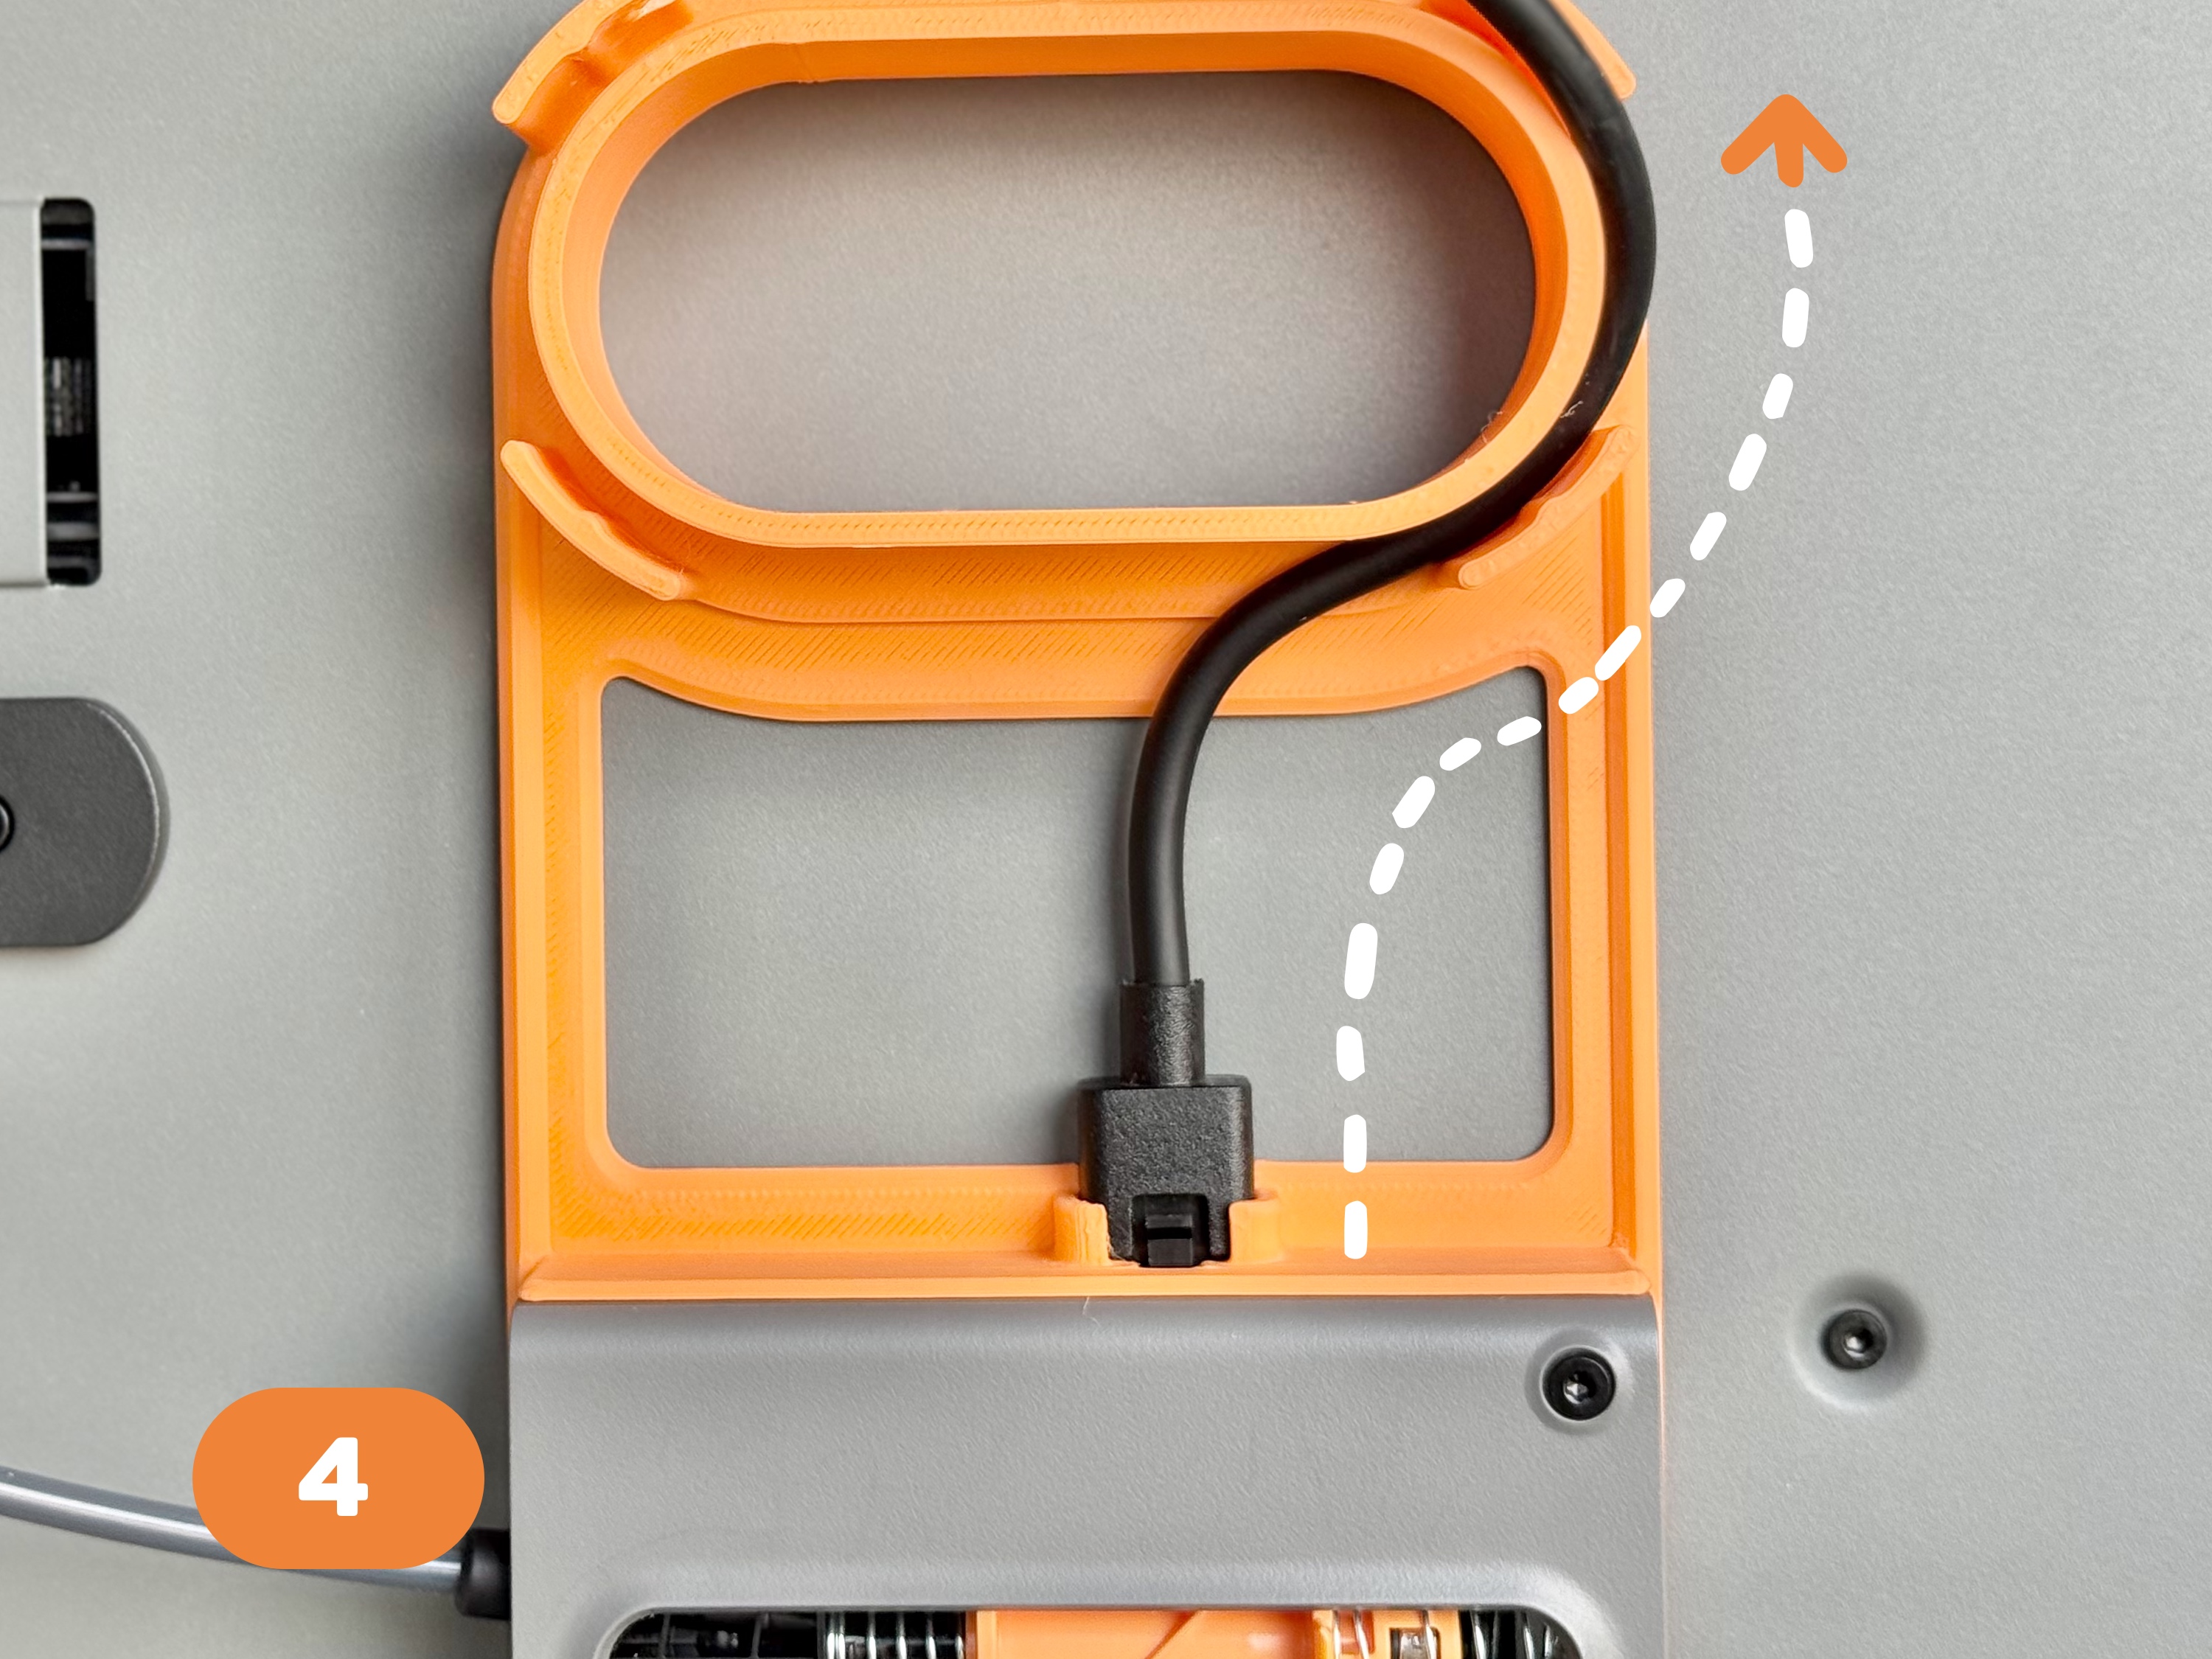
5. Push each loop of cable to the bottom so that the cables are tightly packed together.
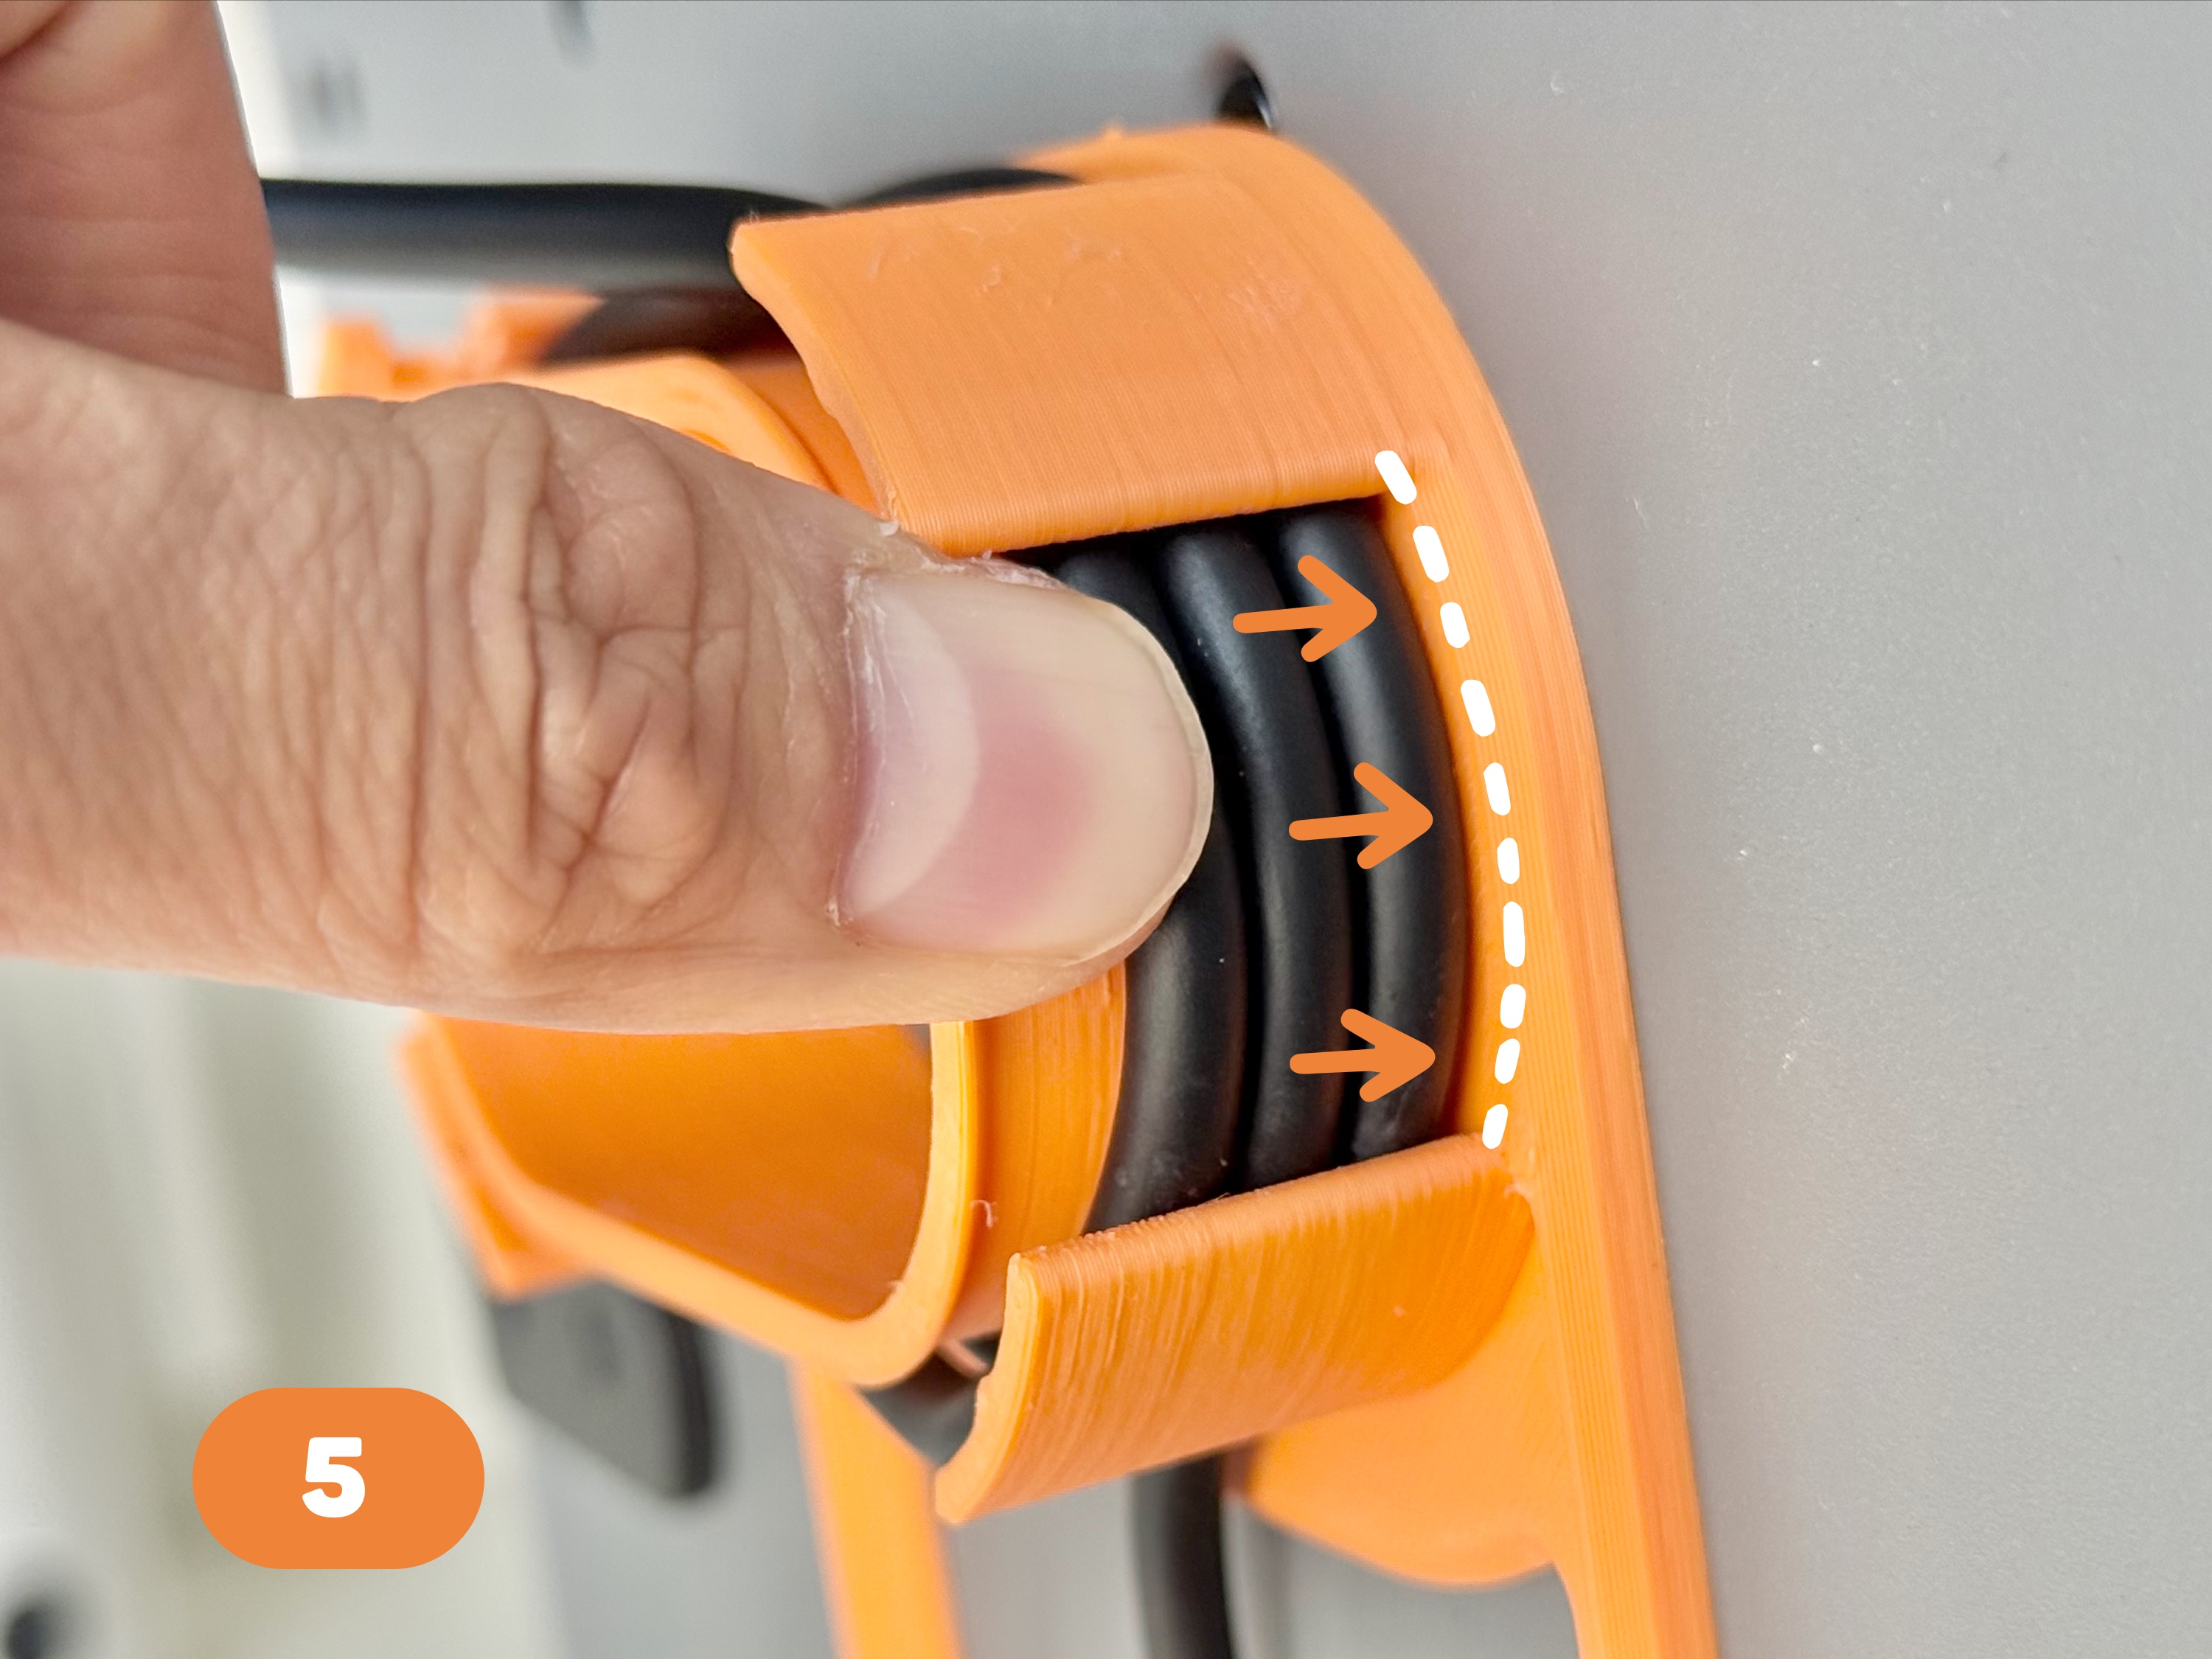
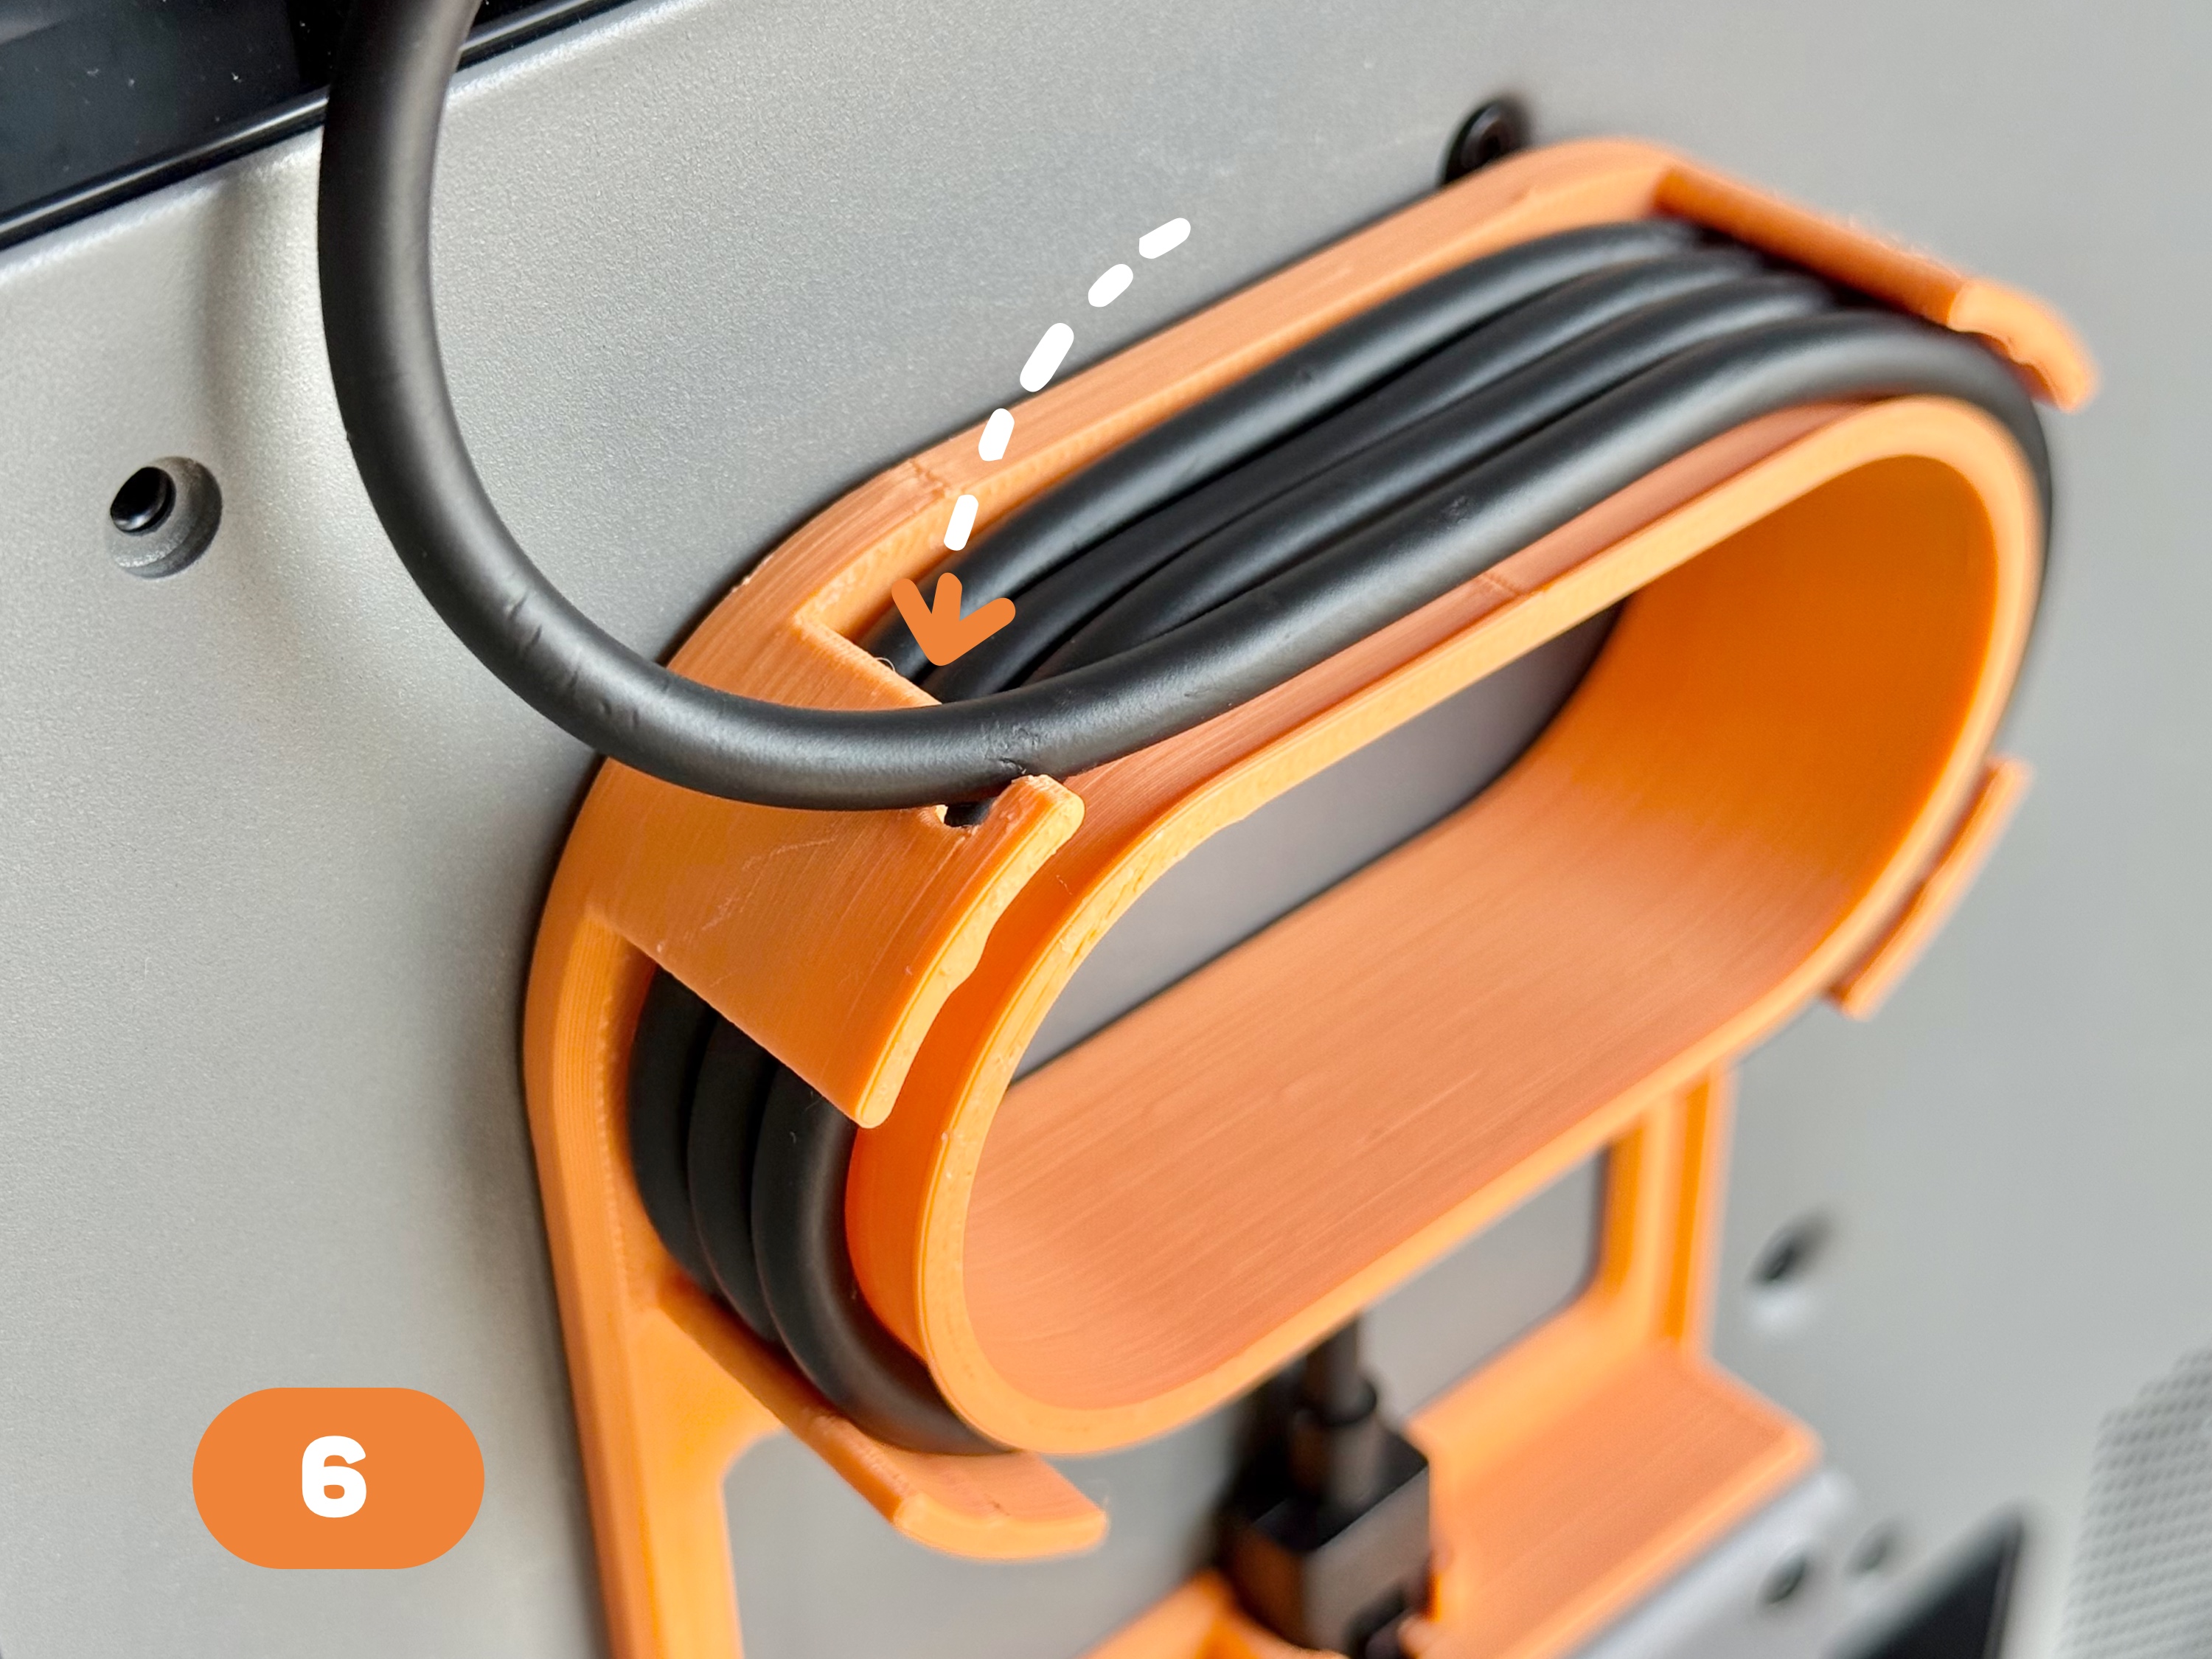
6. Finally, press the remaining cables into the slots on the top of the model to secure them.

Gostou deste modelo? Crie uma conta grátis para salvar seus favoritos e voltar a eles depois.
Criar conta