Você está no 3DFinder
Buscamos em Thingiverse, MakerWorld e Printables ao mesmo tempo para te dar o melhor de cada uma.
Descrição
As many of my descriptions start, I wasn't completely happy with the implementation and design that other people have done for this solution so I designed my own from the ground up. I also didn't see anyone specifying exactly which version of the keyboard was supported for their designs, and none of them seemed to be using the newer USB-C version.
This enclosure is designed for the Apple Magic Keyboard model A3118. It's possible it will work with an older lightning version of the keyboard, but this has not been tested as I don't have one. If you test this with the lightning version please let me know if it works.
What set's this apart from other touch ID enclosures is I utilize the original mounting bracket for the button, and the dimensions are just about as small as you can get them making this the smallest touch ID enclosure available. The design retains full functionality of the button, allowing you to utilize the fingerprint sensor as well as the push button.
What you'll need:
- Screwdriver with T3 bit for the torx screws in the keyboard
- Screwdriver with a Philips 0 bit for the mounting screws
- Apple Magic Keyboard model A3118 with a usb-c port
- M1.4x3 screws to mount the board in the enclosure (This is what I bought: [https://www.amazon.com/dp/B07GKXMSVR?th=1](https://www.amazon.com/dp/B07GKXMSVR?th=1) )
- And ya know, a 3d printer and filament.
Notes on printing:
- The layer height in my print profile is set to 0.12mm, this is to accommodate some tiny features incorporated into the model, it will probably not work if printed at a different layer height.
- Do not use tree support, it will result in a poor surface in the cutout for the button and the push button will not work.
- There is a small intentional 1 layer high bump in the center of the button cutout, this is there to help actuate the push button and is not support, don't try to remove it.
- To clean up supports from the button cutout, I used a metal pry tool (the ifixit jimmy if you're curious) and cleaned up any stubborn remaining bits with an xacto knife.
Assembly Instructions:
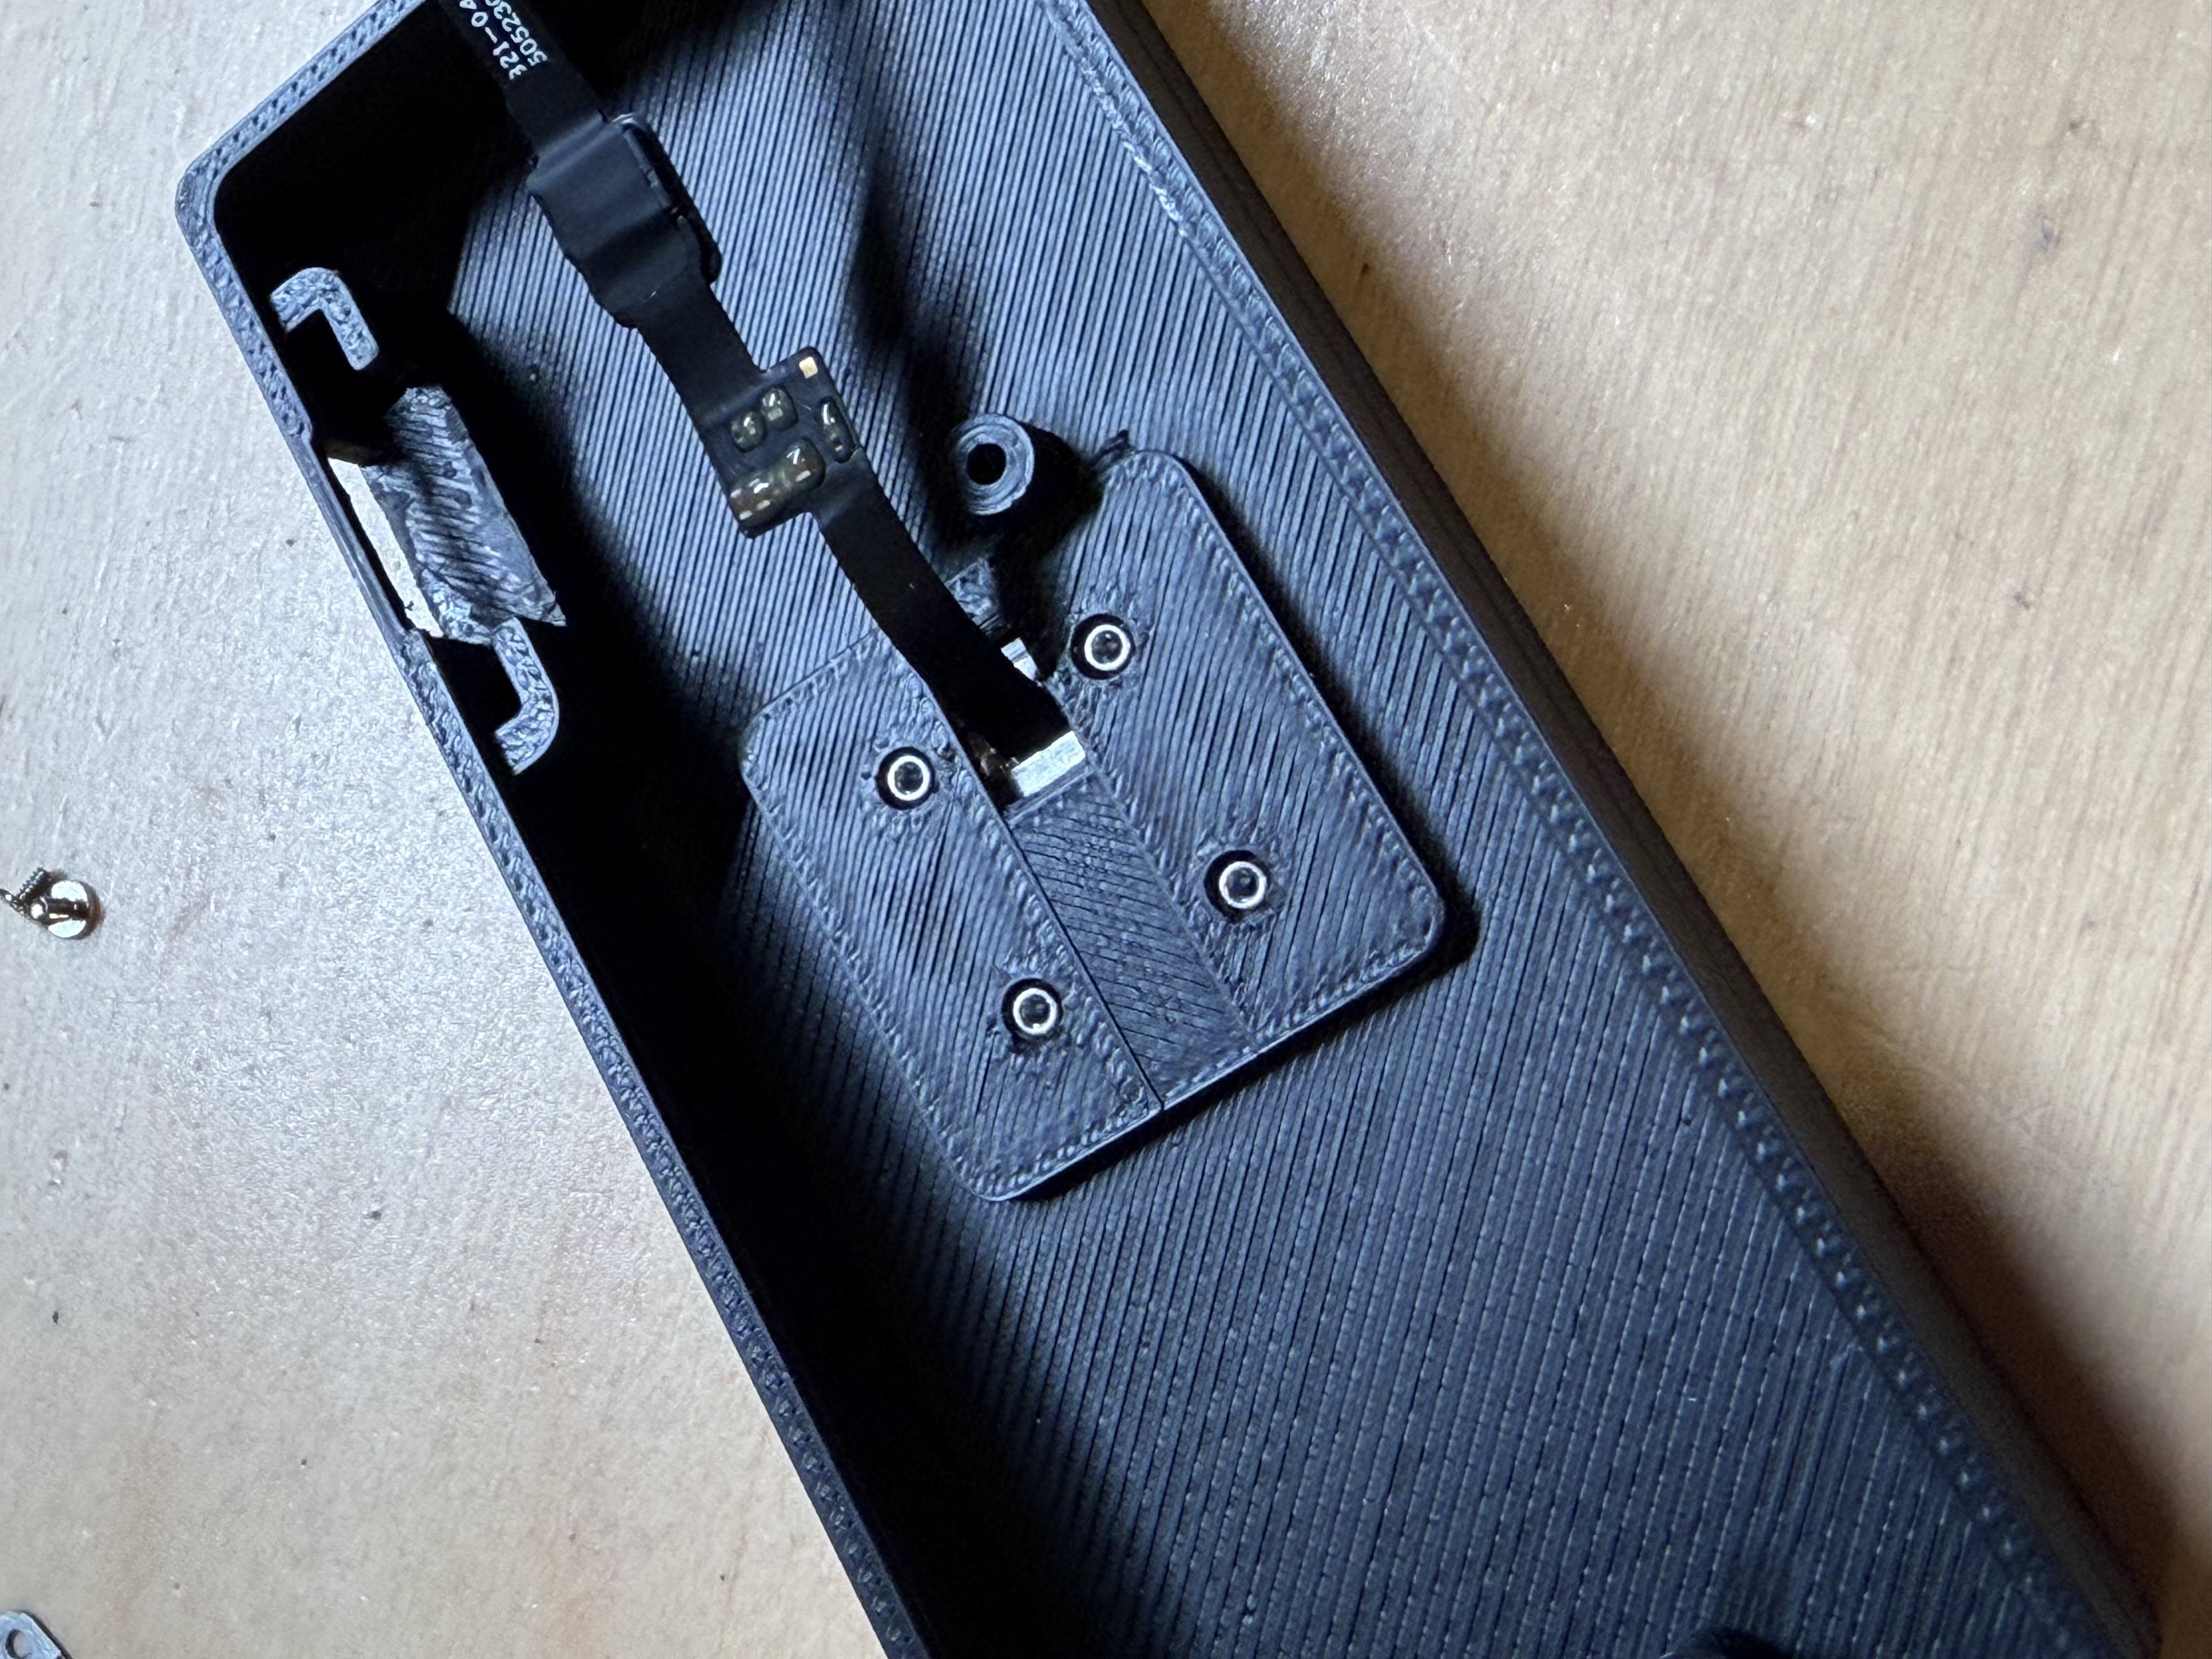
Carefully pass the ribbon cable through the opening in the top of the case and lay it flat on your desk as shown below:
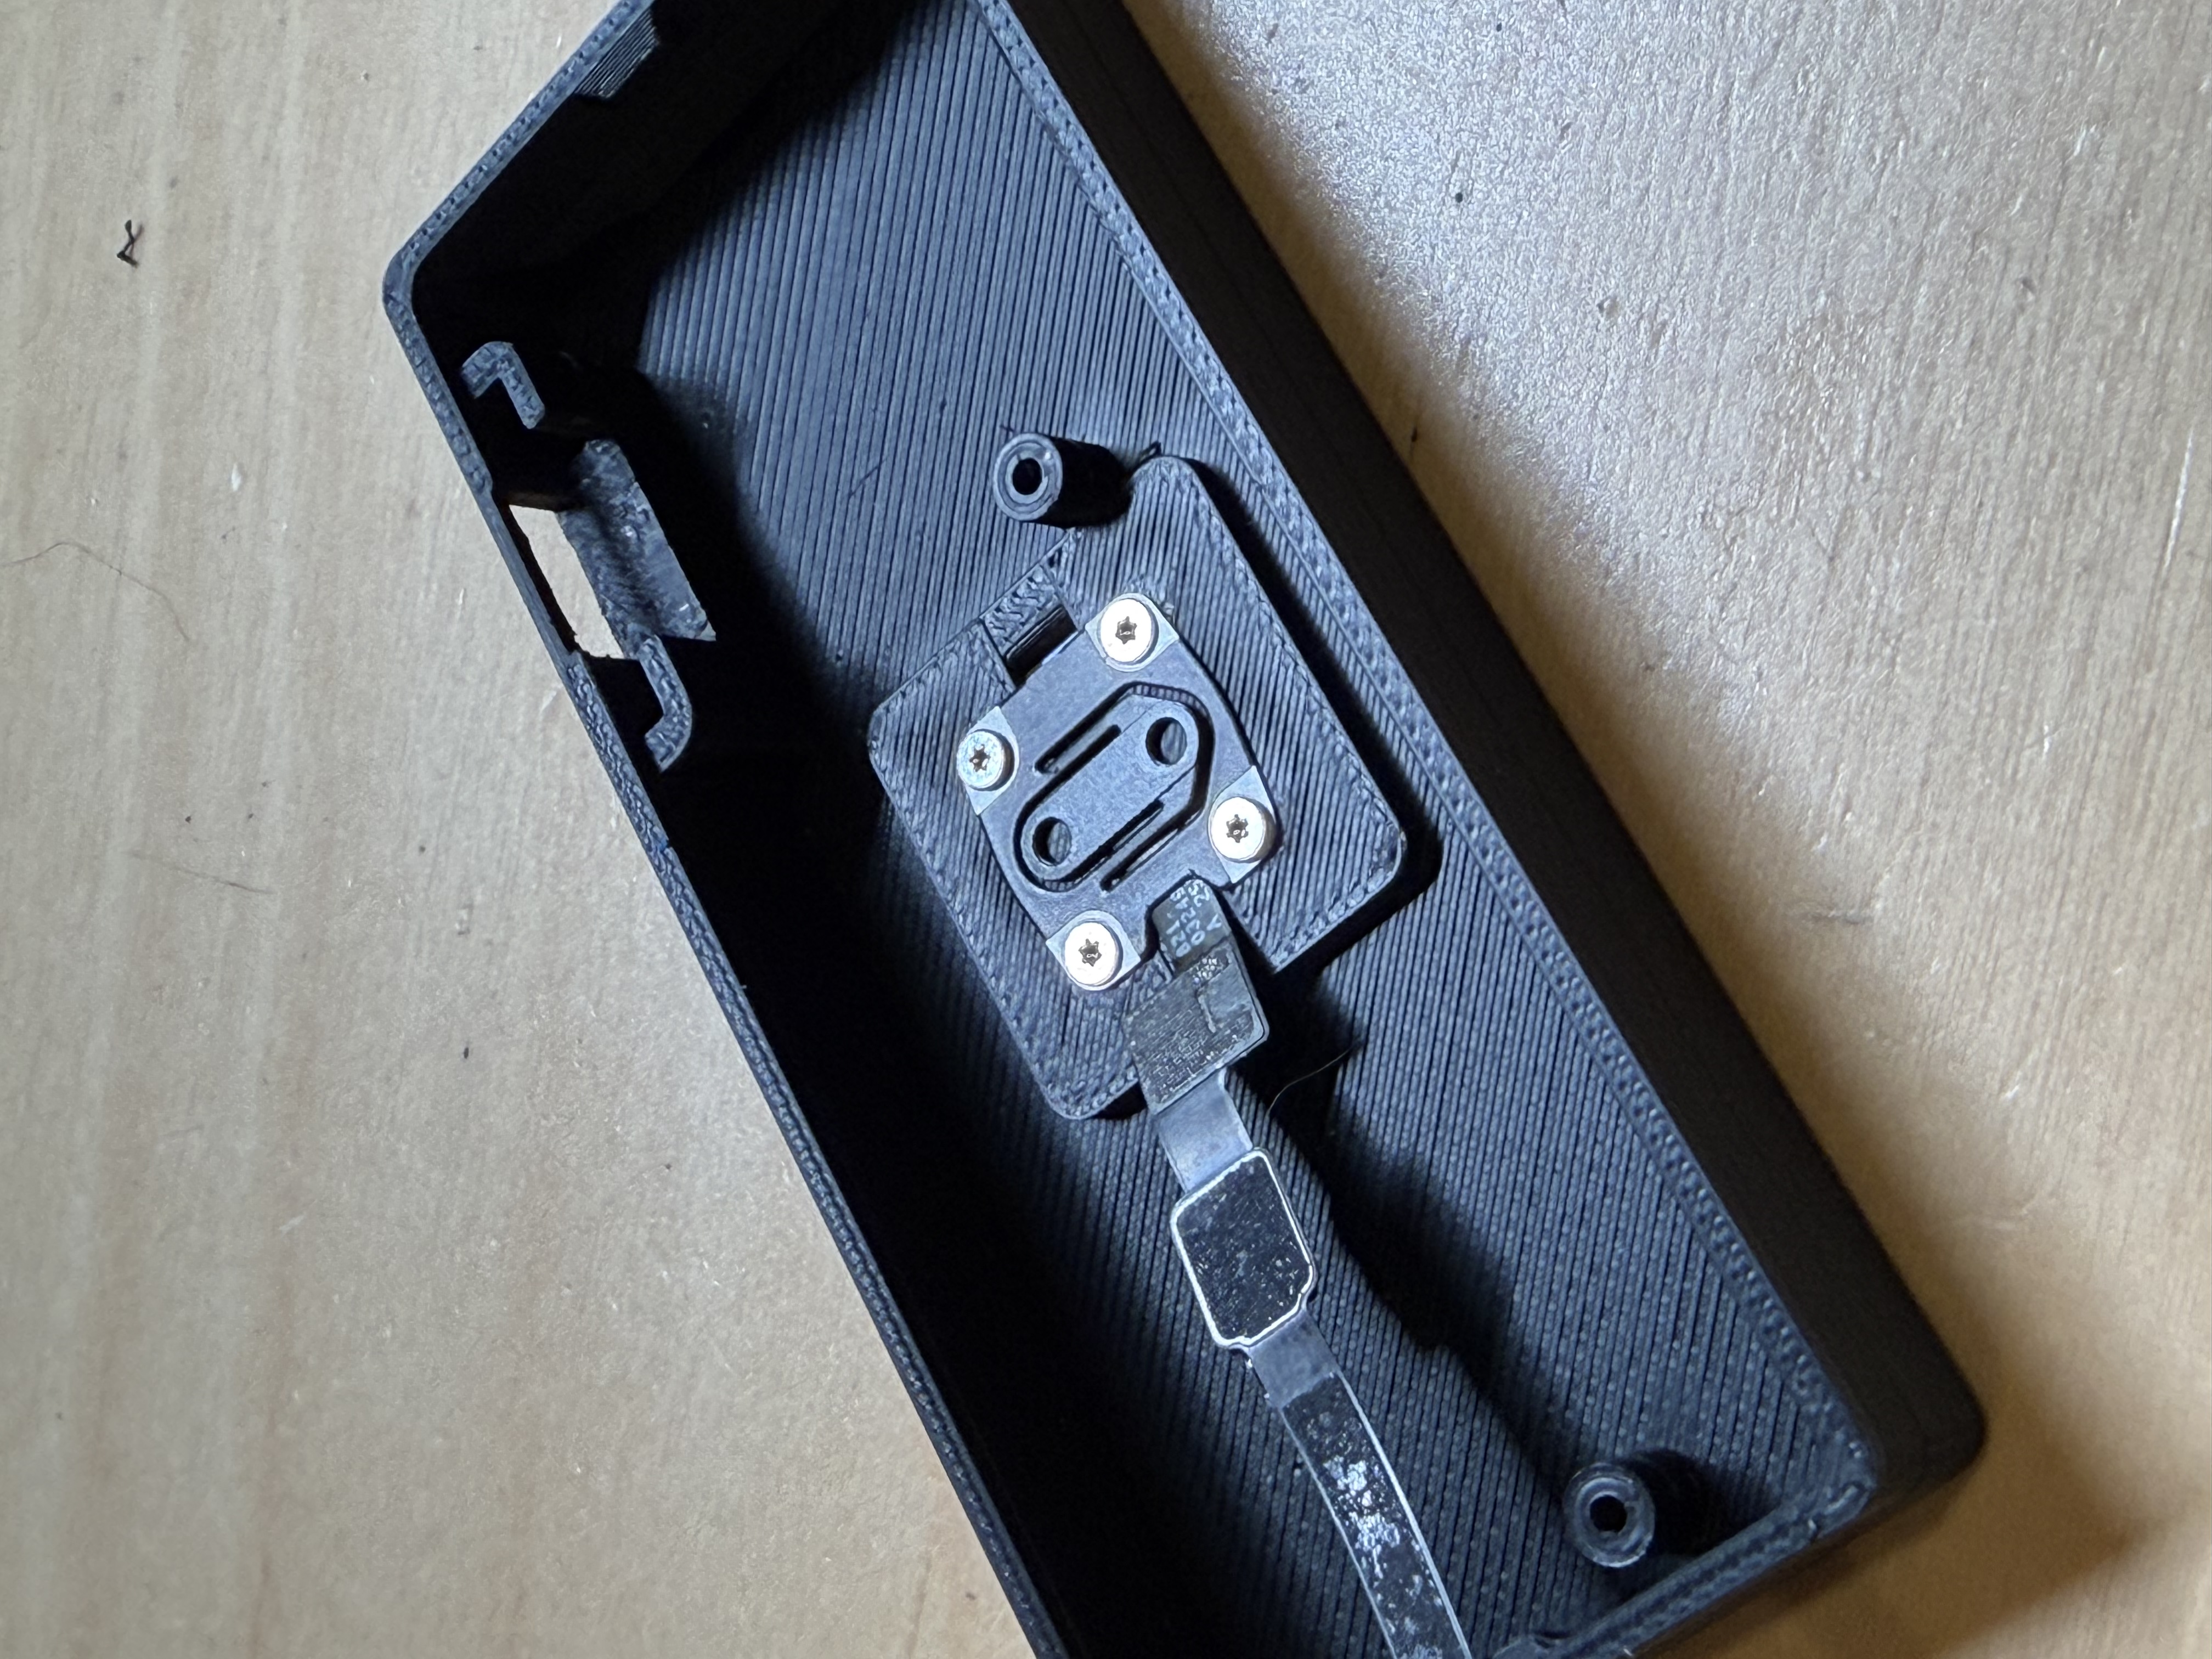
Fold the cable over away from the side with the USB cutout and screw down the bracket using the original T3 screws from the keyboard. Pay attention to the direction of the bracket in my picture, it looks pretty square but its not, it will only fit in this orientation:
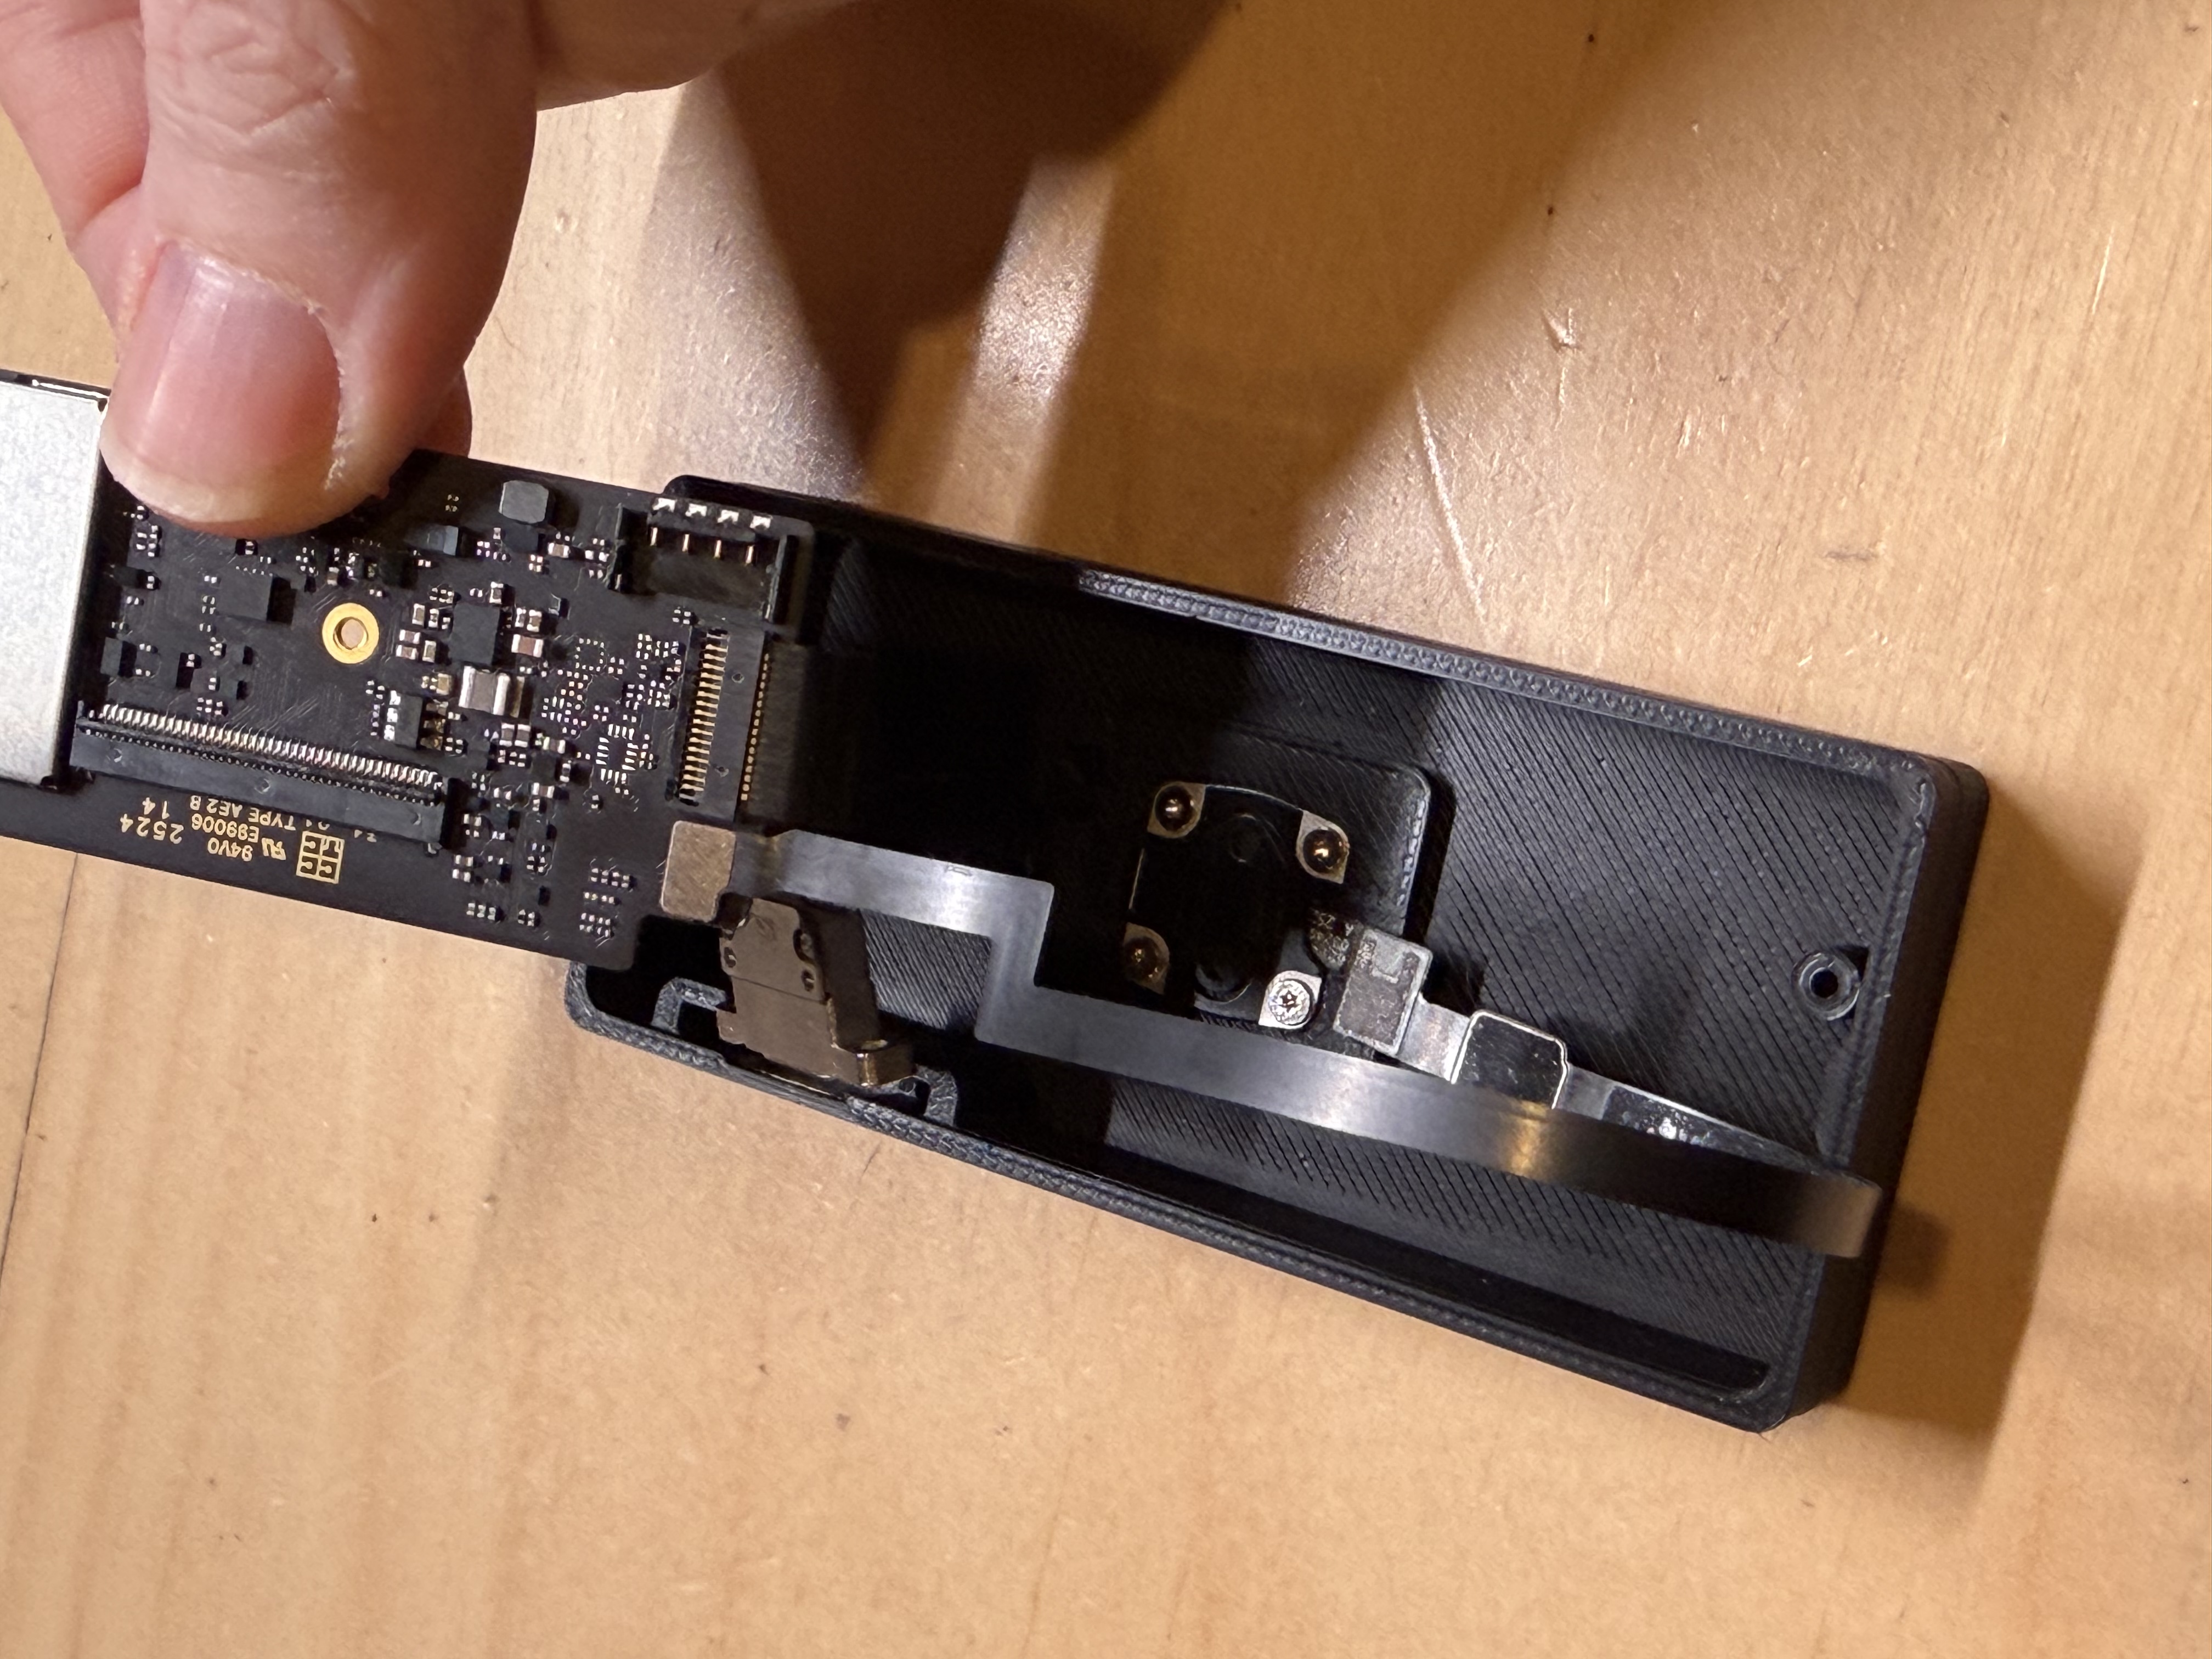
Attach the ribbon cable to the logic board:
Rotate the board so that the ribbon cable is passing over the board, not under:
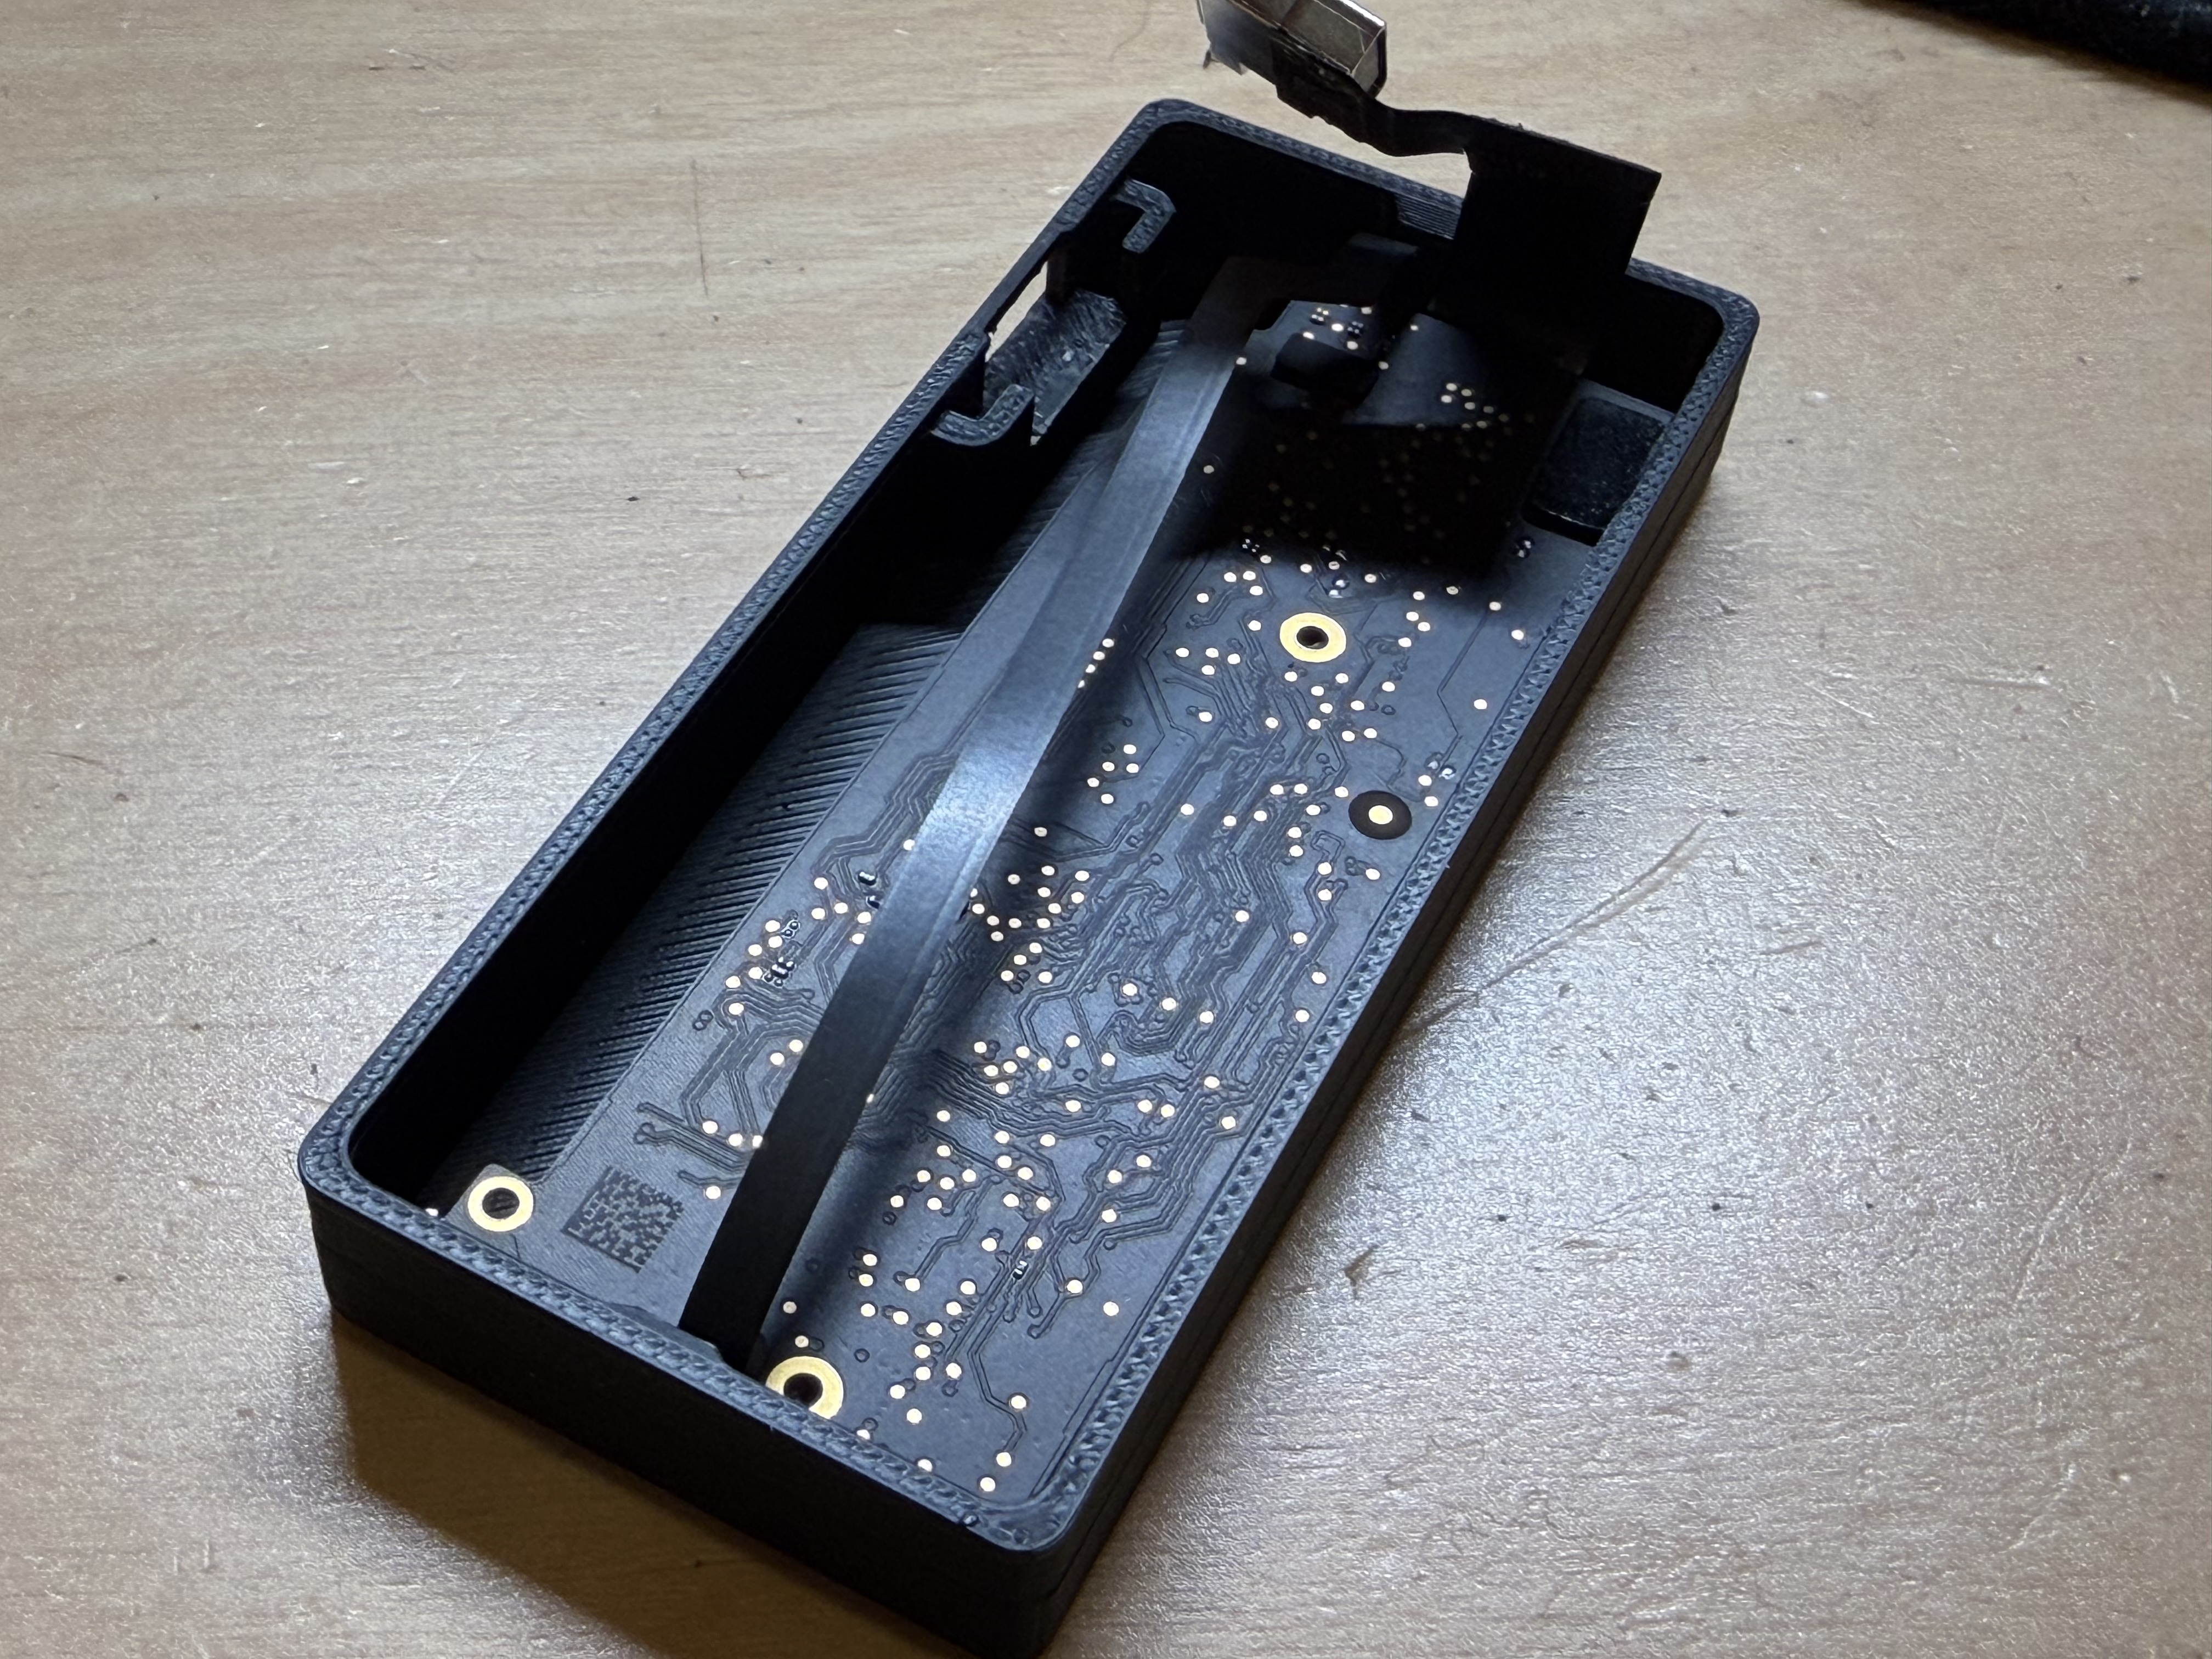
Secure the board into the enclosure using 2 M1.4x3 screws and press the USB connector into the slot:
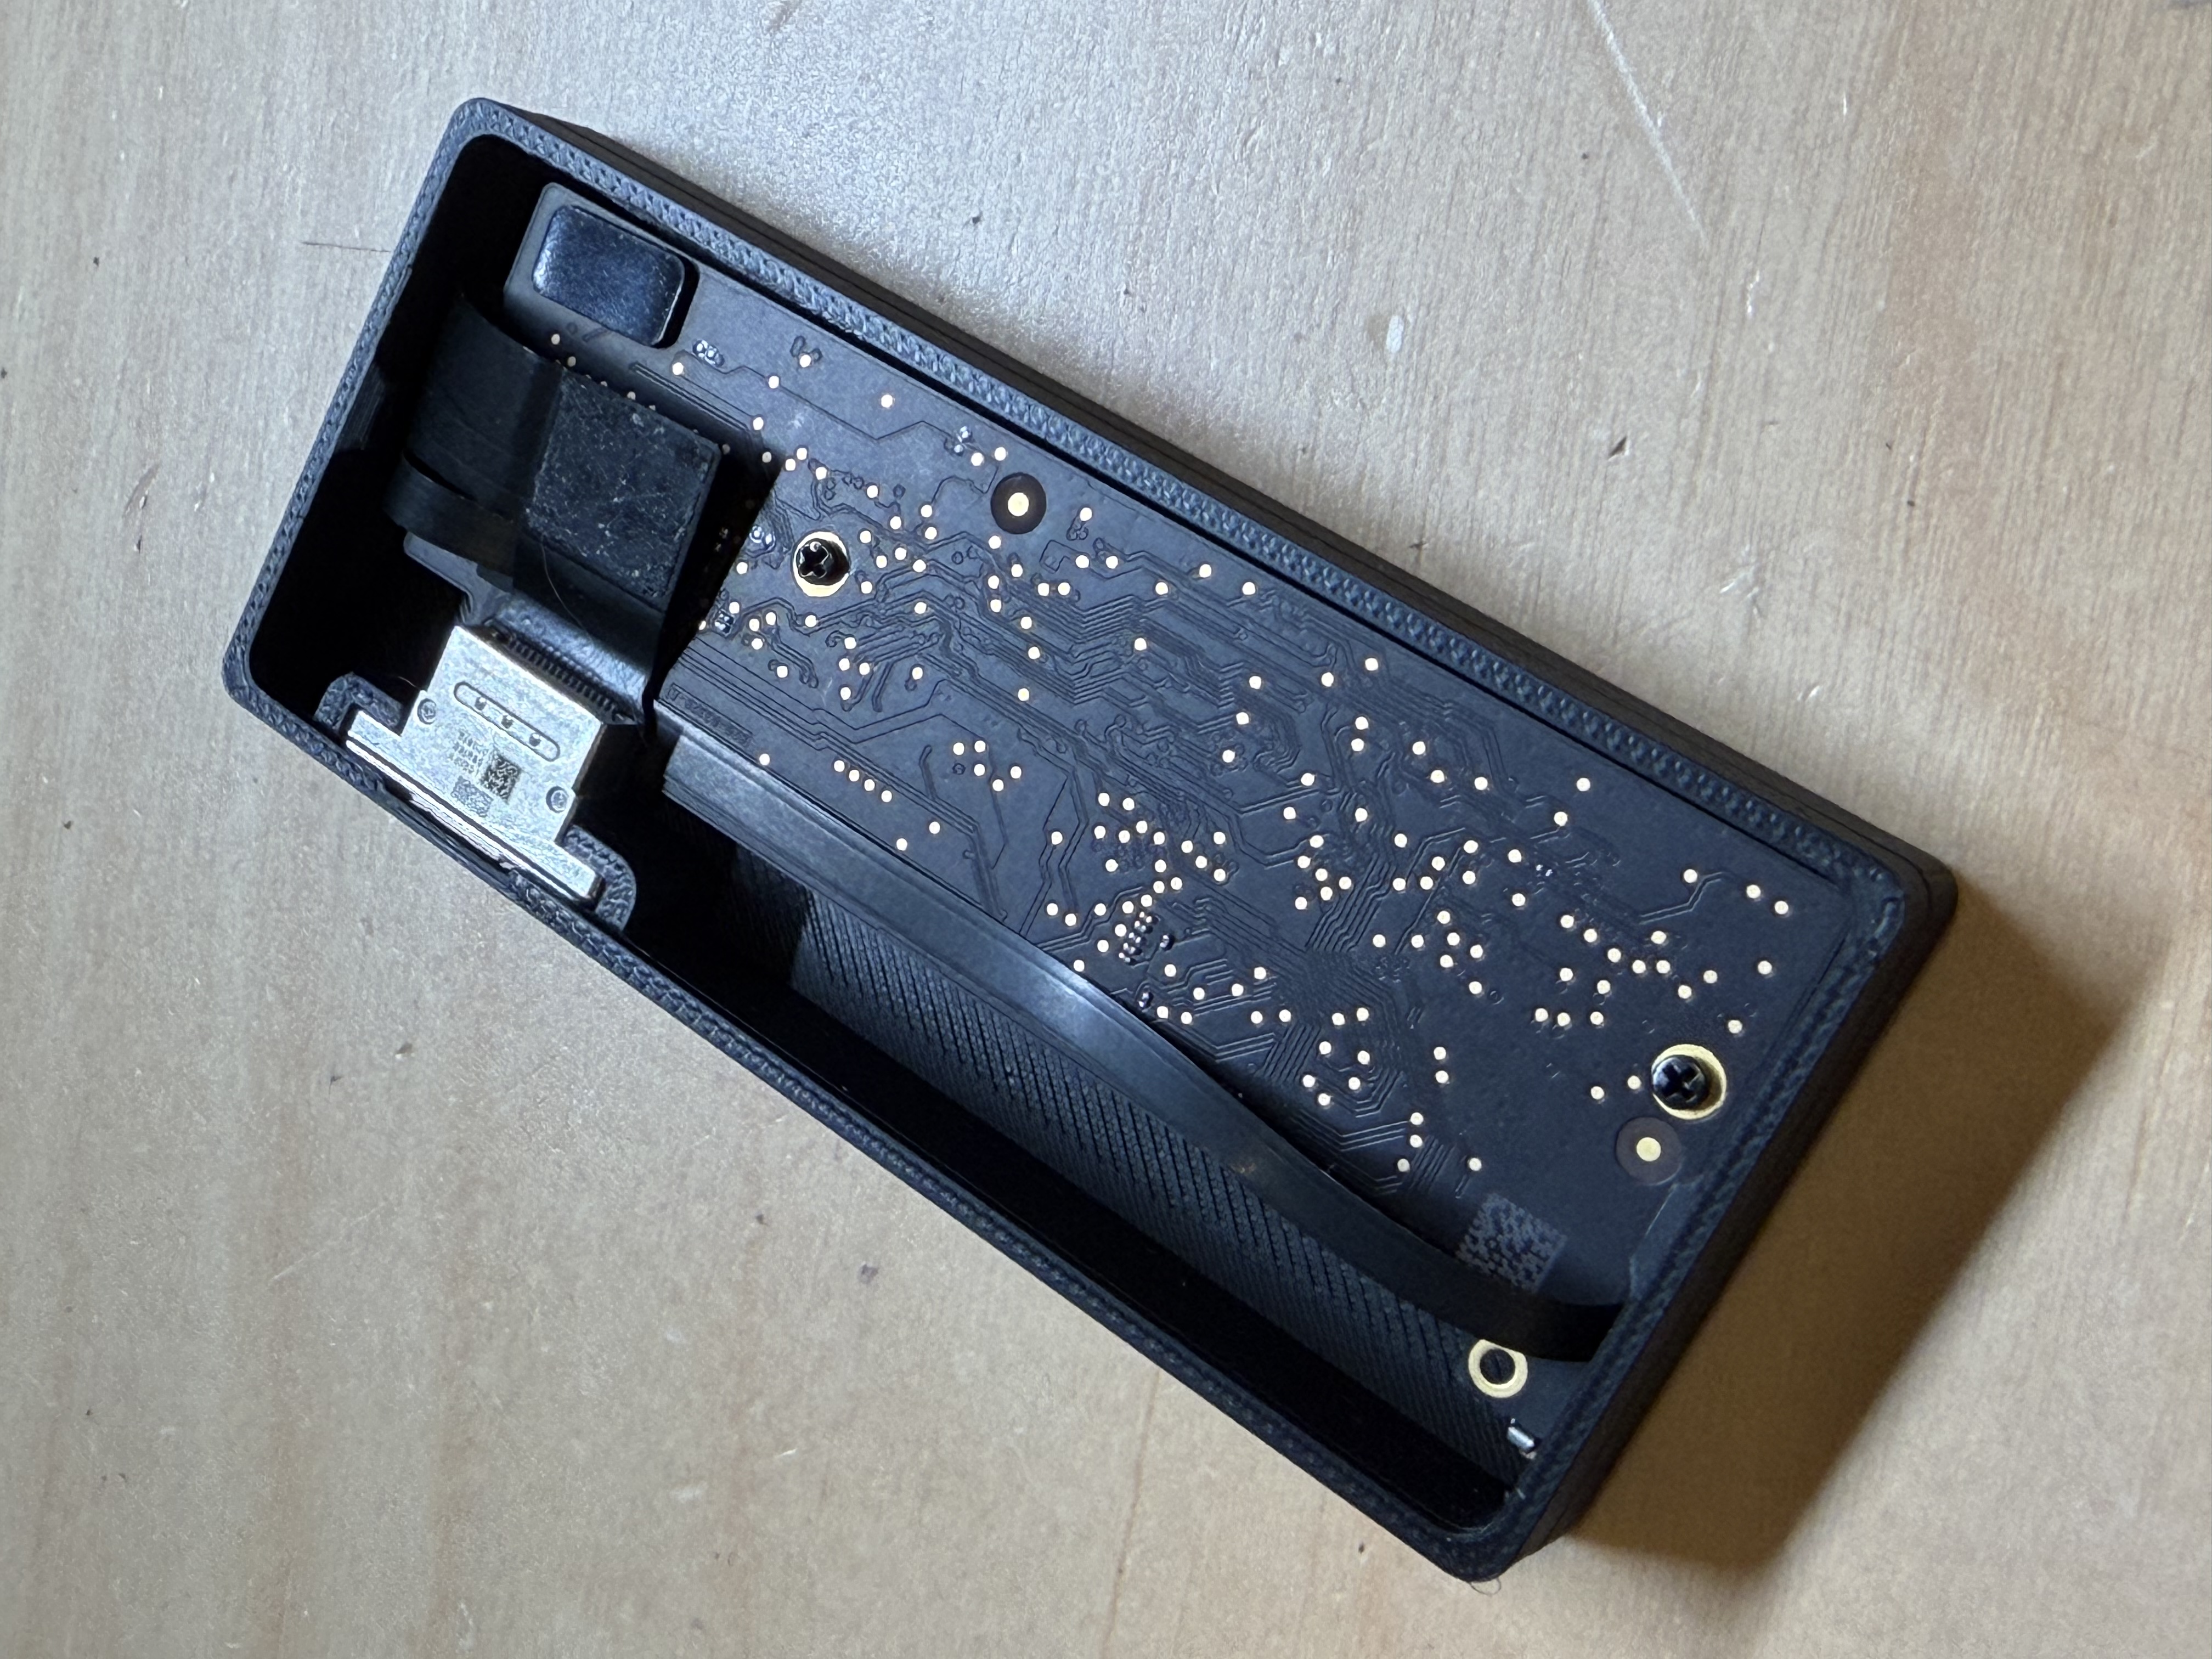
- Snap the back cover on and you're done!

Gostou deste modelo? Crie uma conta grátis para salvar seus favoritos e voltar a eles depois.
Criar conta