Você está no 3DFinder
Buscamos em Thingiverse, MakerWorld e Printables ao mesmo tempo para te dar o melhor de cada uma.
Descrição
Fully-printed case for the common LM2596 DC-DC Buck/Step-Down Converter with integrated voltage display. There are a ton of similar case models out there, but it seems like every manufacturer produces a slightly different board size and/or layout so it's really hard to find a case that exactly fits the board you received.
This one is customizable so you can get a usable case that exactly matches your board. You can control:
- Board length and width
- 4-Corner peg spacing and diameter
- The dimensions and location of the holes for the display, adjuster screw, button, LED window, and wire terminals
- Extra spacing between the board edges and case walls
- Extra spacing below the board (for through-hole component leads)
- Space above the board (wall height)
The lid uses a strong snap-fit mechanism to keep everything secure once assembled.
Want a case that holds input and output ports too? Check out this version.
Customizing
You'll need a ruler and/or calipers to take a couple dozen measurements- or just print the provided model and then check which parts need adjusting.
Most important default values:
- Board dimensions: 66x36mm (but allows 1mm extra space on each side)
- Corner holes center-center spacing: 61x31mm (2.5mm pegs for 3mm holes)
All Default values:
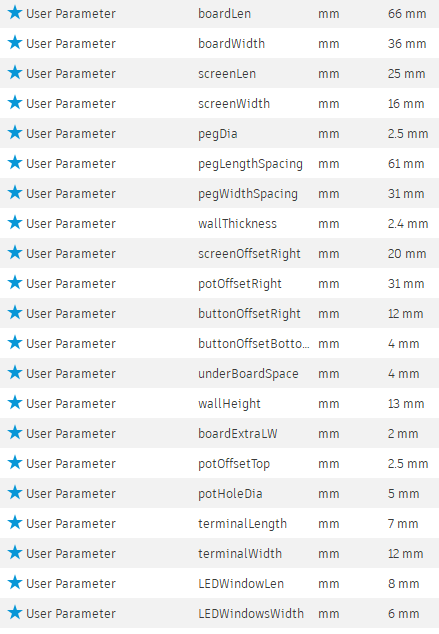
Visual Dimensions:
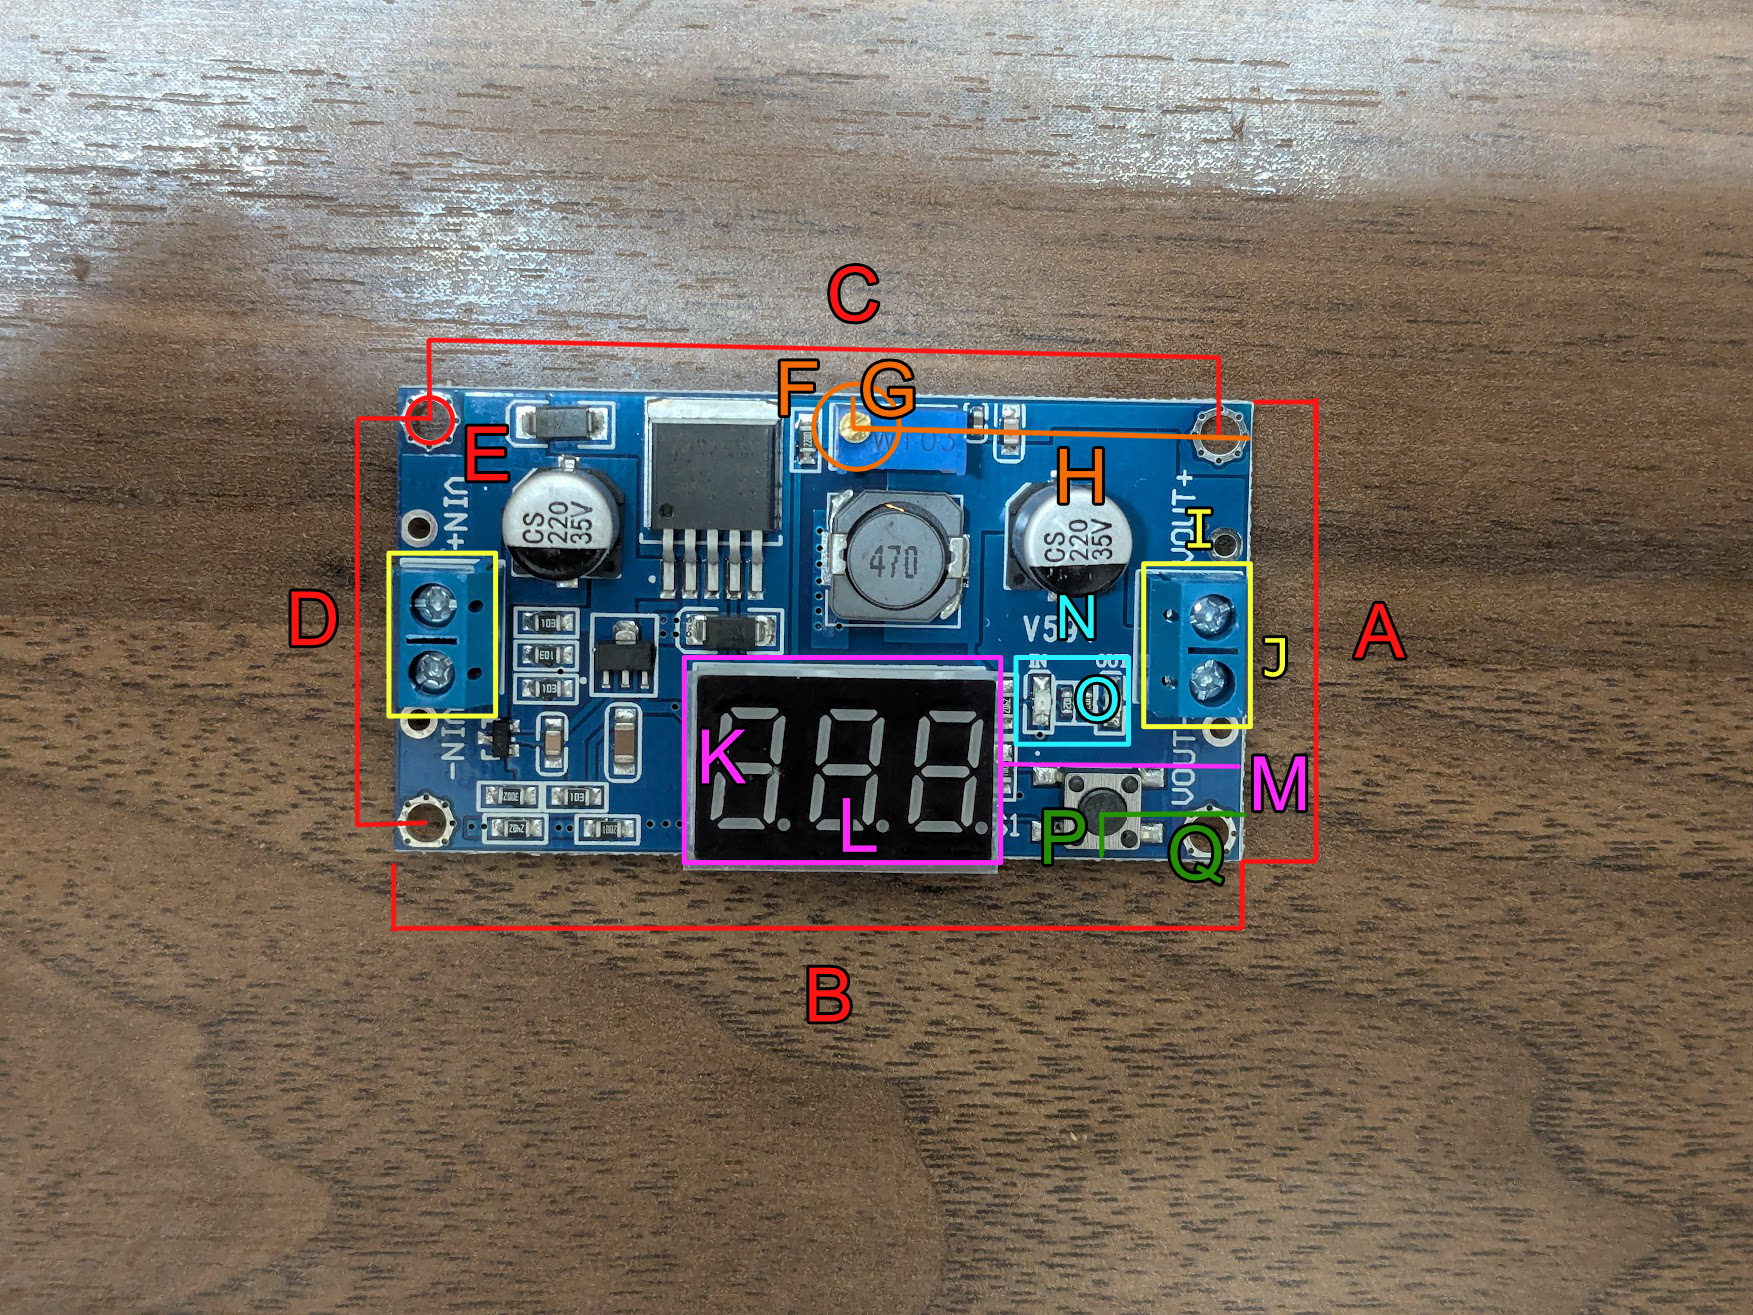
A- boardWidth
B- boardLen
C- pegLengthSpacing
D- pegWidthSpacing
E- pegDia
F- potHoleDia
G- potOffsetTop
H- potOffsetRight
I- terminalLength
J- terminalWidth
K- screenWidth
L- screenLen
M- screenOffsetRight
N- LEDWindowLen
O- LEDWindowWidth
P- buttonOffsetBottom
Q- buttonOffsetRight
Slicing and Printing
Downloaded customized models will not be oriented properly for printing. Open the file in your slicer, then right-click the model and select Split > To Objects.
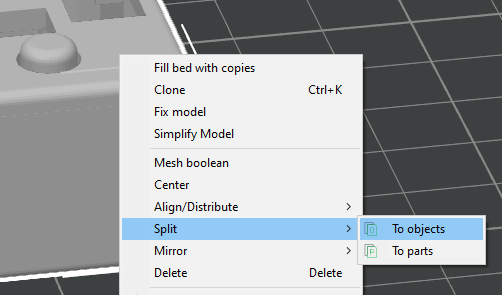
Then rotate the lid so the flat top is flat on the build plate, and separate all three parts for printing. Refer to the provided print profile for an orientation and layout reference.
Assembly
Place the LM2596 board in the bottom of the case. The four corner holes should align with the corner pegs and minimize horizontal movement.
Insert the button piece through the hole in the lid, coming in from the bottom. Once inserted, apply sideways pressure to the top of the button piece with your finger to hold it in place.
Lower the lid+button onto the case, making sure its orientation matches the board orientation. Pop in one side of the lid, then the other. The second side will require a fair amount of force.
Disassembly may require using a flat screwdriver for leverage between the case and lid along one of the long edges to pry it off.
Adjustable LM2596 Case (Display Version)

Publicado em 17 de jan de 2026
Gostou deste modelo? Crie uma conta grátis para salvar seus favoritos e voltar a eles depois.
Criar conta