Você está no 3DFinder
Buscamos em Thingiverse, MakerWorld e Printables ao mesmo tempo para te dar o melhor de cada uma.
Descrição
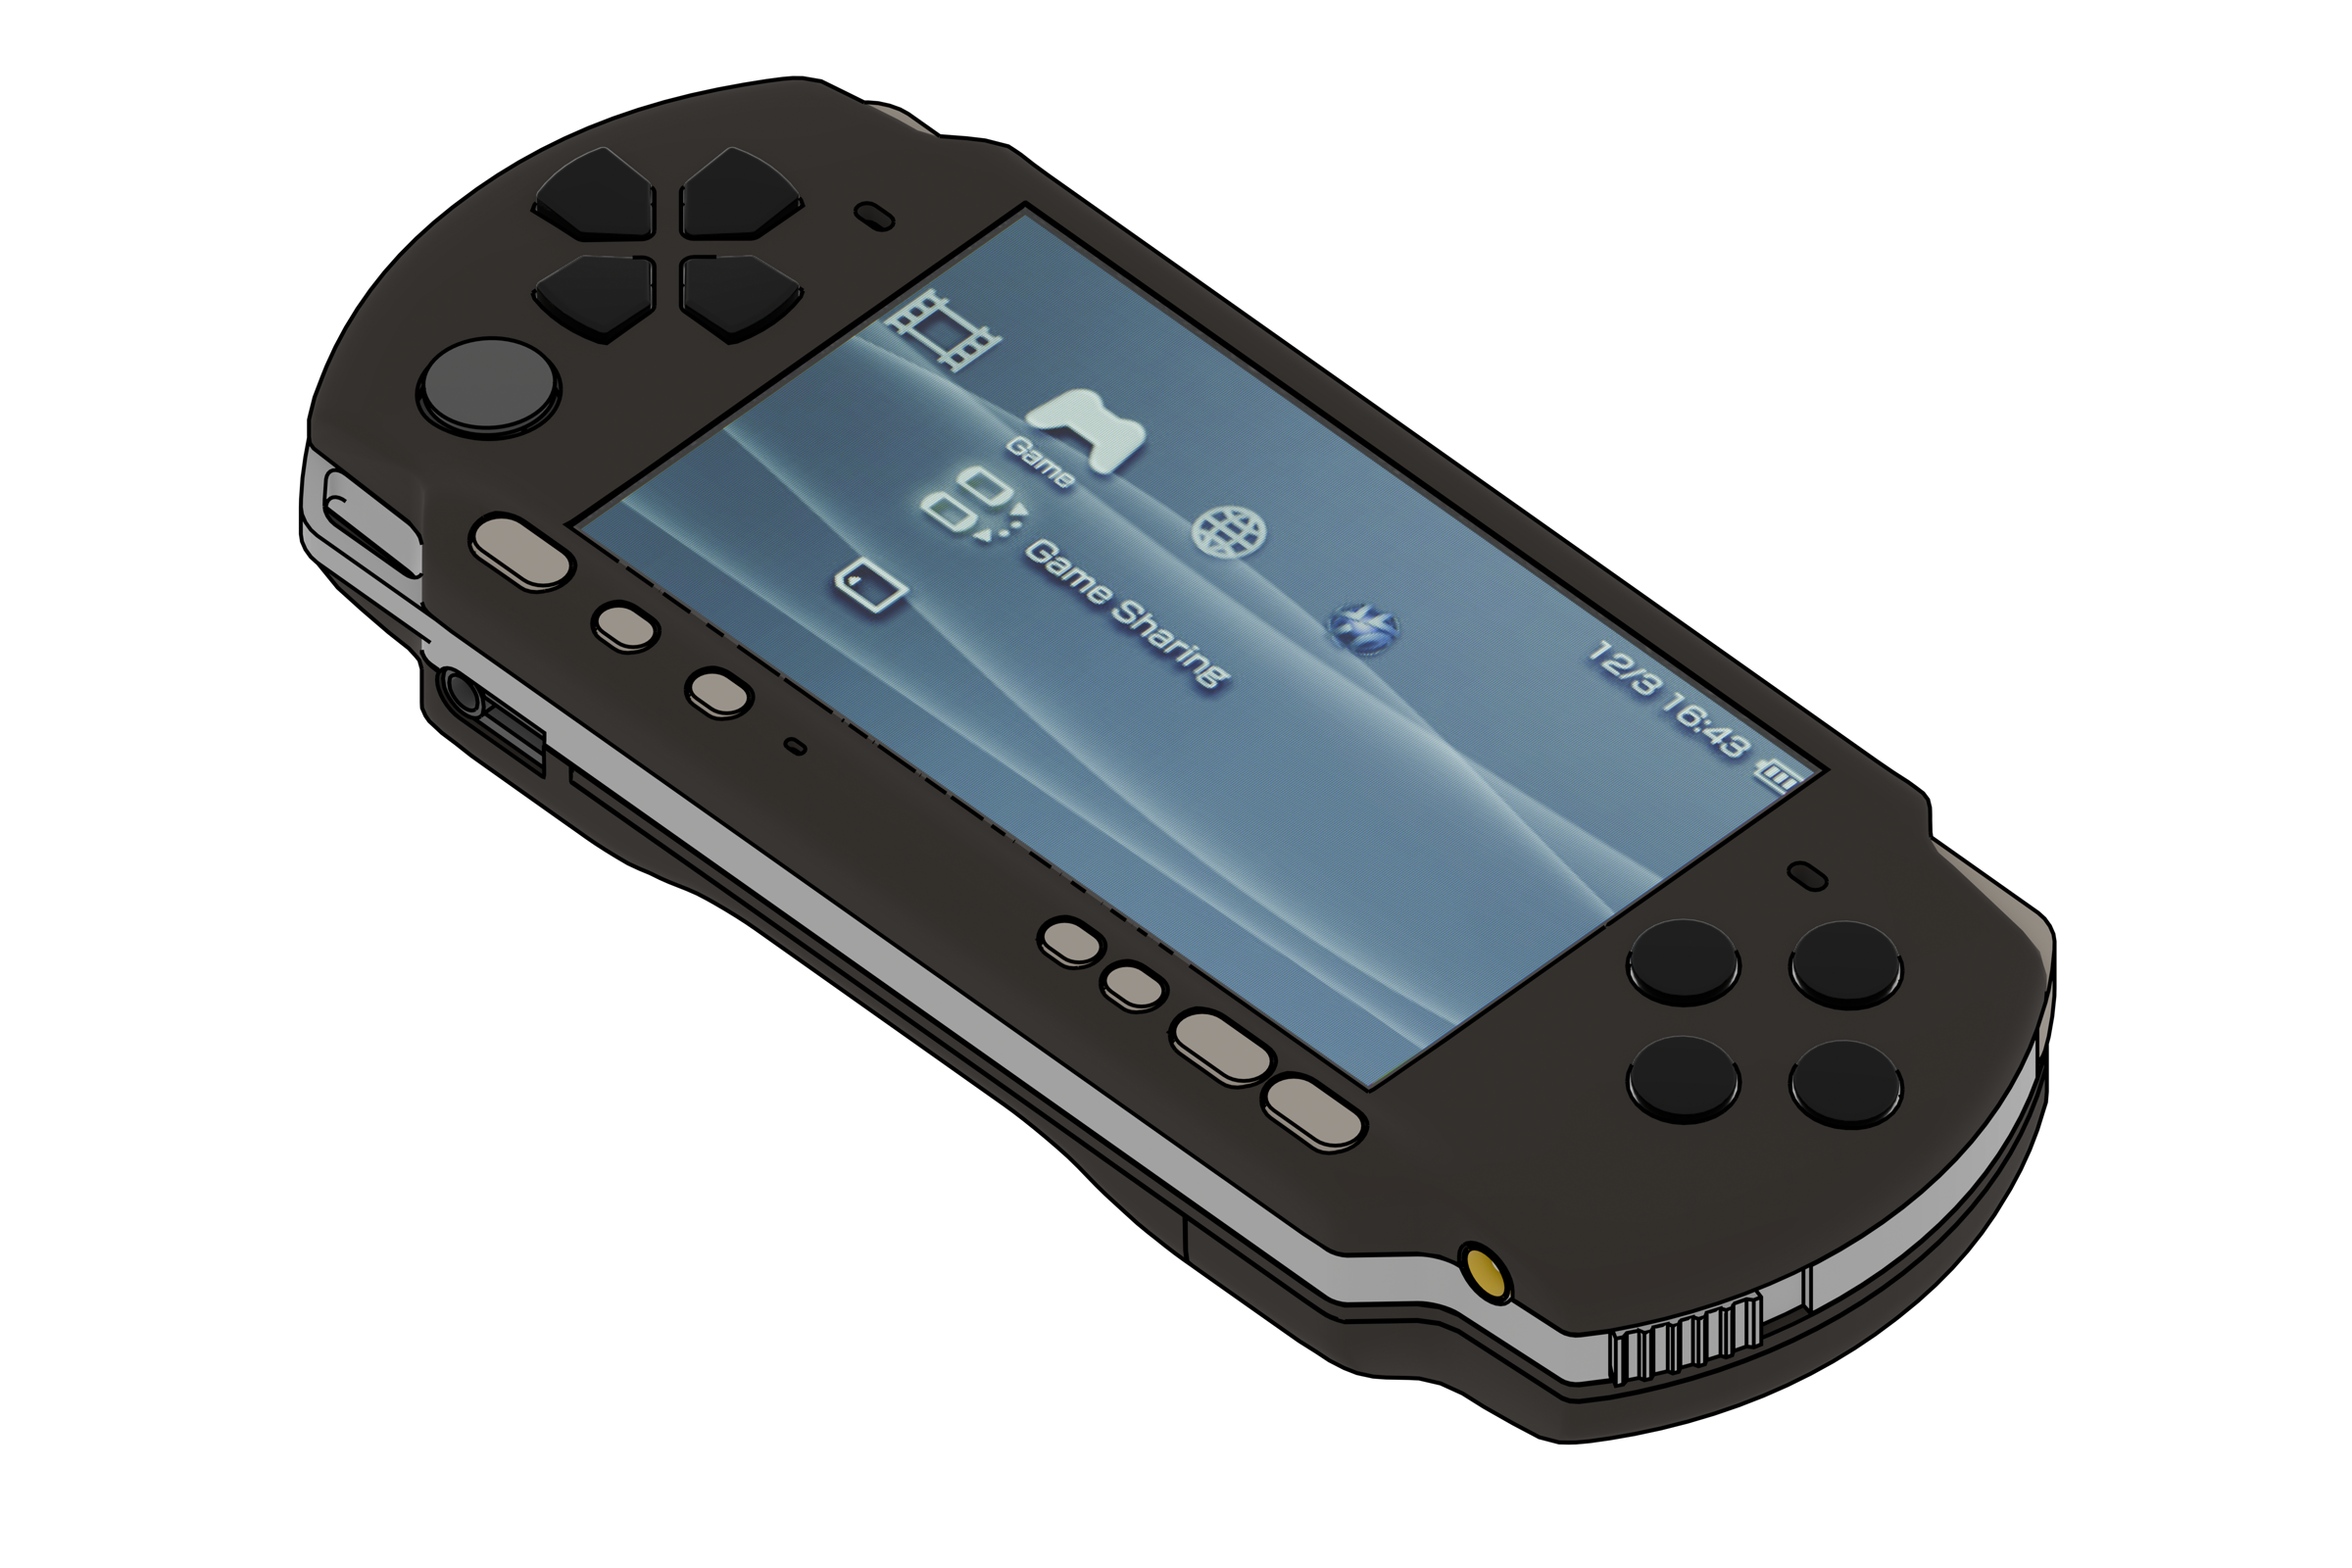
A complete, standalone shell kit designed for the PSP 2000 and 3000 (Slim) models. This custom shell is not compatible with original factory shells and is intended for full replacement or modding projects.
Current avaliable styles
| Styles | Description |
|---|---|
| Default | The default design of the shell. |
| Sackboy / LittleBigPlanet | A Sackboy styled PSP with cardboard triggers + Zipper On/Off switch |
| Lemon | Thirsty ? Lemon lemon lemon |
Some folders from different styles may have less files than the others, because they are direct replacements to the default style parts.
I will add other styles, if people have made custom styles, feel free to message me so that i put your printables link on the style table!
Features
- Fat Battery Support – Includes space for the larger PSP 1000 battery (this means the slim battery isnt really supported)
- Modding-Friendly Design – Extra space on the back for custom modifications (fans, heatsinks, etc.).
- Compatible with 2000 & 3000 PSP models.
What You'll Print
- Full Shell Assembly (front & back halves)
- Internal & External Chassis Frames
- All Buttons & Switches (media, Wi-Fi, power, face buttons, triggers)
- Memory Card Door & Latch
Tools Needed
- 3D printer capable of printing a minimum volume of 180mm x 180mm x 180mm.
- Screwdriver appropriate for the screw sizes used (M3, small black PSP Screws).
Materials for Assembly
| Type | Components | Additional Information | Quantity (Recommended) |
|---|---|---|---|
| Plastic | PLA or better | To print all the parts | ~200g |
| Screws | Self-Tapping M3x4mm | 2x | |
| Screws | Self-Tapping M3x6mm | 2x | |
| Screws | Self-Tapping M3x14mm | 5x | |
| Screen | Front glass panel | Or plastic might also work | 1x |
| PSP Parts | Metal threads | The ones used to screw accessories at the top | 2x |
| PSP Parts | Small black screws | The ones holding the charging port, joystick and power button | 3x |
| PSP Parts | The electronics | Everything except the UMD | 1x |
| PSP Parts | Arrow buttons | 1x | |
| PSP Parts | Main buttons | 1x | |
| PSP Parts | Arrows conductive pad | 1x |
The right pad button might need to be modified if it doesnt fit properly
If you already have some M3x14mm or more you could try to cut them to the other sizes.
Printing
Printing is easy, the hard part is the post-processing of the face plate, be careful to not breaking it when removing the excess plastic, from experience, matte PLA broke easier in the corners of the screen repeatedly.
There is also the media buttons plate for the PSP 3000 wich is extremely fragile, i was able to print and put it in a PSP, but did break 3 - 5 before putting the mic, i will look for an alternative on how to make it.
Assembly
The build guide is primarily designed for the PSP 2000, with additional notes for the PSP 3000 (which has minor differences). Once you’ve printed all parts (as listed above), you can begin assembly.
The point of view will change from time to time, so memorize the parts a bit so you dont get lost.
Step 1 - Wi-Fi button placement
- Put the Wi-Fi button onto the shell chassis
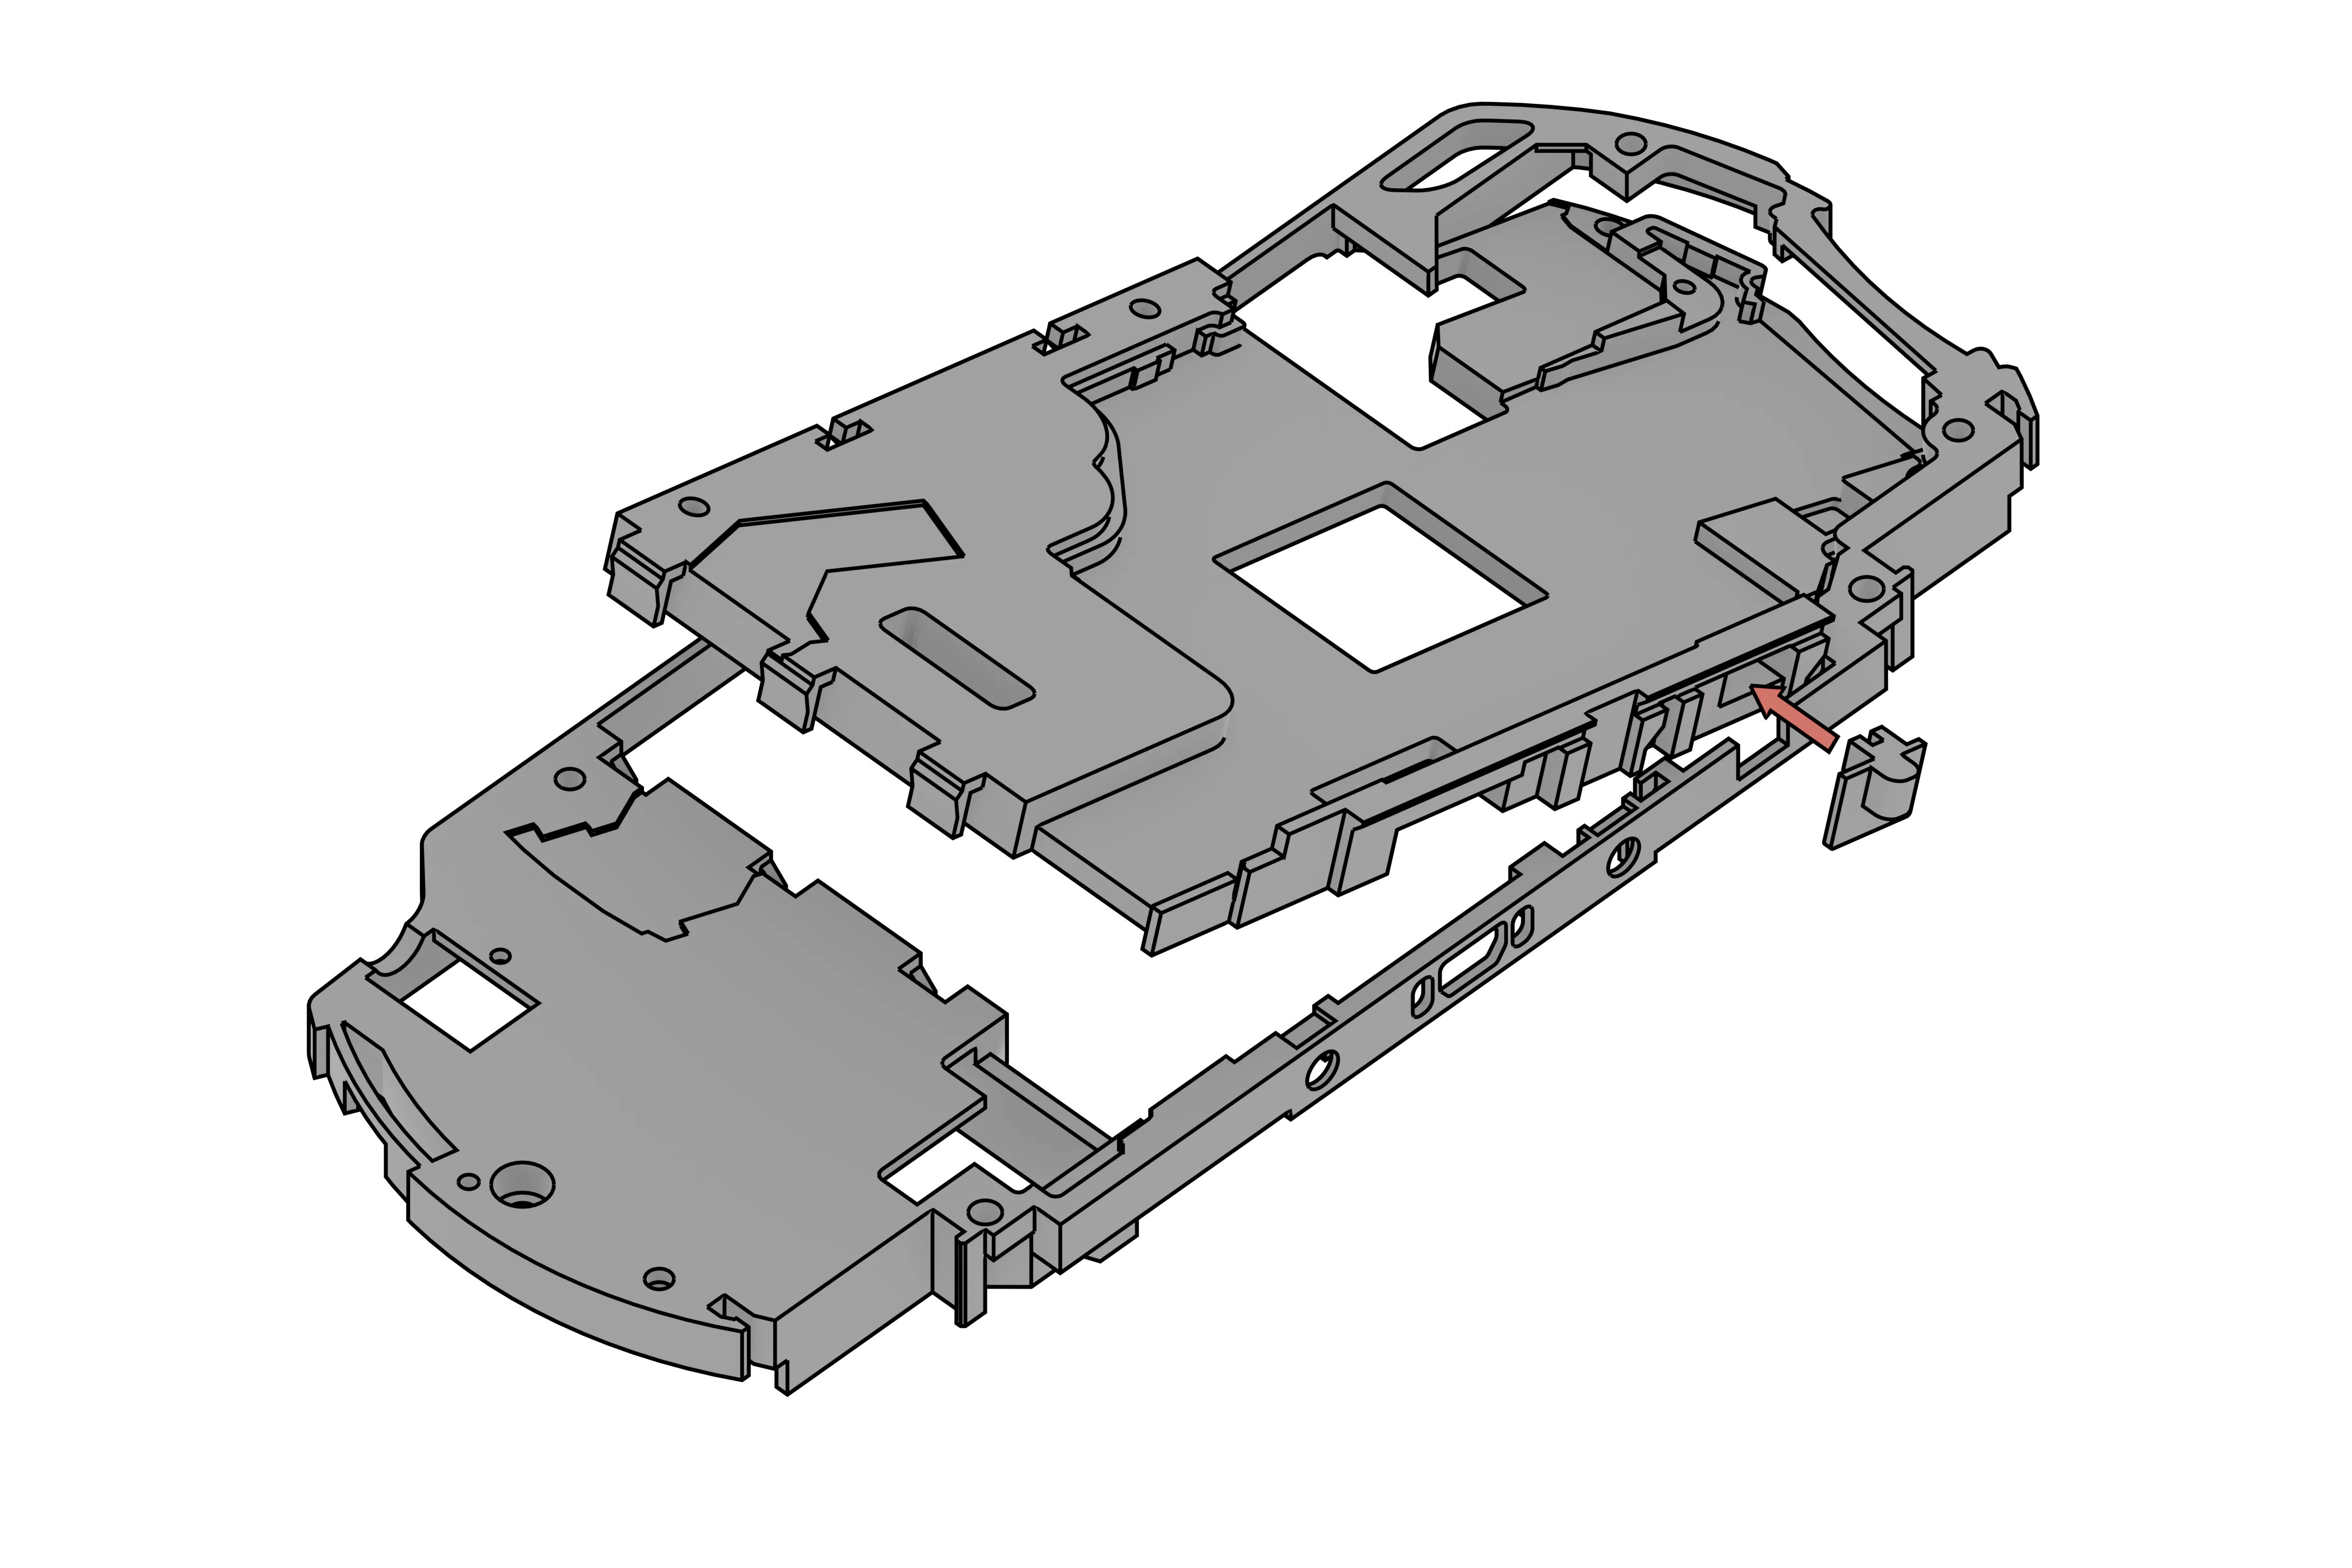
Step 2 - Shell chassis mount
- Push the shell chassis down into the frame(rim
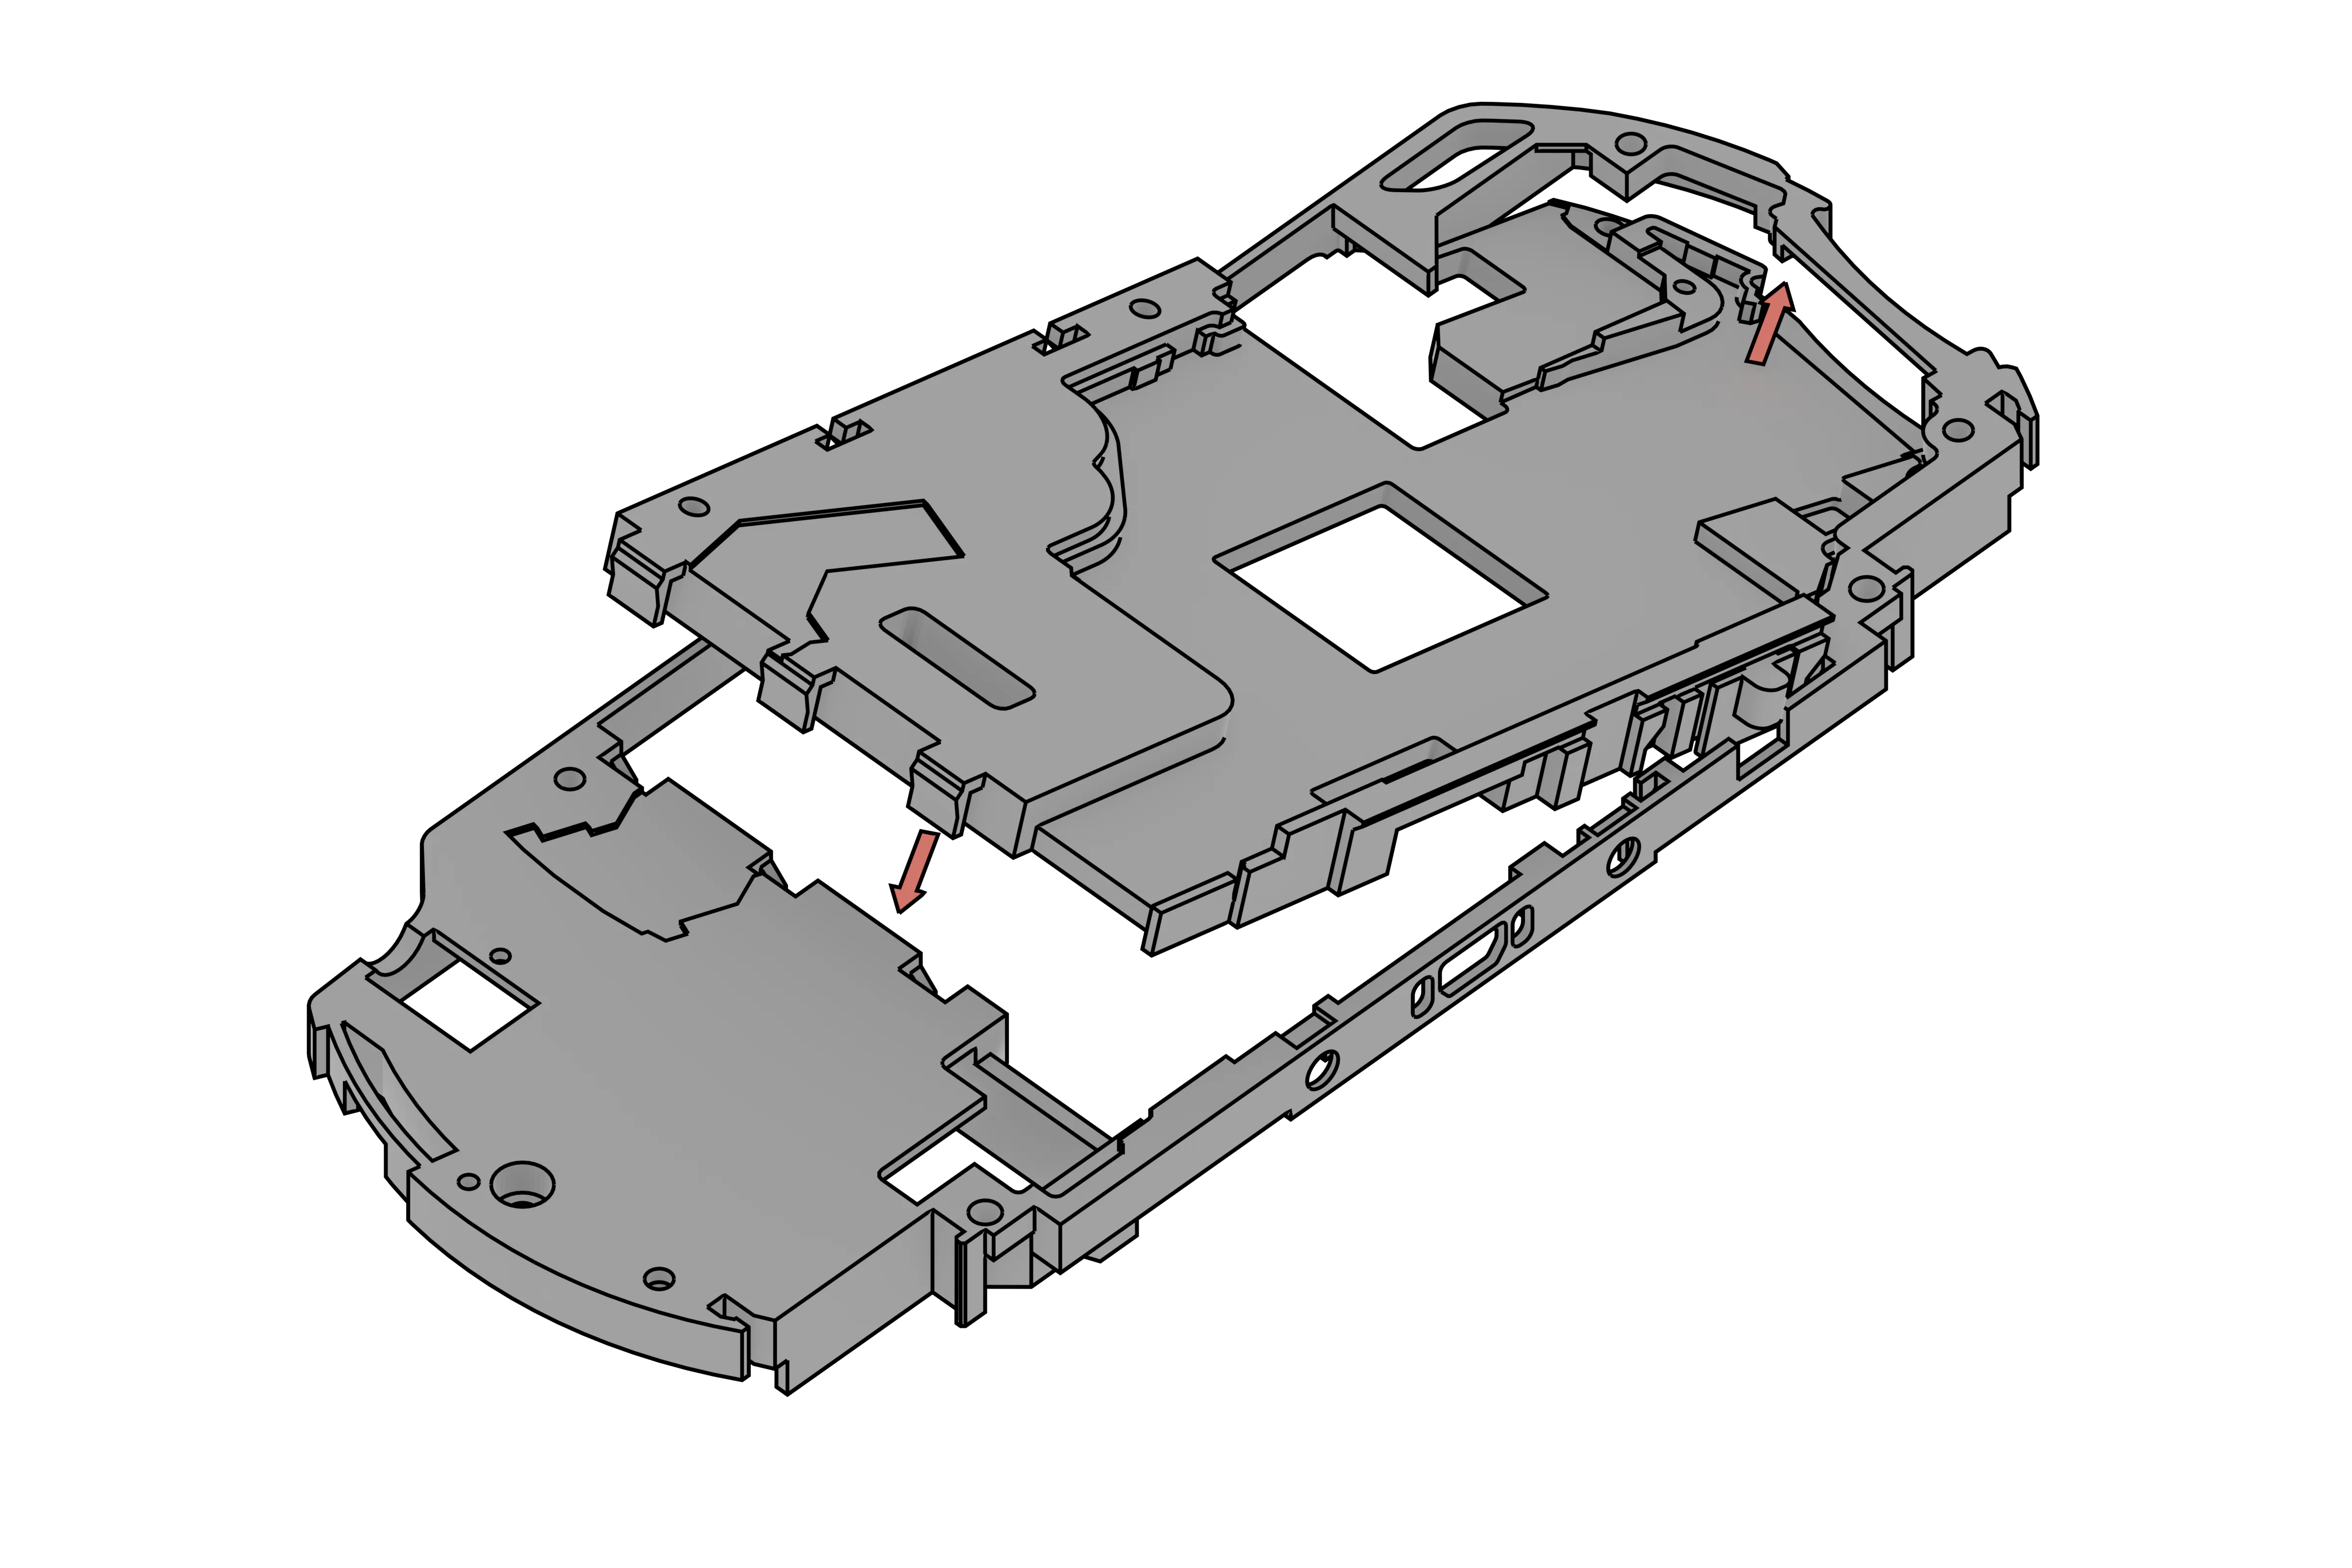
Step 3 - Locking the shell chassis and frame
- Make sure the shell chassis is flush with the frame, the 5 points clip into place.
- 🔵🔵The clips might a bit of strength to enter, be carefull to not break the parts.
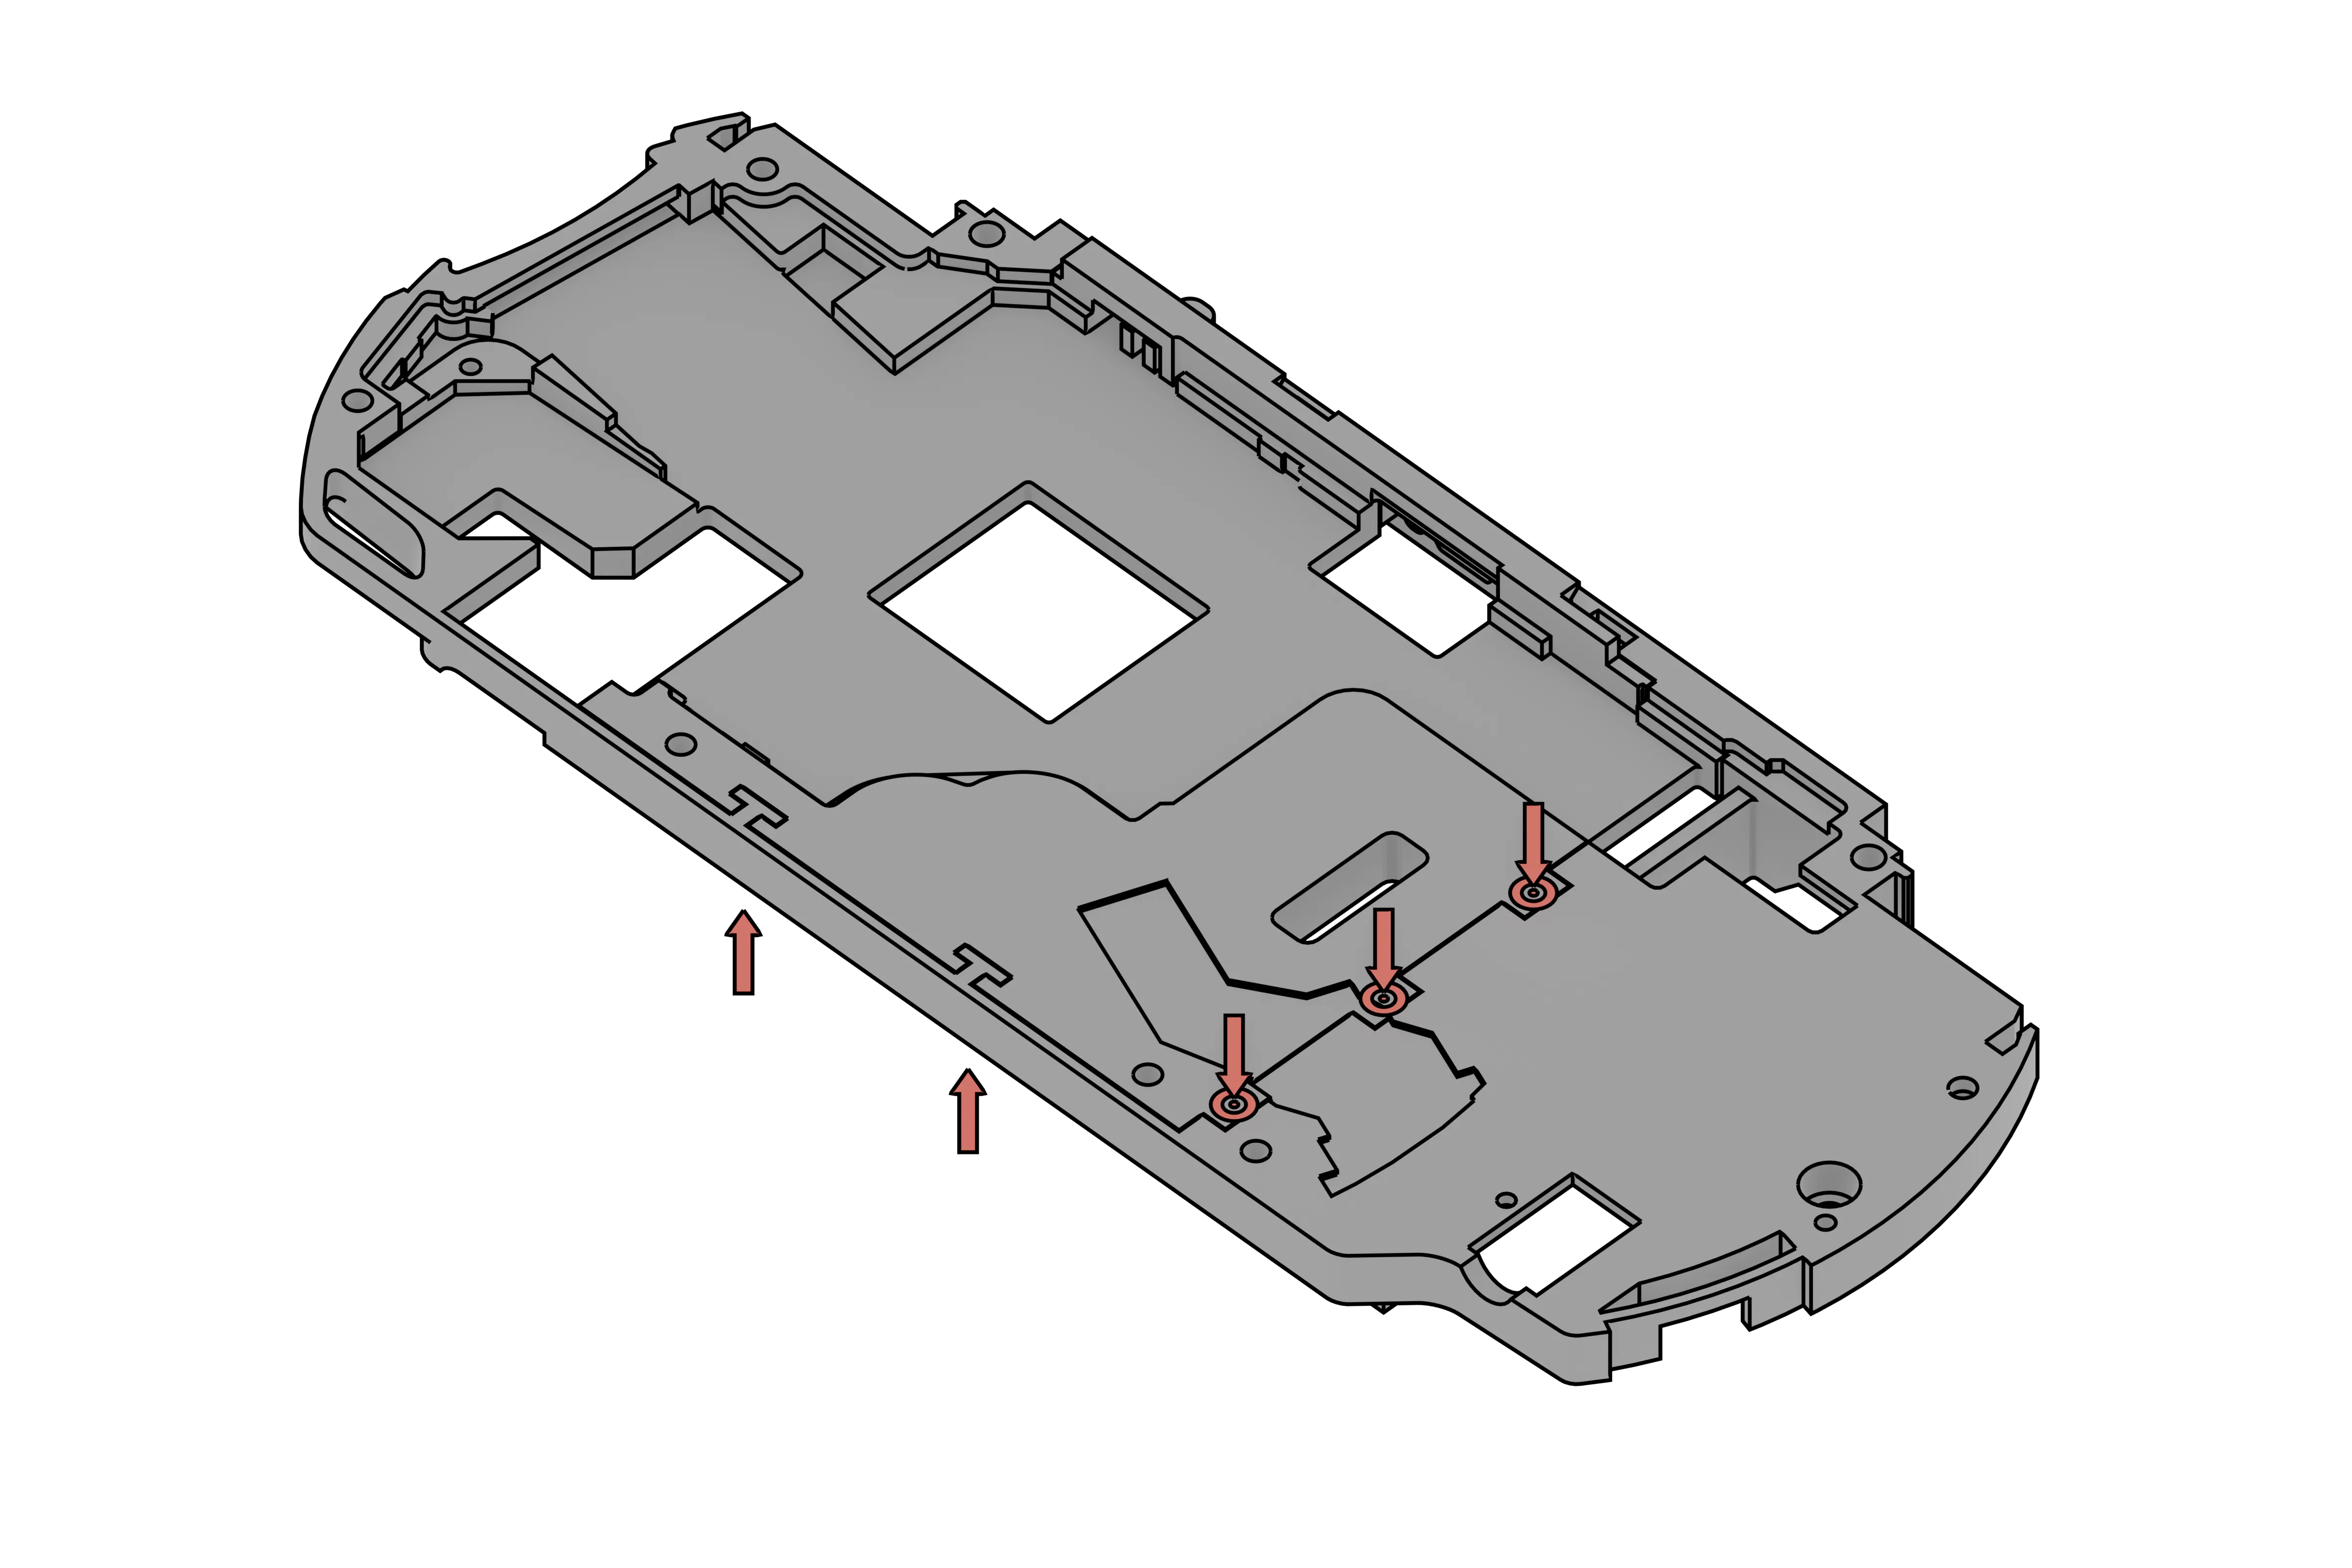
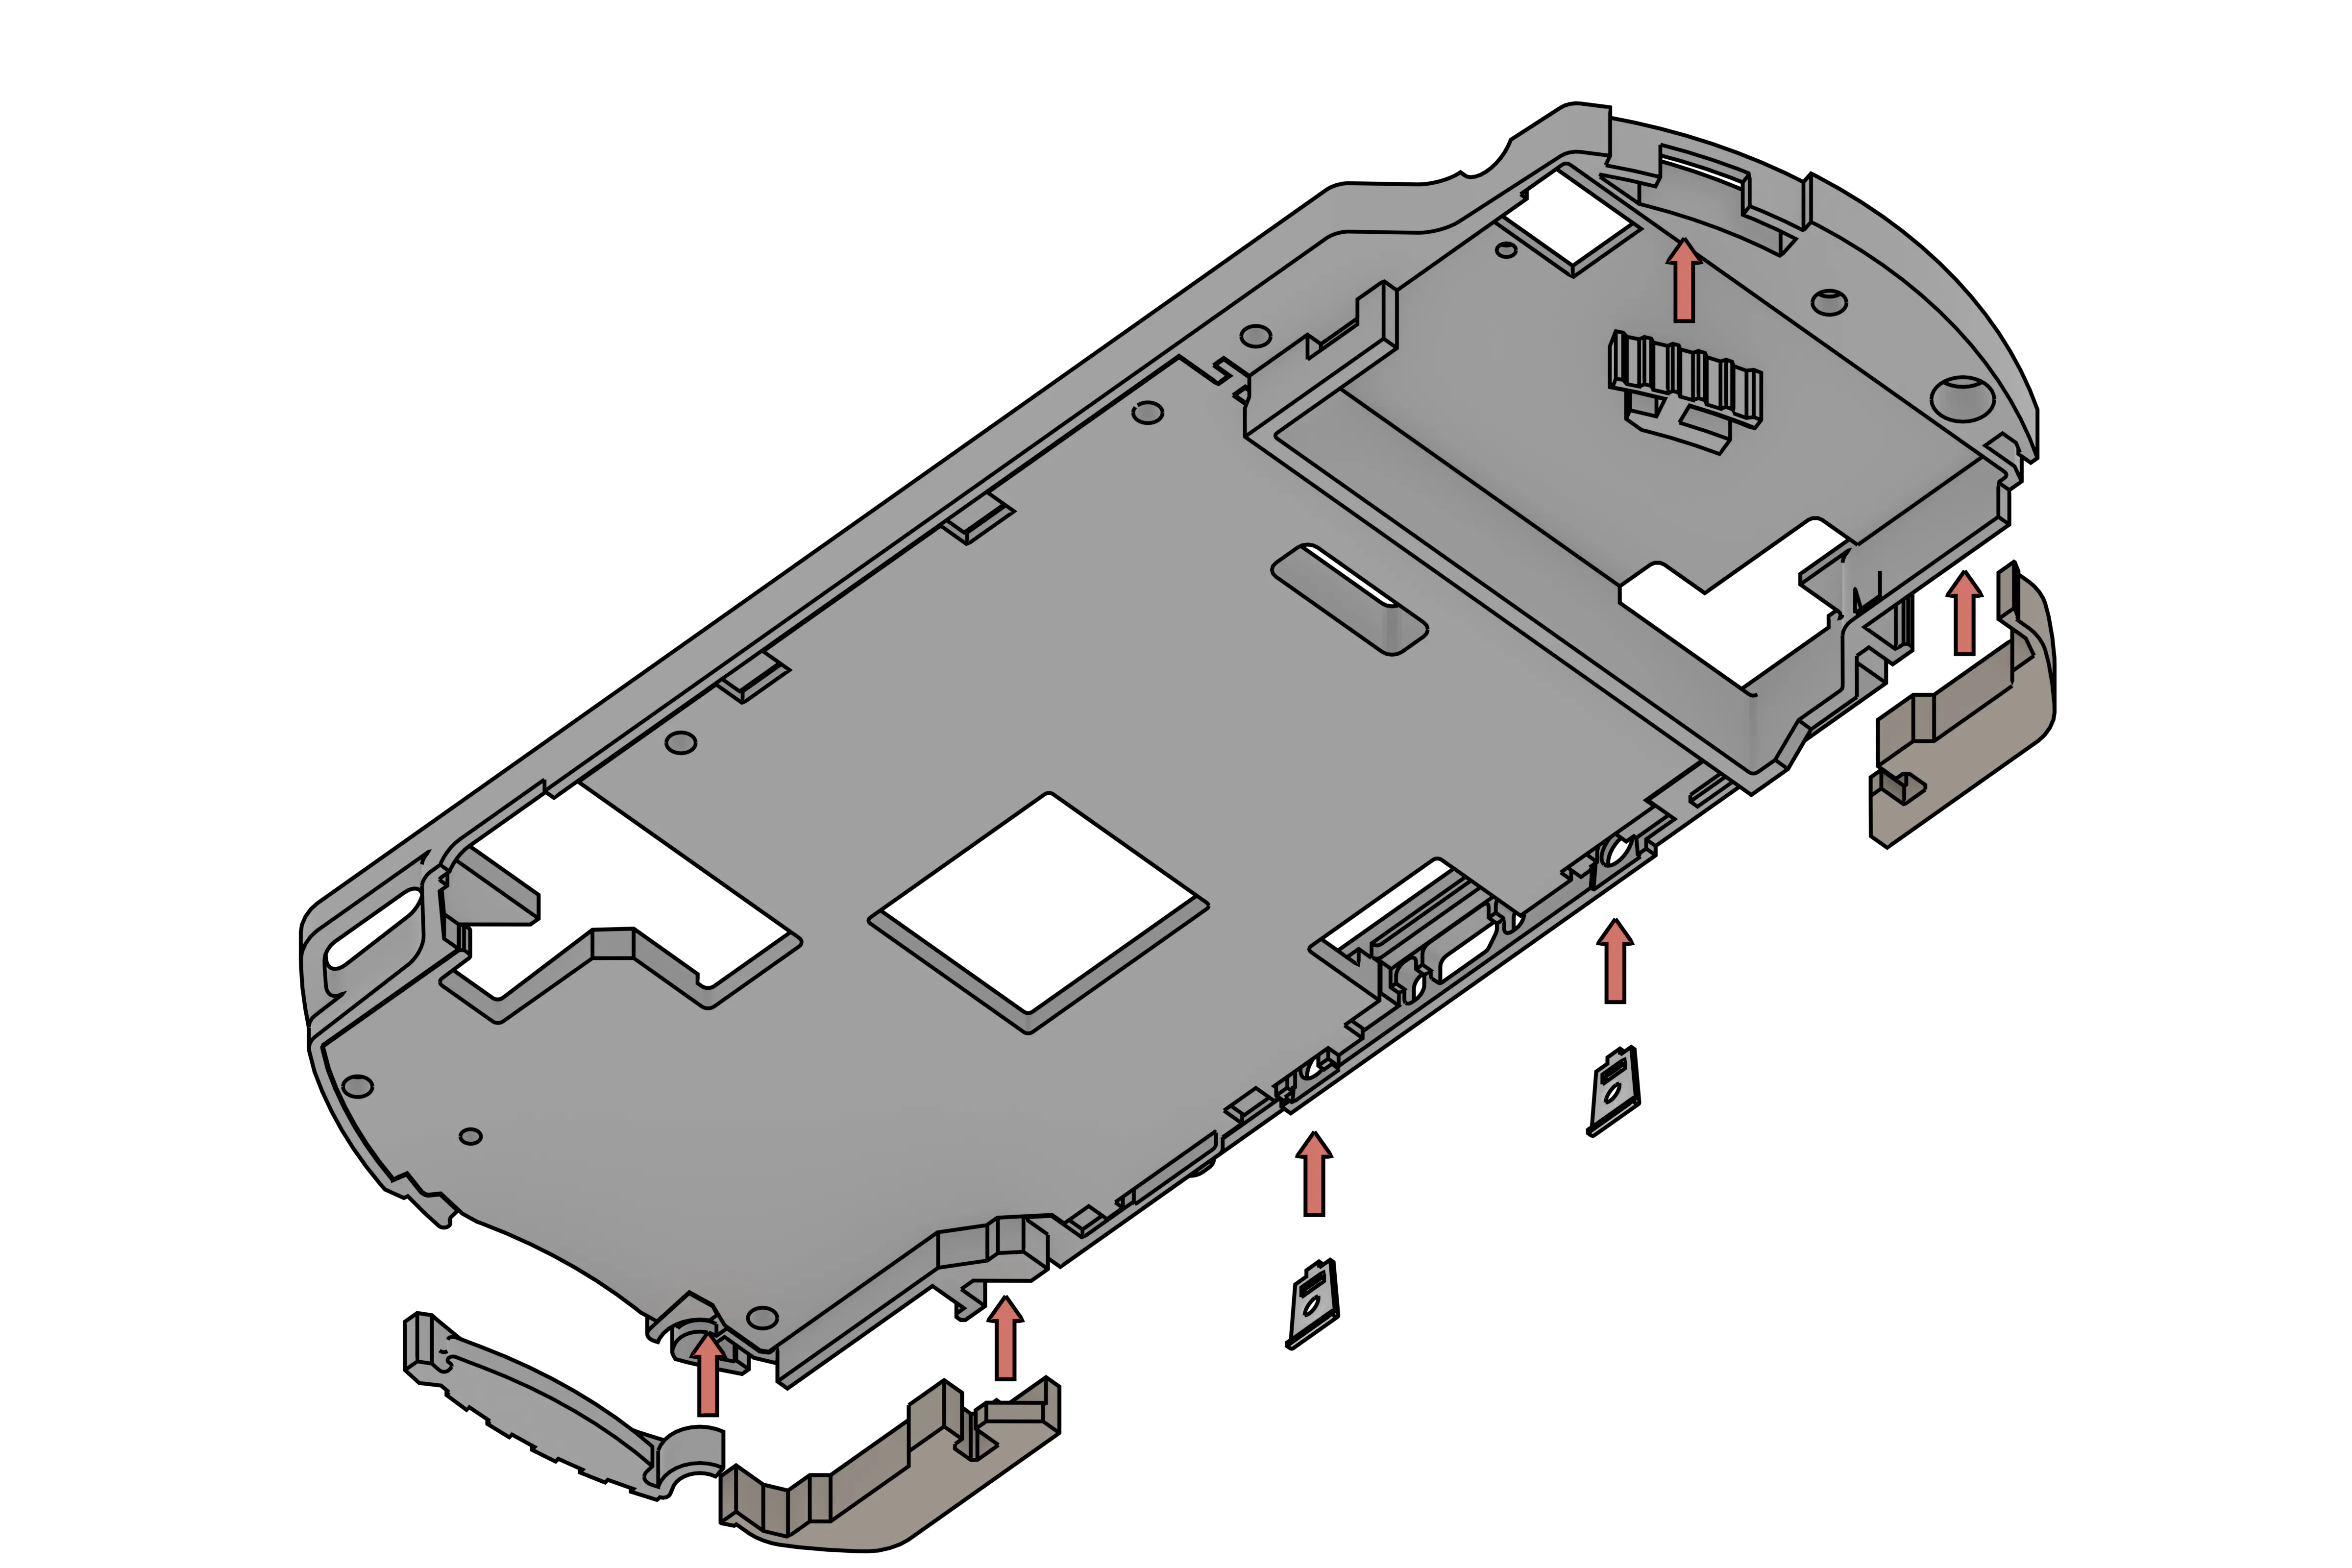
Step 4 - Triggers, door, power button & accessory threads.
- Push the following pieces onto the chassis
- 🔵🔵 Only the memory card door and the accessories threads will hold into place, the other ones may fall, i recommend turning the frame's back upwards so they dont fall, it will also be necessary for the next step
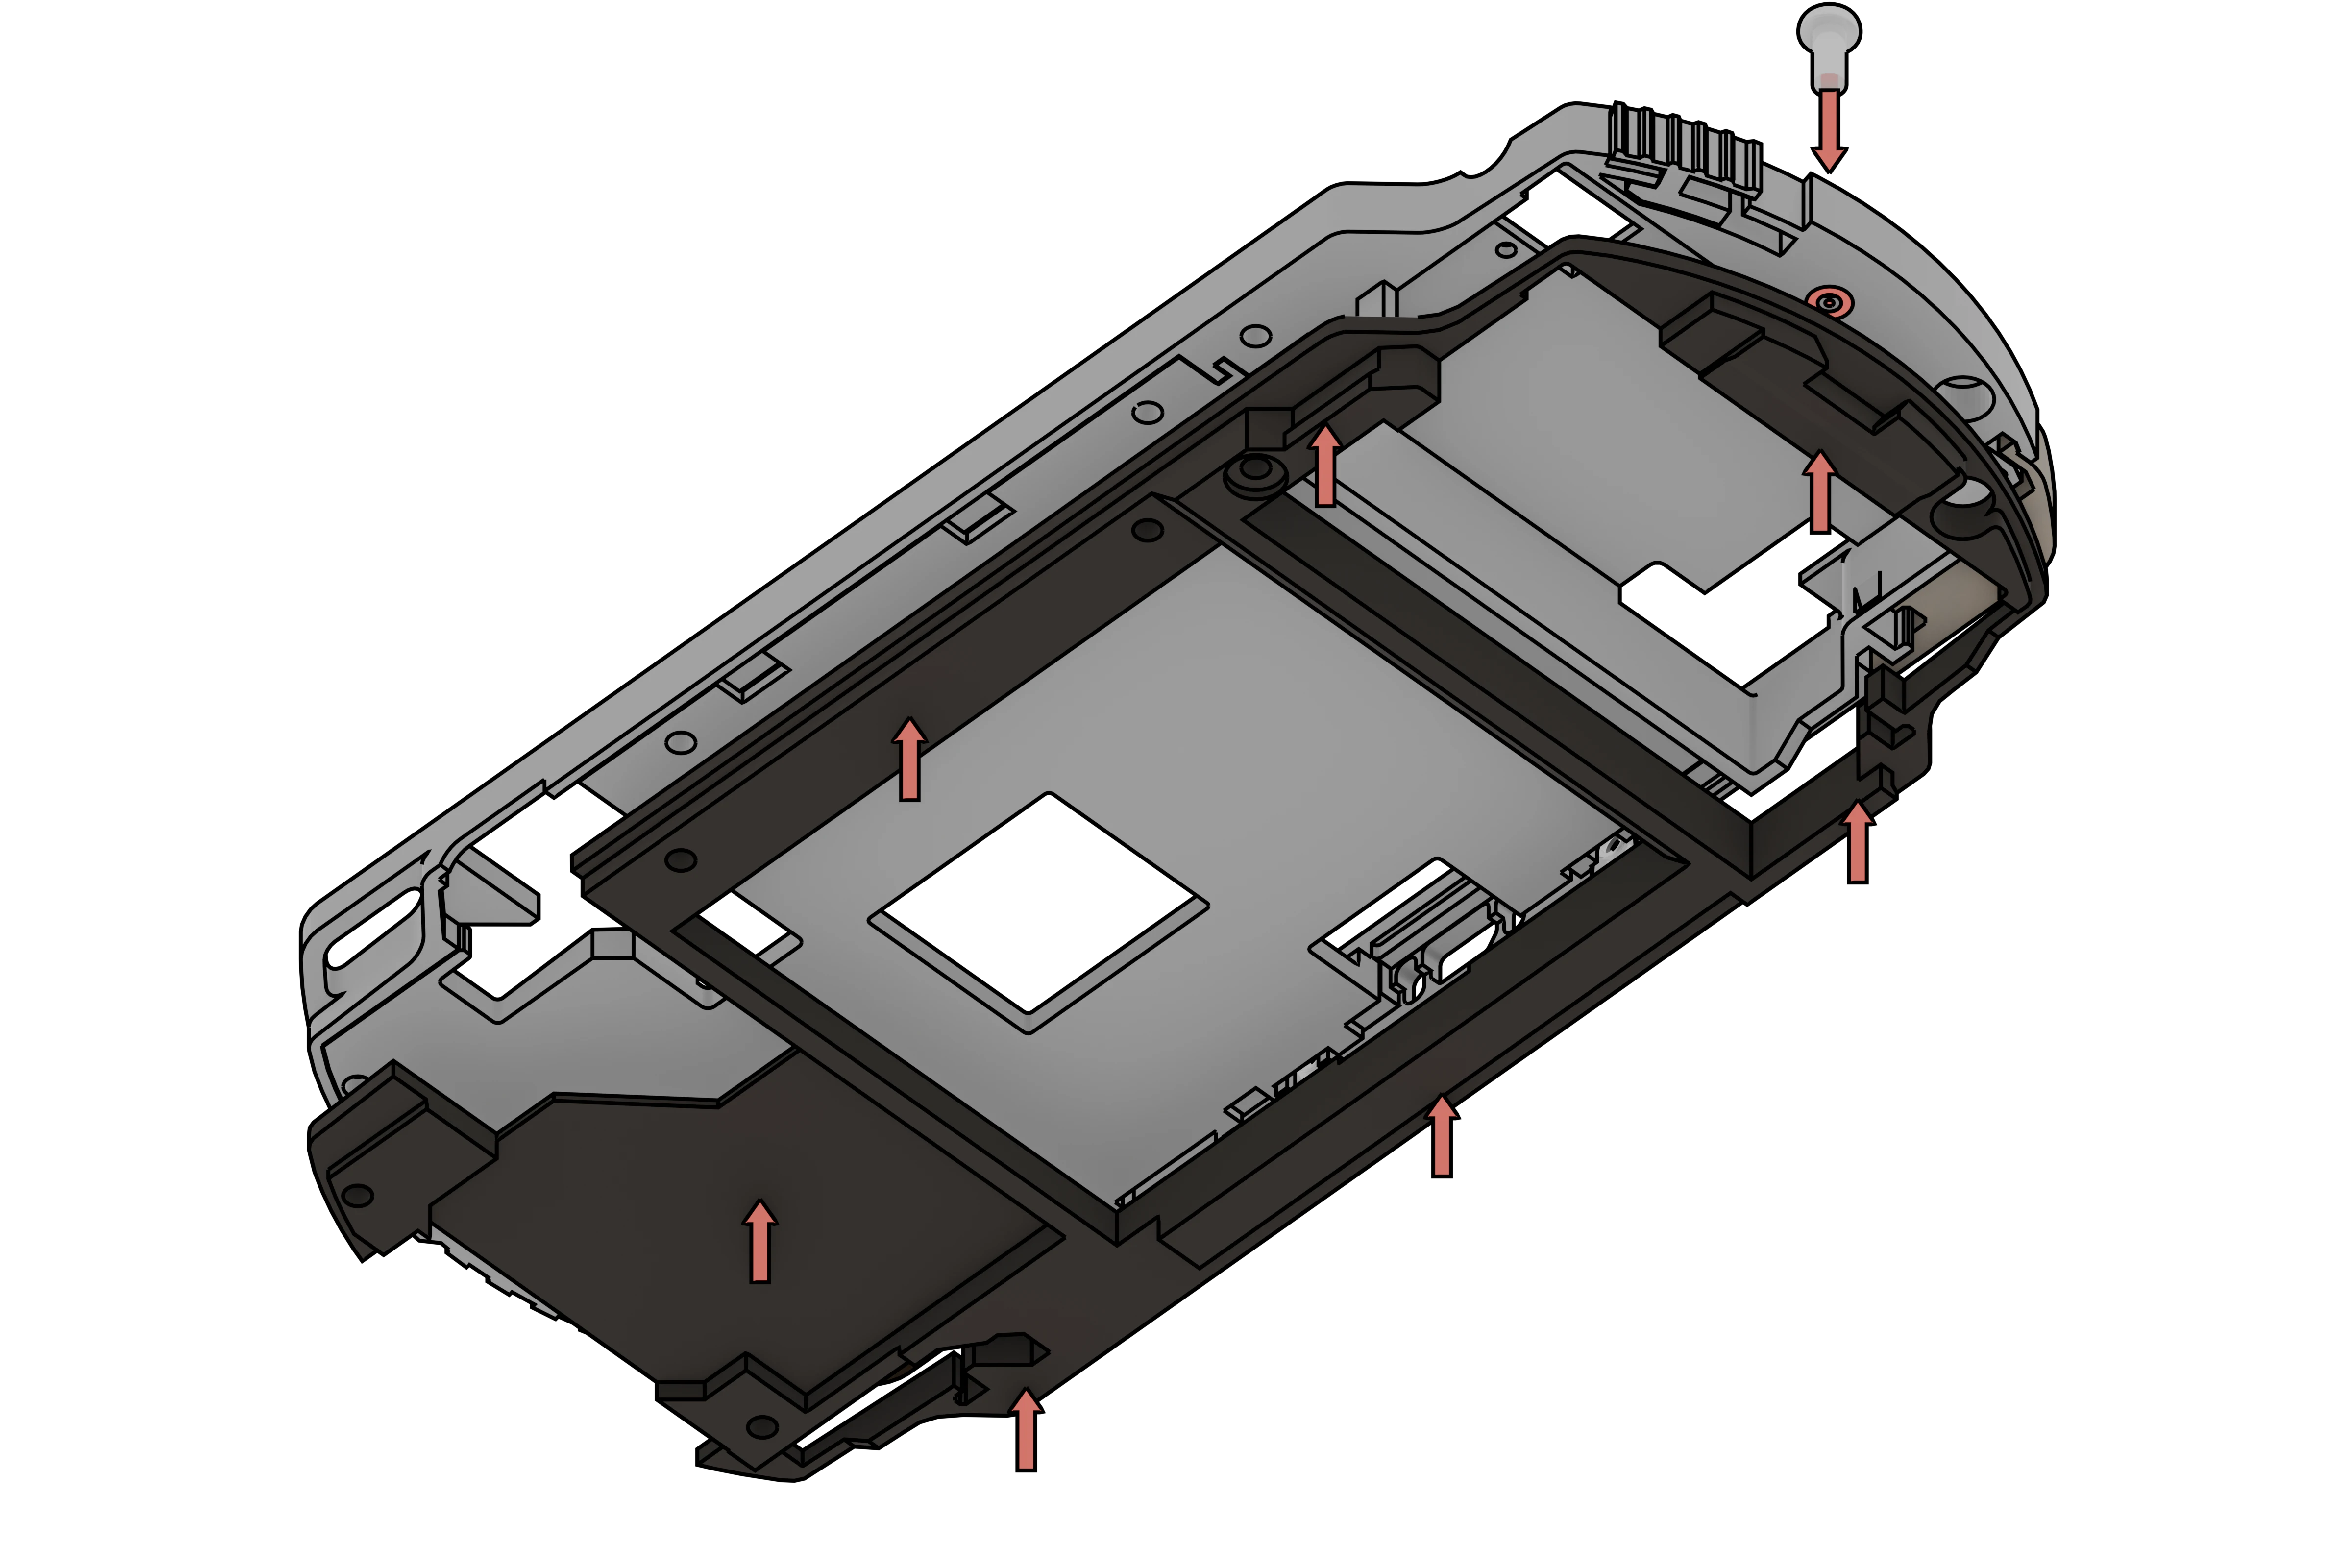
Step 5 - Back face placement
- Put the backface onto the frame and screw it from the other side afterwards.
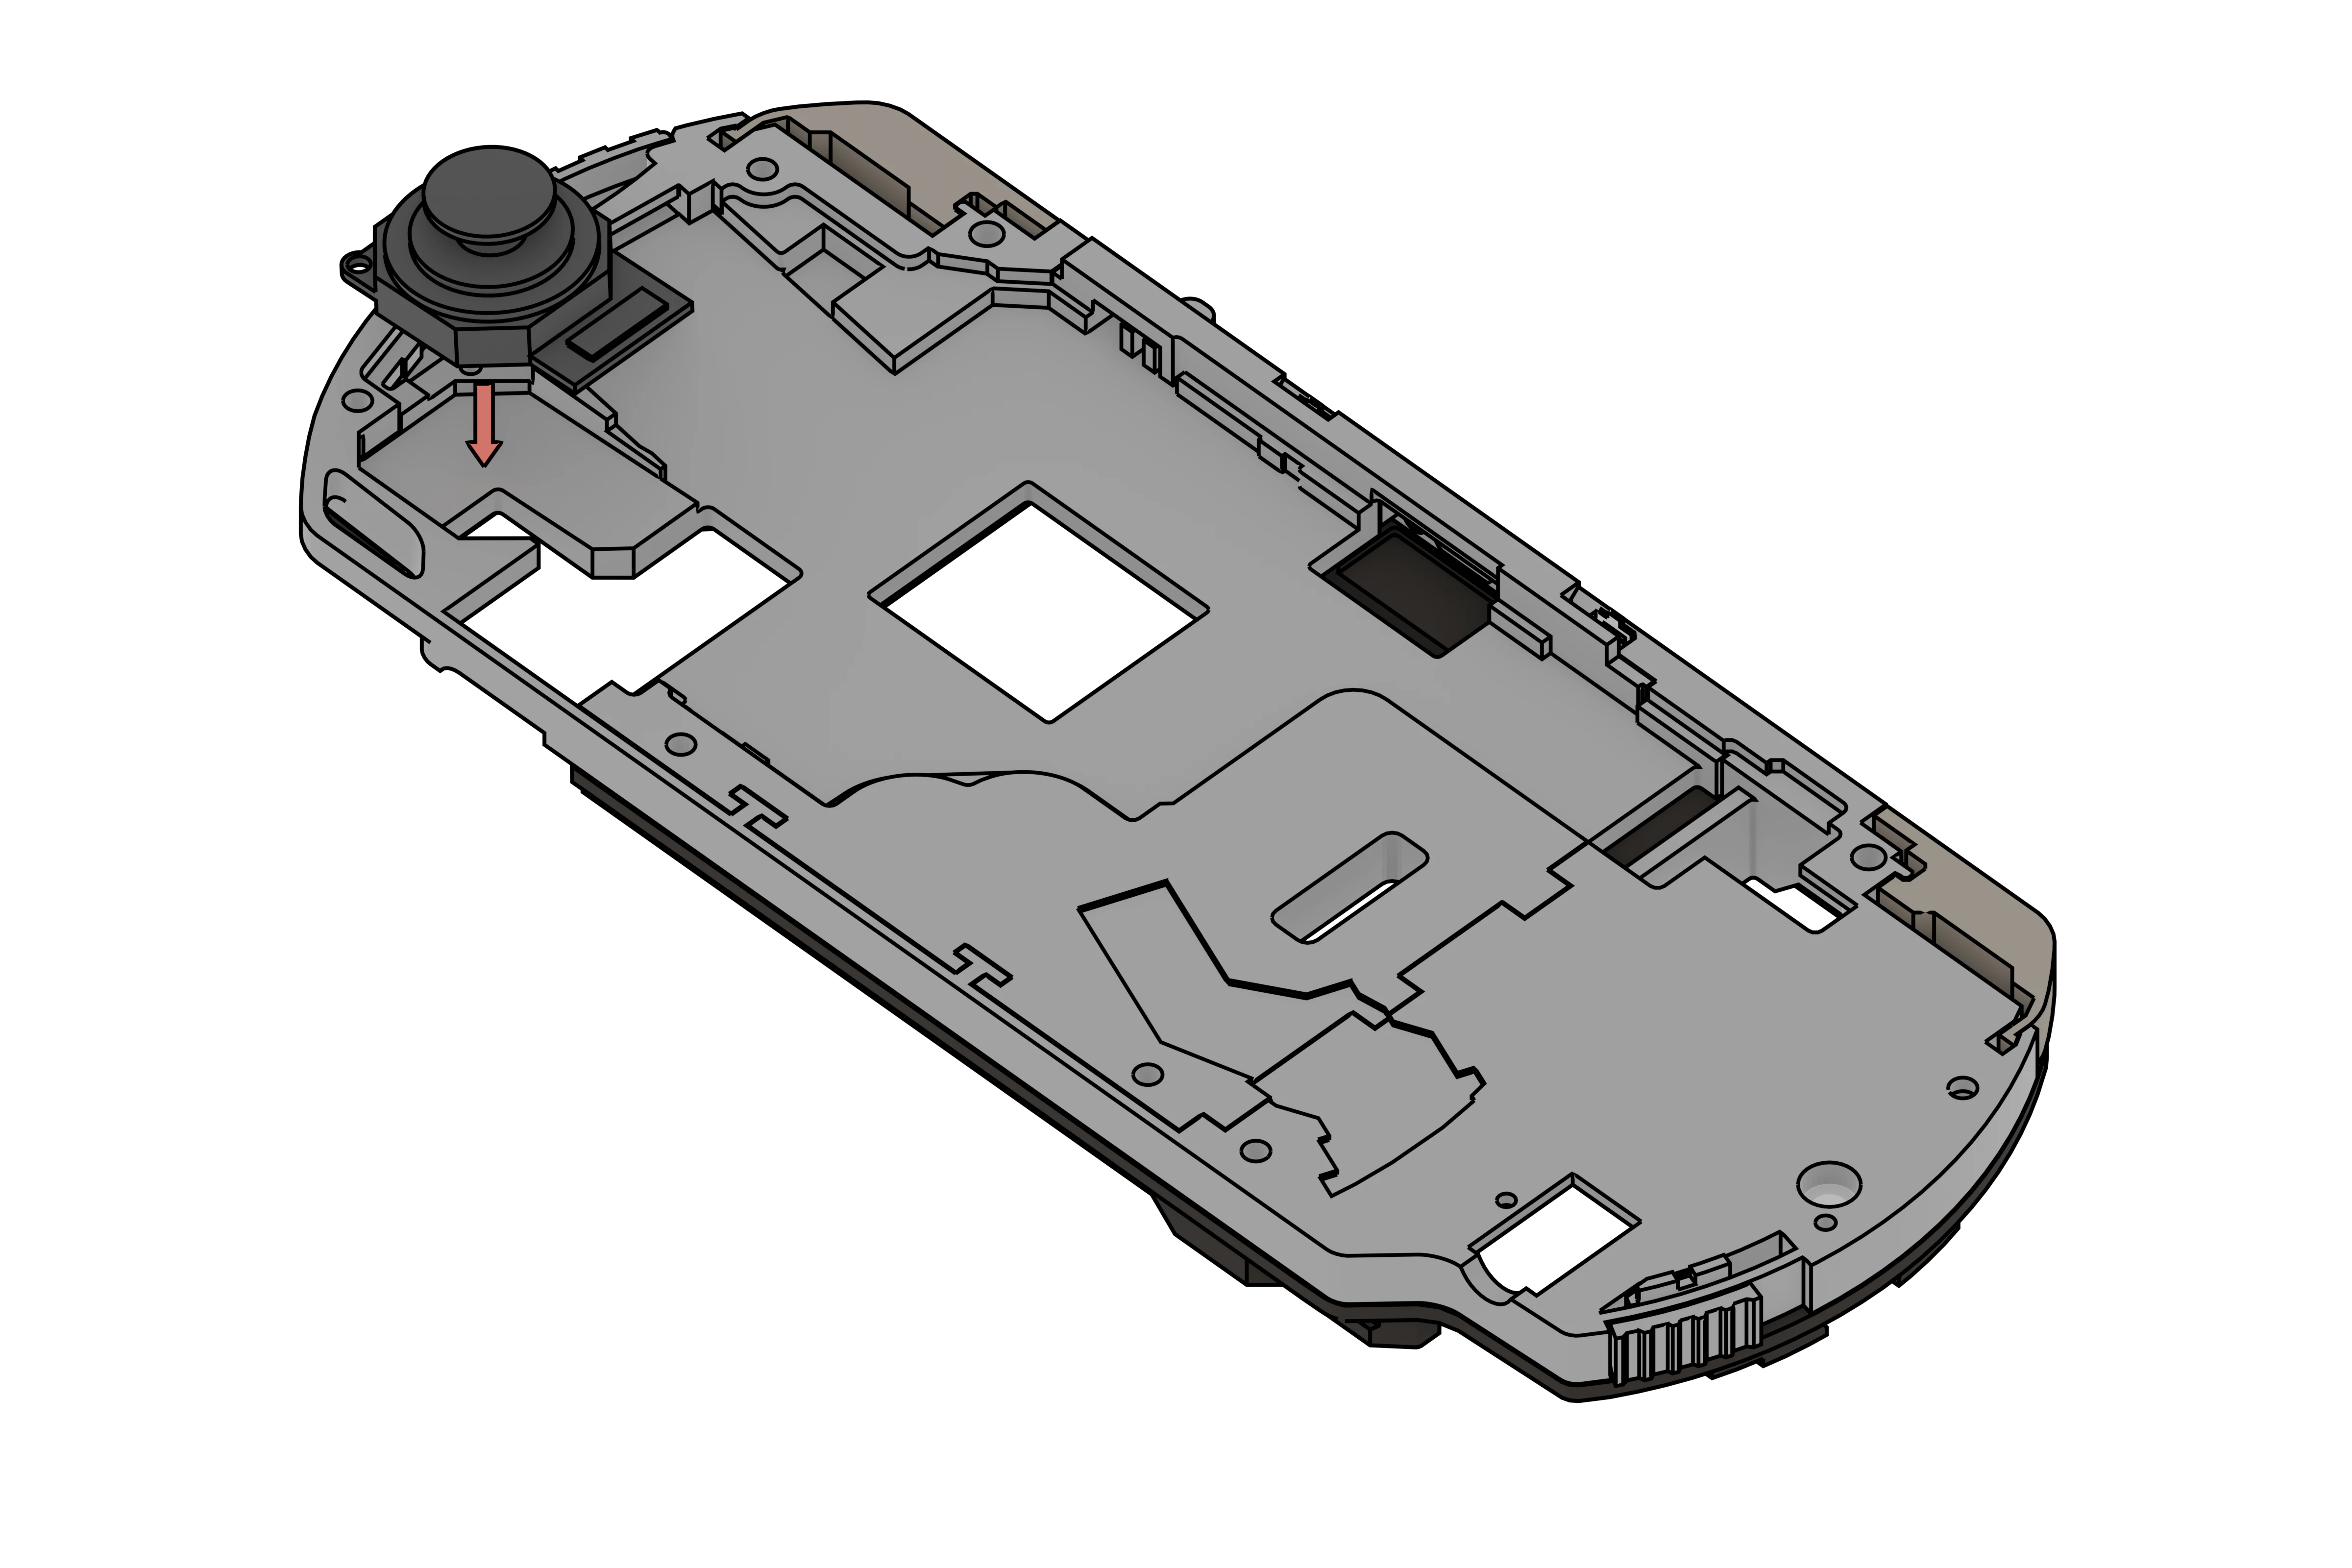
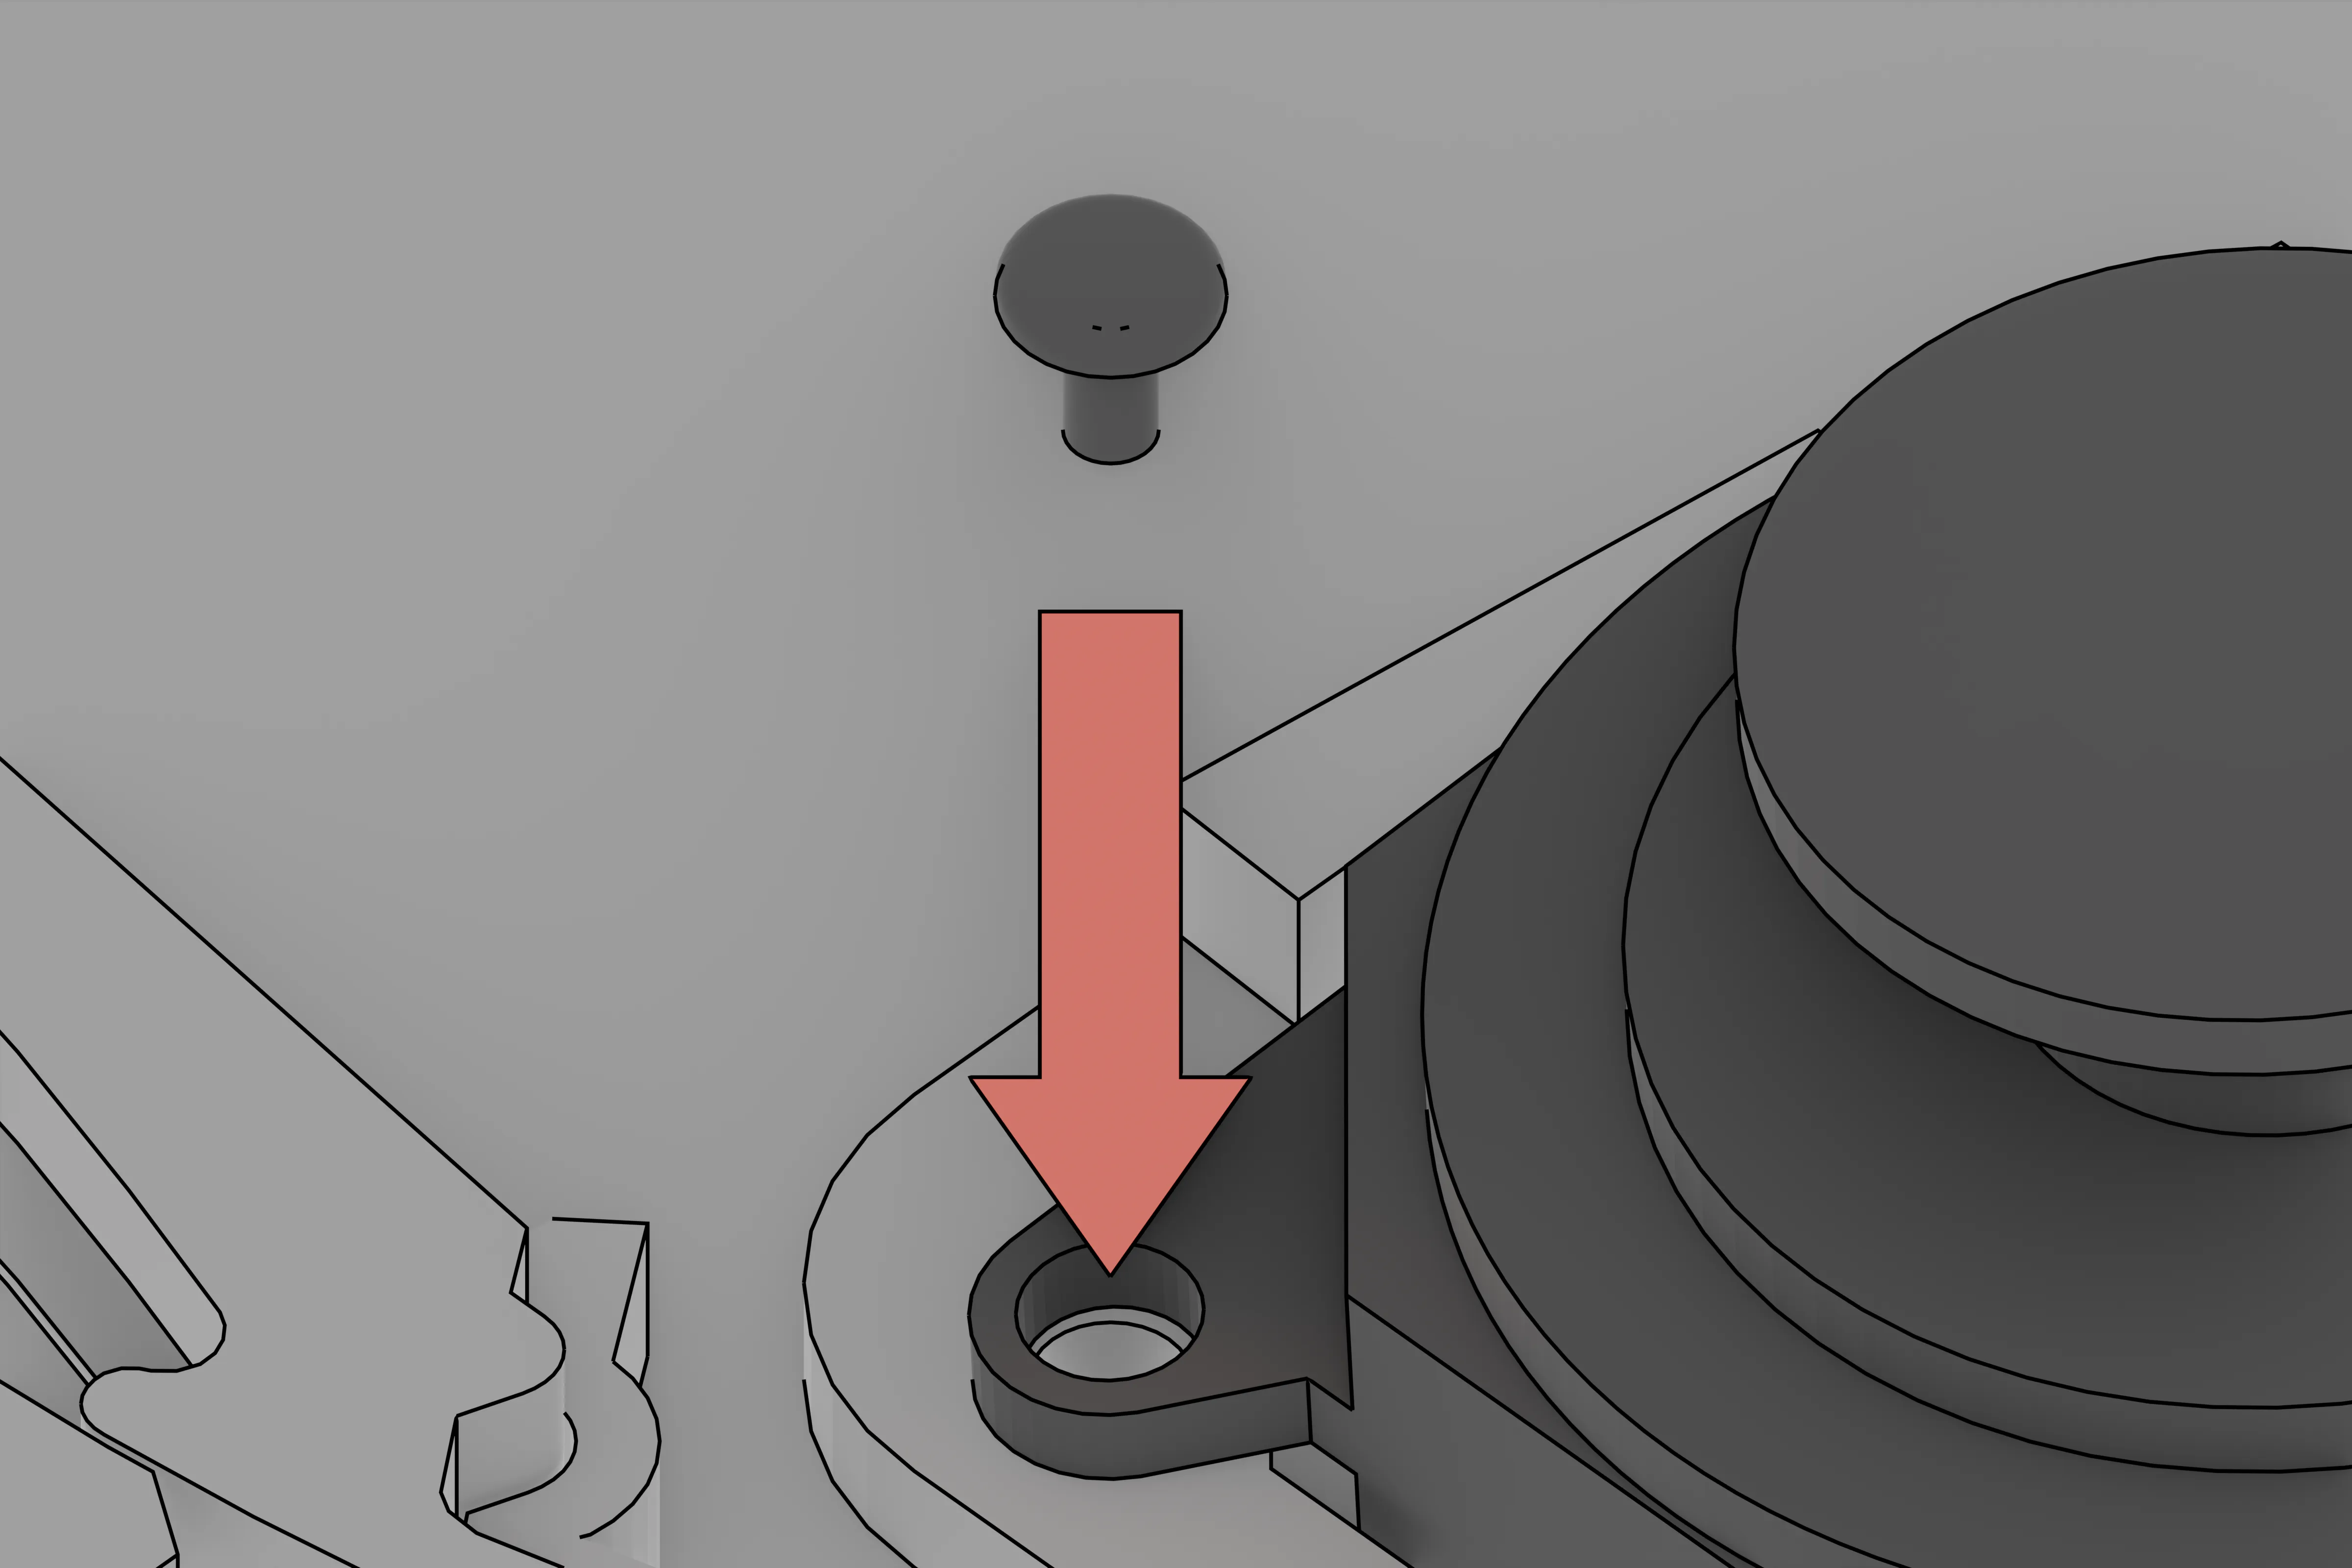
Step 6 - Joystick placement
- Put the joystick onto the chassis and screw it in place
- 🔵🔵 For PSP 3000
I recommend connecting the joystick cable onto the motherboard and putting everything onto the frame in the next step.
Step 7 - Motherboard + audio module placement
- Enter the motherboard and PSP sound/video module onto the case, they do fit but might be hard to put it correctly, make also sure that the Wi-Fi button lines up with the motherboard.
- 🔵🔵 For PSP 3000
This part will be easier than the PSP 2000 because the sound/video module is soldered to the motherboard, when pressing it down you will flex the frame a bit.
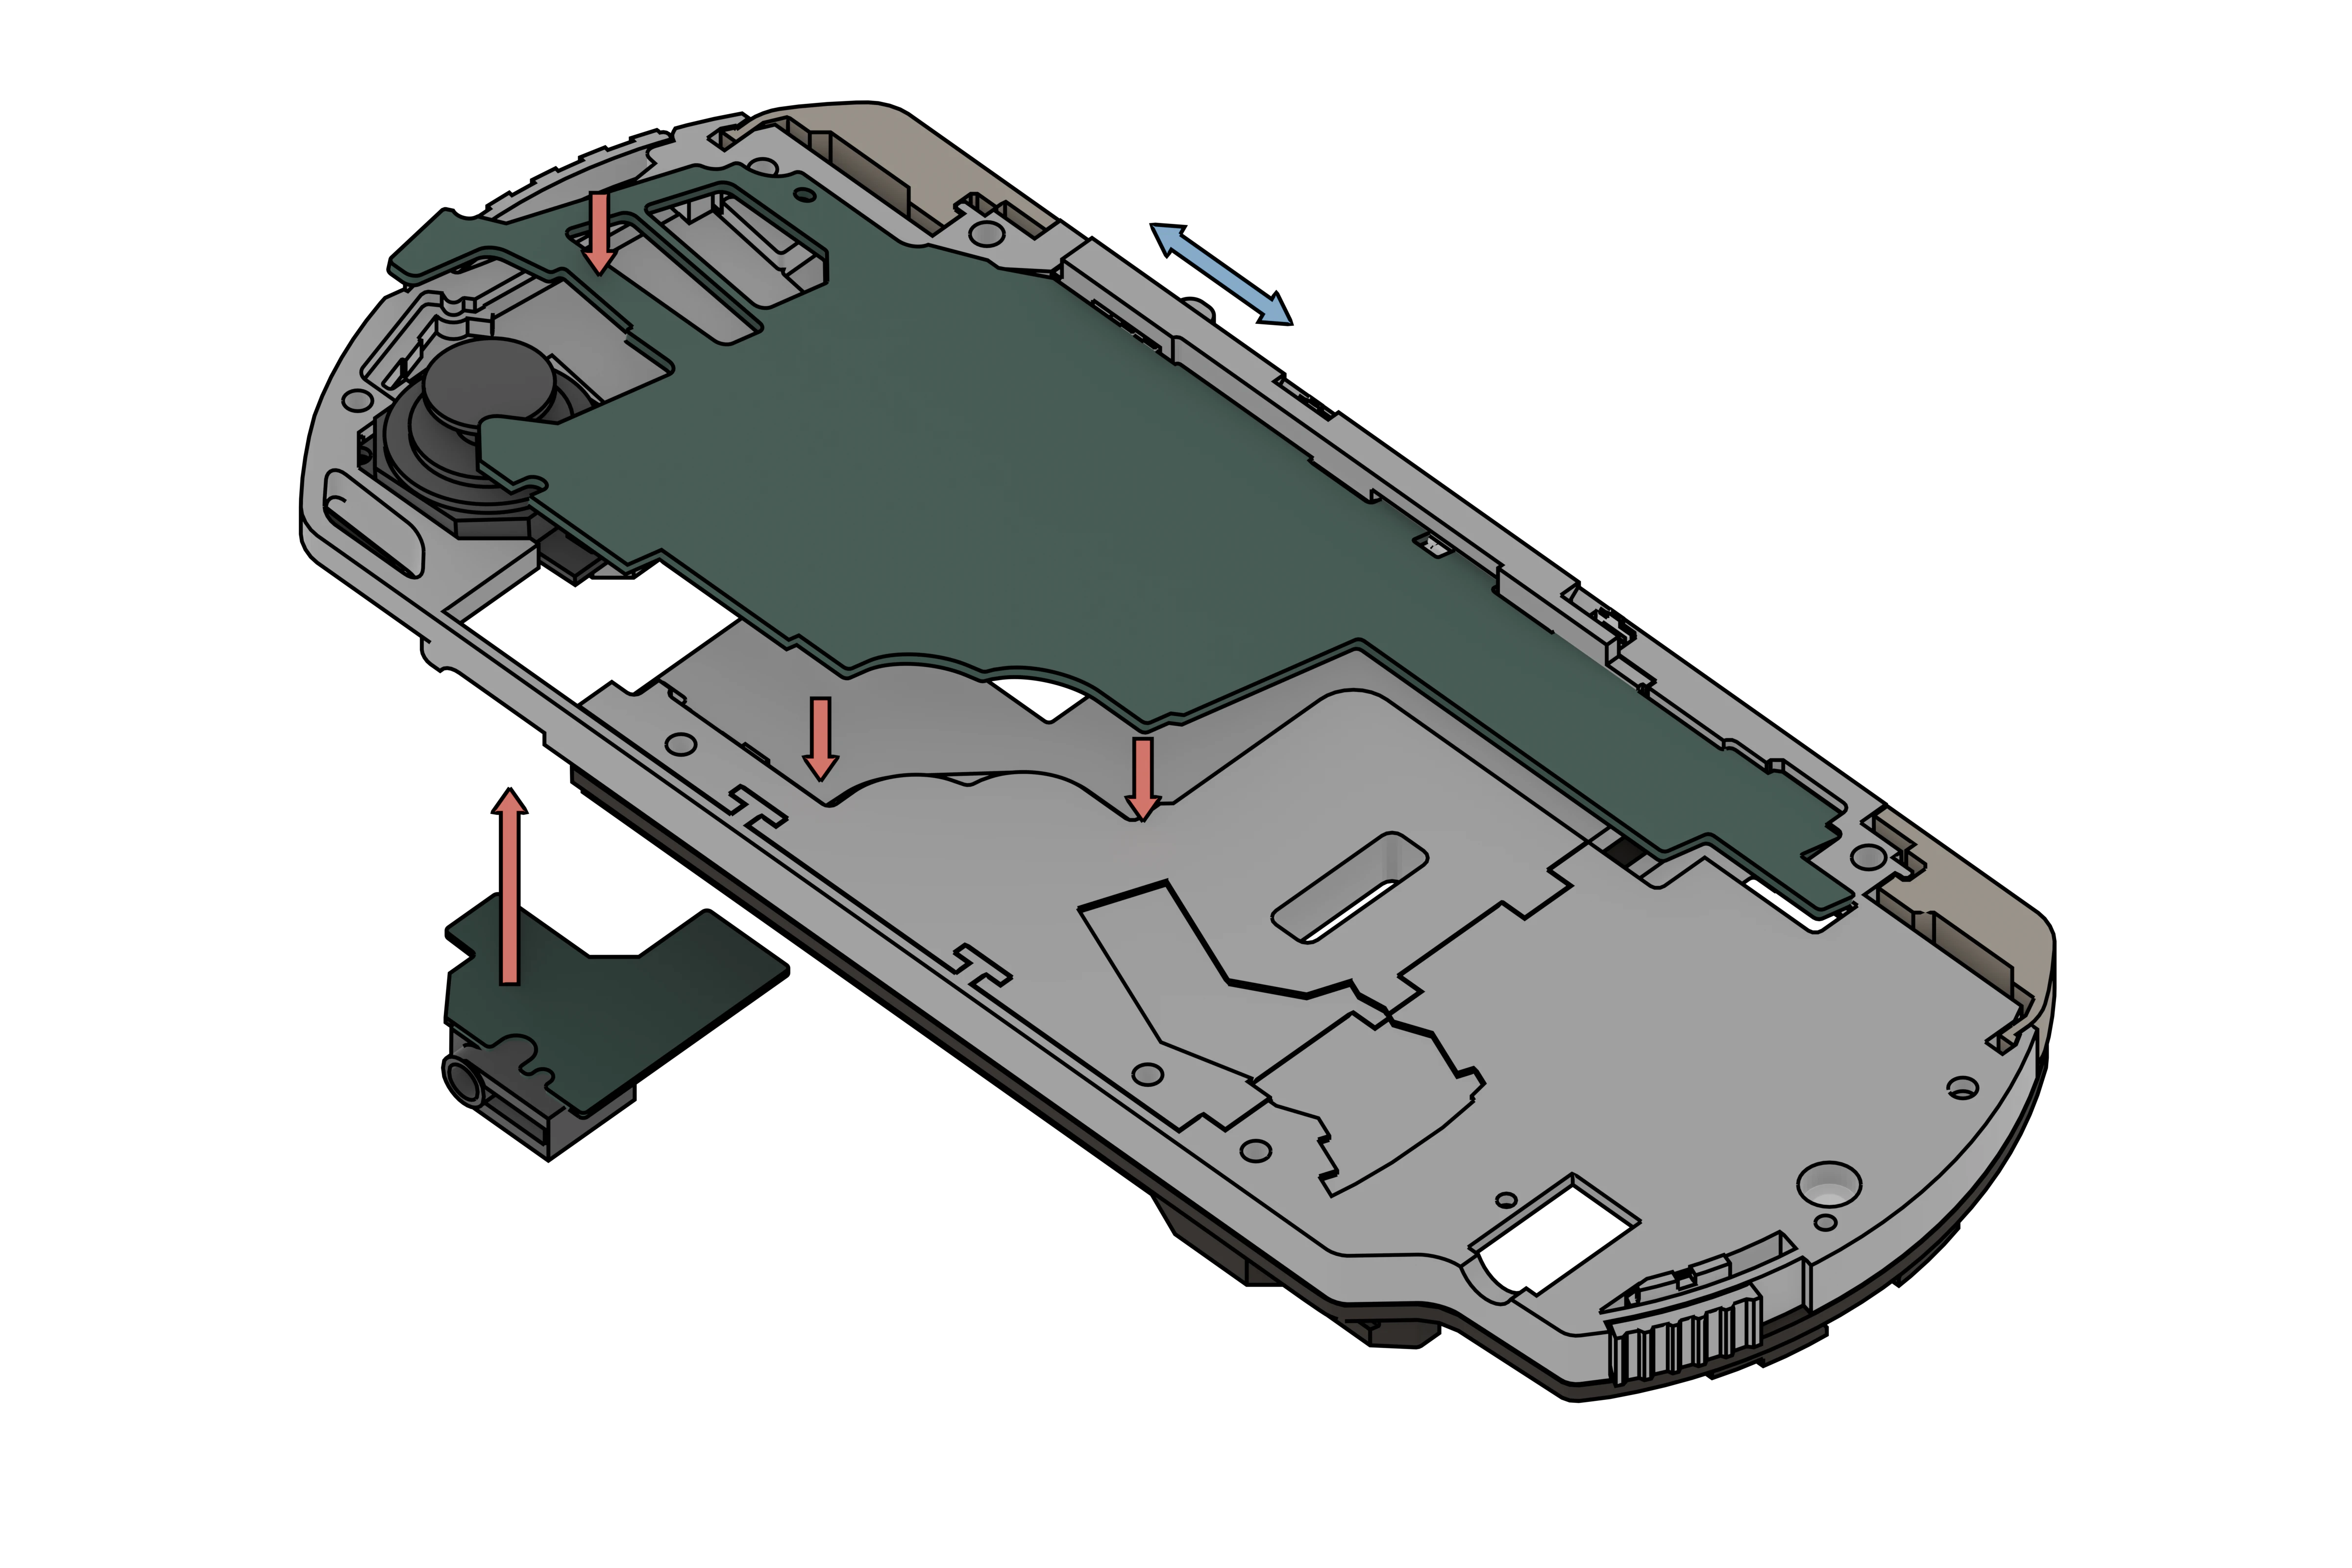
Step 8 - Back face cover
- Slide the back cover into place, as you can see the piece enters a bit angled, because there are parts in the way, only after sliding the piece you can press the other side into place.
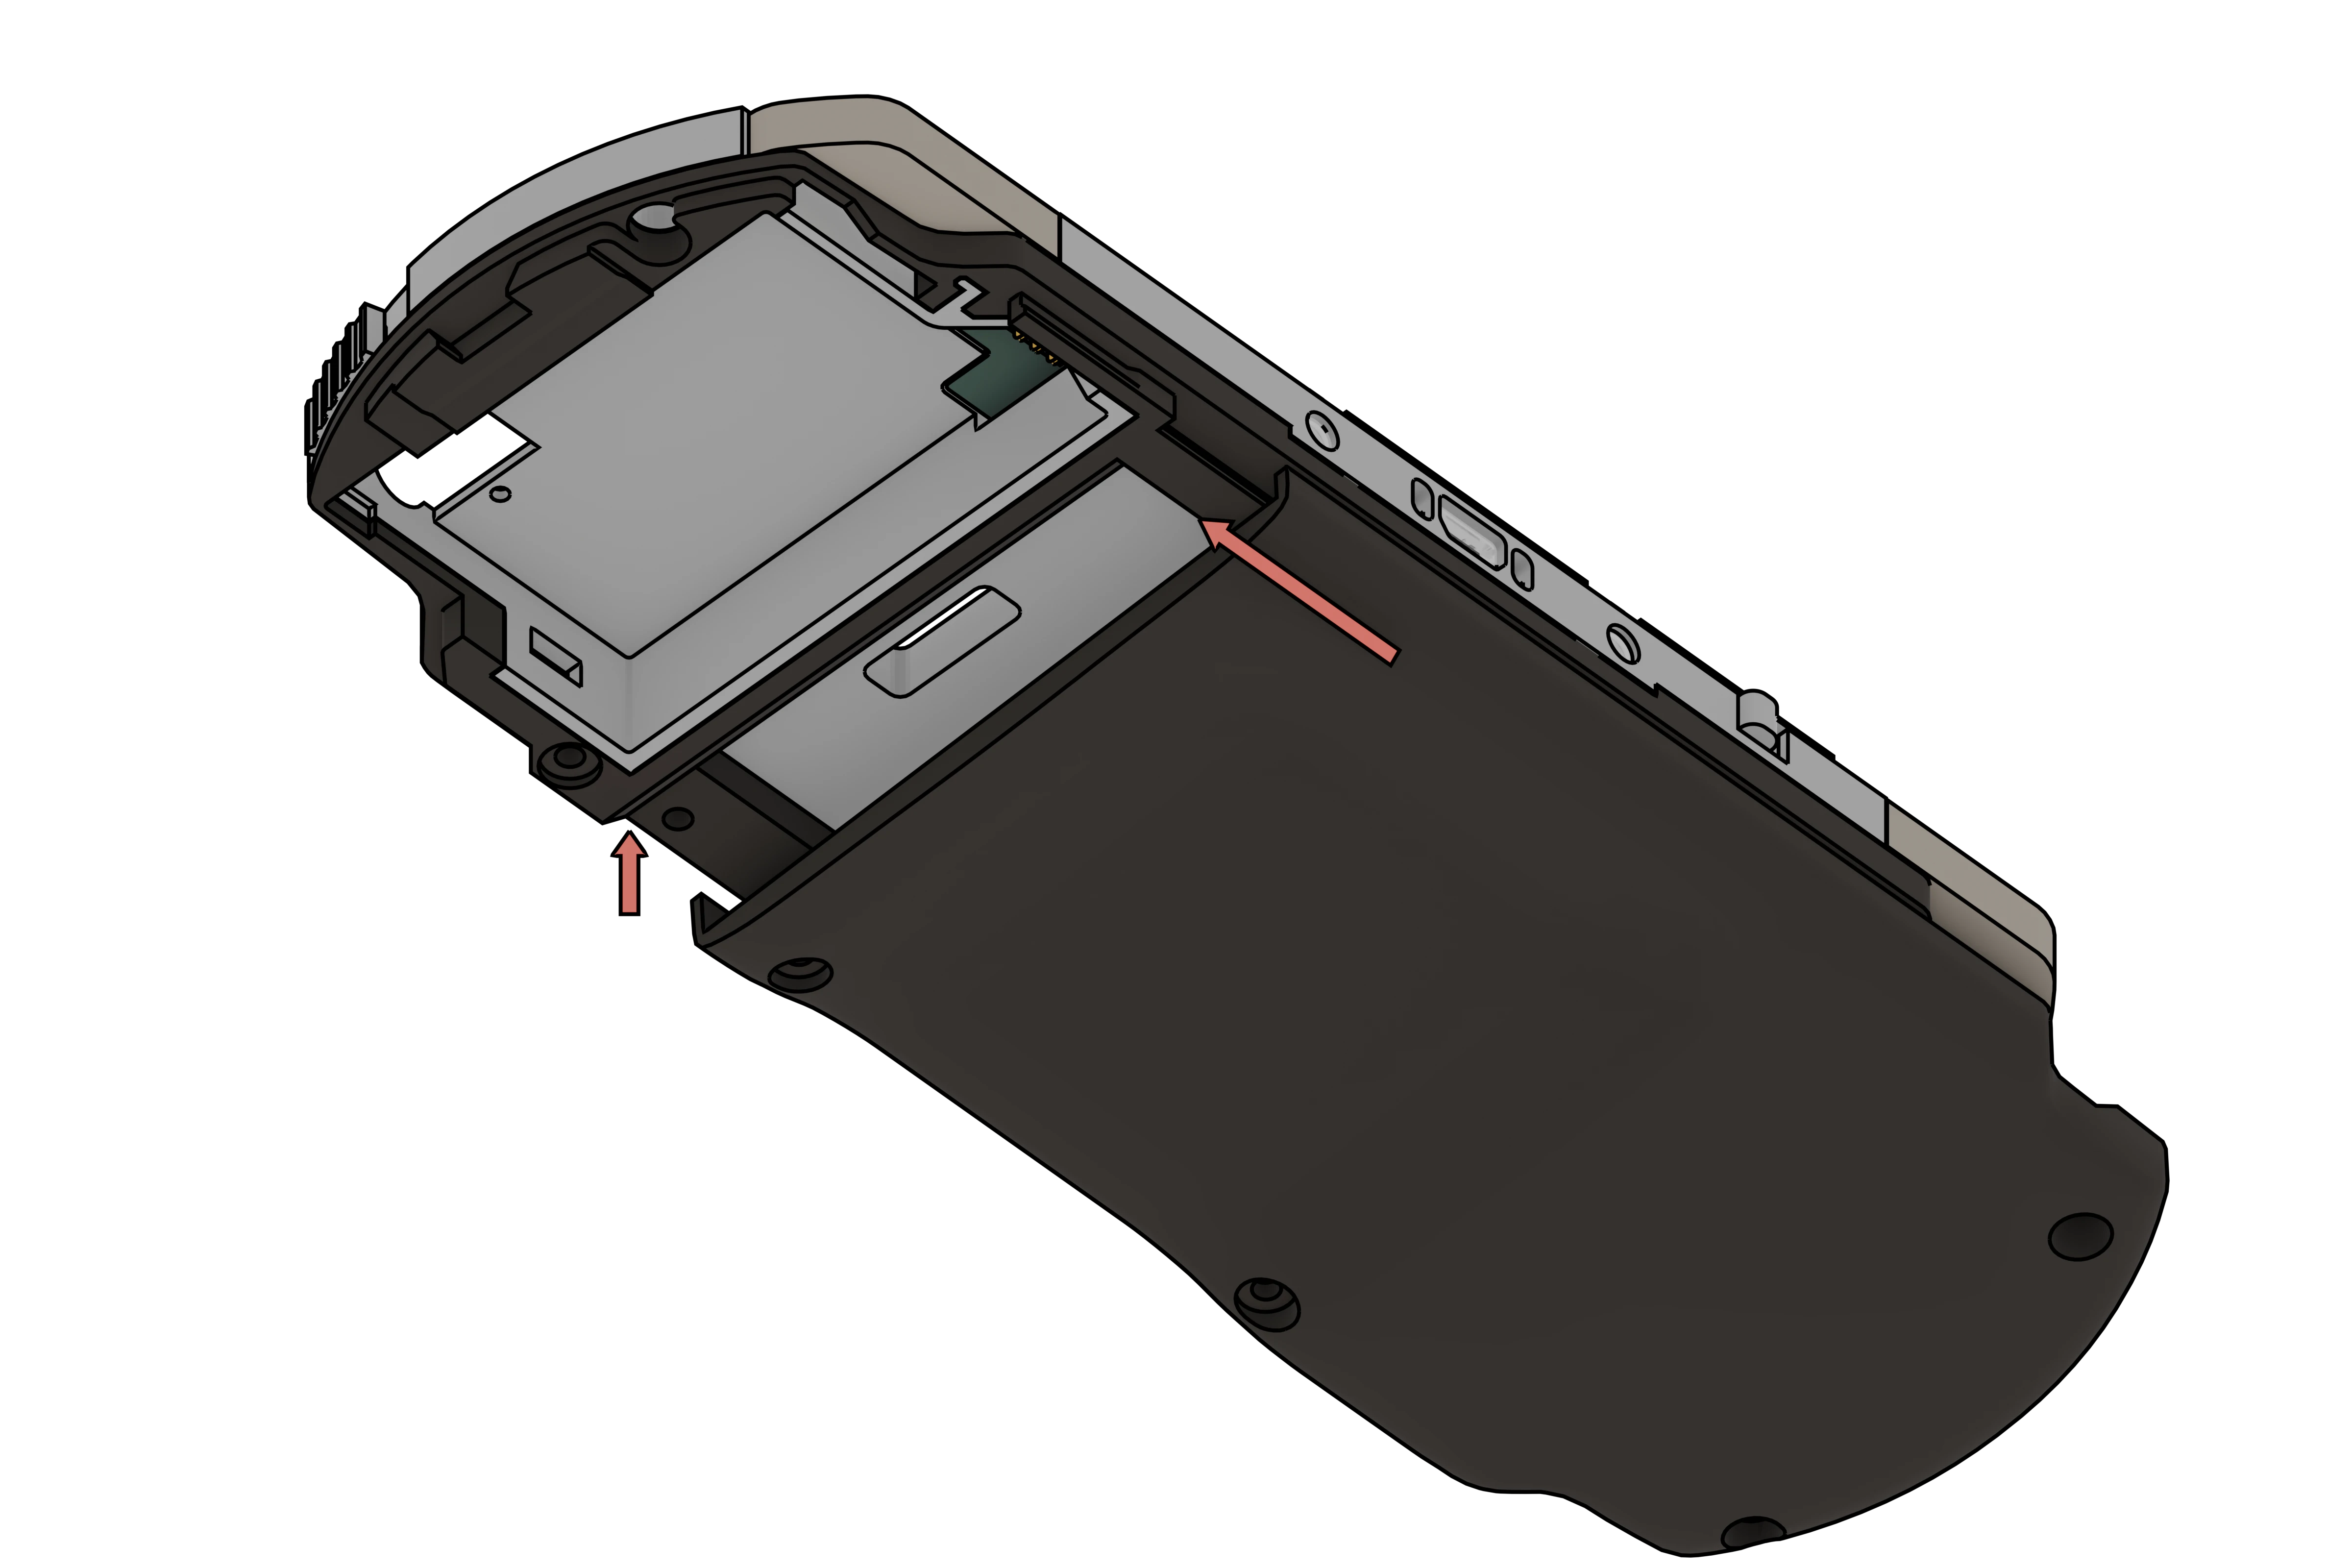
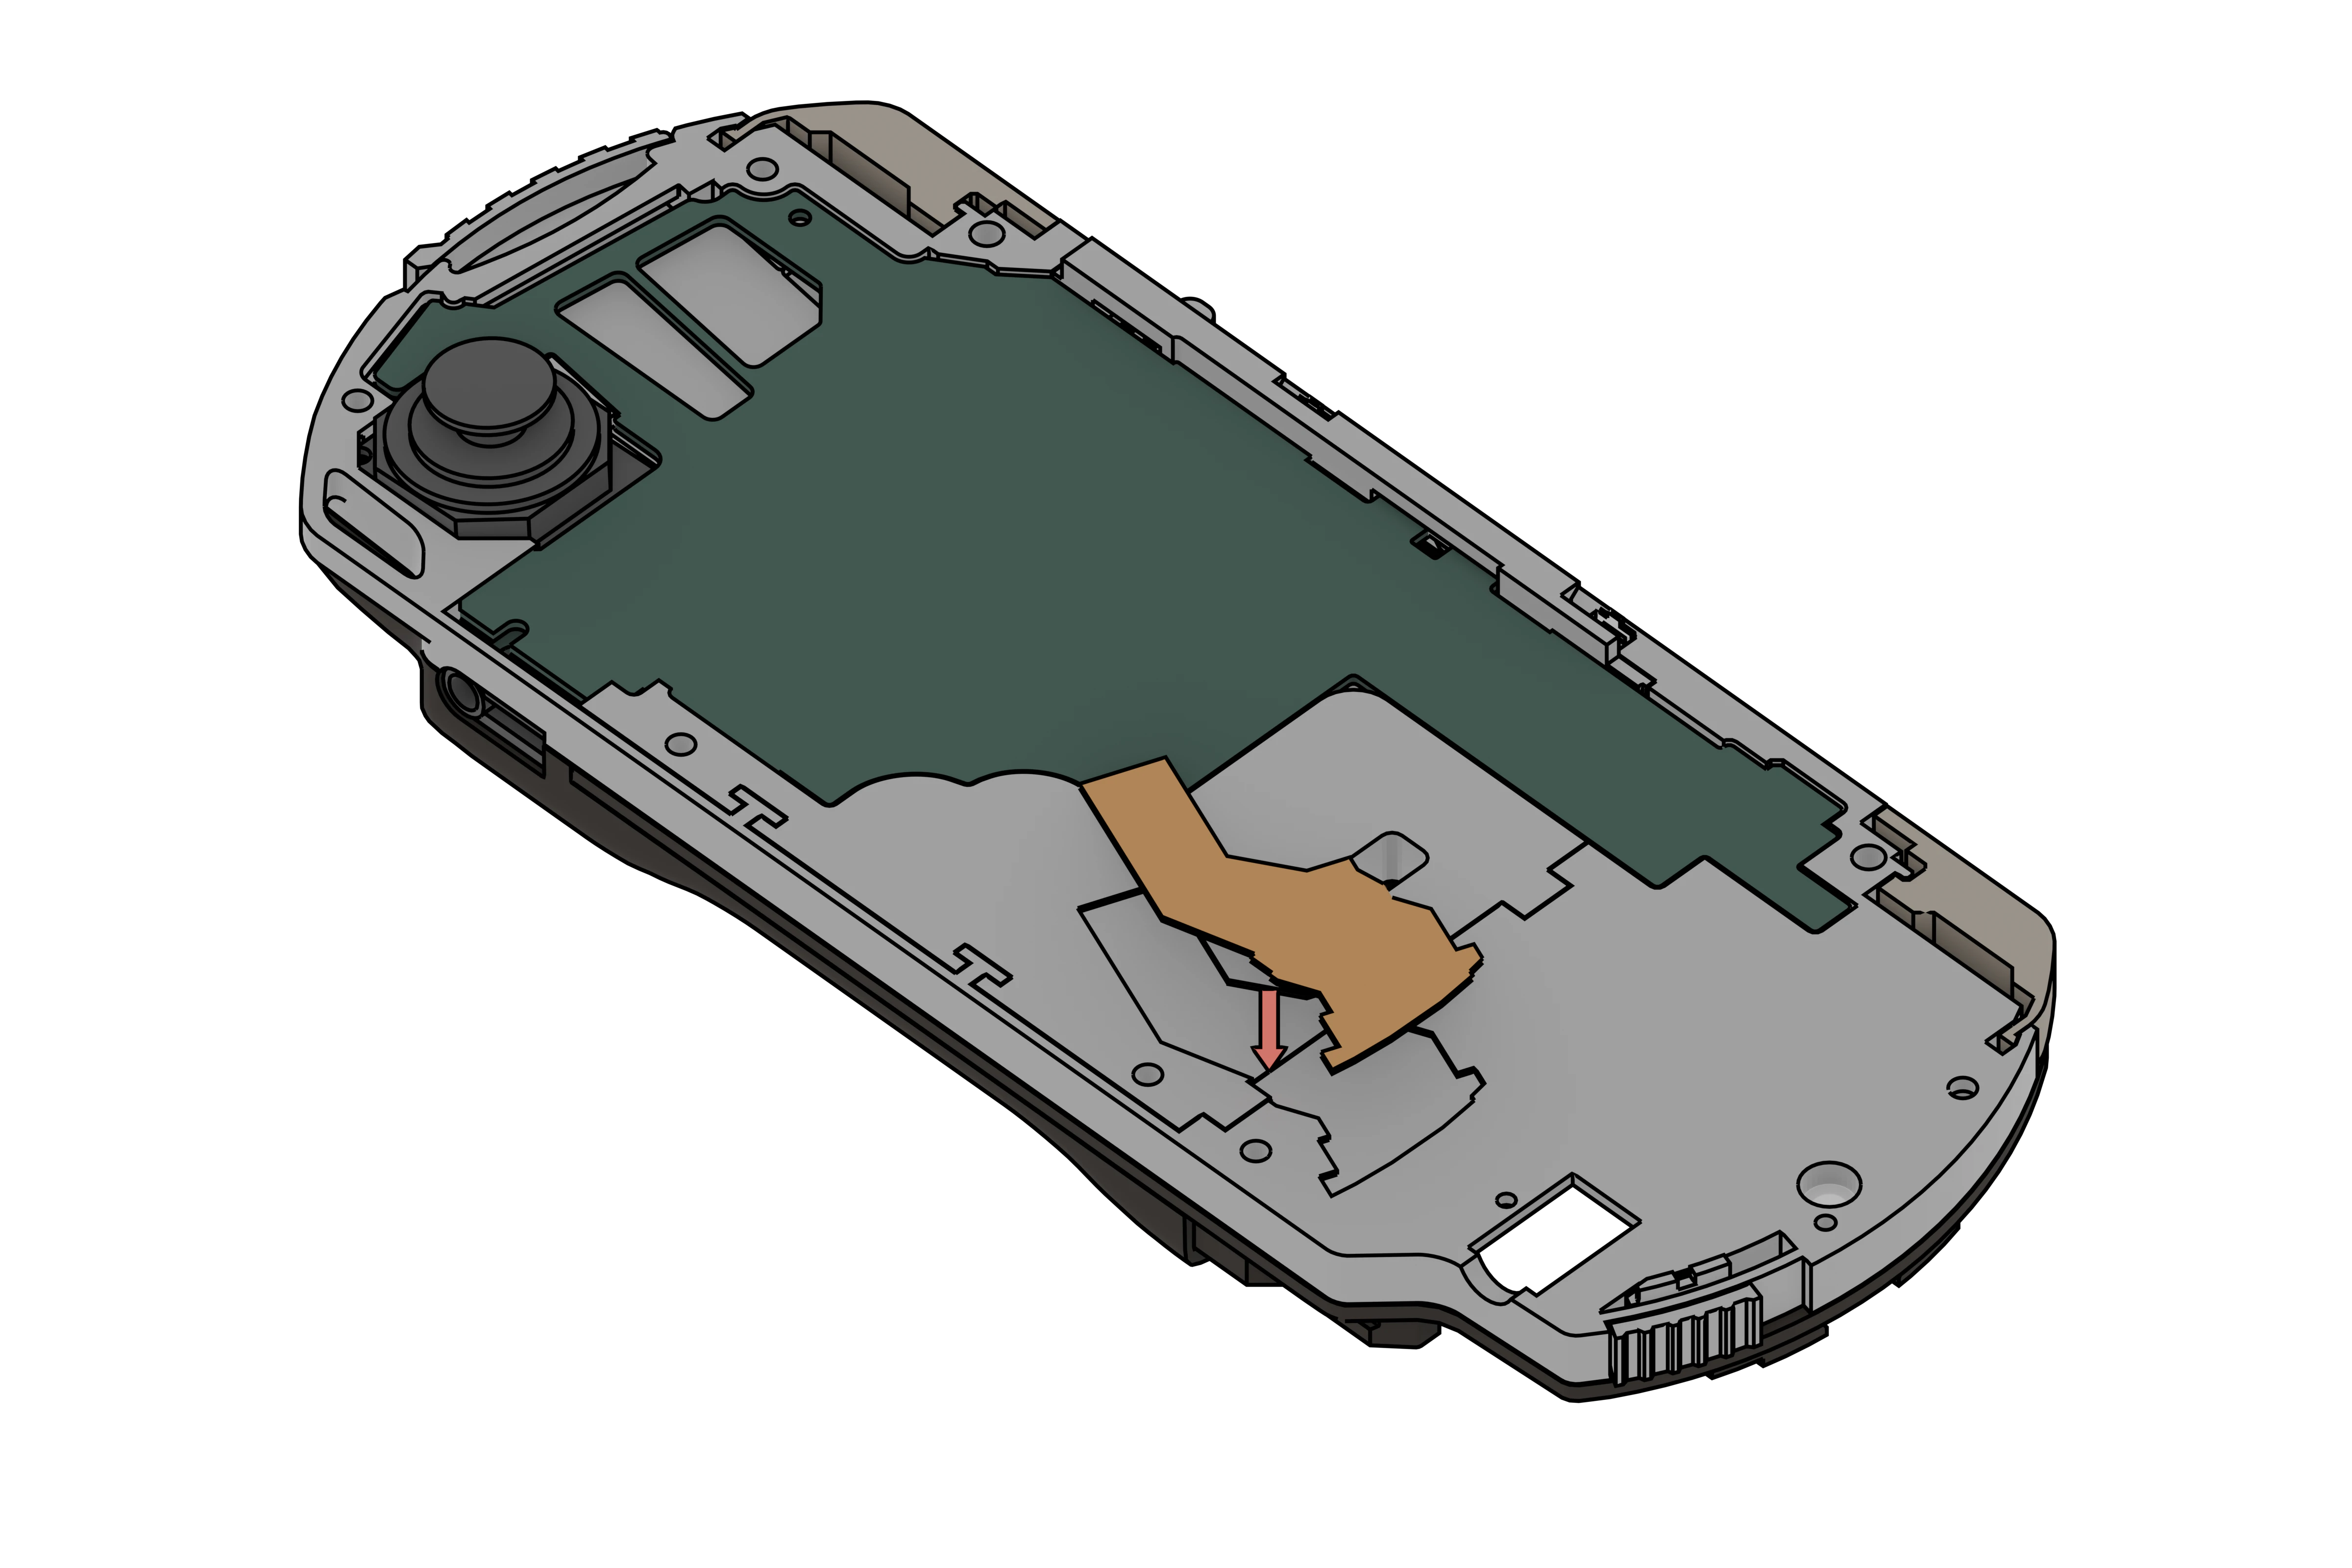
Step 9 - Wi-Fi antenna
- Glue the Wi-Fi antenna into place.
- 🔵🔵The cables may not be shown here, but you can already plug it onto the motherboard.
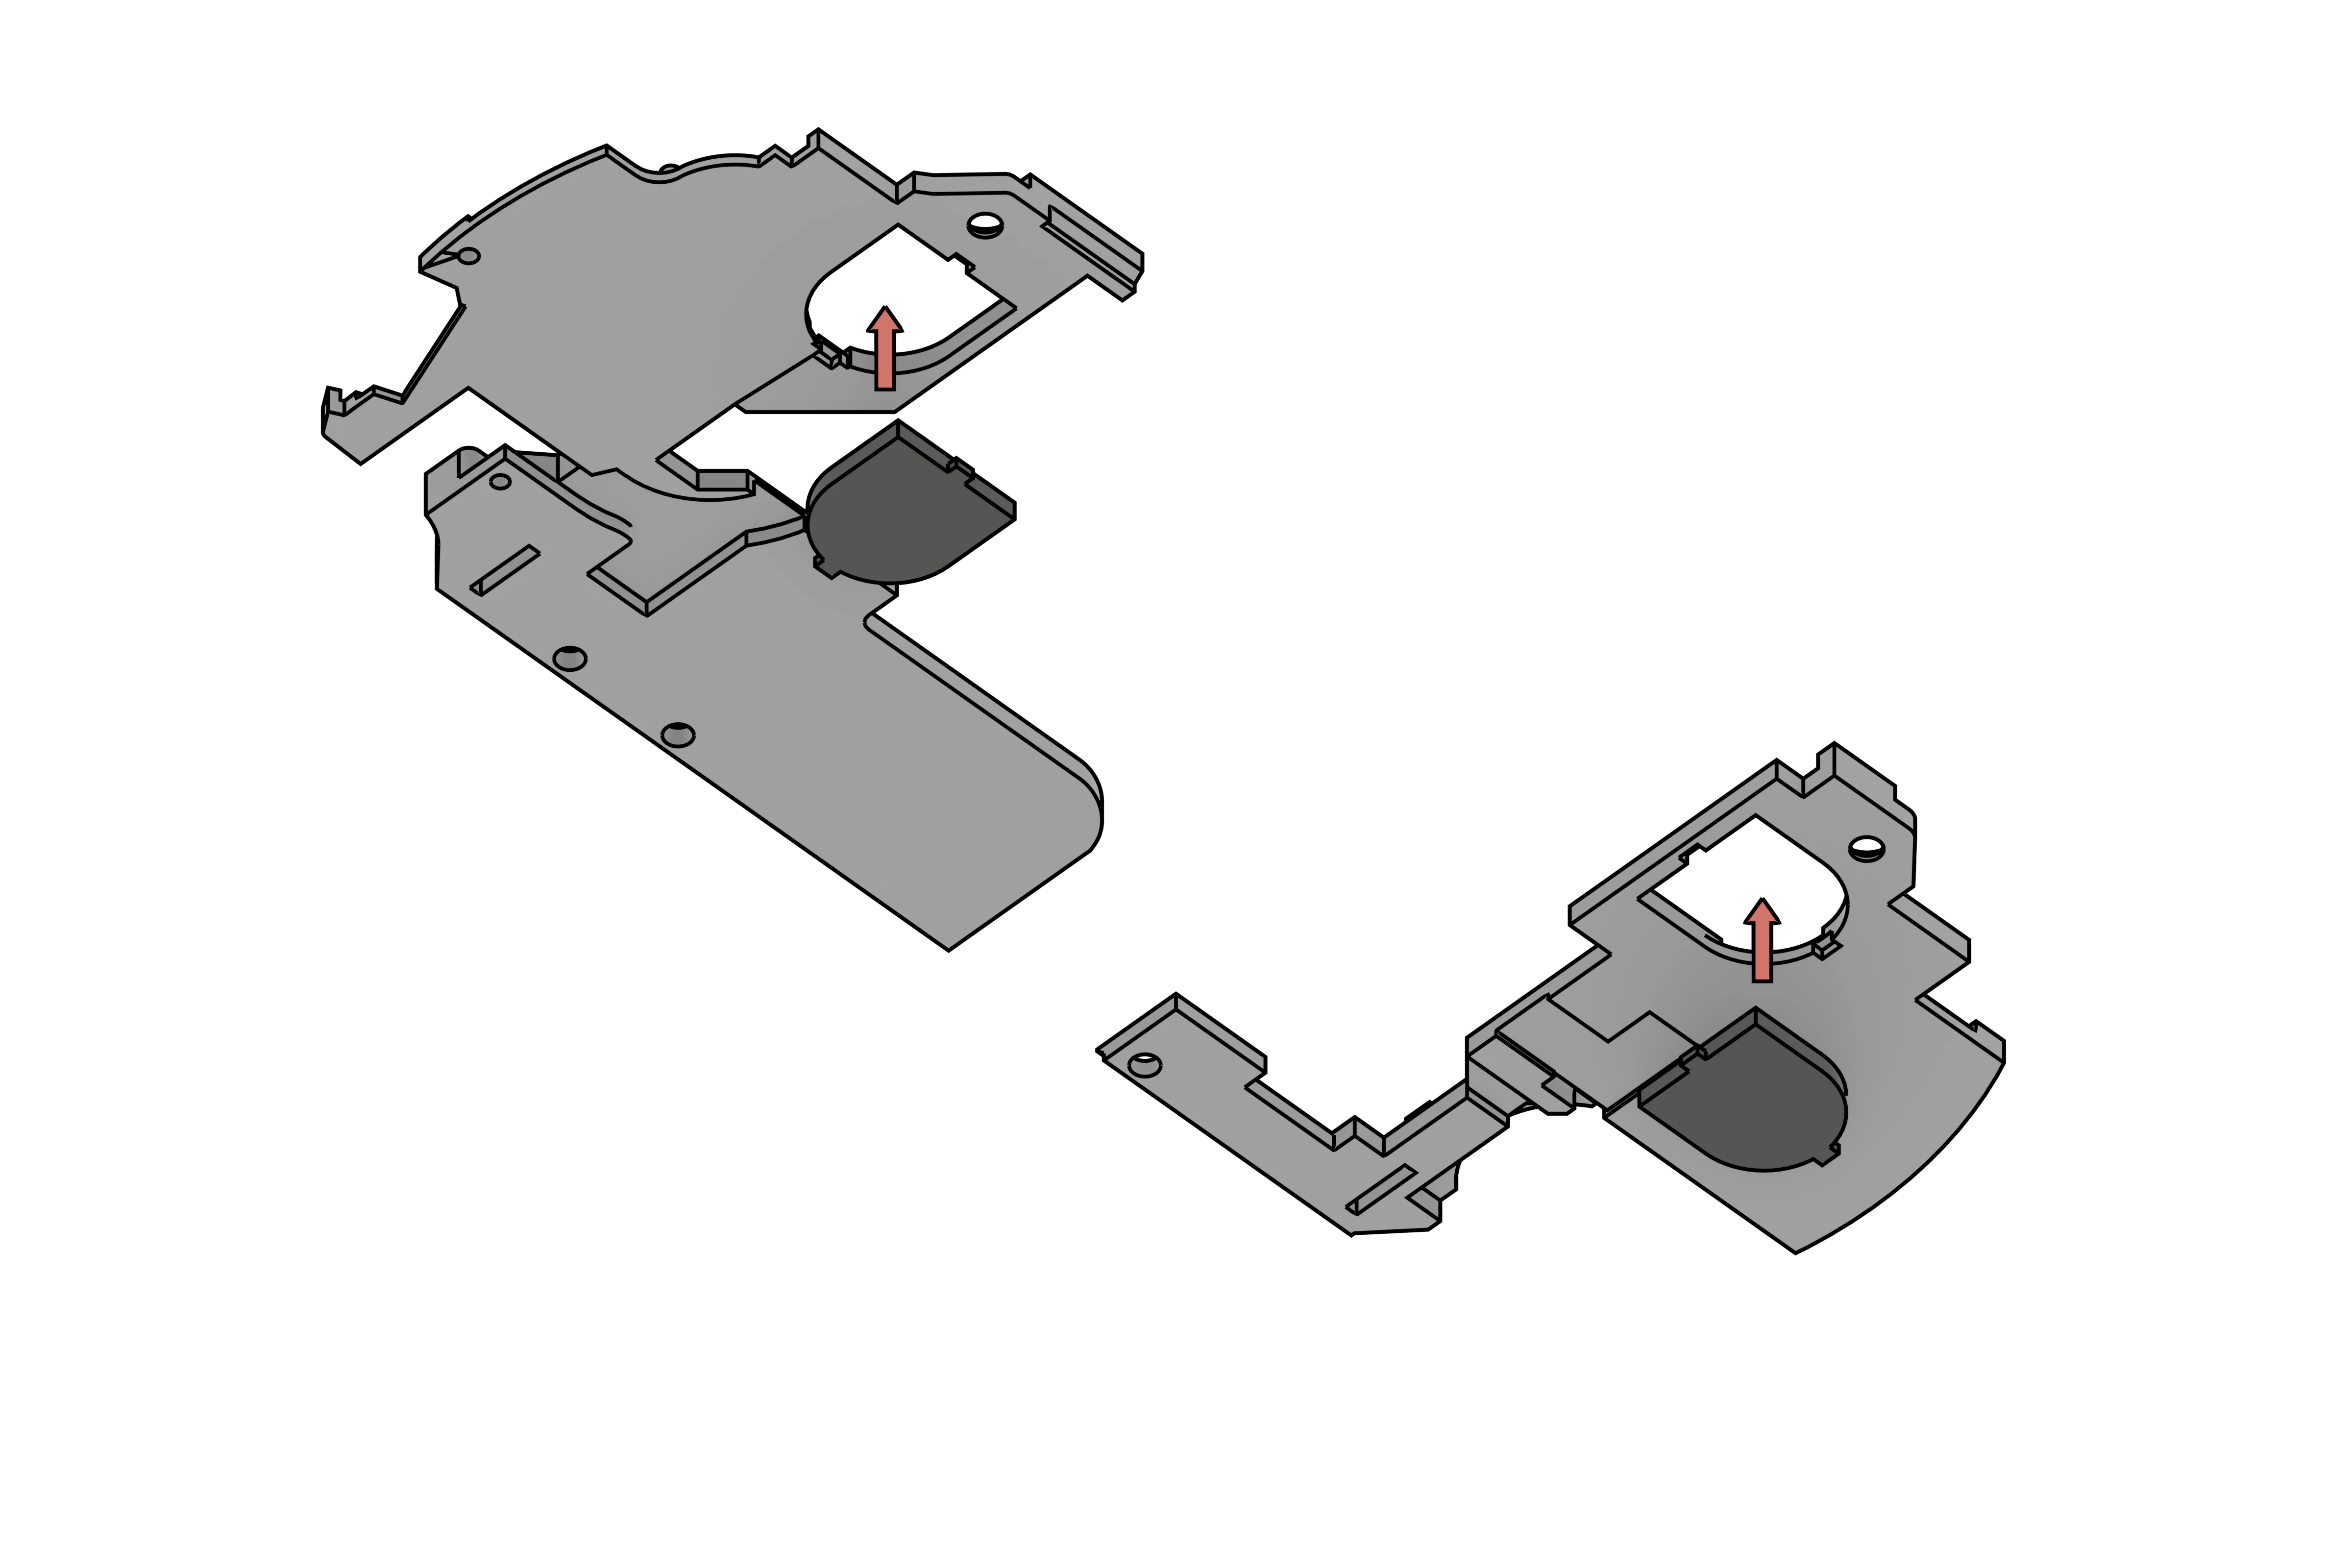
Step 10 - Speakers
- Put the speakers onto the following parts
- 🔵🔵They don't need to be glued, just pressed in, make sure the pins are a bit outwards to ensure contact with the motherboard and that they are flat and not angled.
- 🔵🔵Tip : Put the square side first into the piece at a slight angle and the press the other side into place.
Step 11 - Left button pad
- Put the left button pad (Arrow side pad) onto the left piece. You can already glue it.
- 🔵🔵For the next steps, you dont need to glue the trigger buttons into the frame, they will stay there
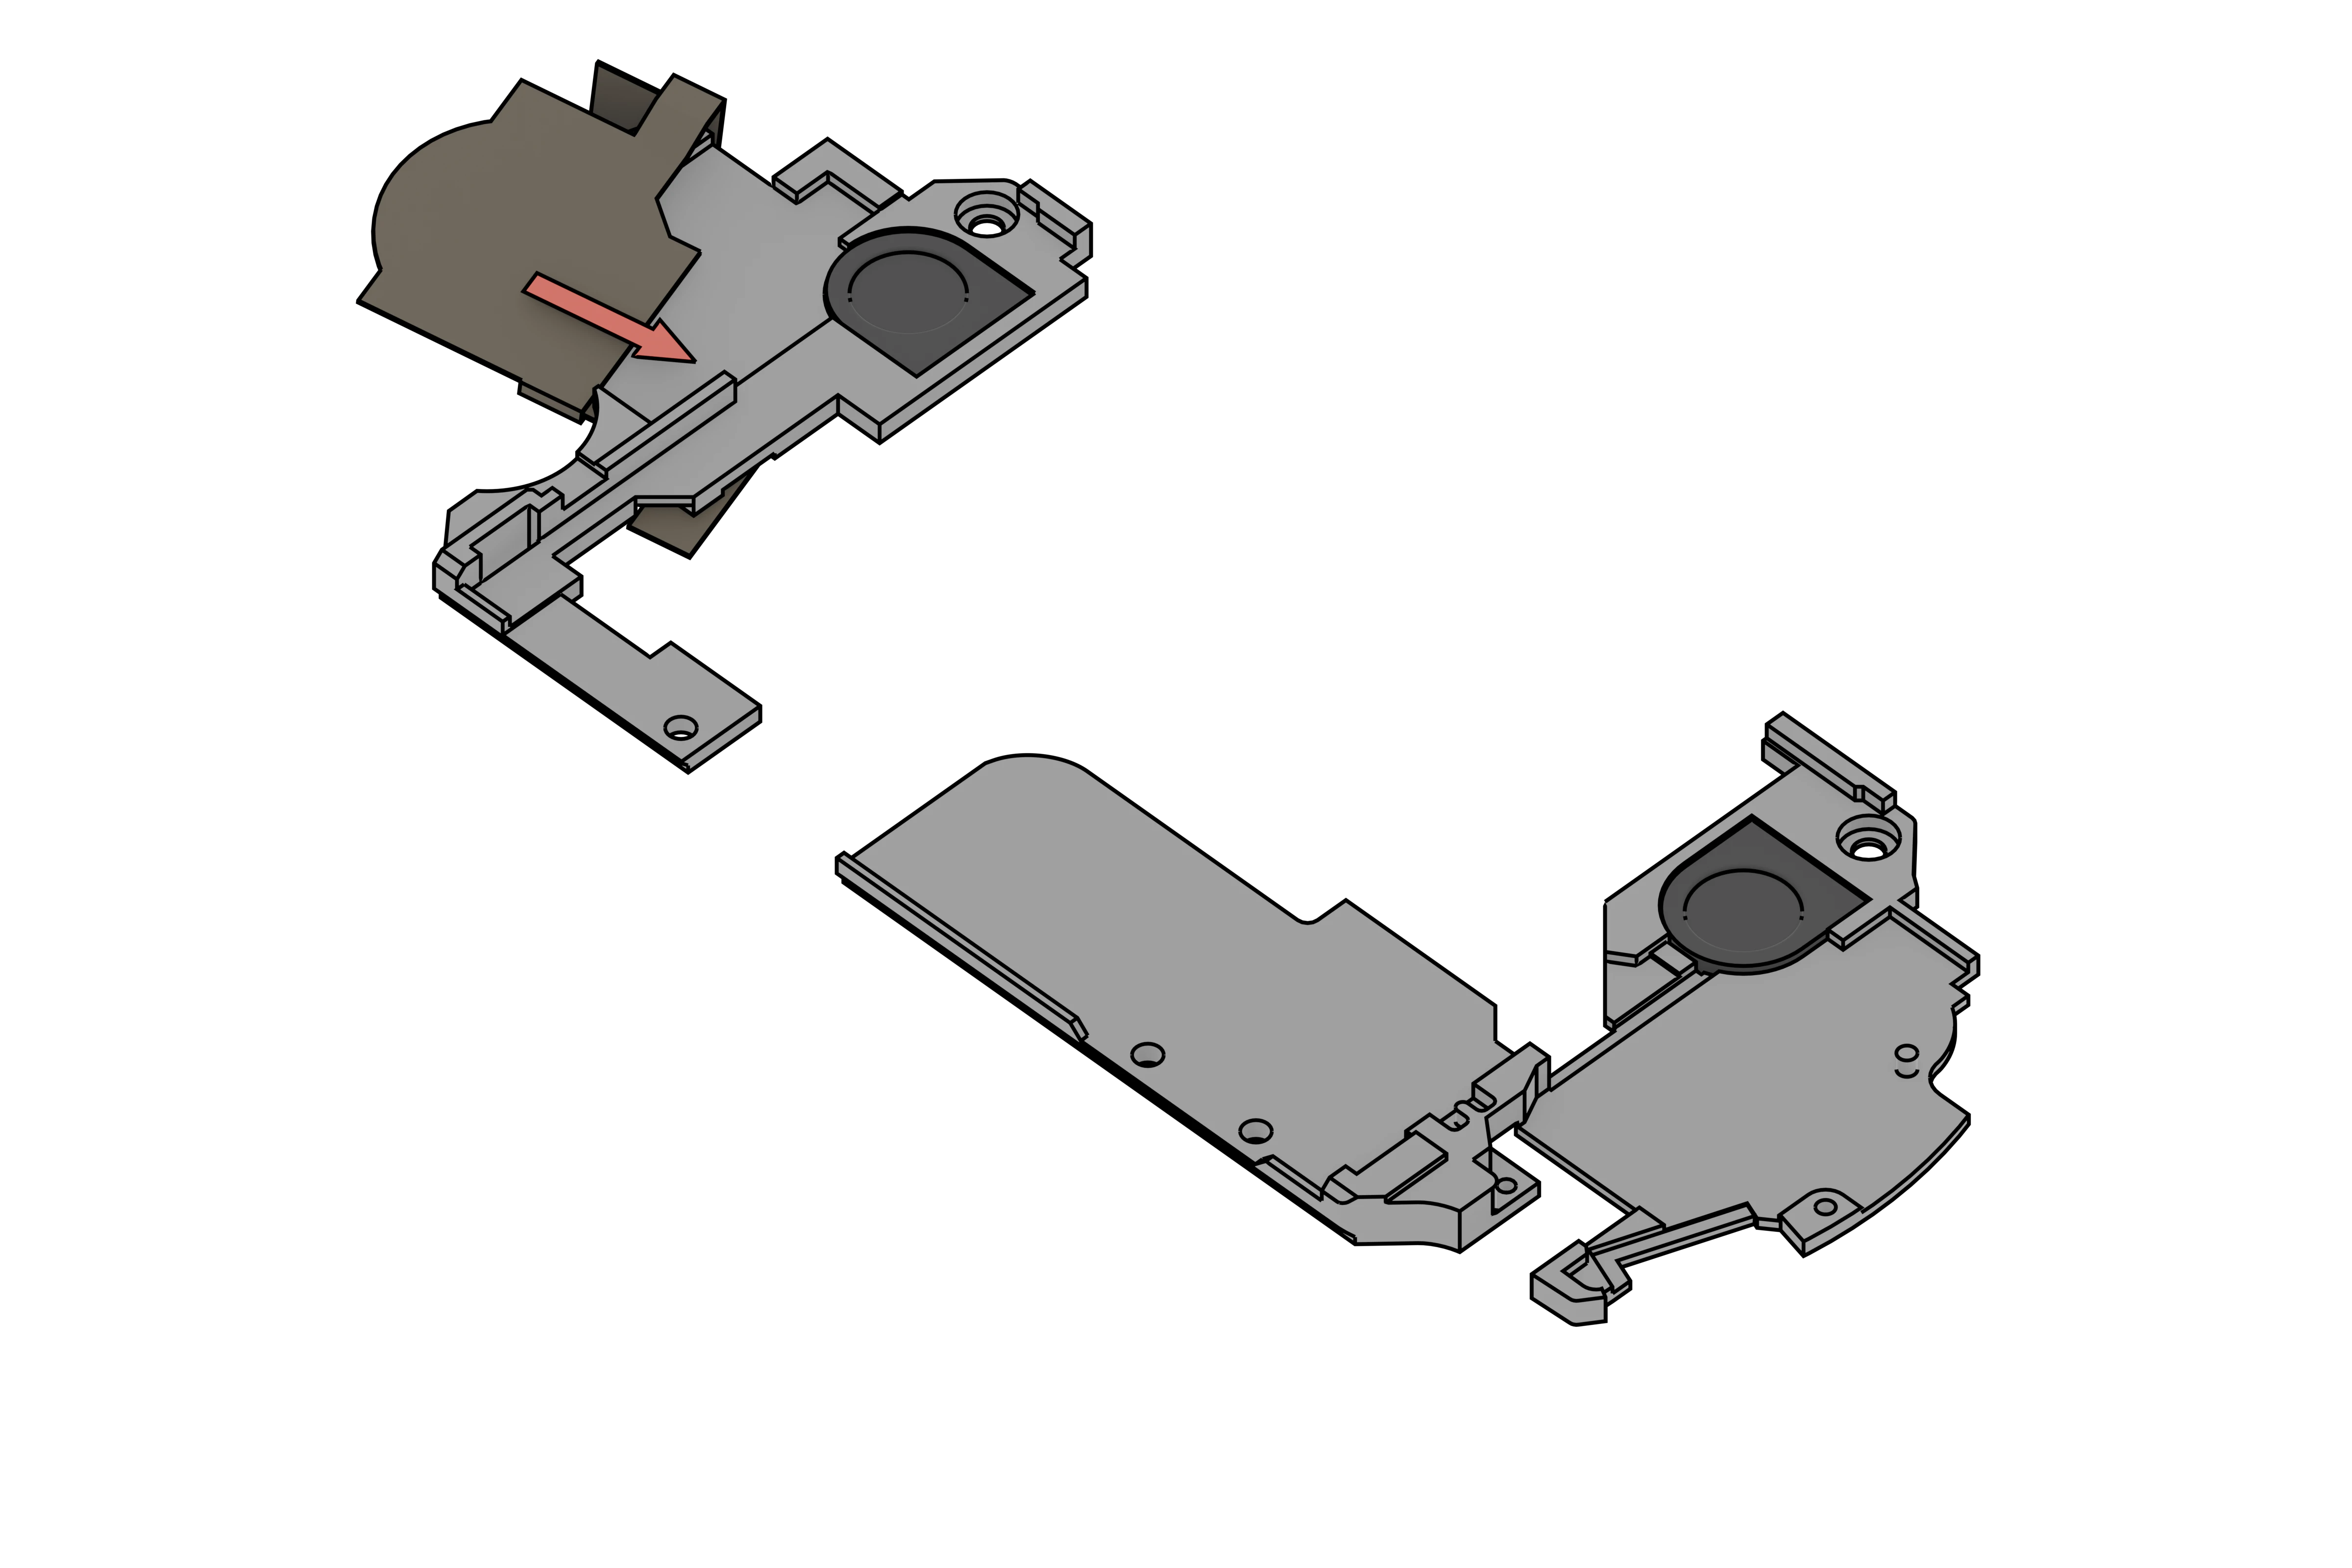
Step 12 - Front side pieces + charging port
- Put the power/charging port into place and route the cables
- Put the pieces on top of the frame
- Screw 2 M3x4mm screws onto the top of the frame, don't overtighten them.
- 🔵🔵 Push the trigger button of the left membrane between the frame and the trigger, you don't need to glue it in place.
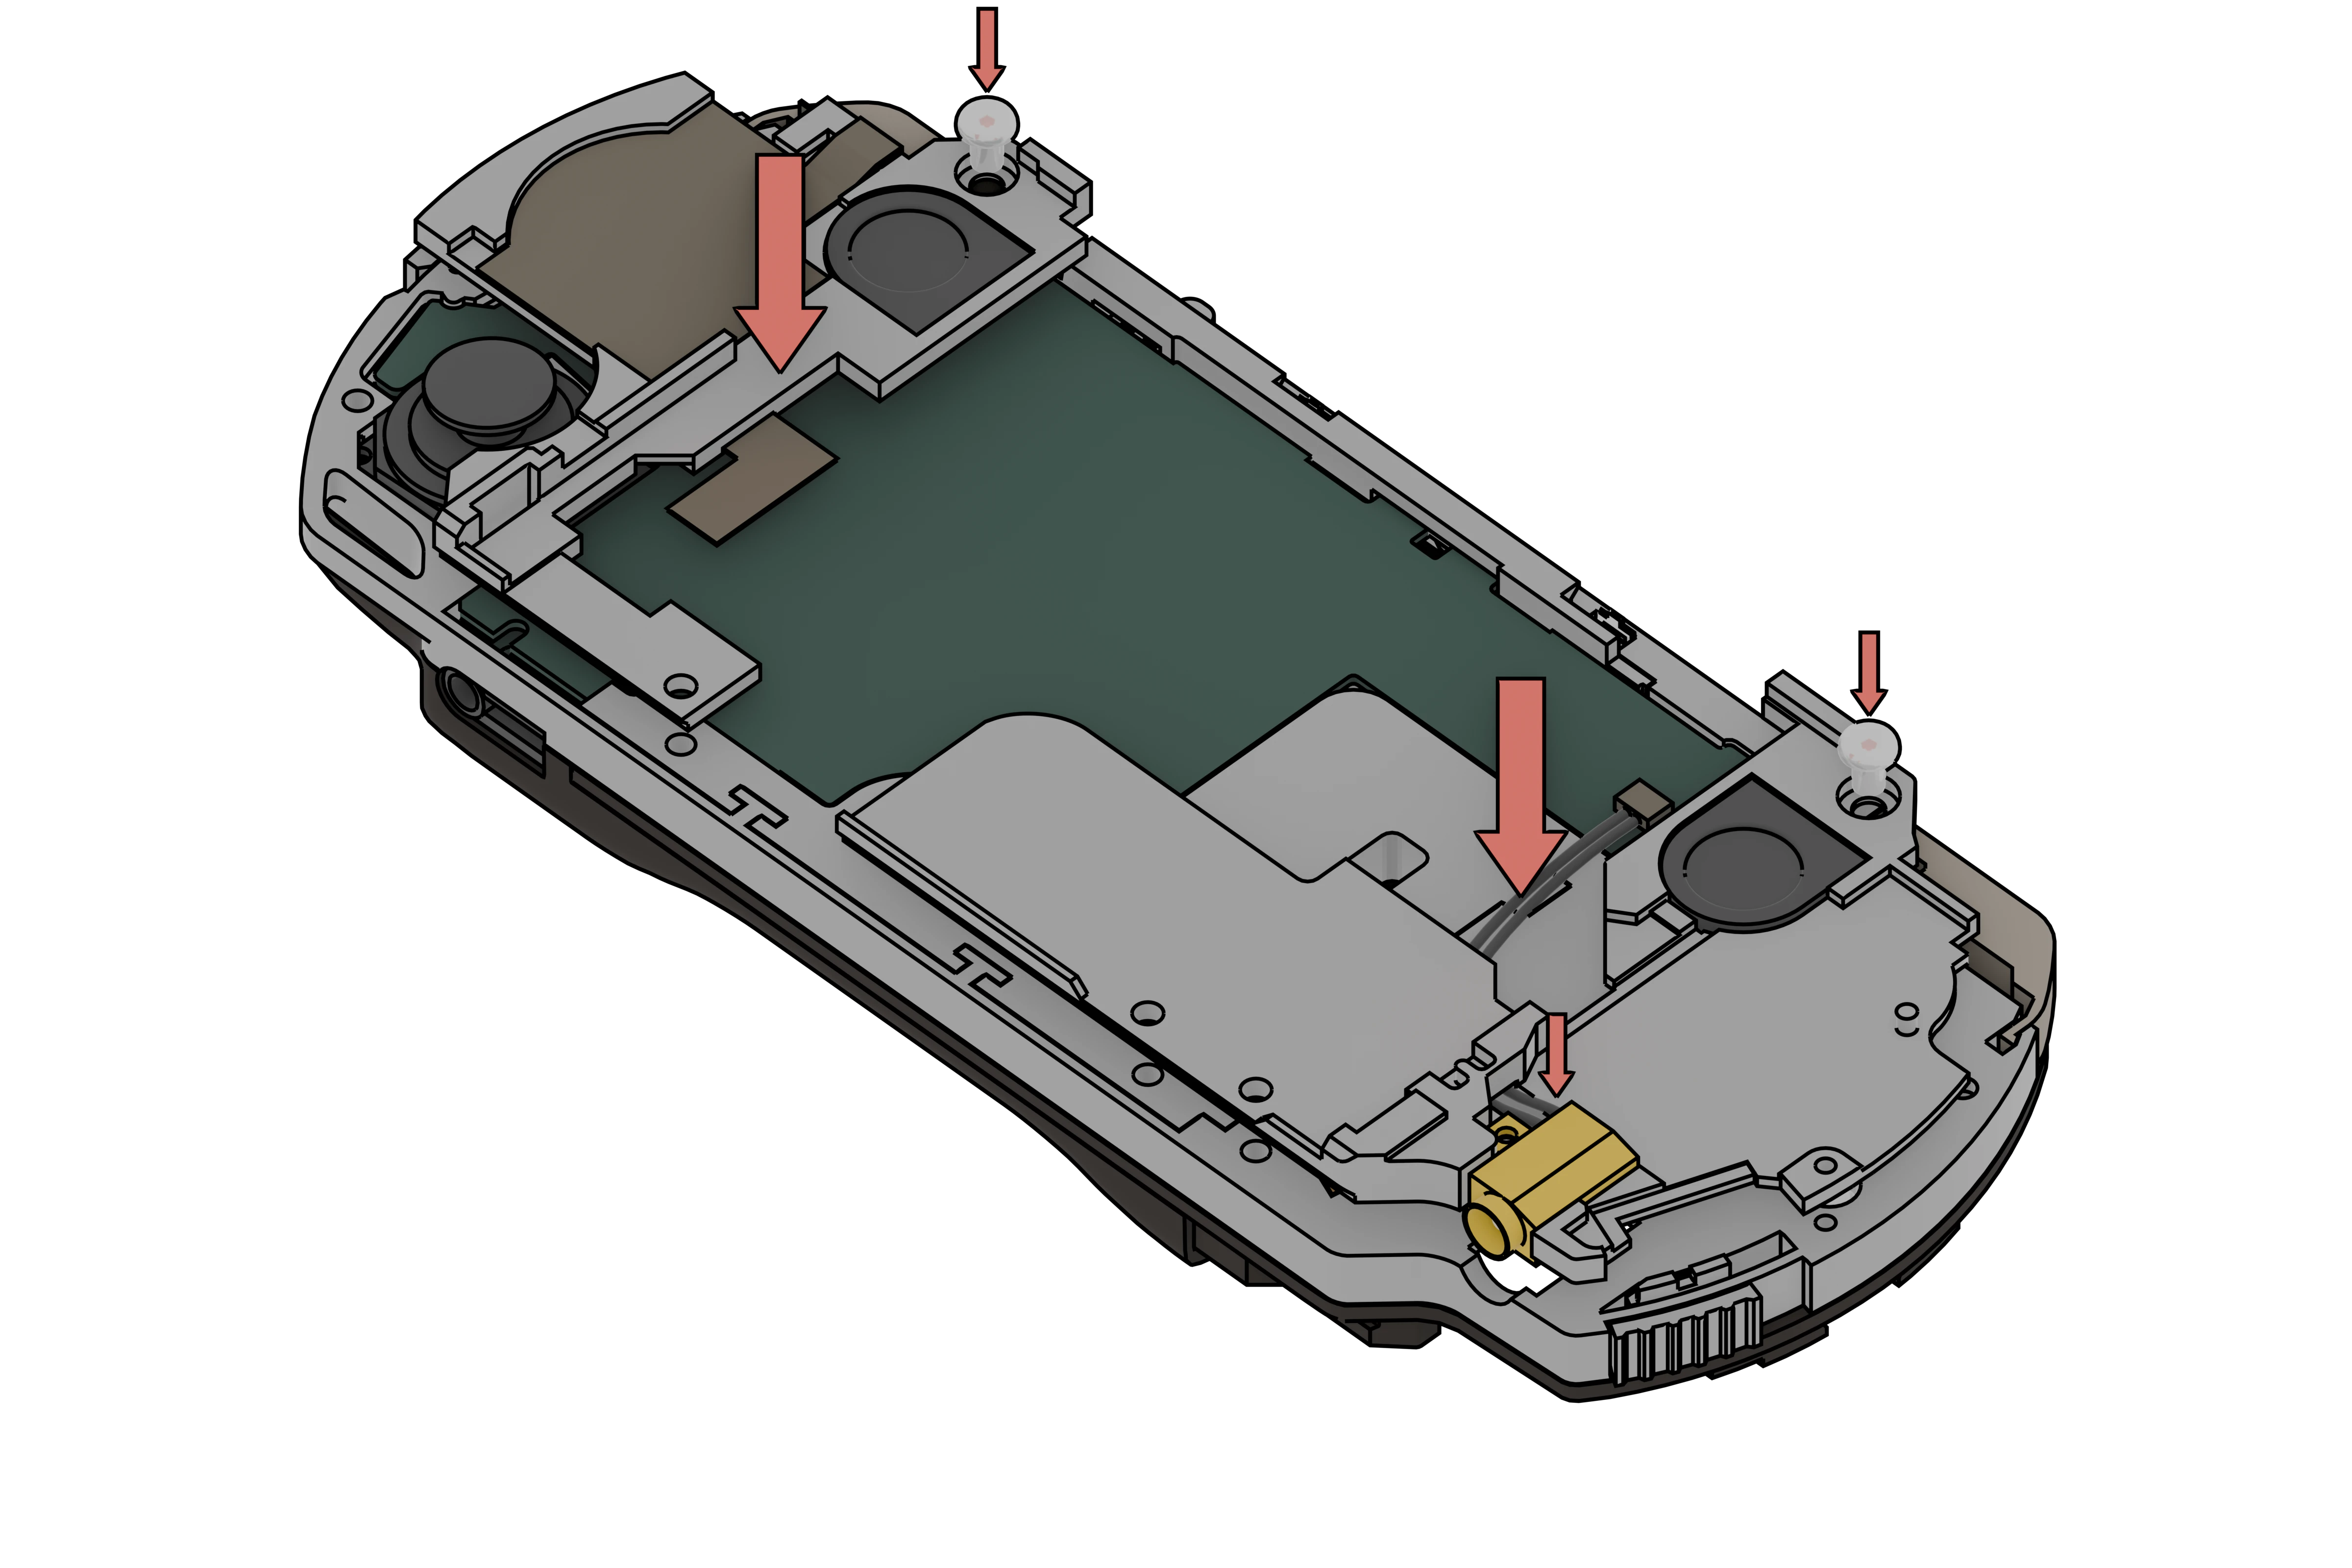
Step 13 - Screws
- Screw the 3 M3x14mm from the back cover to the frame
- Screw the charging port with a small black screw from the PSP.
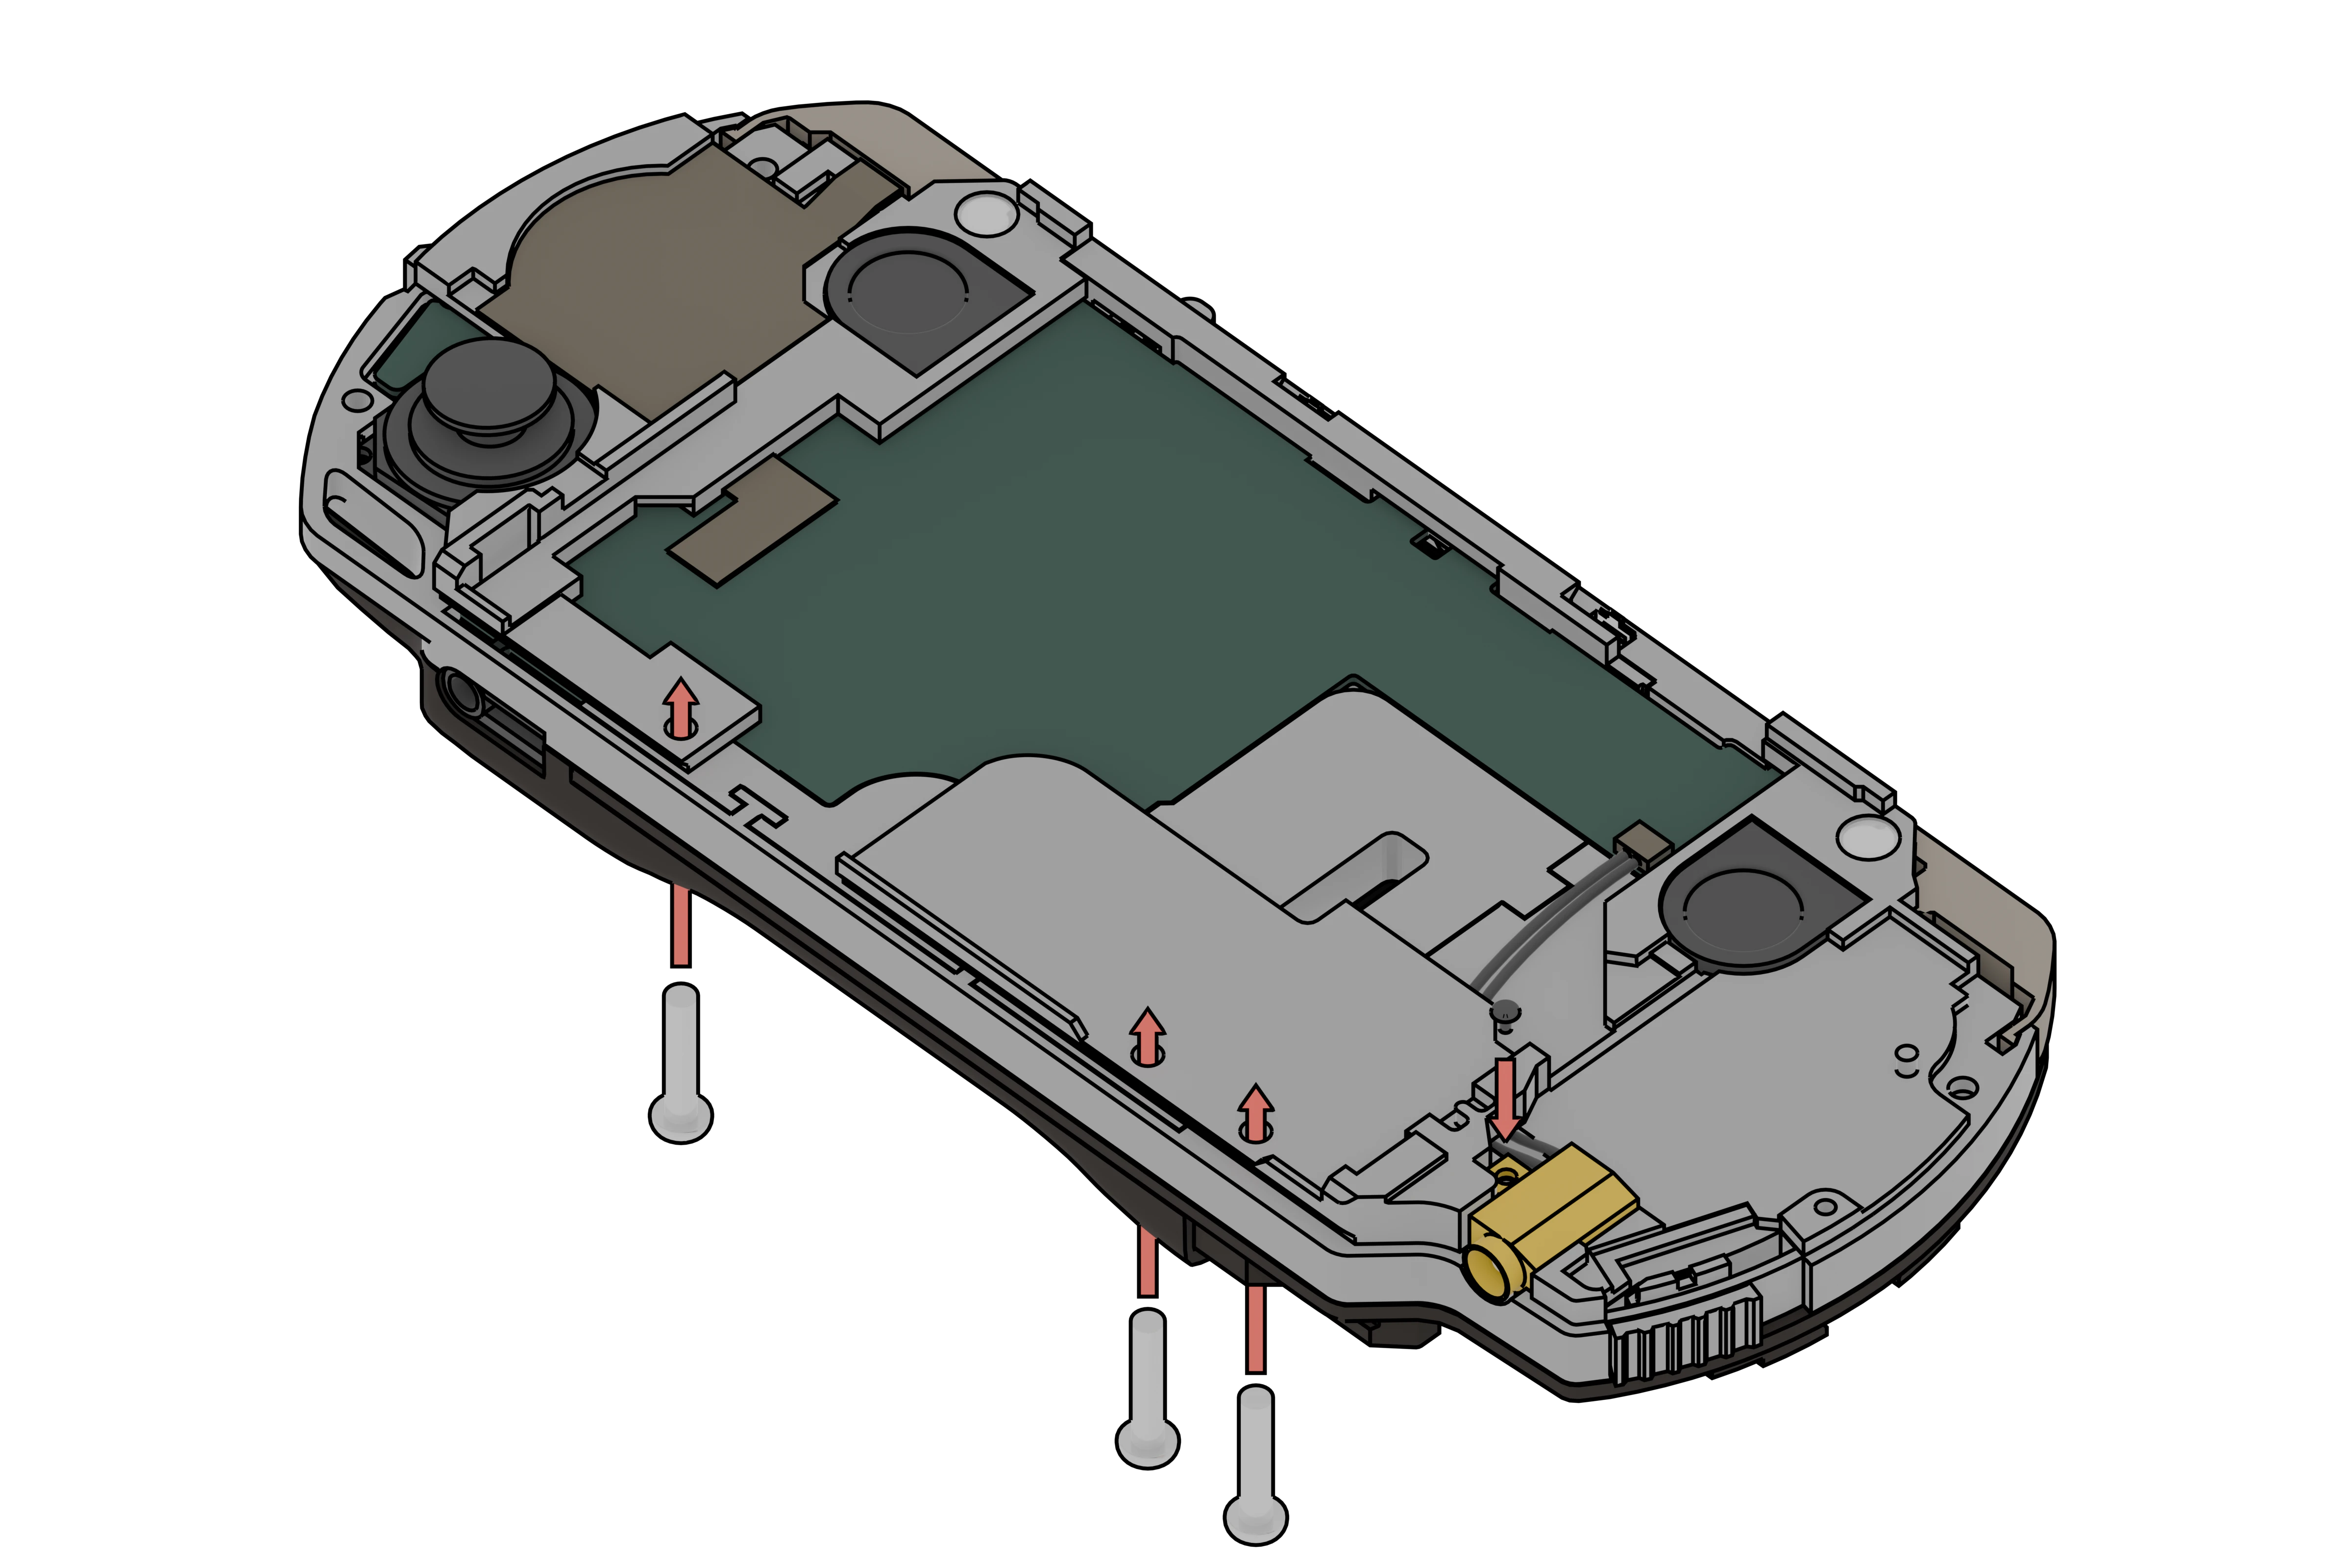
Step 14 - On/Off switch
- Put the right pad into place, the bottom of the pad must be against the charging port at the bottom.
- Put the power switch into place, make sure it lines up with the printed button.
- 🔵🔵 Push the trigger button of the right membrane between the frame and the trigger, you don't need to glue it in place.
- 🔵🔵 After screwing you can test it to check if the speakers, audio jack, charging port, etc work.
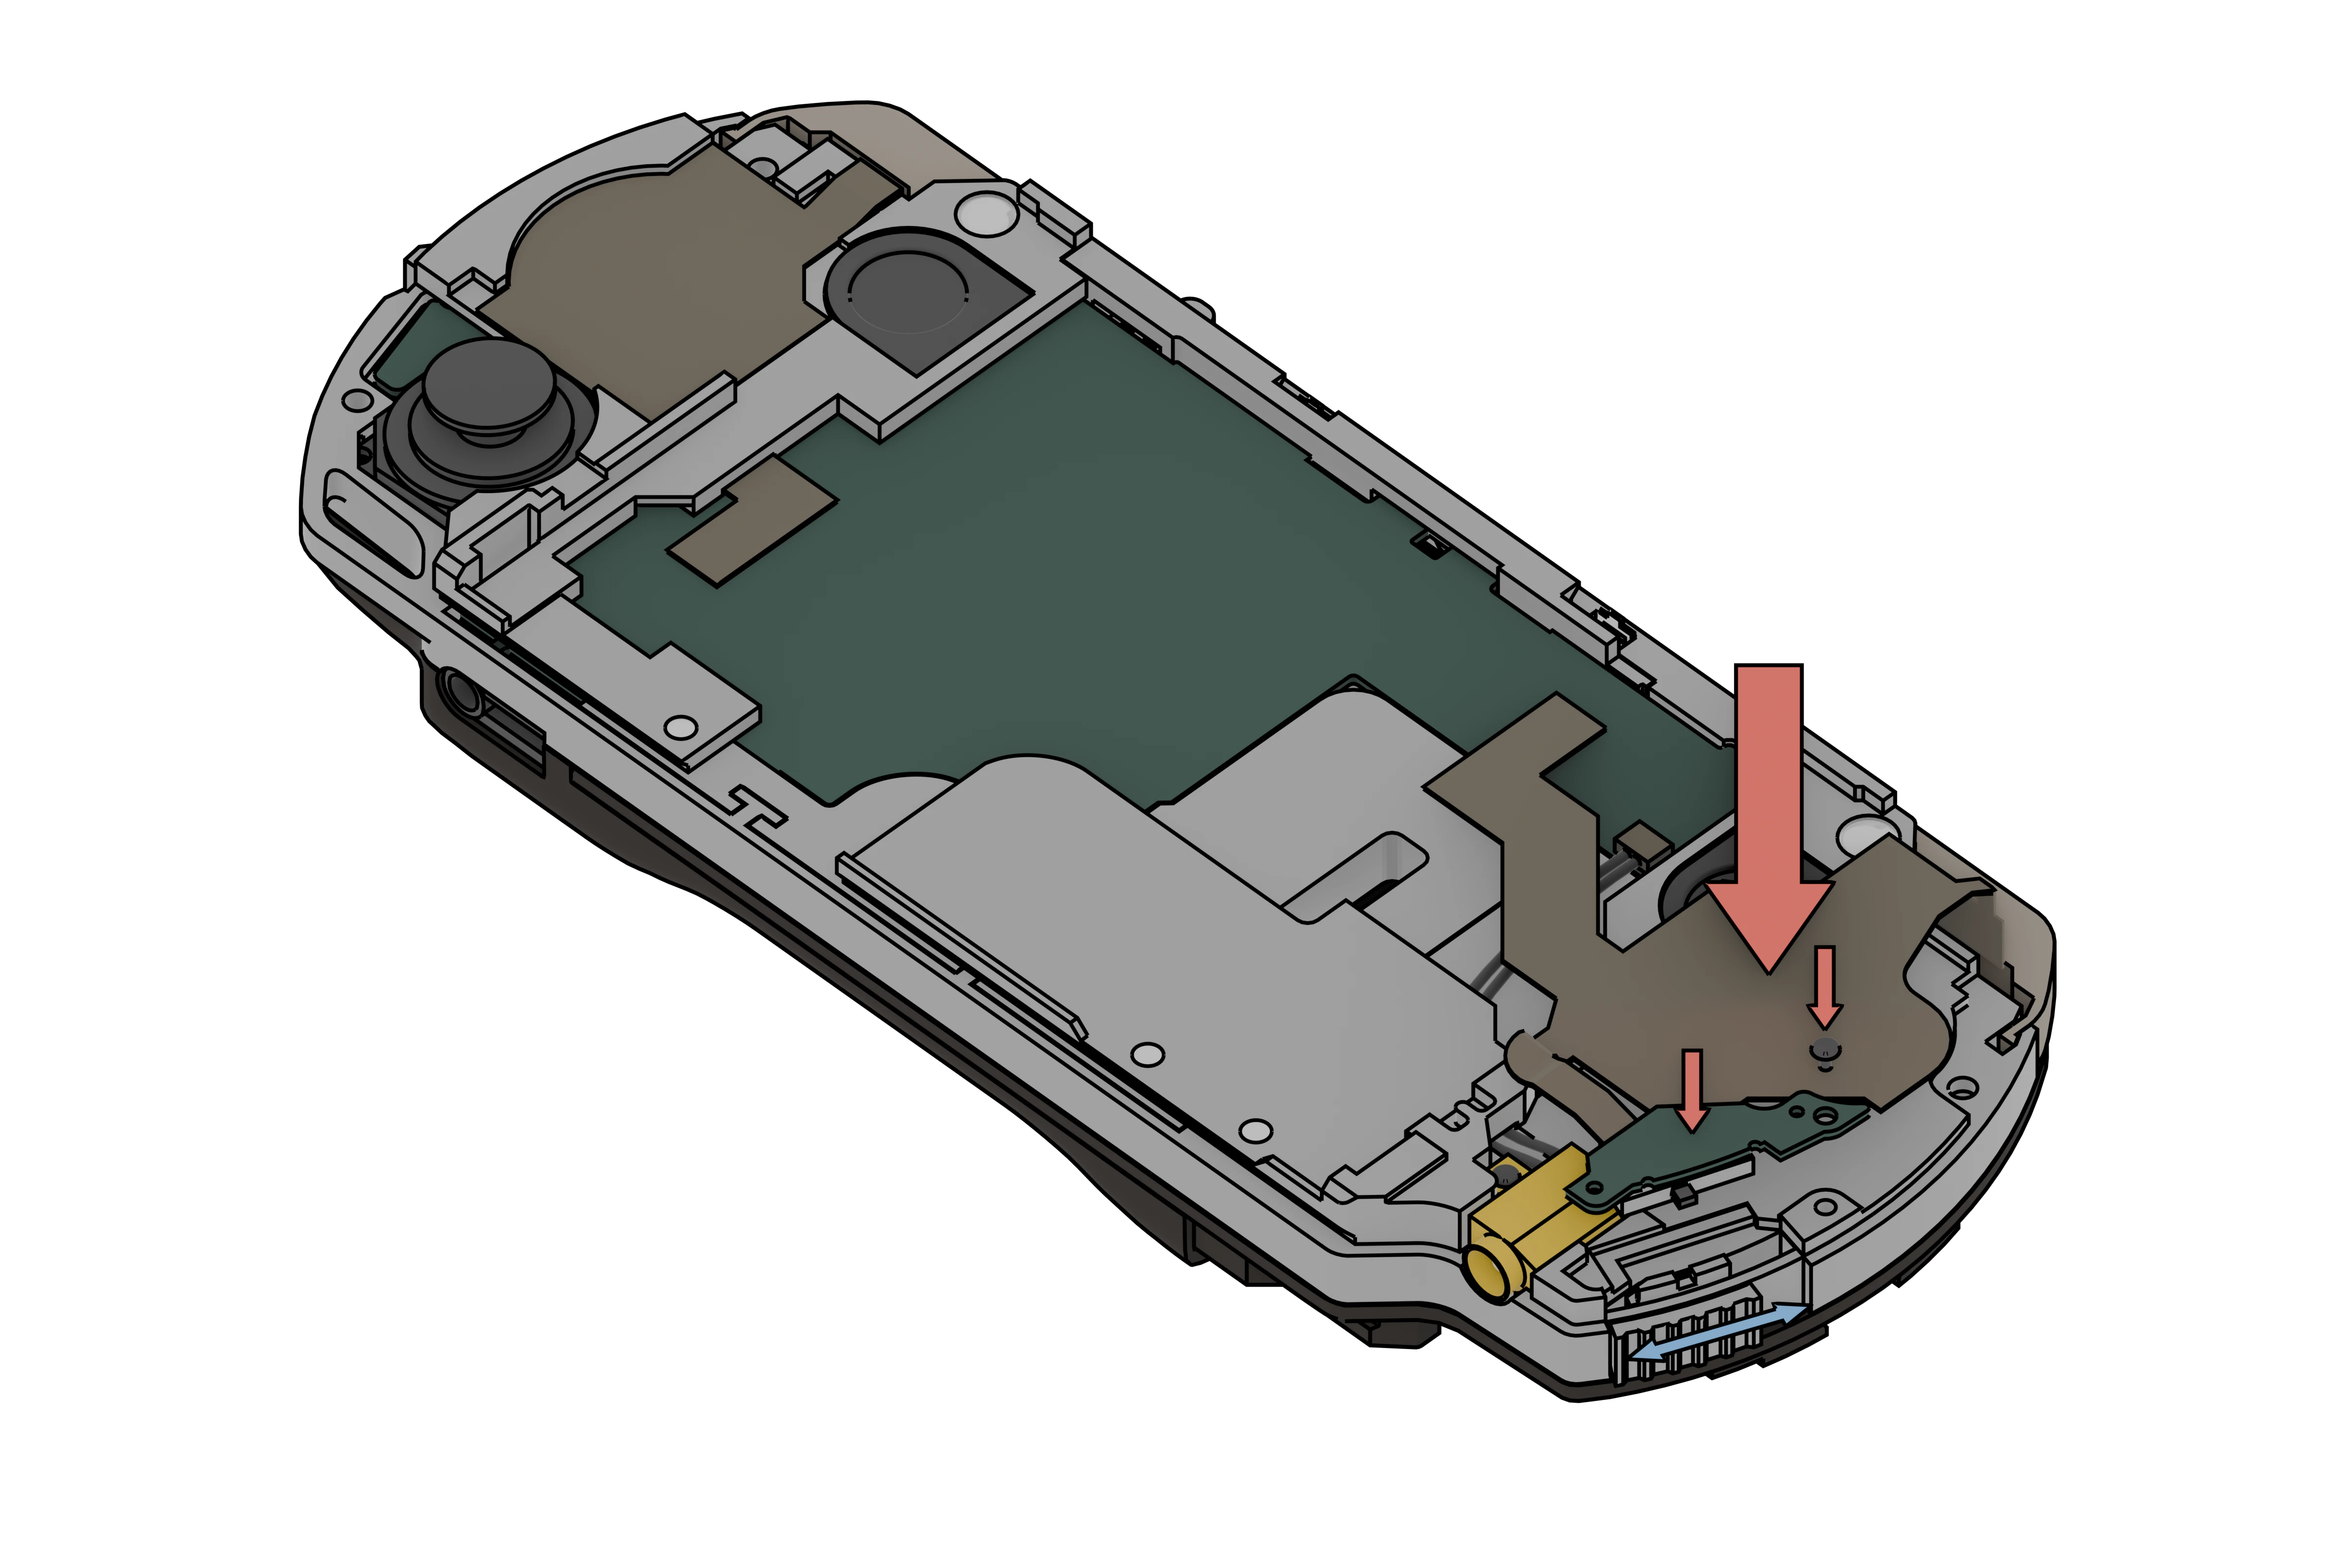
Step 15 - Media buttons
- Glue the media buttons ribbon onto the printed media buttons plate.
- 🔵🔵 For PSP 3000 (part still being worked on)
The plate breaks extremely easily when the mic is added, it will work but the part will be broken, i intend to make a more robust part.
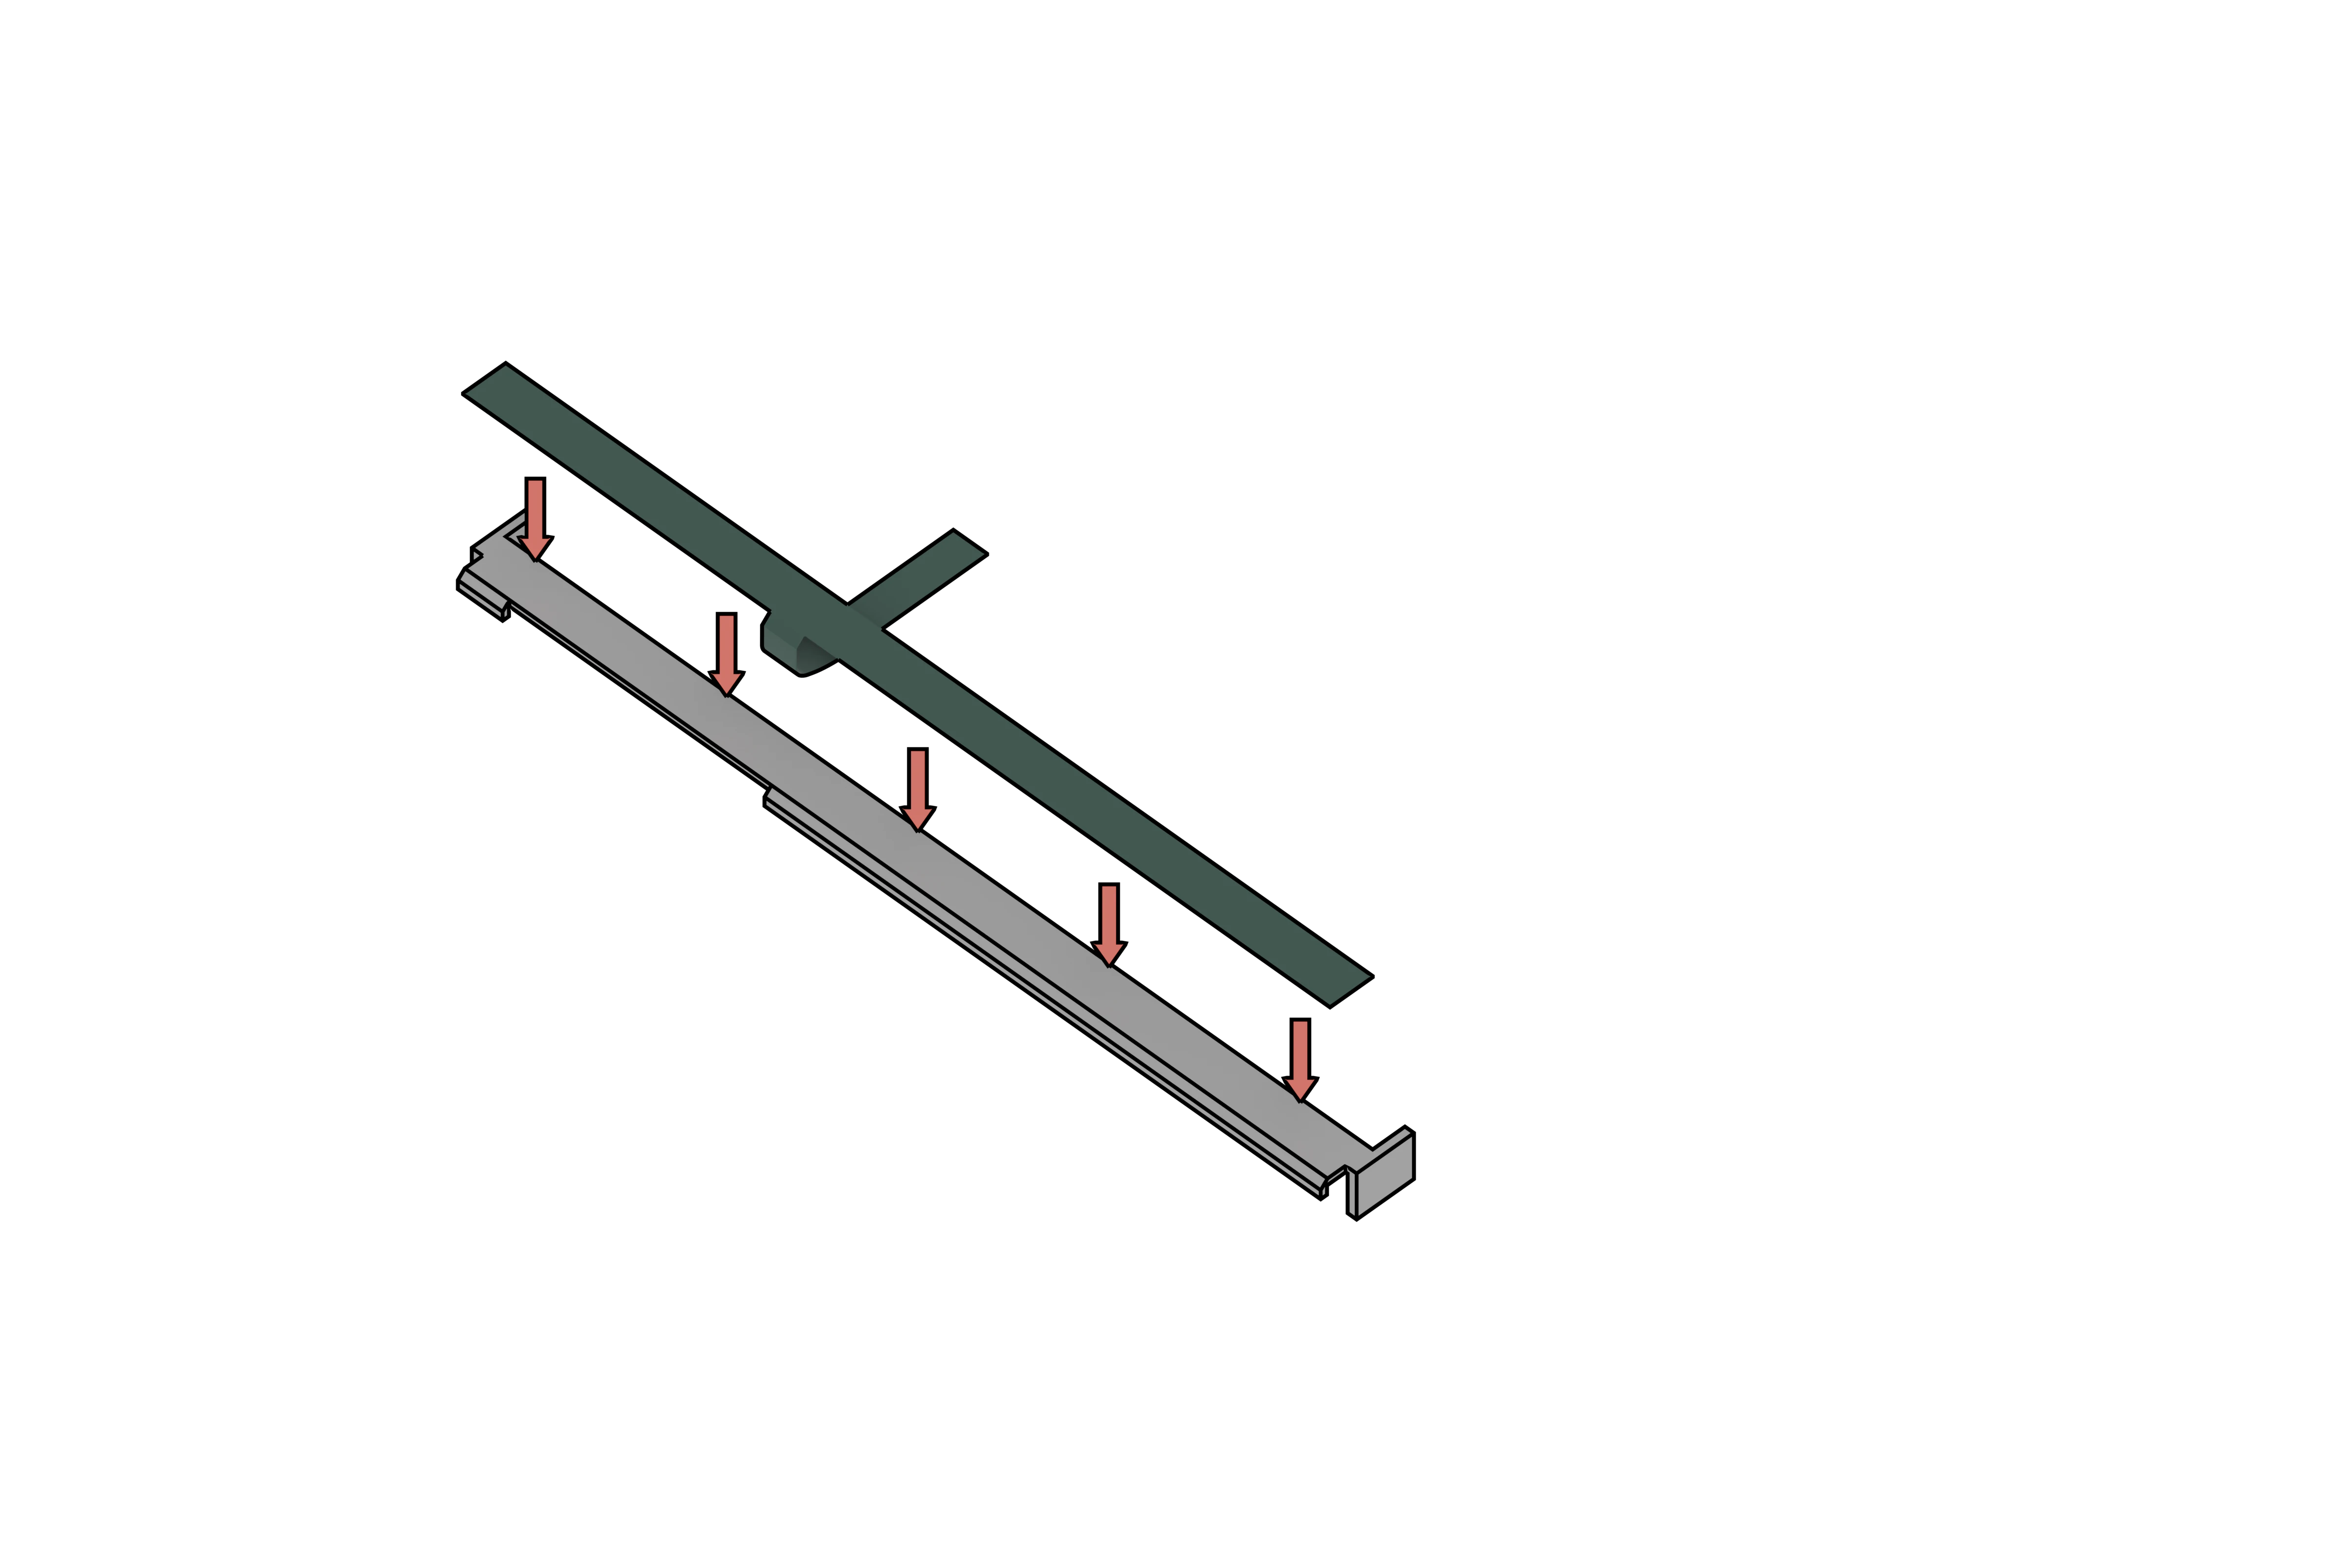
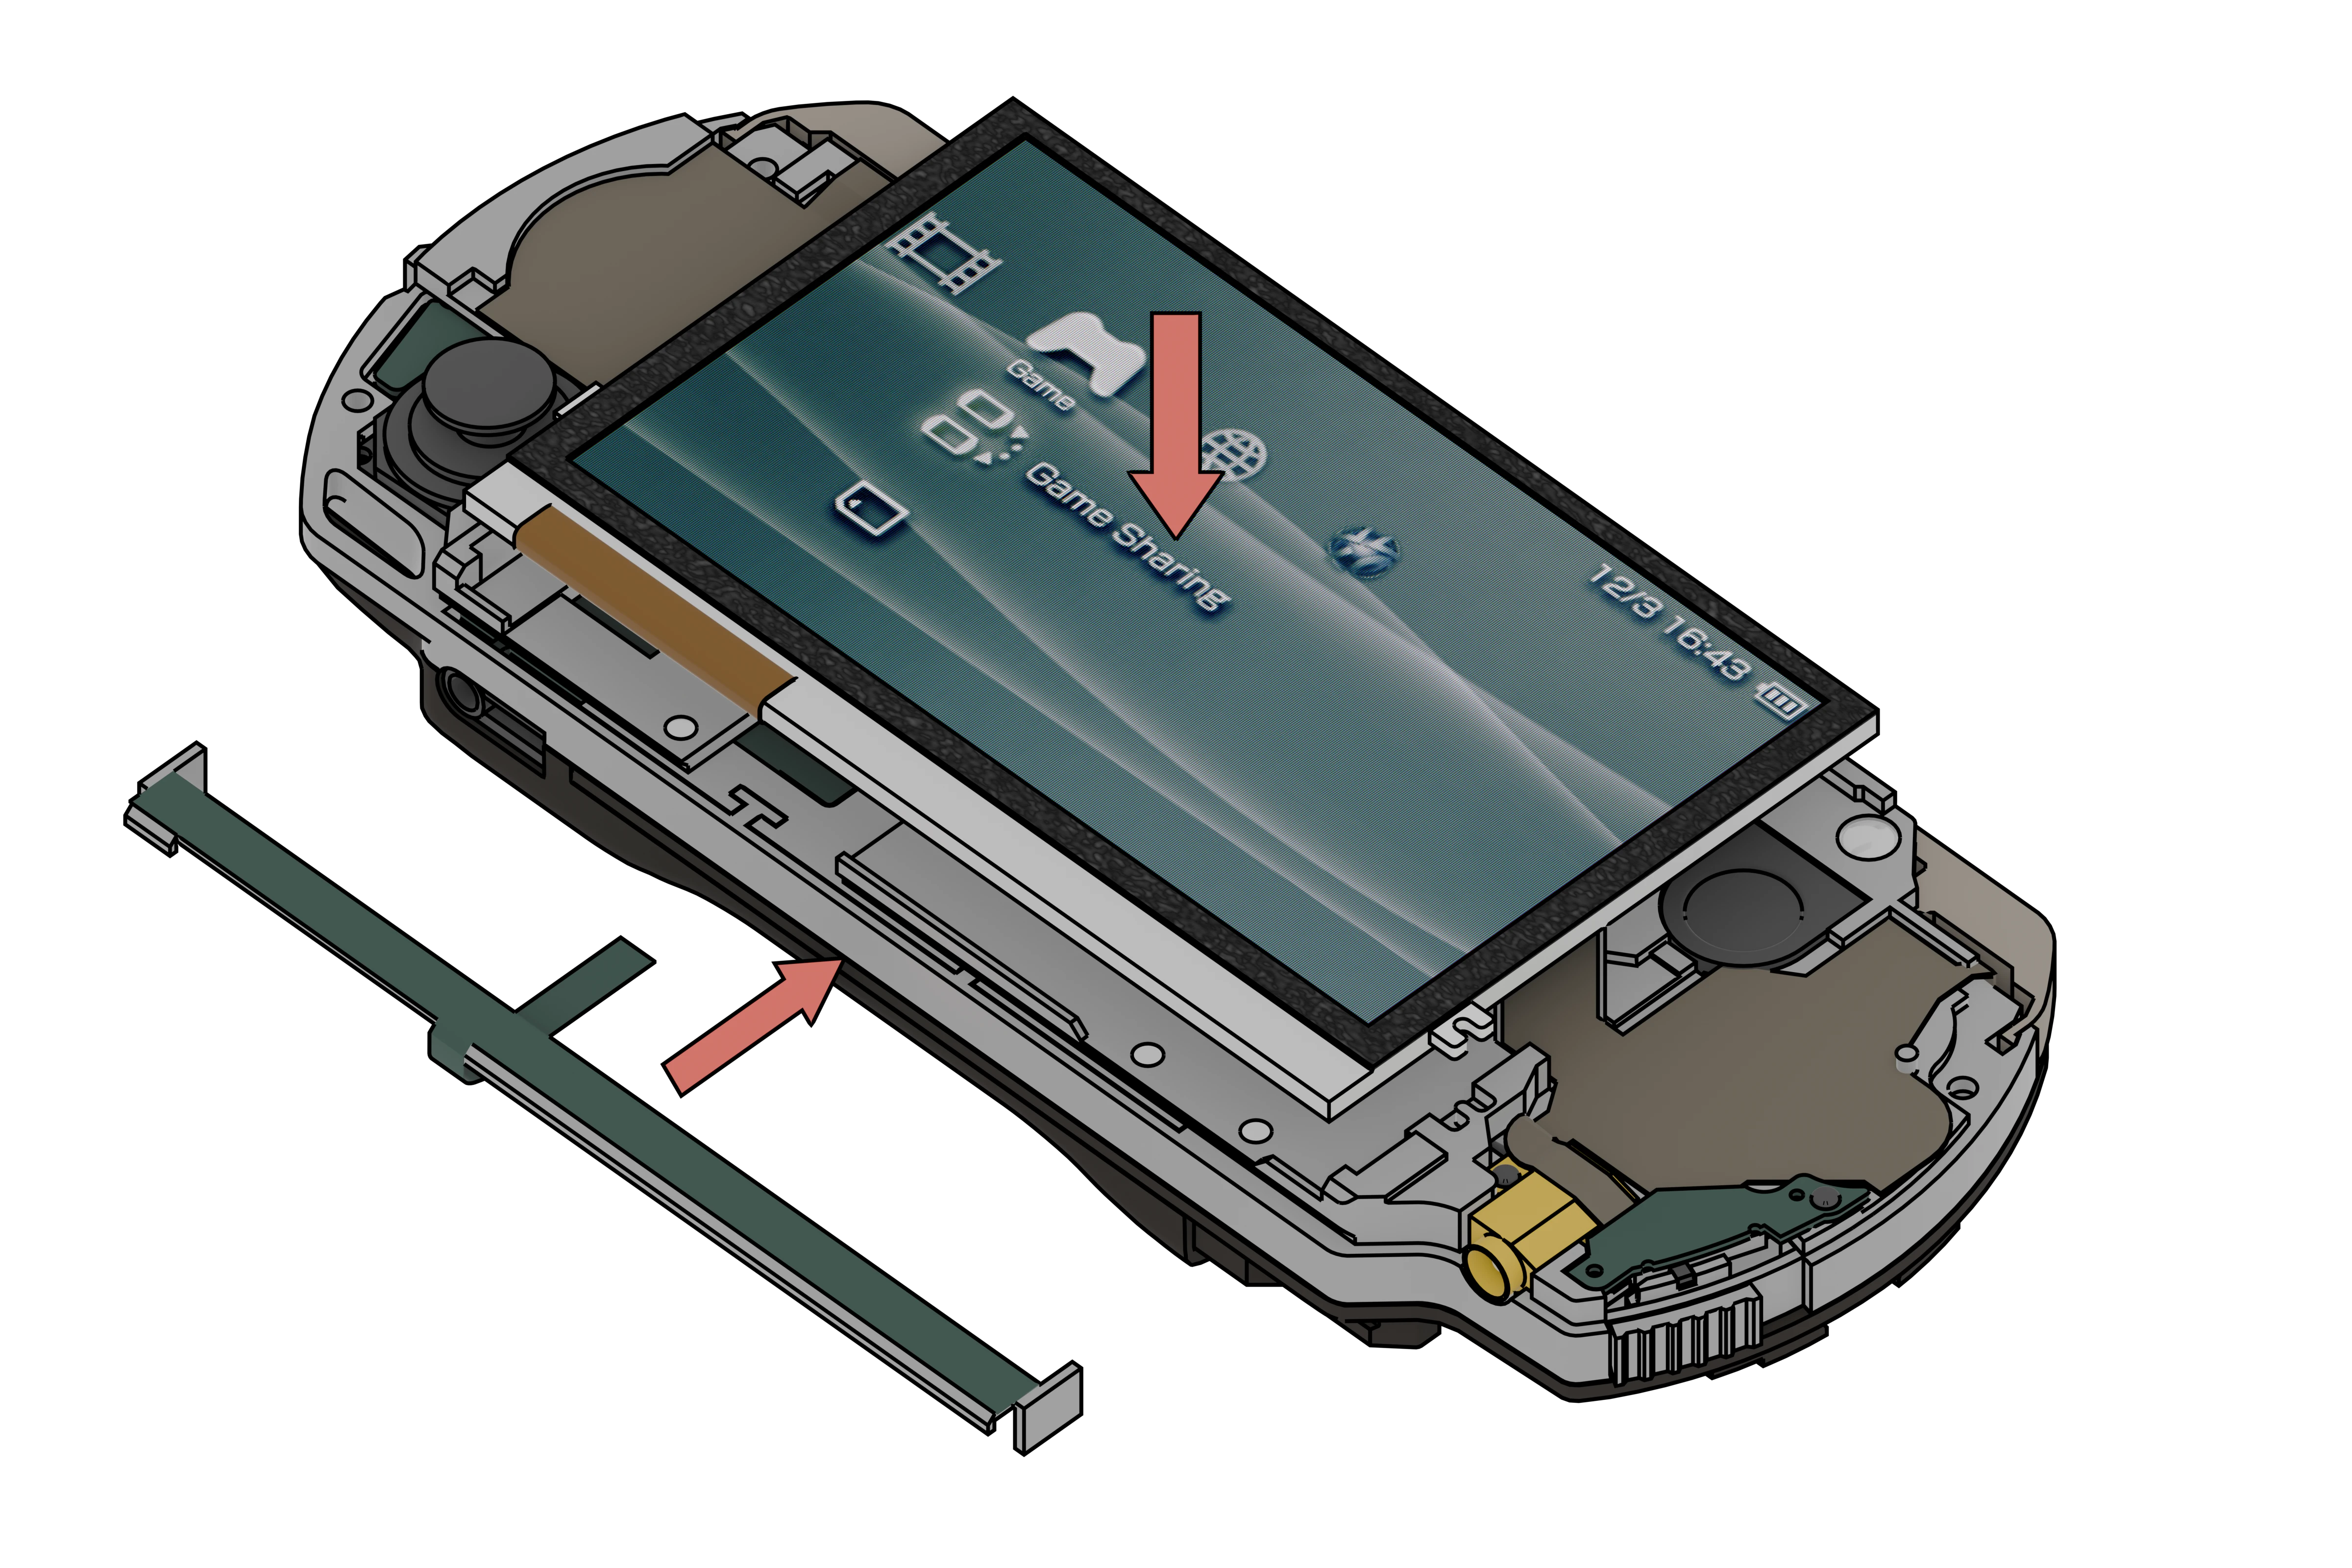
Step 16 - Screen + Media buttons assembly
- Plug in the media buttons
- Plug the screen and put it in place
- Secure the media button plate by putting in in the small rectangular holes on each side of the screen.
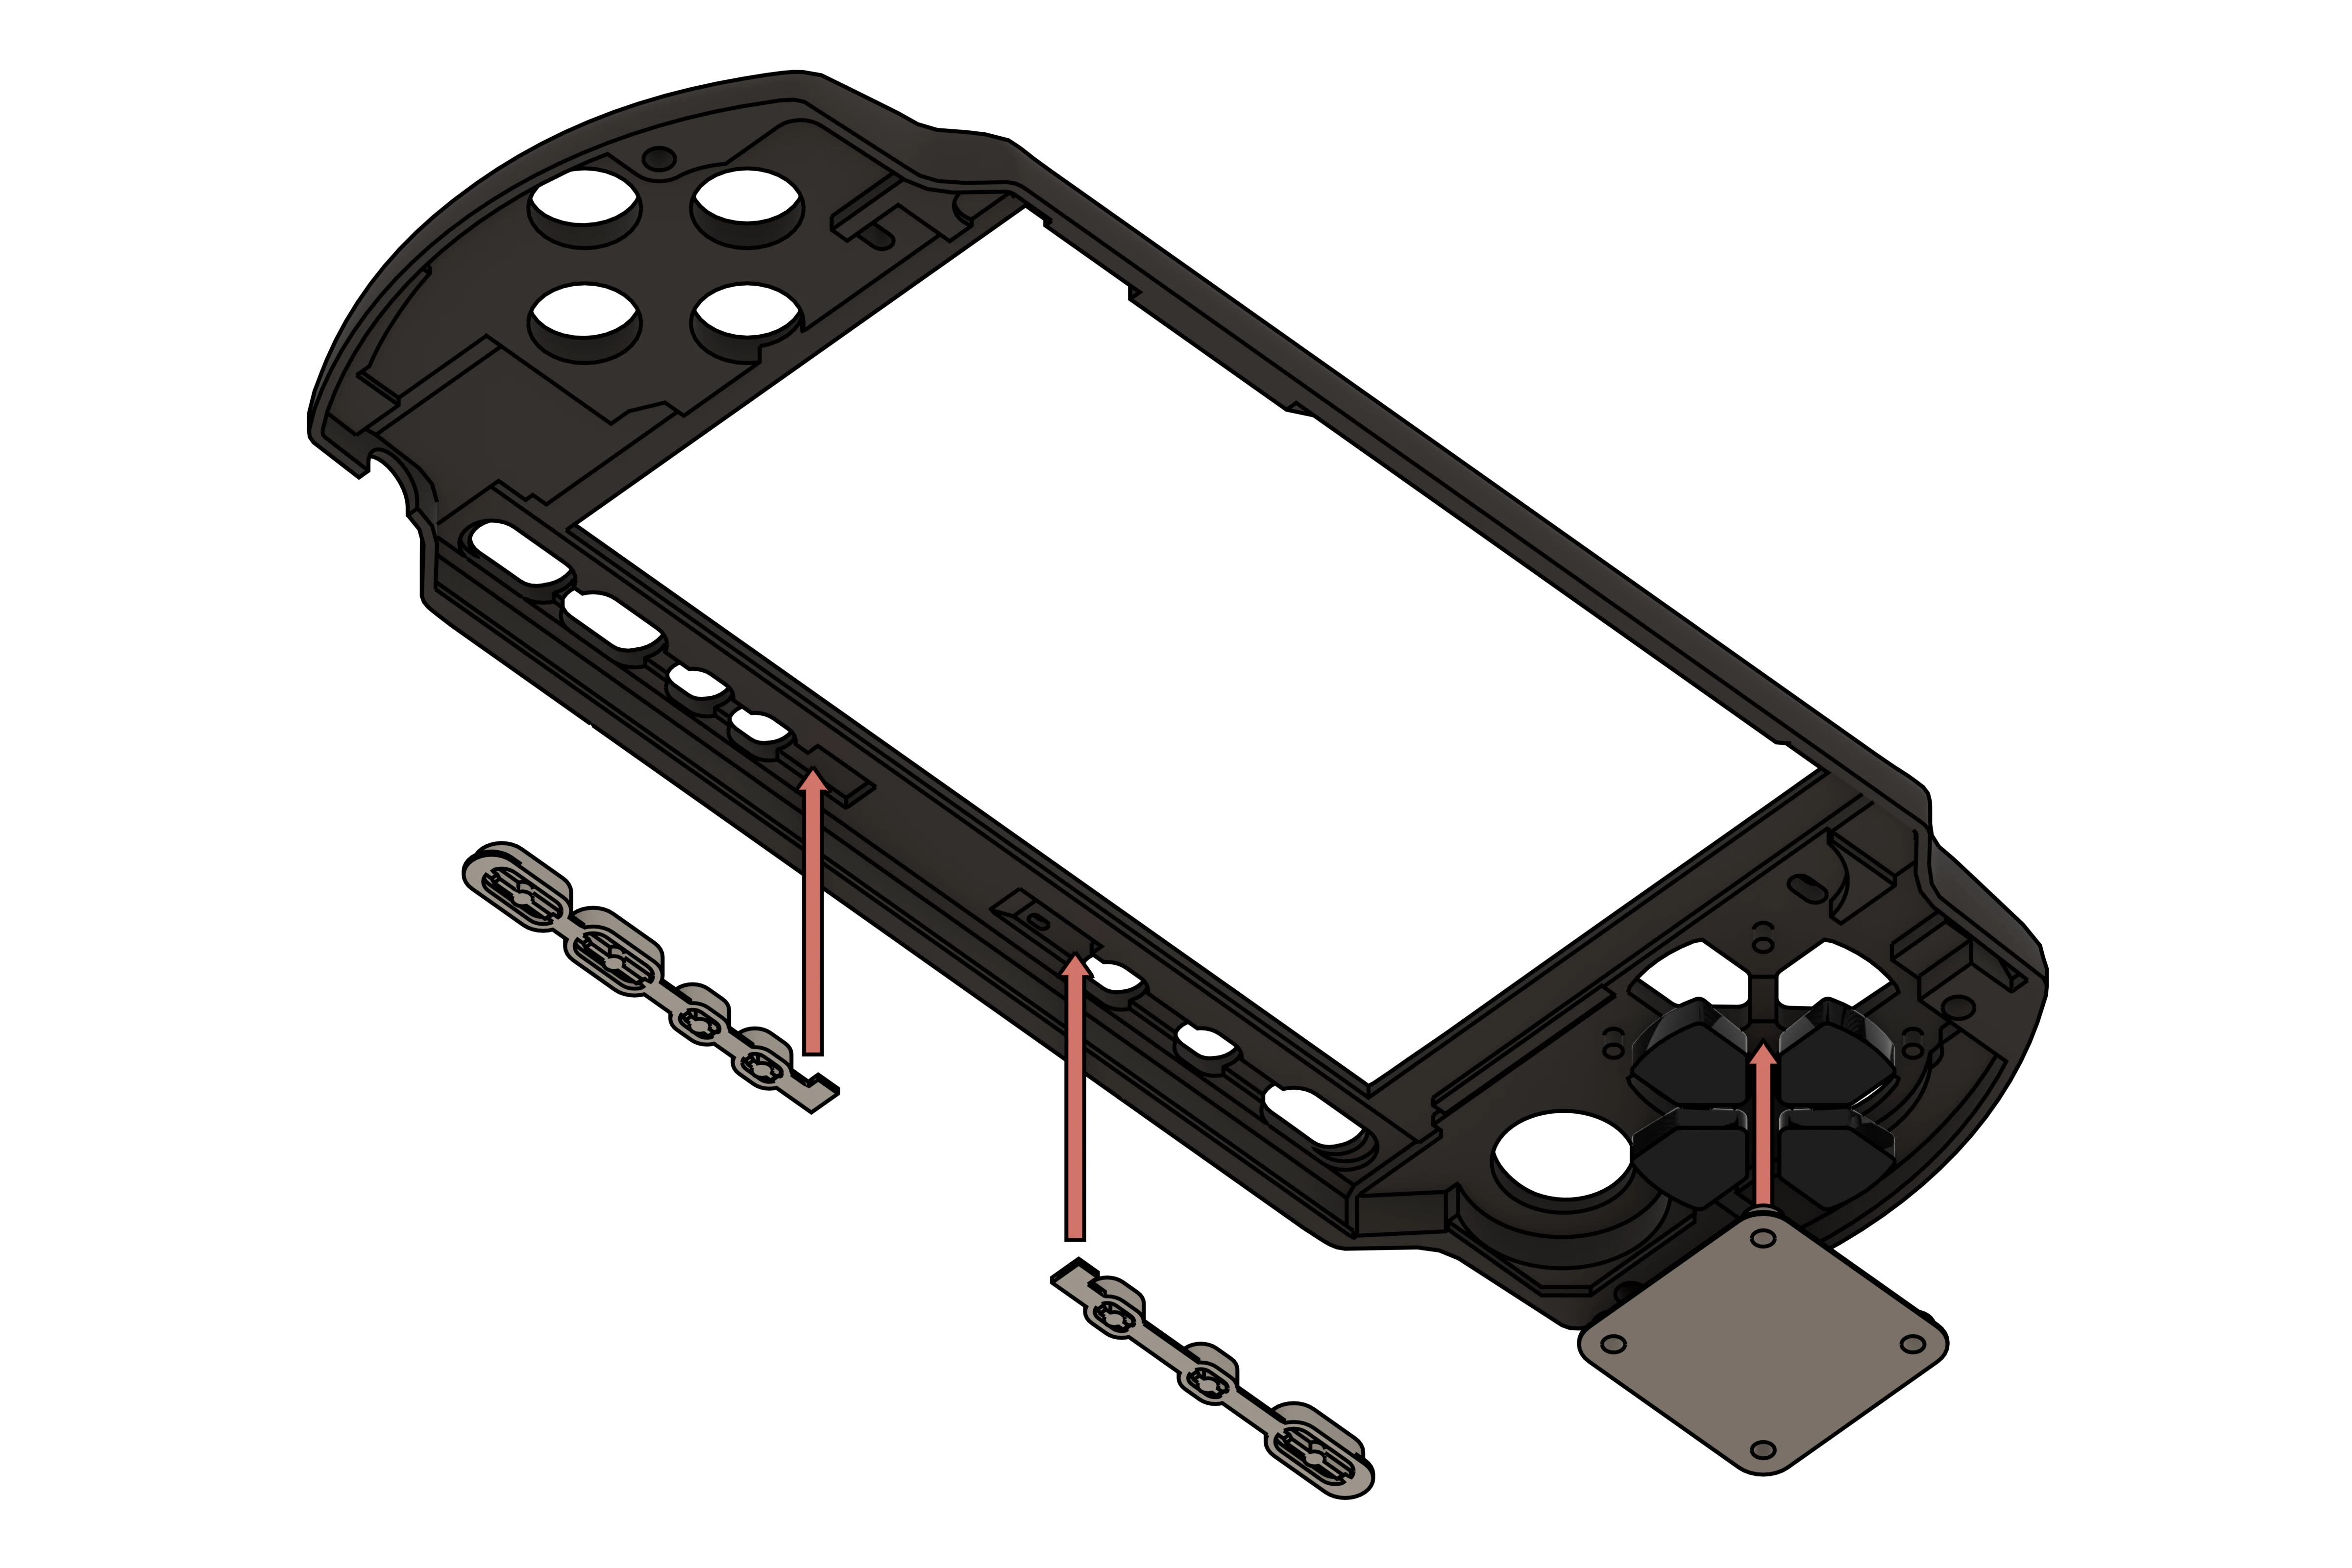
Step 17 - Face plate
- Glue the printed media buttons on the face plate, glue only the parts situated in the middle of the frame (from where the arrows are pointing).
- Put the arrows on the face plate.
- 🔵🔵 You can also melt the media buttons into the faceplate with a soldering iron, works really well if both are the same type of plastic.
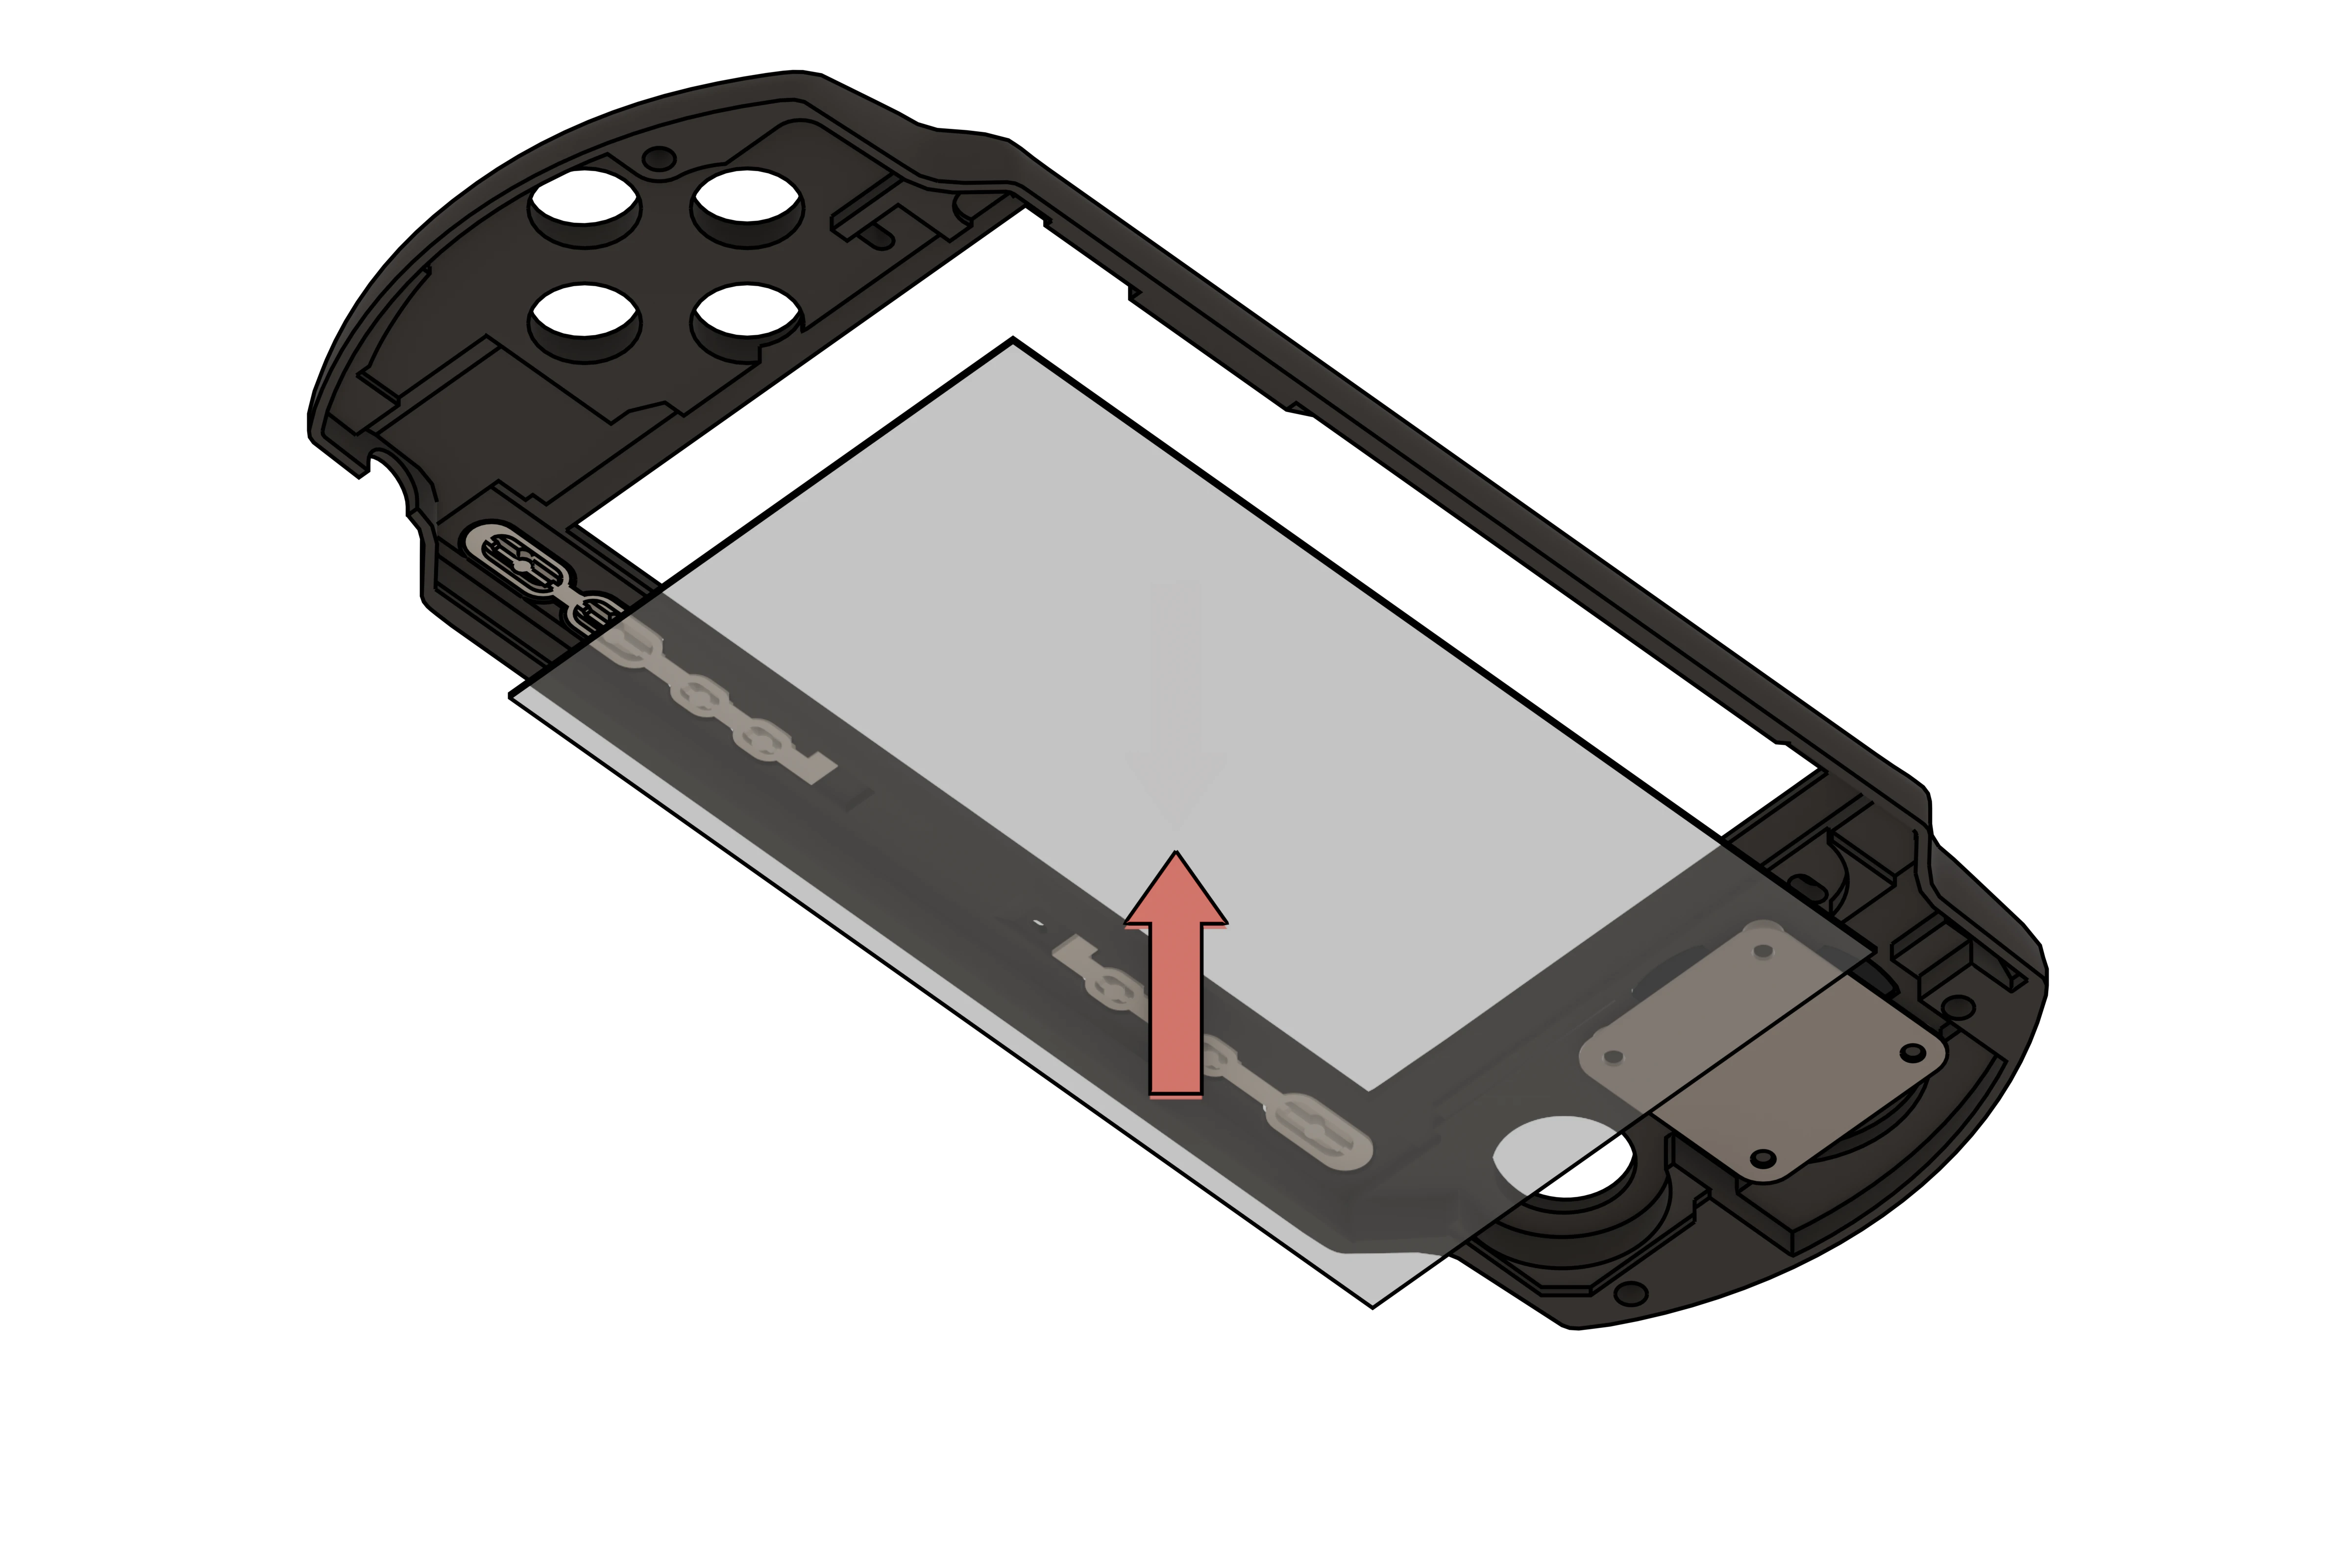
Step 18 - Glass screen
- On this part you have 2 choices :
- Glue the glass or plastic screen onto the face plate
- Just put it on top of the screen
- I recommend gluing it to the faceplate.
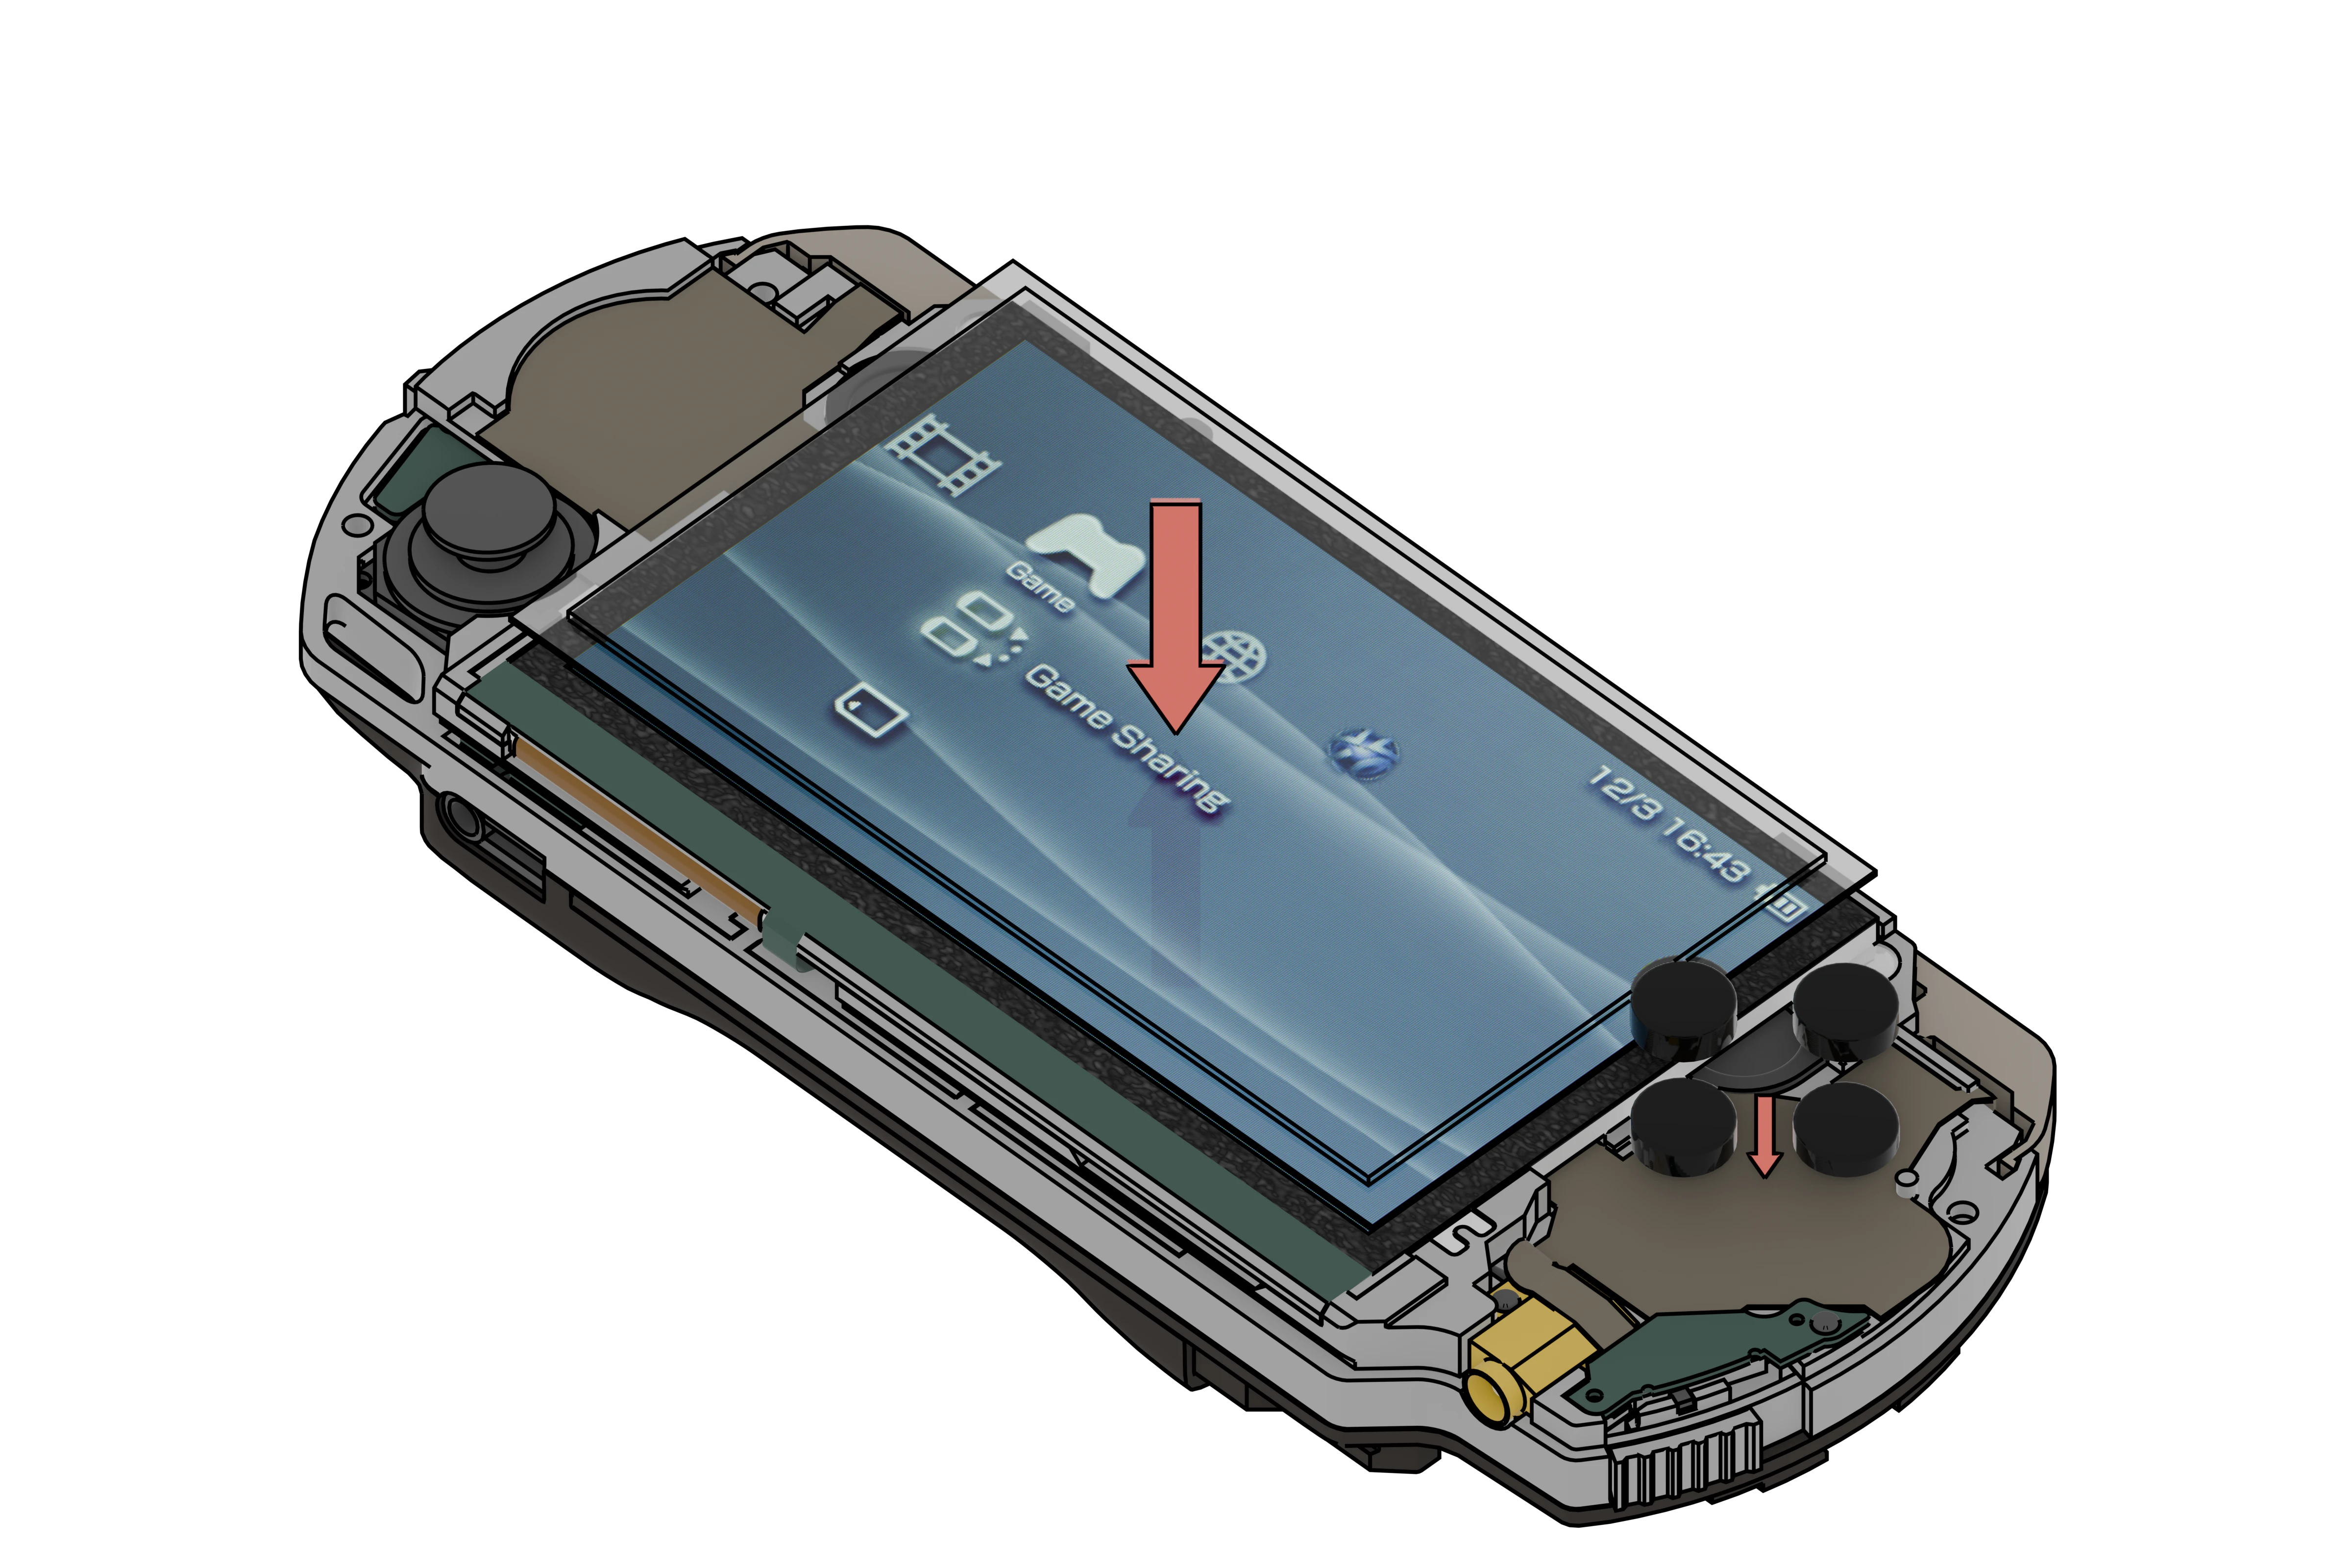
Step 19 - Face plate assembly
- Put the bottom of the faceplate into the frame
- Push down the top on the indicated part.
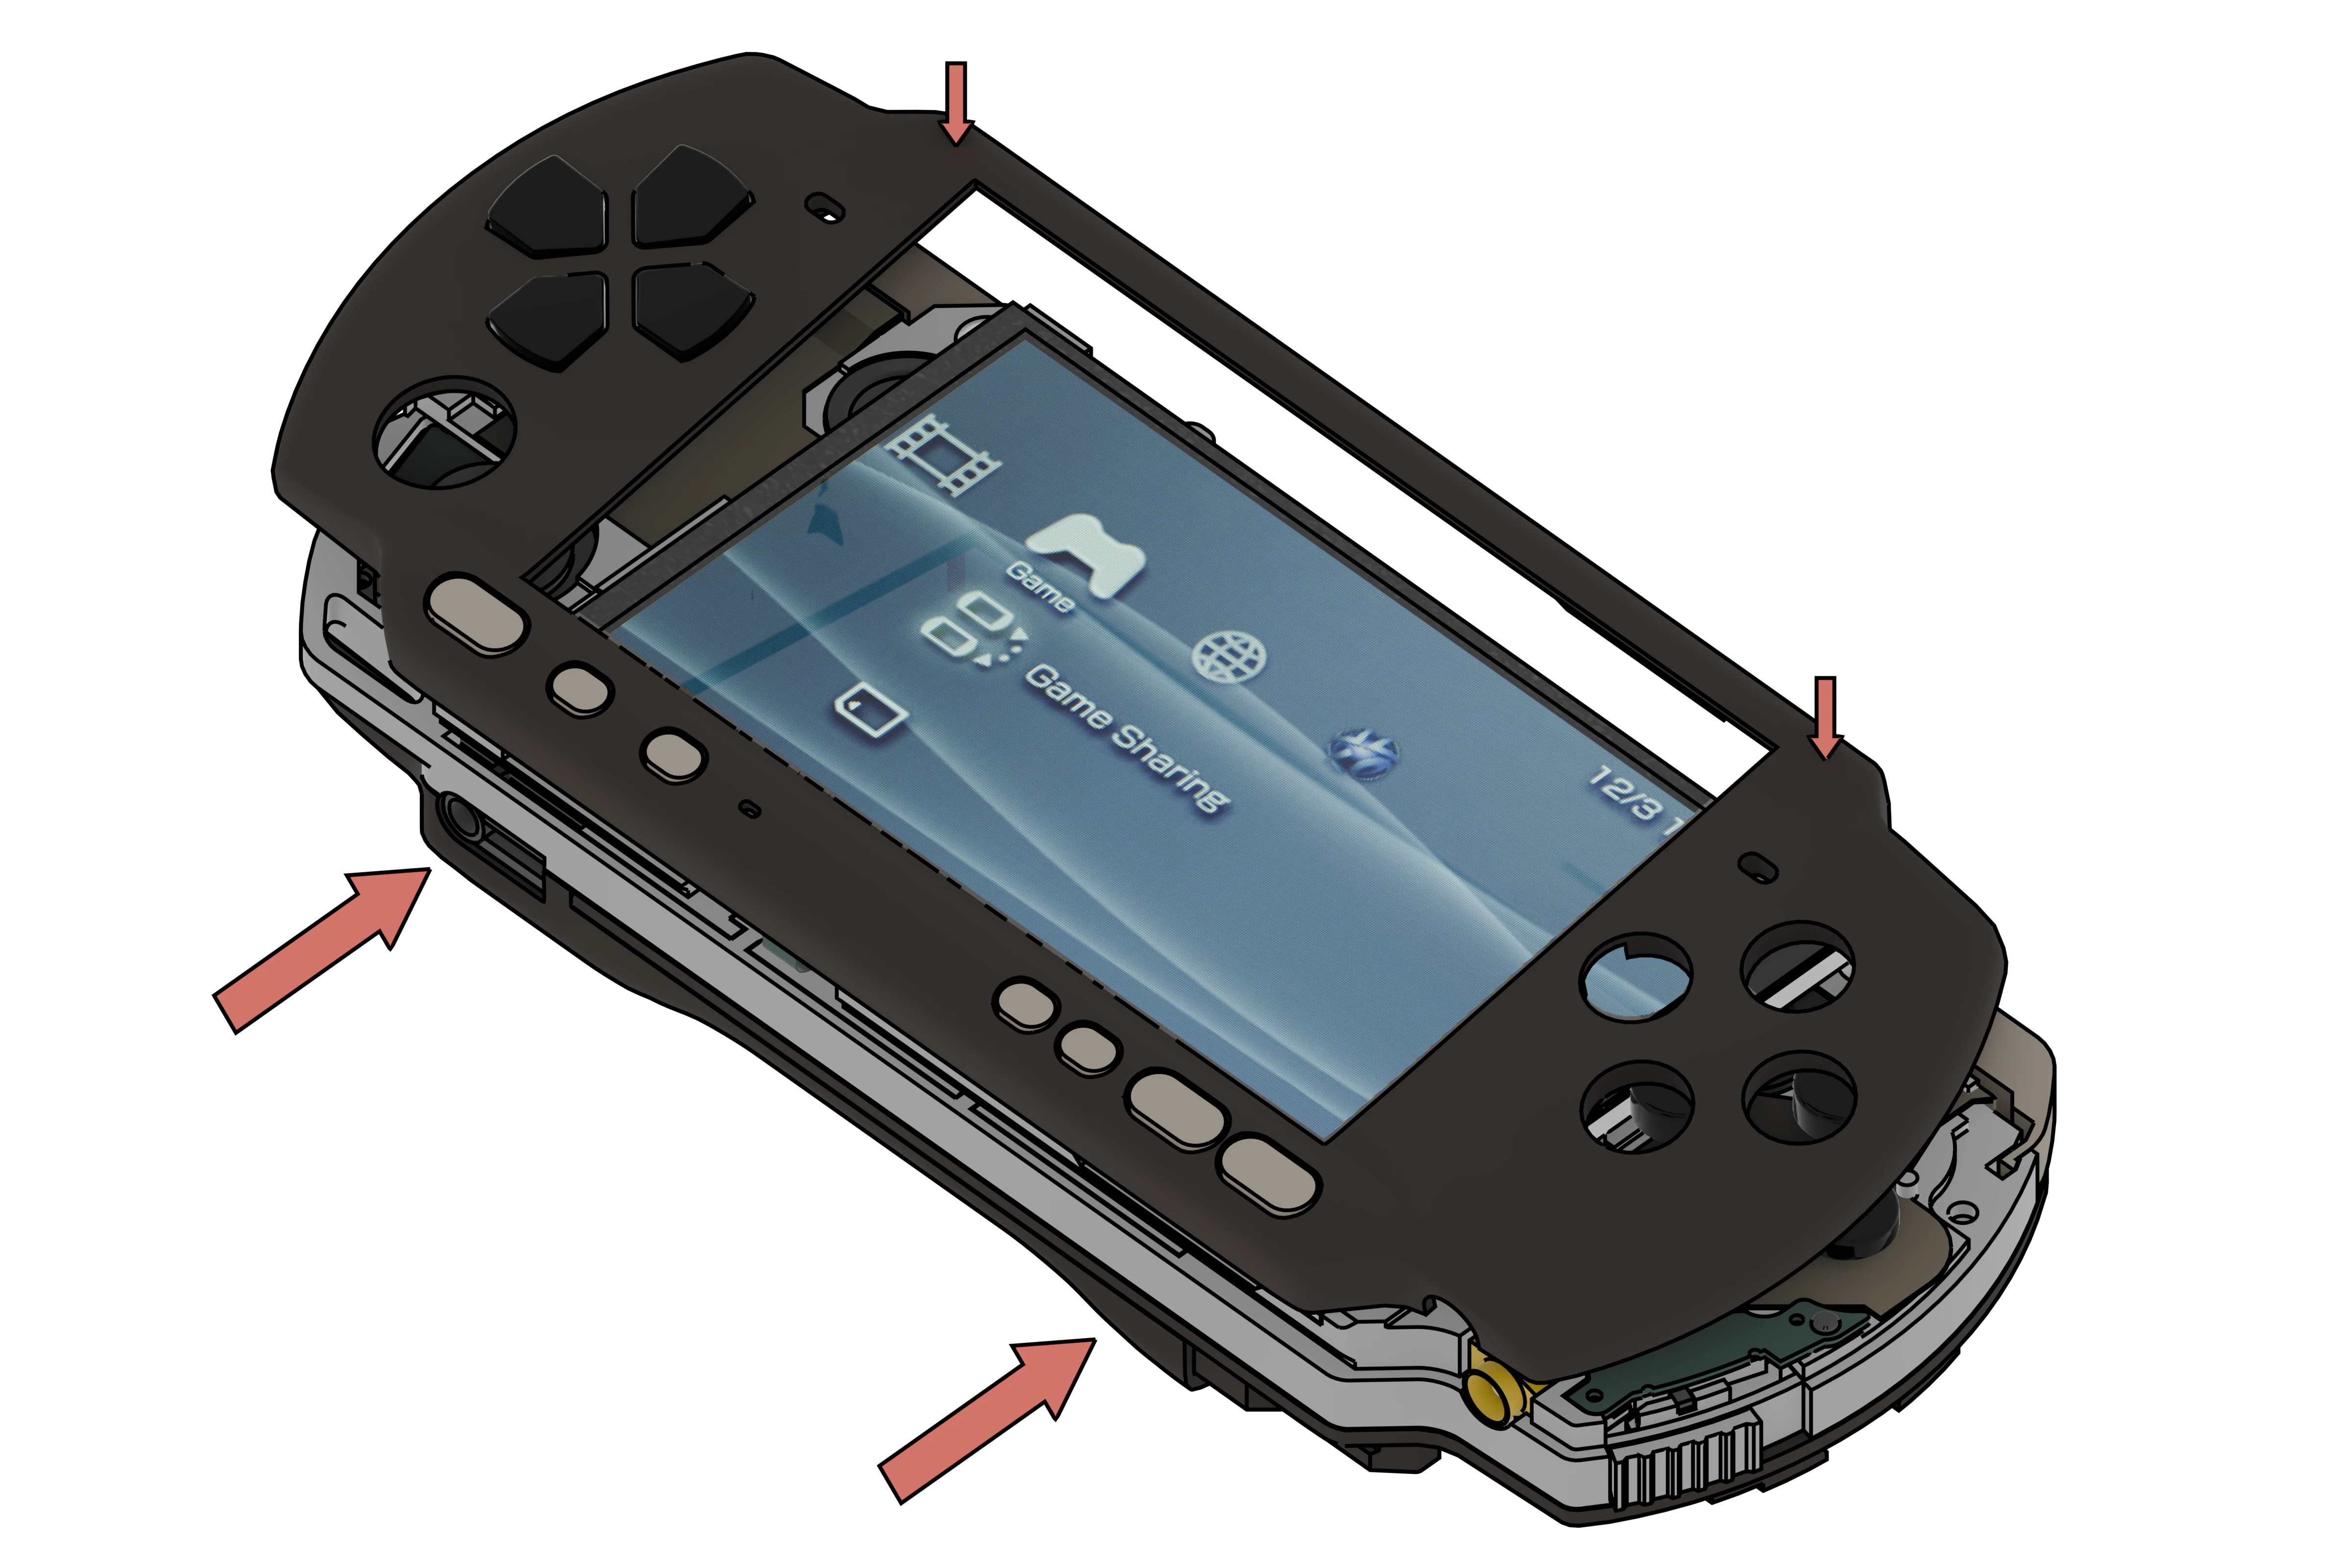
Step 20 - Last screws
- Screw in the faceplate from the back.
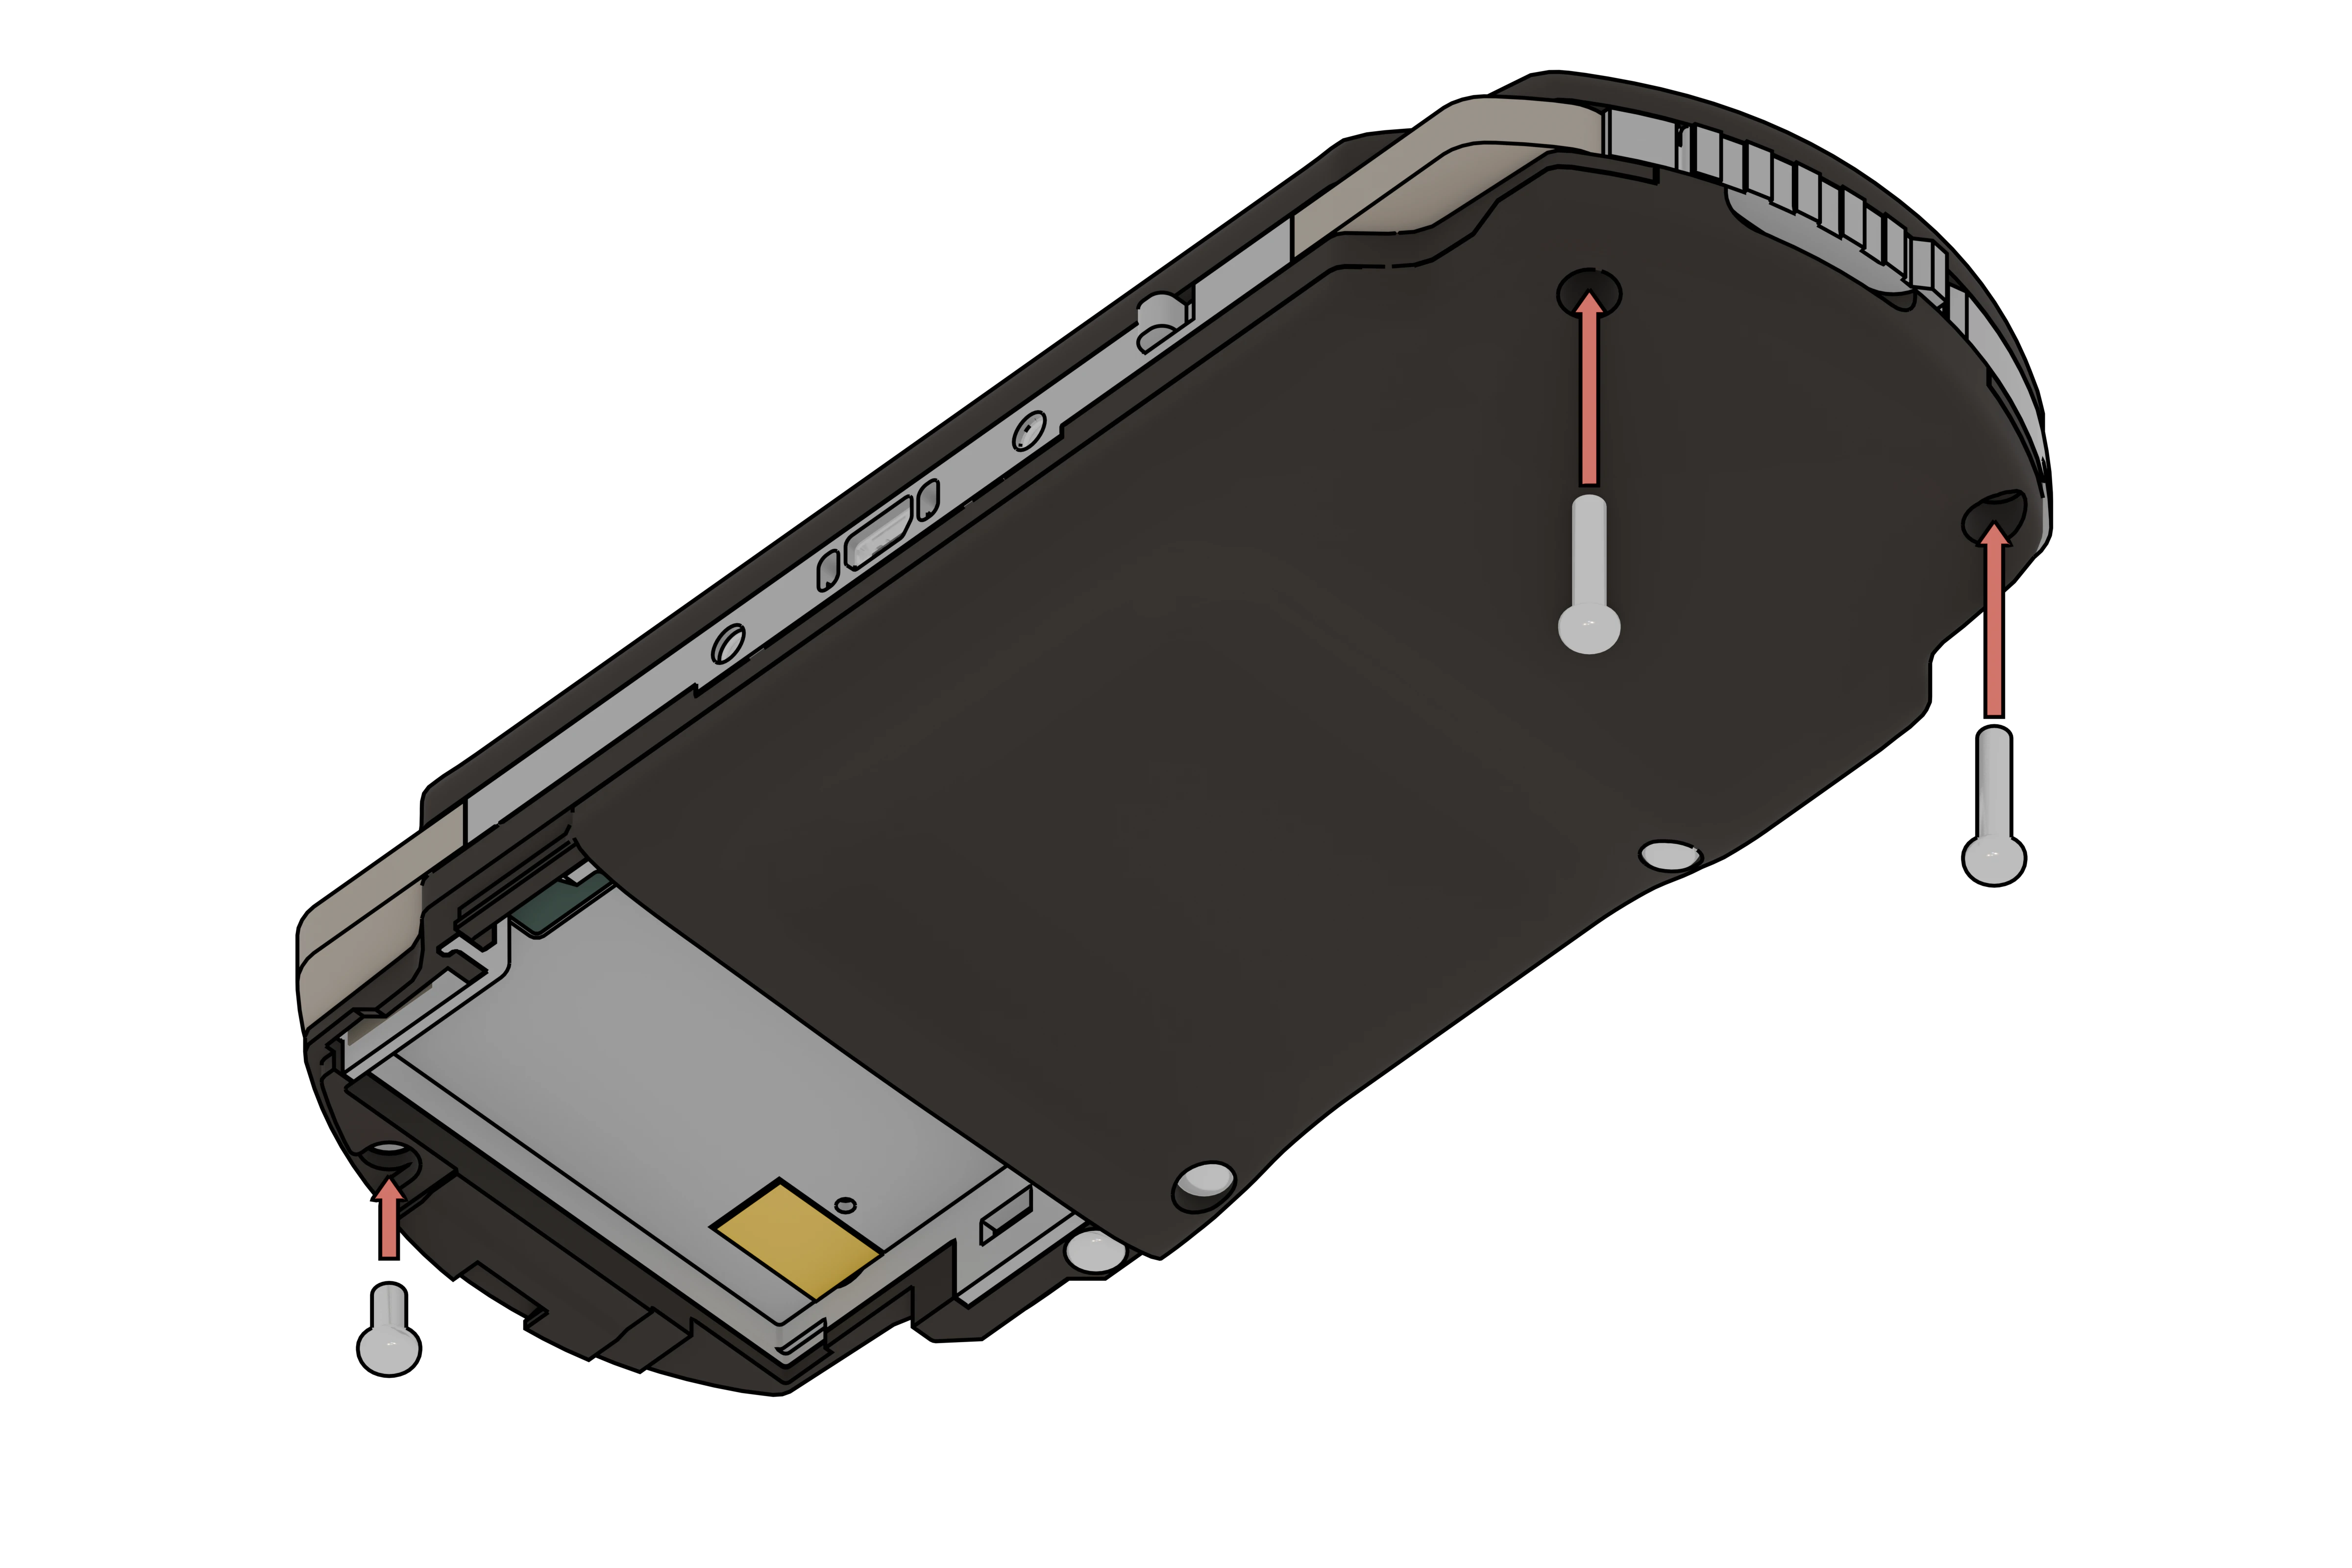
Step 21 - Battery cover
- Put the battery cover. (yes, you can put the battery)
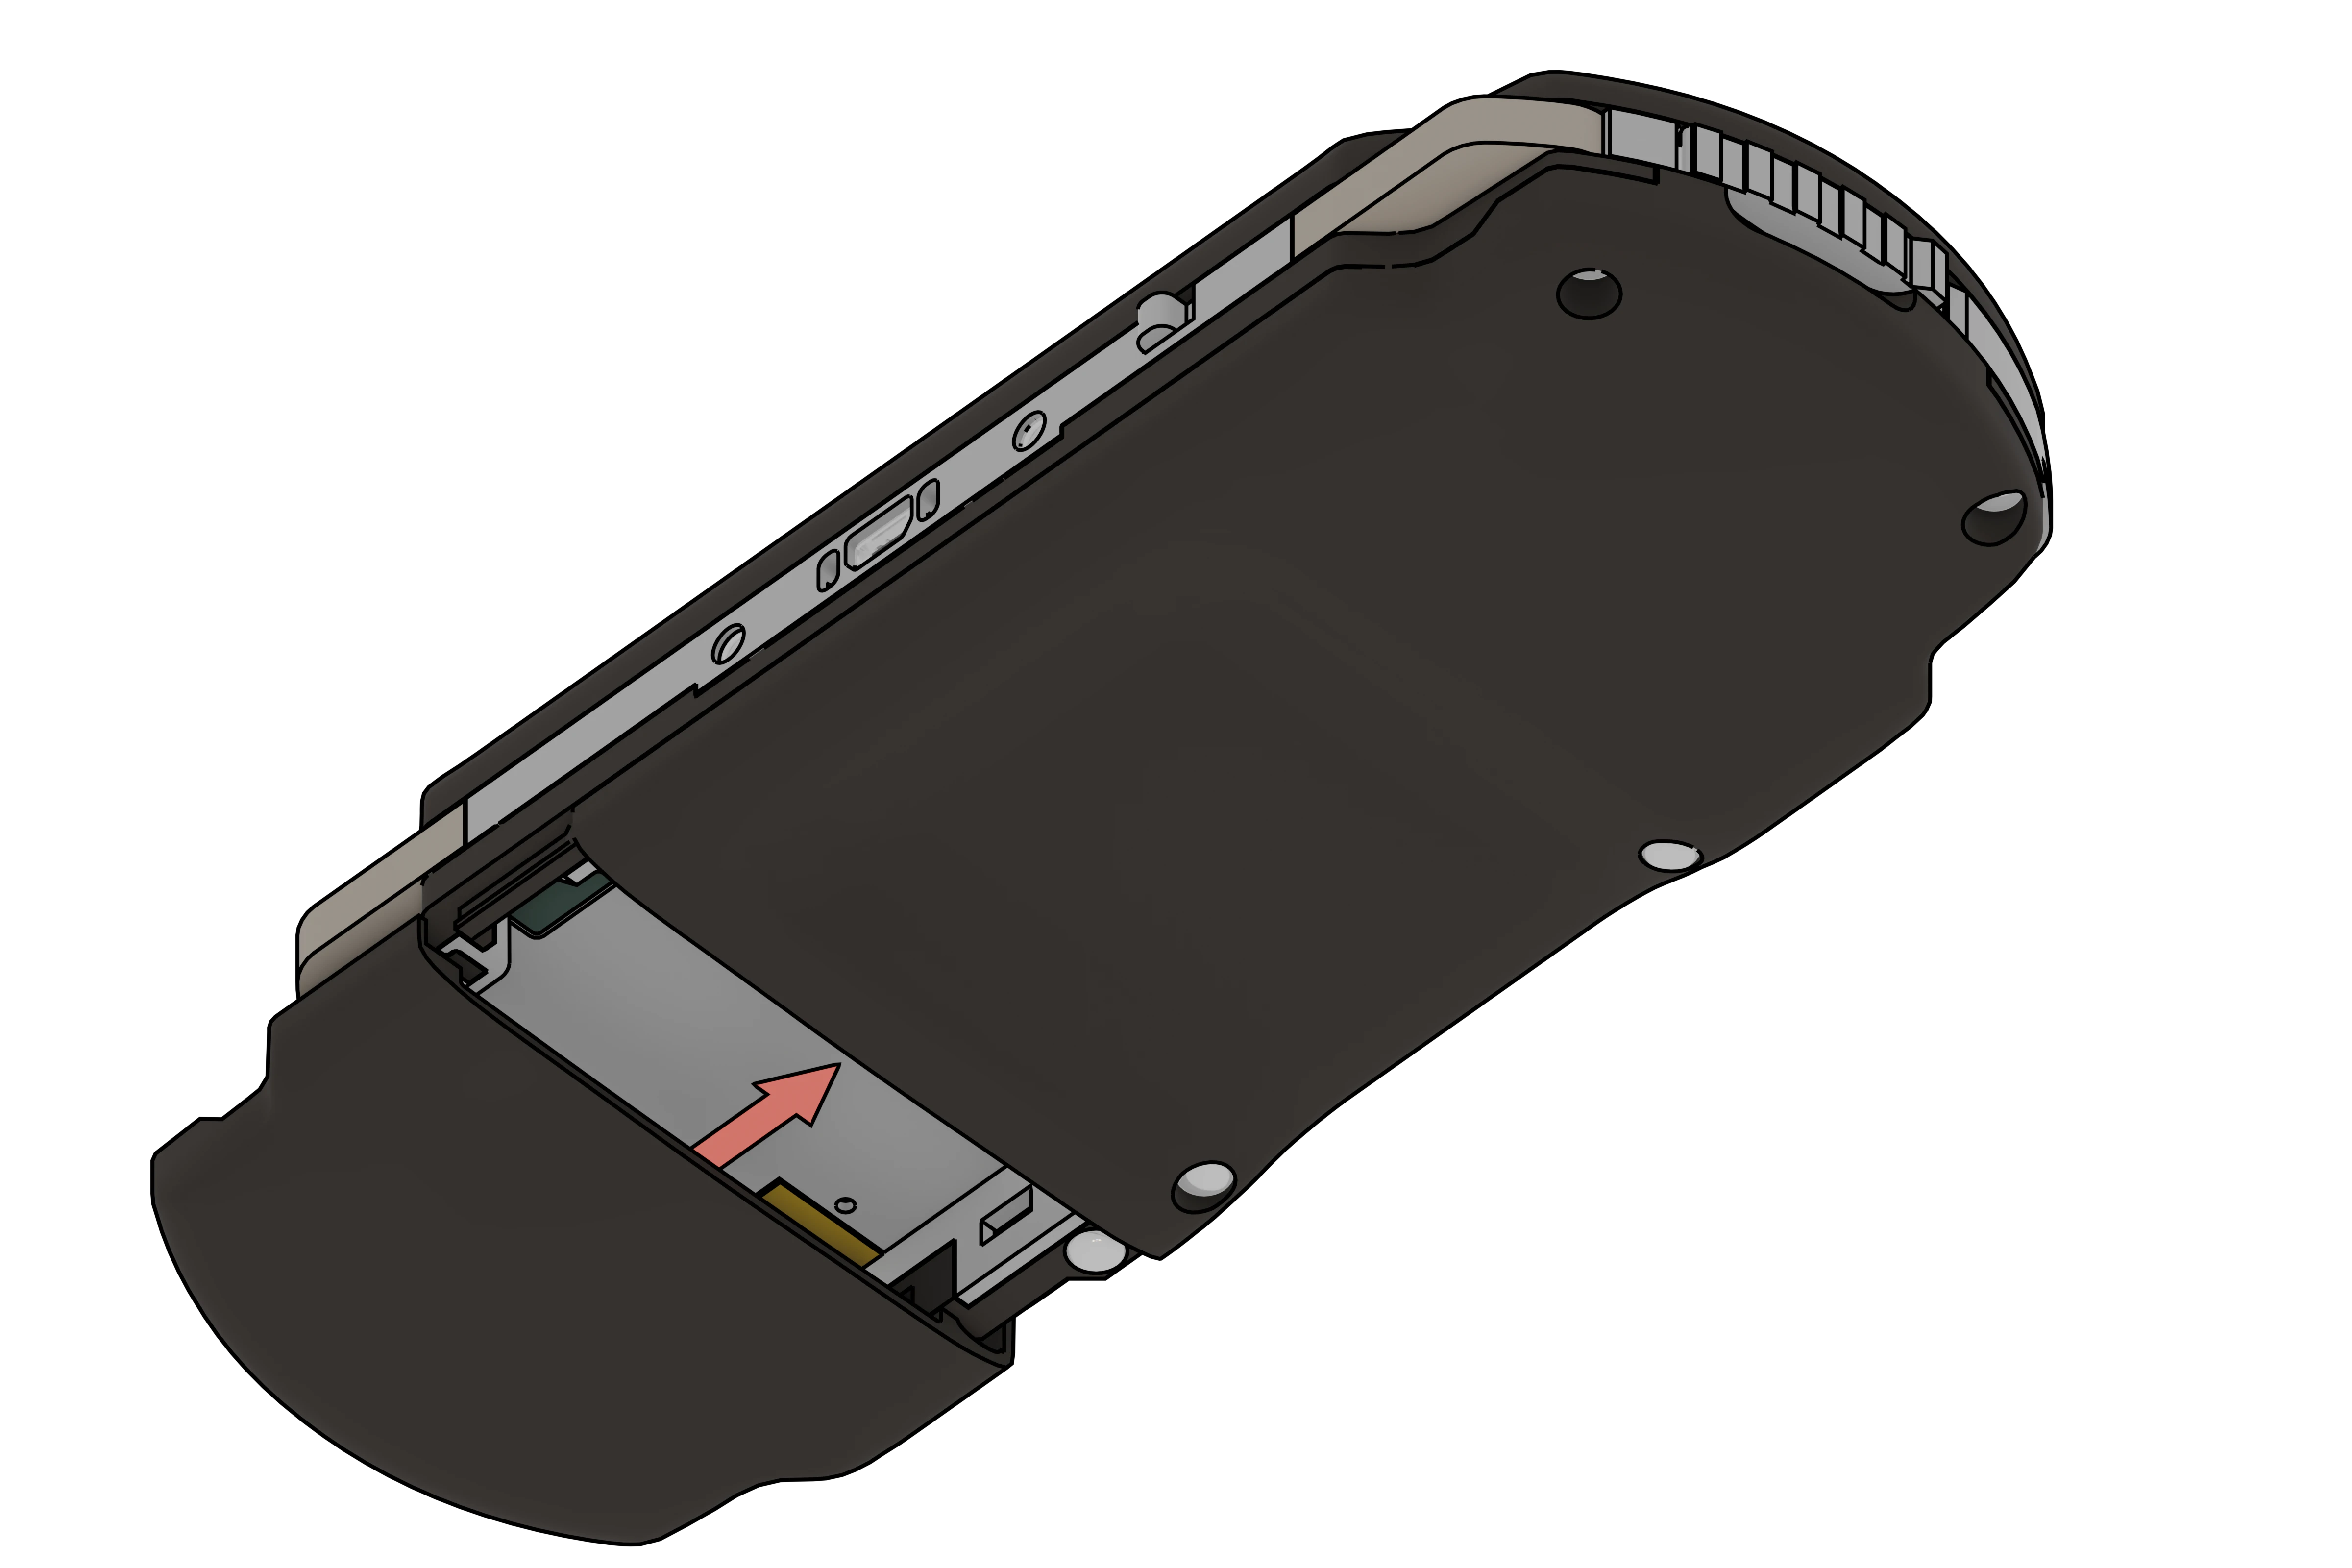
The end
Well done! your PSP shell is now fully assembled, if you still have some fitment issues on other parts, you may still want to take a look at those and shave/clean some plastic of some rough edges.
There is still a small common problem for the top part of the faceplate that could be slightly bent upwards for those that haven't glued the front glass panel in place, wich i do recommend glueing to the faceplate.
Support
If you want to support me, i made a Ko-Fi page where i will be posting new projects i make, i also am selling there a template to ease the making of a custom shell for those that want to try!
Gostou deste modelo? Crie uma conta grátis para salvar seus favoritos e voltar a eles depois.
Criar conta