Você está no 3DFinder
Buscamos em Thingiverse, MakerWorld e Printables ao mesmo tempo para te dar o melhor de cada uma.
Descrição
I am happy to present the first edition of my Collapsible Animal Series, the Zebra.
Printed in multiple parts, connected with a string, this Zebra collapses when the bottom of the base is pressed, powered either by a spring or rubber bands (40mm diameter). Assembly is straight forward, but quite finicky where an extra hand might be required at some points. Please have a look at the assembly instructions before printing to make sure you are up for the task. Failure to create the right tension might require you take the model apart and try again. Please let me know how the build worked out for you.
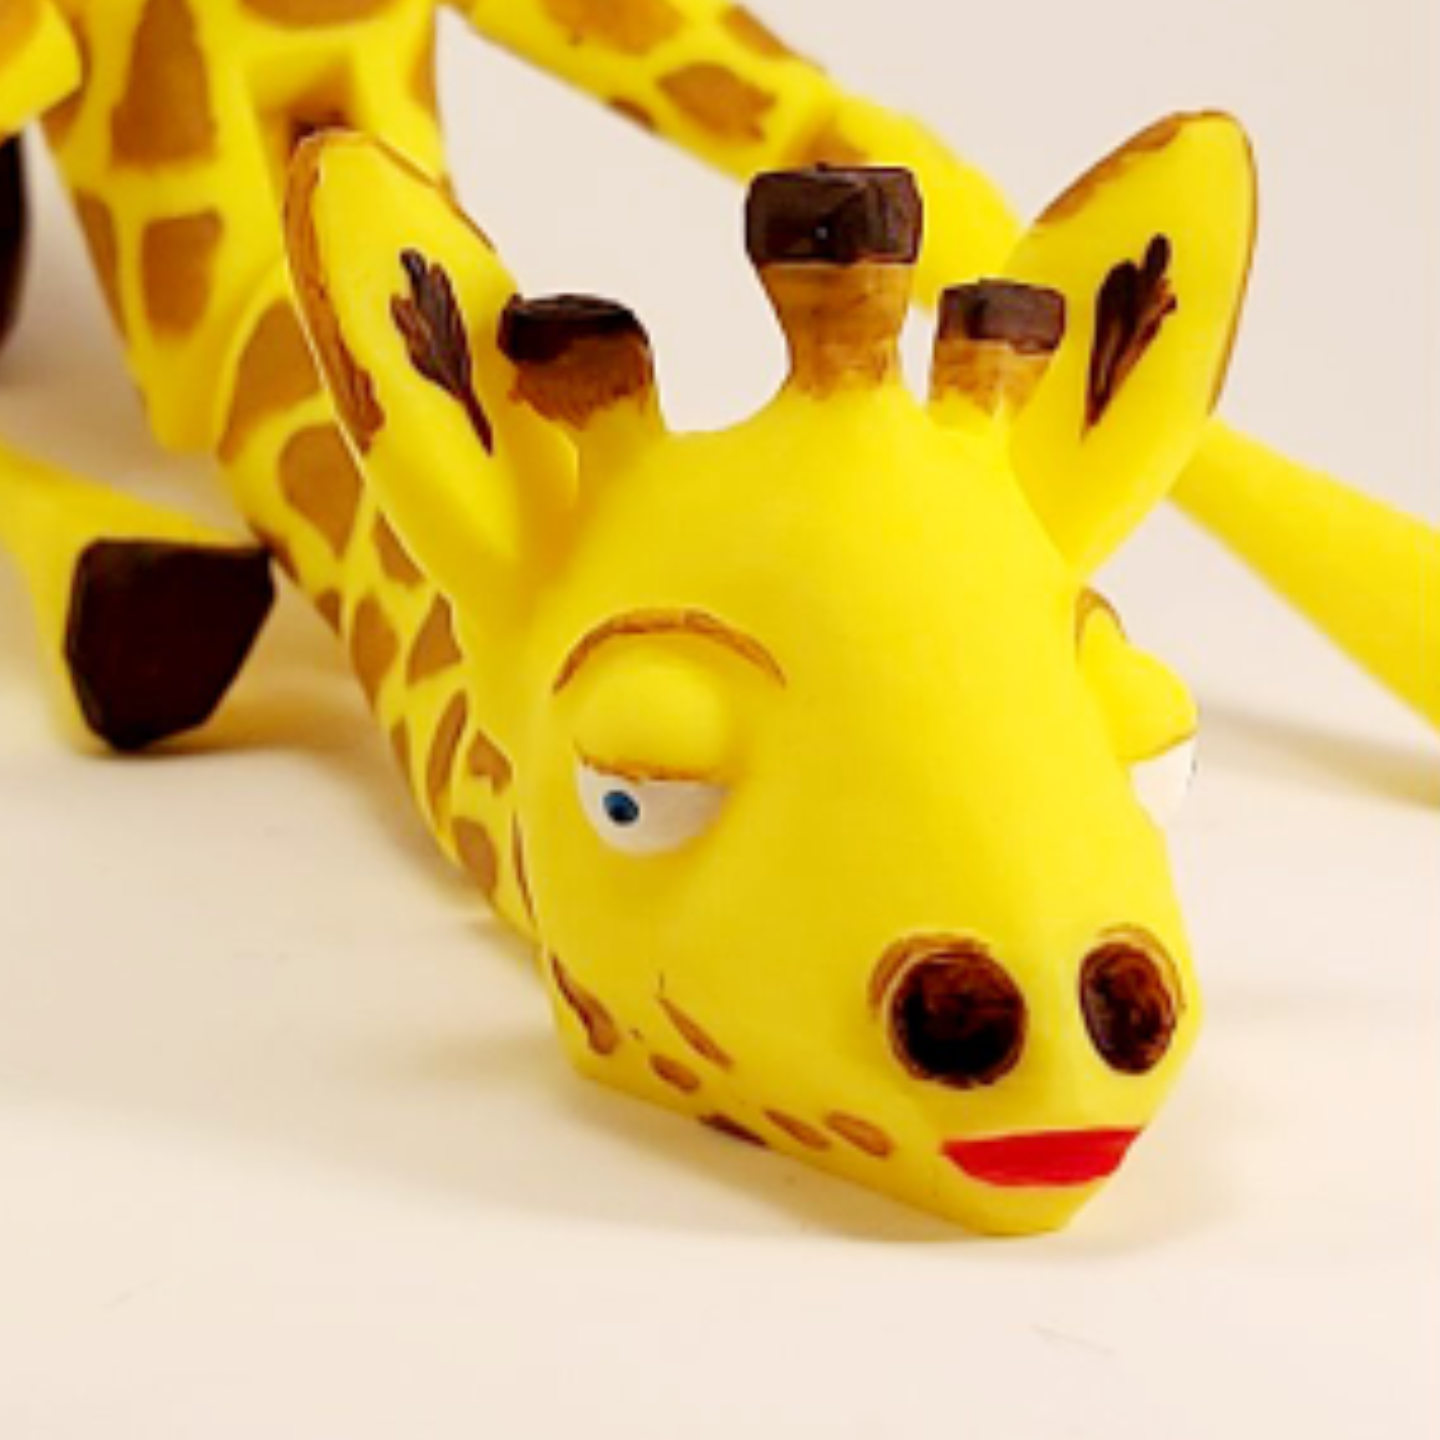
Please have a look at my new model, the Collapsible Giraffe
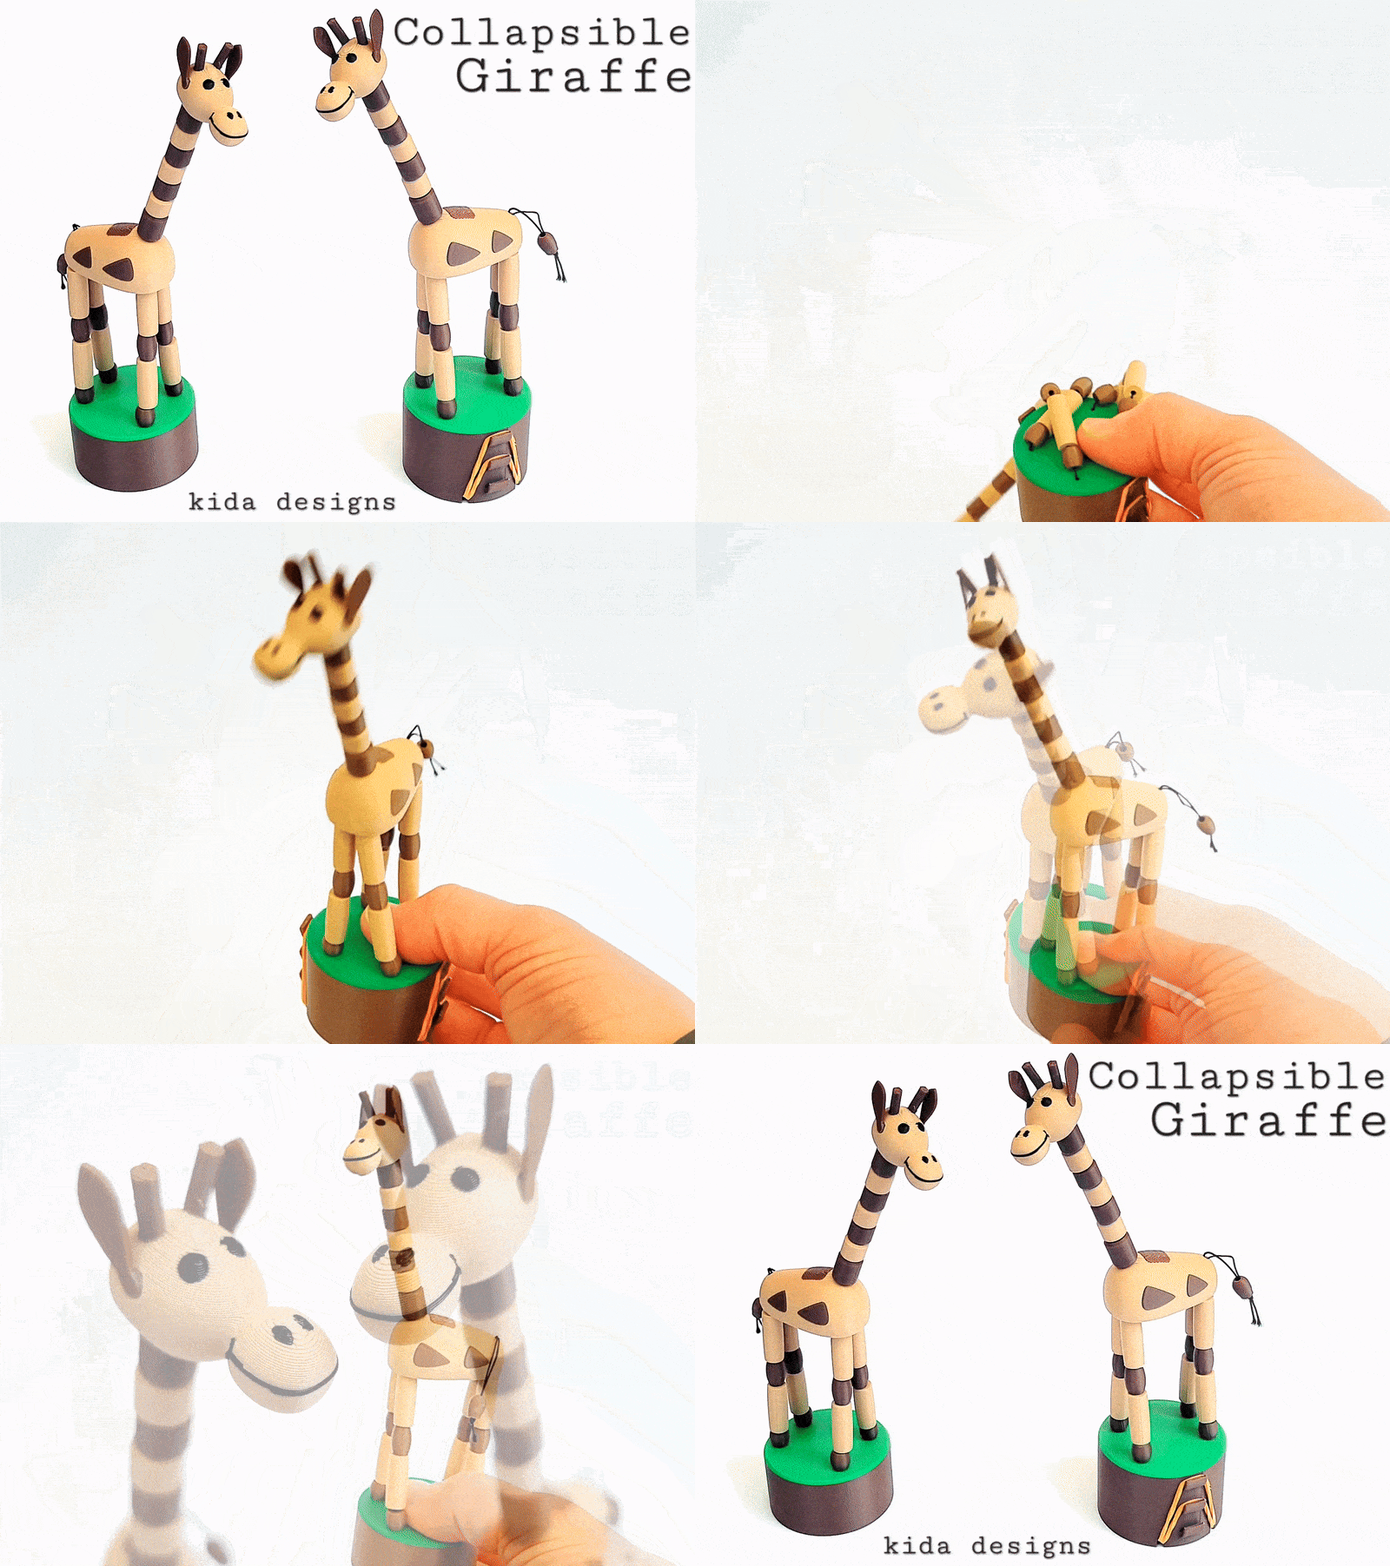
Collapsible Giraffe - Free 3D Print Model - MakerWorld
Printing
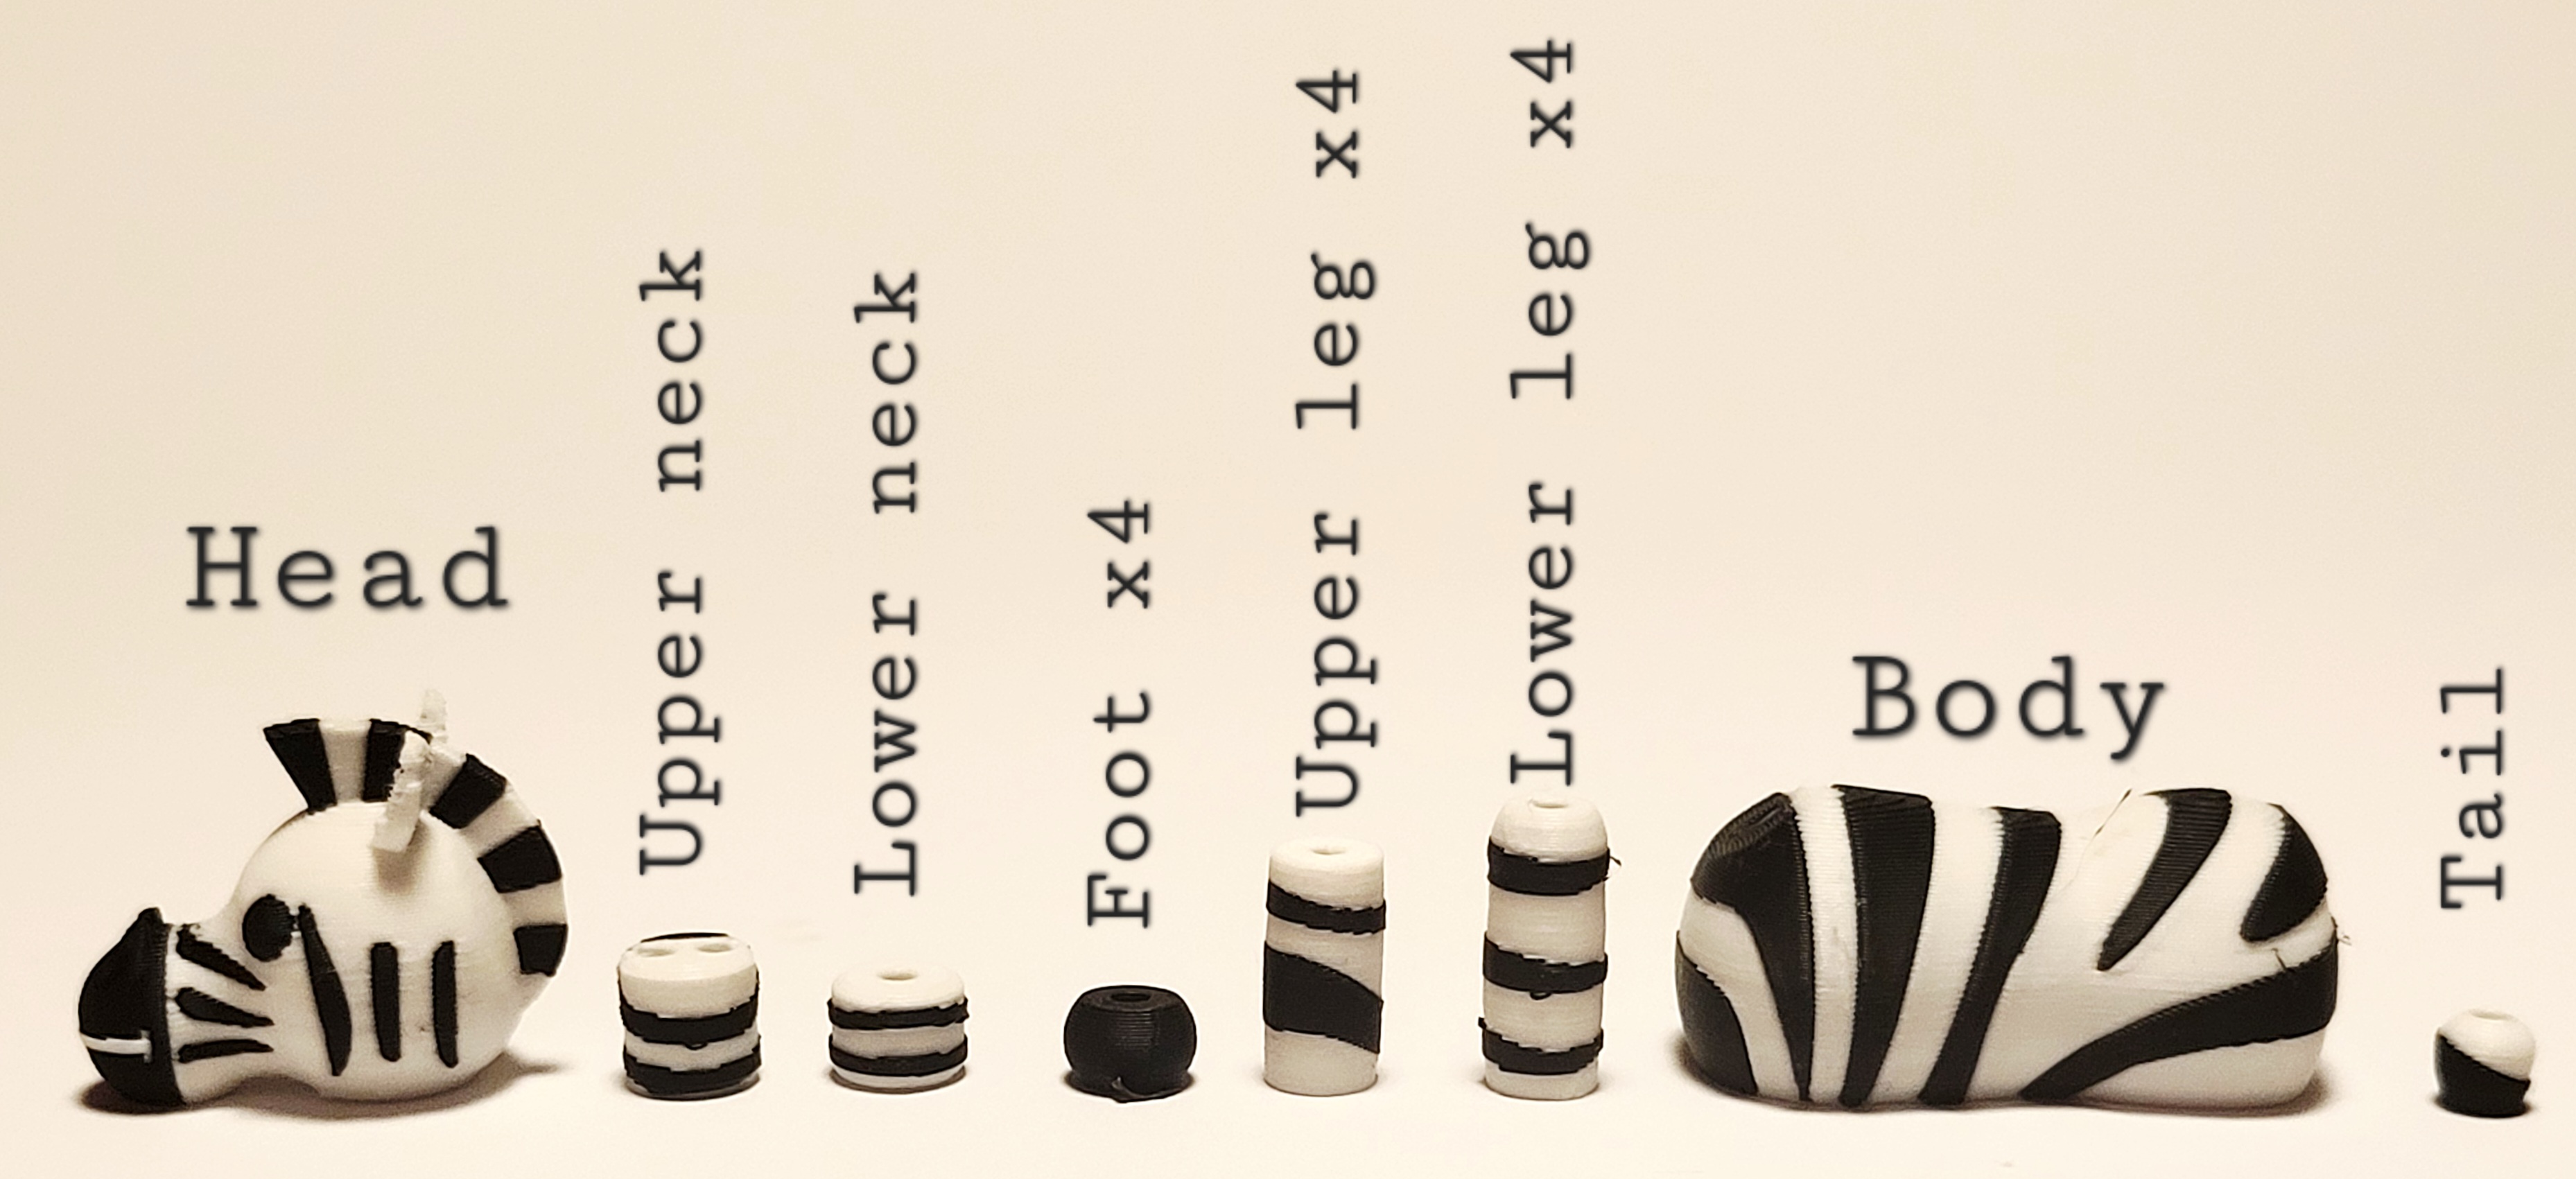
For printing the part of the Zebra, one head, one upper neck, one lower neck, 4 foot, 4 upper leg, 4 lower leg, one body and one tail is required. These files are available for download as .stl.
Alternatively, just use the provided .3mf file where Plate 1 includes the parts required for the Zebra.
In addition the base needs to be printed. If a rubber band mechanism is used, 2 parts are needed (plate 3 of .3mf file). If the spring mechanism is used (plate 2 of .3mf file) 4 additional part will be printed, one of which is a tool that will help you during assembly.
Importantly, if printing the Zebra in multicolour, make sure to include flush object to minimize waste. Suitable objects could be DESIGN BAG CLIP or Infinity Cube - Flush Object or anything else you need. The model can be printed in single colour and will be fun to paint with some acrylics. The model is textured and it will be easy to know where to paint.
Assembly
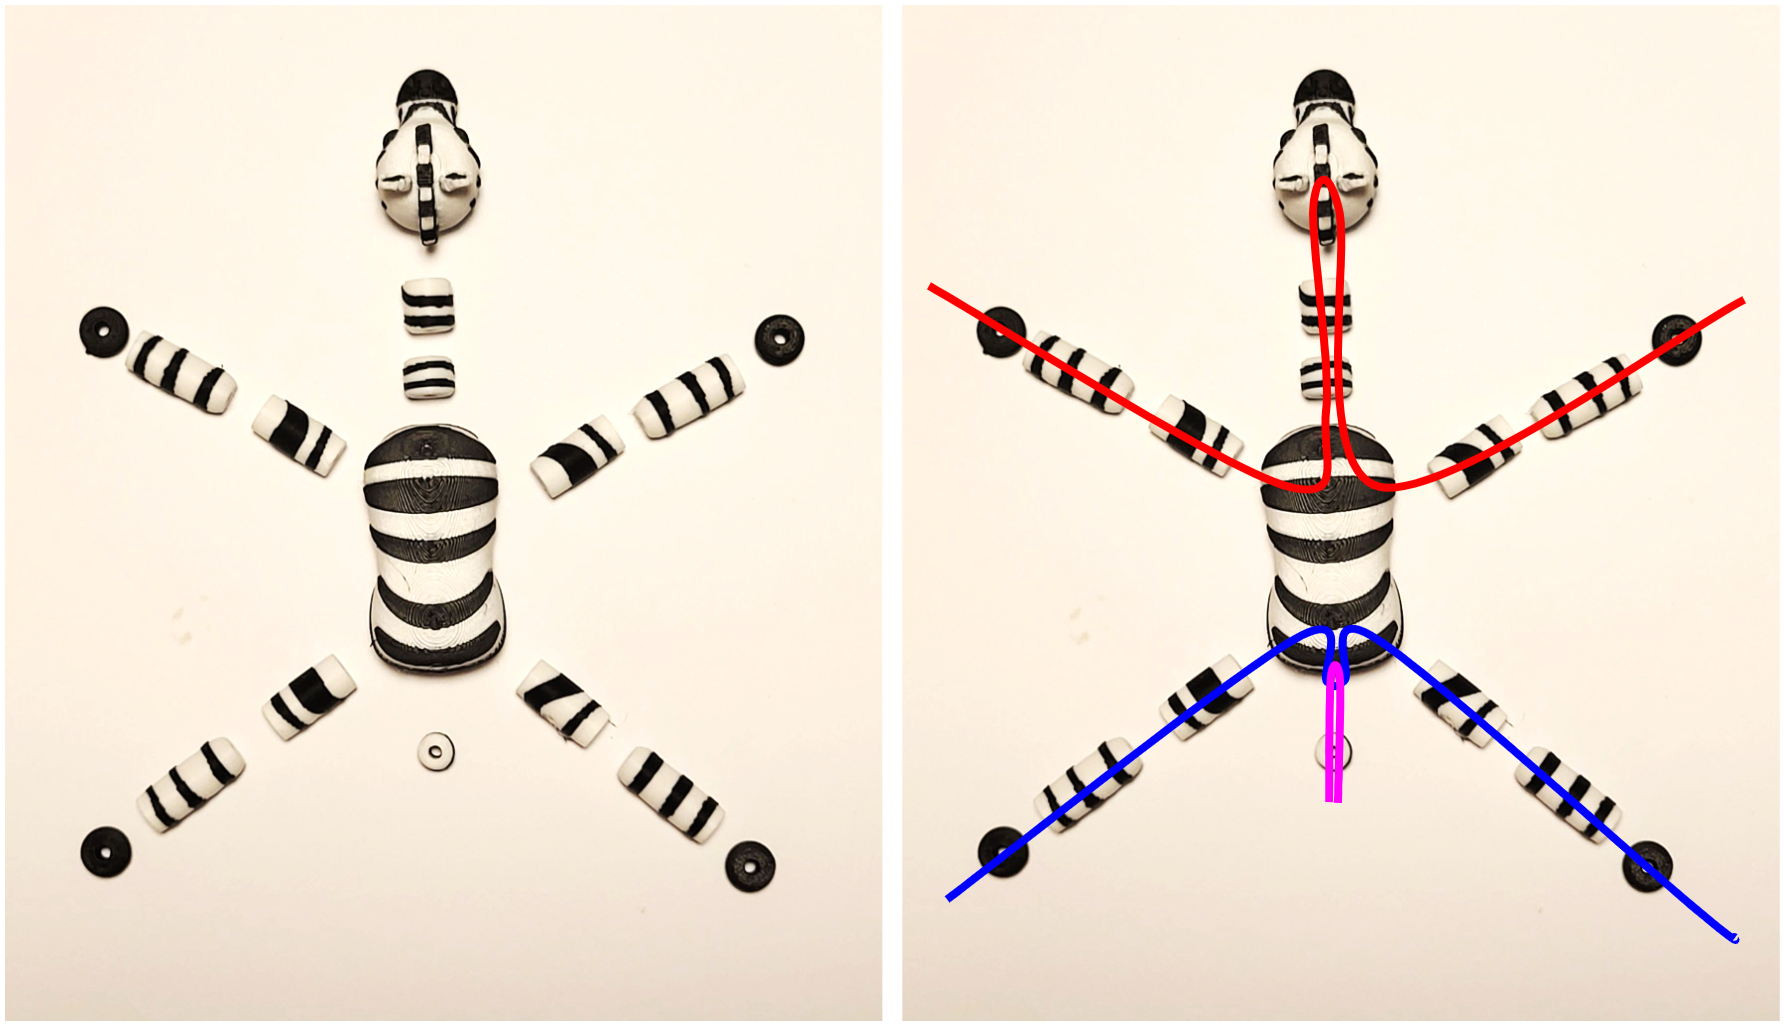
To assemble the toy, you need to first understand how to guide the string. The figure below shows how to lay out the parts and how the 3 different strings will run through the parts.
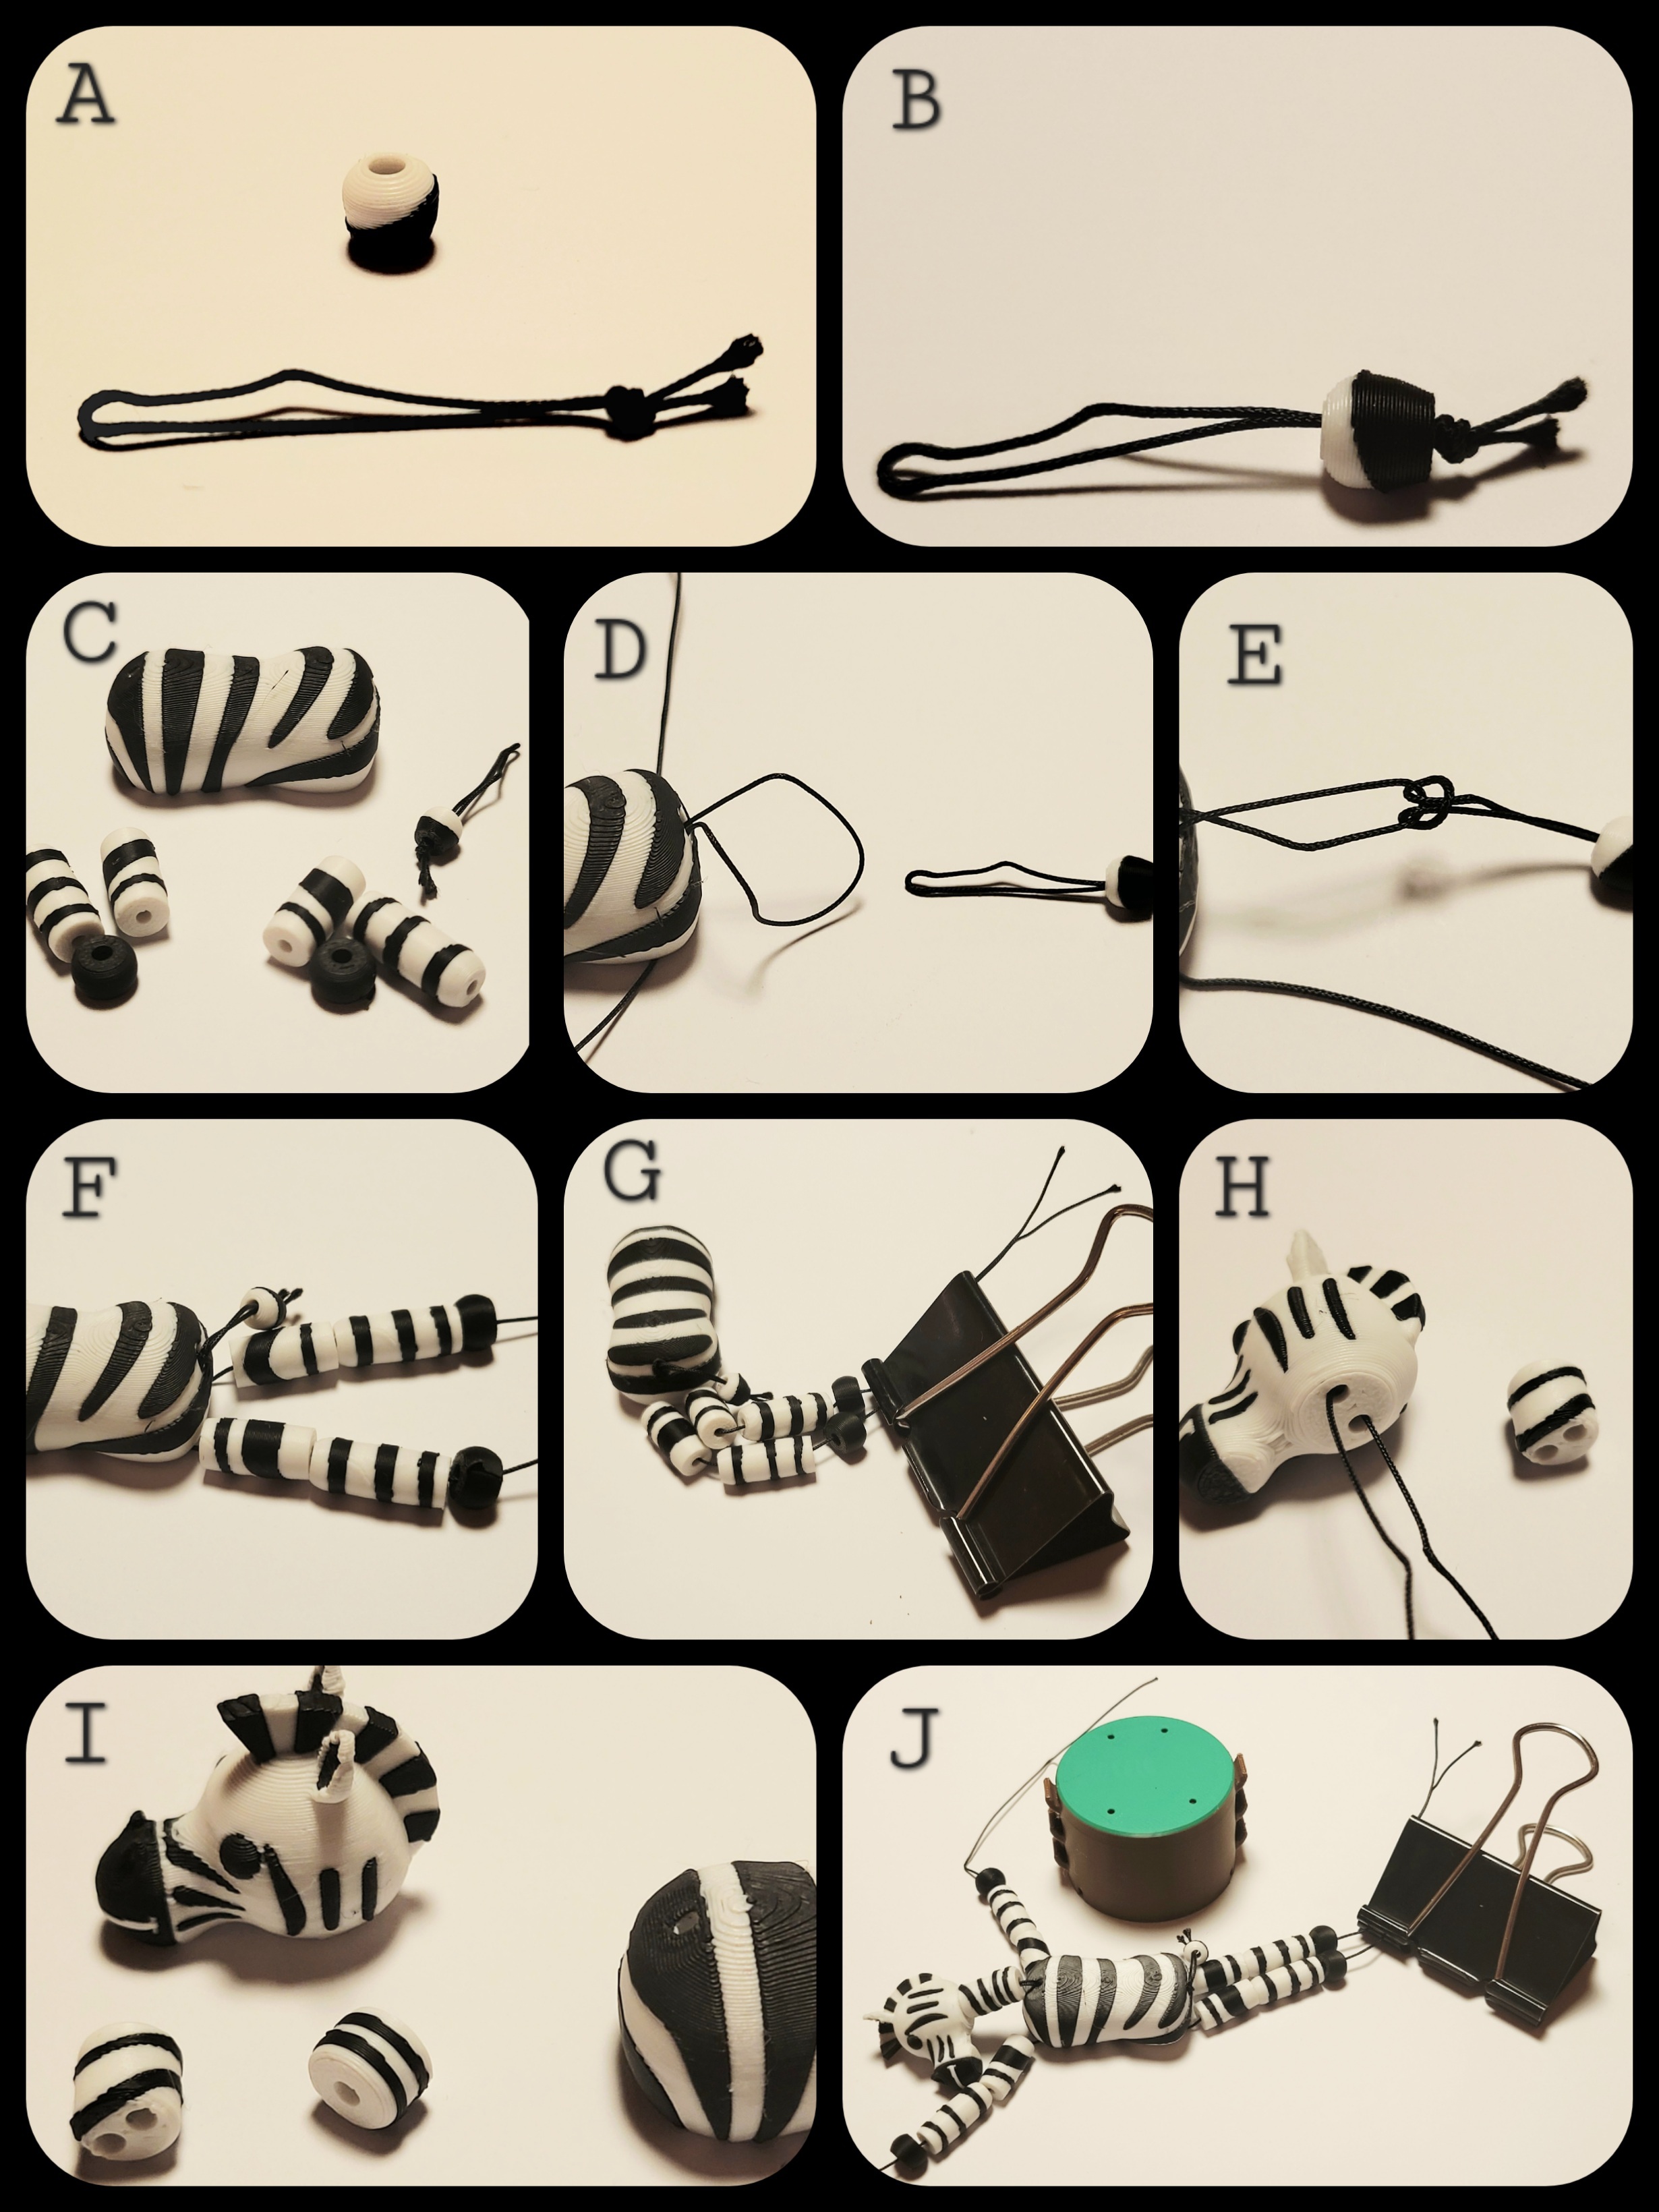
In the figure below individual steps are shown
- Start by taking a short piece of string and make a double knot (Figure 1 A).
- Thread the tail piece on top of the knot (Figure 1 B).
- Collect the parts needed for the back legs and start by inserting the thread through the body leaving a loop out for the tail (figure 1 C).
- Attach the tail to the loop as shown in the picture (Figure 1 E).
- Now thread the leg and foot pieces to assemble both back legs (Figure 1 F).
- It is now a good idea to secure the back legs by using some kind of clamp (Figure 1 G).
- To assemble the front legs/head, start by threading a string through the head part (Figure 1 H)
- Follow by adding both strings through the upper neck and lower neck parts (Figure 1 I)
- Finally, after threading the string through the front of the body piece, assemble the front legs (Figure 1J)
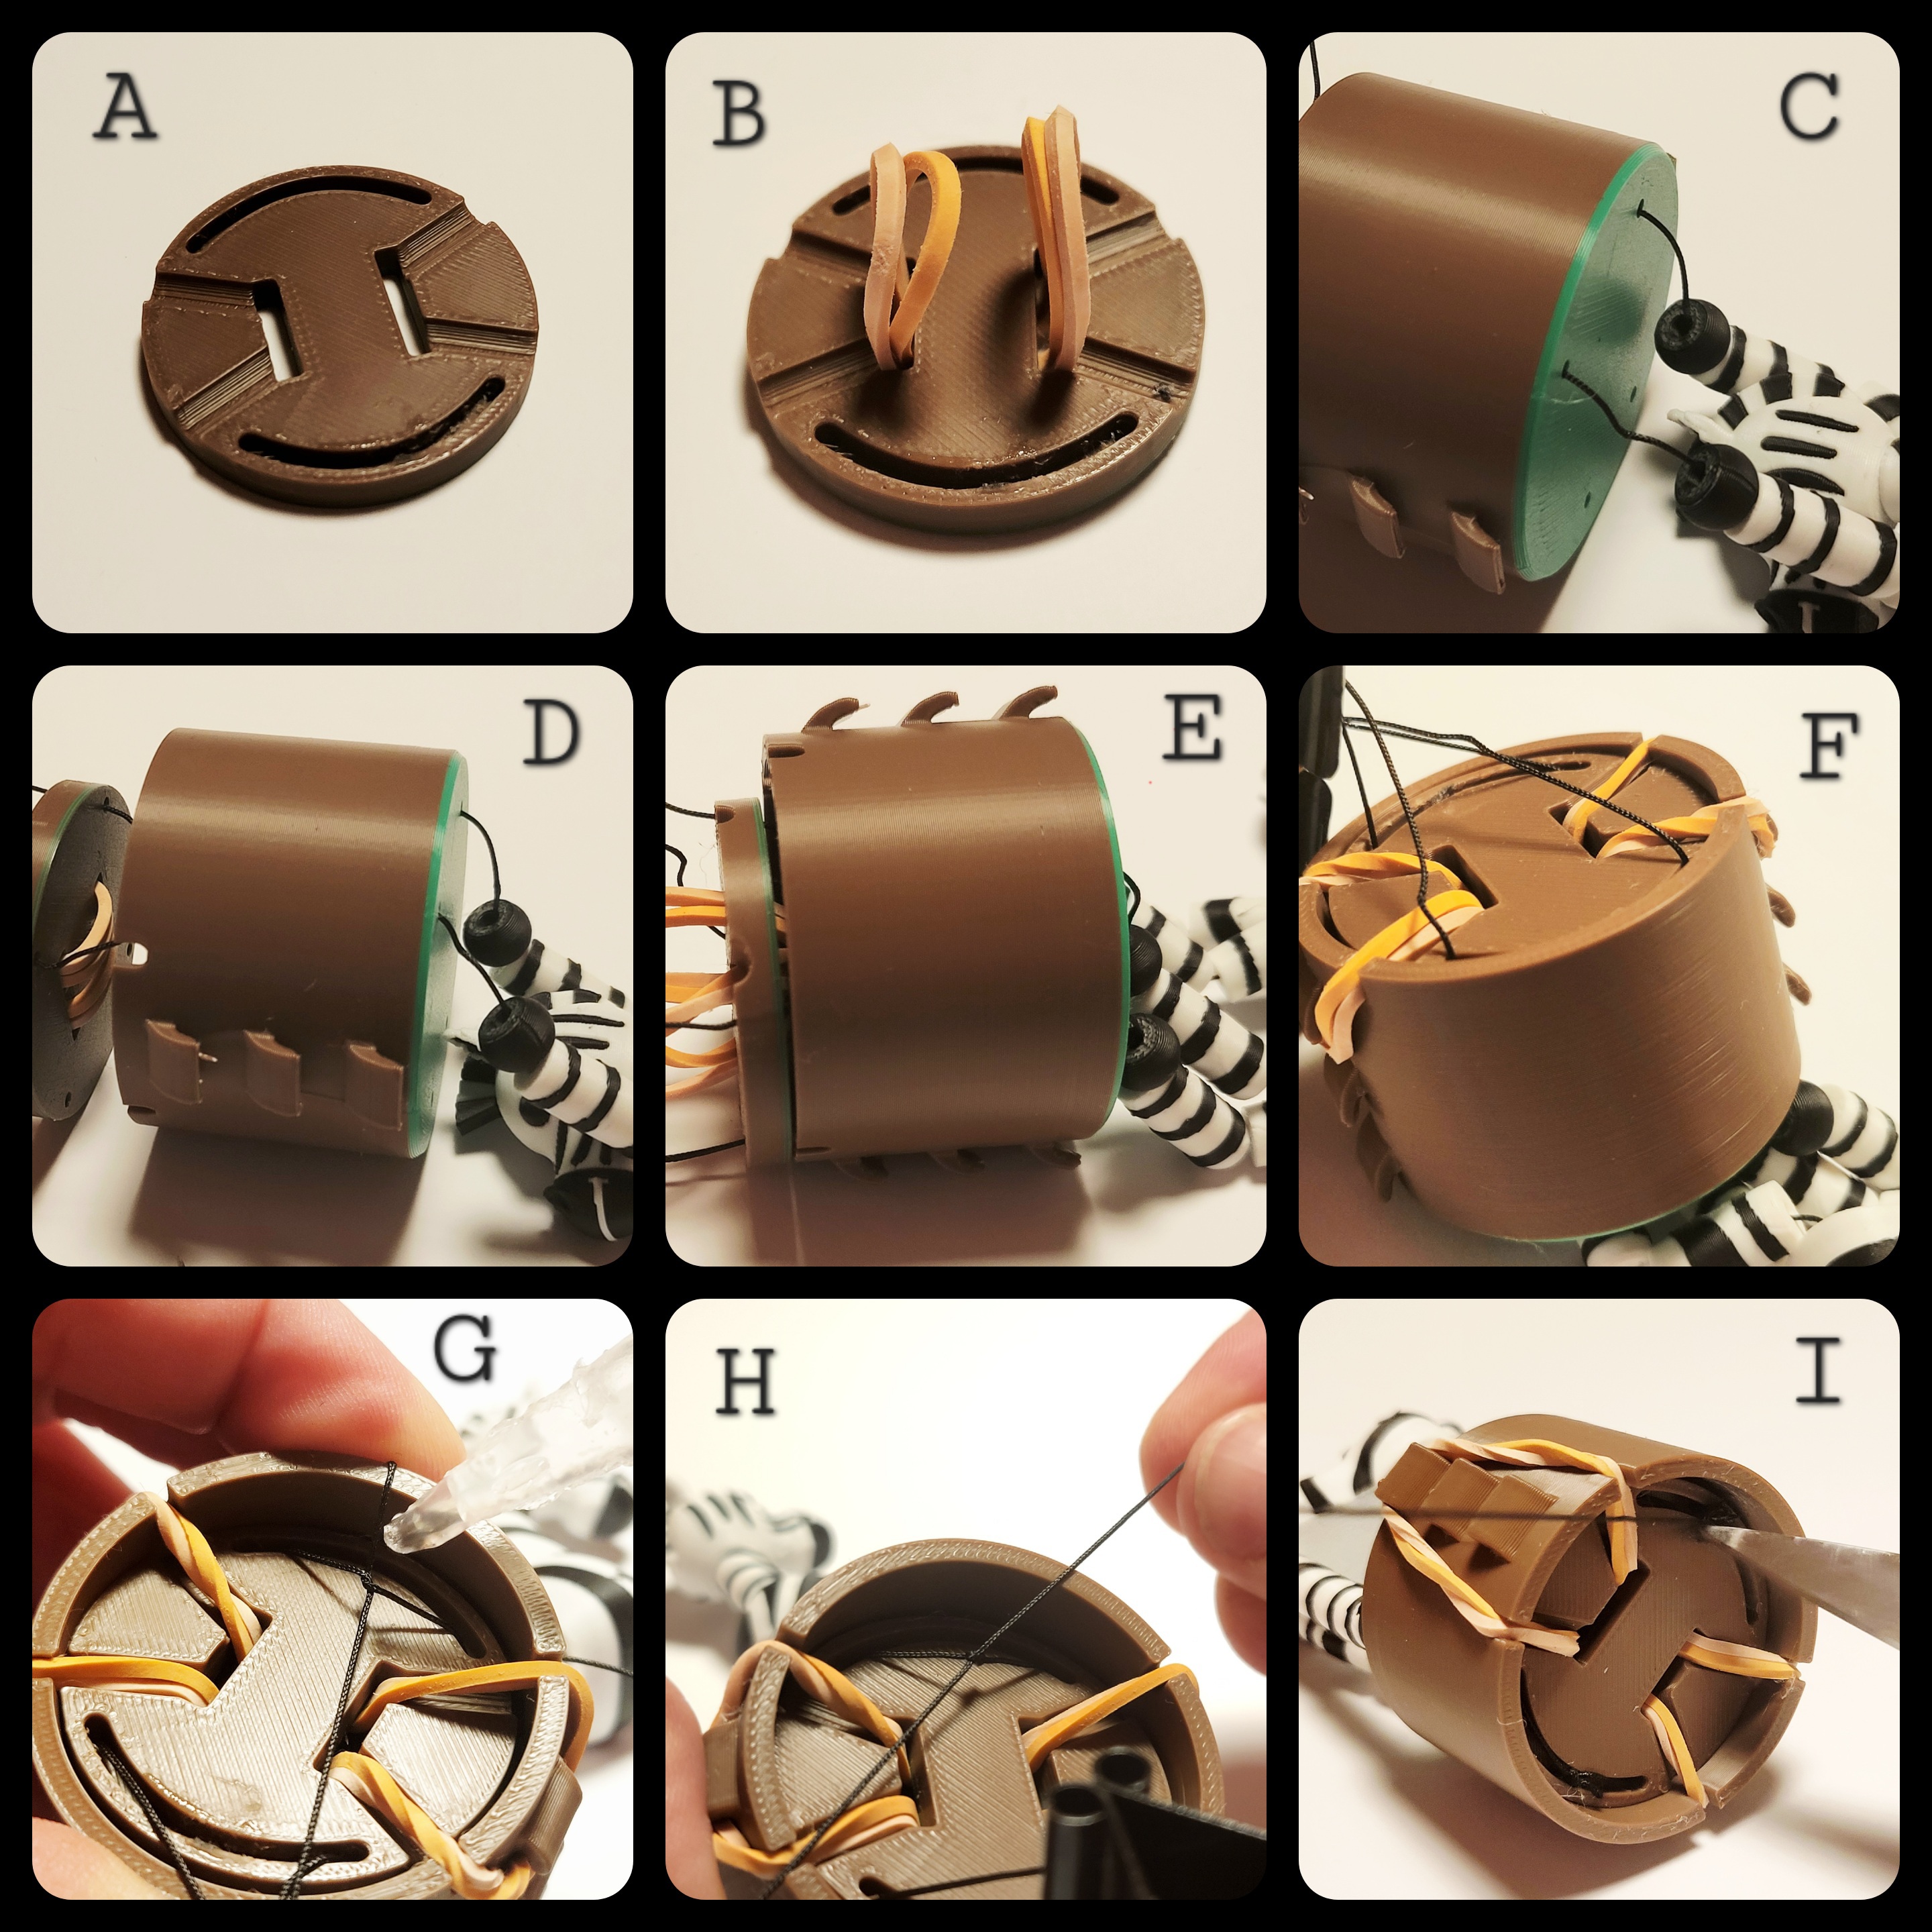
Assemble Zebra with rubber band base
In the figure below the individual steps are shown to assemble the Zebra with the rubber band based base.
- Start by threading one rubber band through the push plate as shown (Figure 2 A-B).
- Thread the strings from the front legs through the two holes of the base plate with a wider distance (Figure 2 C).
- Now thread the same strings through the push plate (Figure 2 D).
- Repeat for the strings of the back legs so that all 4 strings now go through both the base and push plate (Figure 2 E)
- Secure all strings with a clamp and attach the rubber bands to the side of the base plate (Figure 2 F)
- Keeping some pressure on the plate, now make a knot tying together the two strings of the front legs (Figure 2 G).
- When using the nylon string from bambu labs, the initial knot can here be secured quickly with some CA glue (Figure 2 G) before moving on to do the next knot (when making the double knot) (Figure 2 H).
- Repeat with the strings of the back legs.
- Cut the ends of the strings close to the know and push down the string into the slit (Figure 2 I).
- Finally, consider adding some additional CA glue to the strings/knot to make sure it is secure.
- The rubber bands can now be adjusted (moved to a higher position) to change the tension of the mechanism.
Assemble Zebra with spring base
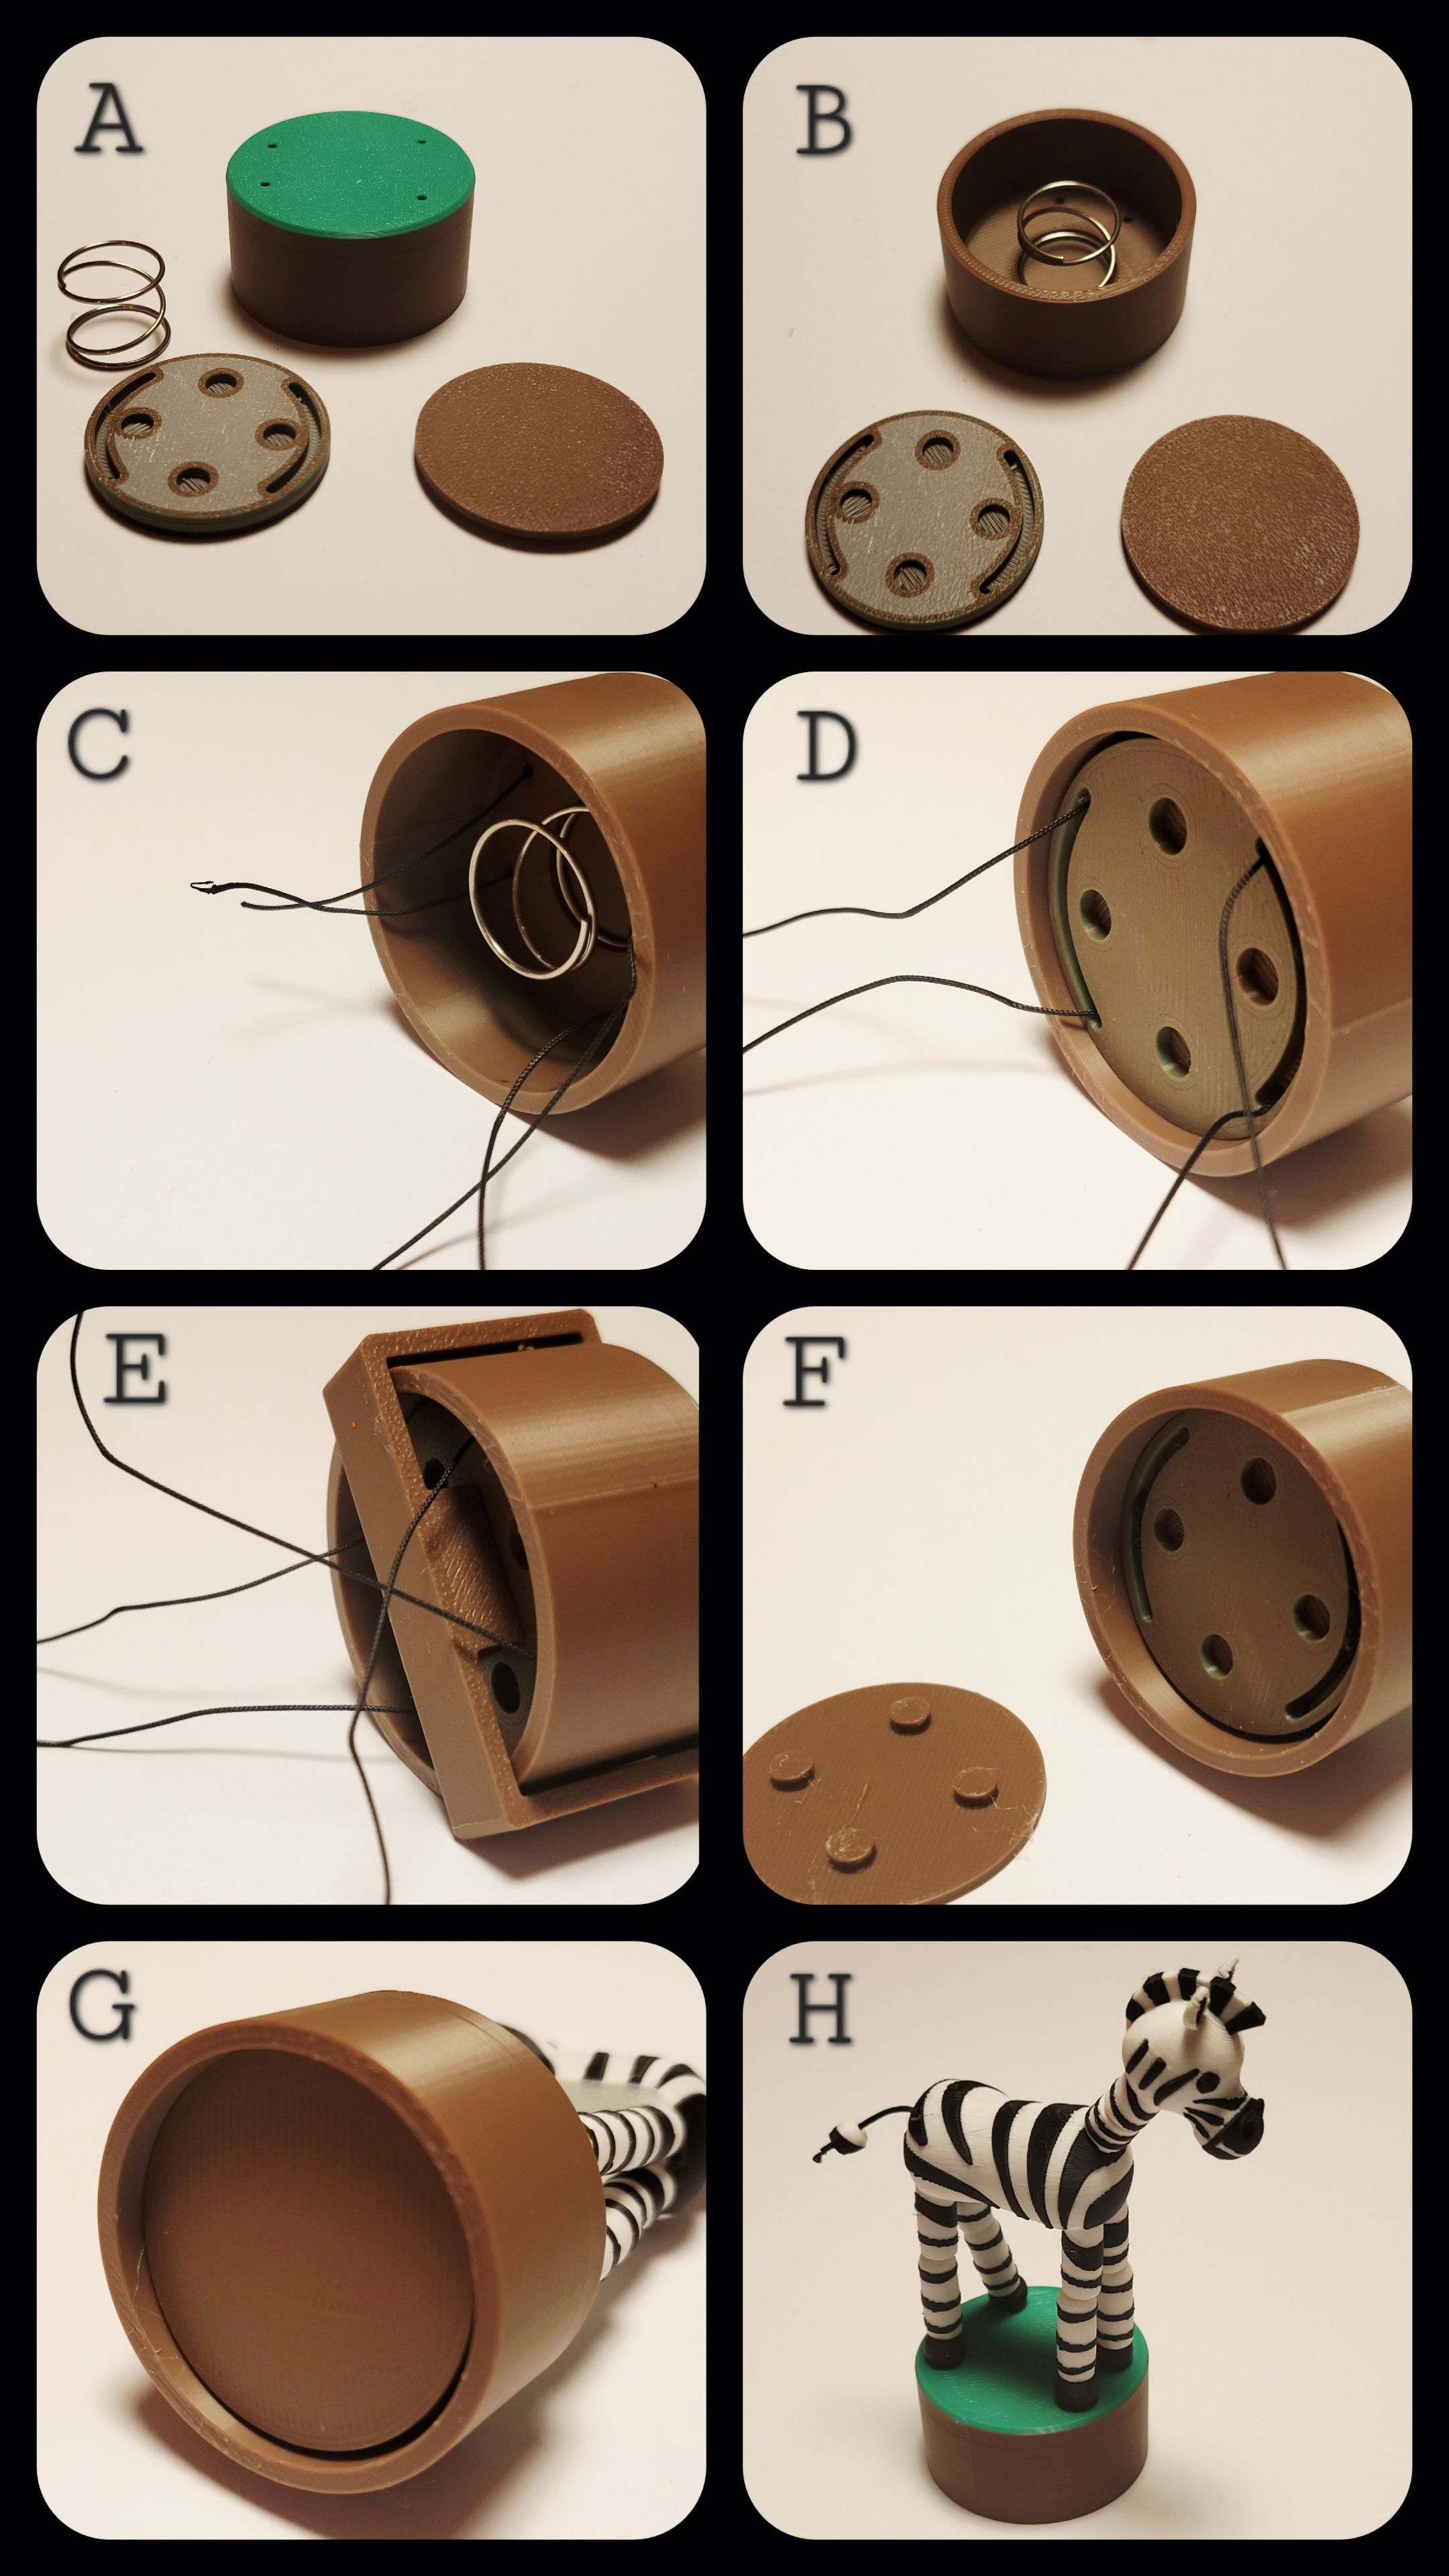
In the figure below the individual steps are shown to assemble the Zebra with the rubber band based base.
- Collect the required parts (Figure 3 A).
- Push the spring into the base plate (Figure 3 B).
- Thread the strings of the back legs and front legs through the base (Figure 3 C).
- Thread the strings through the push plate, making sure that the orientation allows for the front leg strings to be tied together. Push the push plate onto the spring (Figure 3 D).
- Attach the tool to create some force onto the spring (Figure 3 E).
- Tie the strings, adding CA glue as shown in step 6-9 above and remove the “tool” (Figure 3 F).
- Push the push plate cover onto the push plate while aligning the 4 pegs (Figure 4 G)
- You should now have a fun toy that collapses when you press the base plate from the bottom (Figure 4 H)
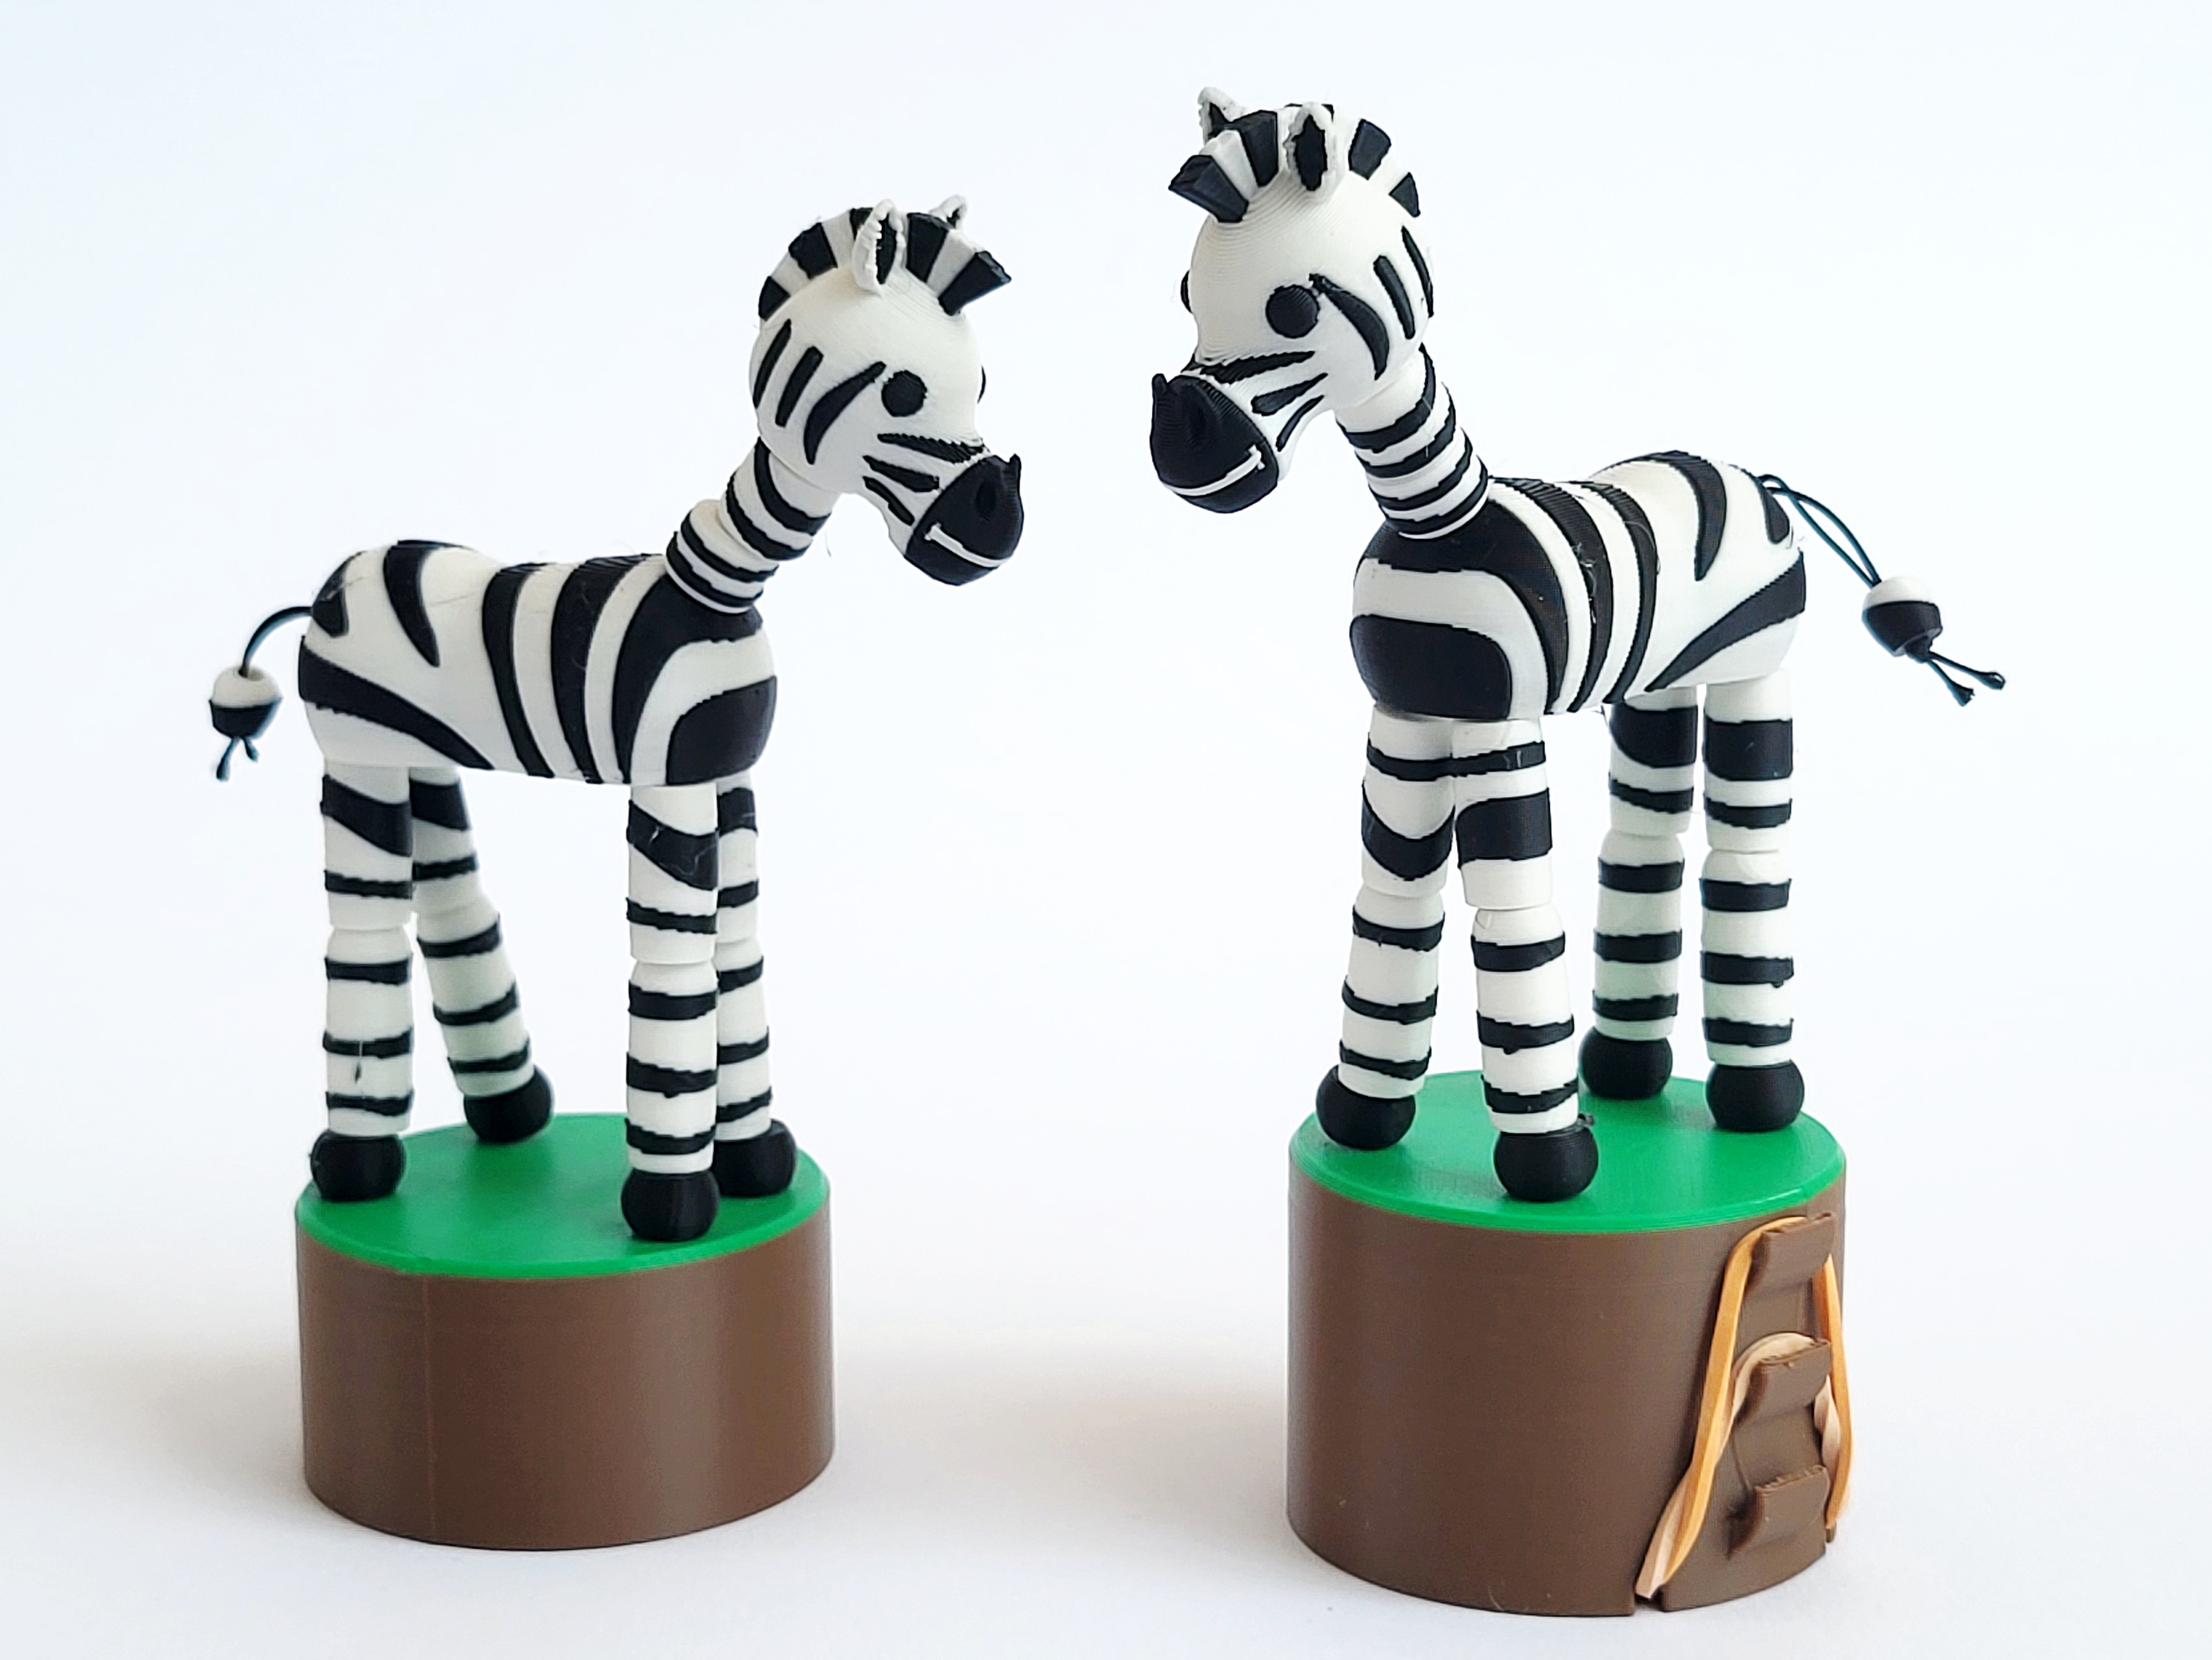
You should now have created a lovely toy Zebra either with a spring or rubber band mechanism. Please remember that this toy contains small parts and is therefore not suited for small children.
Please Enjoy!
If you like this model Please have a look at the other models in my Articulated Animals series.
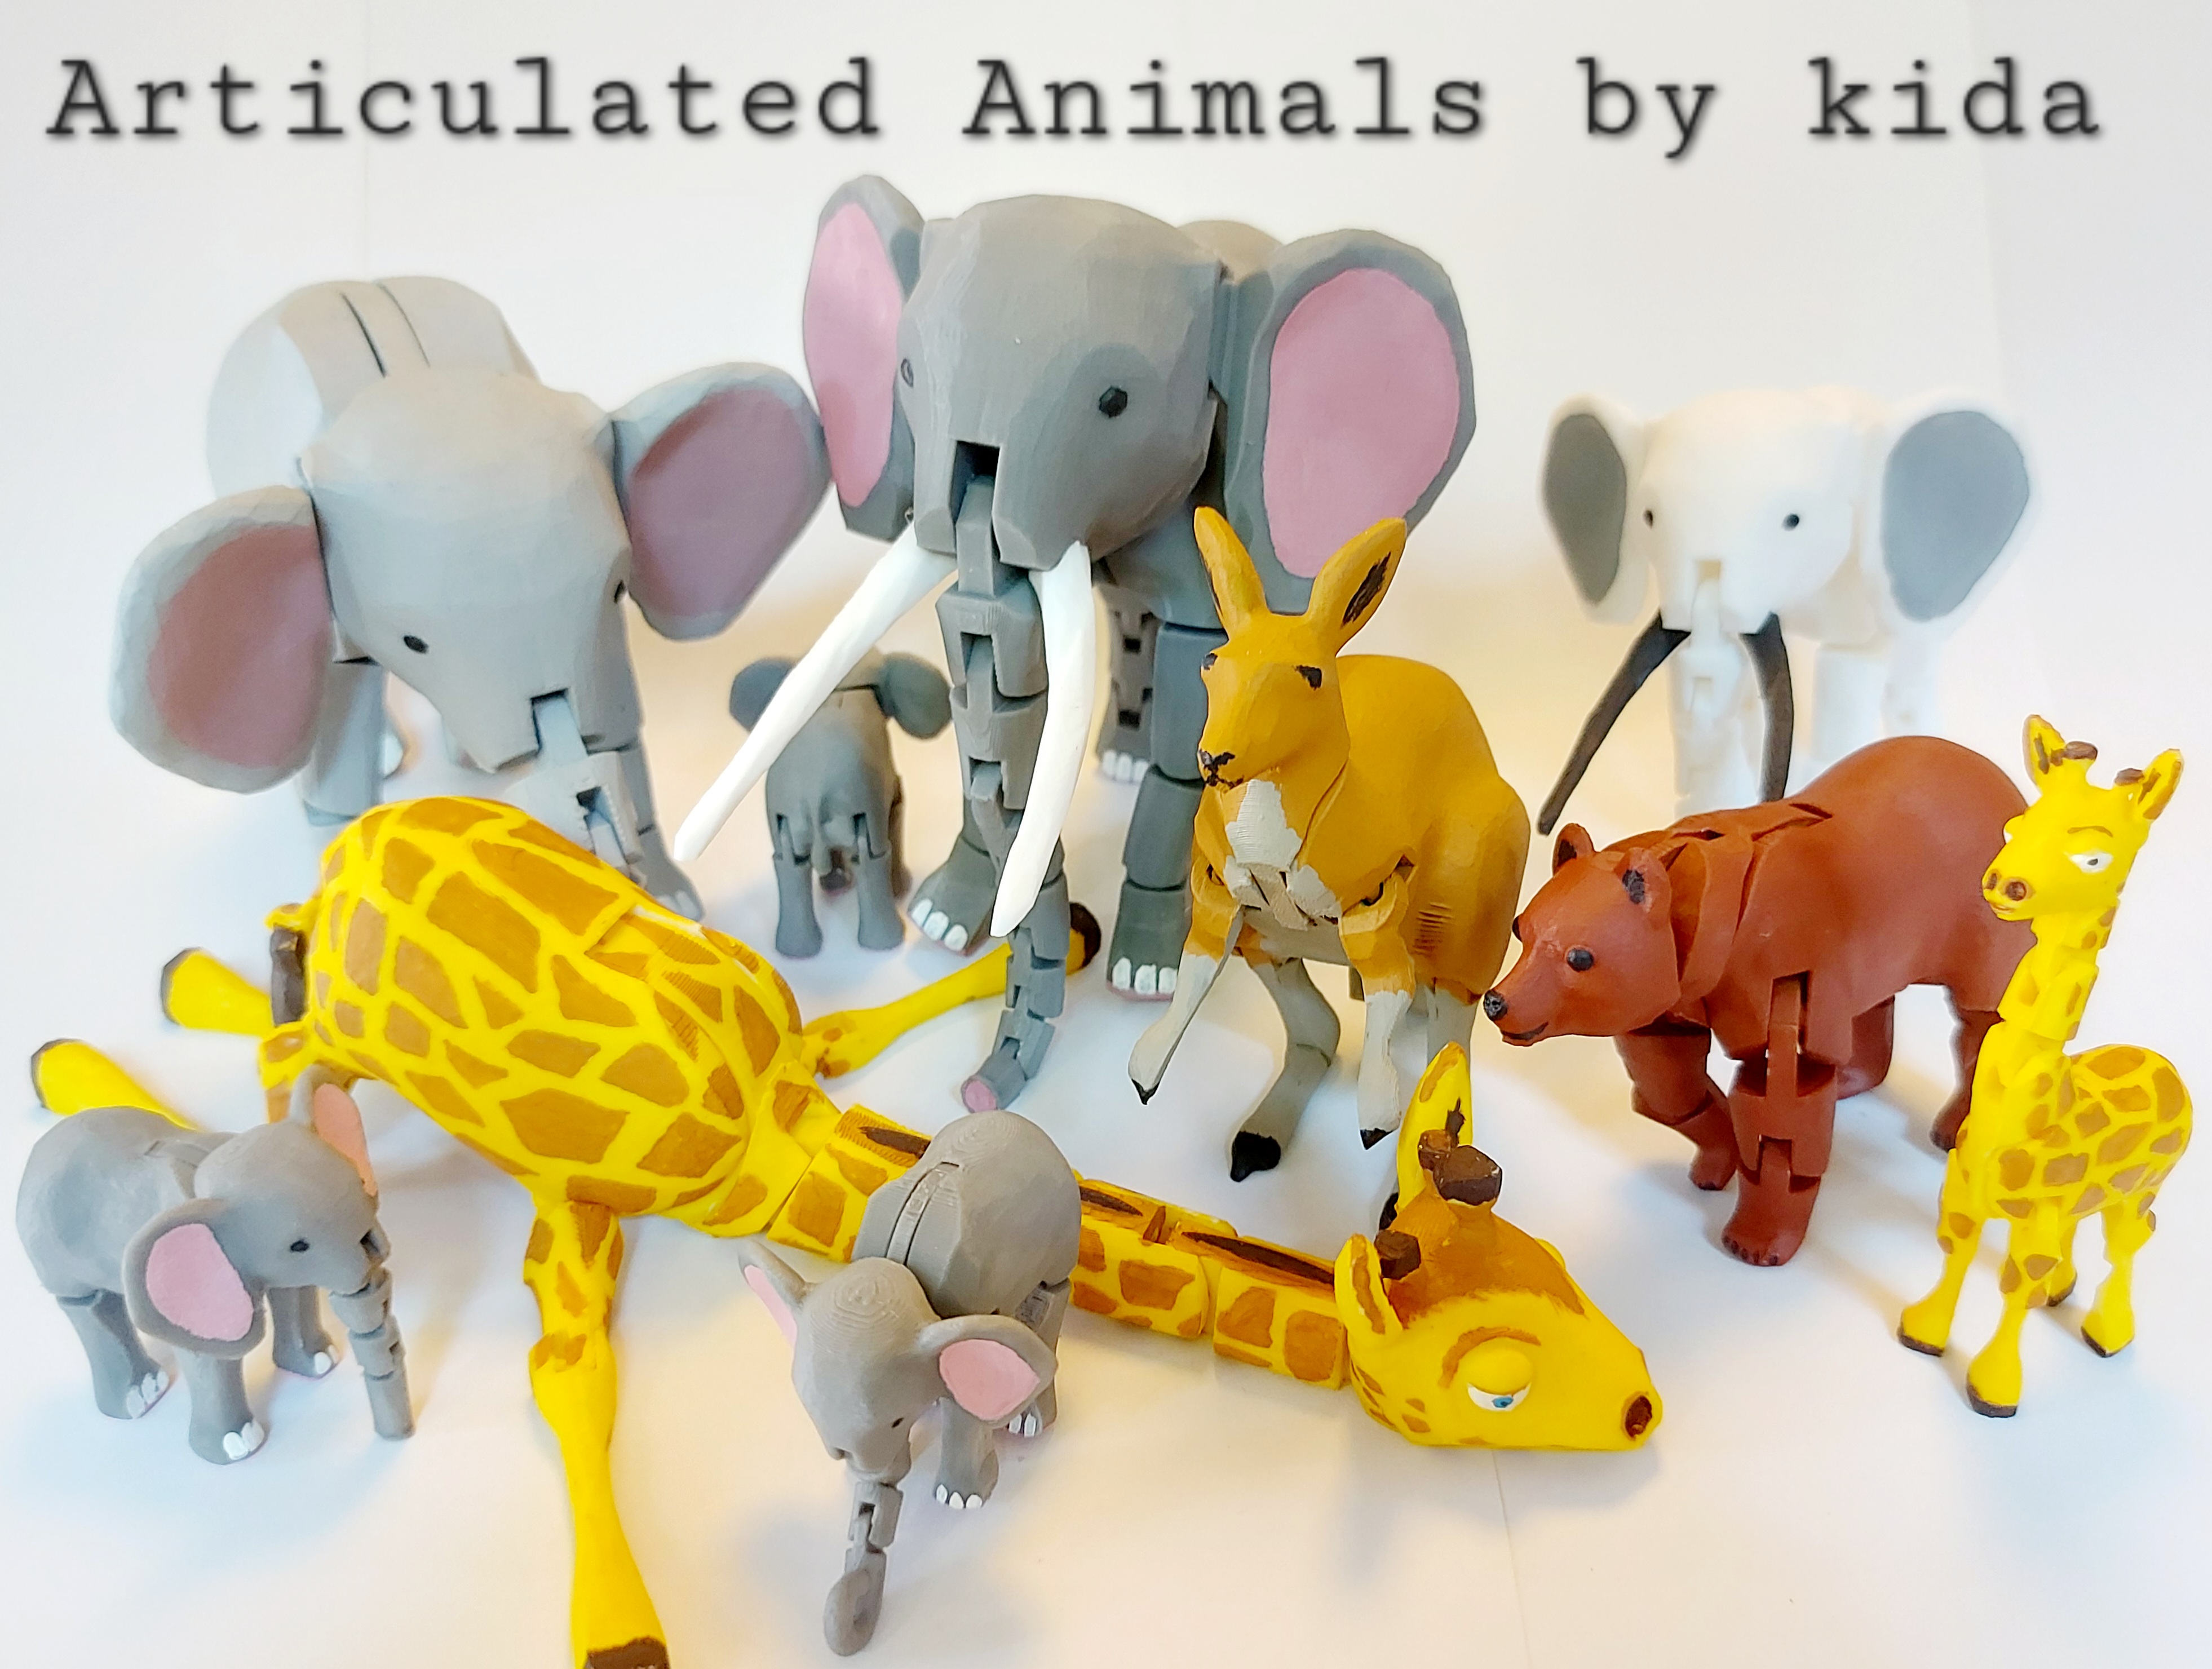
Animal Series by kida | Collection - MakerWorld
Gostou deste modelo? Crie uma conta grátis para salvar seus favoritos e voltar a eles depois.
Criar conta