Você está no 3DFinder
Buscamos em Thingiverse, MakerWorld e Printables ao mesmo tempo para te dar o melhor de cada uma.
Descrição
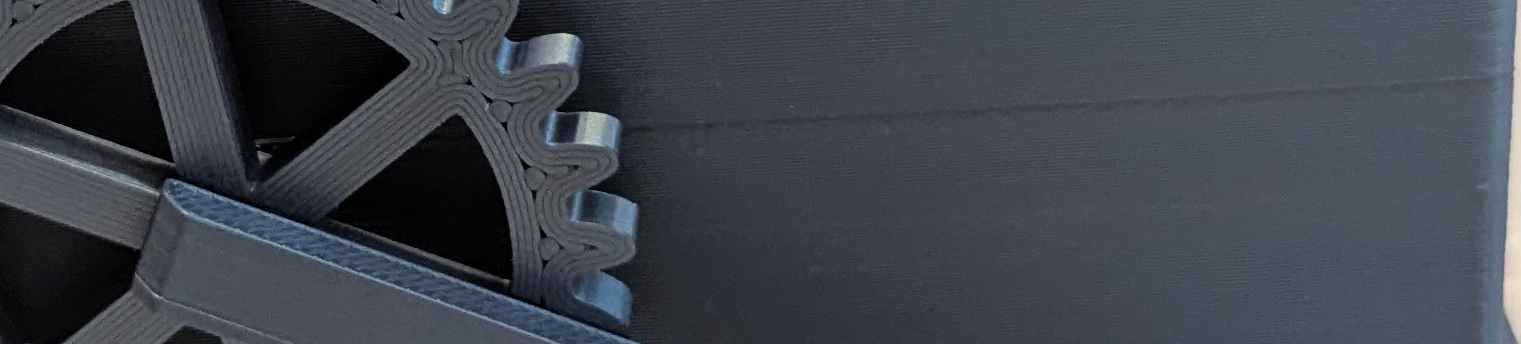
A mechanical box with gear-operated lid inspired by this laser-cut model. I got this box from a souvenir shop and wanted to make my own, but 3d-printed.
Hope you like this model. Share your prints, also leave feedback if you encounter any issues.
Update (20.02.26)
I've increased the length of handle gear axis, as the previous version didn't hold in place very well and the gears could fall out when opening the box.
Also made the alignment marks on the gears a bit larger for easier alignment.
Both profiles and FreeCAD model are updated.
Bill of materials
Non-printed parts and tools
- Axis inserts (x4): brass tube (id 6mm, od 8mm) x 2.4mm. Can be bought on AliExpress or other marketplaces. Recommended length 40mm+ for ease of sawing.
- Hacksaw for sawing the brass tube.
- Heat set insert tool or soldering iron with tip for M6 heat set inserts.
Filament
- Box and parts: Bambu PLA Metal Cobalt Blue.
- Optional for lid drawing (credit): Bambu PLA Basic Brown, Bambu PLA Basic Bambu Green (you can also use custom SVGs and any other filament for drawing).
- Support interface for handle: Bambu PETG-HF.
- The current version requires AMS or a dual-nozzle printer. It should be possible to print without PETG, but I didn't try this. If you choose PLA as support interface, you;ll need to adjust slicer settings (also, try printing samples first to check that the handle will fit in the gear).
- NOTE: I printed on H2D. If your printer has only one nozzle, increase flush volume to avoid layer adhesion issues.
- Any other PETG filament should also work, but you'll need to use a custom filament preset with bed temperatures copied from PLA (default preset will increase bed temperature when printing support interfaces, which can deform the first layer of PLA).
Print plates
I used smooth PEI plate with glue for the lid and gears (for better look) and textured plate for box and handle.
Plate type doesn't affect functionality, you can use any plate for all parts.
Plate descriptions
Box (textured PEI plate) - the box itself.
I used variable layer height with smoothing for better printing of axis holes, but this caused a noticeable line at the level of lower hole. You can try disabling variable layer height or applying additional smoothing.
- Lid (smooth PEI plate) - the lid with connectors. Requires AMS for multi-color. or you can use the profile without drawing for single-color printing.
- Handle (textured PEI) - handle with PETG support interface. Requires dual-nozzle printer or AMS.
- Gears (smooth PEI).
- Samples for tolerance testing (smooth PEI). If you use the same filaments as me, you can probably skip these. Other colors of the same filaments should also be fine (I used leftover black PLA, the results were consistent with the final print). If you use other filament type or brand, it's recommended to print this plate first to see if everything fits well. If not, you'll need to adjust tolerance offsets in the source model (see box.FCStd in files, I used FreeCad 1.1-rc2).
- Handle sample for tolerance testing (textured PEI). This is a separate plate because prime tower is incompatible with variable layer height from box wall sample.
- Brass tube holder for sawing (textured PEI). Allows to saw off exactly 2.4mm of the tube. Use clamps or vice for safe sawing.
Assembly instructions
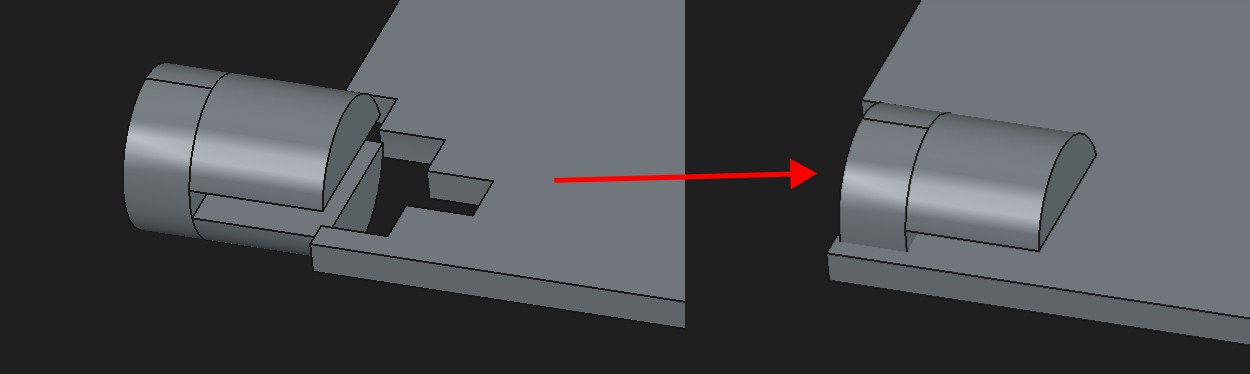
- Saw off 4 pieces of brass tube, each ~2.4mm in length (use tube holder from plate 7 for easier sawing).
- Install brass tube pieces into axis holes in the box. Use special installation tool or soldering iron, heat to PLA printing temperature.
Connect axis holders with the lid
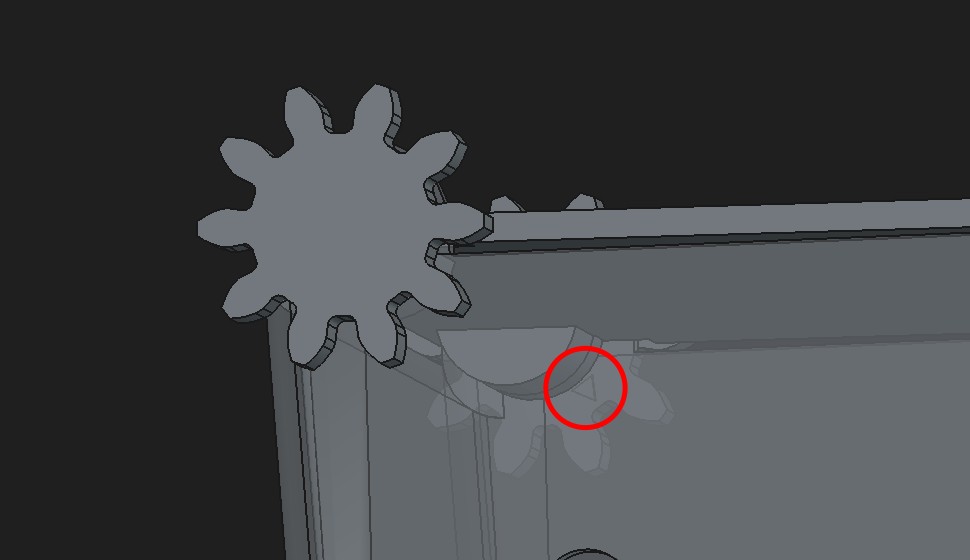
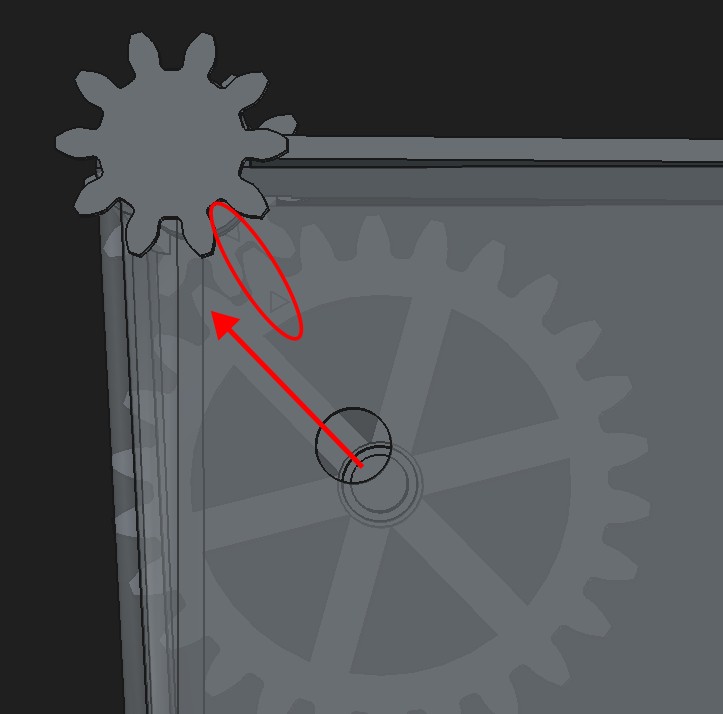
Put the lid onto the box, insert lid gears. Alignment marks on the gears must point forward and down. 2 teeth of the gear must be exactly horizontal (see image below), if they are not, then swap left and right gears.
Install handle gears. Alignment marks must match with marks on the lid gears. The spoke closest to the alignment mark must point towards the back of the box.
- Install the handle to lock gears in place.
FreeCAD model
If you want to adjust model parameters, download the source model file (box.FCStd). I used FreeCAD 1.1-rc2, but older versions should also work. Most parameters are defined in VarSet. Tolerance-related adjustments are placed in tolerance_offsets group.
Most of other sizes are also configurable, but some changes may break the model if they cause renaming of faces/edges/vertices.
Handle gear placement is manual, use assembly view to check that handle works as intended, and if needed, adjust gear placement and angle (handle_hex_angle in VarSet).