Você está no 3DFinder
Buscamos em Thingiverse, MakerWorld e Printables ao mesmo tempo para te dar o melhor de cada uma.
Descrição
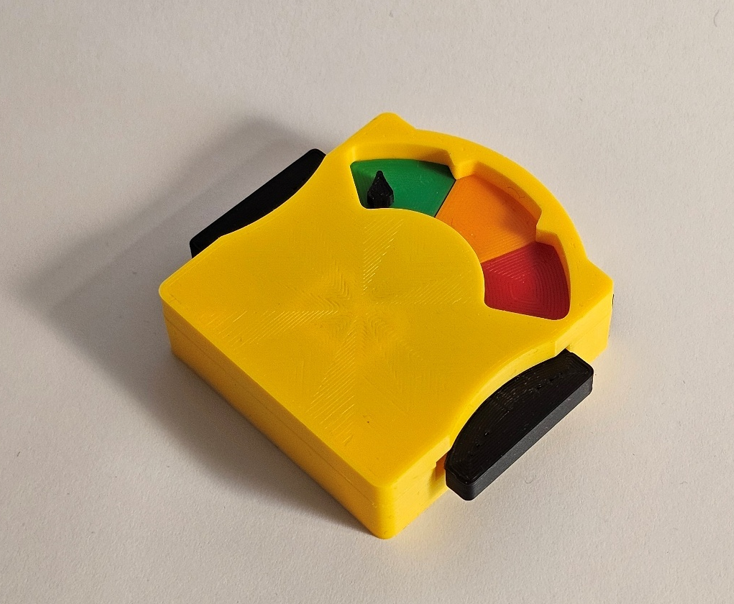
Over-engineered Fidget Toy
A completely unnecessary mechanical device designed for one purpose only:
making an absurdly satisfying click.
Press the buttons on both sides simultaneously and watch the analog gauge rise dramatically toward MAXIMUM STRESS™. Push all the way and the mechanism locks with a deeply satisfying click. Press the reset button to release everything and begin the cycle again immediately for absolutely no reason.
⚠ Warning
Do not press the buttons too hard.
Seriously.
The click is dangerously satisfying and may result in:
- repeated “just one more click”
- reduced productivity
- emotional attachment to a tiny plastic machine
You have been warned.
Assembly
This is NOT a print-in-place model.
The model contains 10 parts that need assembly, so this is perfect for people who enjoy building little mechanisms. No AMS, supports, or super glue required.
If a part eventually wears out from enthusiastic clicking, individual parts can be reprinted and replaced easily.
Material Notes
All parts can be printed in PLA, PETG, or similar materials.
However, PETG or another durable material is highly recommended for the spring and button parts. PLA springs will wear out relatively quickly, especially if the gauge is left in the loaded state.
PLA Matte and other brittle materials are also not recommended for the case parts.
Assembly Instructions:
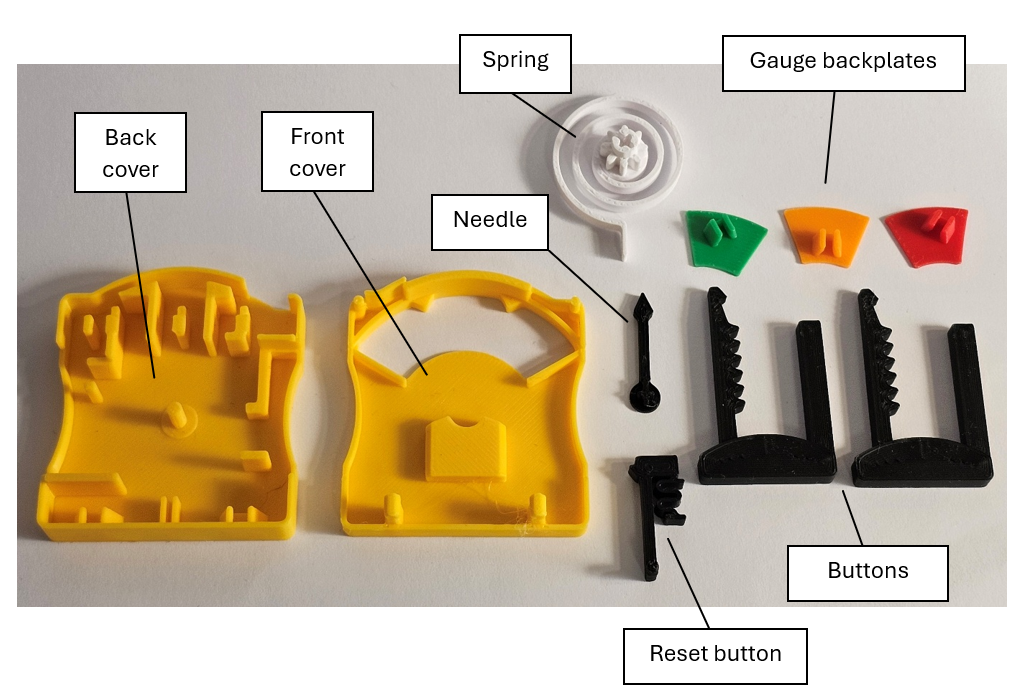
First, make sure you have all the parts printed.
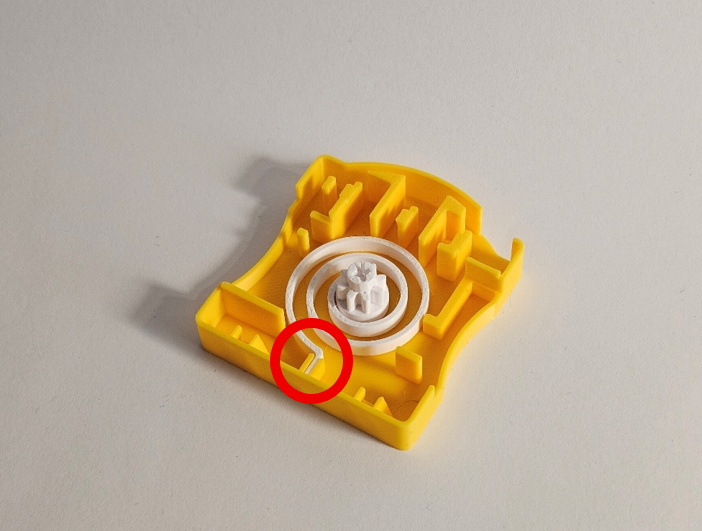
Start by inserting the spring to axis in the middle of the back cover. Make sure the end of the spring is locked in place.
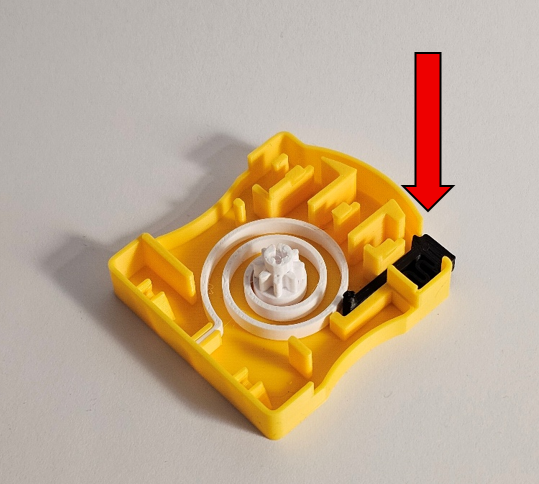
Insert the reset button to the top right corner of the back cover.
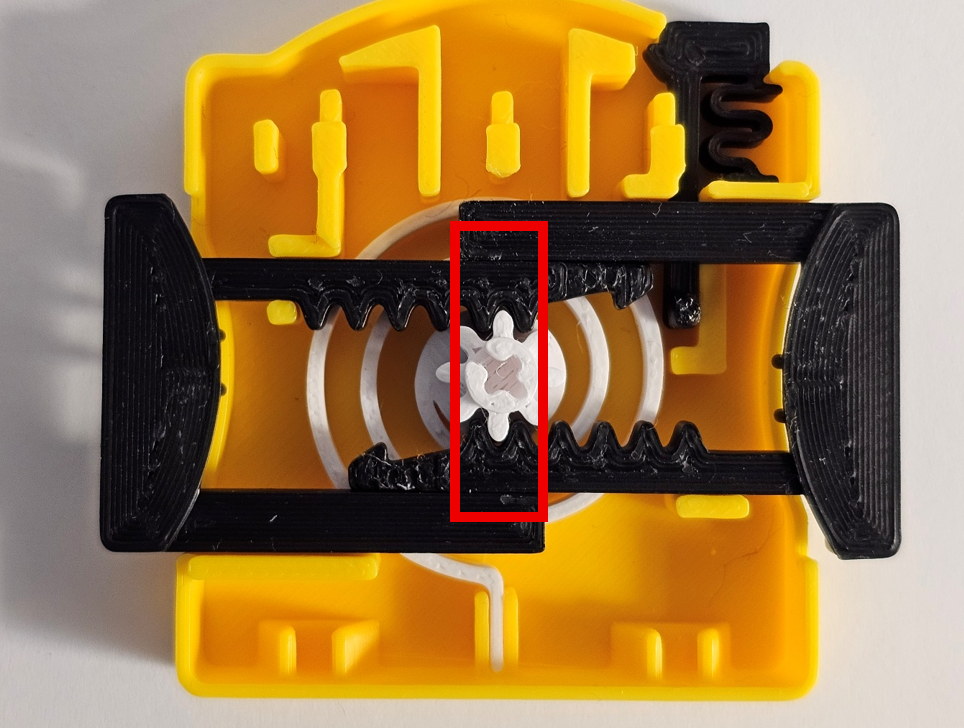
Insert both side buttons. The buttons are identical, but they must be placed in correct orientation. Make sure the tooth of the gear and the buttons are aligned properly.
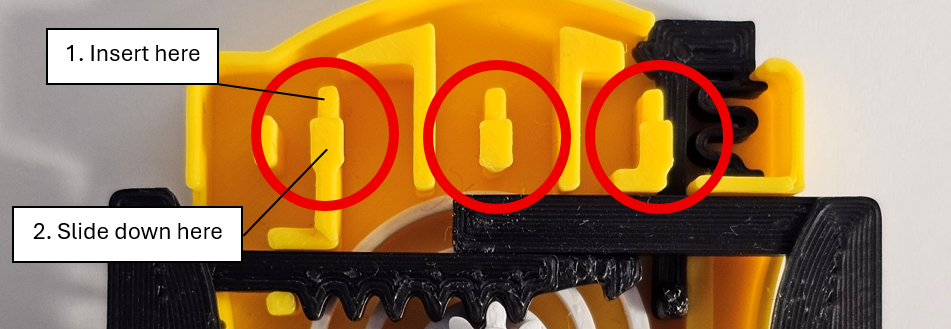
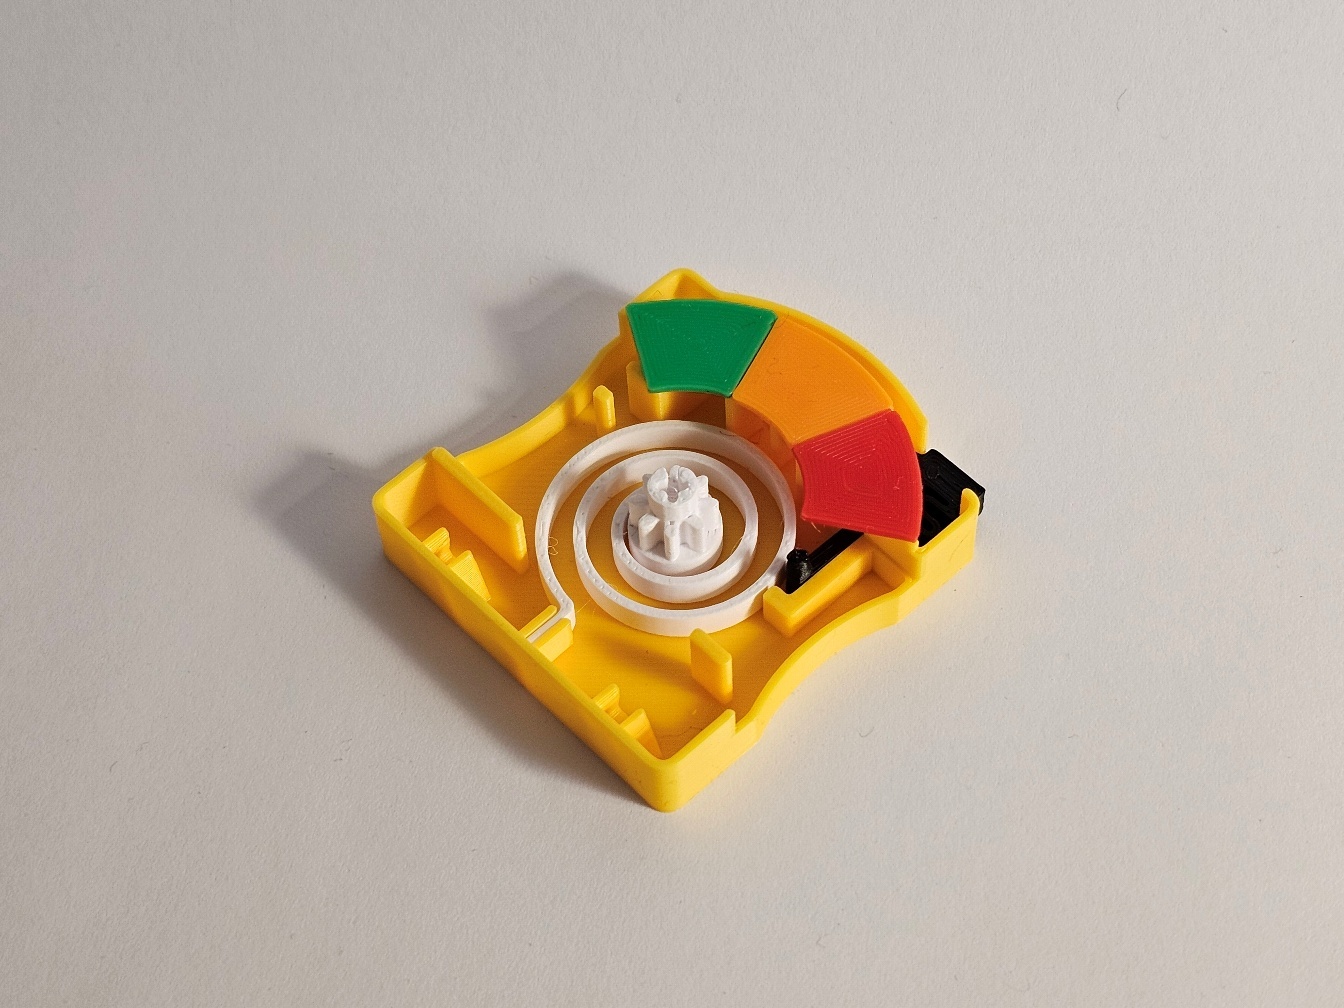
Insert the left (green) and right (red) gauge backplates first and then the middle (orange) plate. Insert a backplate first slightly above it’s final position and then slide it down so that it will stay in place. The backplate connectors are highlighted in the image below:
It should look like this:
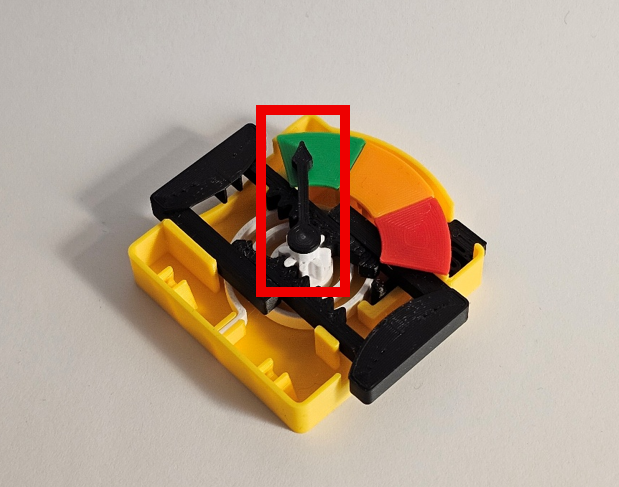
Insert the needle into the cross on top of the gear.
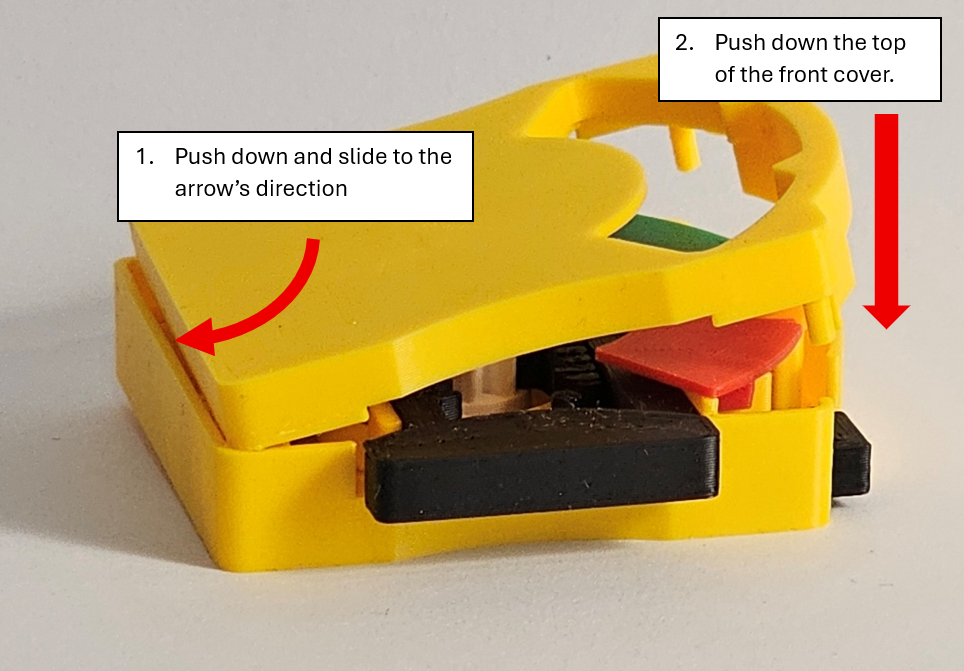
Start inserting the front cover by sliding the snap fits to the corresponding holes in the back cover. The front cover needs to be slightly angled to get it in place. When the snap fits are far enough, you should be able to push top part of the front cover in place too.
Congratulations! Your Fidget Toy is ready!

Gostou deste modelo? Crie uma conta grátis para salvar seus favoritos e voltar a eles depois.
Criar conta