Você está no 3DFinder
Buscamos em Thingiverse, MakerWorld e Printables ao mesmo tempo para te dar o melhor de cada uma.
Descrição
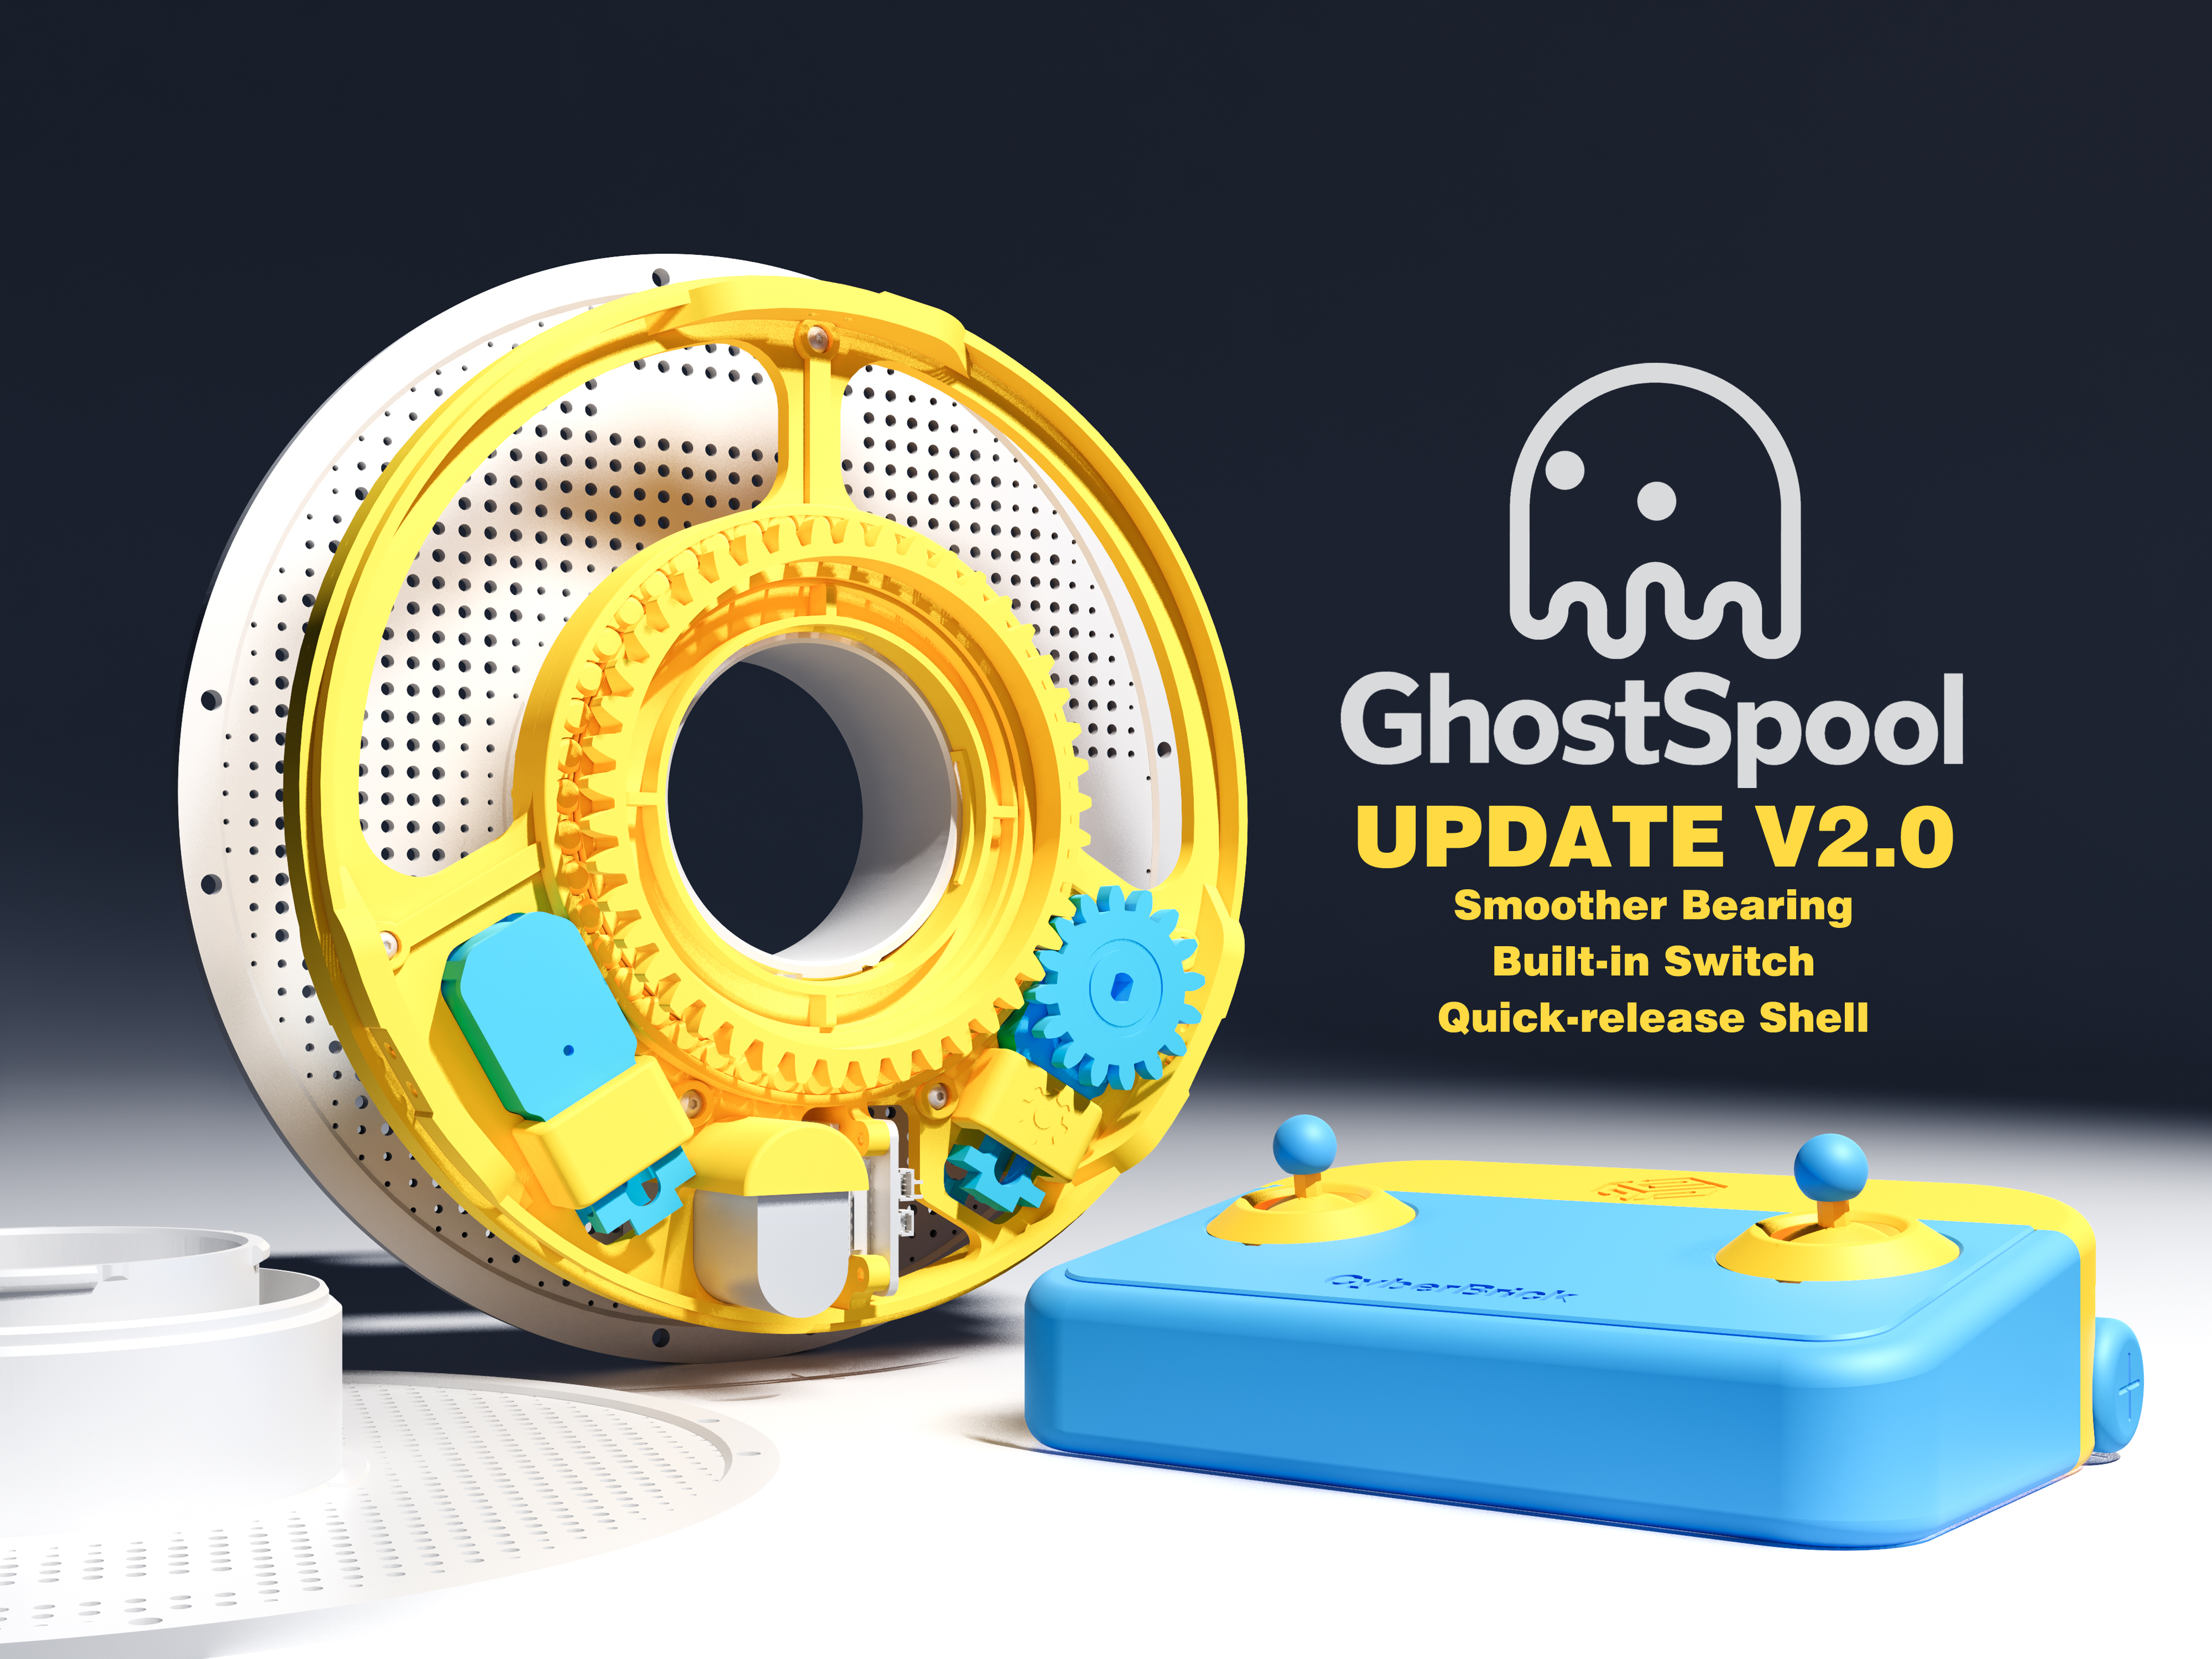
GhostSpool
- Since my child always enjoys rolling empty spools like wheels, I built this car based on CyberBrick. It perfectly mimics a Bambu reusable spool and can even be stored in an AMS.
Design & Control
Two actual spool faces act as wheels, driven by internal geared motors. Gravity ensures the central axis always self-centers.
It is controlled via my previously built ModBrick (👈👈👈The model link and BOM are both available at this link.)
configured as follows:
[LS] - [JS] - [X] : [L2]
[LS] - [JS] - [Y] : [L3]
[RS] - [JS] - [X] : [R2]
[RS] - [JS] - [Y] : [R3]
[LT] - [TR] - [S] : [L1]
[RT] -[TR] - [S] : [R1]
[LB] - [NA]
[RB] - [NA]
- The left and right joysticks independently control the speed of their corresponding wheels for movement and steering. The LT trigger handles pivot rotation, and the RT trigger controls forward/backward.
- This gravity-centric design results in significant inertia, making precise starts, stops, and straight-line driving a skill that requires practice—which is precisely where its unique fun lies.
Assemble Guide 2026.02.23
First of all, my apologies for the huge delay on the assembly guide 😭
I recently got the opportunity to collaborate with Bambu Lab on an official model—something I truly valued. That ended up taking a bit more of my time. I saw every single comment, but since the work wasn't ready yet, I felt kinda guilty and awkward about replying—just know that it's been on my mind the whole time.
- But now, the assembly guide is finally here! And all the issues with the original model have been addressed. Thank you all so much for the love—I never expected so many people to enjoy this little trick!
- Here's what's been improved:
- Switch: The original design didn't include a physical switch. The solution is simple: one side of the spool is now snap-fit. Even if you've already attached the shell and wrapped filament around it, you can easily remove that side to access the switch, or just unplug the cable to charge.
- Bearing: The balls in the original bearing tended to fuse with the housing, requiring manual loosening. Different print environments made it worse—sometimes they were completely stuck. I've redesigned the bearing after multiple tests. Now it spins smoothly right after assembly. Just in case, I also made a small tool to help free up any stubborn balls. A huge thank you to @Tassesin for his brilliant ball-bearing design—I learned so much from his model~
- A1 mini compatibility: The previous shell was too big for the A1 mini (>180mm). I've added a new print profile that splits the shell into three parts—so now it's printable on the A1 mini.
- The assembly guide is below. Looking forward to your feedback!