Você está no 3DFinder
Buscamos em Thingiverse, MakerWorld e Printables ao mesmo tempo para te dar o melhor de cada uma.
Descrição
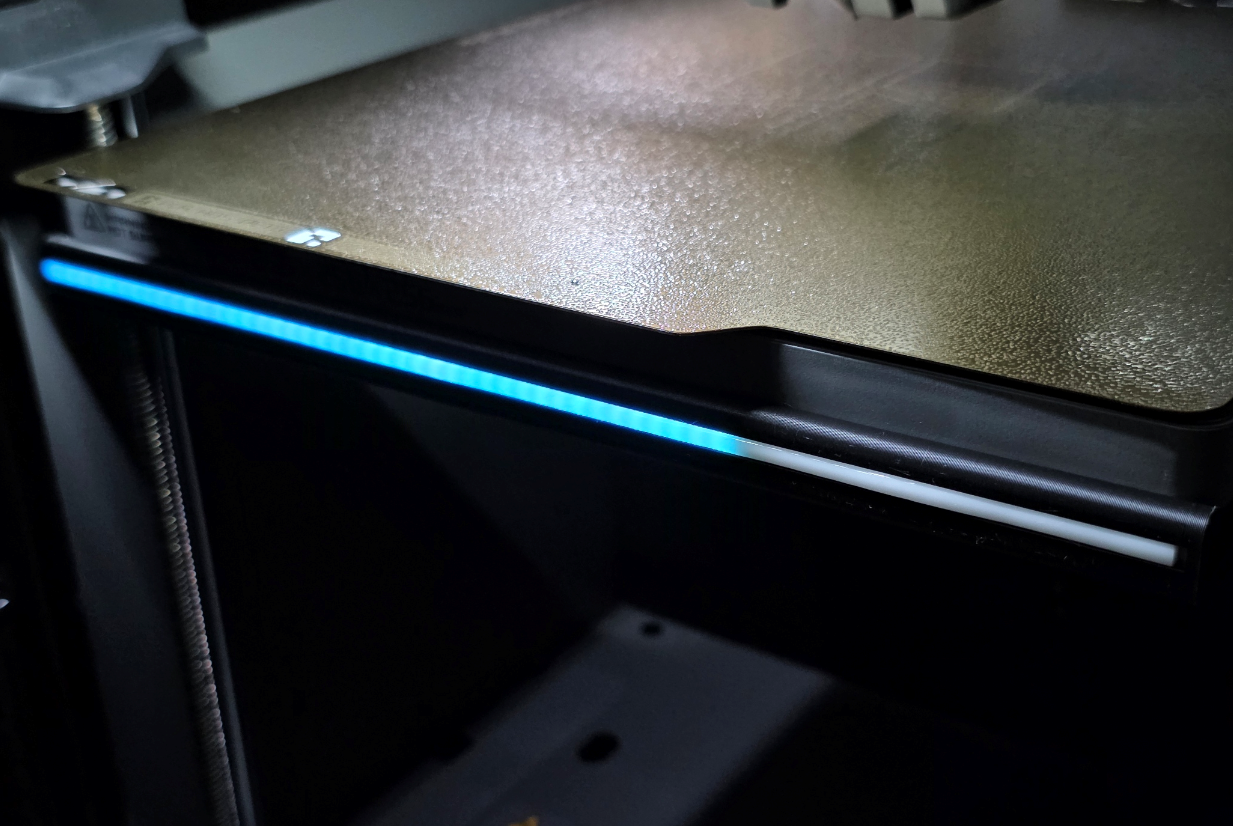
Bambu Lab LED Progress Bar (DIY version using Home Assistant + ESP32 + WLED)
There’s a ready-to-use progress bar kit available from BIQU if you prefer something plug-and-play: BIQU Panda Status LED Light Bar Kit H2D-Style
I wanted to build my own version instead, mostly because I already had the parts and enjoy putting things together.
I followed this video and adapted the approach to work on my P2S: [https://www.youtube.com/watch?v=SImwERgIi7w](https://www.youtube.com/watch?v=SImwERgIi7w)
The goal:
use an ESP32 running WLED to control a COB WS2811 LED strip (5v), and let Home Assistant + the Bambu integration turn the strip into a progress bar that updates while printing.
Requirements:
Before starting, you should have:
- Home Assistant running (Home assistant page)
- Bambu Lab integration installed (more info here)
- WLED integration installed ( WLED page | HA Integration )
- Soldering Iron
Once those are in place, everything else is just wiring, flashing WLED, and a couple of automations.
Parts I used:
- ESP32 WROOM - runs WLED
- 24V → 5V buck converter (3A) - the Bambu PSU is 24V, LEDs + ESP32 need 5V (option 2 adjustable )
- WS2811 COB RGB LED strip - Smooth continuous RGB light (I had the 5v 720, and used a 25cm piece / 10 sections/leds)
- 470Ω resistor - goes inline on the data wire to clean the signal and avoid flicker
- 1000µF 16V capacitor - stabilizes the 5V line
- 3M double-sided adhesive tape — used to stick the LED strip along the front edge of the print-bed frame
Wires — to connect everything
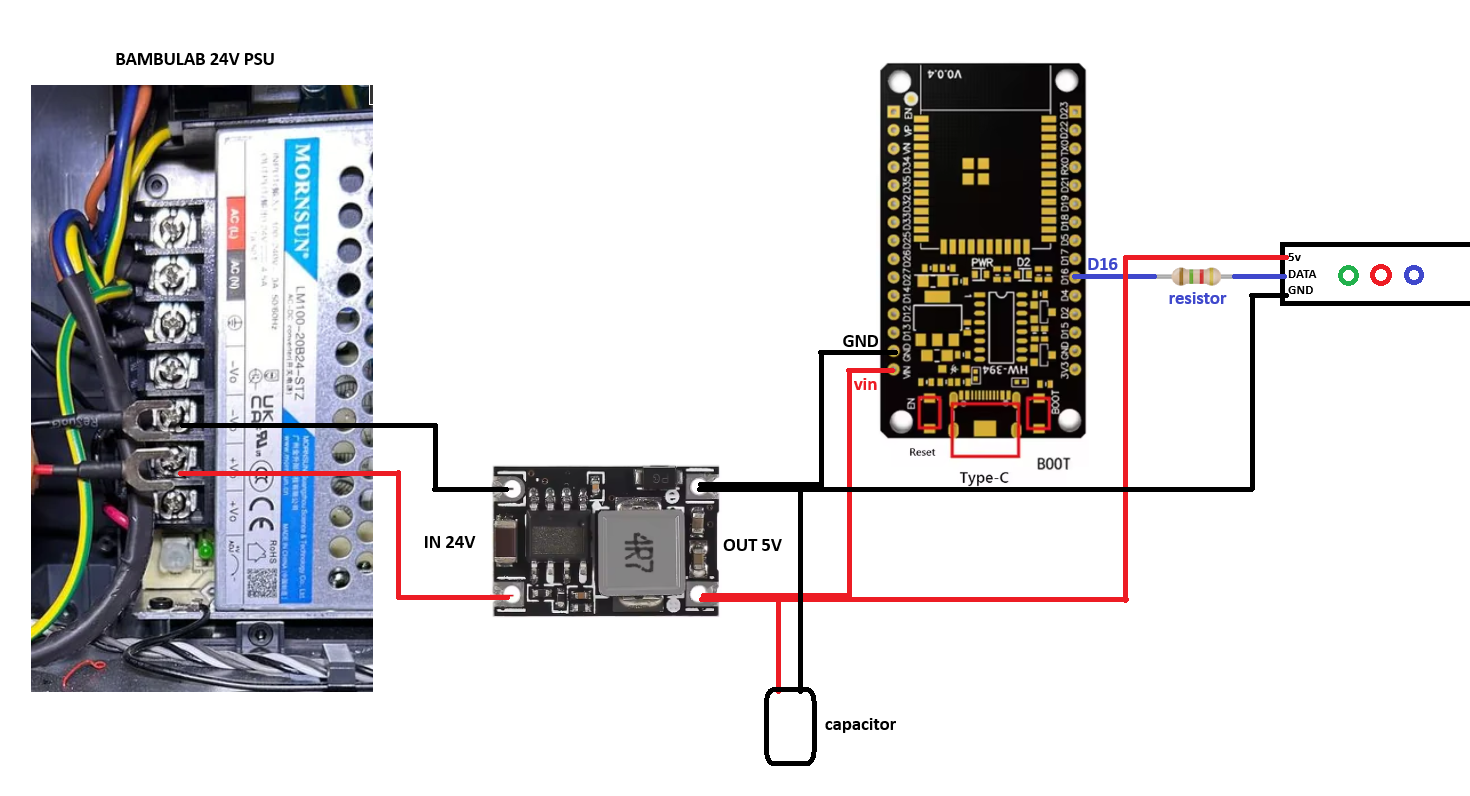
Wiring:
The wiring is straightforward, we pull 24V from the printer power supply, step it down to 5V, power the ESP32 and the LED strip from that, and send one data wire from the ESP32 to the strip.
Two small extra parts help with stability:
470Ω resistor on the data wire
1000µF capacitor on the LED power input
Getting access inside the printer
Make sure the printer is fully powered off and unplugged before opening anything !!
To reach the wiring points we need, remove the back plate of the printer, and then take off the PSU cover to access the +24V and GND terminals.
It’s just screws — nothing hidden.
If you want a visual guide for taking things apart, I recommend this video: Remove poop chute and Remove PSU cover
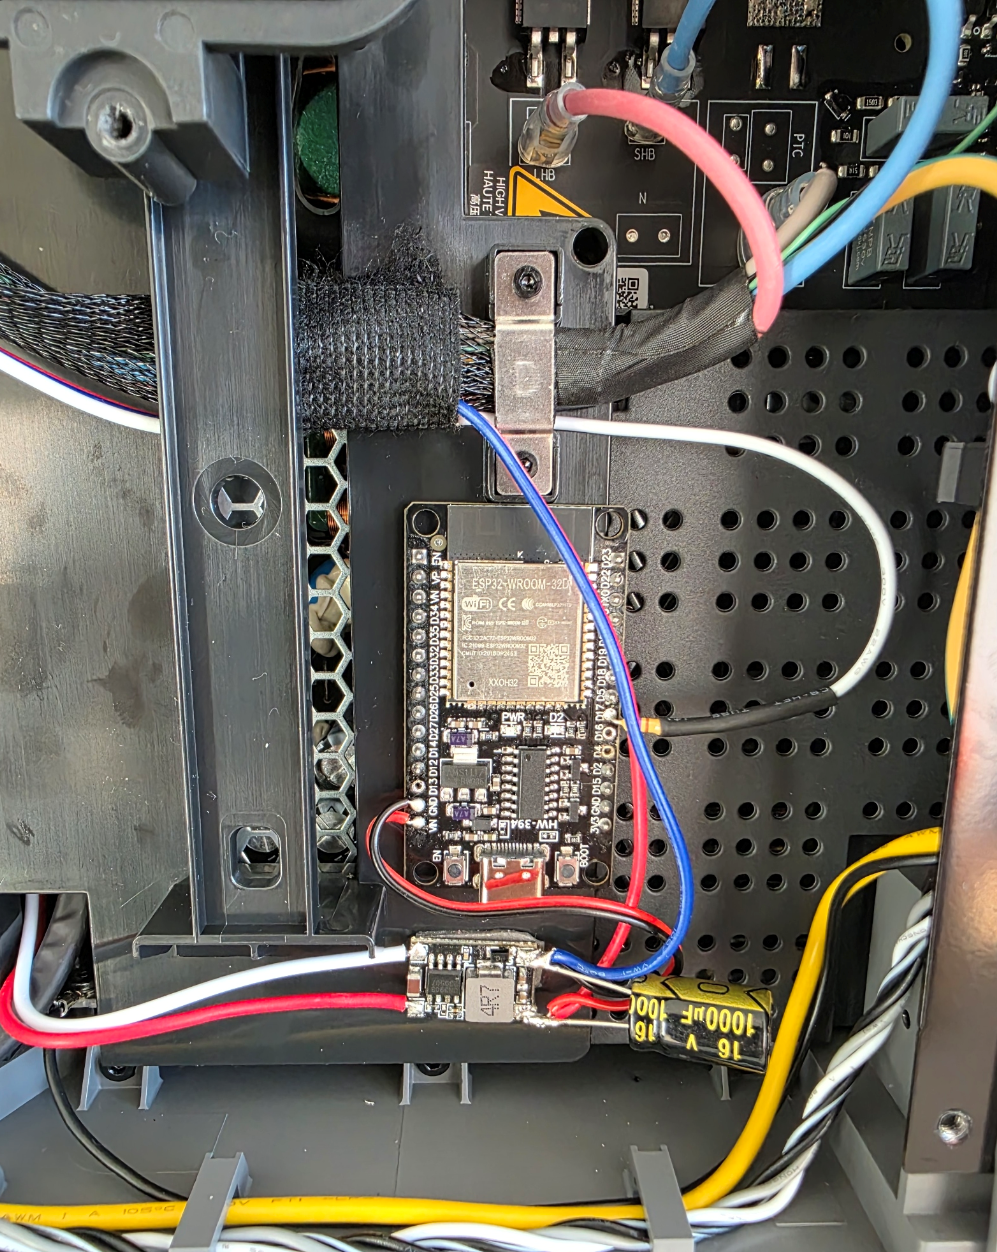
Once the PSU is exposed, you’ll see the screw terminals where we connect power for the buck converter.
I used 3M double-sided tape to mount the buck converter and ESP32 directly onto the PSU cover , this keeps everything secure and out of the motion path. When the cover goes back on, the parts stay inside safely without touching anything else.
Running the LED strip cable cleanly + mounting the strip
Print the LED strip mount.
For mounting the strip to the front of the bed frame, I used a 3D-printed LED strip holder (STL).
The strip slides inside the printed mount, and then the mount itself gets attached to the front edge of the print-bed frame using 3M double-sided tape.
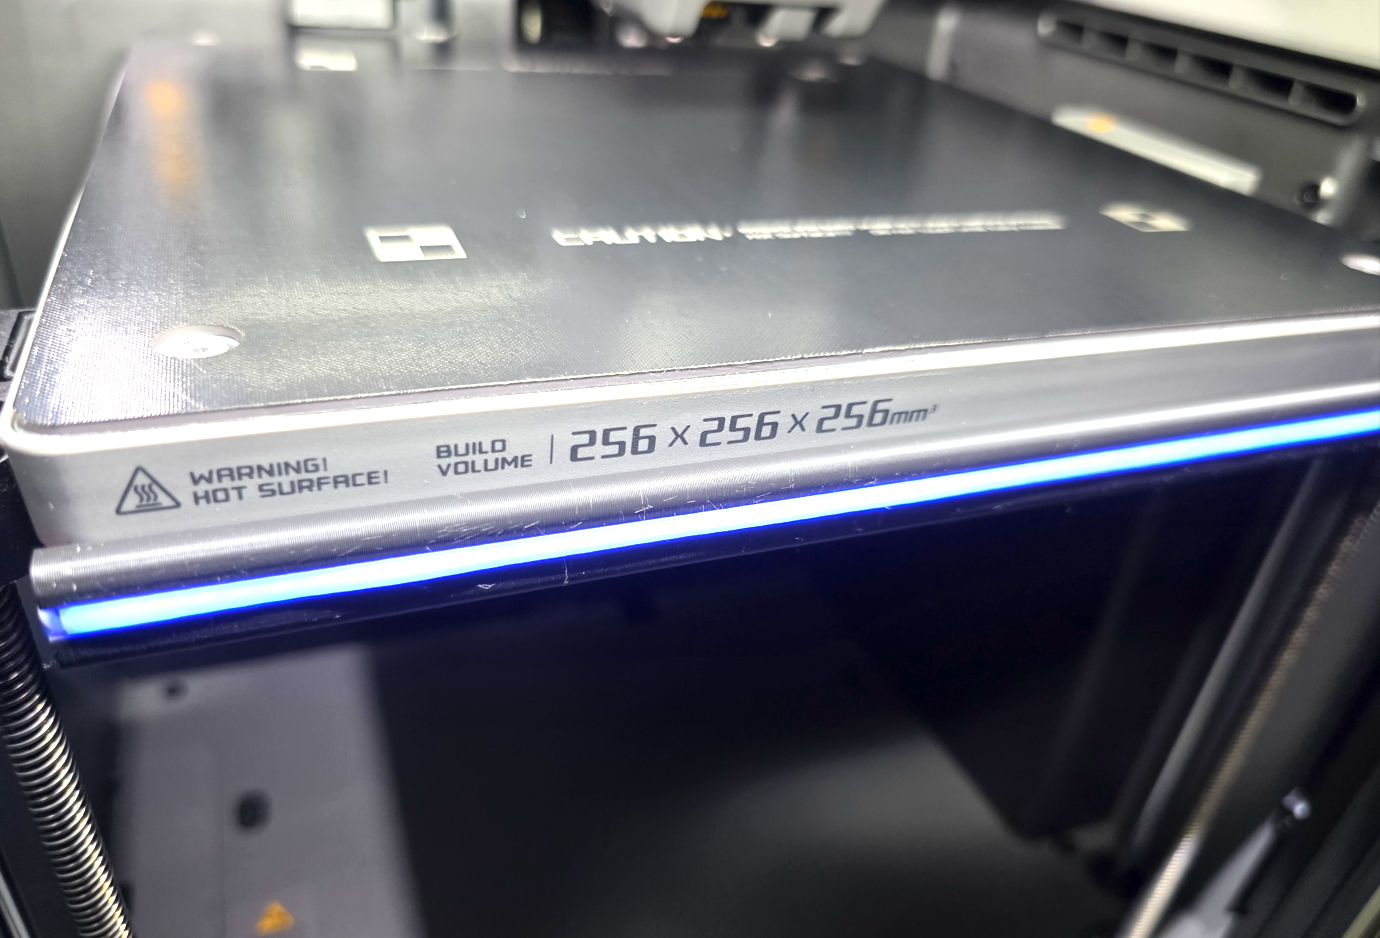
This keeps the strip protected, straight, and gives it a cleaner look than taping the LEDs directly to the frame.
- put 3M double-sided tape on the back of the printed mount
- stick the mount to the front edge of the bed frame, centered or wherever looks best to you
- run the LED strip cable along the existing bed wiring harness toward the back of the printer
- use zip ties or tape so the cable moves naturally with the bed and doesn’t snag on anything
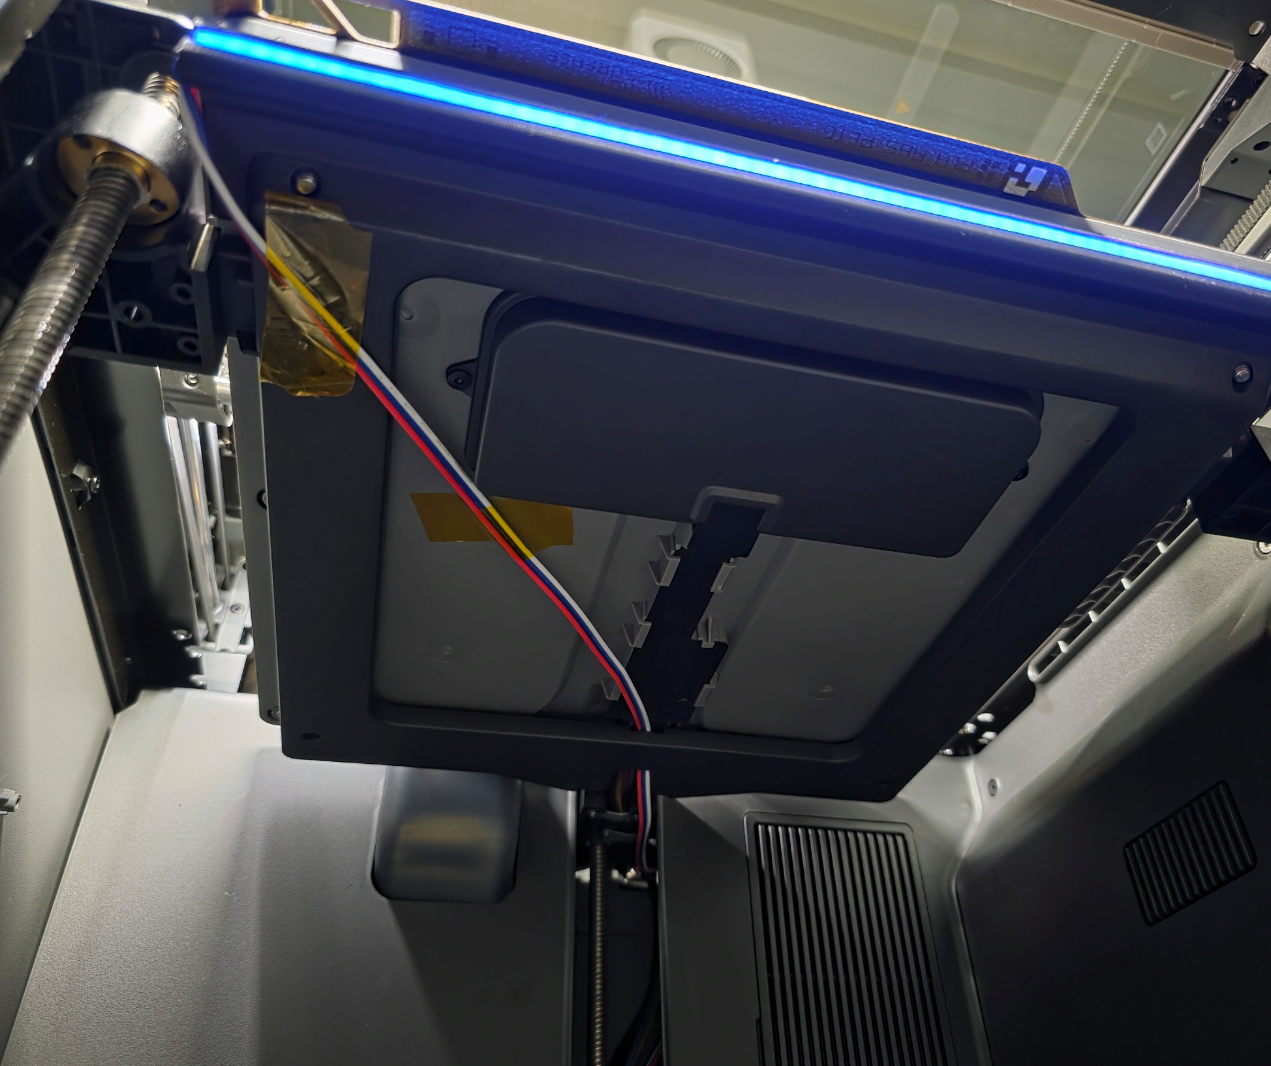
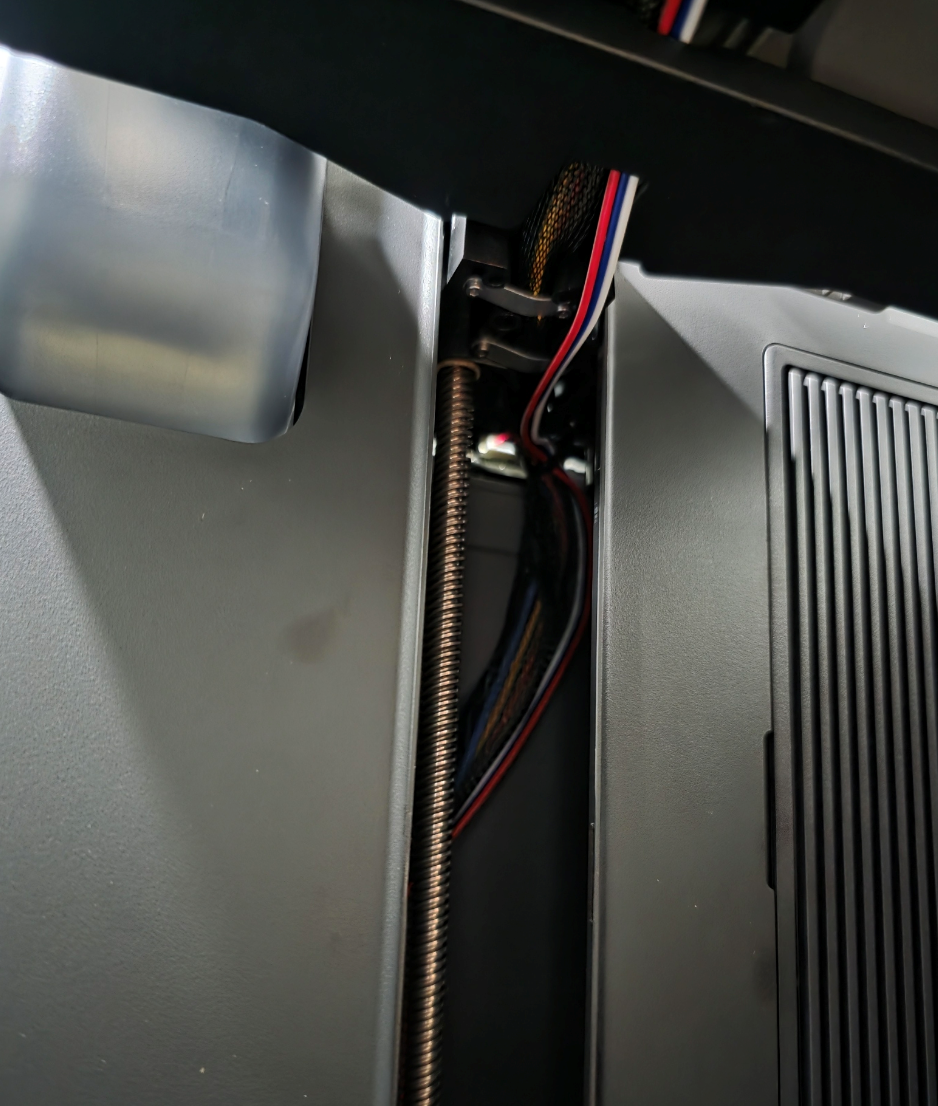
- feed the cable into the printer body and out the opening where the back panel was removed
After everything is routed, connect the wiring to the buck converter, put the PSU cover back on, and close the rear plate.
The LED mount stays on the bed frame, the wiring follows the path of the original harness, and the ESP32 + buck live inside the printer mounted to the PSU cover.
WLED basic configuration
I’m assuming you already flashed WLED onto the ESP32 and it’s online in your network. Flash Web tool
Now we just need to set the LED count and the data pin so the strip behaves like a 10-step progress bar.
- open WLED in your browser
- go to Config → LED Preferences
- set LED count: 10
Scroll down to LED Outputs and confirm the data pin:
- GPIO: 16 (if you used another pin, adjust here — in my build I used GPIO16)
- save & reboot WLED
After reboot, the strip should light up normally when you pick any effect.
if colors look swapped, change Color Order between RGB/GRB.
WLED presets for printer states
To make the LEDs change depending on what the printer is doing, I created a few WLED presets.
These don’t have to be fancy, the important part is that the names stay consistent, because Home Assistant will trigger them later.
You can use whatever effects you like, here are the ones I picked:
Name, Effect, Colour:
1: P2S-idle (Plasmoid, Blue & Light Blue)
2: P2S-finished (Fade, Green & Black)
3: P2S-error (Fade, Red & Black)
4: P2S-heating (Loading, Red & Orange)
5: P2S-calibrating (Gravfreq, Light blue & Purple)
6: P2S-printing (Percent, White)
7: P2S-sleep (Plasmoid, Light Blue & black)
Home Assistant automation
With the presets already created in WLED, the last step is to make Home Assistant switch between them automatically.
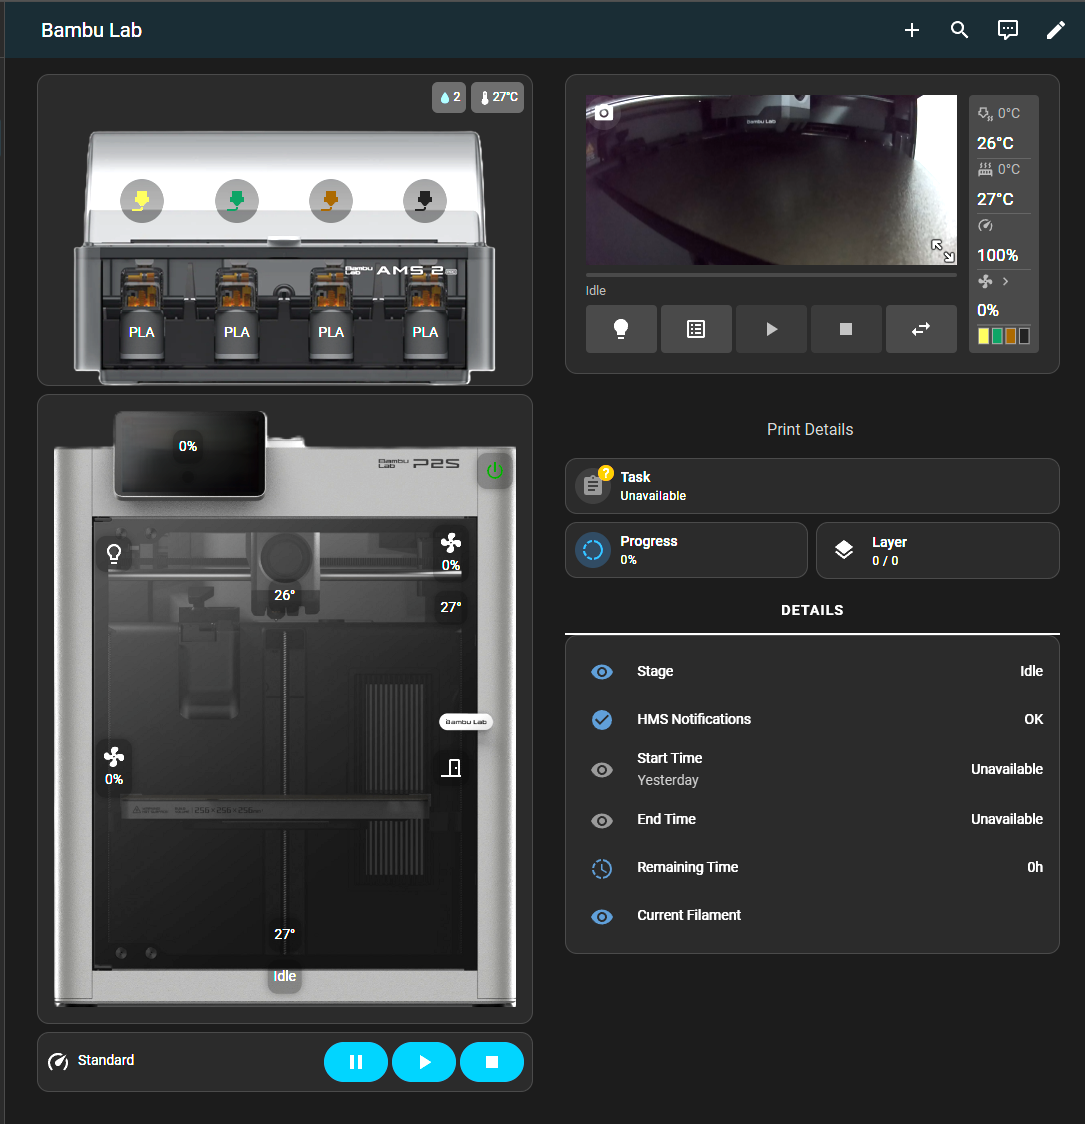
The LED strip will react based on the preset names you made earlier, so heating, calibrating, printing, finished, etc. all show different effects, and while printing, the strip grows like a 10-step progress bar.
Make sure that the Bambu Lab Integration is installed. Integration page
How the automation works:
- Home Assistant checks your Bambu printer status
- based on that status, it tells WLED to load the matching preset
- if the printer is printing, the automation also updates intensity every 10% so the strip grows step-by-step
(one “LED” for each 10% because we set LED count to 10 earlier)
Everything is done inside one automation, so it’s easy to maintain and change later.
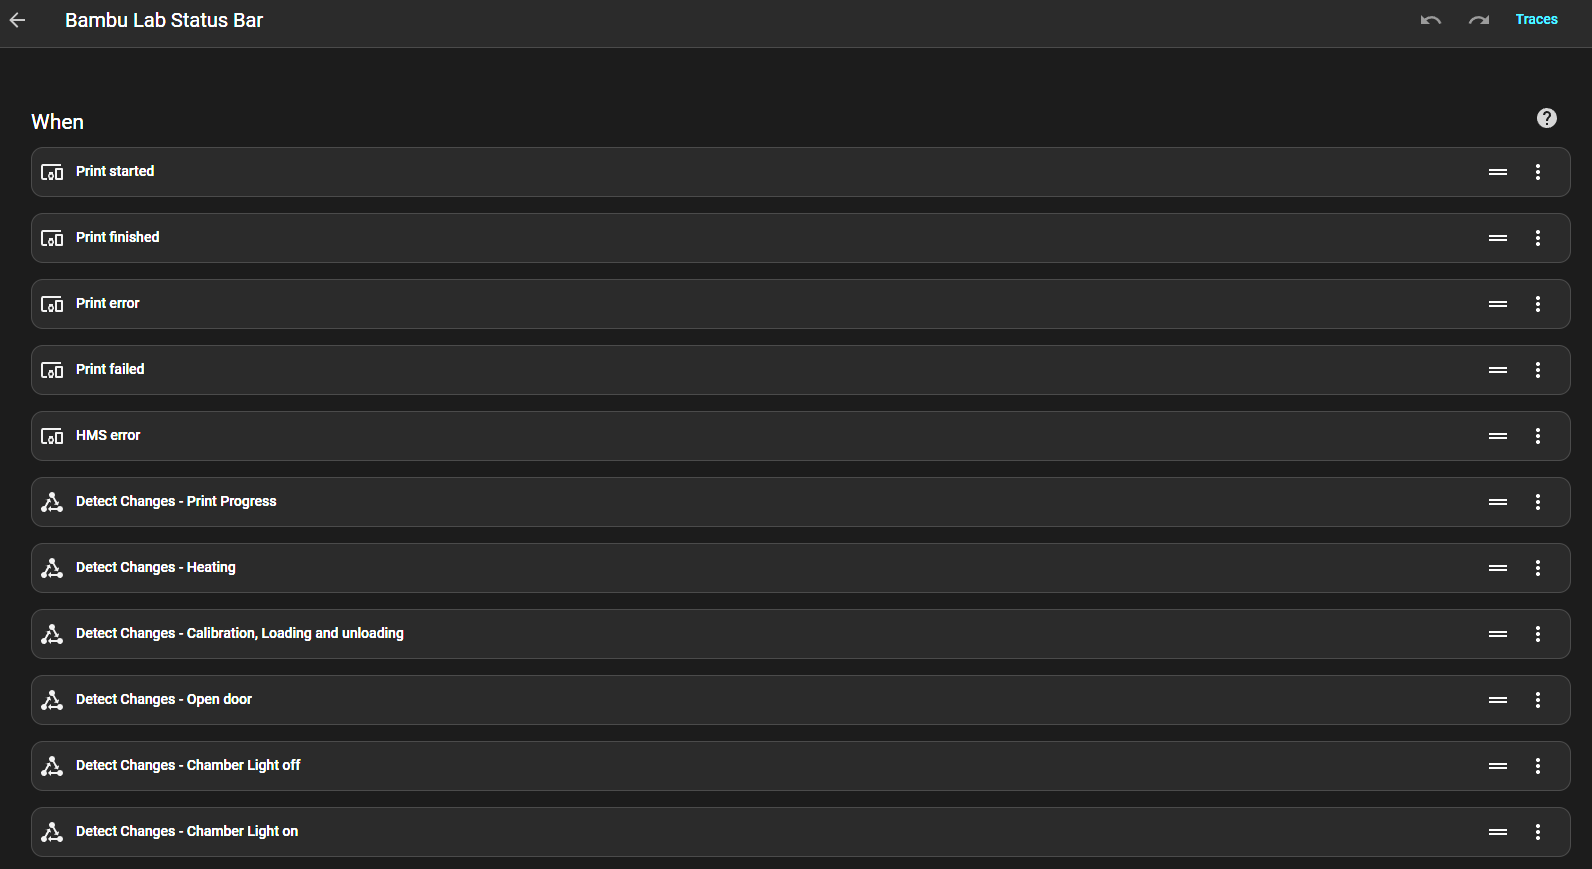

Adding the automation using the YAML file
The full YAML file is attached in the documentation.
To install it:
- open Home Assistant
- go to Settings → Automations & Scenes → Automations
- click “Add Automation” → “Create New Automation”
- when editing the new automation, click the three dots in the top right corner → "Edit in YAML."
- paste the yaml code
- before saving, edit the two entity placeholders inside the file:
- <your_p2s_entity> → your printer entity from the Bambu integration
<your_wled_entity> → your WLED light entity
for example:
sensor.p2p_myprinter_print_status
light.wled_bedstrip
save the automation and reload automations if needed
Once saved, the LED strip will start reacting based on your printer state and the presets you created earlier.
Quick check after importing
If everything is set correctly:
heat the printer → LEDs switch to your heating preset
start a print → progress bar grows every 10%
print finishes → strip switches to finished preset
printer goes idle → idle preset takes over
If nothing happens, double-check:
you replaced <p2s_entity> and <wled_entity> with your actual entities
the preset names in WLED match the preset names used in the YAML
That’s it (for now)
Please treat this as a work in progress, everything here works on my setup, but I’m still dialing in details. If you import the YAML automation directly, it should work, but I’m not 100% sure it will be plug-and-play for everyone. Expect to tweak a bit depending on your entities, presets, and WLED settings.
One thing I’m still trying to understand:
When I power the printer through a smart outlet and turn it off, the LED strip sometimes flashes once, even though everything should be off. I’m still looking into why it happens, feels like a small amount of leftover voltage or leakage somewhere, but not confirmed yet.
If you’re planning to build this, I really recommend watching the videos linked earlier, especially for:
- opening the printer without guessing
- understanding the wiring layout
- configuring WLED
- setting up Home Assistant + automation
They helped me a lot, and they’ll probably save you time too.
Also, if you want to improve things:
- feel free to modify the STL / LED mount, I used onshape to create it: Onshape Document URL
- make your own cable routing cleaner
- adjust the progress bar behavior or colors
- share your tweaks , I’d love to see your version
Thanks for reading! have fun building your own progress-bar LED for the P2S :)
Bambu Lab P2S LED Progress/Status Bar

Publicado em 29 de dez de 2025