Você está no 3DFinder
Buscamos em Thingiverse, MakerWorld e Printables ao mesmo tempo para te dar o melhor de cada uma.
Descrição
Lot No. 2132329 |
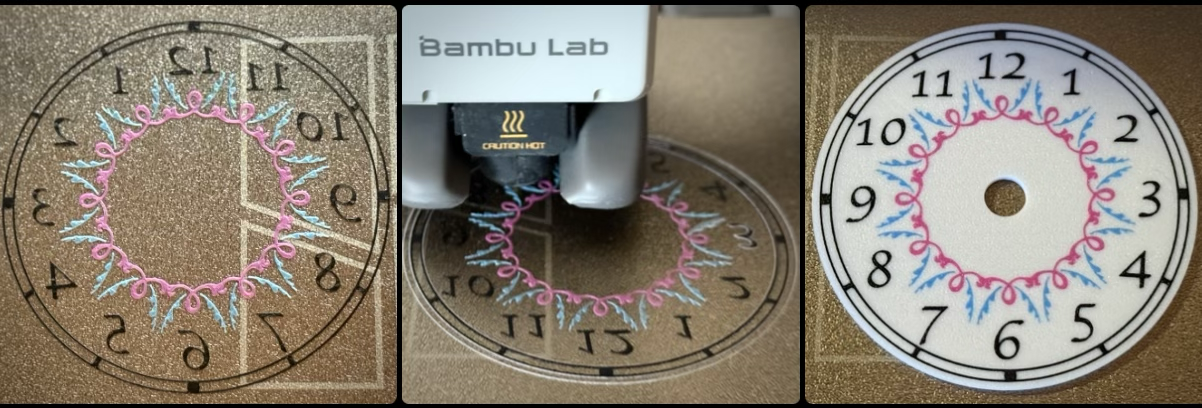
A Belle Époque gilt bronze and champlevé enamel mantel clock; serving as the centerpiece of a larger garniture de cheminée, with its matching torchères en suite available here: [https://makerworld.com/en/models/2092706](https://makerworld.com/en/models/2092706)
Clock (HxWxD): 27 x 18 x 9 cm
Torchère: 21 x 9 x 9 cm
The Vortek Design Challenge:
Zero Compromise
I'm entering this model into the contest because currently there is one compromise that you'll have to make, if you are not printing on an H2C, and that is the blue sphere that houses the clock mechanism. (See below why the rest is not a big issue, if designed correctly)
Current Compromise
Printing the champlevé enamel on every layer of the sphere would simply not be feasible, so to compromise, I've cut recesses that can be filled with primer and painted. Obviously, the color matching to the printed “enamel panels” when painting is a small challenge and it would be much more desirable to simply print with the same colors of filament used for the rest of the model to achieve a cohesive look.
Design is Key
The Spork Fallacy
It's tempting to use the H2C Vortek system to compensate for design inefficiencies; however, that is to treat it like a multitool that hides flaws and improvises solutions. This approach works in a pinch, but it encourages shortcuts and compromises, much like using a spork when a proper utensil is needed.
The Steak Knife Principle
Instead, design with precision in mind and let the Vortek execute your vision faithfully. When your model is carefully optimized for the printer’s capabilities, the results are sharp, clean, and consistent… like using a steak knife in a nice restaurant rather than a camping spork. The printer becomes a tool for refinement, not a crutch for poor design.
Dining by Design
Yes, technically the dimensions would allow you to print the entire model in one piece. But consider the inlays: they're printed face-down and then inserted, because even an H2C can't make that look flawless on the Z-axis. (Someone clearly put thought into splitting the model across 12 print plates.) Doing it all in one go? That's possible, sure… but it’s a restaurant spork: trying to get the (in)convenience of a spork in a setting that demands the precision of a steak knife. It may “work,” but it’s a compromise in an environment where craft matters.
A1 Mini Prints Belle Époque Perfectly
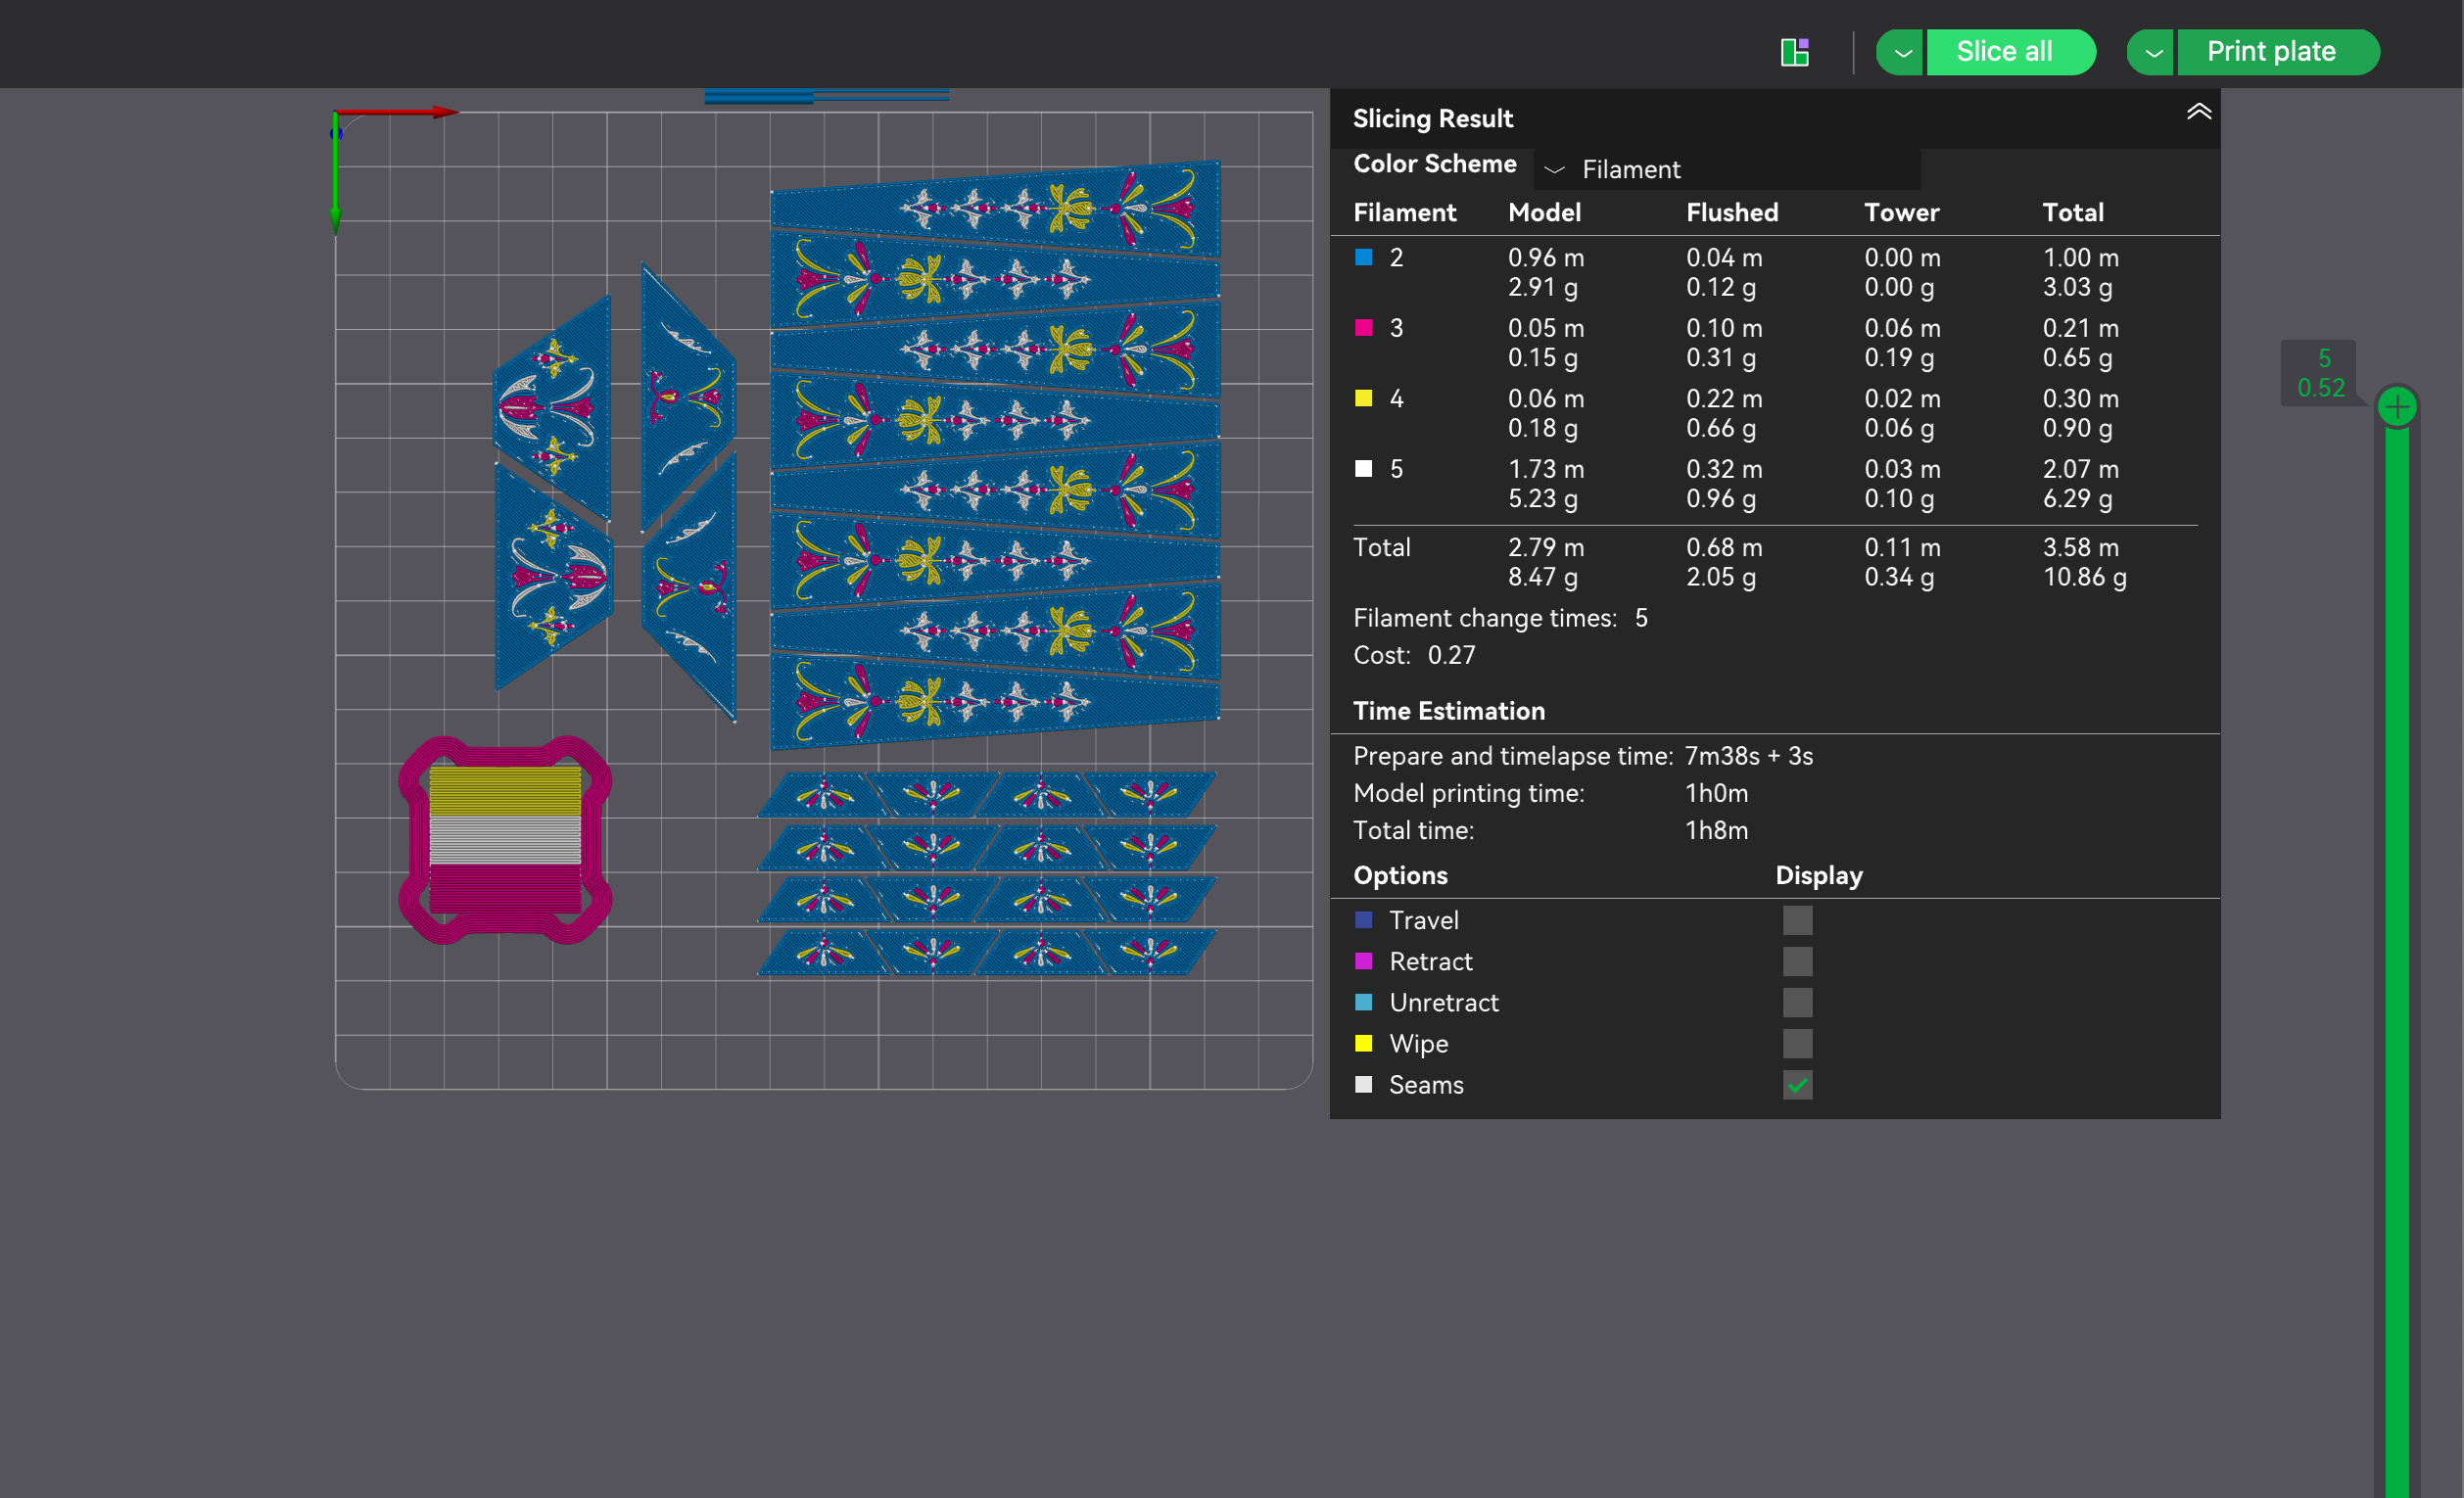
Setting aside the blue sphere, the rest of the model prints flawlessly on an A1 mini…
…now, will an H2C Vortek system reduce purge? Yes, it will… but look at how it slices on an A1 Mini already (if designed correctly). Also, the differentiating factor in terms of quality is effectively the nozzle size.
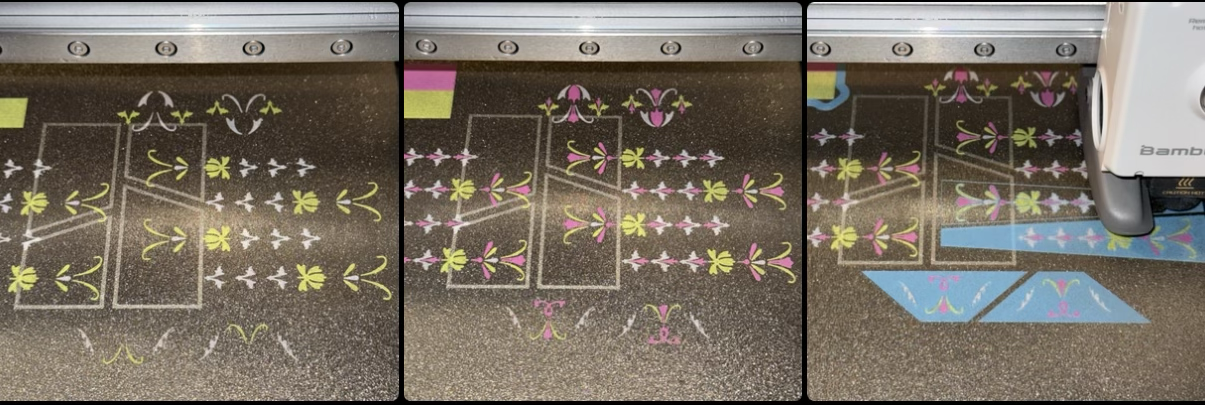
…here a better “visual” showing the detailing of each of the pieces and the amount of (very manageable) purge.
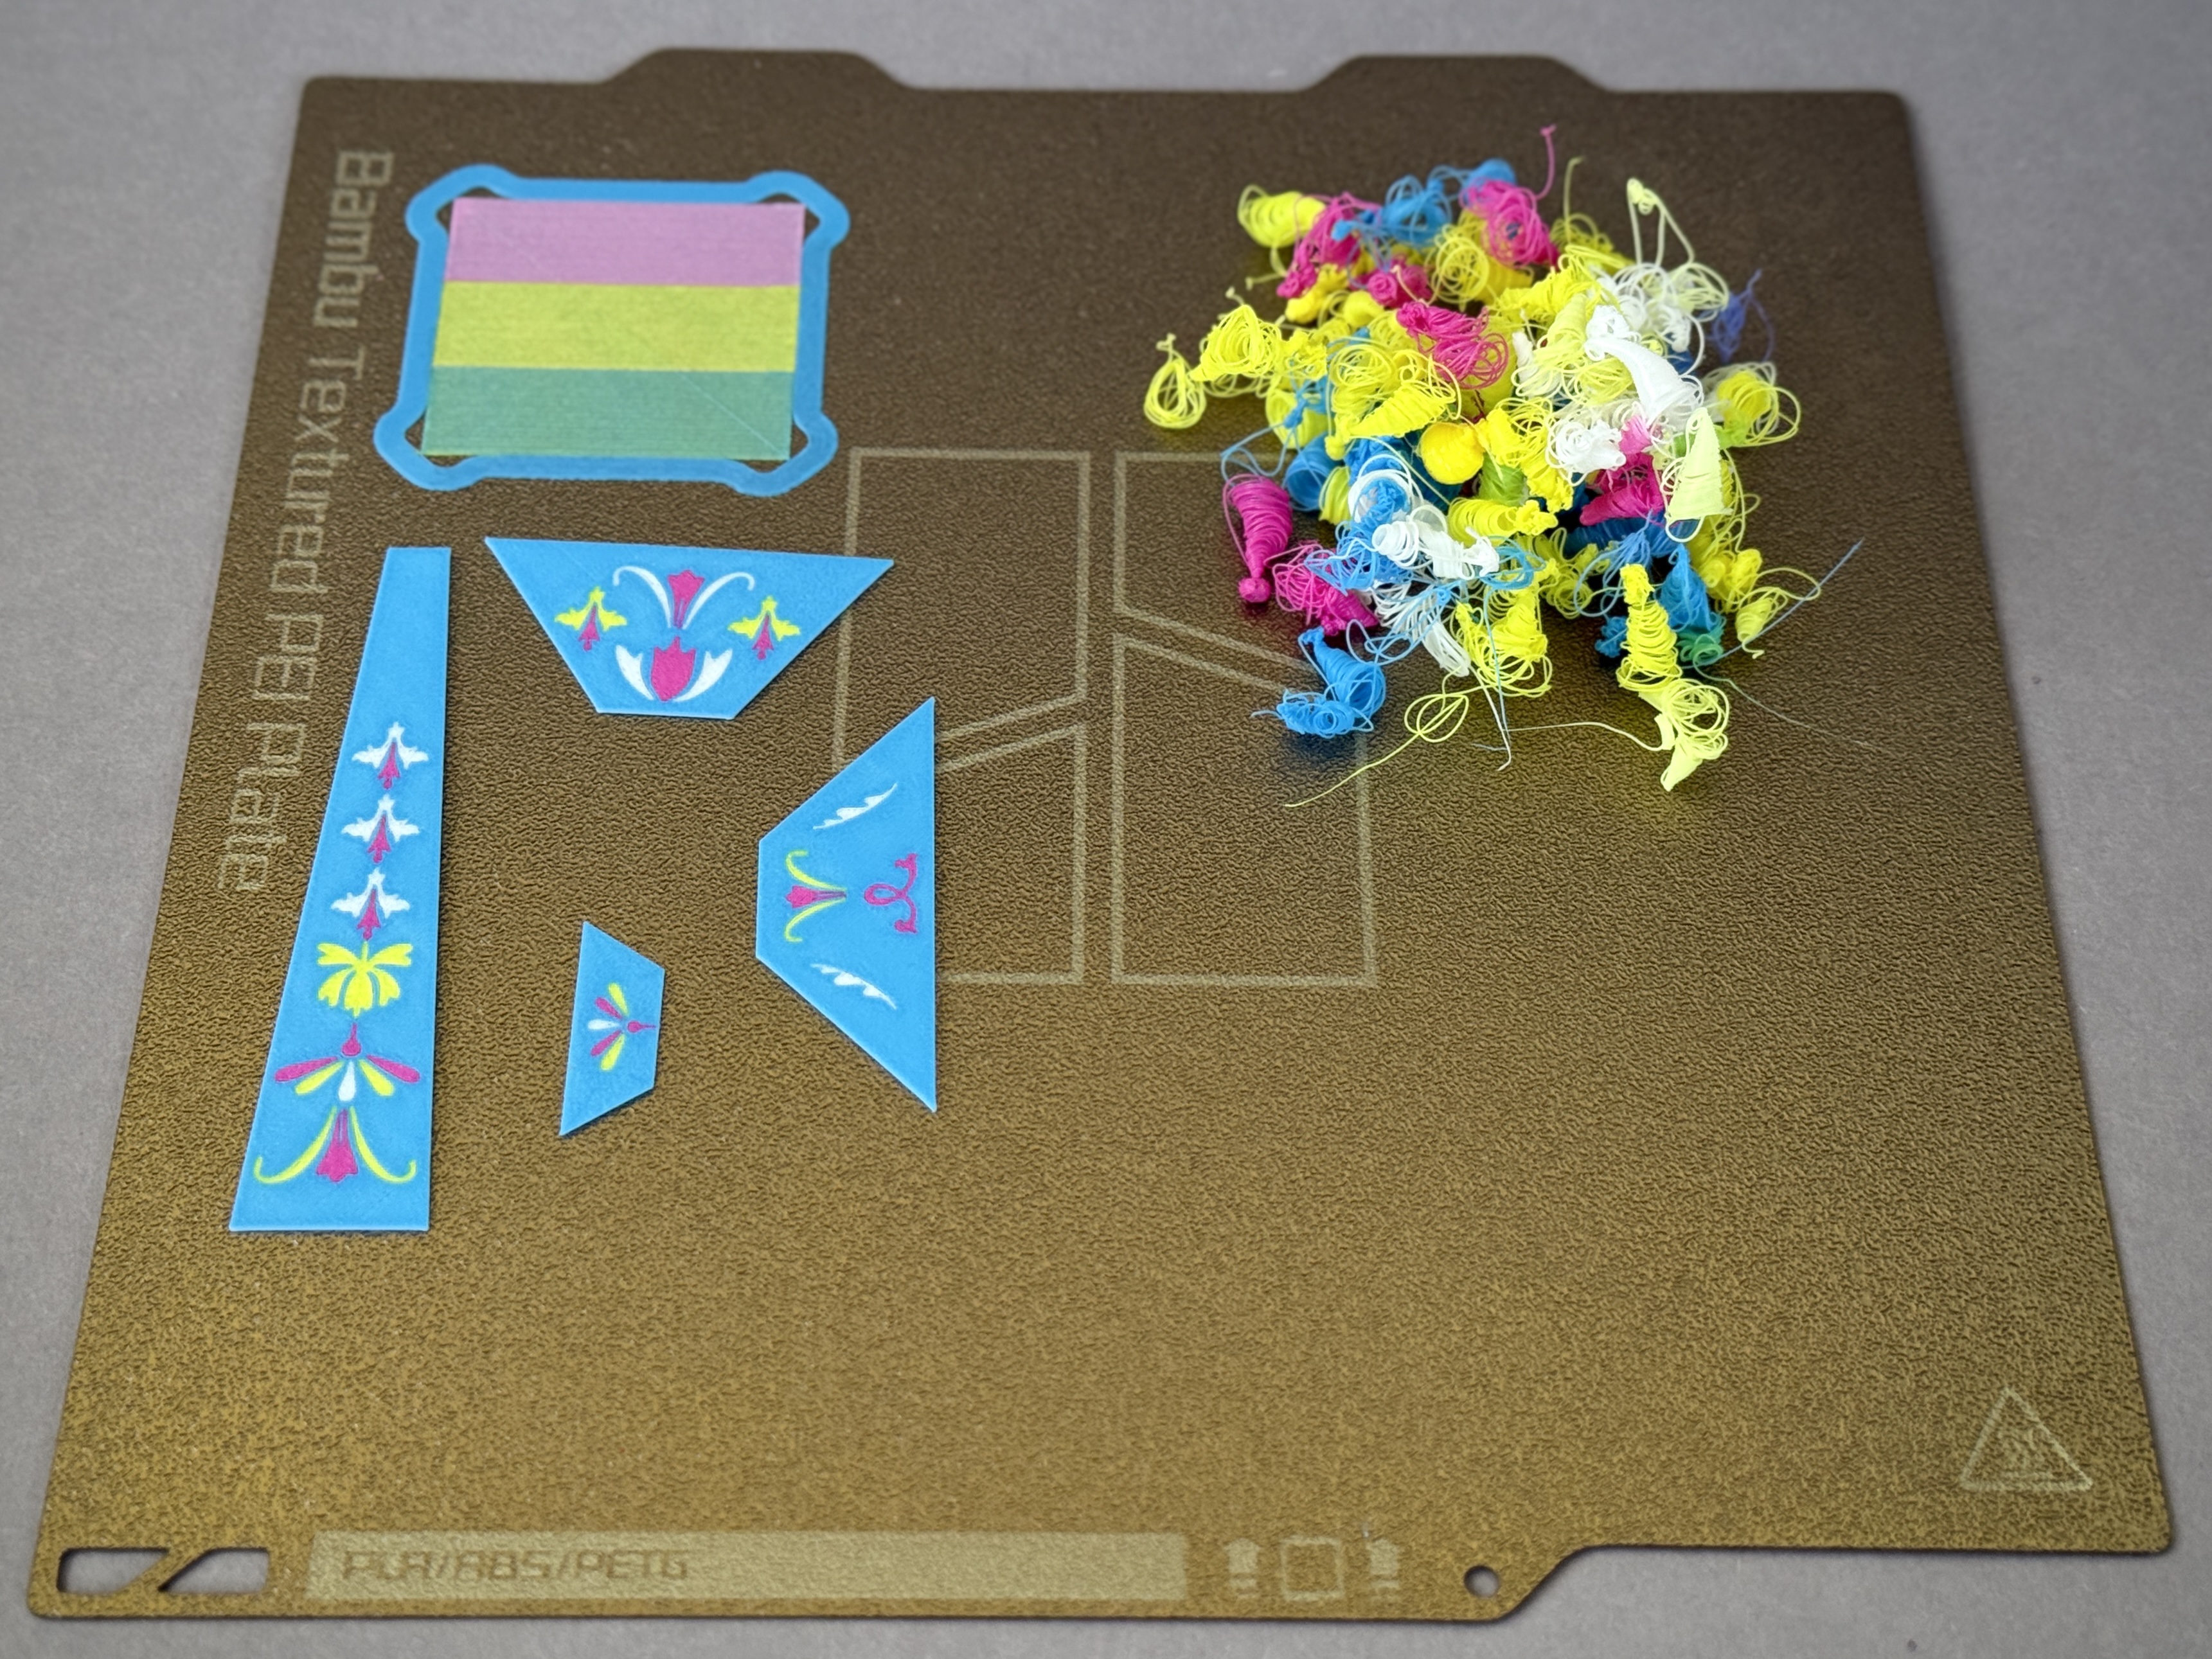
For scale: an 18cm x 18cm “Textured PEI Plate” - the items shown were printed with a 0.2 nozzle and 0.1 layer height, performing color changes on the first two layers.
Assembly Process
The process generally follows these steps, from base to top (you can open the attached Assembly Guide.pdf for a visual reference):
- Base Assembly:
Start with the main base units of the clock and optionally the two torchères. Glue the separate colored porcelain-style panels into their designated recesses on the gold bases. - Mounting the Uprights:
Attach the main vertical supports (columns) to the prepared bases. Ensure they are perfectly straight and square before the glue sets. - The Clock Body:
Assemble the main blue clock body sphere. Glue the clock face and (optionally) internal mechanics (Clock Components Kit 011) into place within the sphere. - Connecting the Top and Bottom:
Attach the clock sphere assembly to the main vertical supports. This is a critical step for alignment of the final piece. - Finials and Embellishments:
Glue the decorative finials (the pointed tops) onto the columns and the small cherub figure onto the top of the clock.
Post Processing
Here's an optimized process that leverages the unique properties of each of the materials:
- Silk Filament Base:
PLA Silk+ Gold provides a built-in metallic sheen and a good base color, minimizing the need for full coverage with metallic paints. - Burnt Umber Wash:
Applying a wash and letting it settle in the recesses adds instant depth, shadows, and an aged patina, perfectly mimicking the look of oxidation that collects on antique bronze in hard-to-reach areas. - Metallic Watercolors Dry Brush:
The dry brush technique involves applying a very small amount of paint to a brush and lightly skimming it over the raised surfaces. This method highlights the high points of the model, making them look shiny and metallic, further enhancing the illusion of genuine gilded metal without covering the base filament's luster.
Together, these simple, low-cost steps transform a plastic print into the photorealistic antique you see in the cover image and in the gallery pictures. You could take it even further by applying UV resin to create a “dome” effect on the enamel pieces; however, the above steps alone will already give image recognition systems like Google Lens a run for their money.
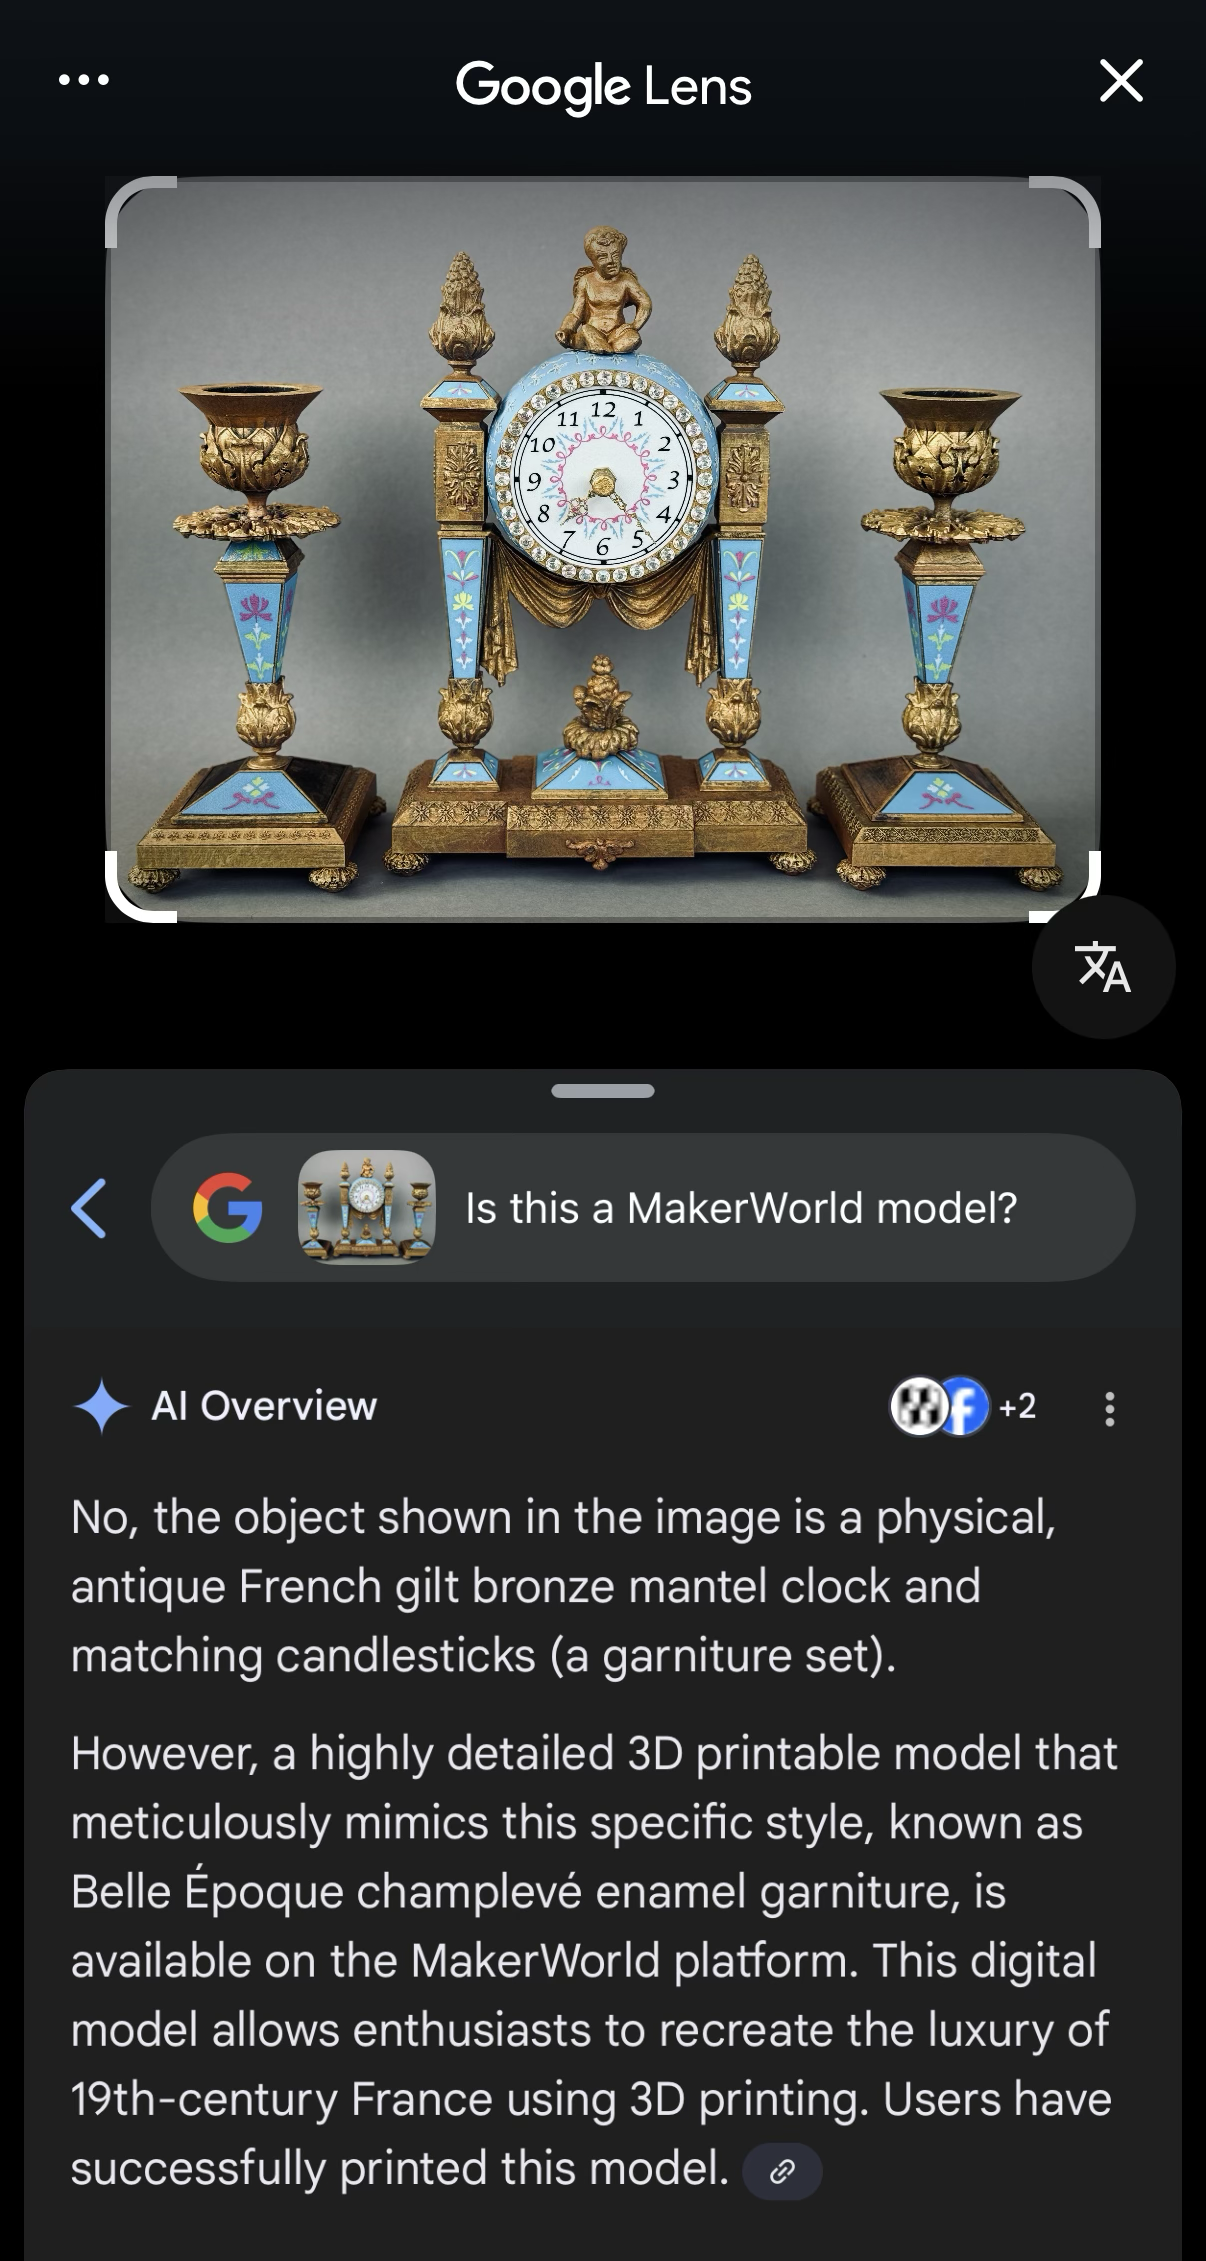
Google Lens prompted with, “Is this a MakerWorld model?" provided the cover image of this model as input.
It knows about the model on MakerWold and even links to it; however, it refuses to accept the image itself to be of a 3D print even though it is pixel-for-pixel the cover image of this model. Even if you try to course correct by asking “Why do I see layer lines,” it will still not accept the image being of a 3D print and instead educate you about “more likely” things that may cause these artifacts.
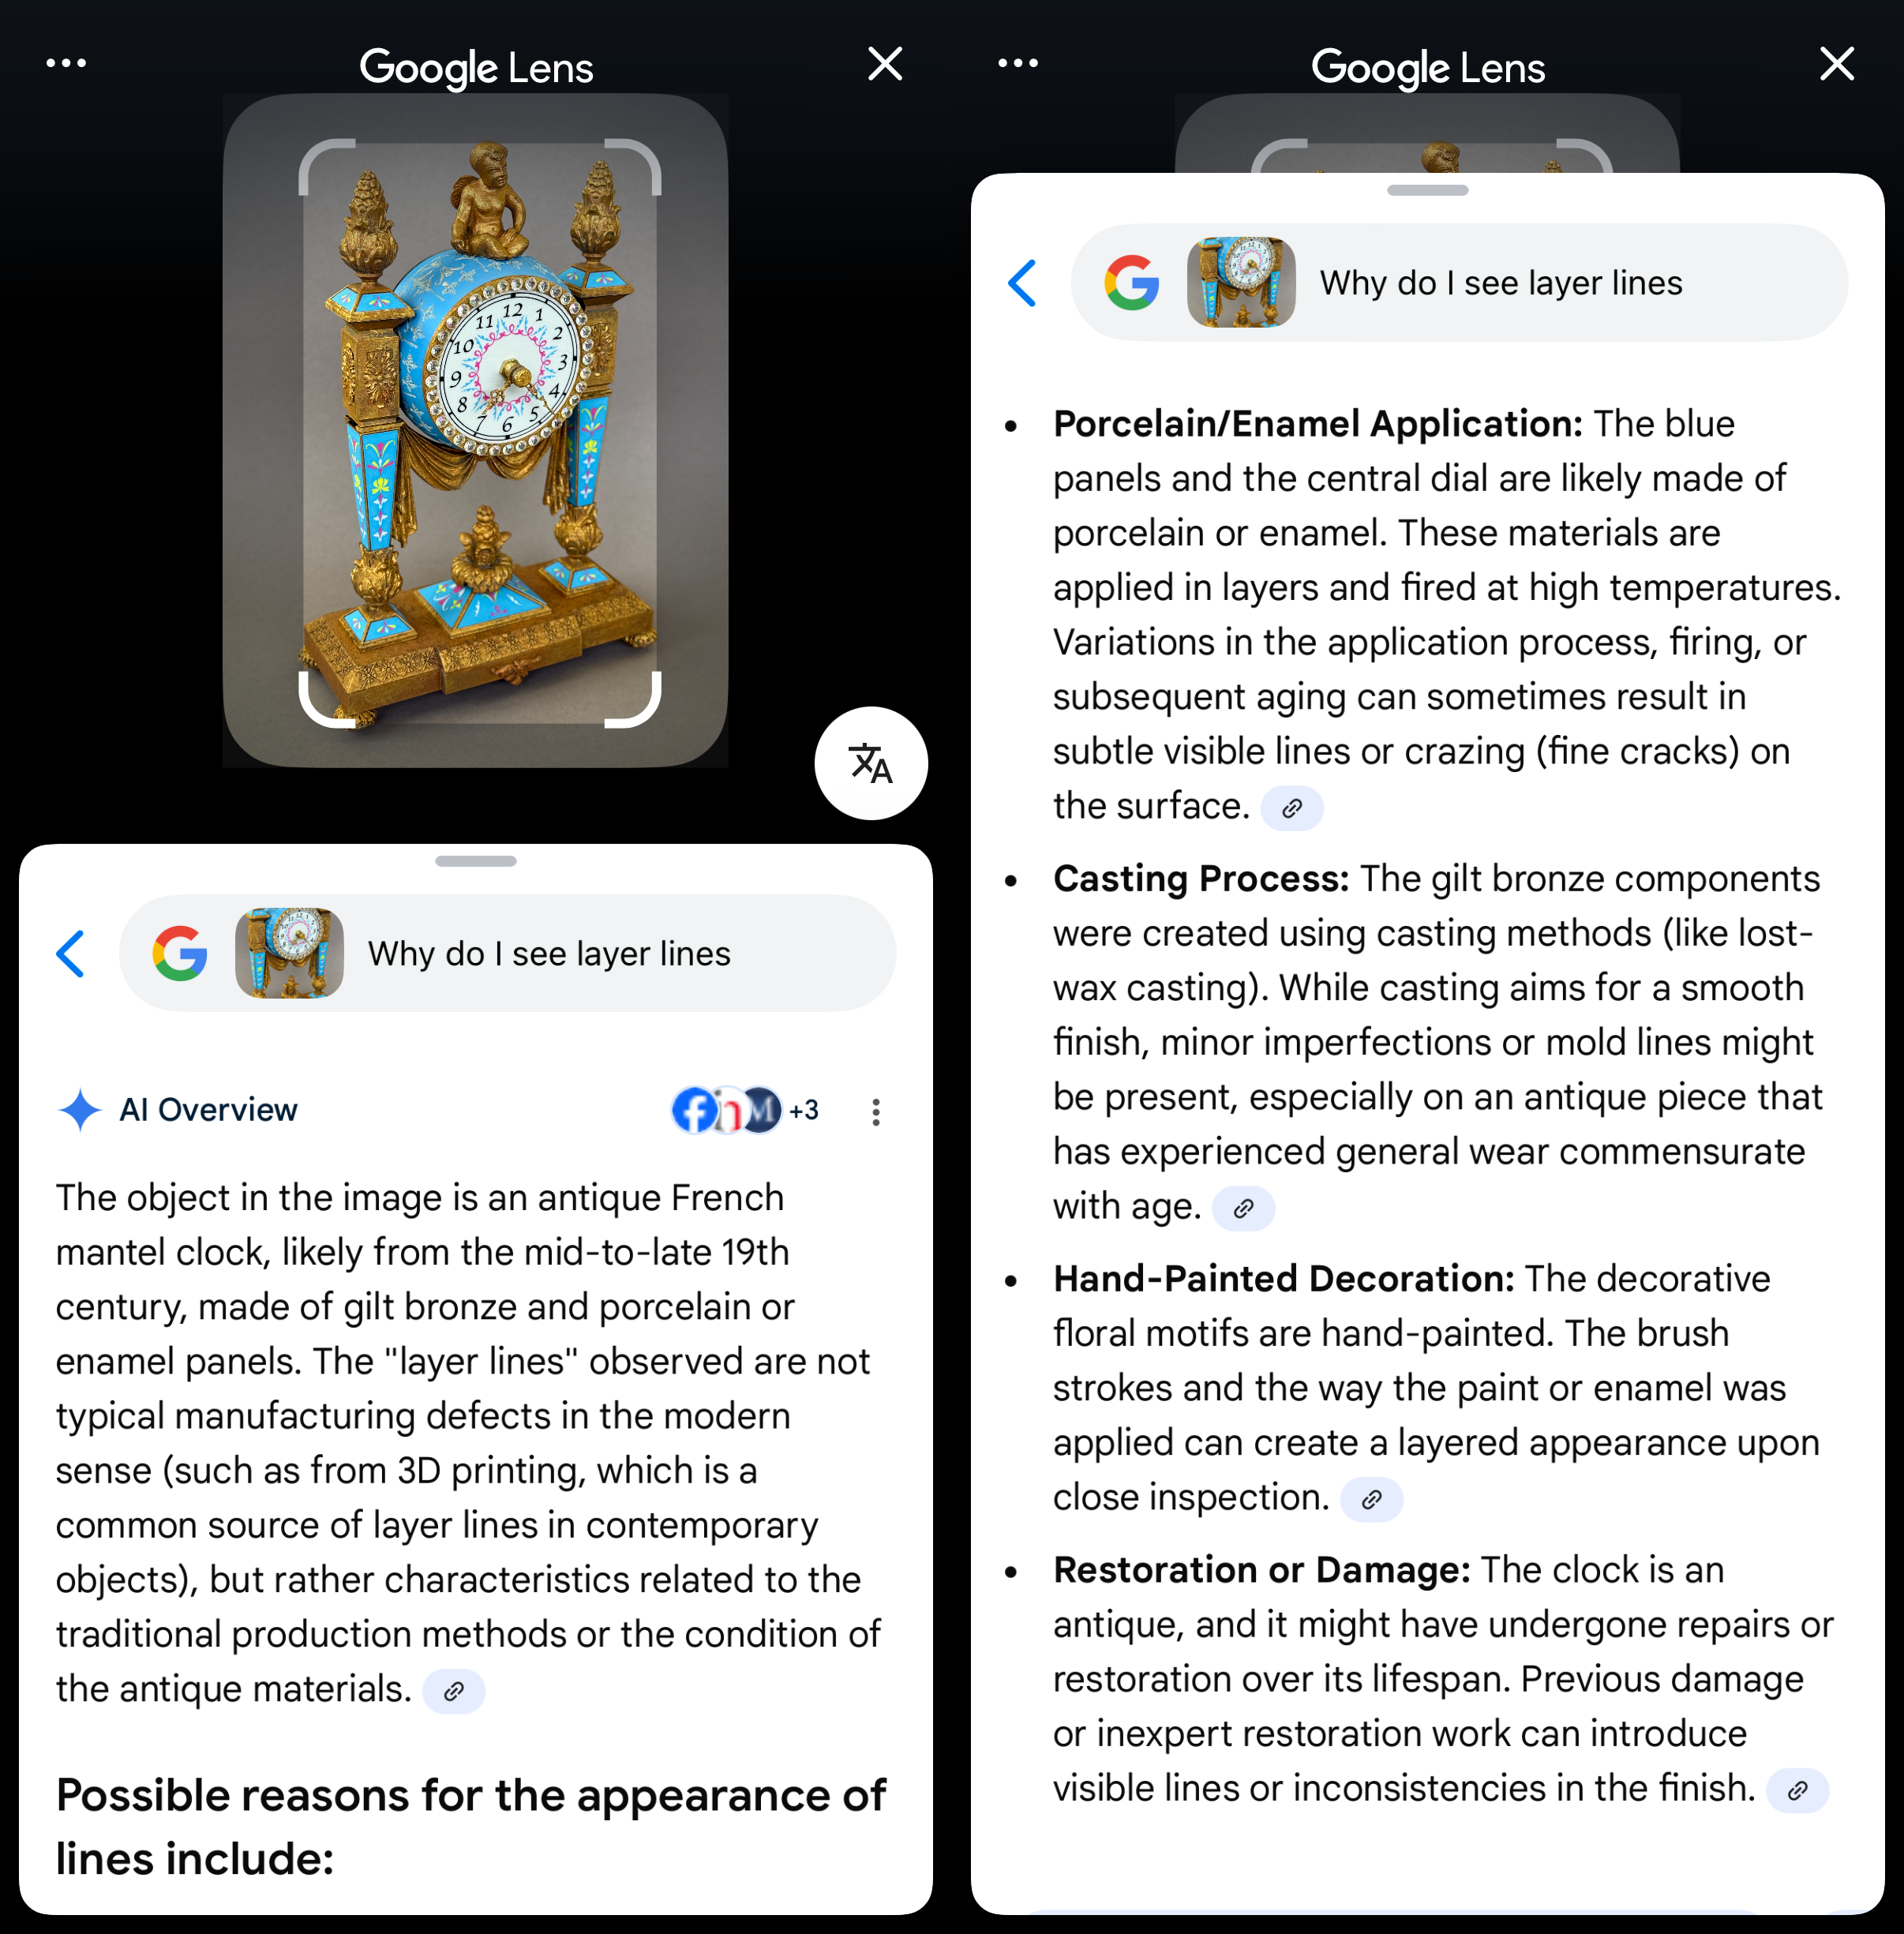
“These aren't the droids you're looking for” ~Obi-Wan Kenobi
Zero Compromise:
Fully Realized
This “pendule à portique” was designed as a thought experiment in "zero compromise," made meaningful by the presence of a single, deliberate exception. The only remaining concession (the champlevé detailing on the spherical clock body) exists not because the design falls short, but because current multi-material workflows still impose practical limits when ornament wraps continuously across complex curvature.
Every other element is resolved through design discipline rather than brute-force printing: inlays are oriented for surface fidelity, assemblies are split where craftsmanship demands it, and color changes are employed with intent rather than excess. The result is an object that reads as finished, not fabricated. So convincingly, in fact, that even image recognition systems reject it as a 3D print altogether.
In this context, the remaining compromise is not a flaw, but a marker: a clear boundary between what is already achievable through careful design and what a truly unconstrained multi-material system like Vortek is poised to eliminate next.