Você está no 3DFinder
Buscamos em Thingiverse, MakerWorld e Printables ao mesmo tempo para te dar o melhor de cada uma.
Descrição
Experience the Infinite
Transform your space with this stunning 3D-printed LED Infinity Cube that creates an endless tunnel of light that reacts to music and sound in real-time. Watch as sound waves become visible art, with cascading reflections that seem to stretch into another dimension.
What Makes This Special
🔊 Sound Reactive Magic
- Built-in sound sensor responds to music, voice, or ambient noise
- Powered by WLED firmware with Sound Reactive effects library
♾️ True Infinity Effect
- Six mirrored acrylic panels create an endless reflection tunnel
- Hypnotic depth that seems to go on forever
- Stunning from every angle
🎨 Endless Customization
- Full WLED control via WiFi (web interface + mobile app)
- 100+ built-in effects and patterns
- Adjustable brightness, speed, and color palettes
- Create your own custom effects
- Sync multiple cubes together
- Connect the cube to your home automation
👉 Words of warning: This project is not the simplest, although it is worth the effort. Steady hands and a lot of patience are required when assembling and soldering. Also, the ESP8266 microcontroller and audio sensor I used are a bit dated. A more modern ESP32 microcontroller is recommended to get the most out of WLED. STEP -models are included if you would like to adapt the base to support other components.
Perfect For
✅ Music lovers and audiophiles
✅ Streamers and content creators (amazing background piece!)
✅ Desk/shelf decoration with WOW factor
✅ Gift for tech enthusiasts
✅ Learning WLED and LED programming
✅ Parties and events
Three Ready-to-Print Profiles Available:
- Model for Home Is Where The Smart Is WLED Controller with USB-C – No soldering required to the controller. Features an onboard microphone. WLED Preinstalled. For easy installs.
- Model for Wemos D1 Mini (ESP8266) and Waveshare Sound Sensor – Not recommended by WLED.
- Model with no holes in the Base – This model offers maximum internal space for components. Requires drilling for power wire installation.
Additional components required
- Addressable 5mm wide LED Strip (60 LEDs/m), WS2812B or similar
- Power brick (Optional, depending on the LED Power requirement)
- Buck converter to 5V (Optional, depending on the power brick output voltage)
- Male barrel jack connector for the power brick
- 1000 μF Capacitor or similar (Optional)
- Basic wiring (26-28 AWG or similar)
- Two-way mirror or acrylic, 3mm thickness (300 x 400mm sheet)
- M2x8 Screw (or similar) for the microcontroller and sound sensor, 4pcs
- Countersunk screws for the lid, 3pcs
Assembly instructions
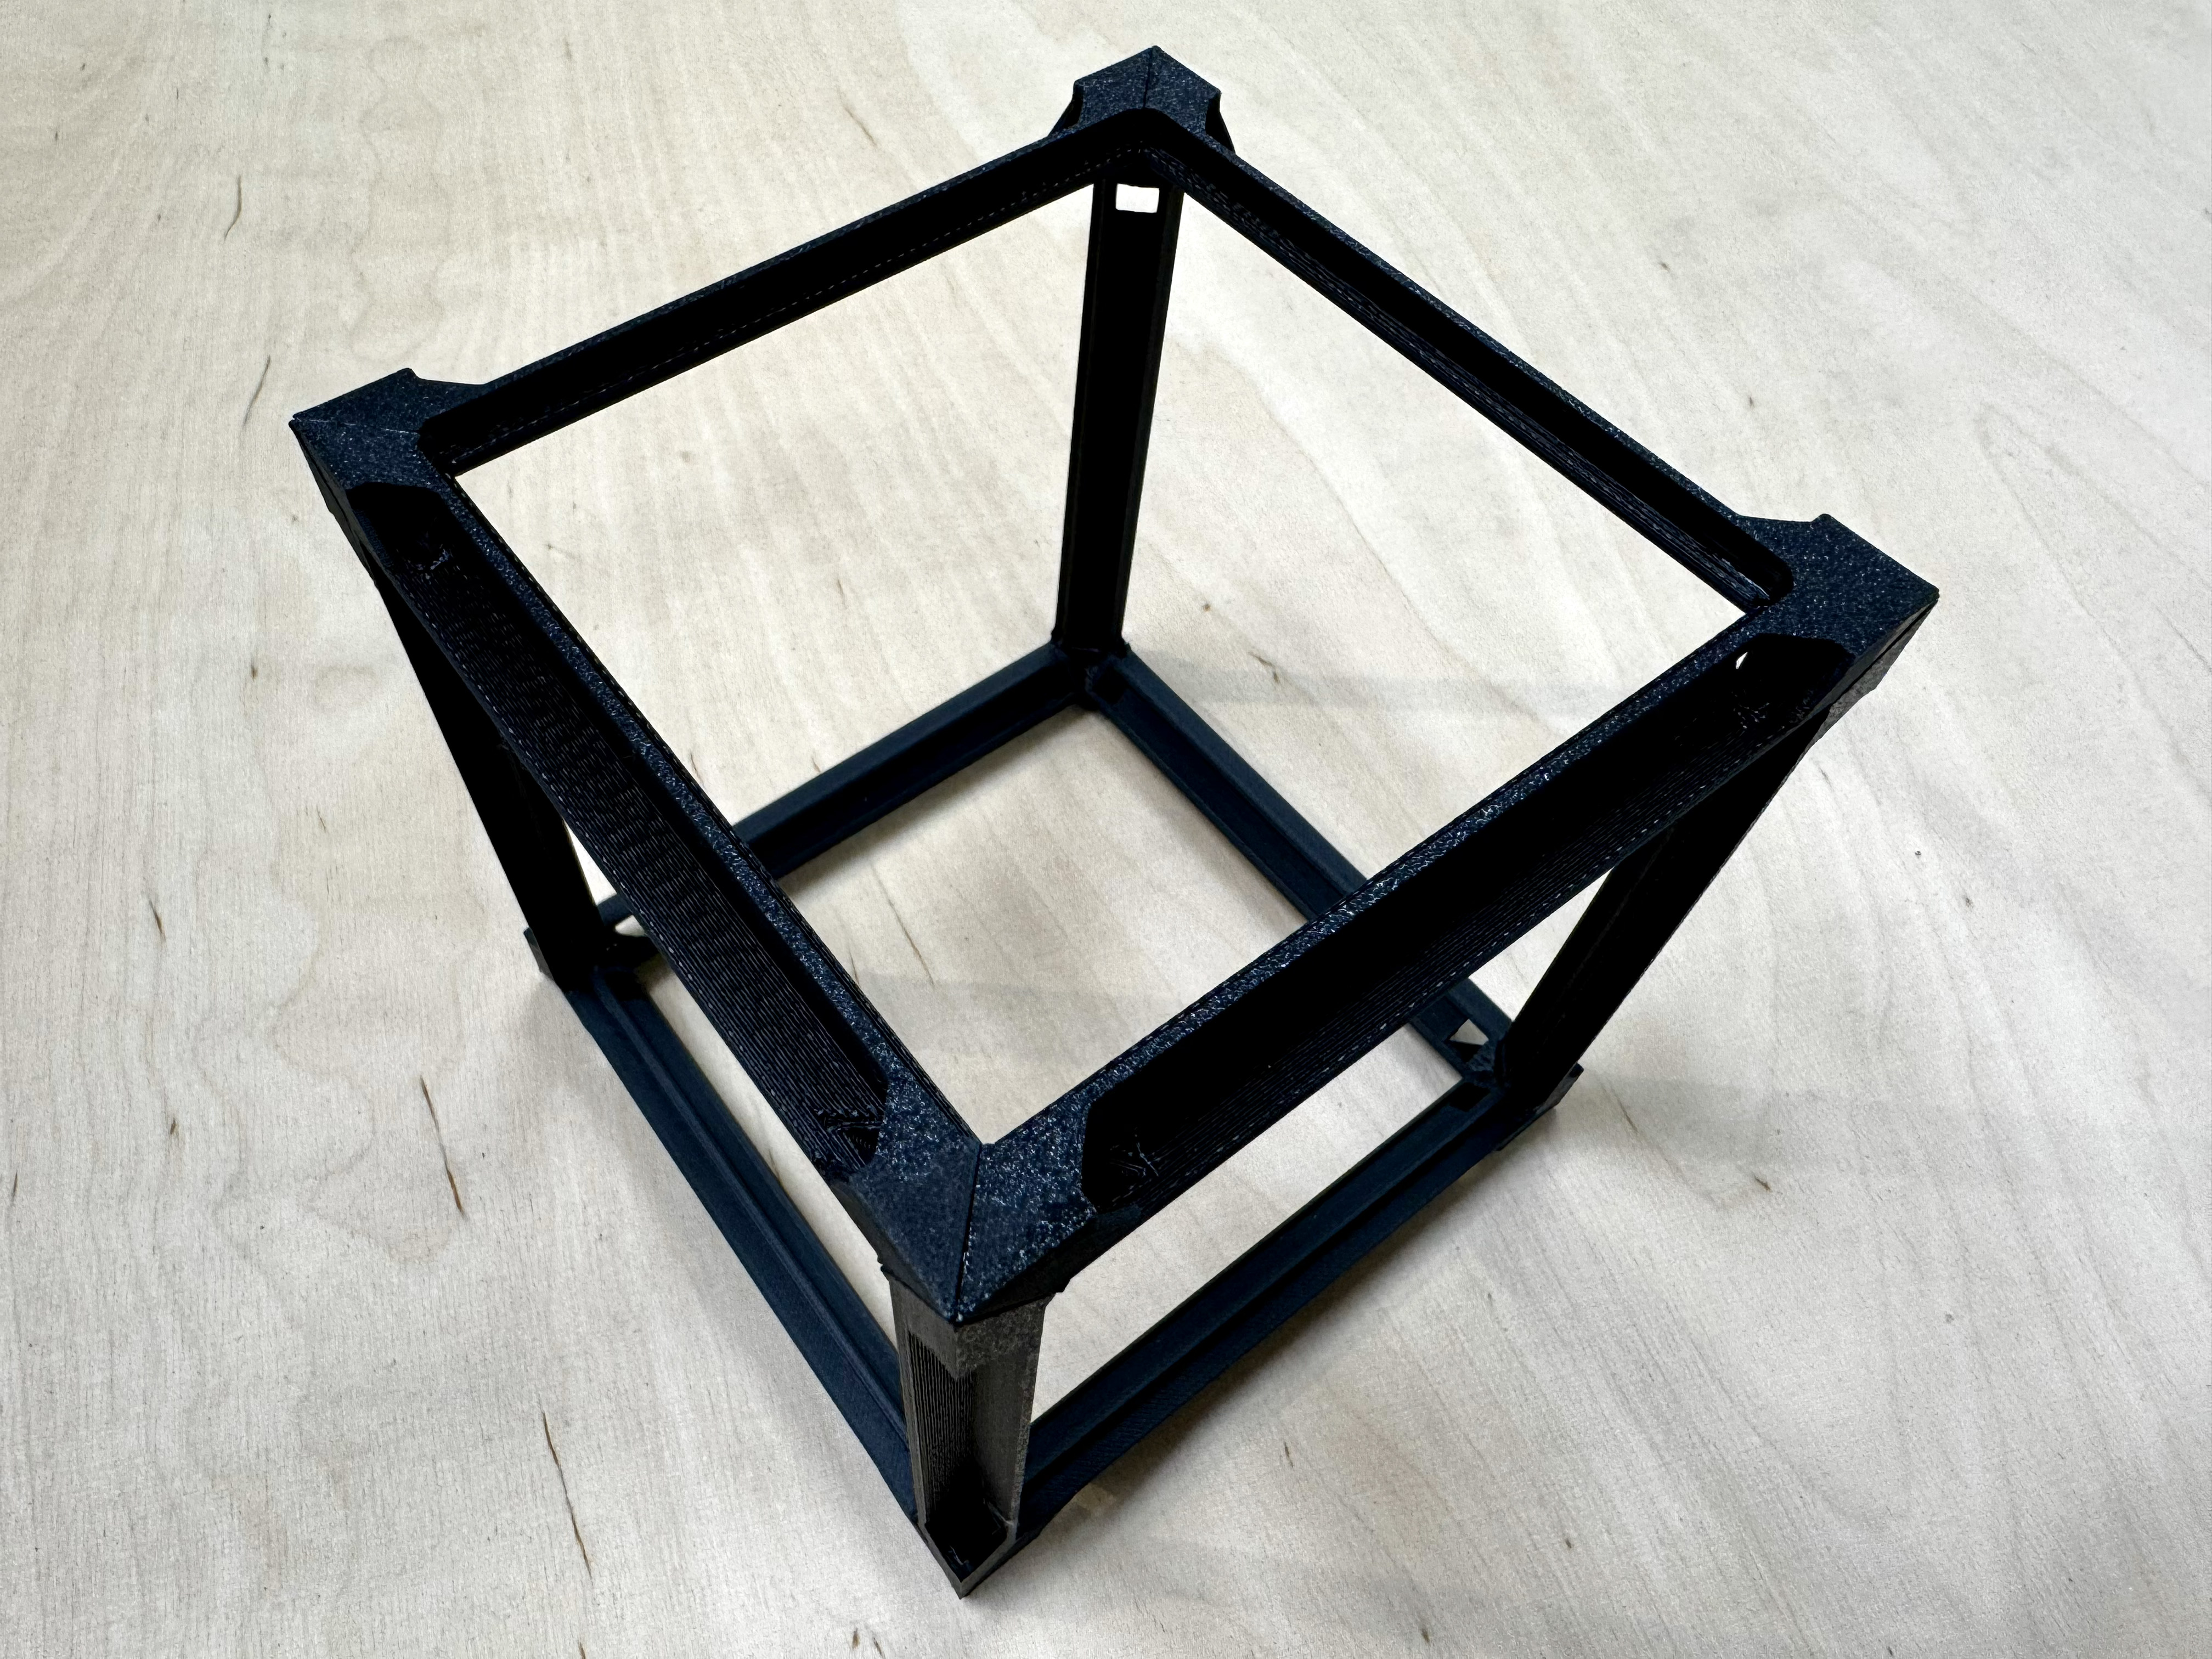
Assemble the 9+3 parts of the frame using super glue. Note the three parts that have an open end to allow the wiring to go to the base
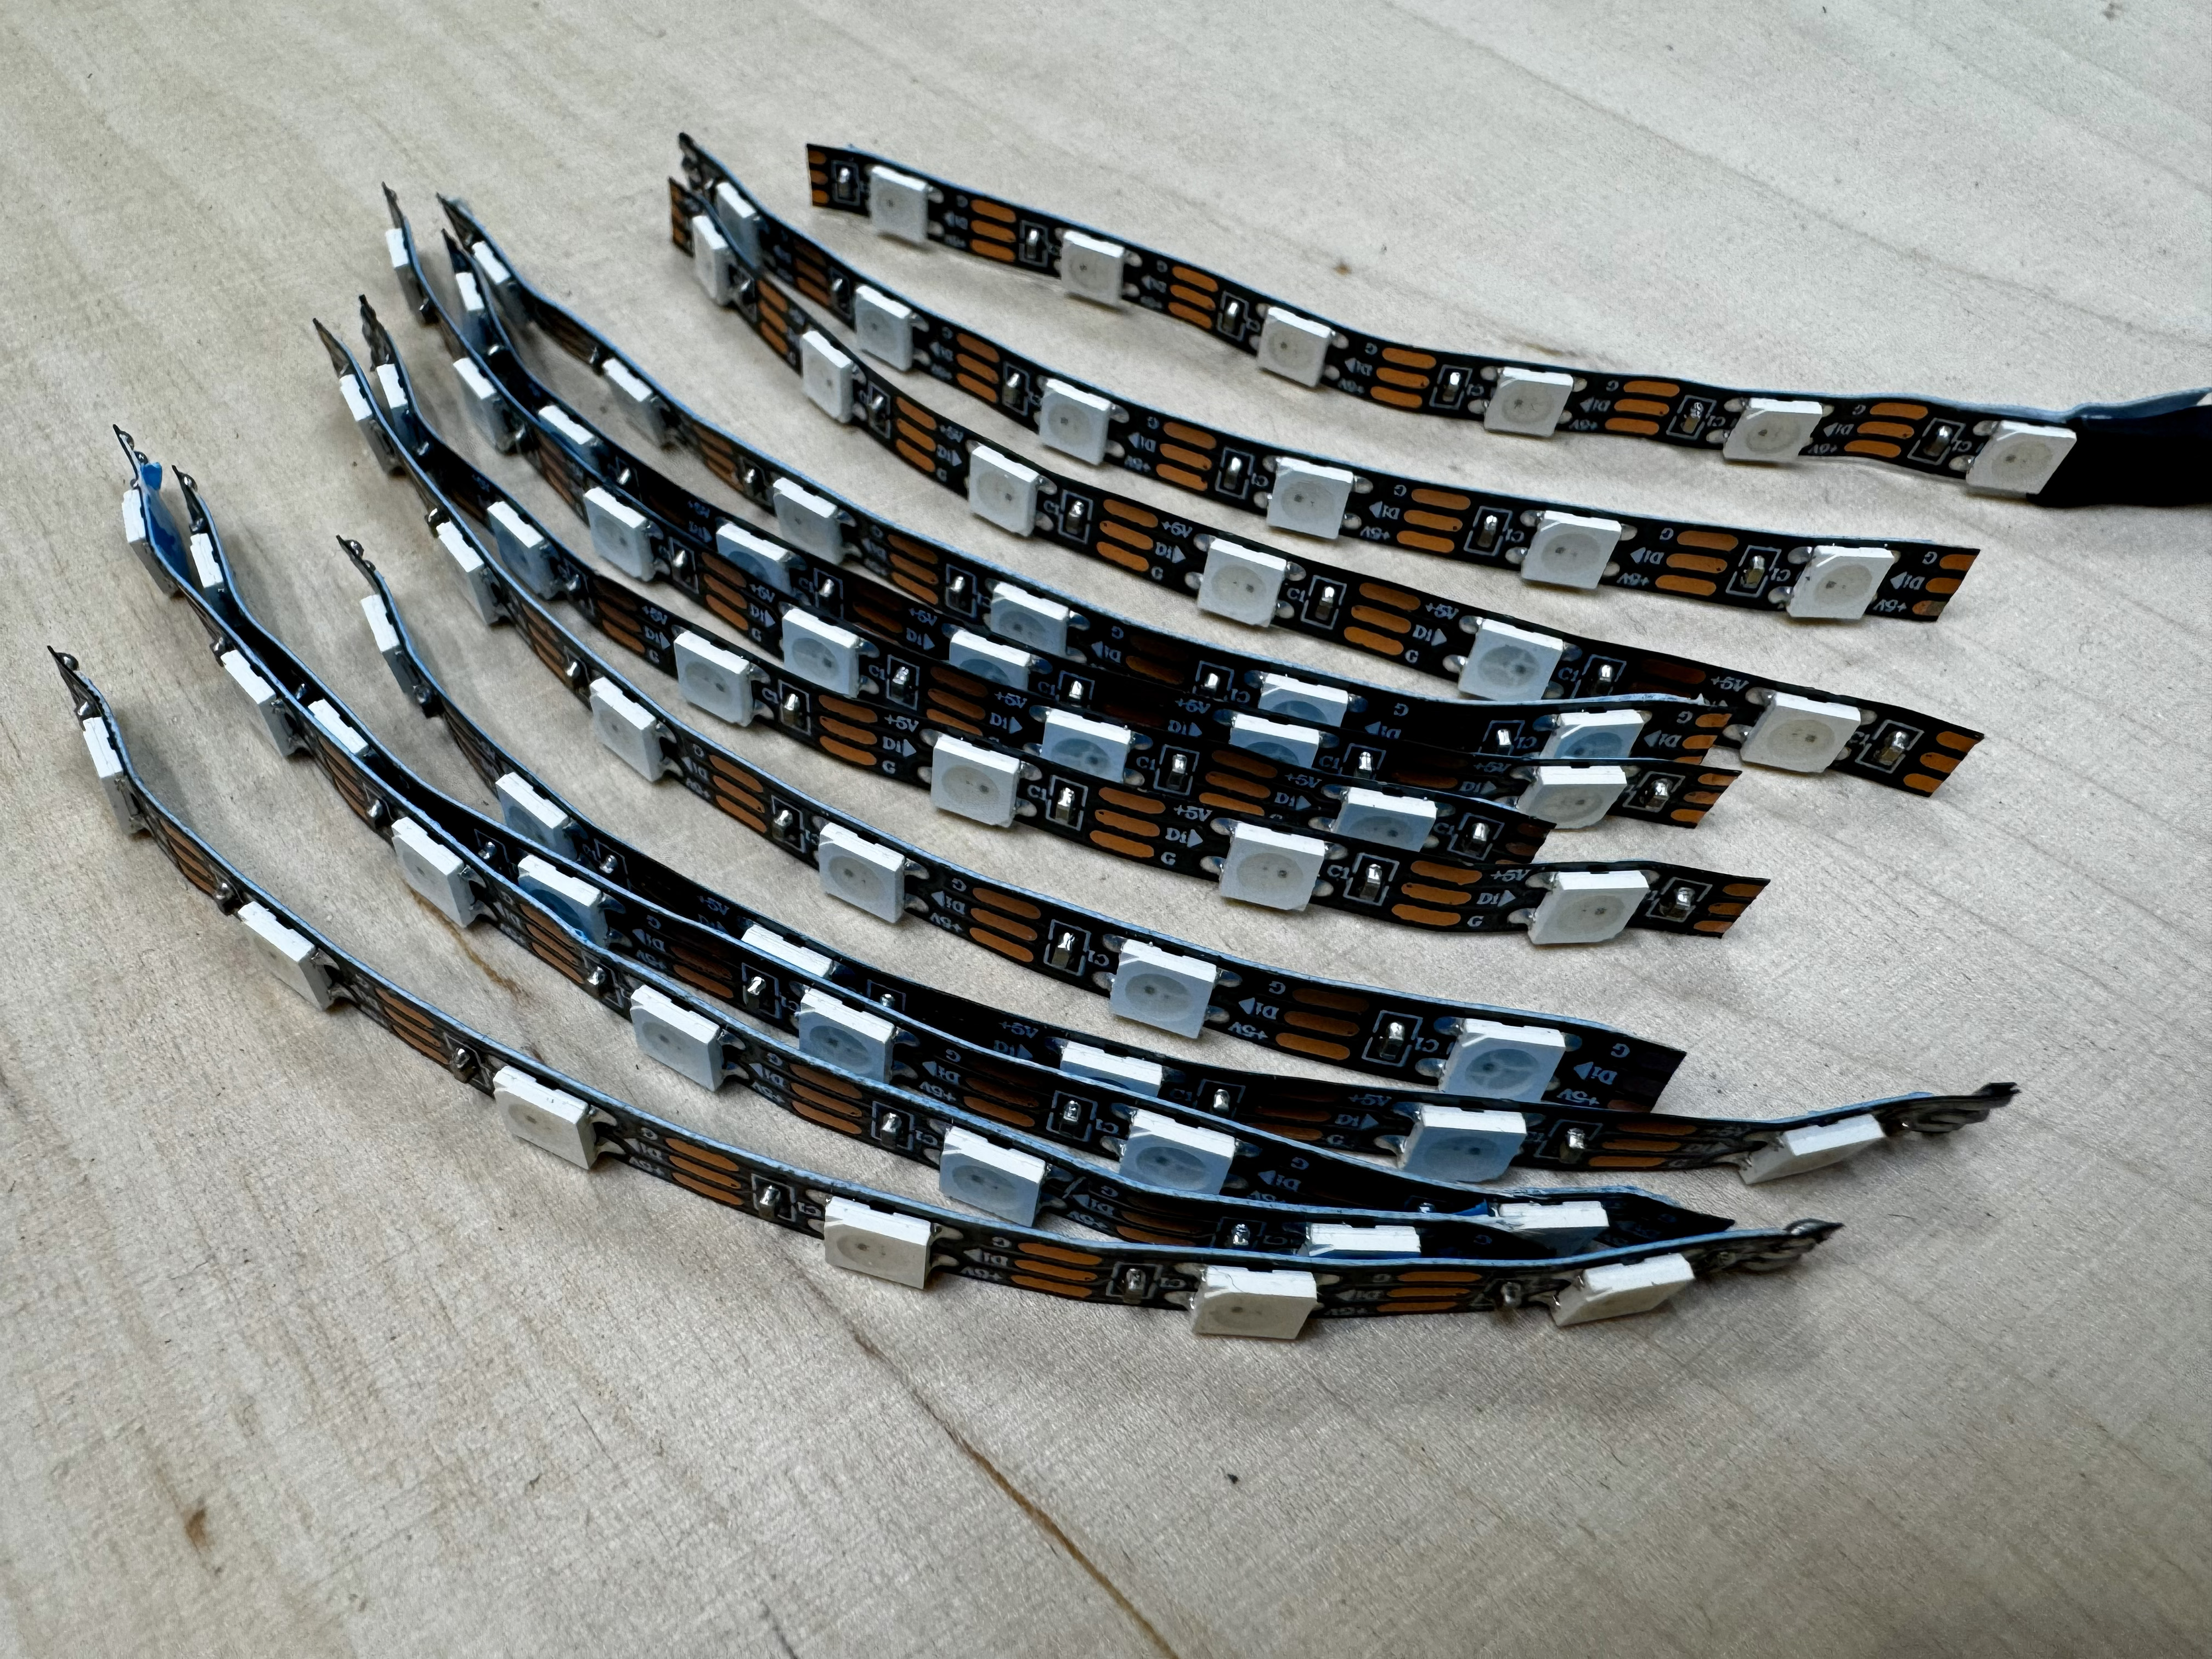
Cut the LED strip into 12 pieces, 100mm in length (6 LEDs in each)
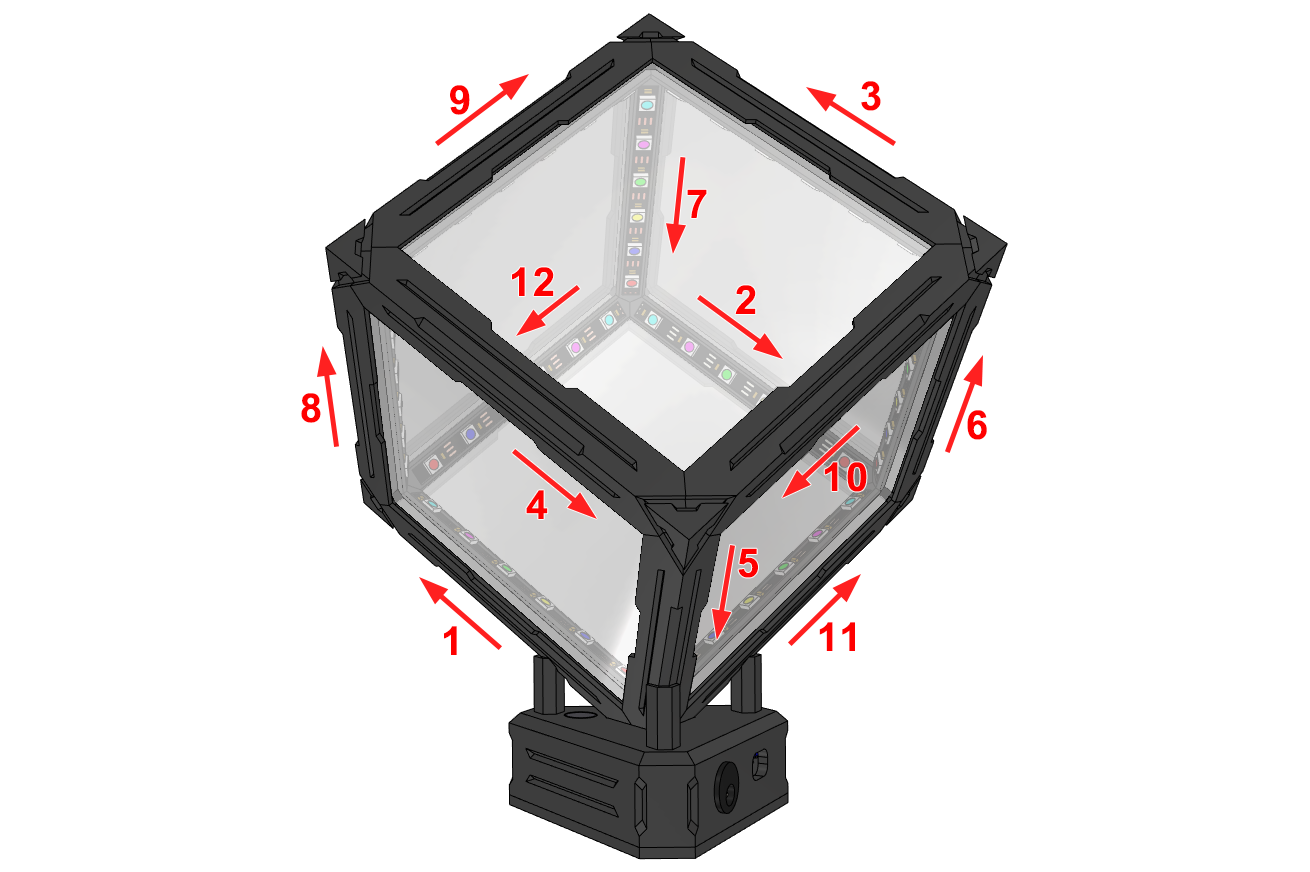
Place the LED strips into the slots inside the frame. Connect them by soldering wires between the strips to form a chain that goes through all 12 strips. Use the wiring order I used (below), or you can come up with your own. Use the channels behind the strips to hide the wiring between the strips. Note that the data wire has a direction in the strips.
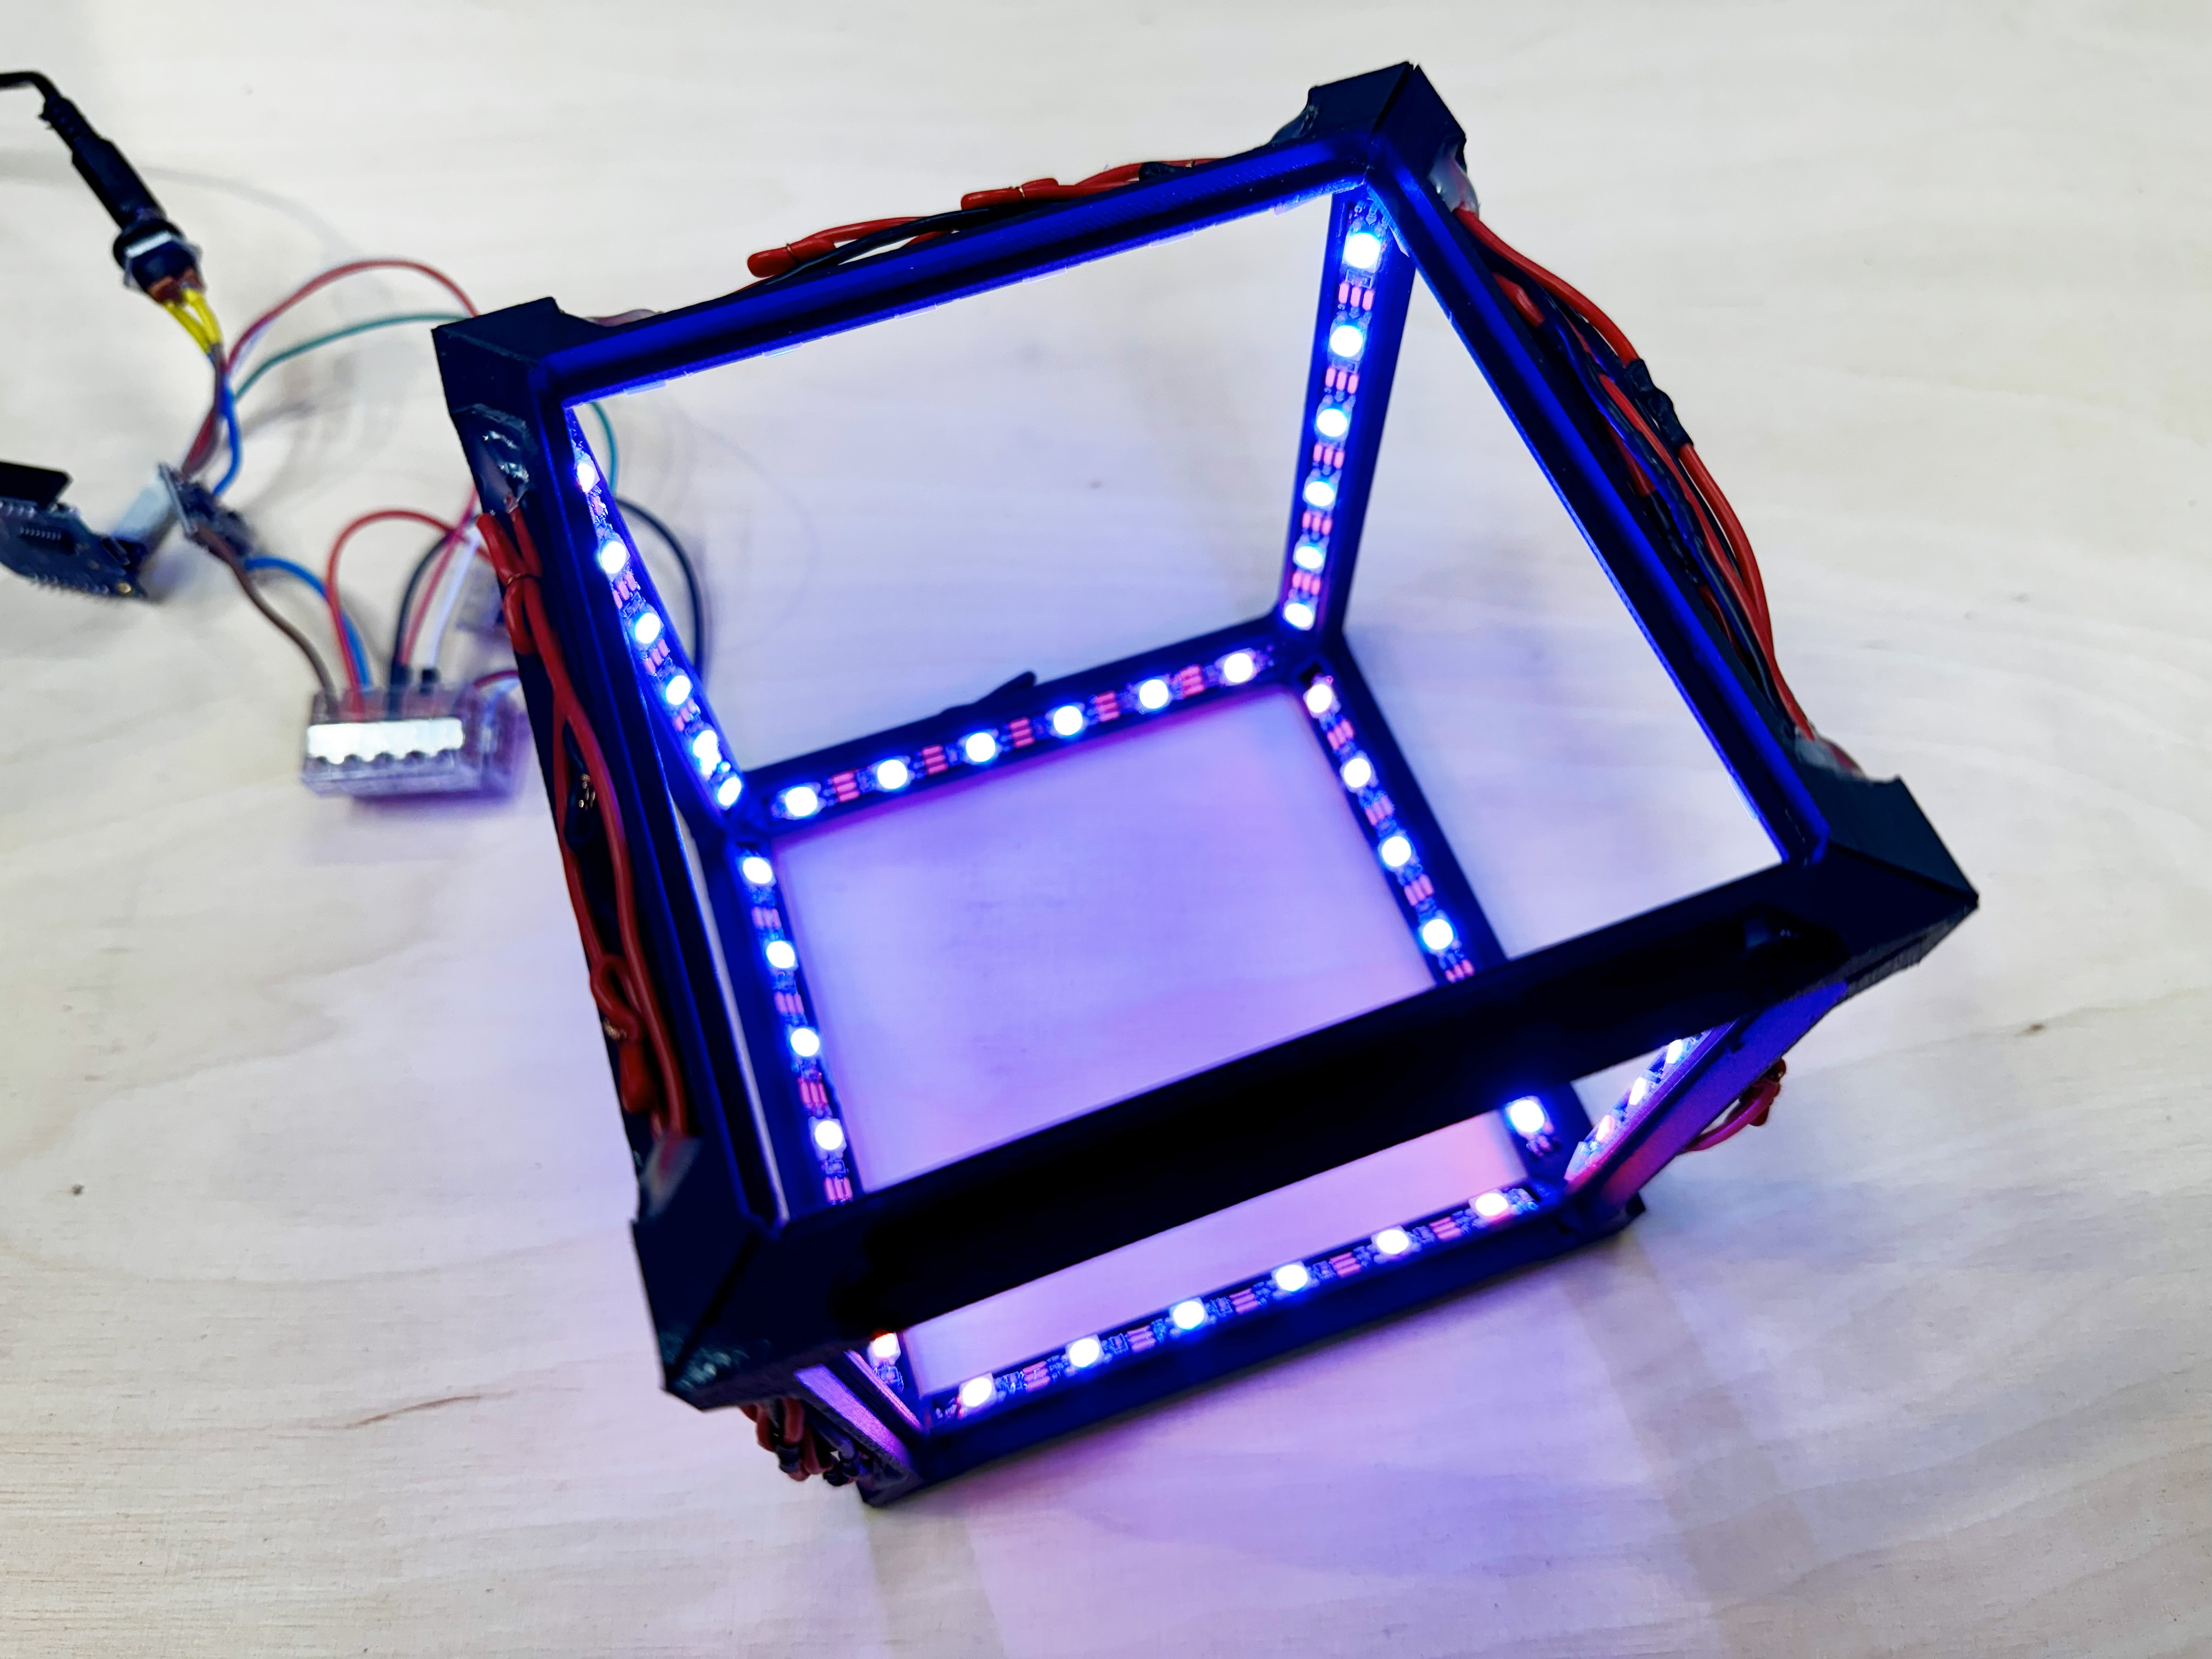
Cut the acrylic mirror sheet into 6 pieces of 105mm × 105mm. Score with a sharp utility knife multiple times using a ruler, then snap by bending firmly
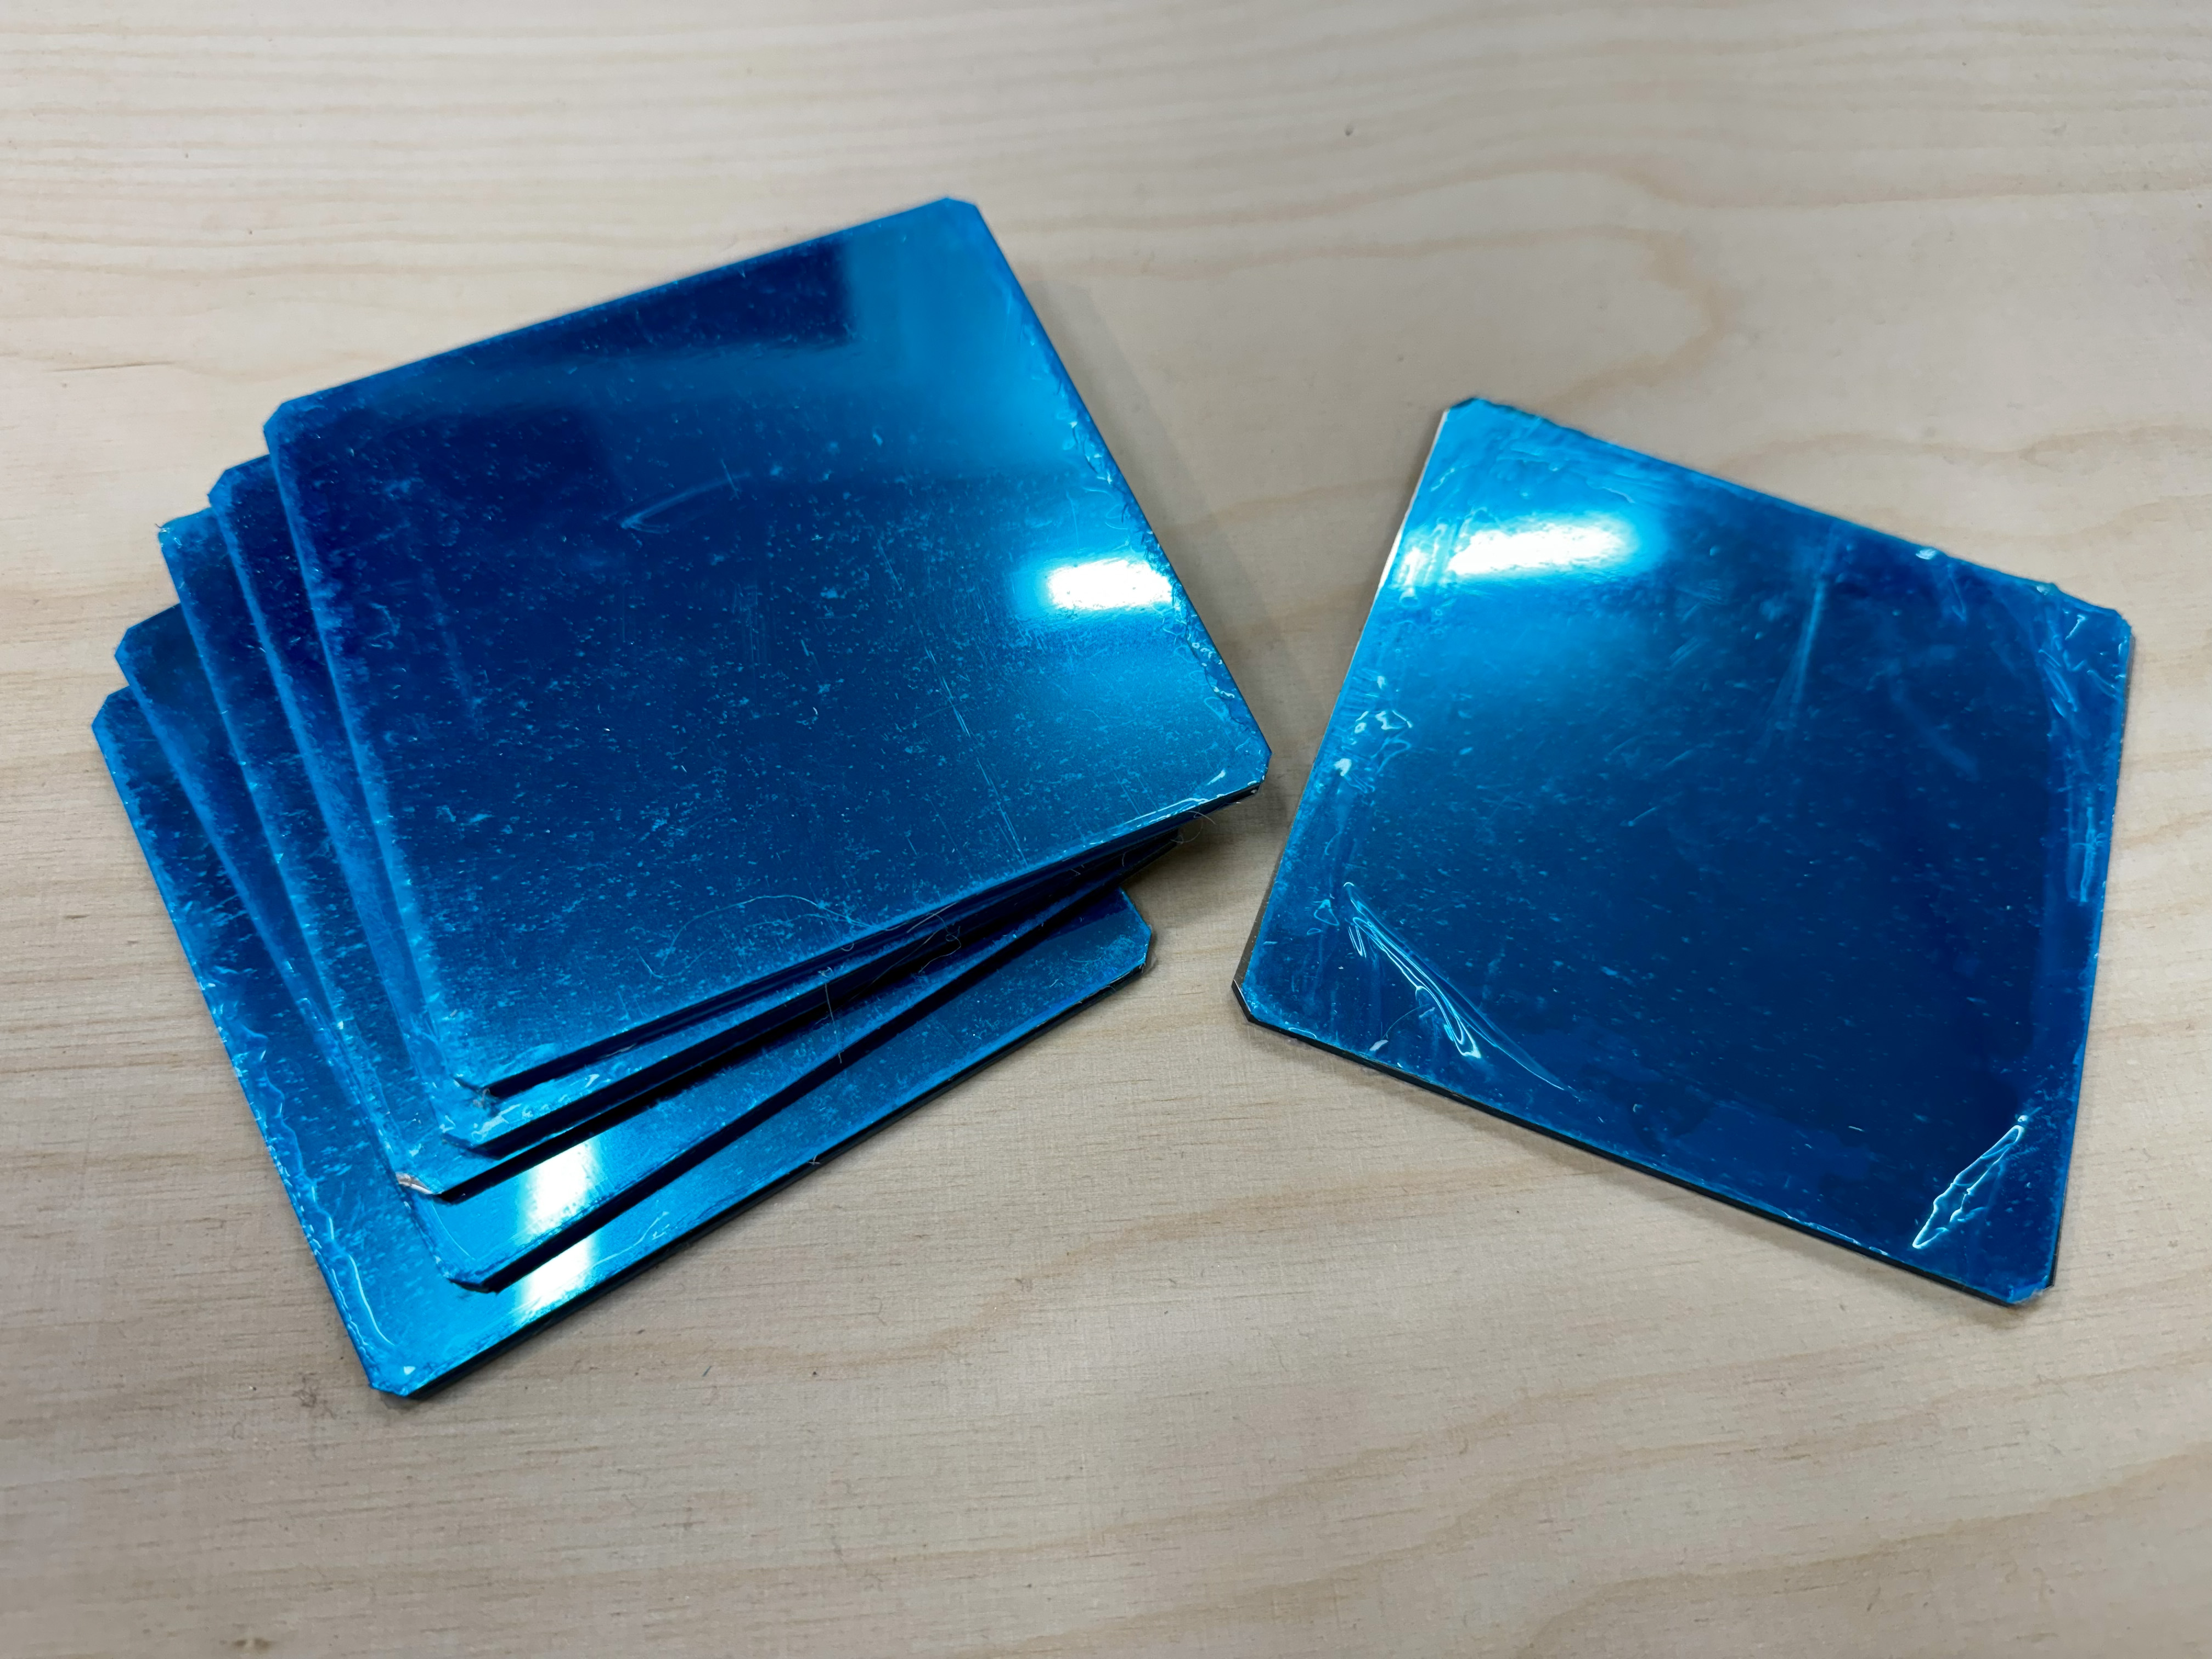
Place the two-way mirrors in the openings
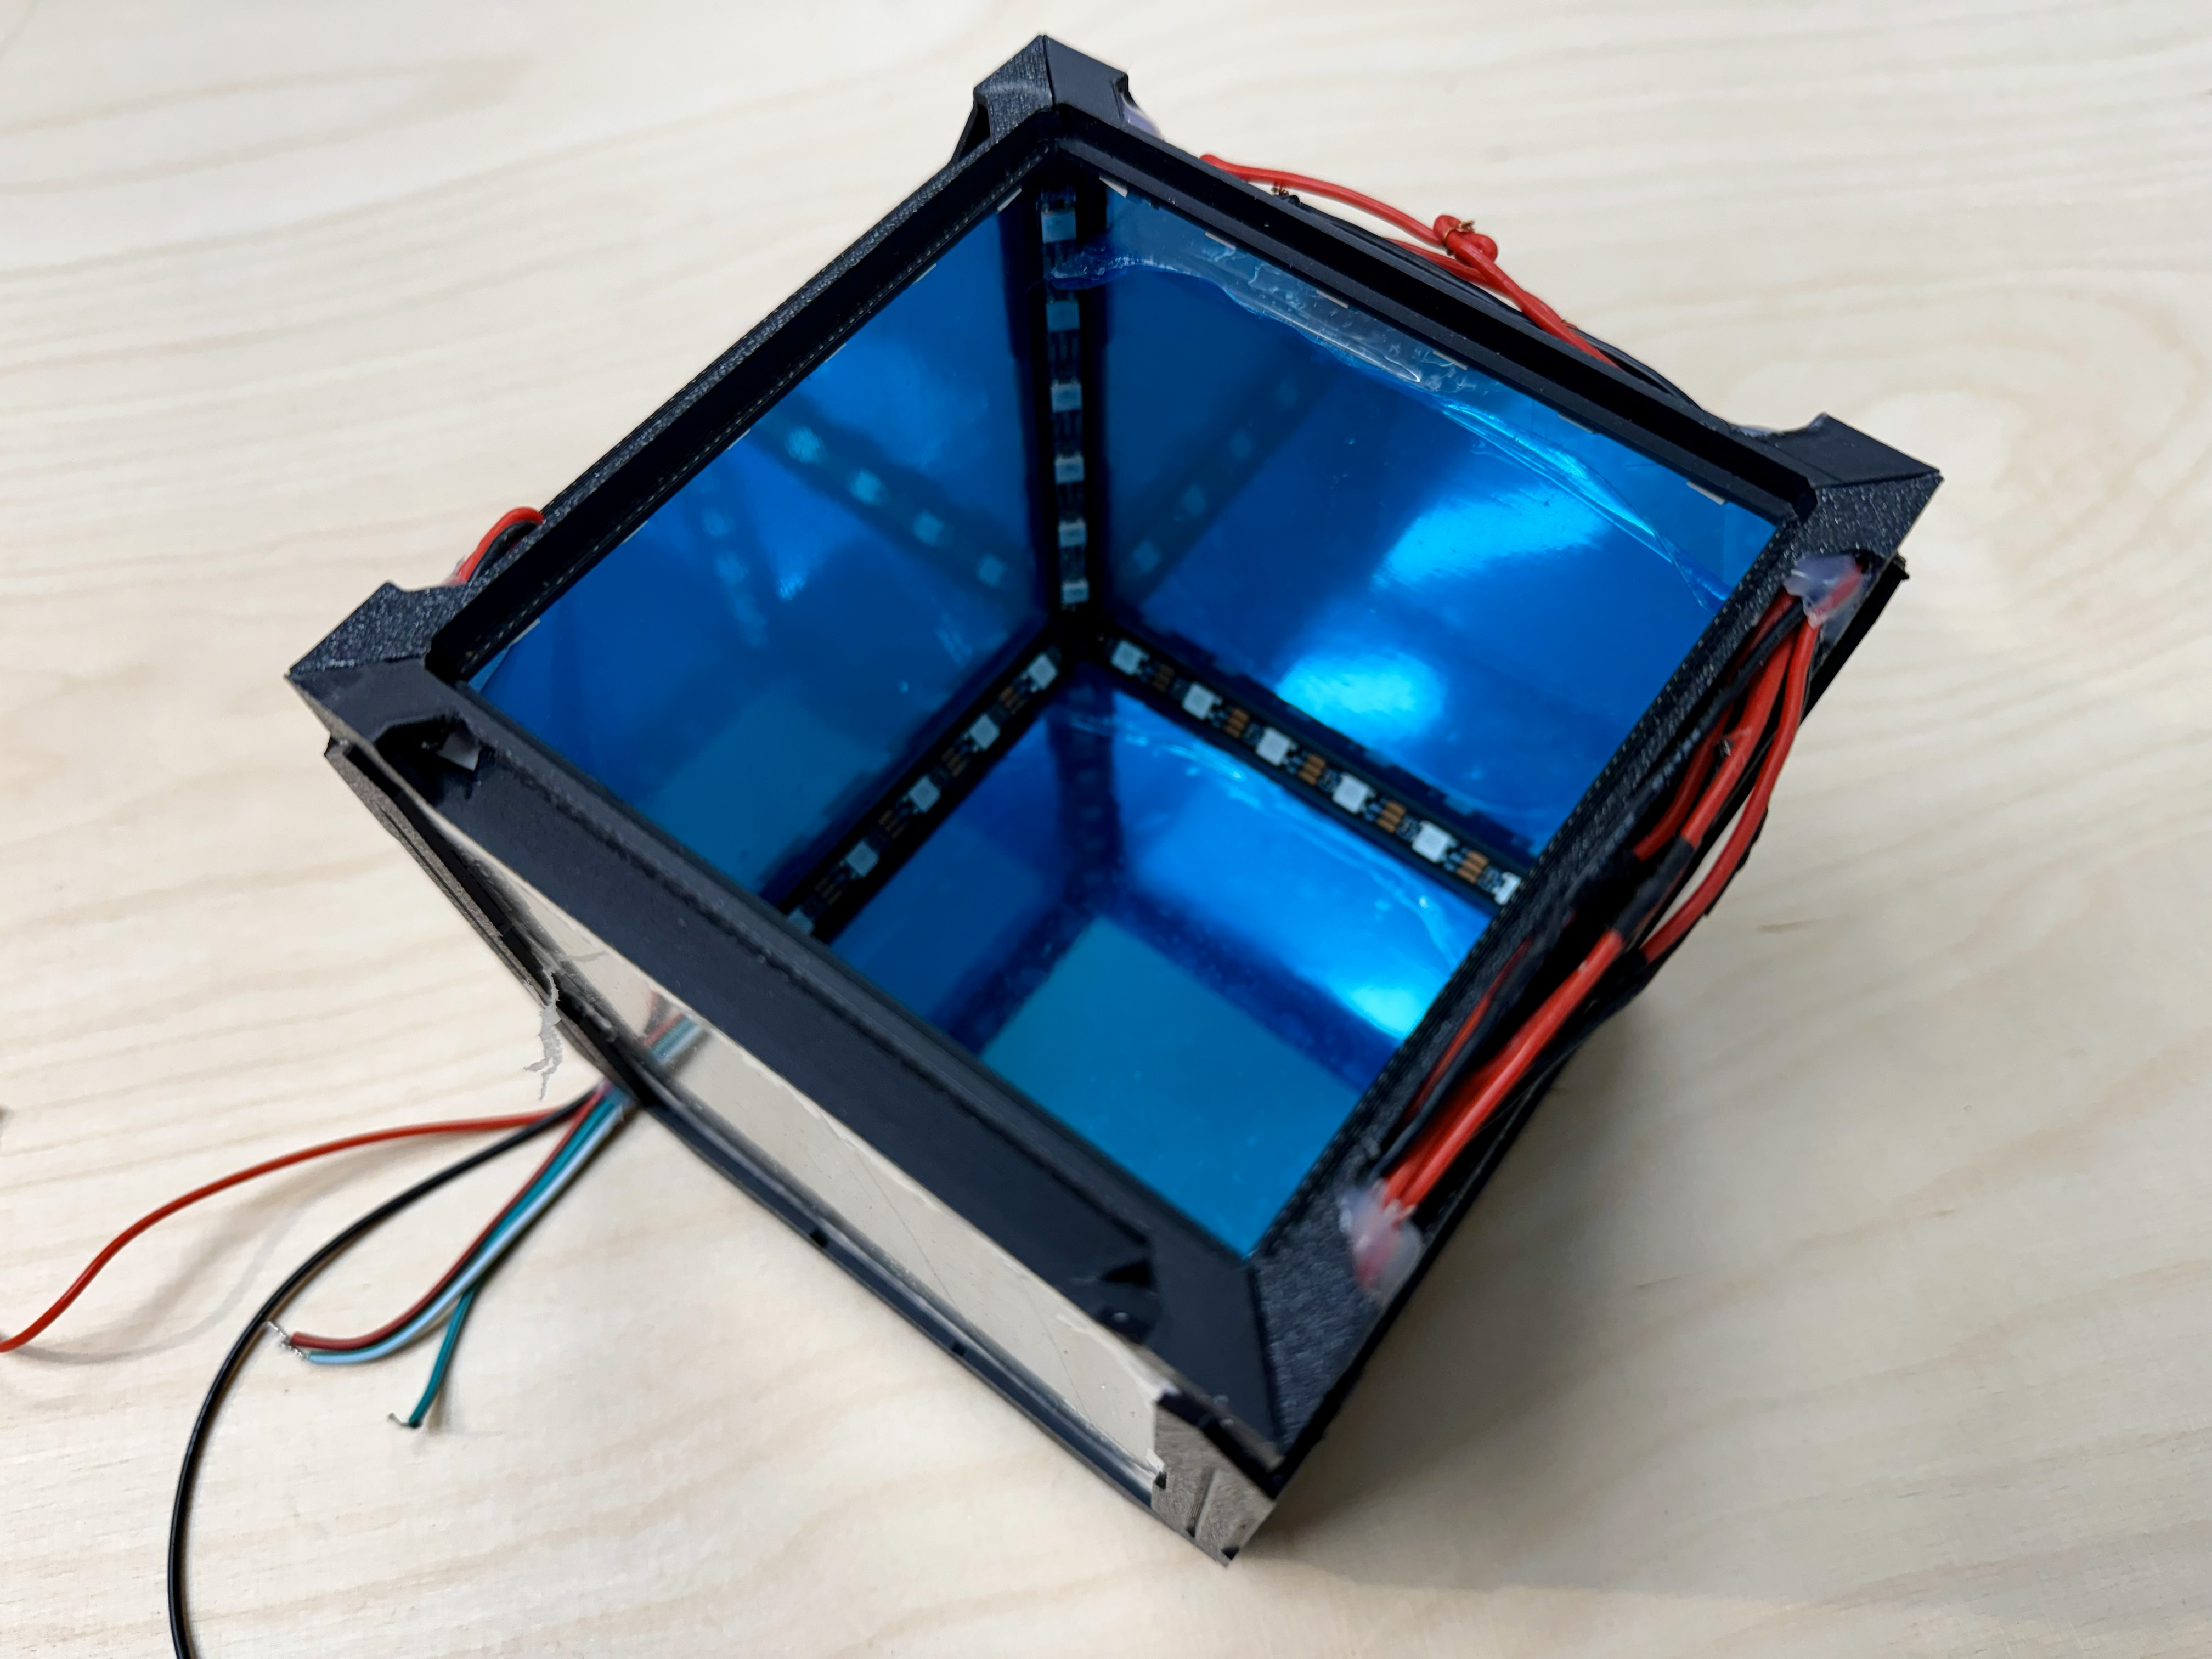
Use super glue to attach the Corners and Covers to hide the wiring and to lock the mirrors in place. Glue the frame to the base
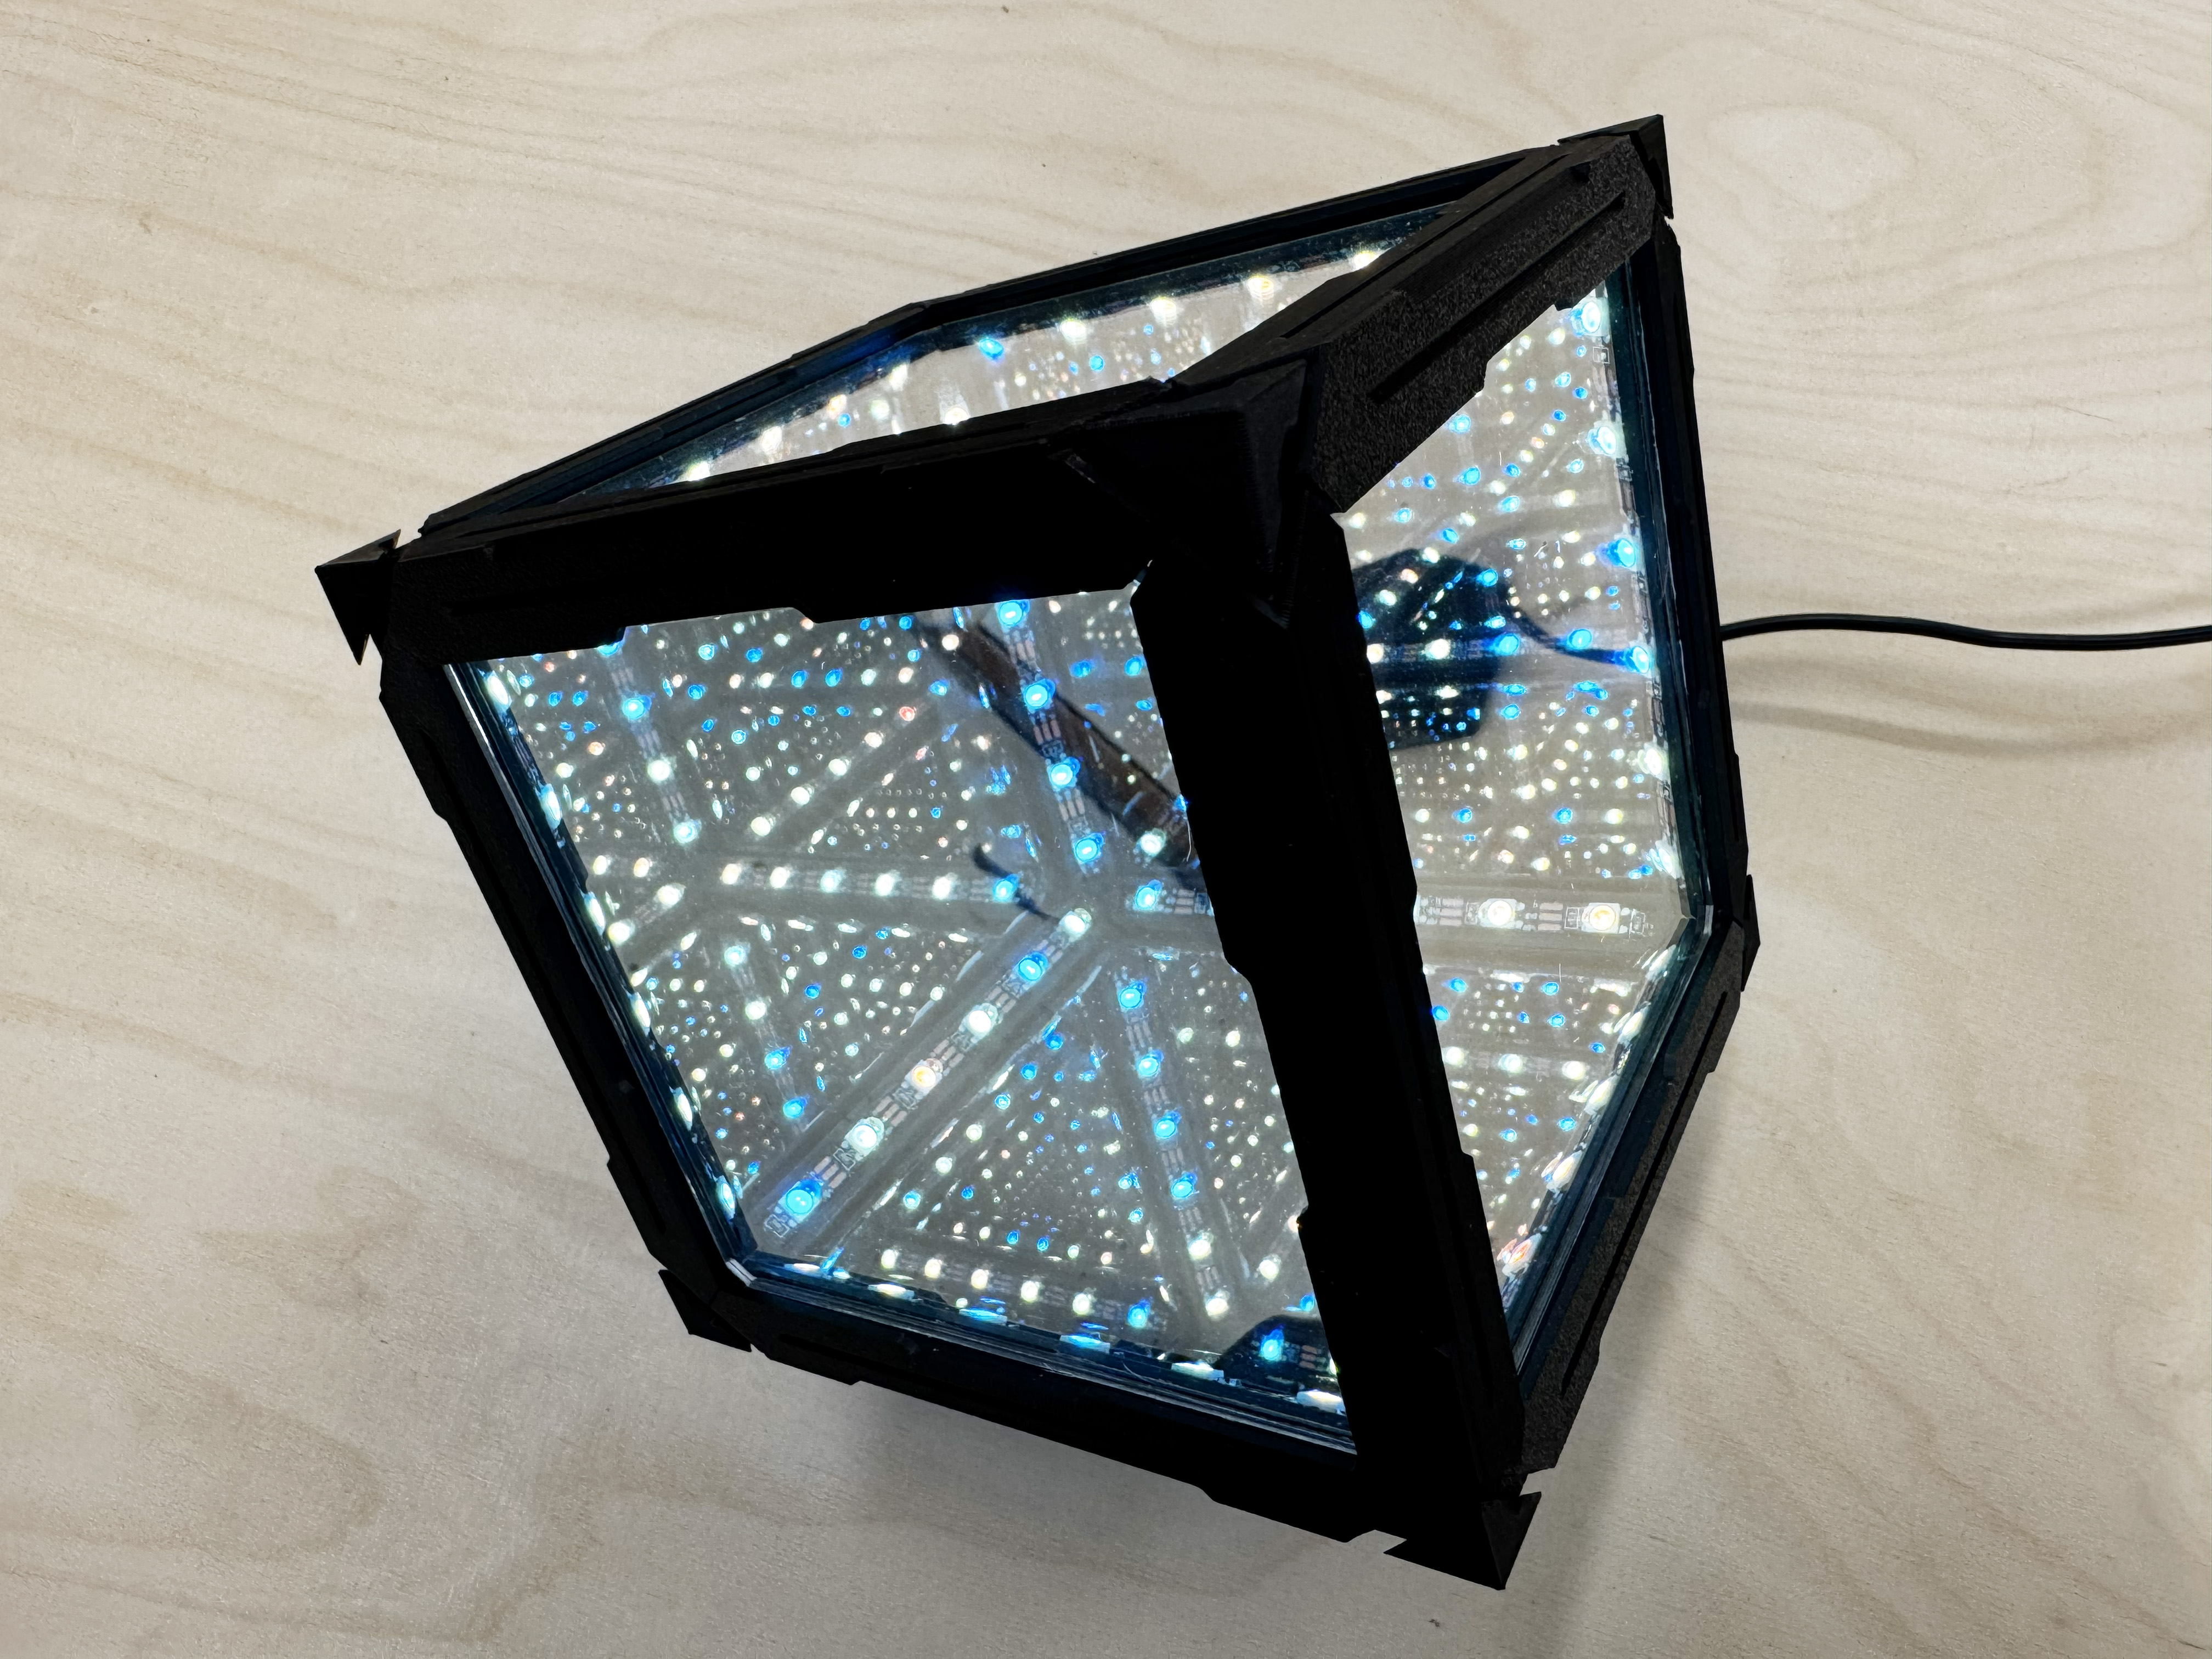
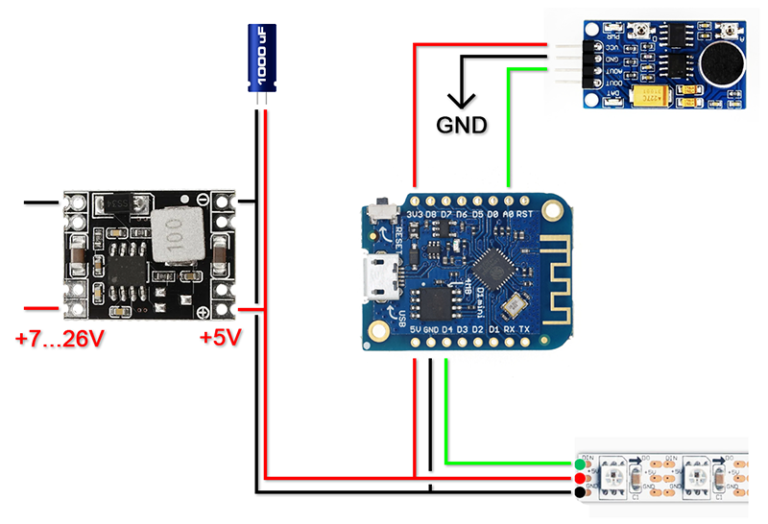
Install the controller and optional components in the base. Wiring if using the Wemos D1 and sound sensor:
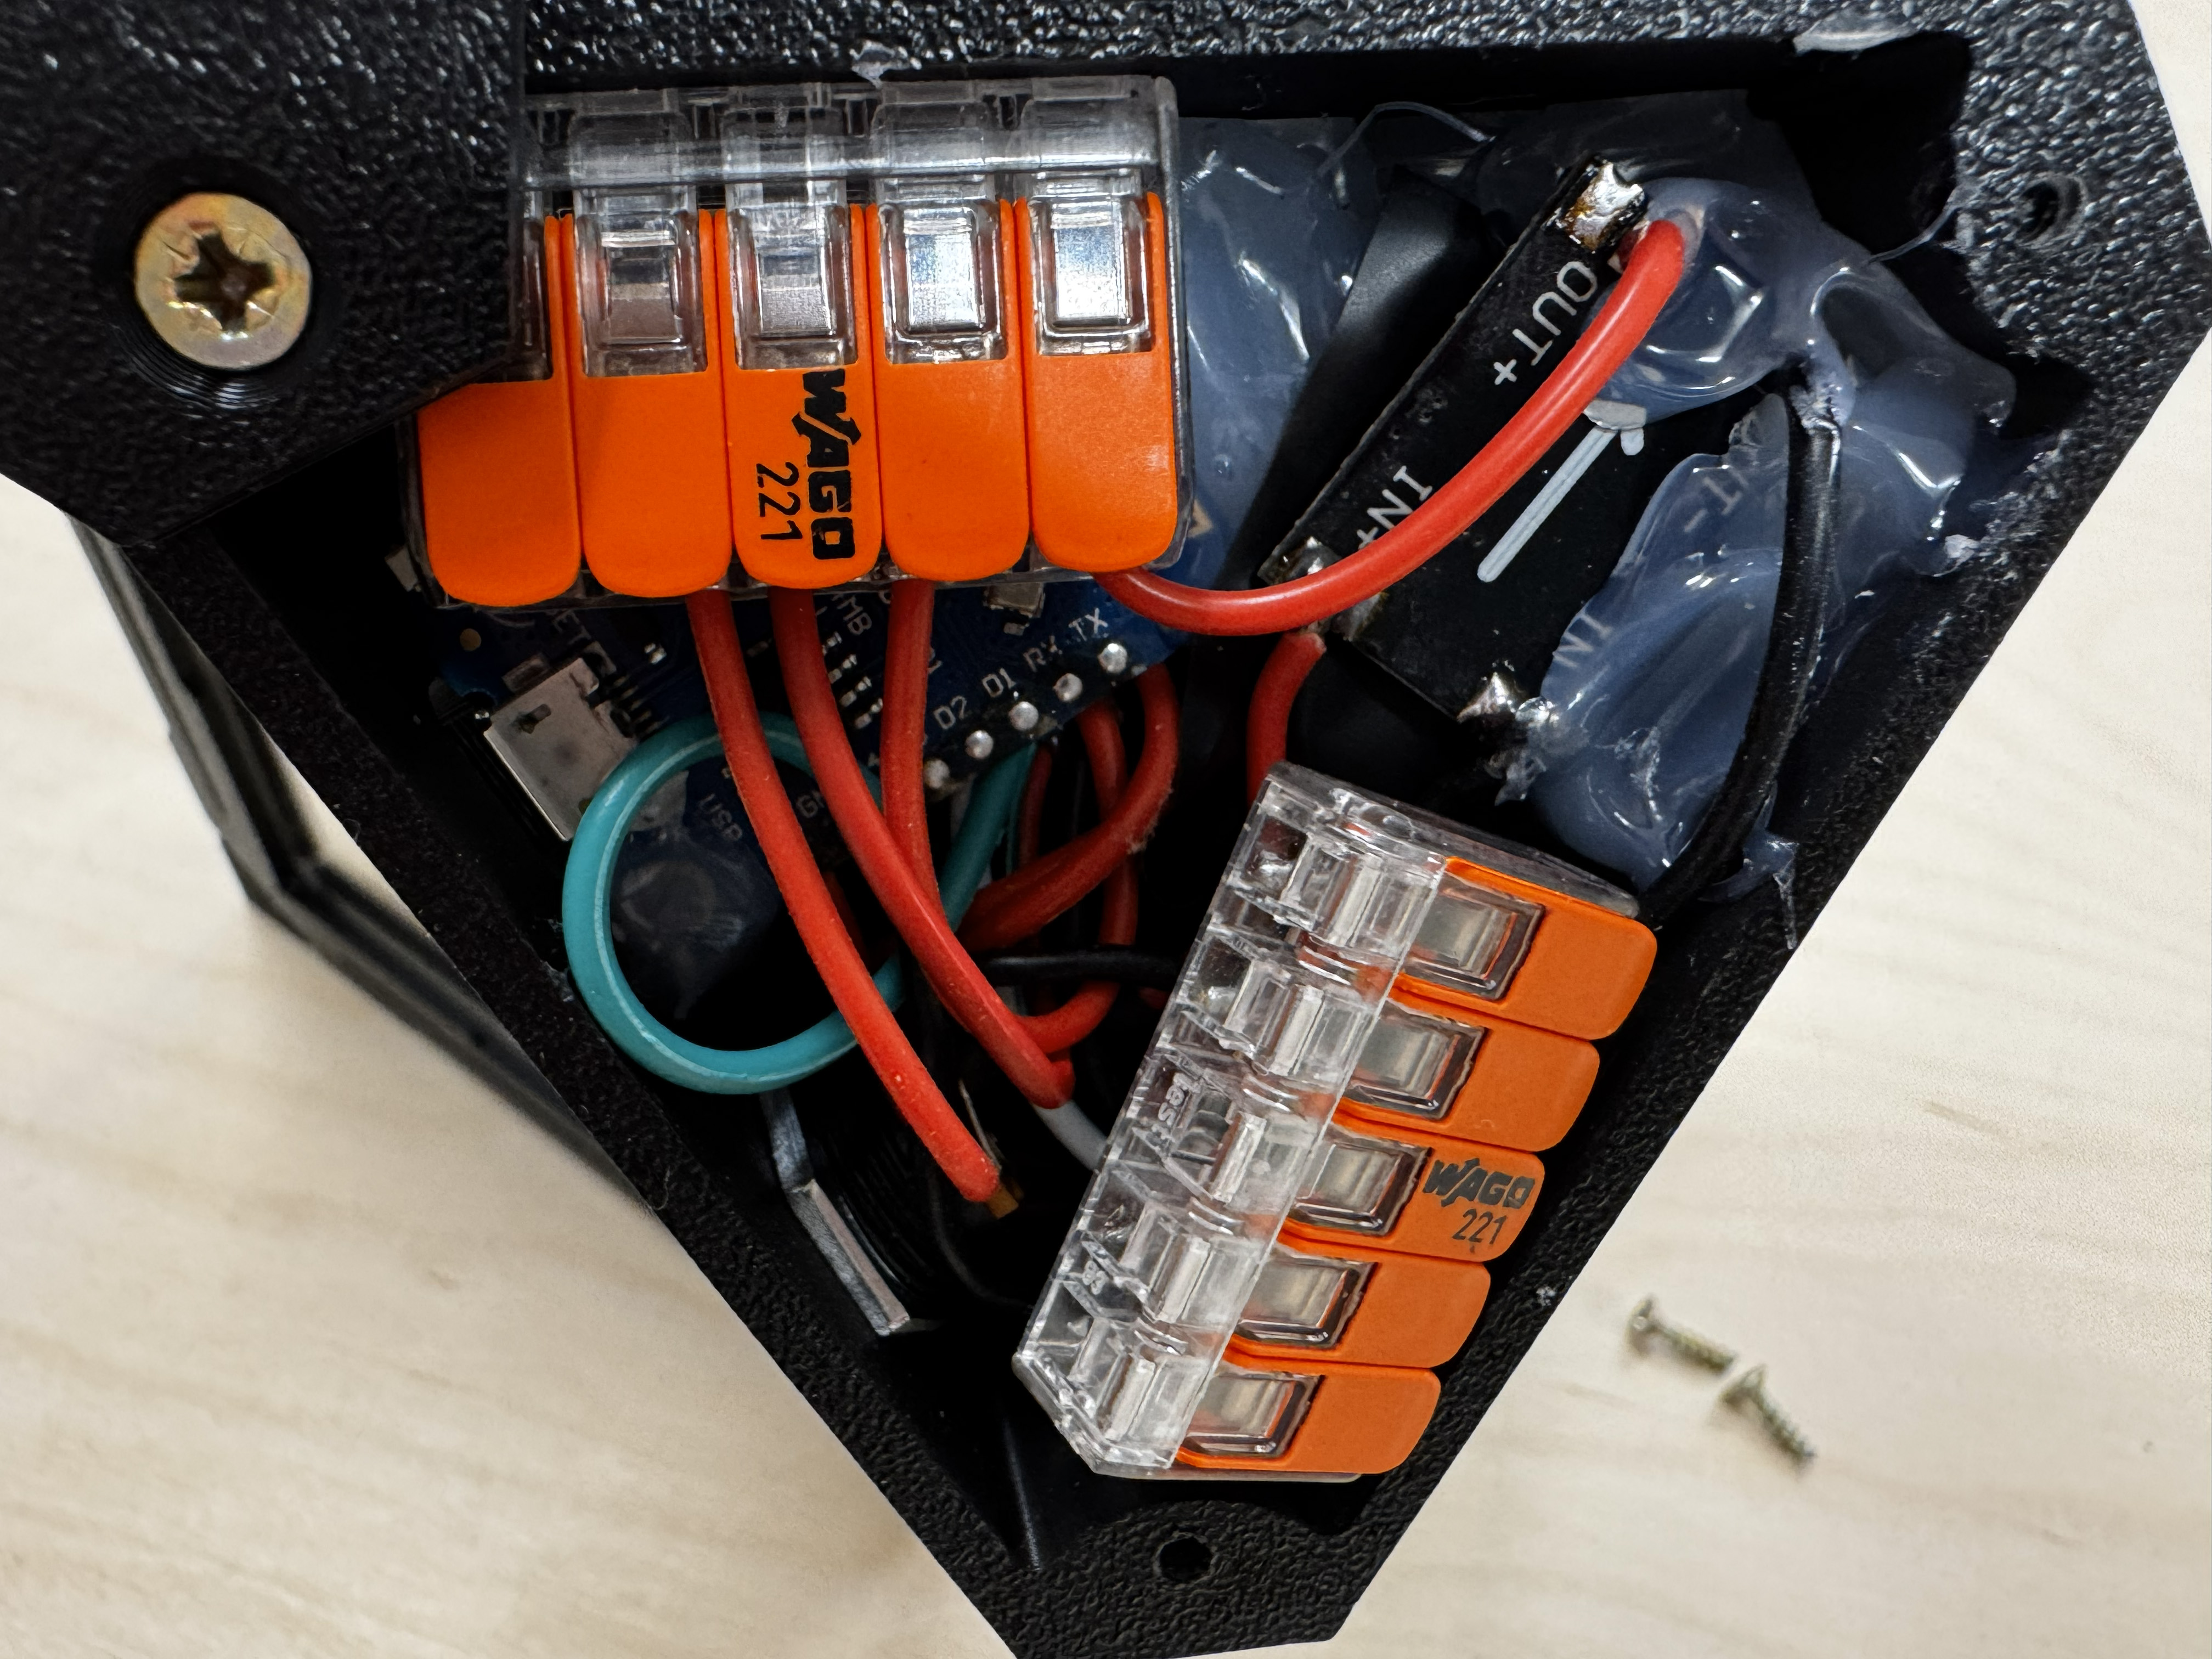
- Fasten the cover lid using three countersunk screws
- Install WLED onto the microcontroller if needed
✨Additional tips
- There is a lot of soldering involved. Test the LEDs after every few solder joints to ensure they all work
- The assembly requires threading many wires through small holes; a good pair of tweezers is your friend
- Try scaling all the parts larger if you would prefer to create a bigger cube
- There is also an STL and STEP file for the base without any external holes available, which can be used with custom components
🌟 Make it yours. Make it infinite. 🌟
Drop a comment if you build one, and share your results in the comments - I would love seeing your color schemes and effects!
This design is part of my Gadgets collection. Check it out for more useful prints like this.
[https://makerworld.com/en/collections/4371323](https://makerworld.com/en/collections/4371323)
If you like the design, consider buying me a coffee or contact me for a custom design inquiry at:
[https://buymeacoffee.com/tinkerer_designs](https://buymeacoffee.com/tinkerer_designs)
Check out my portfolio:
[https://makerworld.com/en/@tinkererdesigns](https://makerworld.com/en/@tinkererdesigns)
Sound-Reactive LED Infinity Cube

Publicado em 12 de dez de 2025
Gostou deste modelo? Crie uma conta grátis para salvar seus favoritos e voltar a eles depois.
Criar conta