Você está no 3DFinder
Buscamos em Thingiverse, MakerWorld e Printables ao mesmo tempo para te dar o melhor de cada uma.
Descrição
This is a simple Raspberry Pi case that can hold the small computer but is also decorative and looks like an Ore Block from Minecraft.
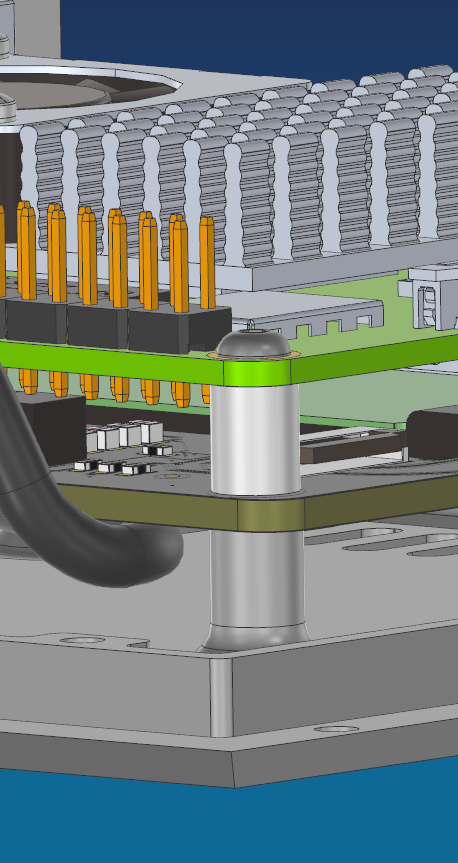
There is a Bottom Piece that the RPi sits on, with hols in the bottom to allow for different arrangements of parts to be used. For my own setup I have the RPi 5 board with active cooler, and also a NVMe base from Pimoroni which allows me to use a bigger storage capacity (it's a Minecraft server so I need more space). This means that I have bolts from the underside which go through the NVMe base into the standoffs, and then I bolt the RPi down on top in the same standoffs.
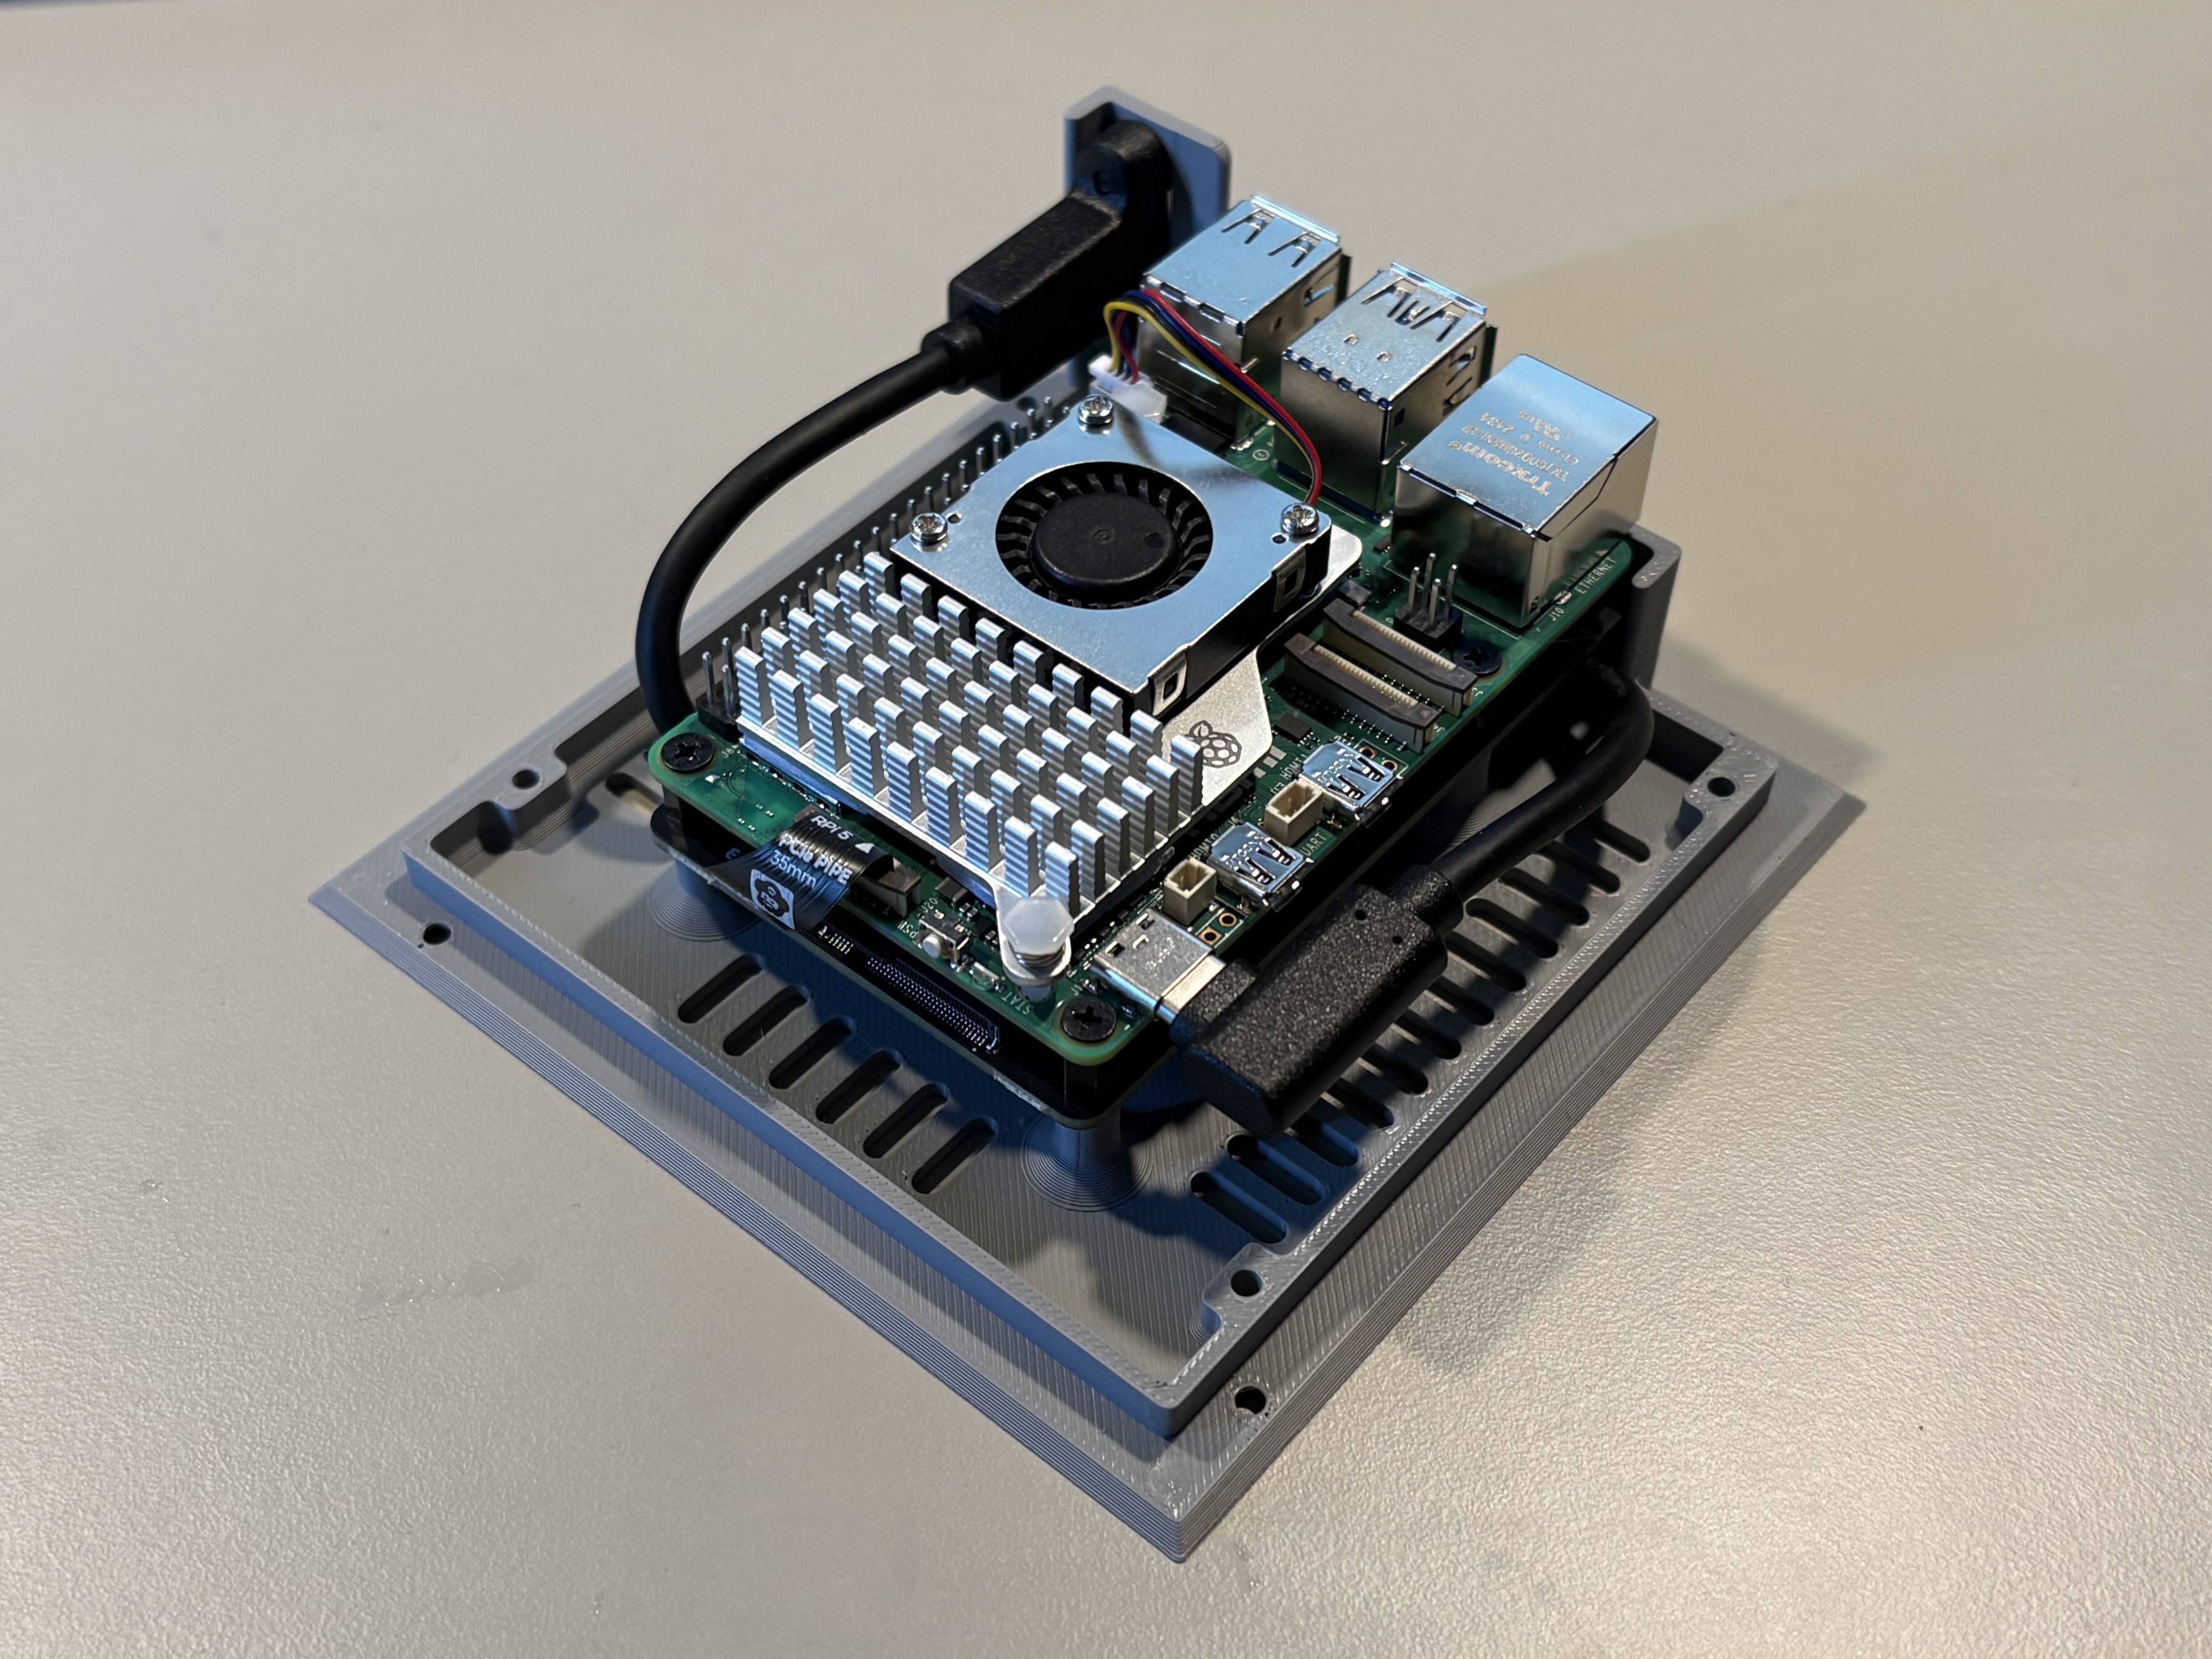
I also have installed a USB-C panel mount cable from Pimoroni which is just the right length to go from a mounting point on the back panel of the Ore Block to the power socket on the board itself - note that I run my server headless so this right angle connector covers up the HDMI sockets.
If you're not using an additional card, place one of the optional 8.6mm high standoffs under the RPi board to ensure that the height of the IO panel matches the hole in the back of the cover/frame.
The print profile contains the following plates:
- Front, Left, Right frame panels
- Top, Back panels, and Bottom piece
- Front, Left & Right Faces
- Top & Back Faces
- PETG Diffusers
- Optional Parts
Print all of the plates, including the optional parts if you're not using any additional cards to the RPi. I have chosen to print the diffusers in Transparent PETG, but Bambu's new Transparent PLA works quite well too.
Glue the faces onto the panels being careful to make sure that all the holes line up. Then glue the diffusers to the inside of the panel so that they align with the holes and sit slighly inside them.
The ore block itself is assembled from the front, left, right, back and bottom pieces as in the picture below, note that there is a notch on one edge of each frame piece, this is the bottom of the assembled frame and will then sit over the base piece. DO NOT glue the bottom piece to the cover/frame.
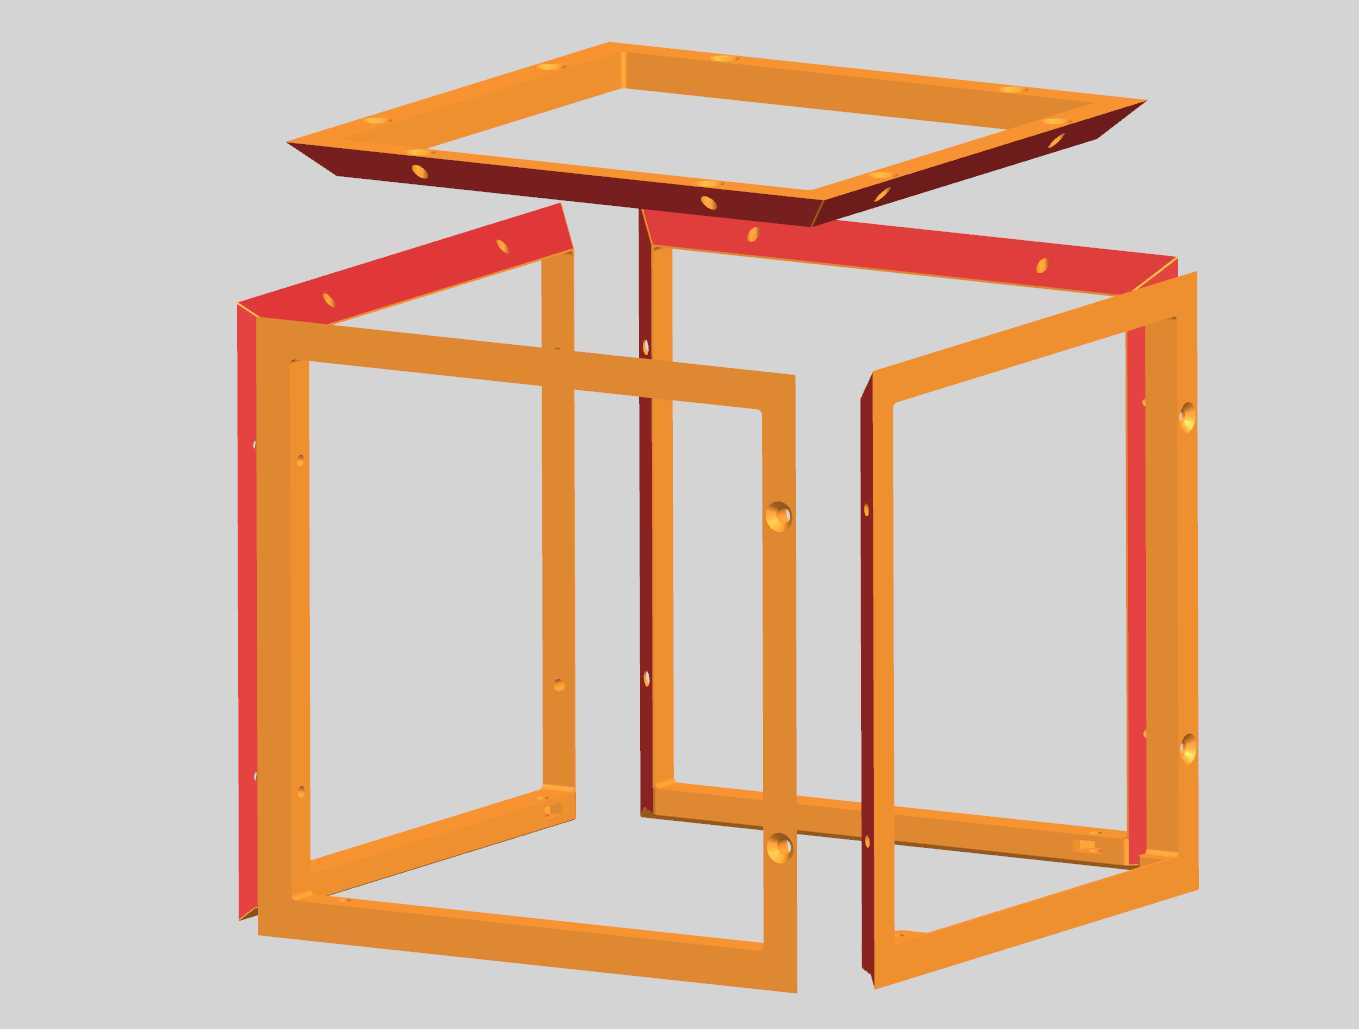
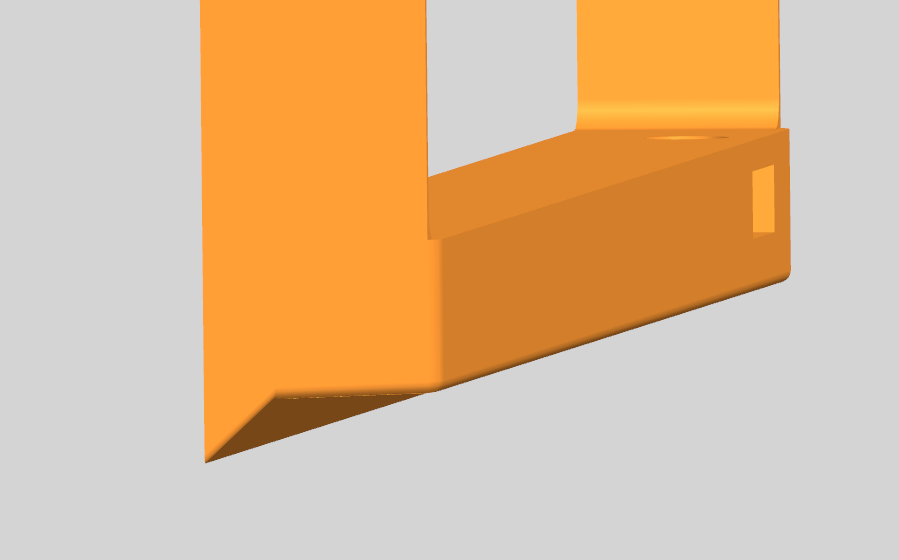
Once you have all the panels assembled they can be slid over the bottom with the RPi assembled on to it, there are 4 holes in the bottom to allow the bottom to be screwed to the frame. This is done by placing 4x M2.5 nuts into the slots in the frame and then passing a countersunk M2.5 bolt through from the base to secure the frame in place.
NOTE: A full PDF of assembly instructions in in progress. For the glowing colour effect you can add you're own method, I have a simple remote controlled colour changing light in there that I can set to the colour I want, I am working on a method integrated directly to the RPi.
Raspberry Pi5 MineCube Ore Block Case

Publicado em 30 de nov de 2025
Gostou deste modelo? Crie uma conta grátis para salvar seus favoritos e voltar a eles depois.
Criar conta