Você está no 3DFinder
Buscamos em Thingiverse, MakerWorld e Printables ao mesmo tempo para te dar o melhor de cada uma.
Descrição
The SFF ITX Open Frame Case allows for modularity so the components can be easily repositioned or reconfigured for different layouts, setups, components etc.
This uses the standard 15mm camera system rods which can be aluminum or carbon fiber. The components are then clamped on and can be positioned along the rods as needed.
The renders and build here show the use of a 40cm long rod, but shorted rods of 30cm can also be used if you have a smaller GPU.
The IO ports can be configured to face up or down, it's easily done by moving components along the rods to give your IO clearance and then flipping the case. Obviously if you wanted to have a horizontal setup that would be easy as well.
Additional accessories can also be mounted easily, just a matter of designing a mounting bracket and clamp it onto the rod. E.g front IO, additional radiators on the side for custom loops etc.
The standard version:
GPU: Up to a 2 slot GPUs (or cards with a 2 slot bracket) and a height of up to 139mm (all Nvidia SFF ready cards should fit).
PSU: SFF or SFFL PSU
The XL Version:
GPU: Up to a 3 slot card (or cards which a 3 slot bracket) and a height of up to 150mm so it should fit even the biggest 5090 cards.
PSU: SFF, SFFL or ATX PSU (PSUs longer than 150/160mm may have clearance issues for the cabling)
Material List:
42 x M3 nuts
33 x M3 x 16mm Countersunk
1 x M3 x 12mm Countersunk
2 x M3 x 10mm Countersunk
4 x 6-32 1/2" (for PSU)
6 x M3 6+6mm Standoffs
4 x M3 x 5mm (for Motherboard)
1 x 90 Degree C13 to C14 Panel Mount Power Cable
e.g.
[https://www.amazon.com/JSADZKJ-Extension-Converter-Monitors-Computers/dp/B0CX7TQ3NW](https://www.amazon.com/JSADZKJ-Extension-Converter-Monitors-Computers/dp/B0CX7TQ3NW)
1 x 16mm push button switch
e.g.
[https://www.amazon.com/YACSEJAO-Chassis-Switch-Desktop-Computer/dp/B0BWDXFSMQ](https://www.amazon.com/YACSEJAO-Chassis-Switch-Desktop-Computer/dp/B0BWDXFSMQ)
4 x 15mm x 16inch/40cm Camera rail/rod
e.g.
[https://www.amazon.com/SmallRig-Aluminum-Female-Thread-Inches/dp/B00AZFX77S](https://www.amazon.com/SmallRig-Aluminum-Female-Thread-Inches/dp/B00AZFX77S)
1 x PCIE Riser (double reverse)
Tested with Linkup PCIE 4, double reverse, 18cm
Assembly:
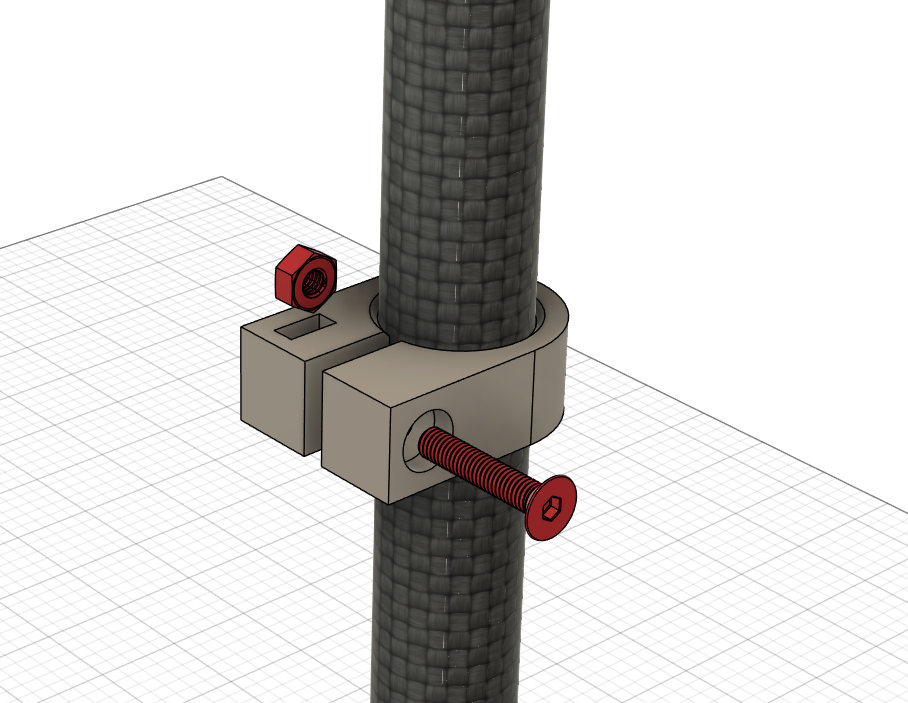
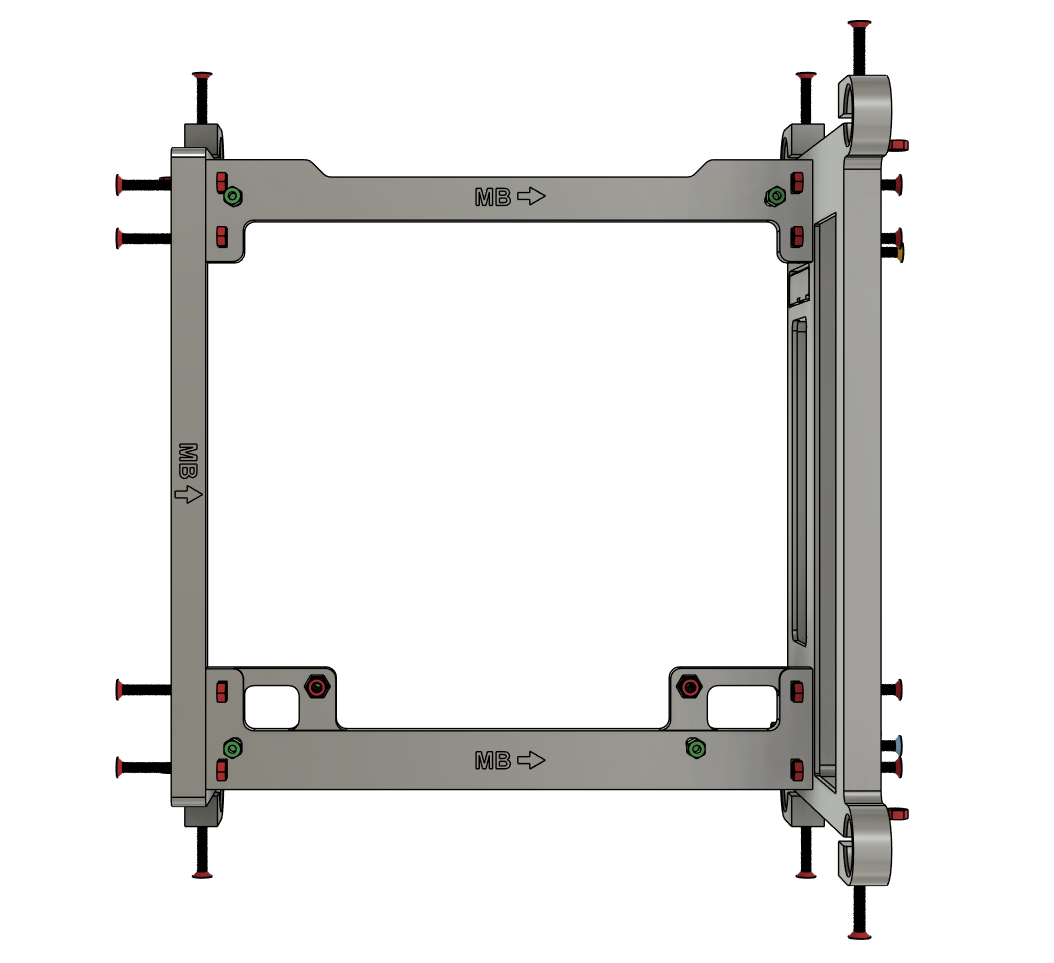
I've designed the case to stick to one screw as much as possible, below are some exploded views to show assembly.
Red Screw: M3x16 Flathead
Red Mut: M3 nut
Orange Screw: M3 x 12 flathead
Blue Screw: M3 x 10 Flathead
Green Screw: M3 6x6mm standoff
The hex nuts should be lined up and inserted into the slots as show, use a screwdriver to push them in to ensure they are fully inserted all the way. Insert all the nuts before assembling the rest of the case.
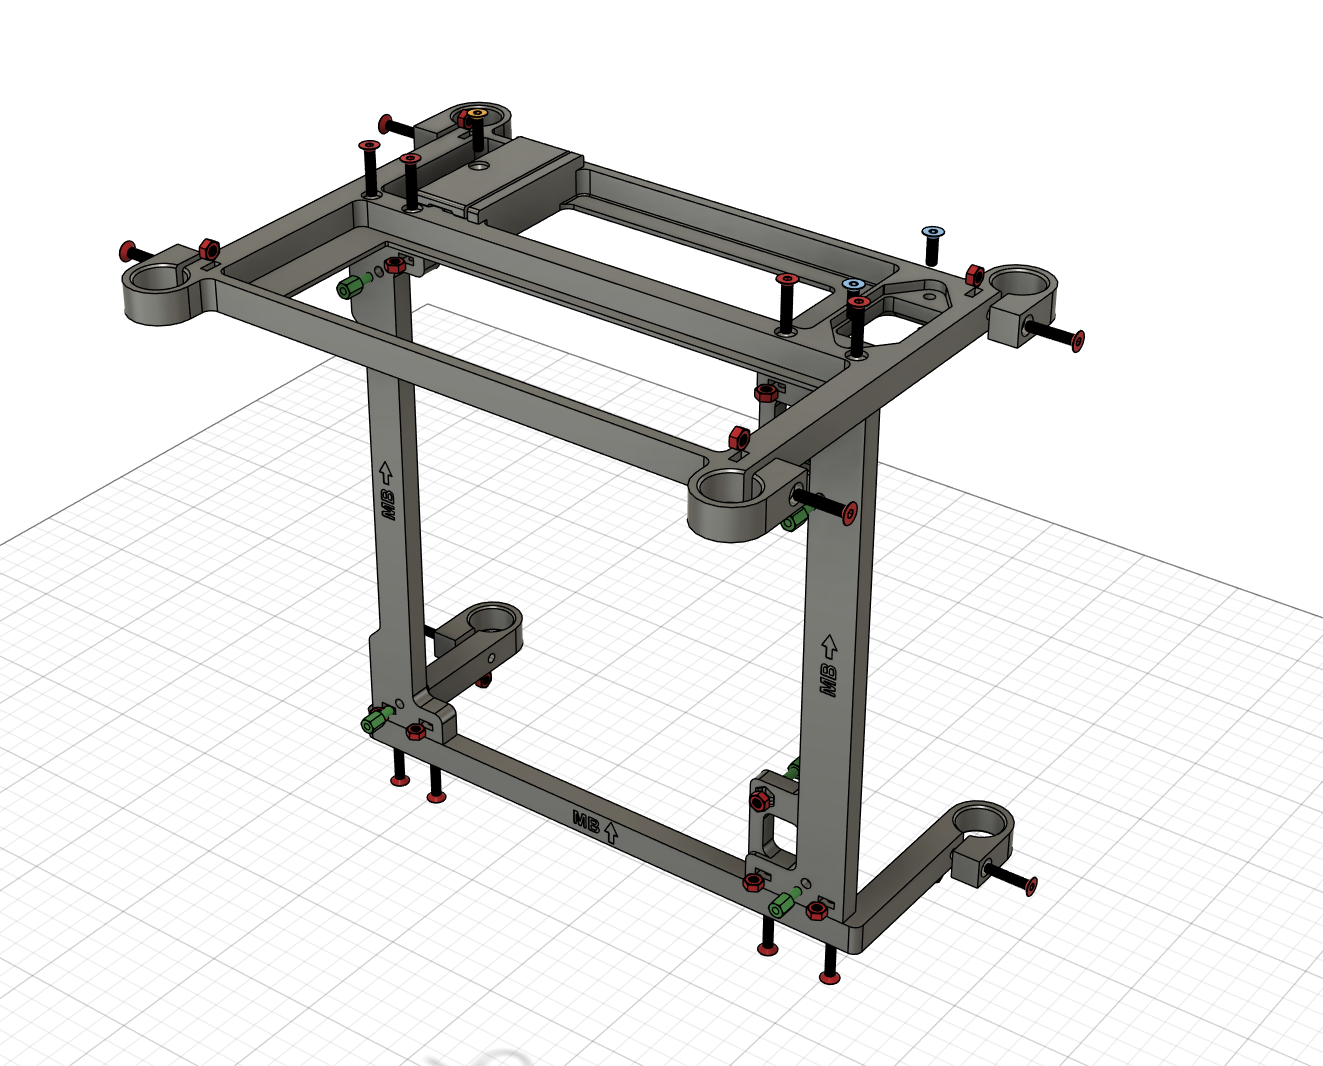
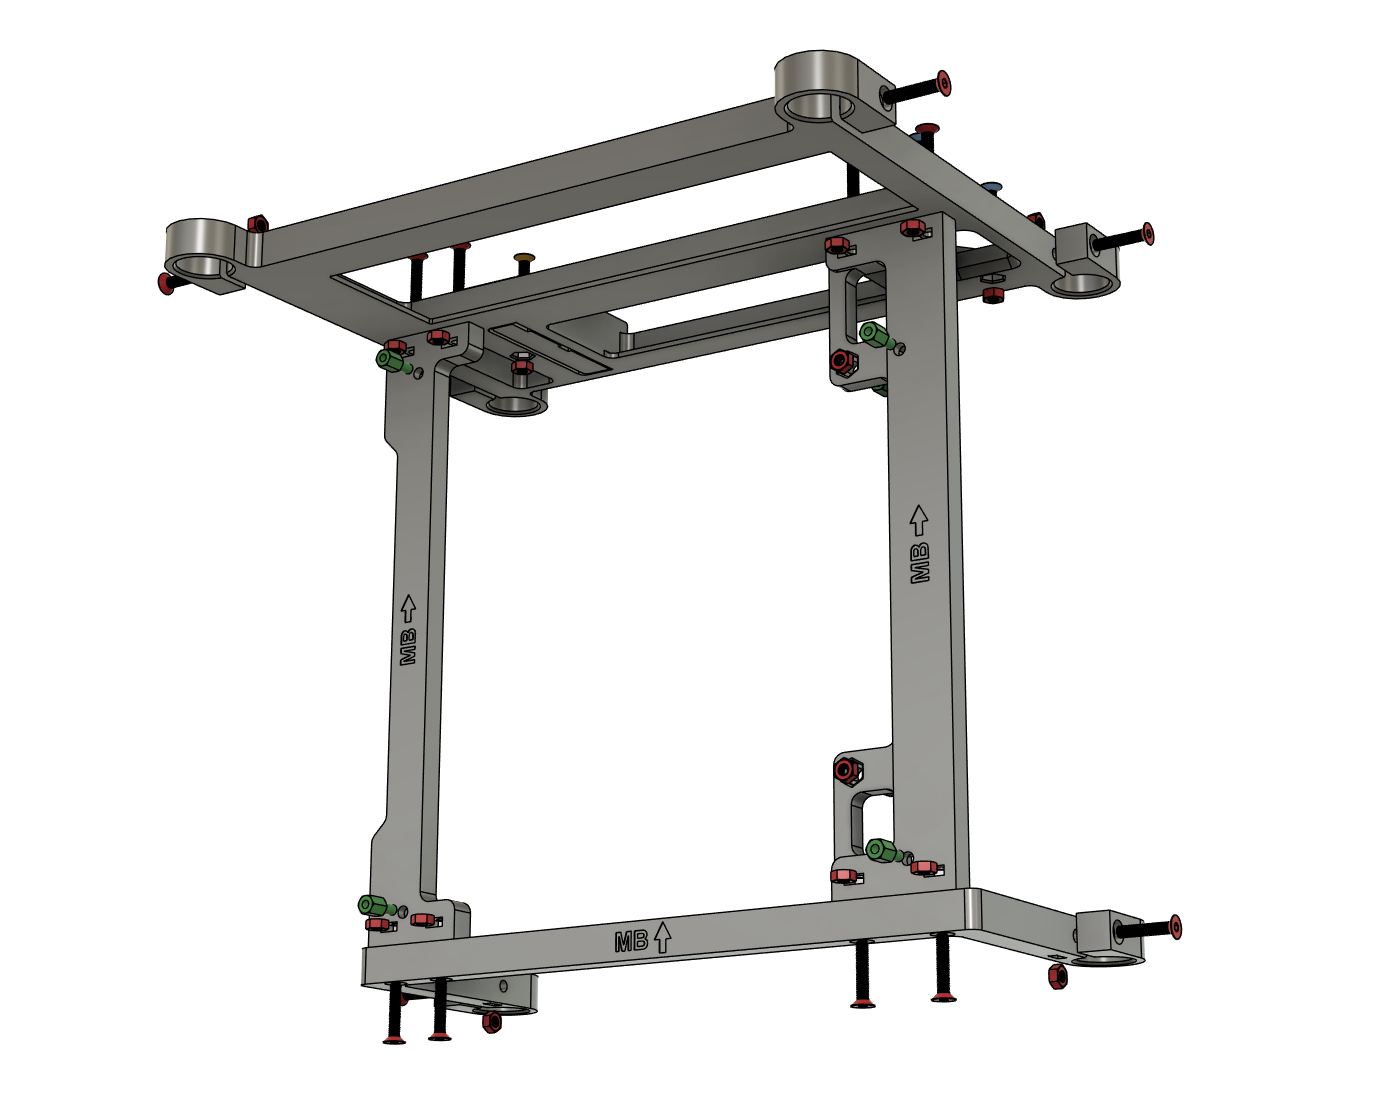
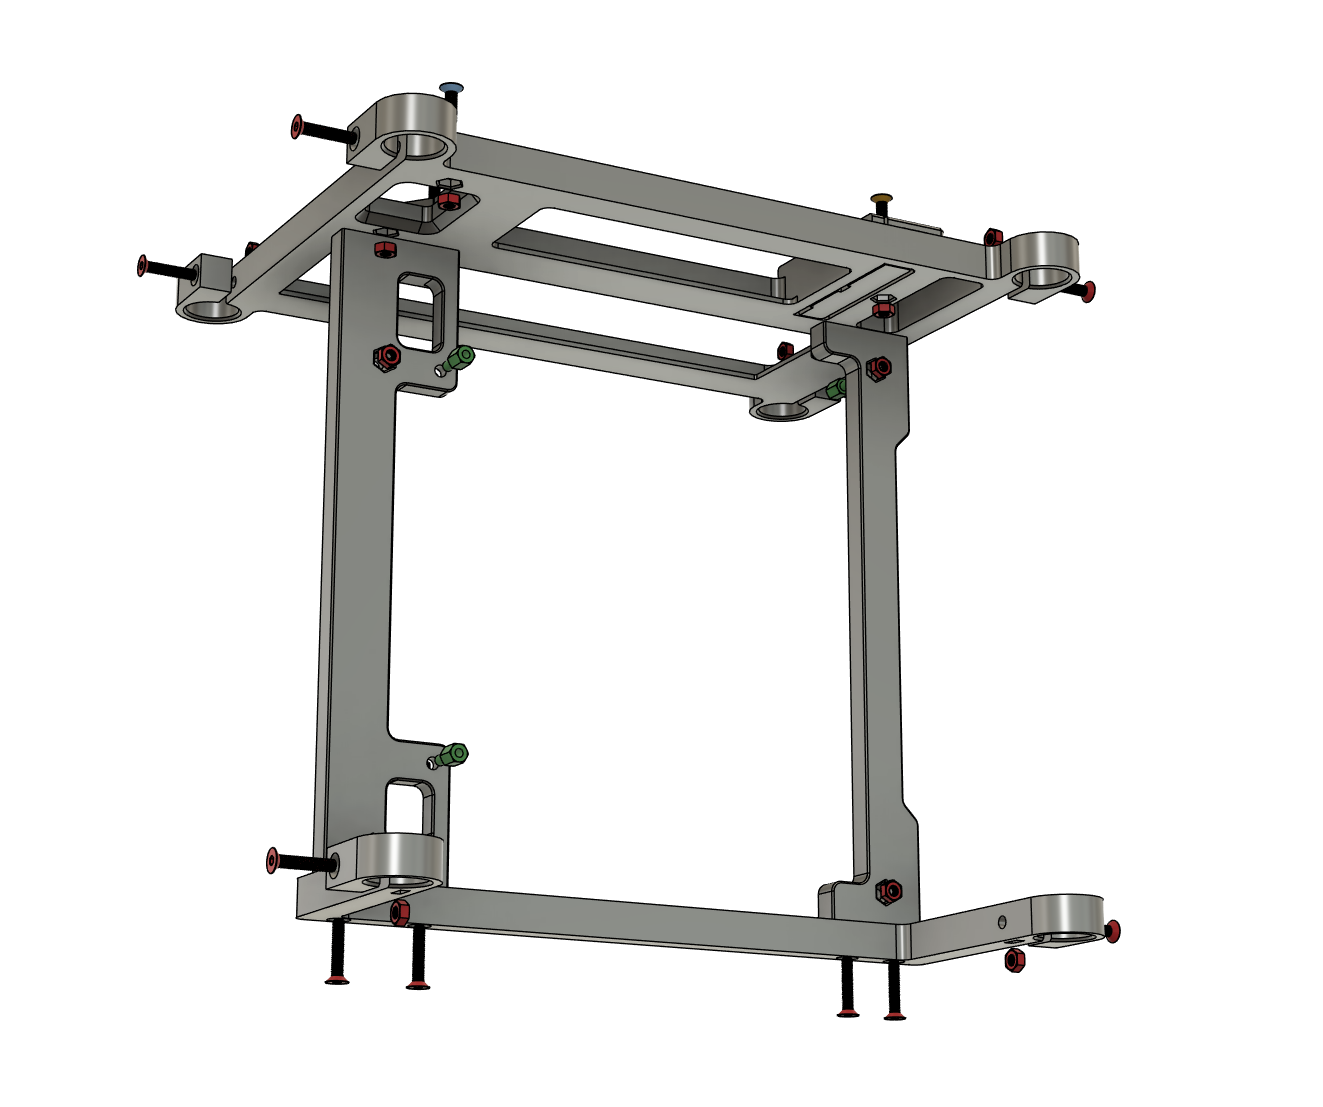
For easier identification on which side should be for the motherboard when assembling the pieces are marked with “MB” and an arrow pointing towards the motherboard rear IO:
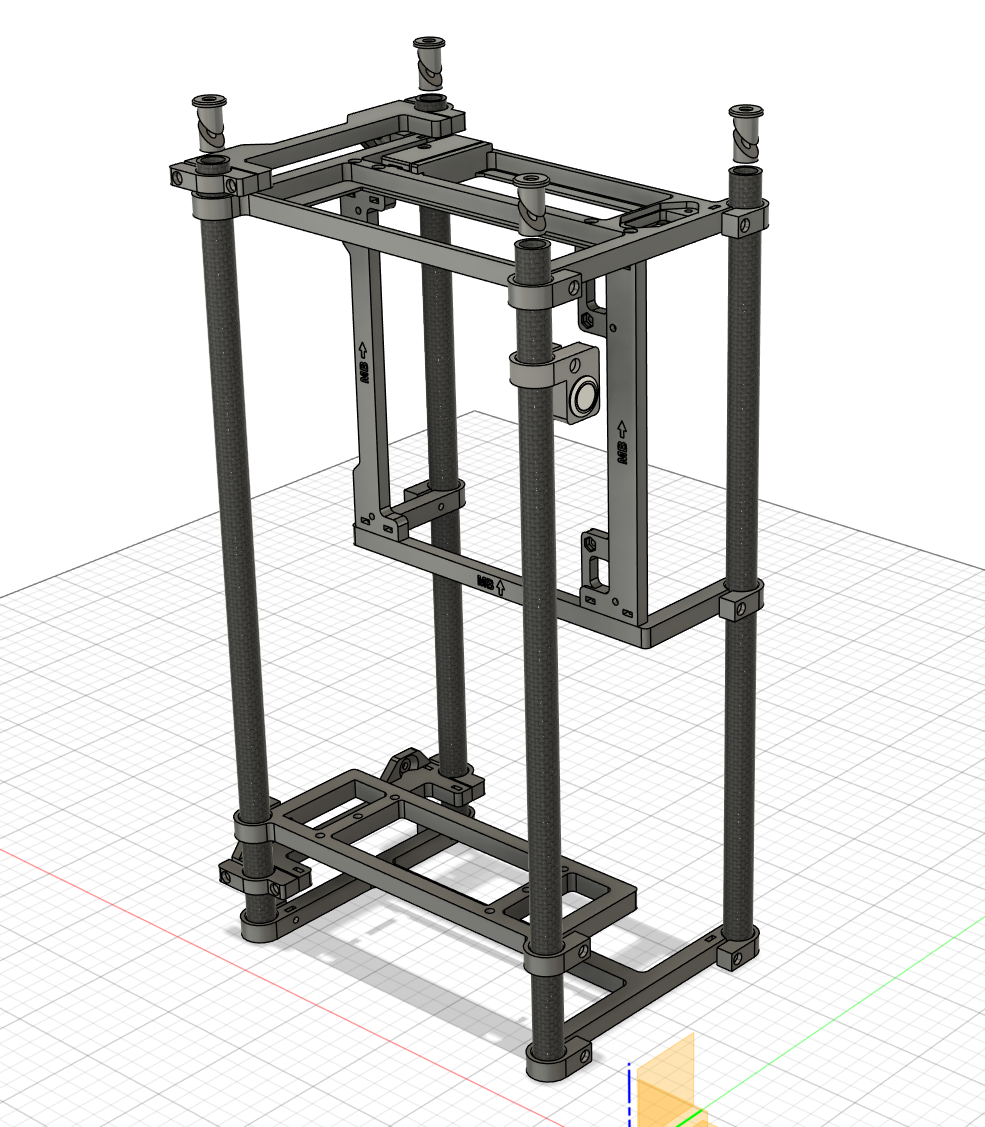
Once the motherboard Tray is assembled the rods can be inserted and then the clamps tightened with the M3x16mm flathead scews.
The same can then also be done with the PSU Bracket and End Brace.
Then it's just a matter of repositioning the brackets along the rods to fit your configuration.
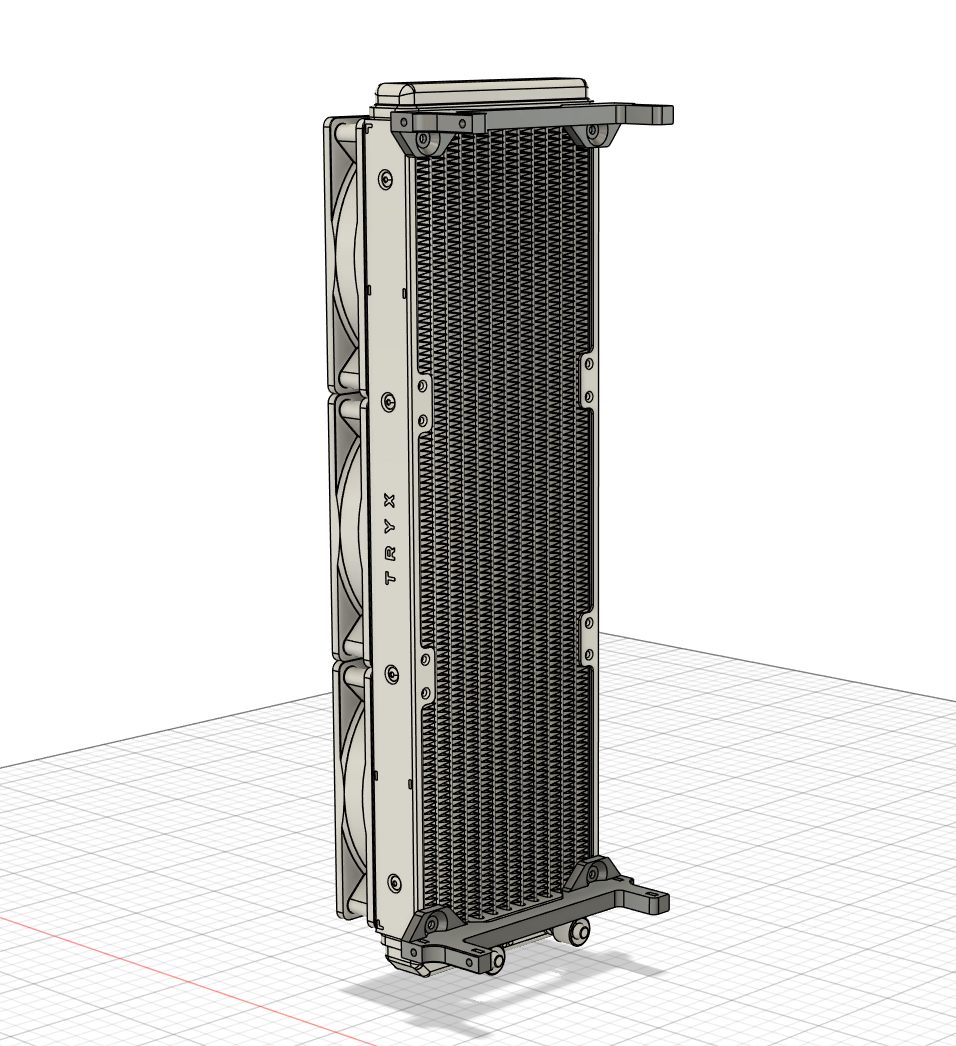
The last piece would be to mount the radiator for your AIO.
Ensure that you have inserted the hex nuts into the slots on the radiator bracket, just like with the clamps on the rest of the case, then attach the bracket to the radiator with the screws which (should be) included with your AIO:
Next insert the bracket between the carbon rods either at the front or the rear of case depending on your setup:
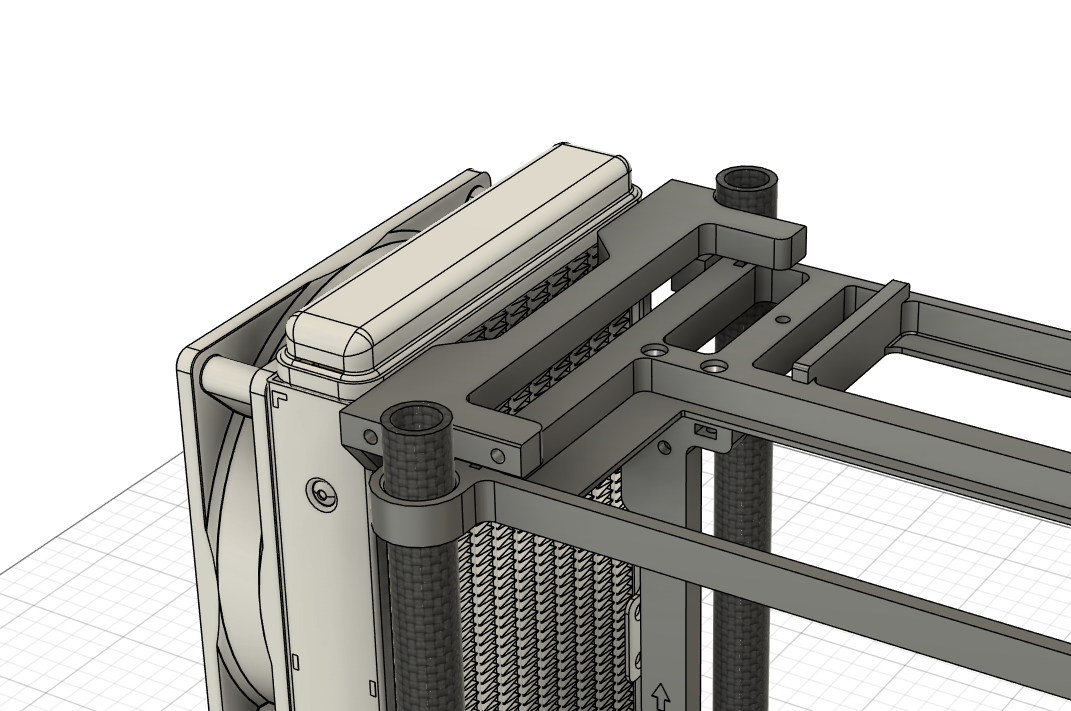
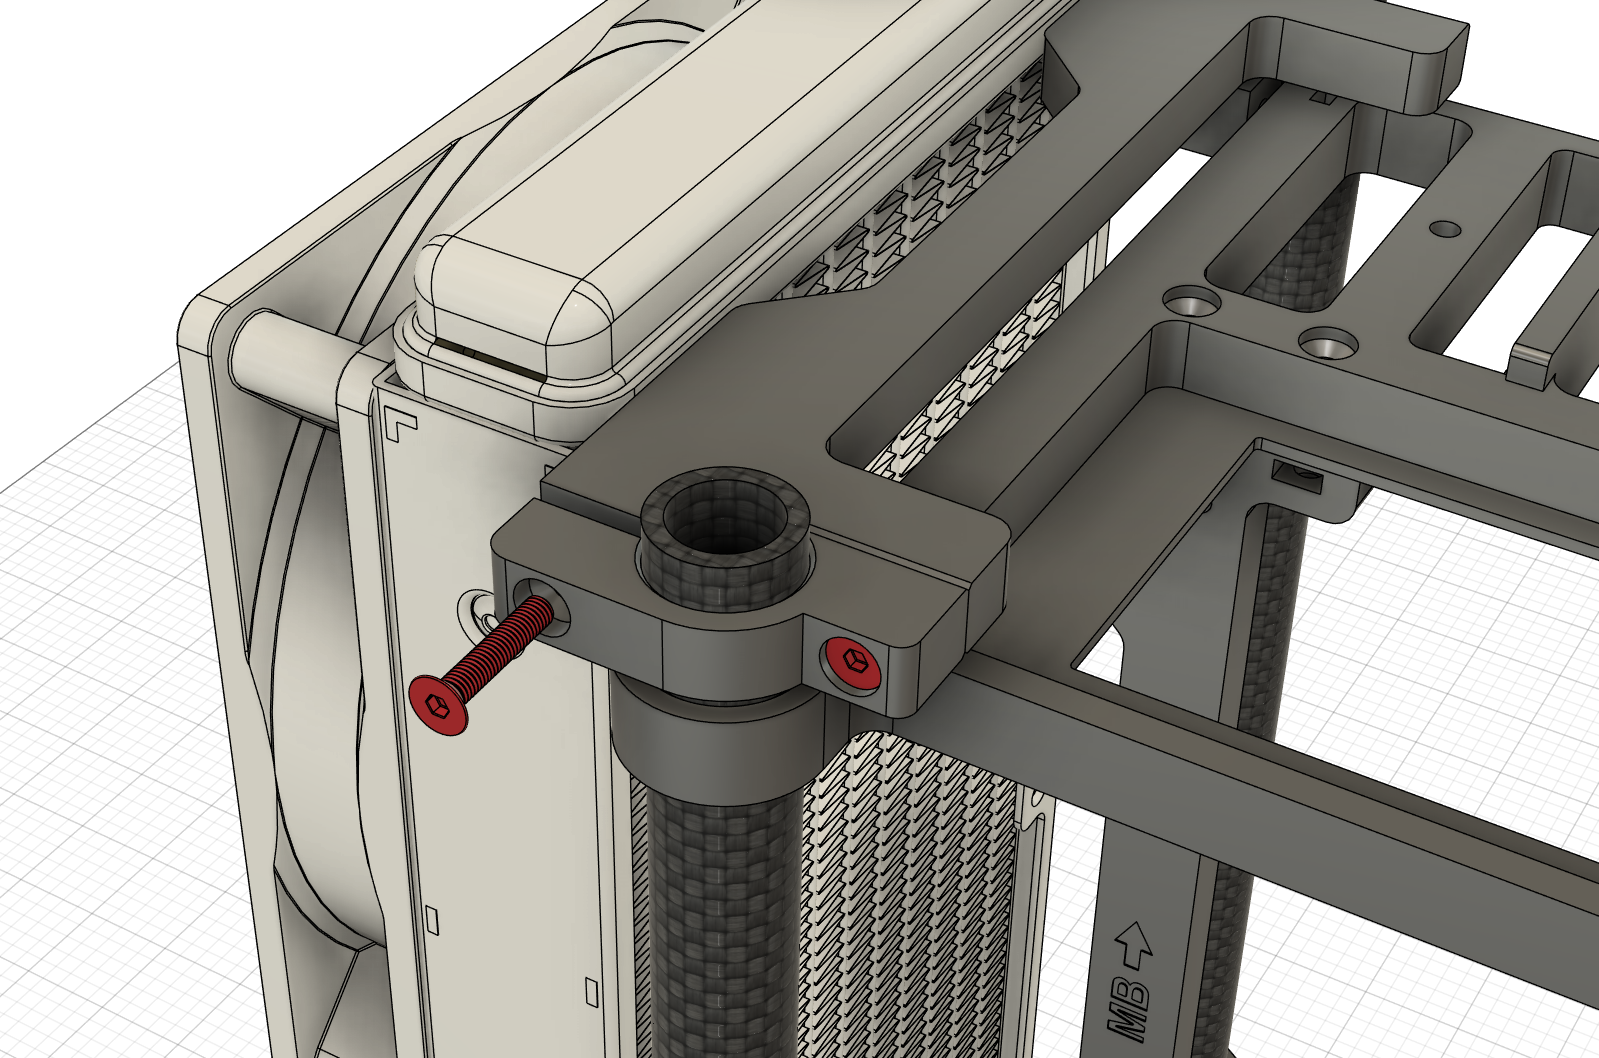
Next attach the clip for the radiator mount as pictured below, and then insert a M3x16mm flathead screw into the hole closer to the inside of the case and fully tighten. Repeat on the other side.
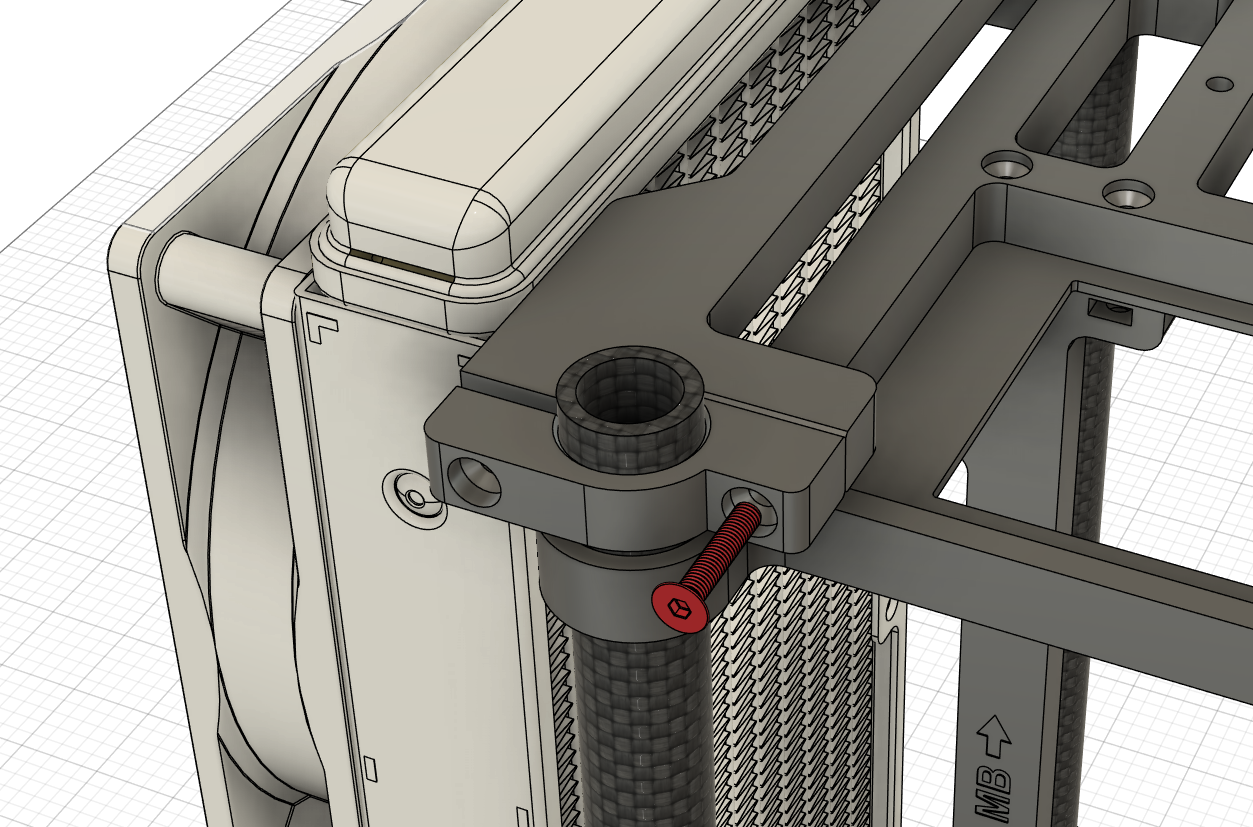
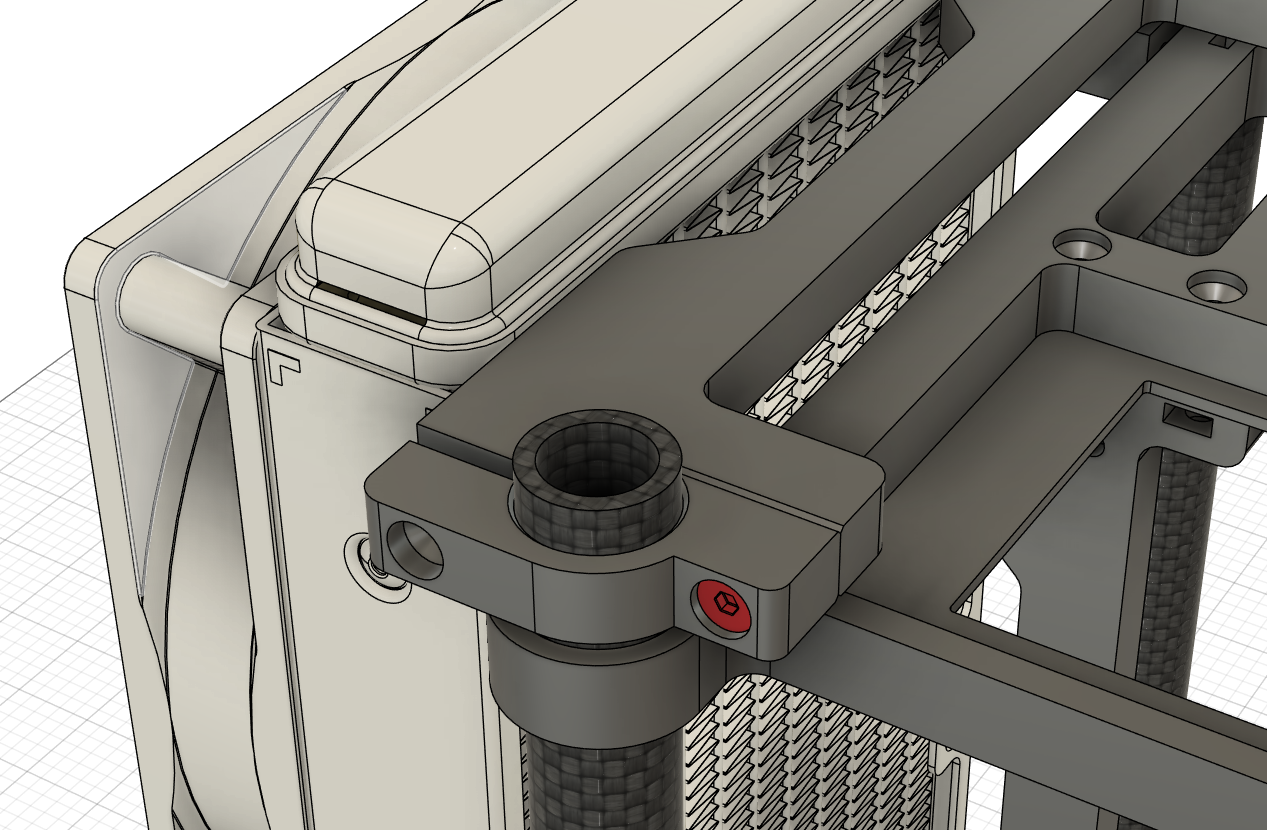
Lastly insert a M3x16 flathead on the outer screw hole and tighten to secure the radiator bracket in place.
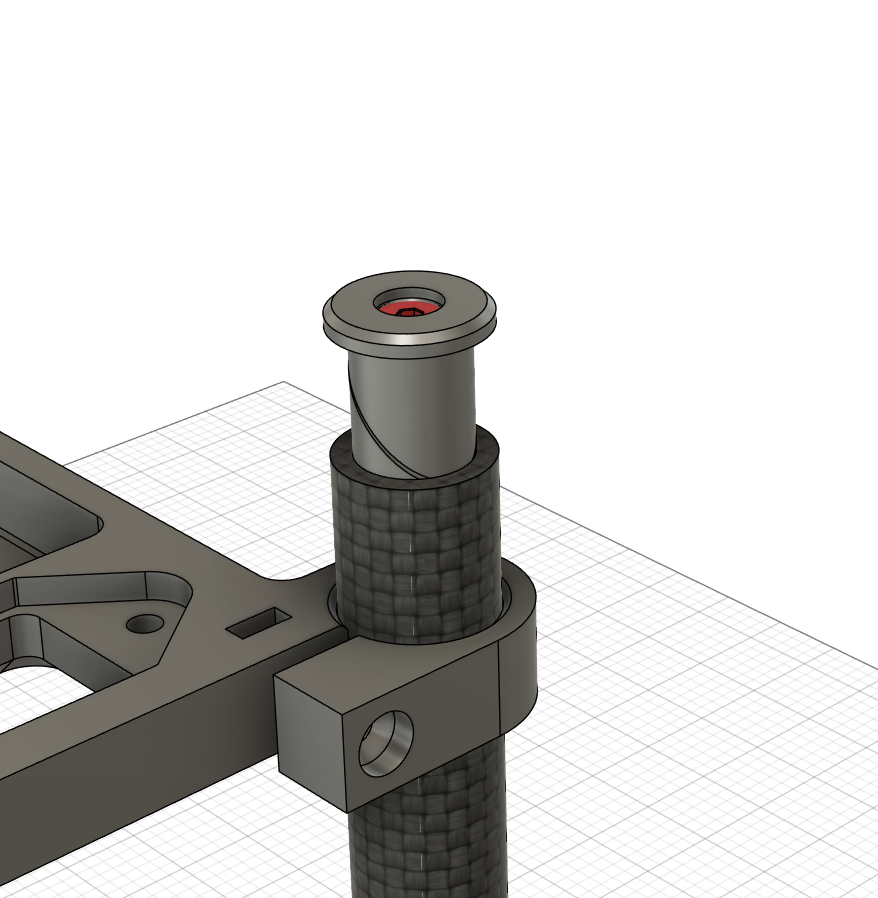
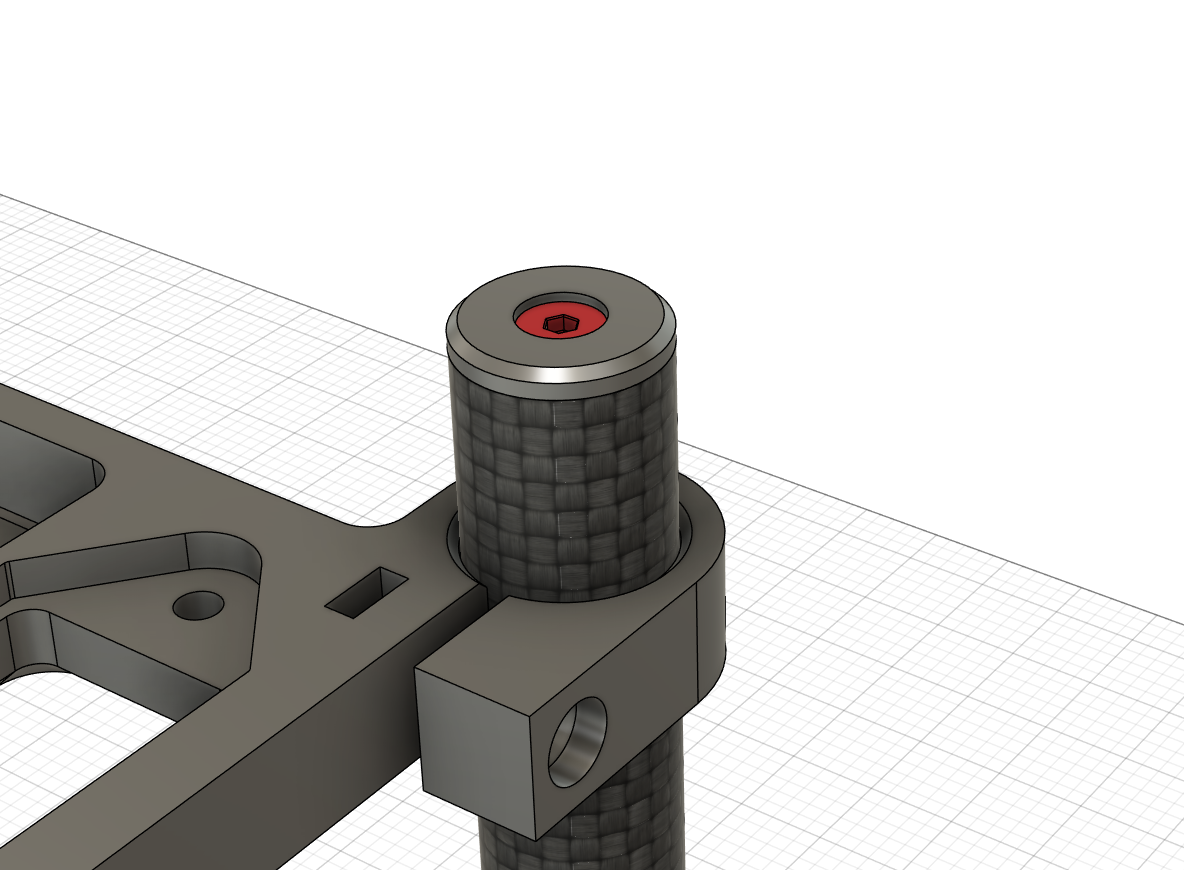
To install the end caps insert the nut into the end piece, then loosely assemble together with the M3x16 flathead screw so the parts stay together but are still loose.
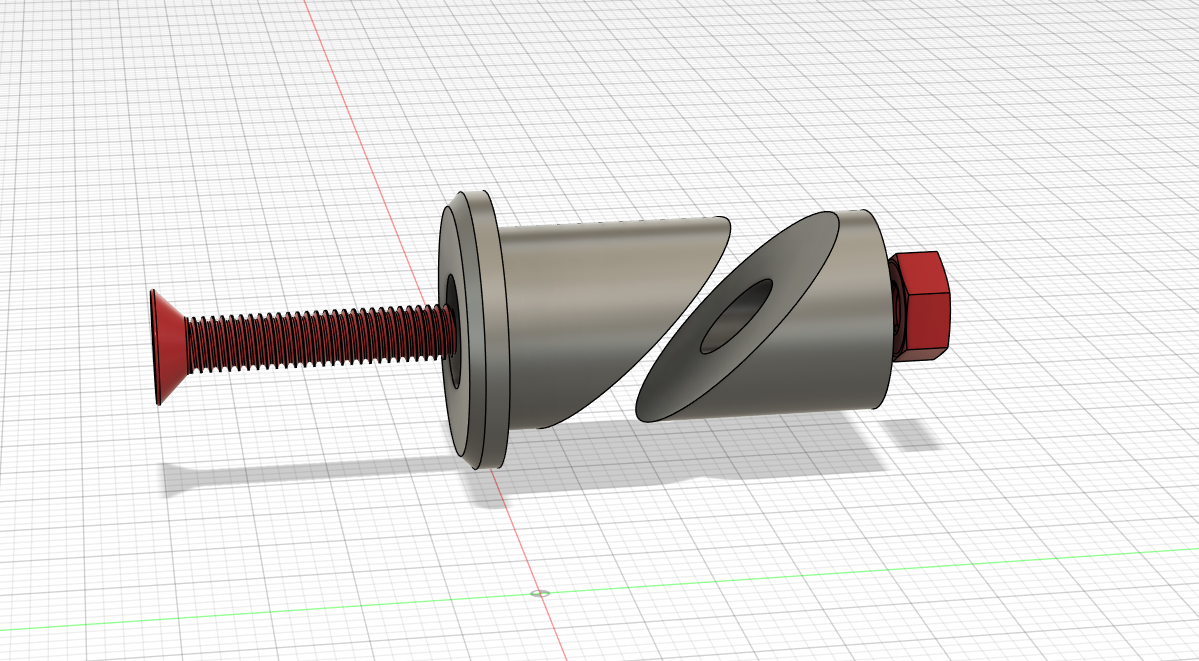
The pieces can then be inserted into the end of the carbon fibre rod and then tightened to hold it in place. Make sure not to overtighten, it just needs to be tight enough so it stays in place.
SFF ITX Modular Open Frame Case

Publicado em 25 de nov de 2025
Gostou deste modelo? Crie uma conta grátis para salvar seus favoritos e voltar a eles depois.
Criar conta