Você está no 3DFinder
Buscamos em Thingiverse, MakerWorld e Printables ao mesmo tempo para te dar o melhor de cada uma.
Descrição
This is a replacement base for the knife switches you can get on amazon. The original base is made from ABS and when you want to push these higher then 3 amps, it can easily melt and or catch fire. This is printed in PPS-GF for the specific reason of flame retardant & reliable: UL94 V0 certified and 6.05 kV/mm dielectric strength (you better not be putting voltage above 30 though this you jackwagon). Not to mention it is very strong and stable, especially with heat.
Well I like knife switch's, and unfortunately we no longer an economical rated one produced any more. So I made one that can using parts of the cheap ones that readily available.
If you haven't realized, open knife switches can be dangerous, and that's why they are not common. They are quite appealing and easy to use. It is very critical to fuse, use the correct wire, and have the proper jacket on the wire for your use. If you can not or do not know how to test and build low voltage electrical systems correctly, this is not for you and its not worth the risk of death and fire; modern solutions are much better with inherit safety.
I use these for my ham gear and what not. It is all a 12 volt system, so you will have higher currents; like my Icom-7610 pulls in the ball park of 20 amps when operating under rated power. During extended use, this resulted in a bit of thermal excursion.
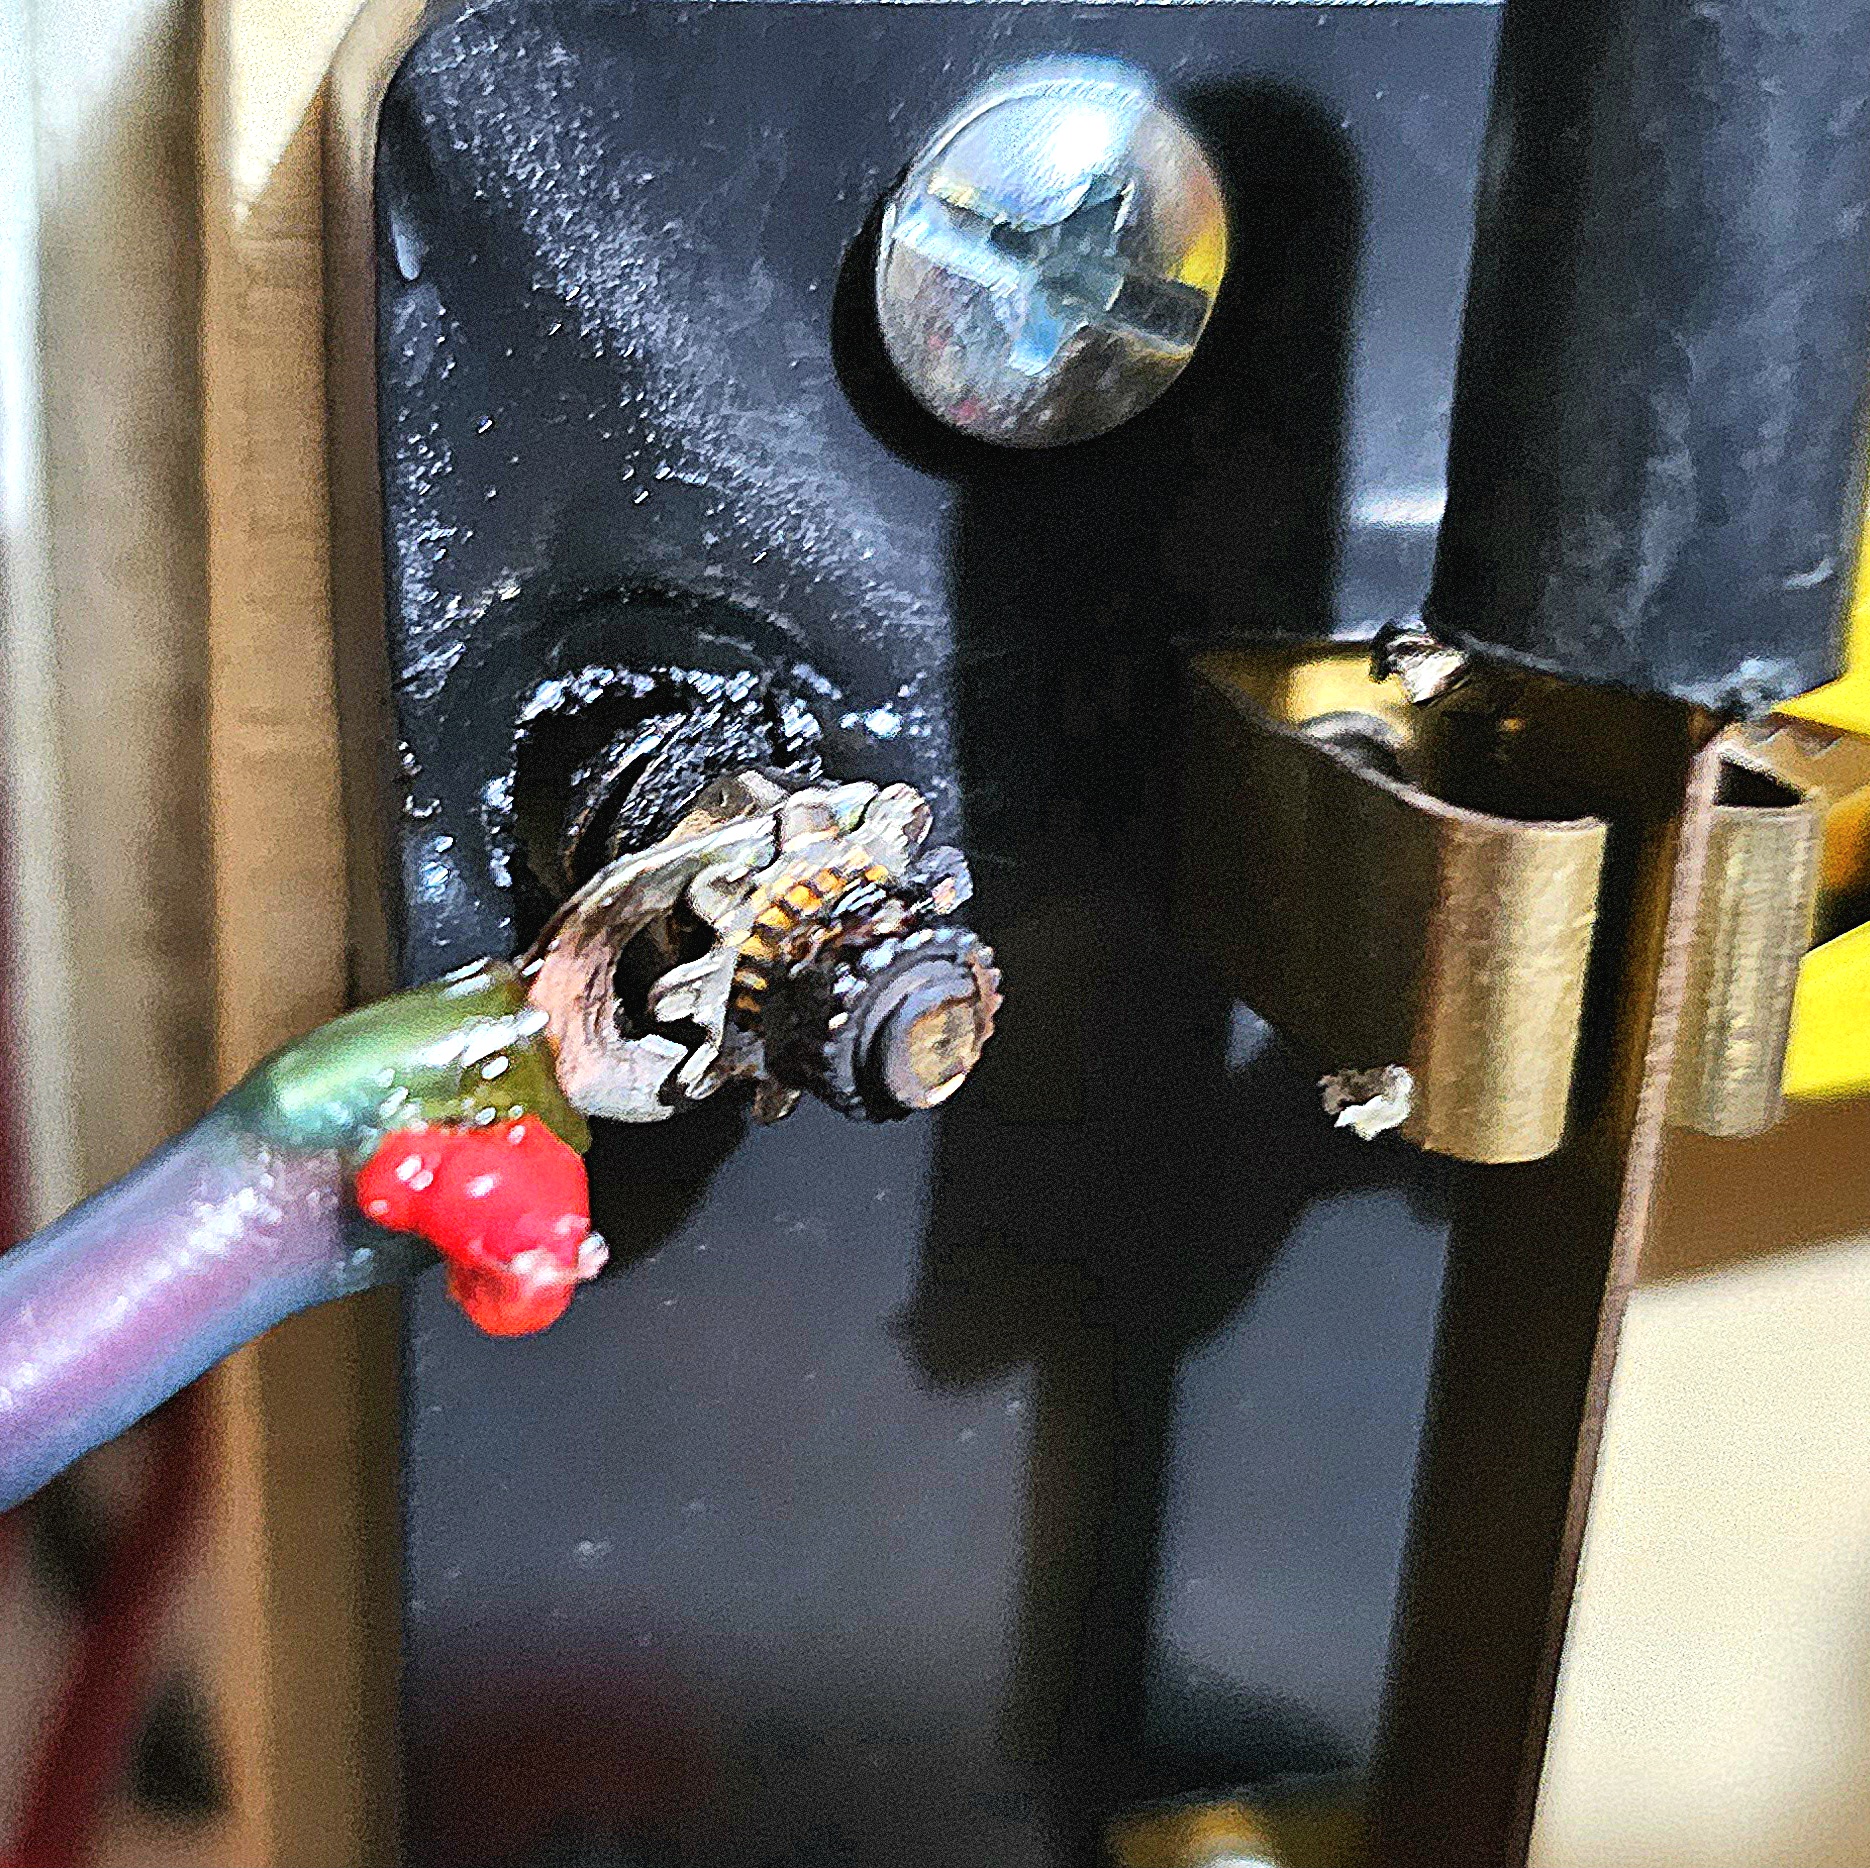

Testing with out tin, I found the one I built can handle 30 amps contentiously. The major bottleneck will be the fingers that grab the blade (not the rivet hinge to my surprise!). This will be the critical part for your final rating. My details of the non tinned will be below the parts list. This set up if pushed very hard will obviously get very hot. The critical will be when the brass can anneal and loose its properties in a way that effects pressure and creep for the contact. This could start to happen around 248°F (120°C), and be damaging around 356°F (180°C).
To build:
- Acquire the parts from the list.
- On the knife switch, drill out the 2 rivets and remove them.
- Use a 3/16 drill bit and open the rivet holes up.
- Cut the copper bus bars to fit the printed base.
- Drill 3/16 holes to match the base plate holes.
- May skip this step, but properly clean and tin all metal parts (slightly better ratings and more corrosion stable [did mine with acidic stannous sulfate tinning bath]).
- Grab 2 10mm, 2 20mm, 8 washers and 4 bolts brass screws from the screw kit. (you will need 4 additional washers later)
- Put washers on all the bolts to the head and insert though the base with threads to the topside.
- Slide the pre-drilled copper bus bar down on the bolts (if your drilling is good it should be a close fit but no bind).
- Insert a nut and washer into the knife bases and thread onto the 10mm bolt.
- Bolt and washer onto the 20 mm bolt.
- Align and settle then tighten the bolts very well. (brass may be deformed and need crushed some)
- Toss 2 additional washers each of the 20 mm studs.
- Screw down the 2 brass knurled knobs onto the 20 mm studs.
- Verify the alignment of the knife and finger and straighten out the fingers if distorted. The brass is thin and easy to manipulate. Small pair of needle nose pliers and you will be a tin smith in short order.
- Optional recommend: On the finger, the non lipped side; tweak over to put a slight taper on the contact point. This will act like a spring and push the knife bar into the other-side with the catch. This will reduce surface area on the tweaked, but the spring pressure will greatly improve contact pressure and long term stability. This will give you good current still with out it drifting. If you don't, I observed usable rating drop to a ⅓ to ½ the value I got in my final build.
- Test and verify your build, and measure and find your ratings!! No more than 3ish watts of loss is recommend. 5 watts of loss you need to cut back amperage or correct. 4 watts is well into a potentially sketchy zone.
- Test and verify
- Test and verify. Remember, heat will move into the wires at the terminal and into the jacket..
Parts:
Knife Switch
[https://www.amazon.com/dp/B07P5LXDFP](https://www.amazon.com/dp/B07P5LXDFP)
PolyMaker PPS-GF
[https://www.amazon.com/dp/B0F2H8JYS1](https://www.amazon.com/dp/B0F2H8JYS1)
Brass Screws and washers and standard nuts
[https://www.amazon.com/dp/B0CYW9LYY5](https://www.amazon.com/dp/B0CYW9LYY5)
Brass Knurled Nuts
[https://www.amazon.com/dp/B0CWP7L331](https://www.amazon.com/dp/B0CWP7L331)
Copper Bar Stock
[https://www.amazon.com/dp/B07DZP451G](https://www.amazon.com/dp/B07DZP451G)
Tinning solution I used is MG Chemicals 421. You can make your own solution, you can electroplate. Don't solder, its has to move and very difficult to make the coating smooth and uniform enough that it wont affect performance. The tinning should slightly increase ratings and offer far better long term performance and stability since it will retard brass corrosion. Silver plating in theory would be higher for ratings, but the tarnish will quickly rob those from you and make it worse.
My Measurements:
Non tinned, just as raw brass. I did tin mine later for building 3 of these. Figured most wouldn't and so I should measure as raw brass, despite knowing I was not going to make them that way.
Electrical performance summary:
1. Contact Resistance (real measurements)
Observed these states:
| Condition | Voltage Drop @ 30 A | Effective R (Ω) |
|---|---|---|
| Ideal squeeze (fresh) | ~84–92 mV | 0.0028–0.0031 |
| Heat-soaked | ~92 mV | 0.0031 |
| After mechanical cycling under load | ~150 mV | 0.0050 |
| After more cycles (self-burnished) | ~90 mV | 0.0030 |
Long-term stabilized baseline:
→ 0.003–0.004 Ω
Thermal behavior observed:
Power loss = I²R
Using long-term R = 0.003–0.004 Ω:
At 25 A, Very safe for continuous duty
- 25² × 0.0035 ≈ 2.2 W
- Warm, stable, no creep
- Minimal oxidation
At 30 A, Safe for continuous duty
- 30² × 0.0035 ≈ 3.15 W
- Brass heats to 77–95°F (25–35°C) above ambient. (this means room at 72 + 95= 167°F for those who don't know)
- No runaway
- Contact pressure stays stable
At 40 A, Safe short term rating
- 40² × 0.0035 ≈ 5.6 W ← to high to sustain!!
- Gets hot 302–392°F (60–80 °C) within minutes
- Still mechanically stable
- Not suitable for long-term, but OK short bursts
At 50–60 A, Intermittent rating
- 50² × 0.0035 ≈ 8.75 W
- 60² × 0.0035 ≈ 12.6 W
This is where brass begins:
- Softening
- Losing spring tension
- Increasing resistance
- Starting thermal runaway if held long
- Not safe for continuous duty
- Will cause damage and\or fires.
Behavior characteristics:
1. Brass is the limiting material
- Resistivity higher than copper
- Oxidizes faster
- Softens around 302–392°F
- Surface films increase R unless self-polished
2. PPS-GF is excellent
Base temperature tolerance is not a limiting factor (melts ~280 °C).
3. Contacts self-burnish
- Resistance peaked after cycling (0.005 Ω)
- Then dropped back to ~0.003 Ω after more movement
This is typical of brass joints.
Final ratings I found:
Continuous Current Rating
25–30 amps
- 2–3.5 W heating
- Stable resistance
- No mechanical creep
- Safe brass temperatures
- Predictable long-term behavior
Intermittent / Short-Burst Rating
40 amps for several minutes
- 5–6 W heating
- Hits ~140–176°F fast
- No runaway if watched
- Contact pressure still acceptable
Momentary / Surge Rating
50–70 amps (switching only)
- Allowed only for momentary closure
- Heating too high for sustained load
- Brass softening risk
- Resistance rise → runaway if held
Long term expected behavior:
- R will stabilize around 0.003–0.004 Ω
- Contacts will burnish smooth with cycling
- Heat-soak does not cause permanent drift
- Oxidation will slowly increase R over months
Mechanical creep will be minimal below 212°F
Maintenance interval:
- Light polishing every 50–200 cycles, or once a year if rarely used as needed.
- Periodically inspect fasteners for proper tension.
Summary:
- Continuous: 25–30 A
- Intermittent: 40 A
- Surge only: 50–70 A
- Brass contacts are the limiting factor
- PPS-GF base is excellent and not thermally limiting
- System shows good long-term stability after heat and mechanical cycling
Gostou deste modelo? Crie uma conta grátis para salvar seus favoritos e voltar a eles depois.
Criar conta