Você está no 3DFinder
Buscamos em Thingiverse, MakerWorld e Printables ao mesmo tempo para te dar o melhor de cada uma.
Descrição
This is an entertaining factory for play-doh and other soft materials! This was surprisingly satisfying to play with and the adults couldn't wait for the kids to be done, so they could have a go!
In this industrial environment you can play around with:
- A motorized extruder
- Different dies to make various shapes
- Material cutter
- Motorized conveyor belt
- Material cart with wheels
- Control panel with knobs to start / stop the conveyor belt & adjust the speed
- Don't forget your hard hat, work wear, goggles and gloves c",)
How to use
Select your die and screw it in place on the front of the extruder. Start the extruder and make sure the speed controller is set to maximum speed to get enough power. Start the conveyor belt and adjust the speed to your liking, make sure there is room in the cart for more product. Feed play-doh (or other soft material) into the extruder using the plunger, don't push hard, let the auger screw chew the material away. Cut of the product at your desired length and watch it travel along and fall into the cart. When full, drive the cart away for further product processing! If the extruder is struggling to push the material through, stop it and remove the from die to empy it, before starting again. It's important that the material is very soft, play-doh that have started to harden will stop the extruder.
How NOT to use (warning)
Do NOT put your fingers or anything else you care about into the rotating auger, including any types of hard materials or objects. The extruder has a 10:1 gear ratio and is very powerful! If any hard object enters the rotating auger there will be damage, either to the motor, the extruder or the object, whatever gives in first.
Non-Printed parts
All parts are available in the Maker's Supply and are listed in the Bill of Materials on this model.
Printing
The print profile contains various settings for different objects, so I recommend using the profile when printing. All parts are tested and printed in PLA. A1 Mini Print profile is coming :-)
General settings
- 0.2 mm layer height (0.1 mm for the auger and cutter poles)
- 20% rectilinear infill
- Tree supports where needed
- 4 walls
- Prime tower is disabled as there is no room for it on 256 x 256 print bed on some of the parts. If using H2x or printers with larger beds I recommend enabling it. On plate 1 and 7 the extra part is for purging instead of prime tower.
- Ironing on most top surfaces. I have found Ironing Speed 60 mm/s and Ironing flow 30% to work very well with most types of PLA across different Bambu printers to work very well.
The auger screw
- 0.1 mm layer height
- 10 walls
- Do NOT use matte filament. The surface need to be as smooth as possible so i recommend standard PLA.
- Supports on build plate only
- Take your time and be careful removing the supports. Patience is rewarded :-)
Calibration
- Calibrate filament and temperatures
- Clean build plate with dish soap and warm water for good adhesion
Printing on H2D
After printing another one of these myself on my H2D i learned that it actually can't be done. For some reason all the dimentions change and the parts does not fit together properly. This design has alot of moving parts that need to be correct and when so many things are being changed in the H2D it cant be done for the time being. I dont know what other printers are affected by this, but it prints perfect on P1S.
Assembly
See detailed images and instructions below.
There are a lot of small tolerances in screw holes, for ball bearings, motors etc. and this will vary depending on printer, filament, calibration etc. Due to this some modifications may be required to make everything fit together perfect, use a drill to open up holes more if they are tight, sand paper for larger surfaces or knife. Some parts need to be pushed into place.
Assembly Instructions
| Insert 608ZZ ball bearing in the back of the extruder and insert the auger screw through the extruder with the end going throught the ball bearing. | 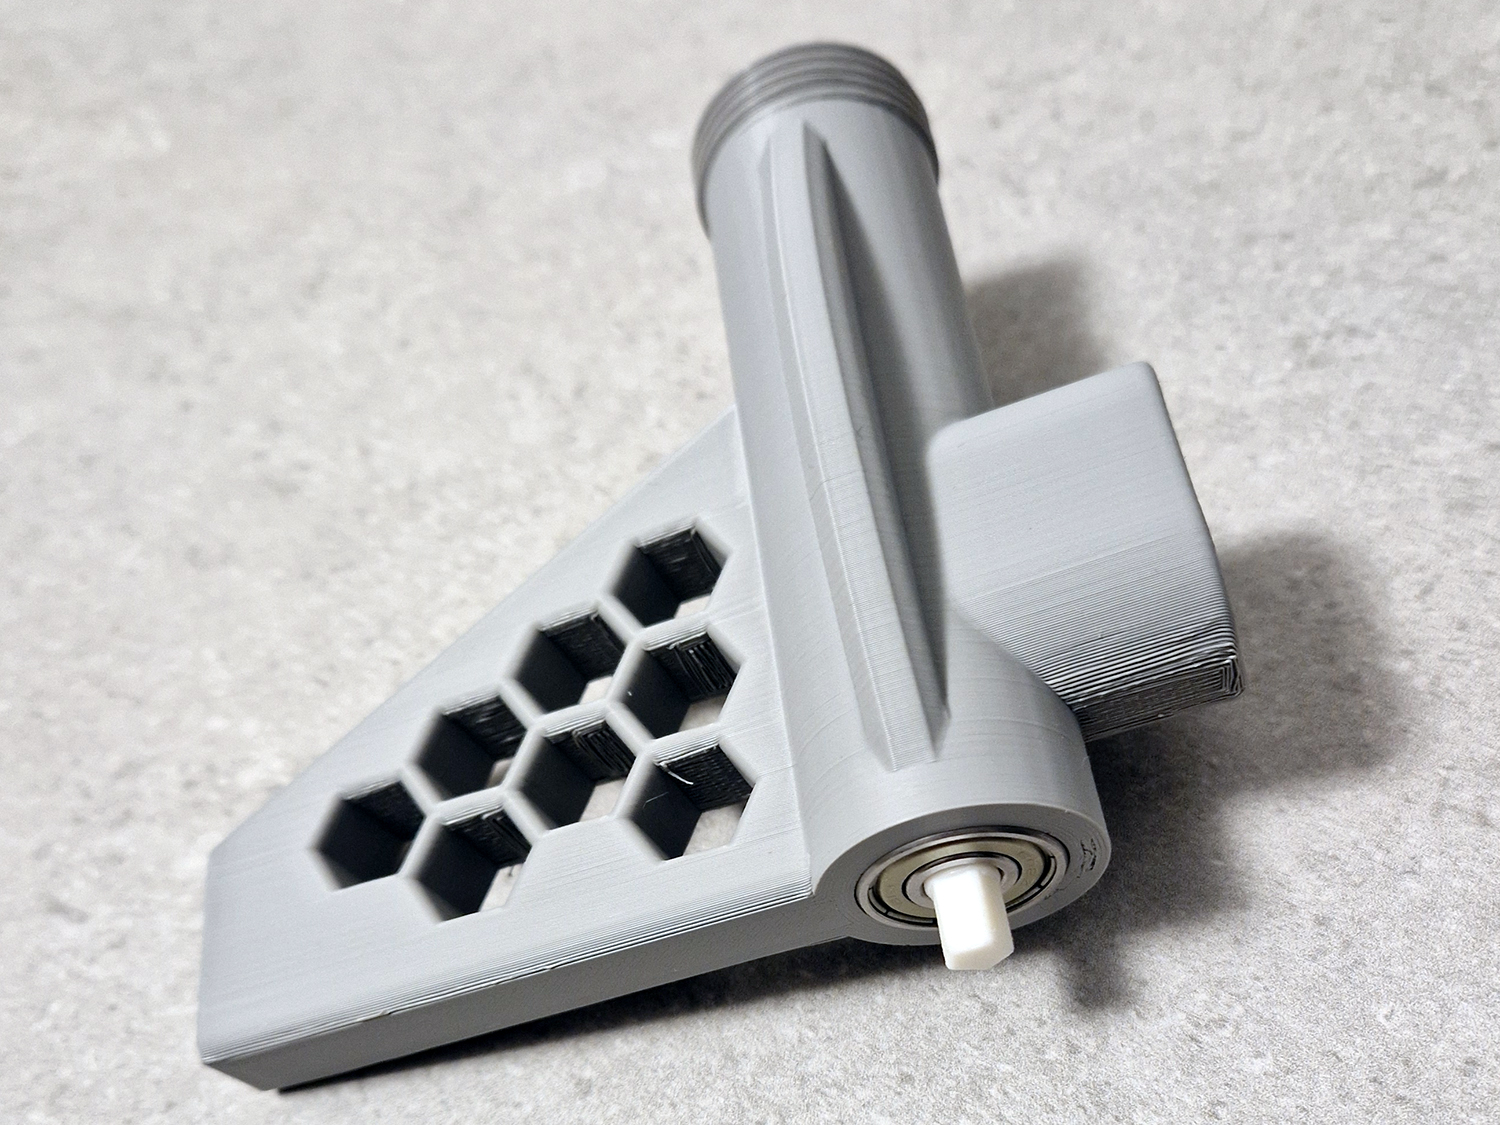 |
| Push the end of the auger screw into the large gear while holding the tip of the auger screw. This is a tight fit so wiggle it a bit back and forth, but be careful not to use too much force so that it breaks. |  |
| Push the small gear onto the motor, this is a tight fit. Push the motor into the motor mount and make sure it's sitting flat. Secure with a 2.6x8 mm screw. | 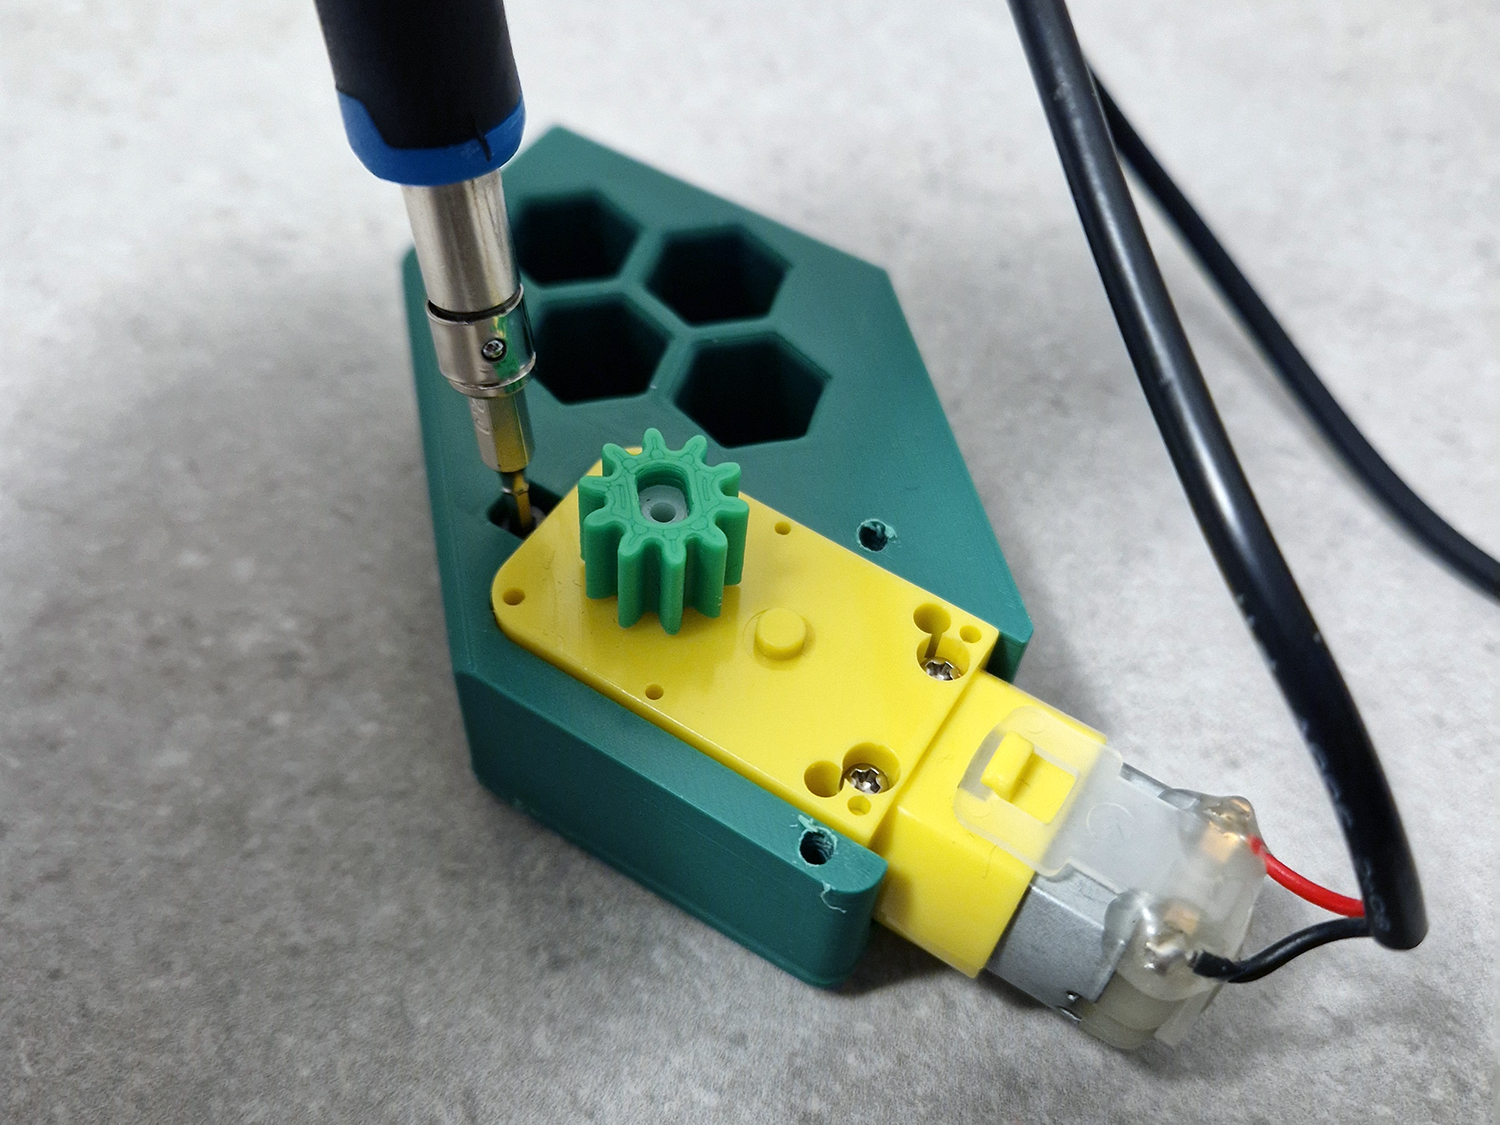 |
| Lay the cable holder over the cable and secure it with 2 pcs 2.6x8 mm screws. | 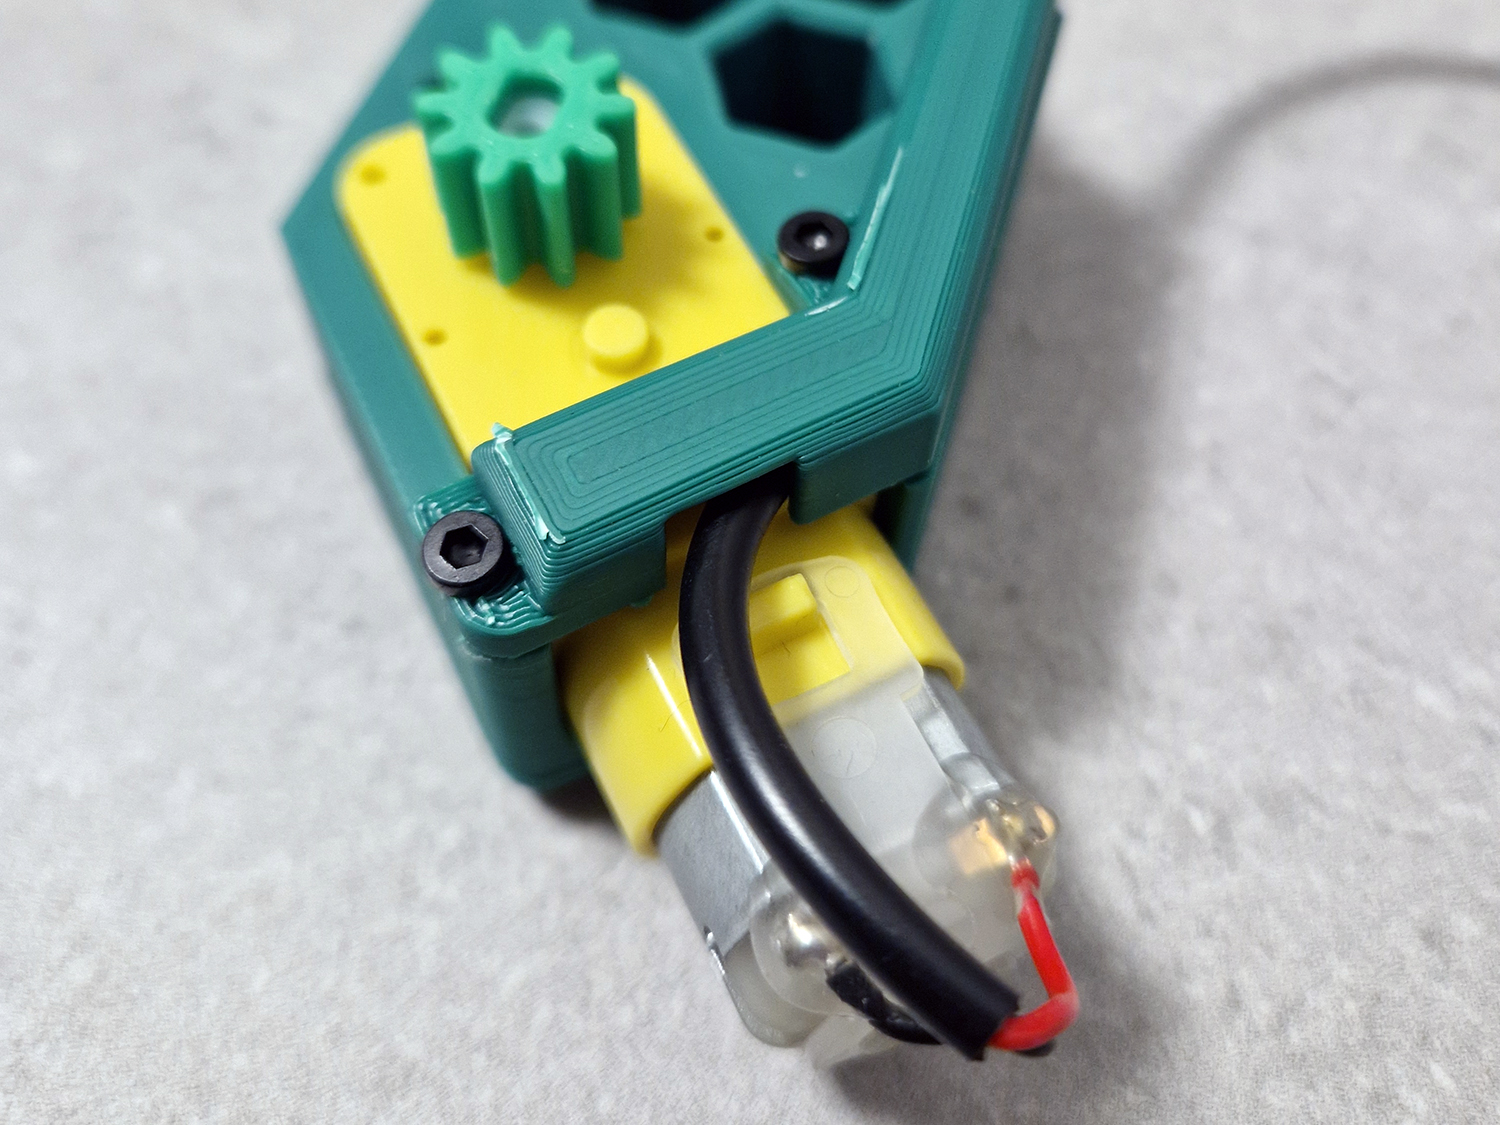 |
| Push the conveyor belts together to get a continuous belt. This is a tight fit and require some force. | 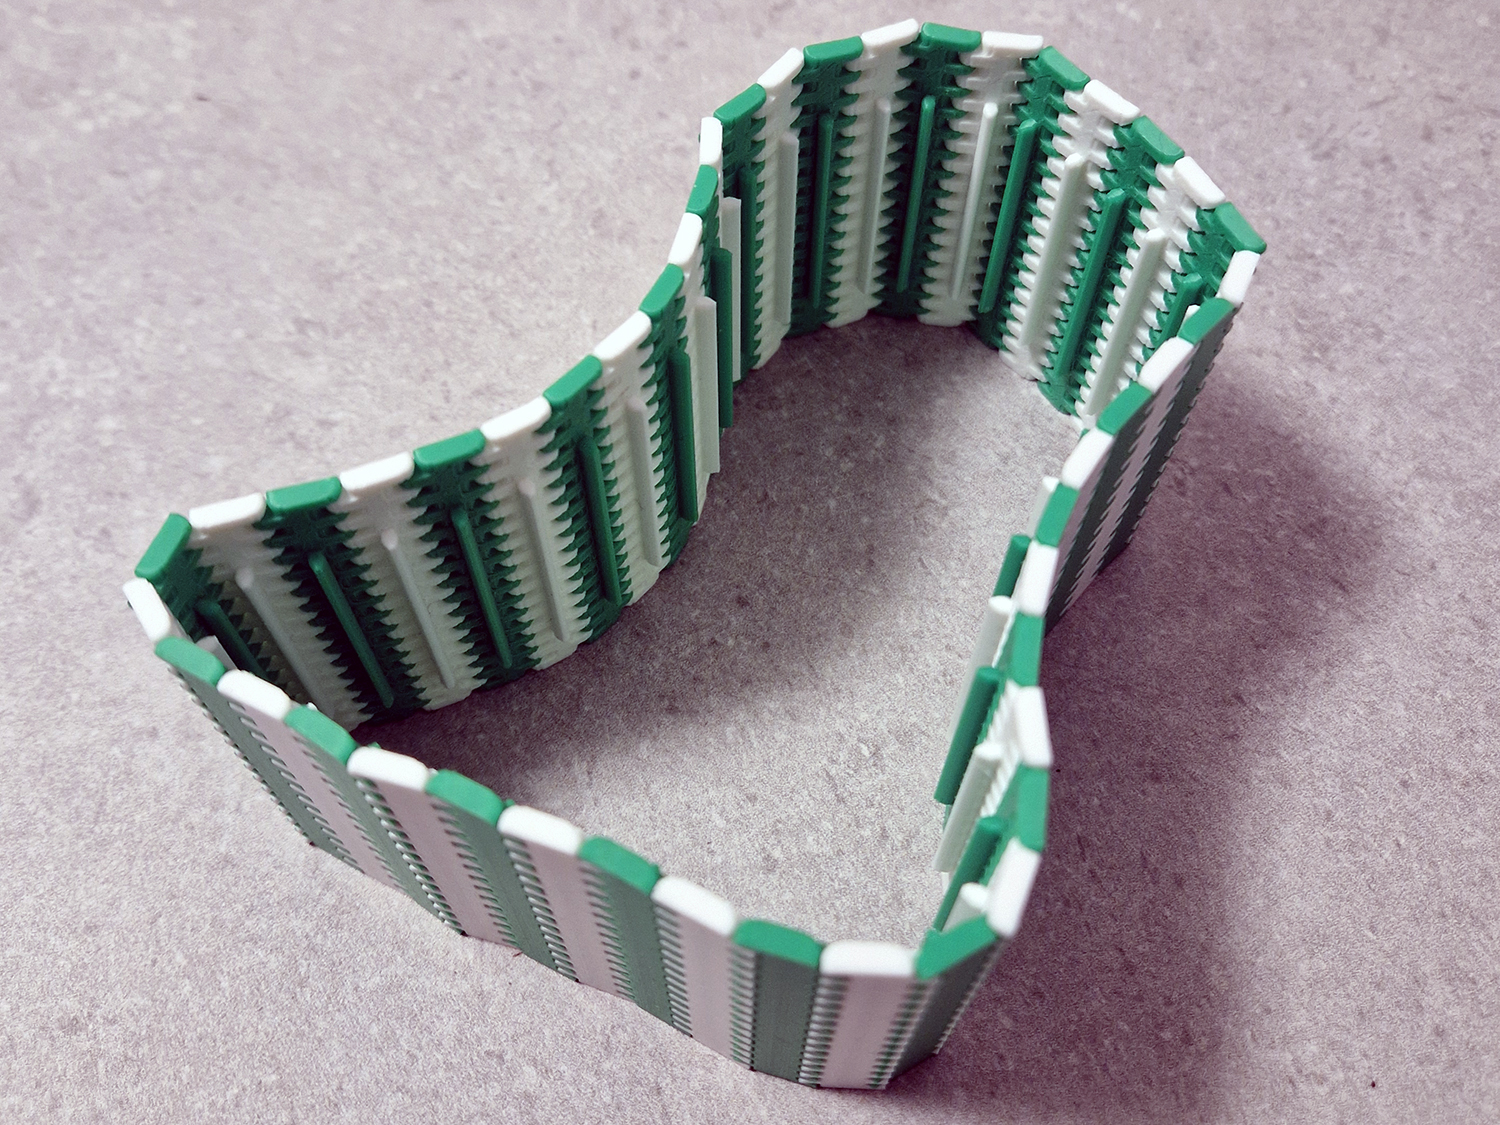 |
| Install the conveyor motor in the side of the conveyor belt. Make sure you place it with the correct side up. The cable connection should point up, so you can push the cable plug down into the motor from the top. Secure the motor with the bracket and 2 pcs. 3x8 mm screws. Attach the small gear to the motor. Attach the 200 mm SH1.0 wire to the motor and run the wire through the hole. | 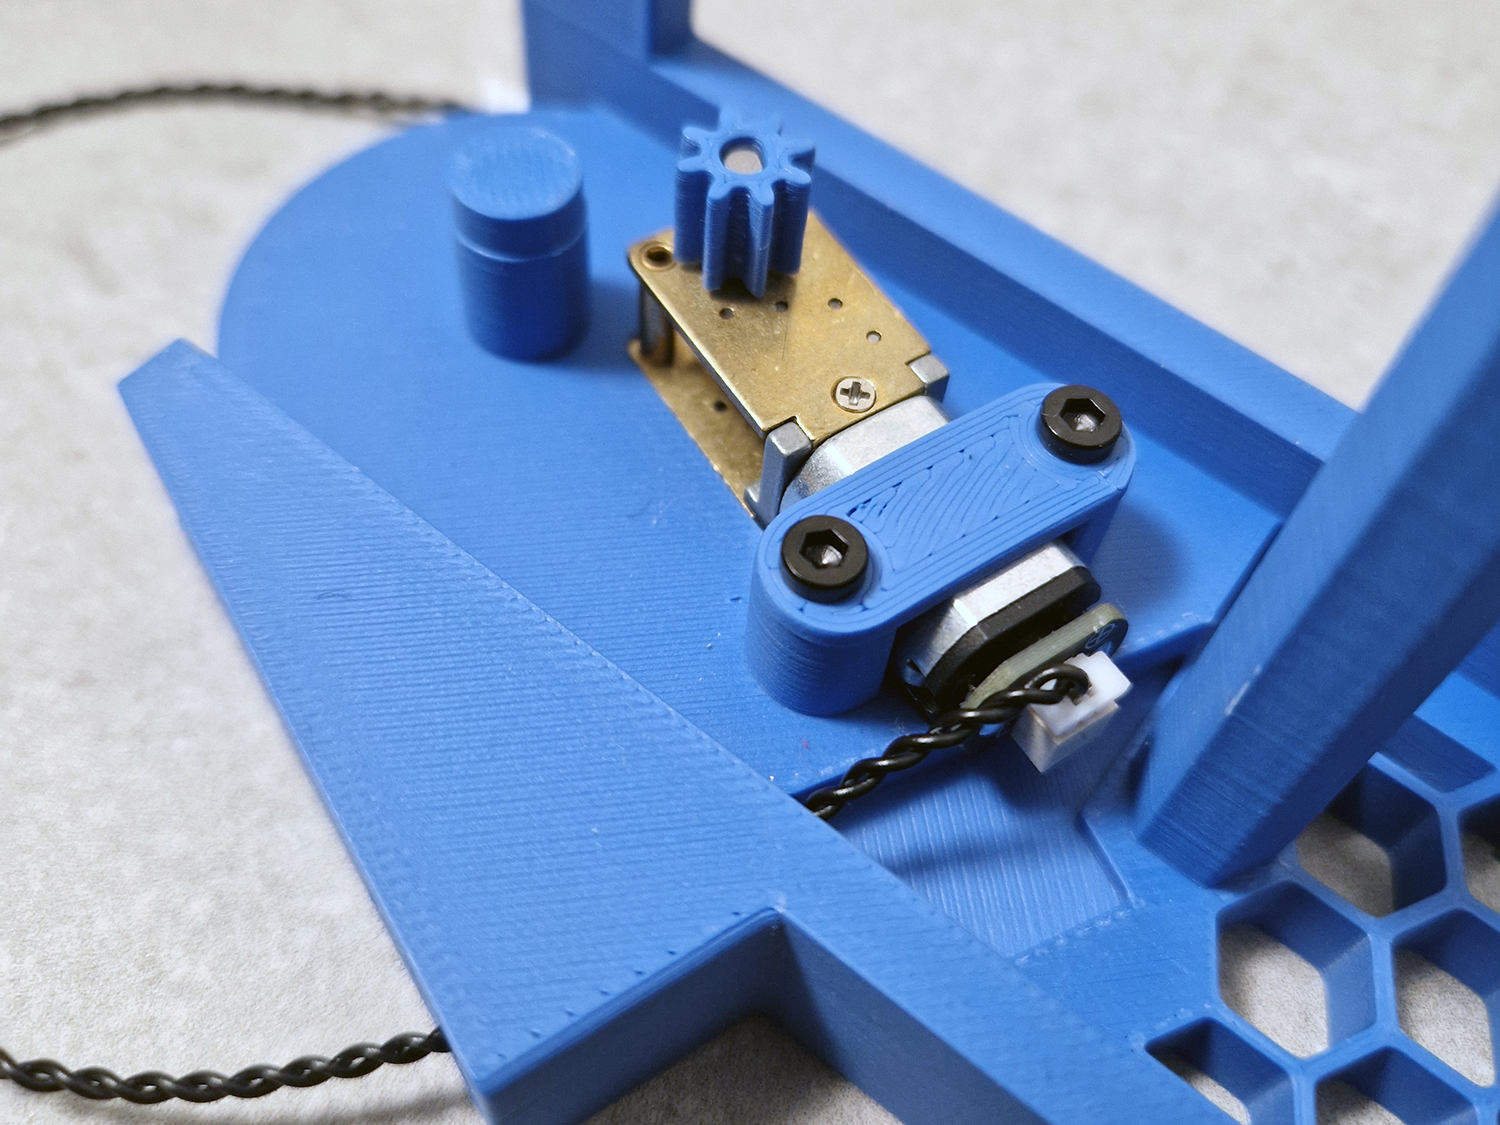 |
| Install MR128 Ball Bearing in both ends of the rollers for the conveyor belt. These are tight fits and may require some force. |  |
| Place the roller in the other conveyor side. The roller with the gear on it should point up. Thread the belt over the rollers and make sure it is all the way down and it slots into place. | 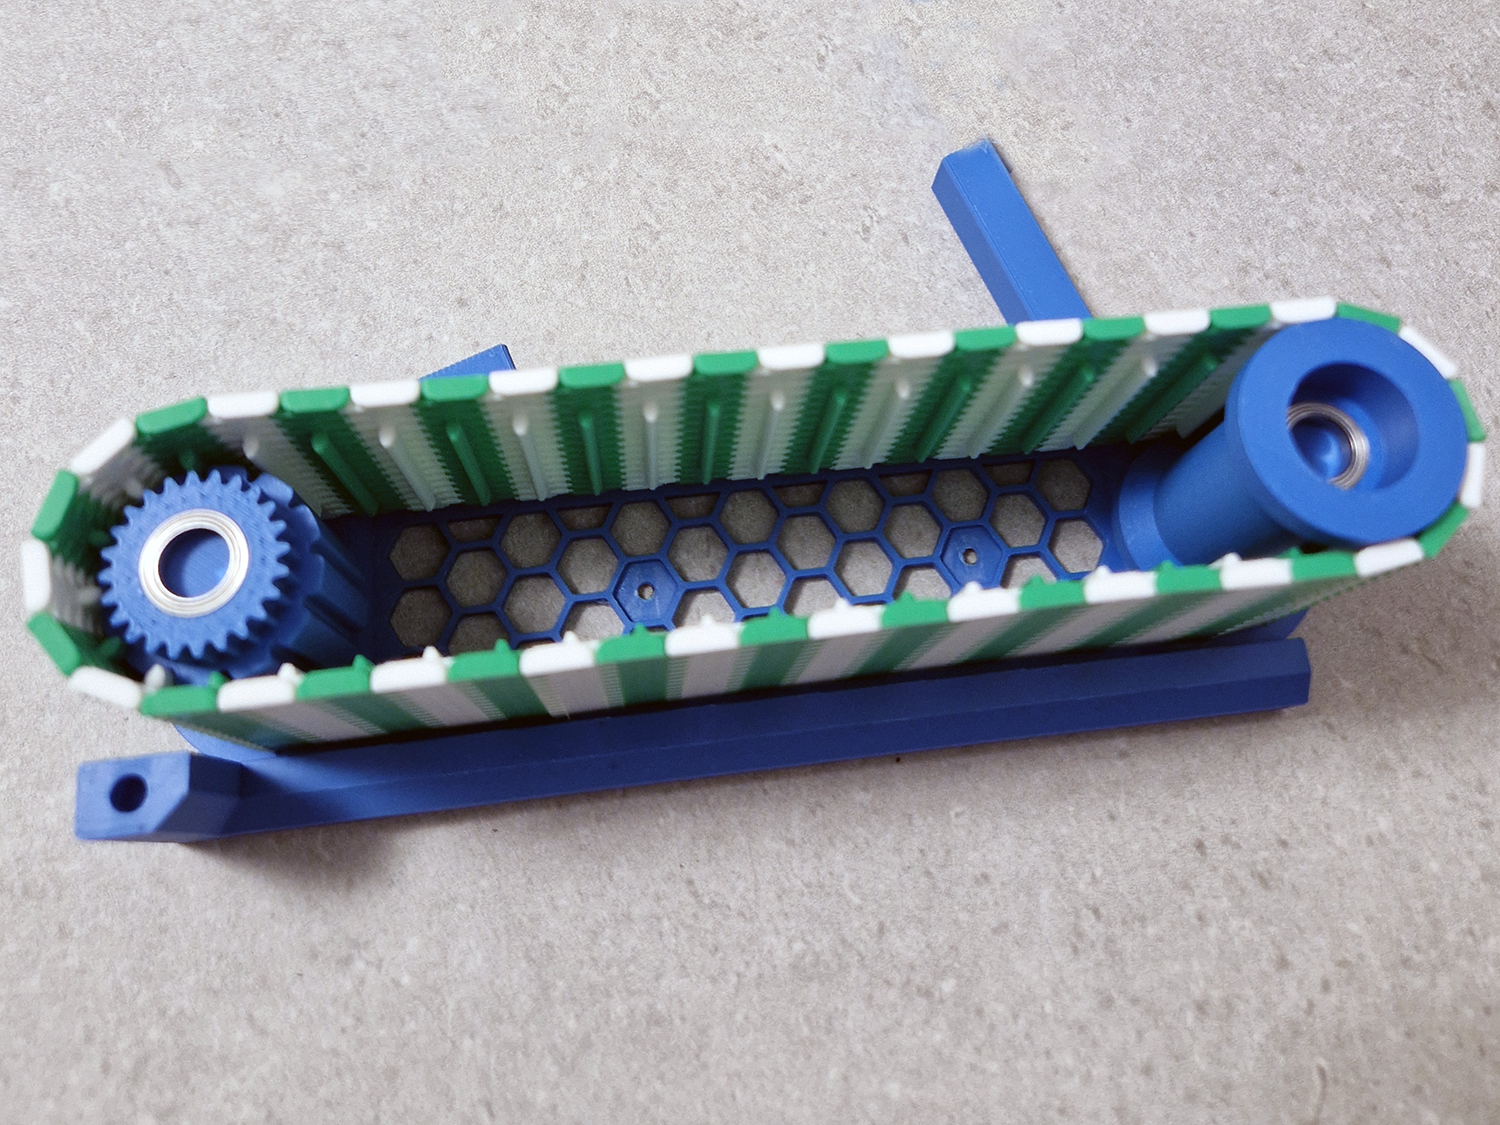 |
| Place the conveyor side with the motor over the conveyor side with the rollers and belt. Wiggle it a bit back and forth to make sure everything is in place. Secure with 2 pcs. 3x8 mm screws. | 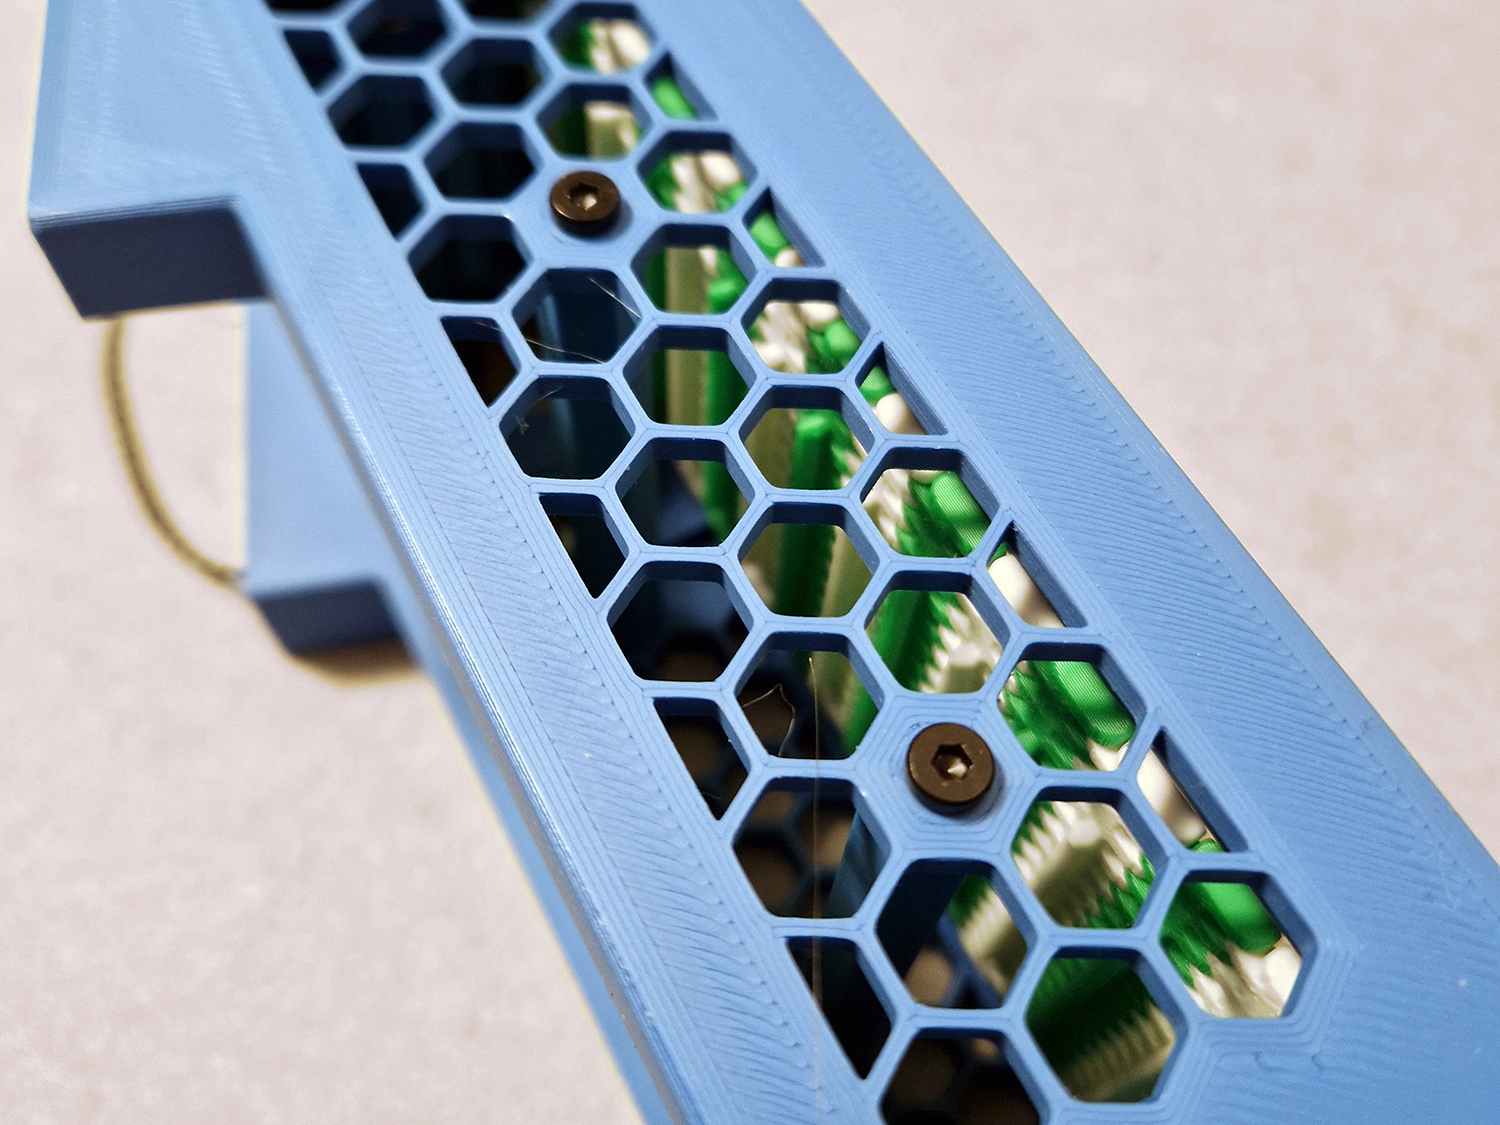 |
| Push the cart wheels on to the cart. | 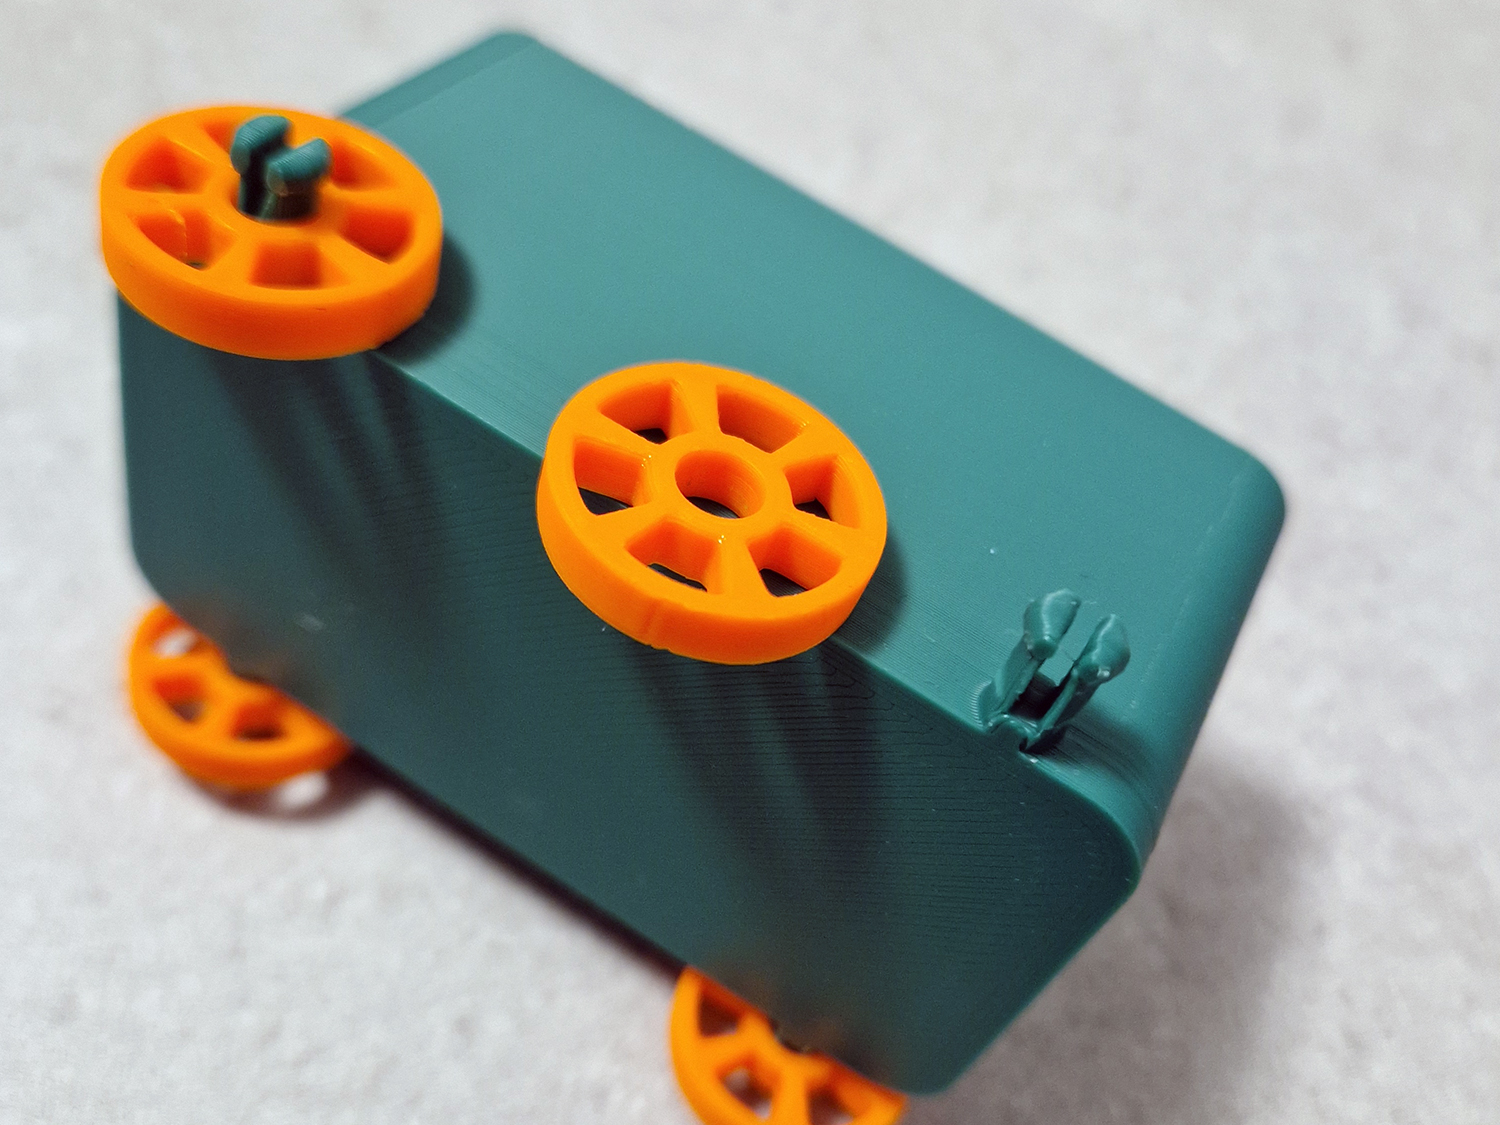 |
| Install the button switch and potentiometer inside the control panel securing them with 4 pcs. 2x8 mm screws. Attach the 100 mm SH1.0 wires. Attach the knobs and glue the sign in place. | 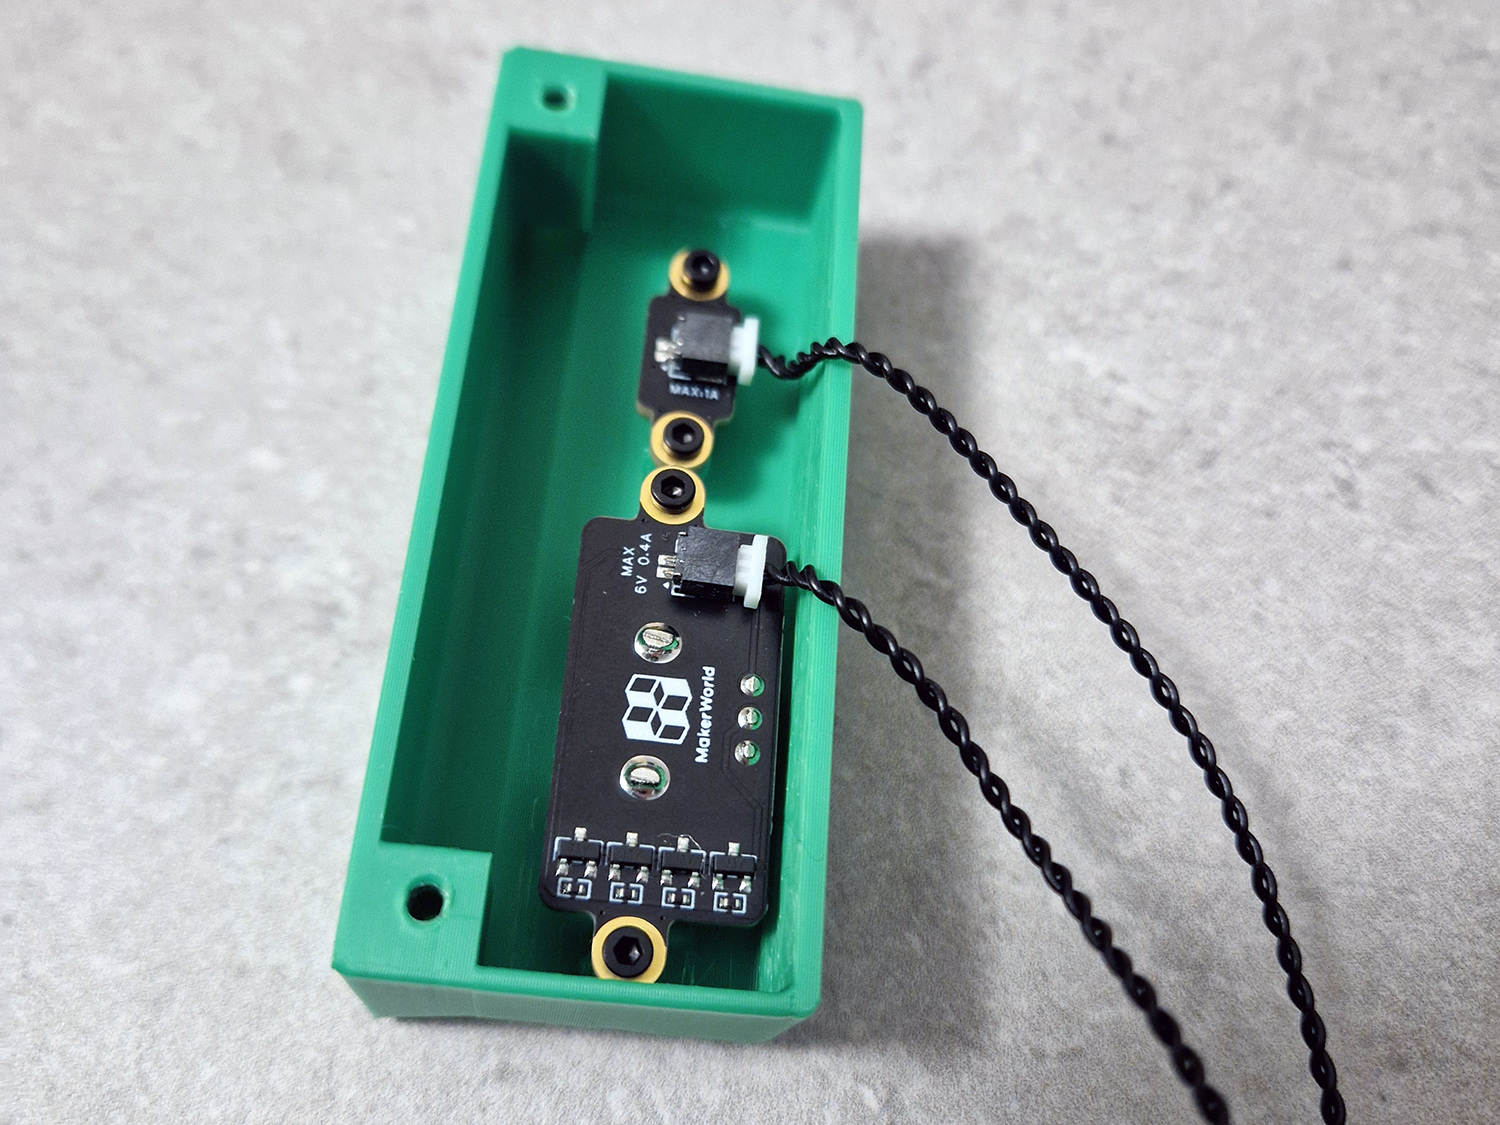 |
| Secure all the components mentioned above to the upper floor using 3x8 mm screws and run the wires through the corresponding holes. Also attach the cutter poles to the lower floor using 2 pcs. 3x8 mm screws on each pole. Place the auger motor cover over the auger motor and gears and attach with 3x8 mm screws, and the same with the die holder. | 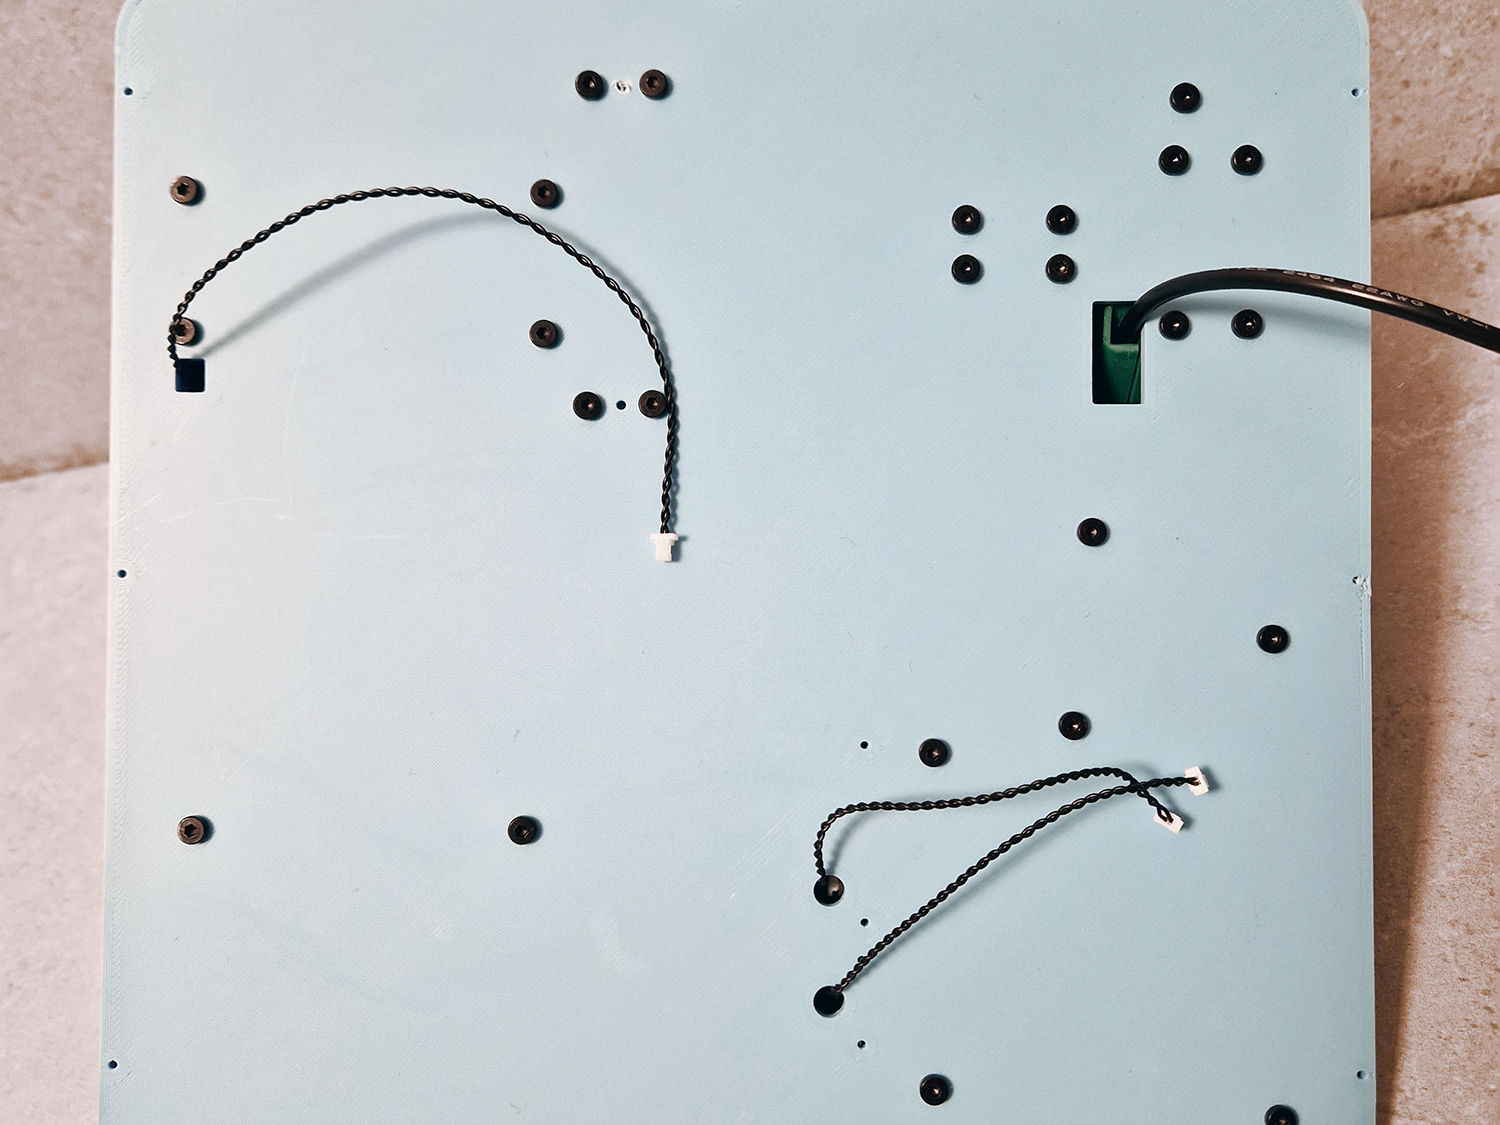 |
| Insert the compression springs in the cutter poles. | 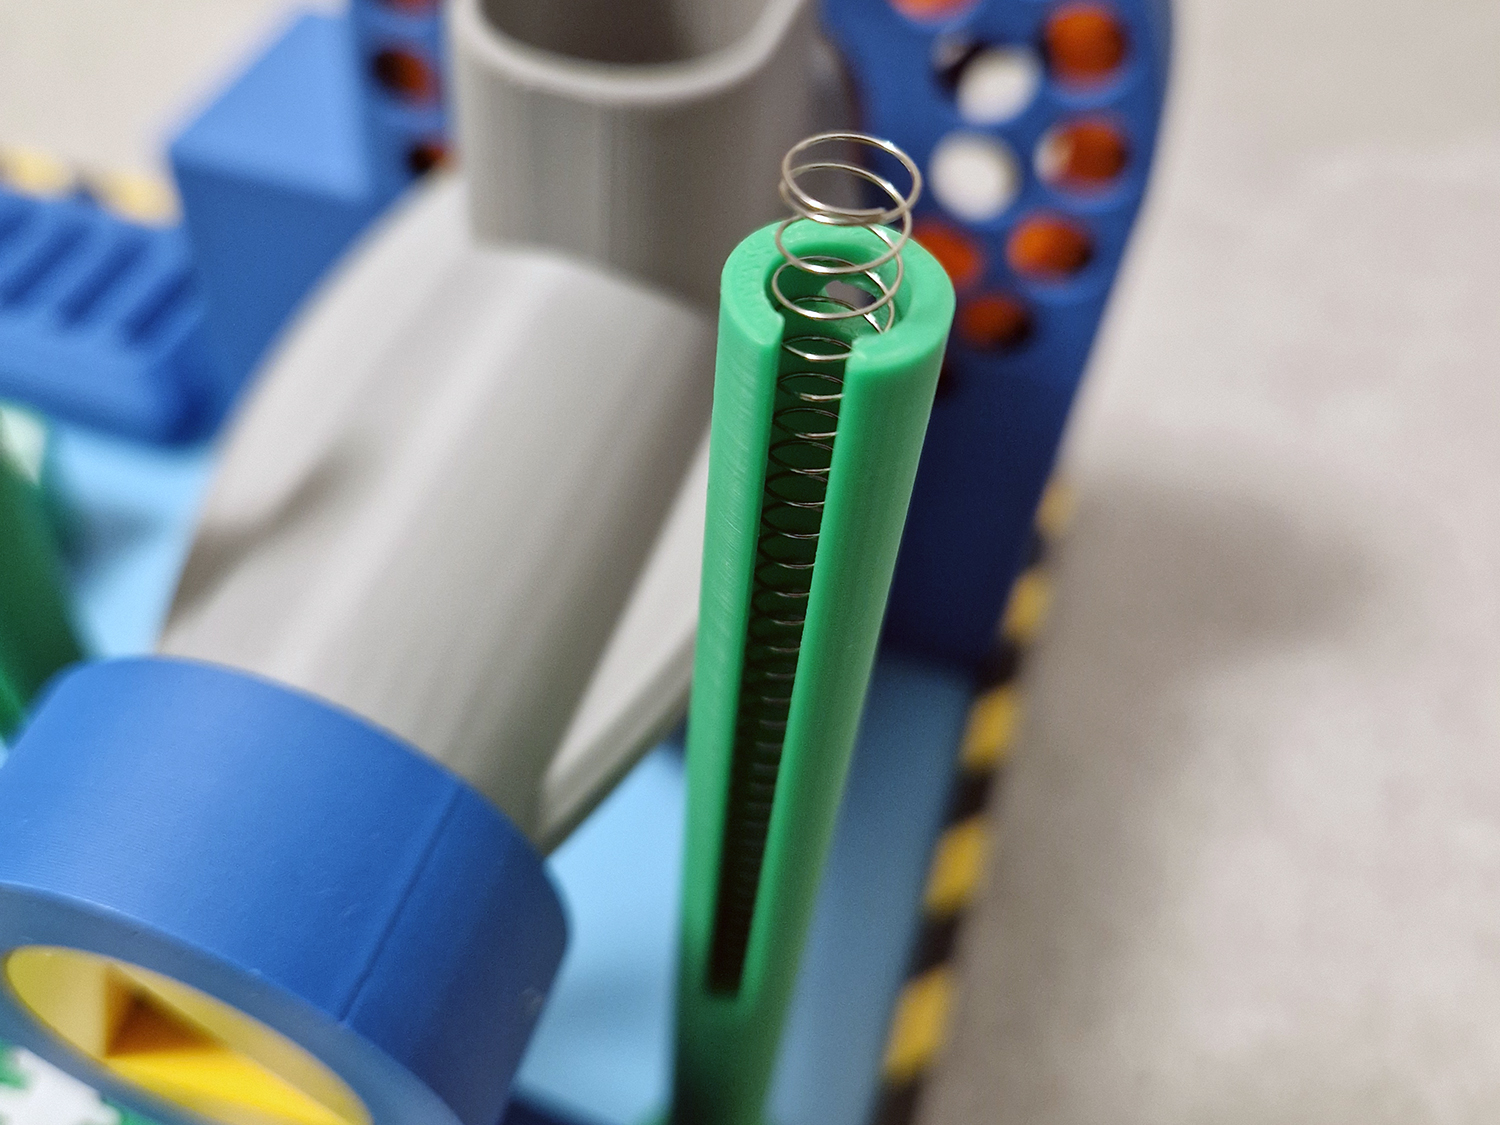 |
| Thread the cutter onto the cutter poles. Place the cutter plugs on top of each cutter pole and attach them with 3x8 mm screws. | 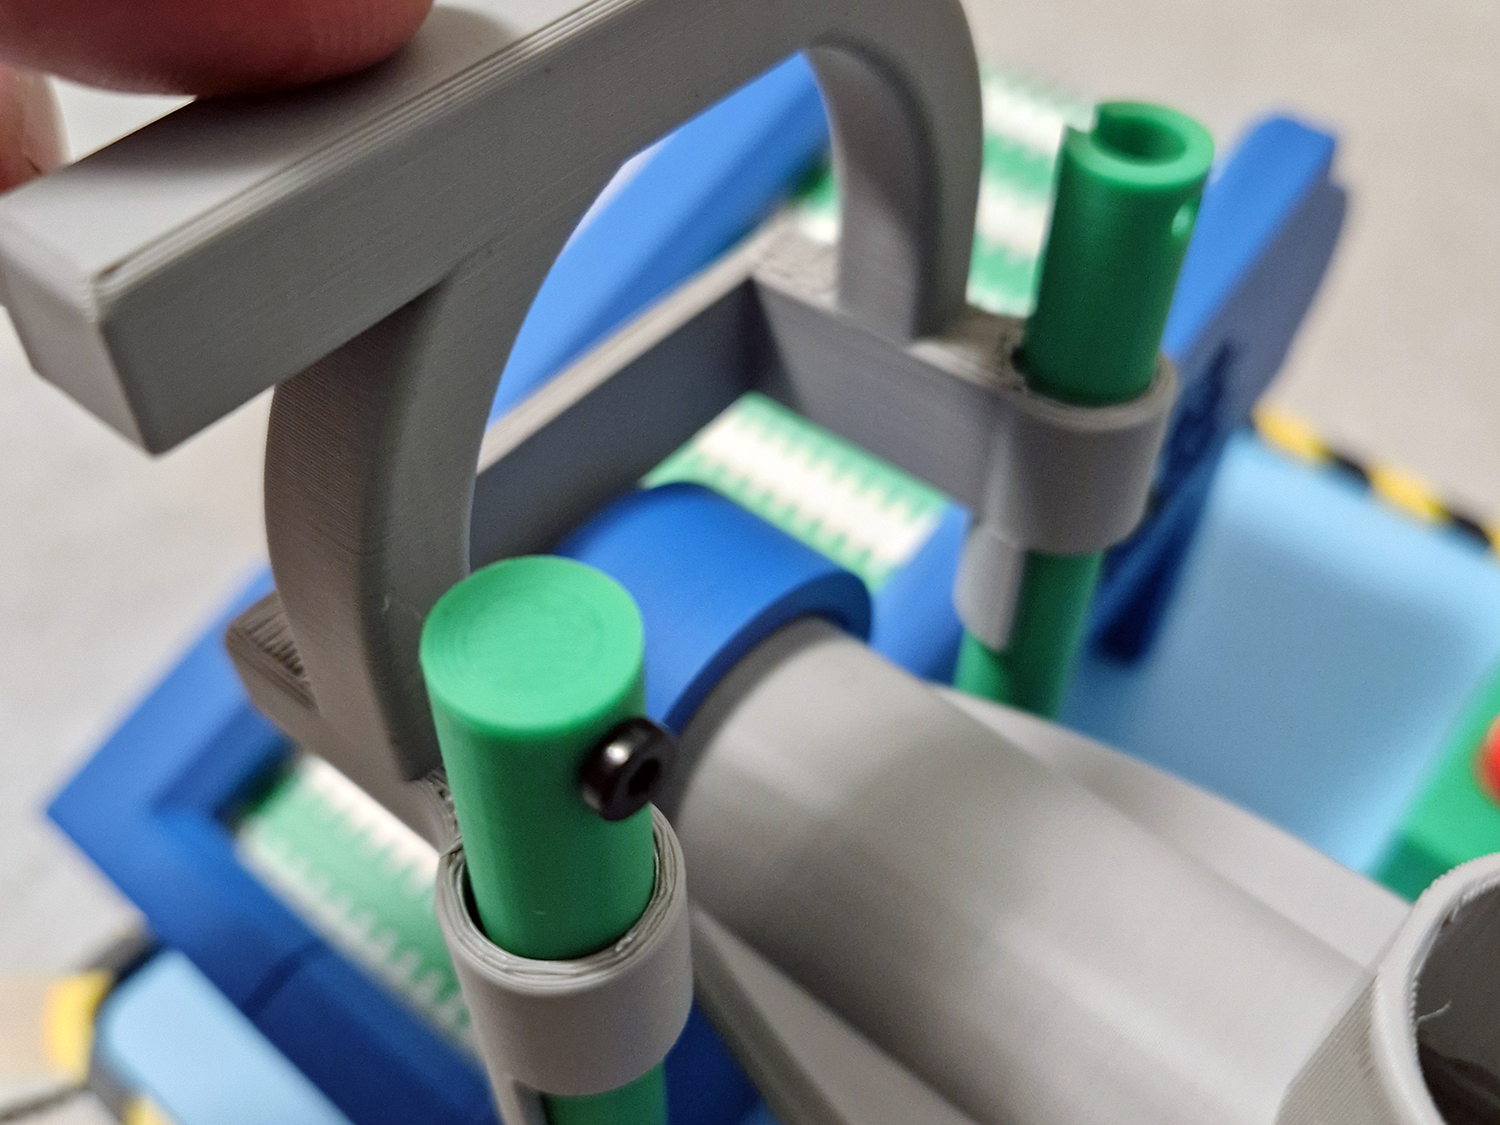 |
| Connections to the Power Distribution Board. Do not connect the motor at this point. | 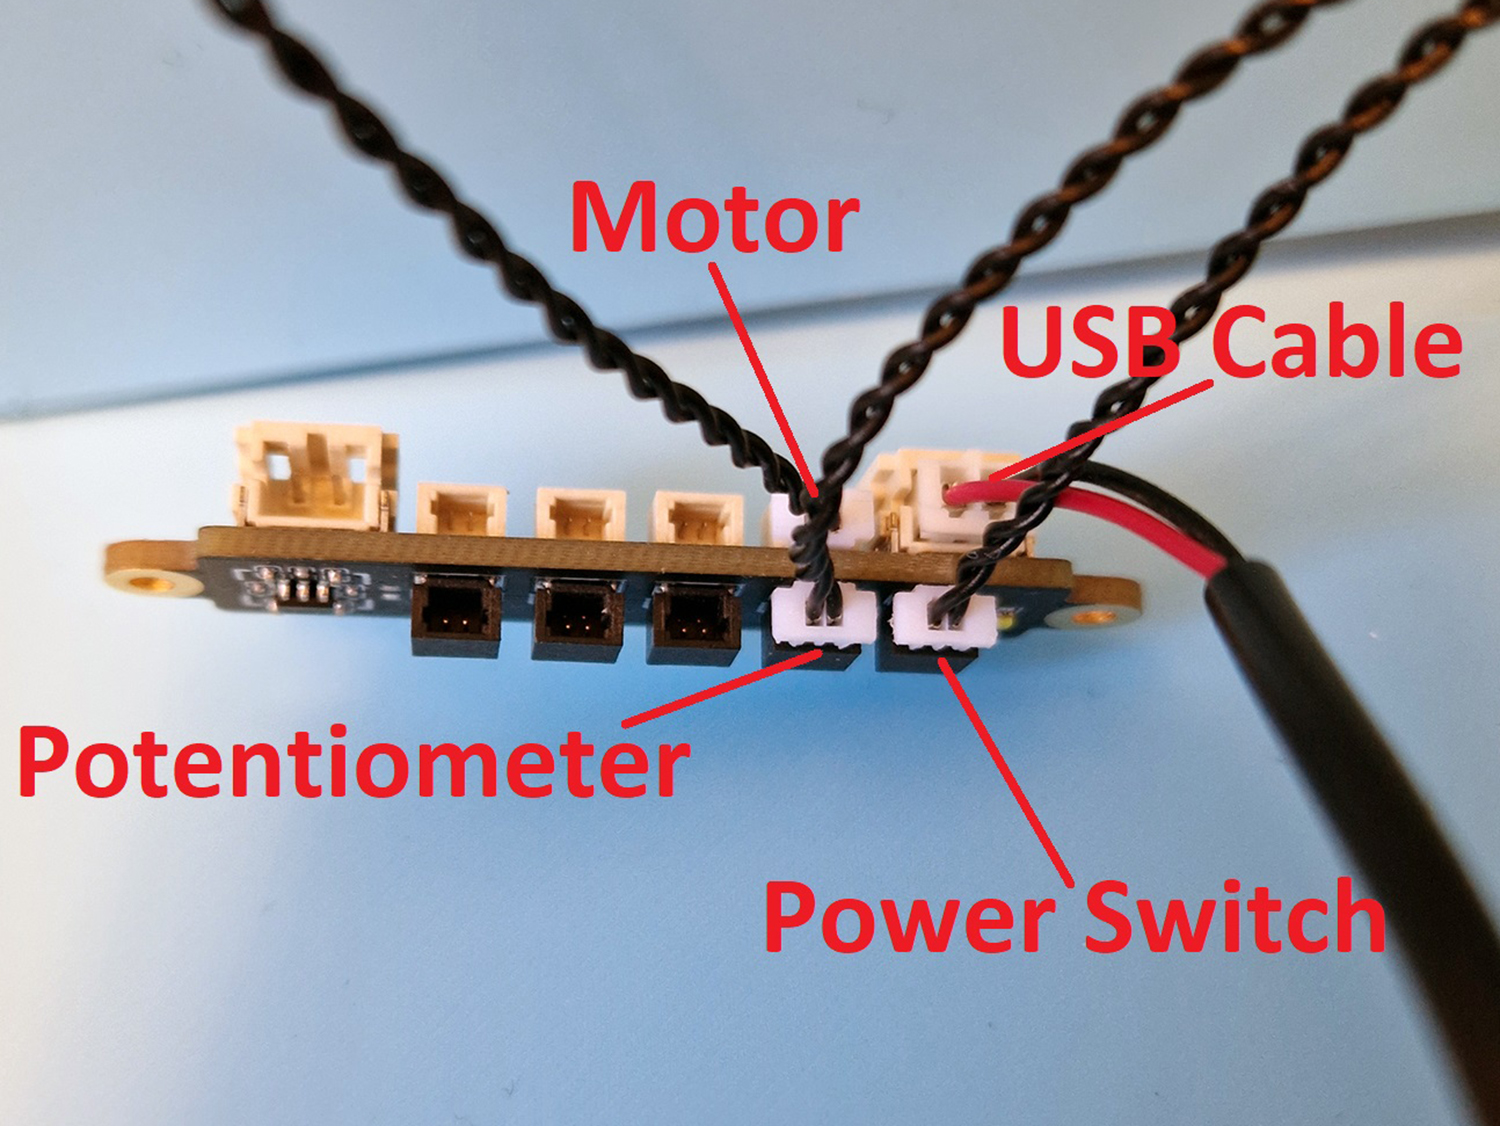 |
| Connect the wires from the power switch, potentionmeter and USB plug to the power distribution board. Attach the power distribution board with 2x8 mm screws to the lower floor. Use the cable clamp to clamp the USB cable in place with a little slack, use 3x8 mm screws, don`t tighten hard, only enough to keep the cable in place. Then connect the wire from the motor to the power distribution board. | 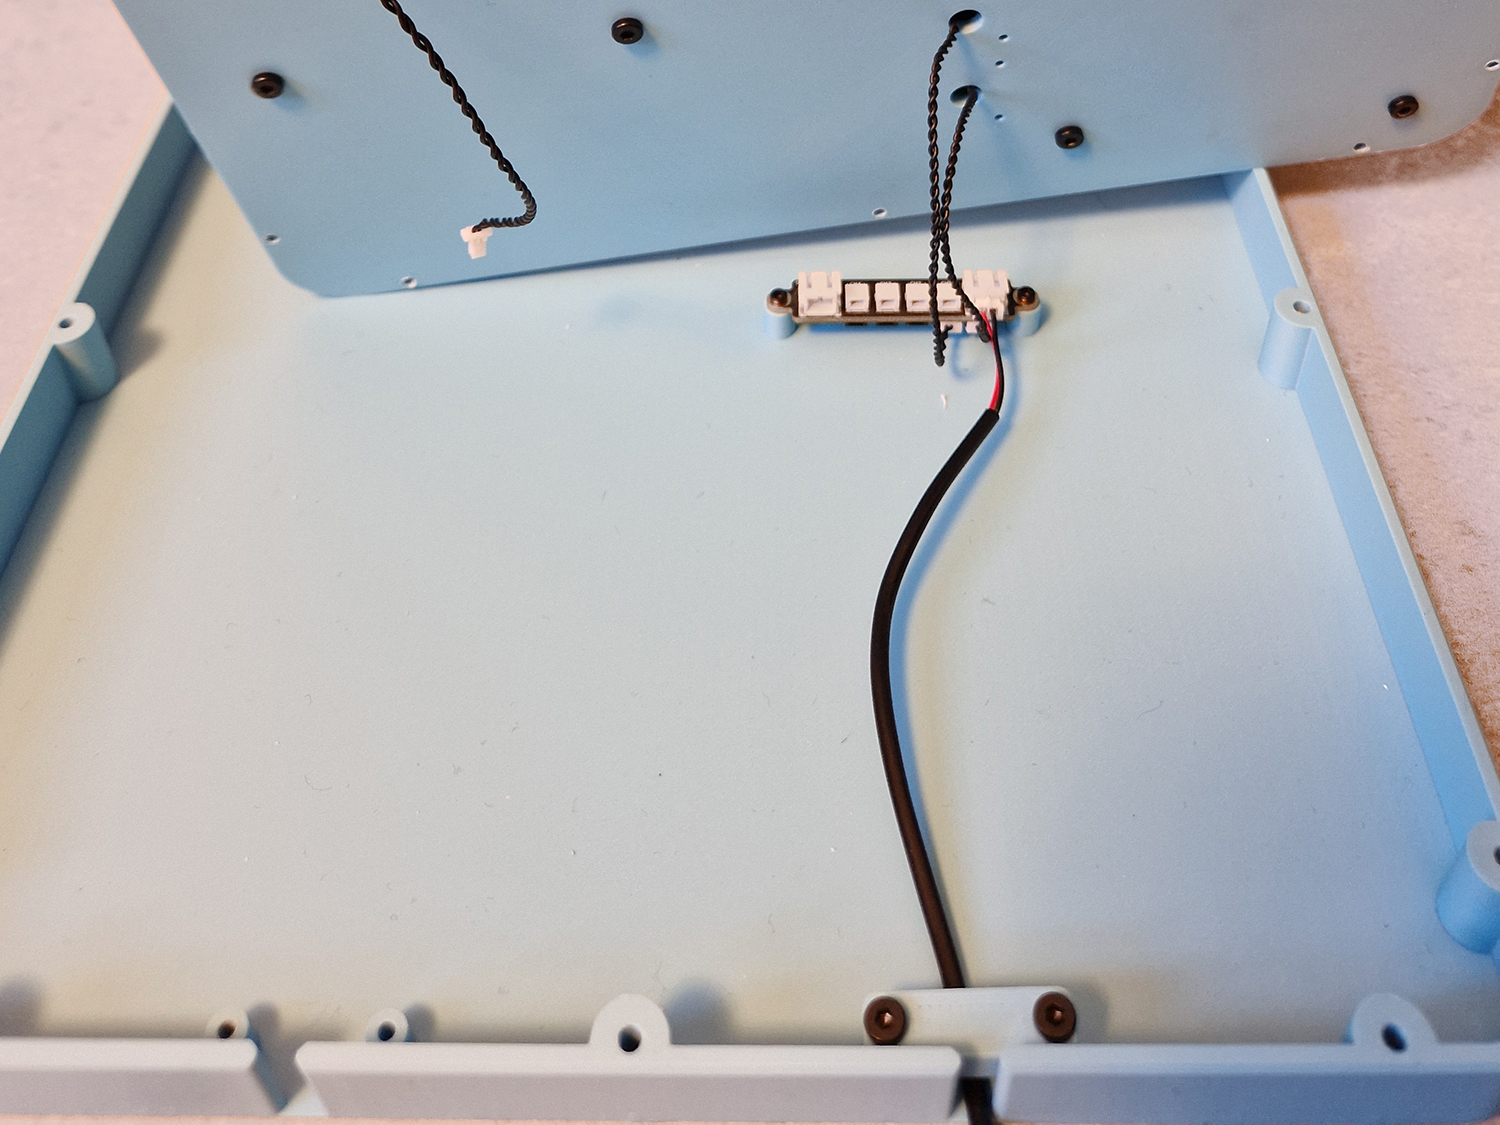 |
| Lay the top floor on top of the lower floor carefully to not rip out the wires. Clamp down the USB cable for the extruder motor with the cable clamp and 3x8 mm screws. | 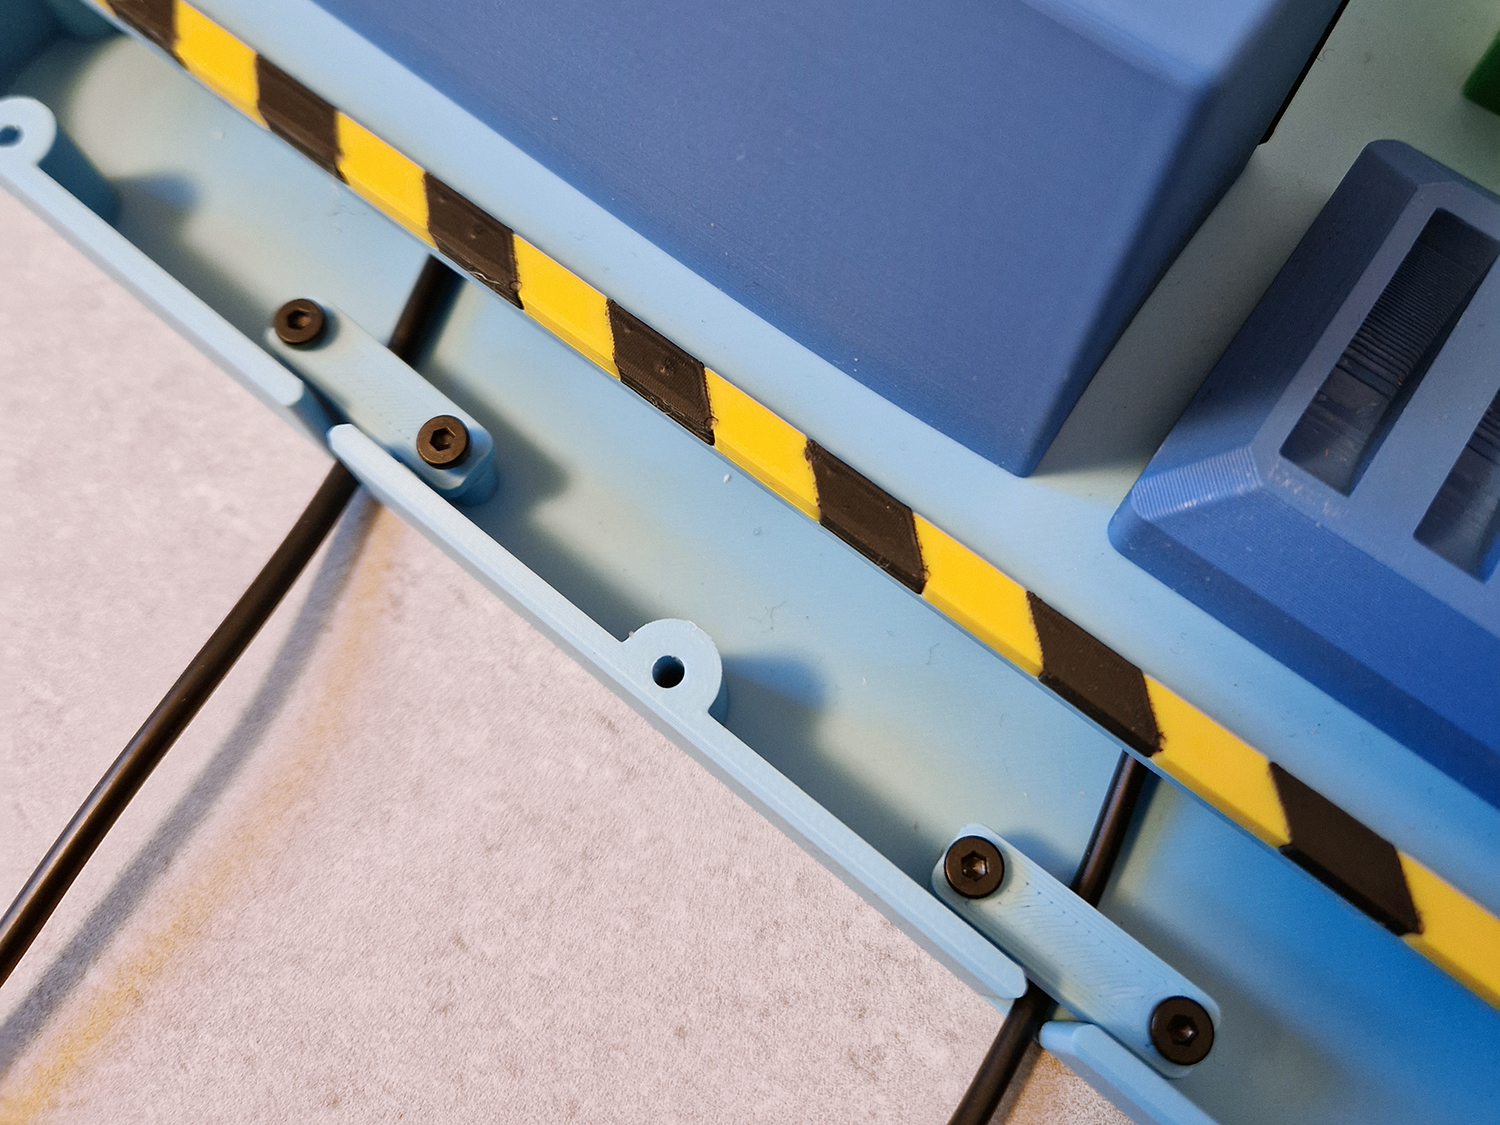 |
| Attach the lower floor to the upper floor using 3x20 mm screws. | 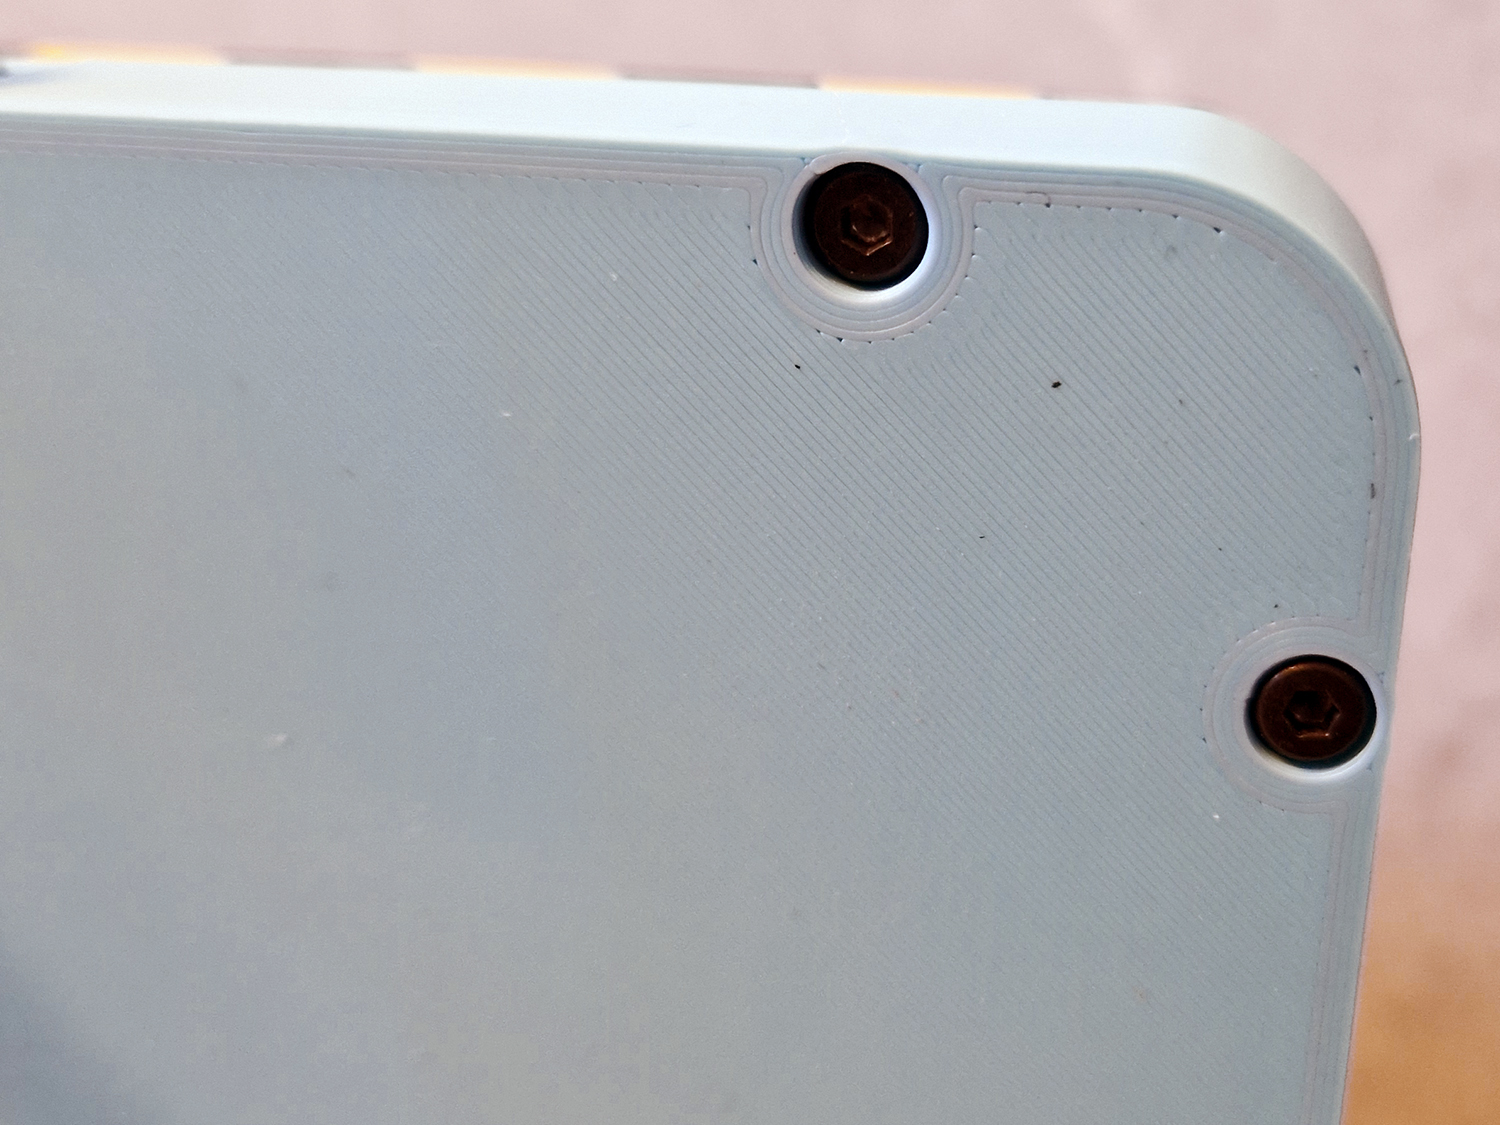
|
| Glue the Danger Conveyor sign to the conveyor belt. Glue the Danger Auger sign to the cover on the extruder. | 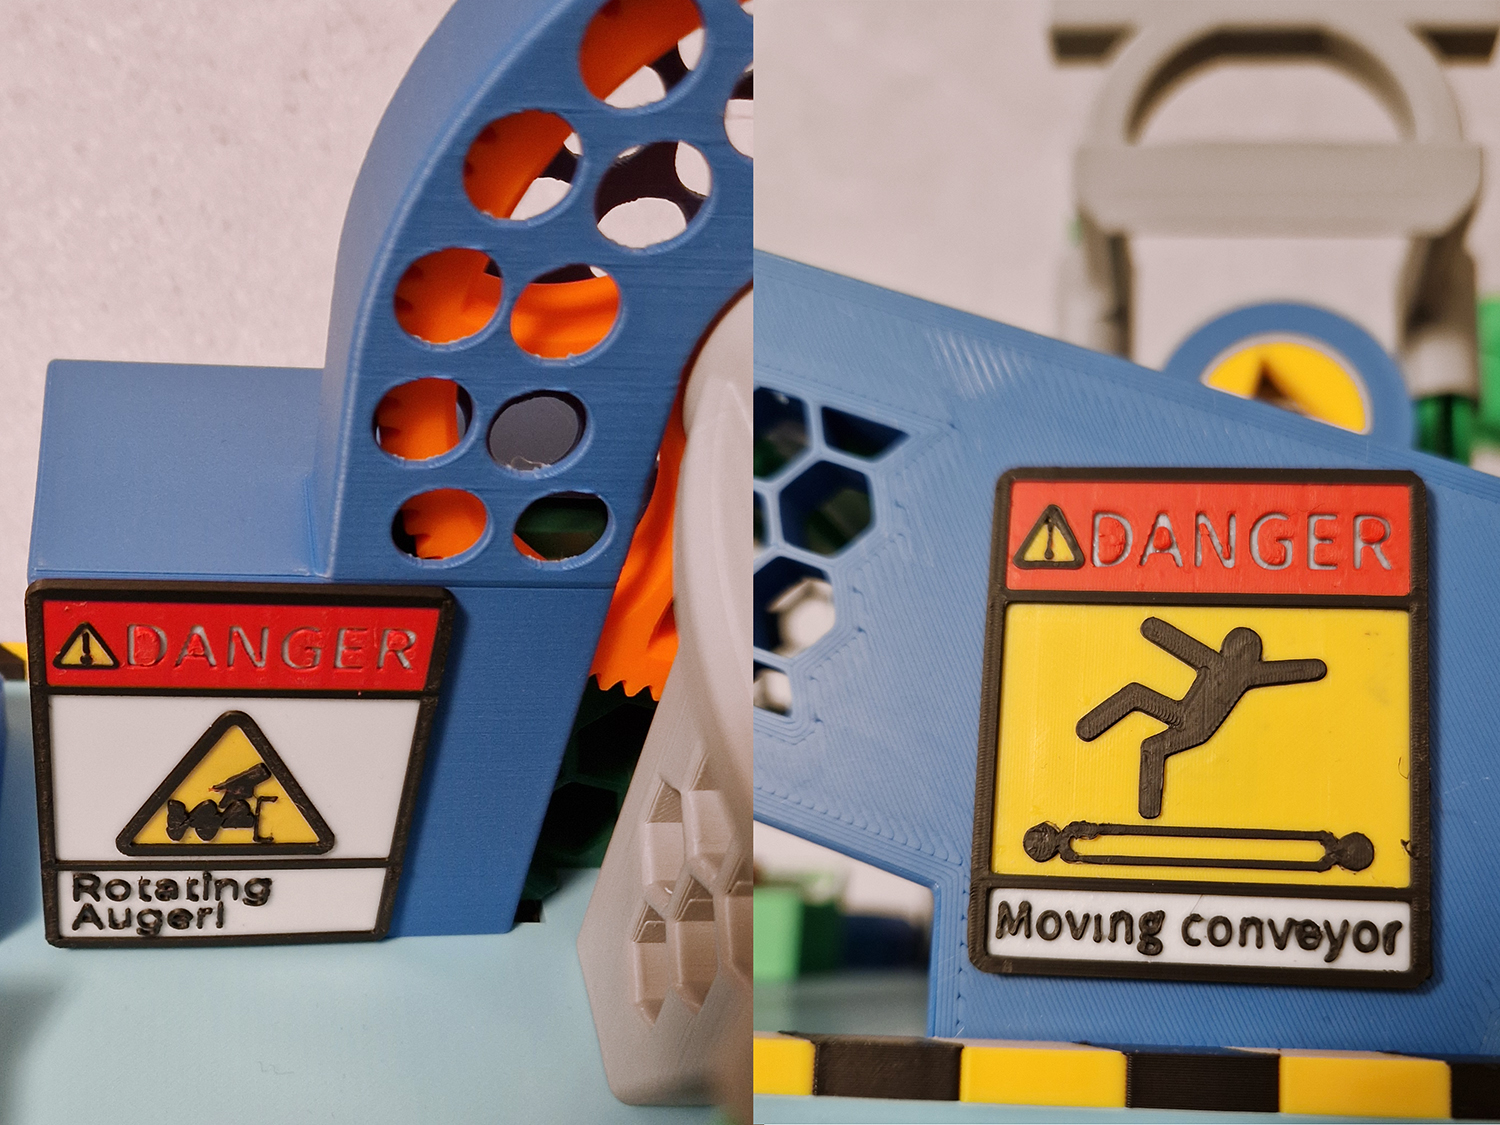 |
| Connect the Speed Controller to the extruder motor cable. Use the max setting, 8. | 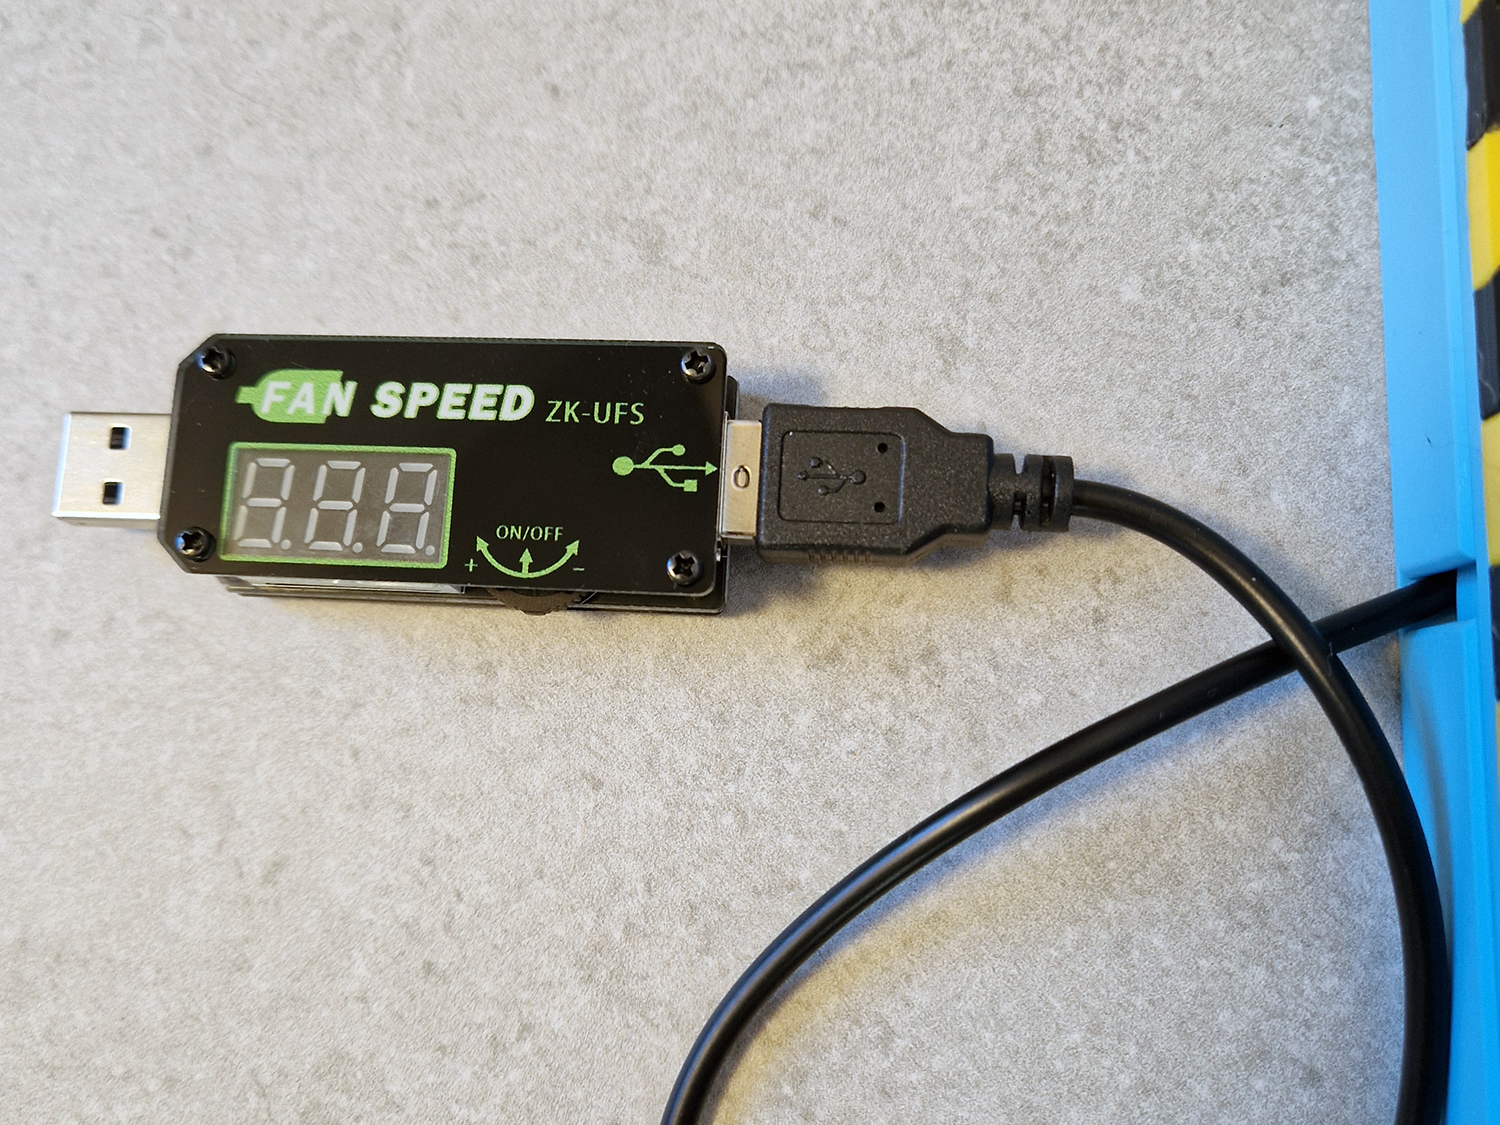 |
I hope you have as much fun making and playing with this model as i had designing it! c",)
