Você está no 3DFinder
Buscamos em Thingiverse, MakerWorld e Printables ao mesmo tempo para te dar o melhor de cada uma.
Descrição
The A1's camera just got better
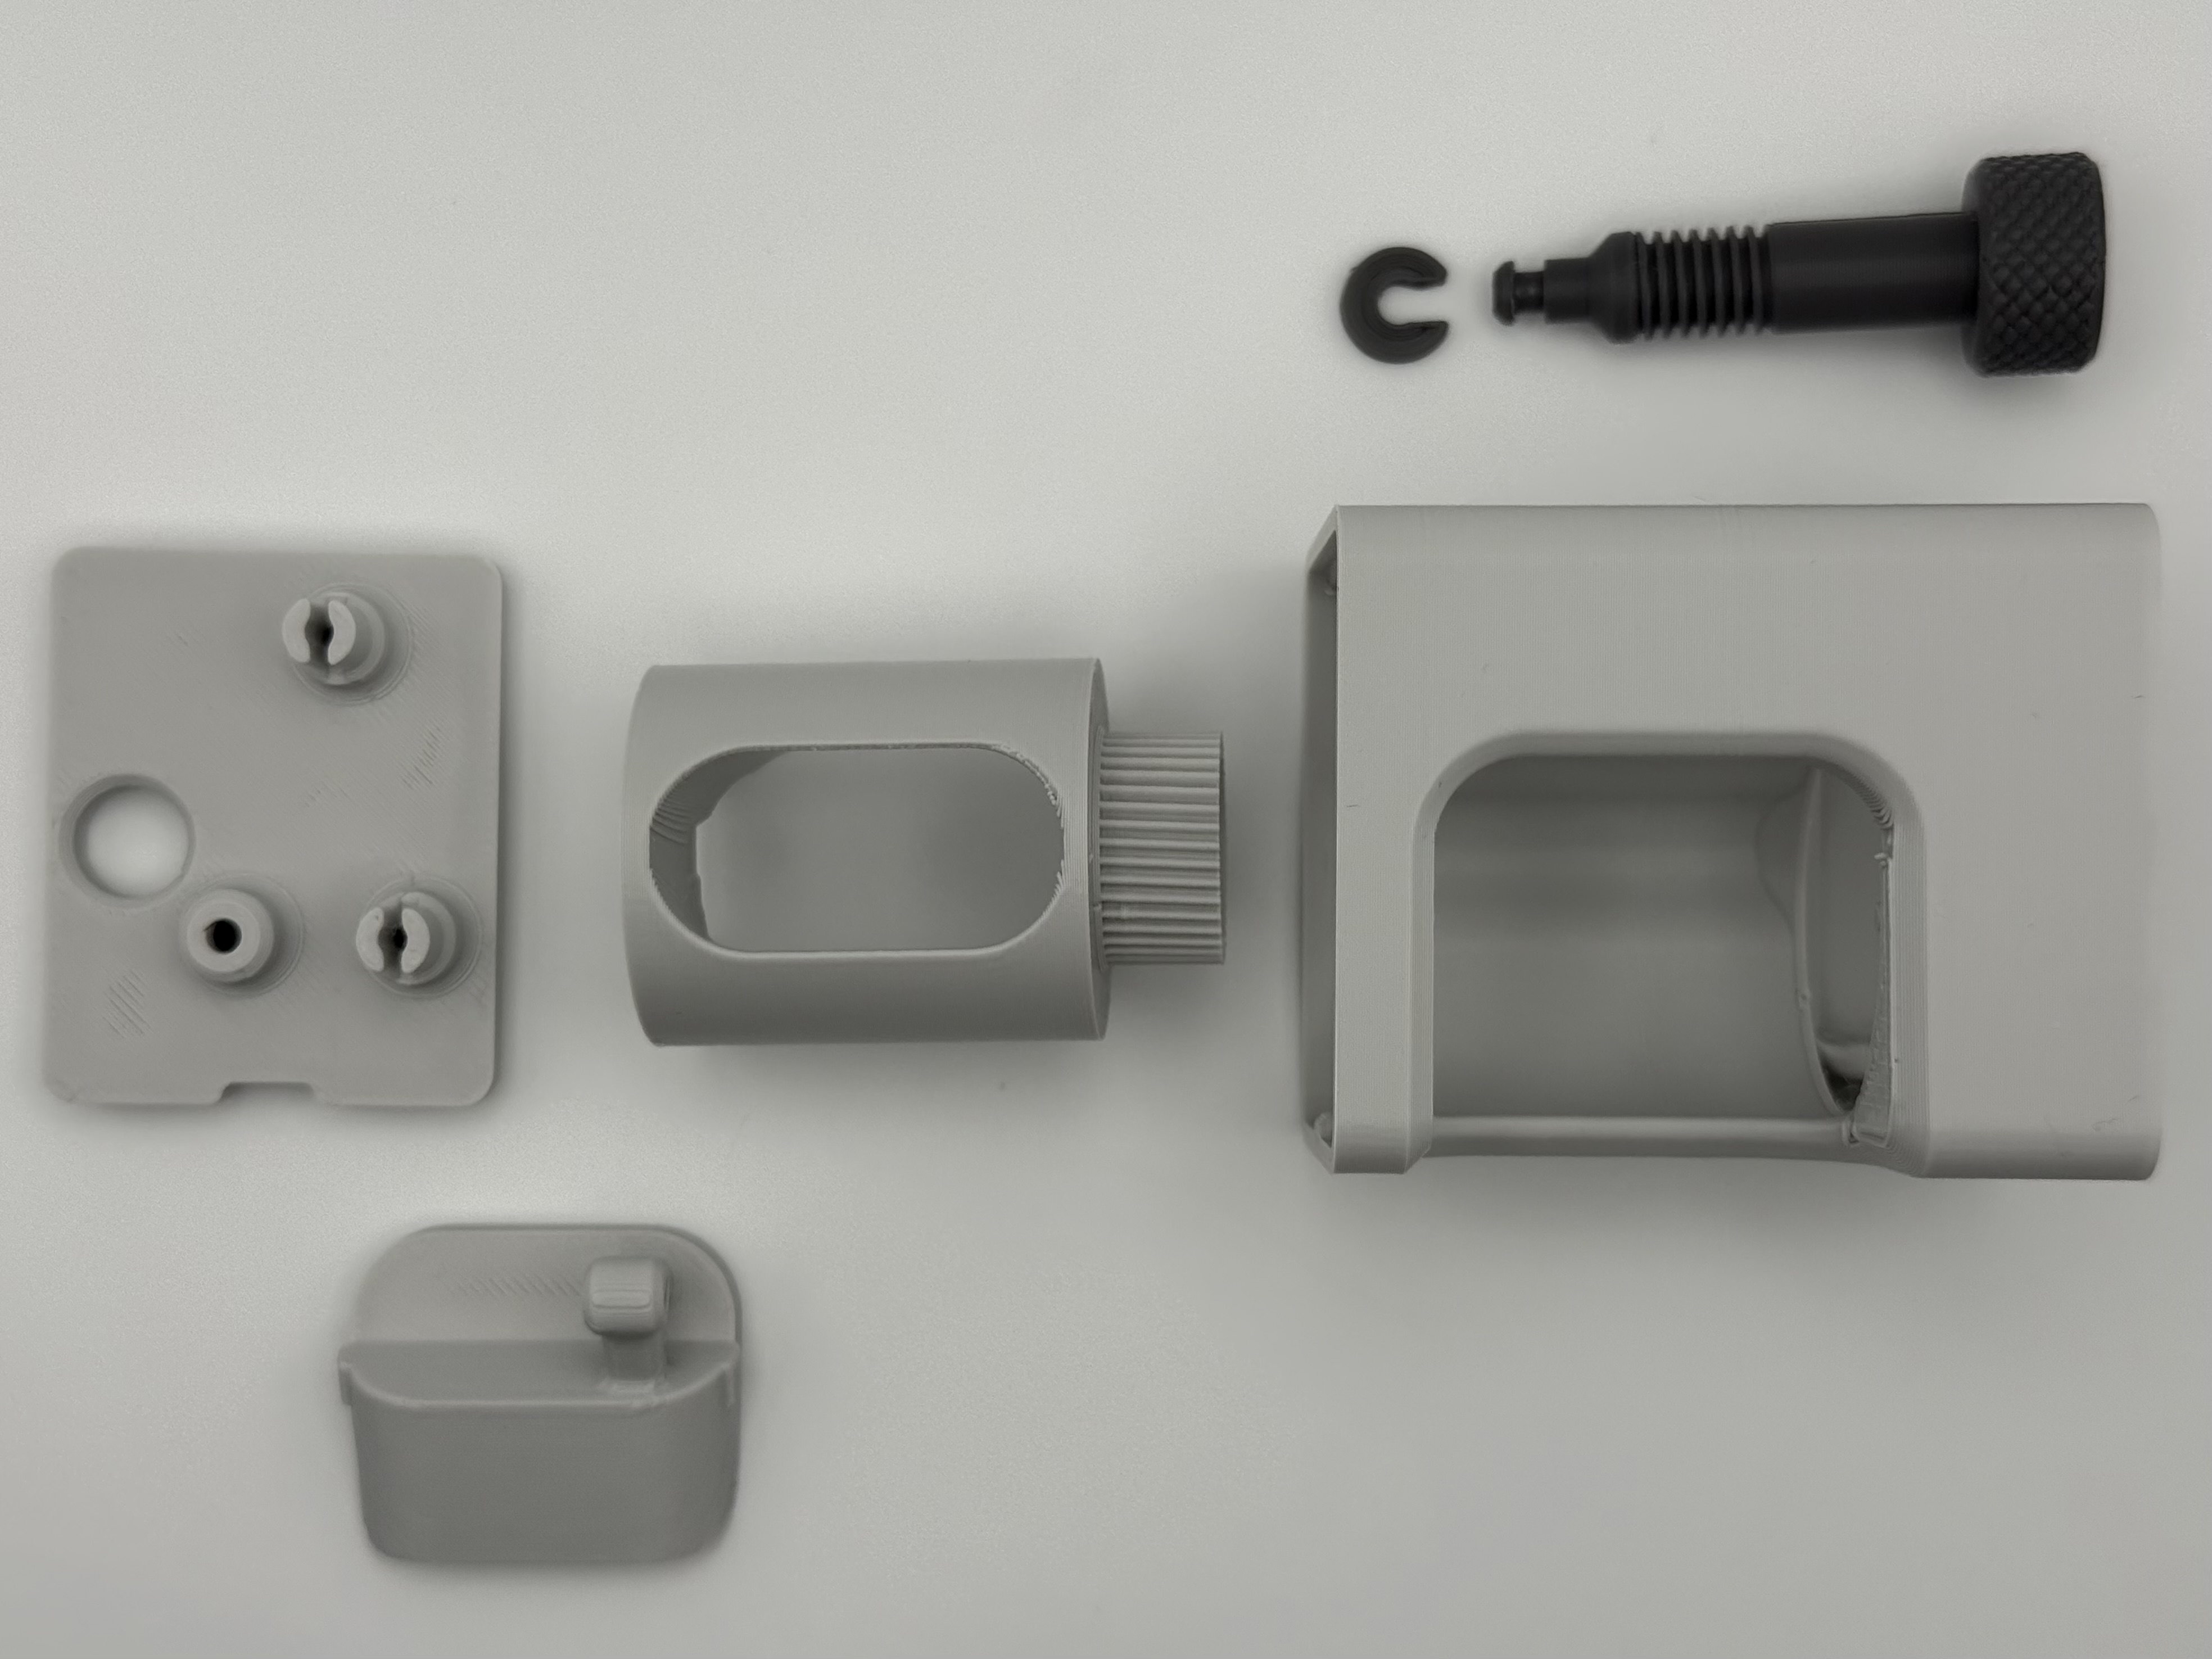
It doesn't take a keen eye to notice that the A1 Camera has very poor placement. Thankfully, there is a fix! This print seamlessly integrates with the A1's simplistic look, and part of that is thanks to it using the factory X-axis motor cover. For it to blend in even better, print out of Bambu Lab Light Gray PLA Basic, as it matches the printer nearly perfect. It also features a camera plug with a perfect fit. The model attaches firmly onto your A1 using drywall anchor-style grips, instead of fragile clips. I know what you're thinking, “I have to drill holes in my printer?” No, you will not need to drill any holes. This model slides and clamps into place. To expand the anchors inside the print, you will need to use four BT3x8 SHCS Self-Tapping Screws (these are included with the free Maker's beginner kit you get free of charge for making your MakerWorld account) to activate the clamps and mount the main camera body to the adapter plate. After the installation is swiftly completed, you get to enjoy a premium camera experience. What makes this premium, you may ask? Well, let me tell you; there is a set of gears inside the print that allow for your camera to tilt anywhere inside a 45-degree range, all with a twist of a knob. About to start a smaller print? Adjust the camera to be more level. Maybe it's time for a bigger print job? You can angle the camera down to see the entire print. Also, if you're looking for a little more privacy with your printer's camera, there is a built-in privacy wall. That way, your camera focuses on the print, and less of what it doesn't need to see.
Notes
If you do not have the screws and/or color-matched filament for your printer, you can find them in the links below. The links below are affiliate links. Which means if you use those links, it supports me greatly, and I appreciate it even more. Thank you!
This model does not fit on the A1 Mini.
If you have a different camera relocation kit and want the perfect fitting camera replacement cover, you can find it HERE.
Installation Guide
Assembly is easy, and I'll walk you through it step by step.
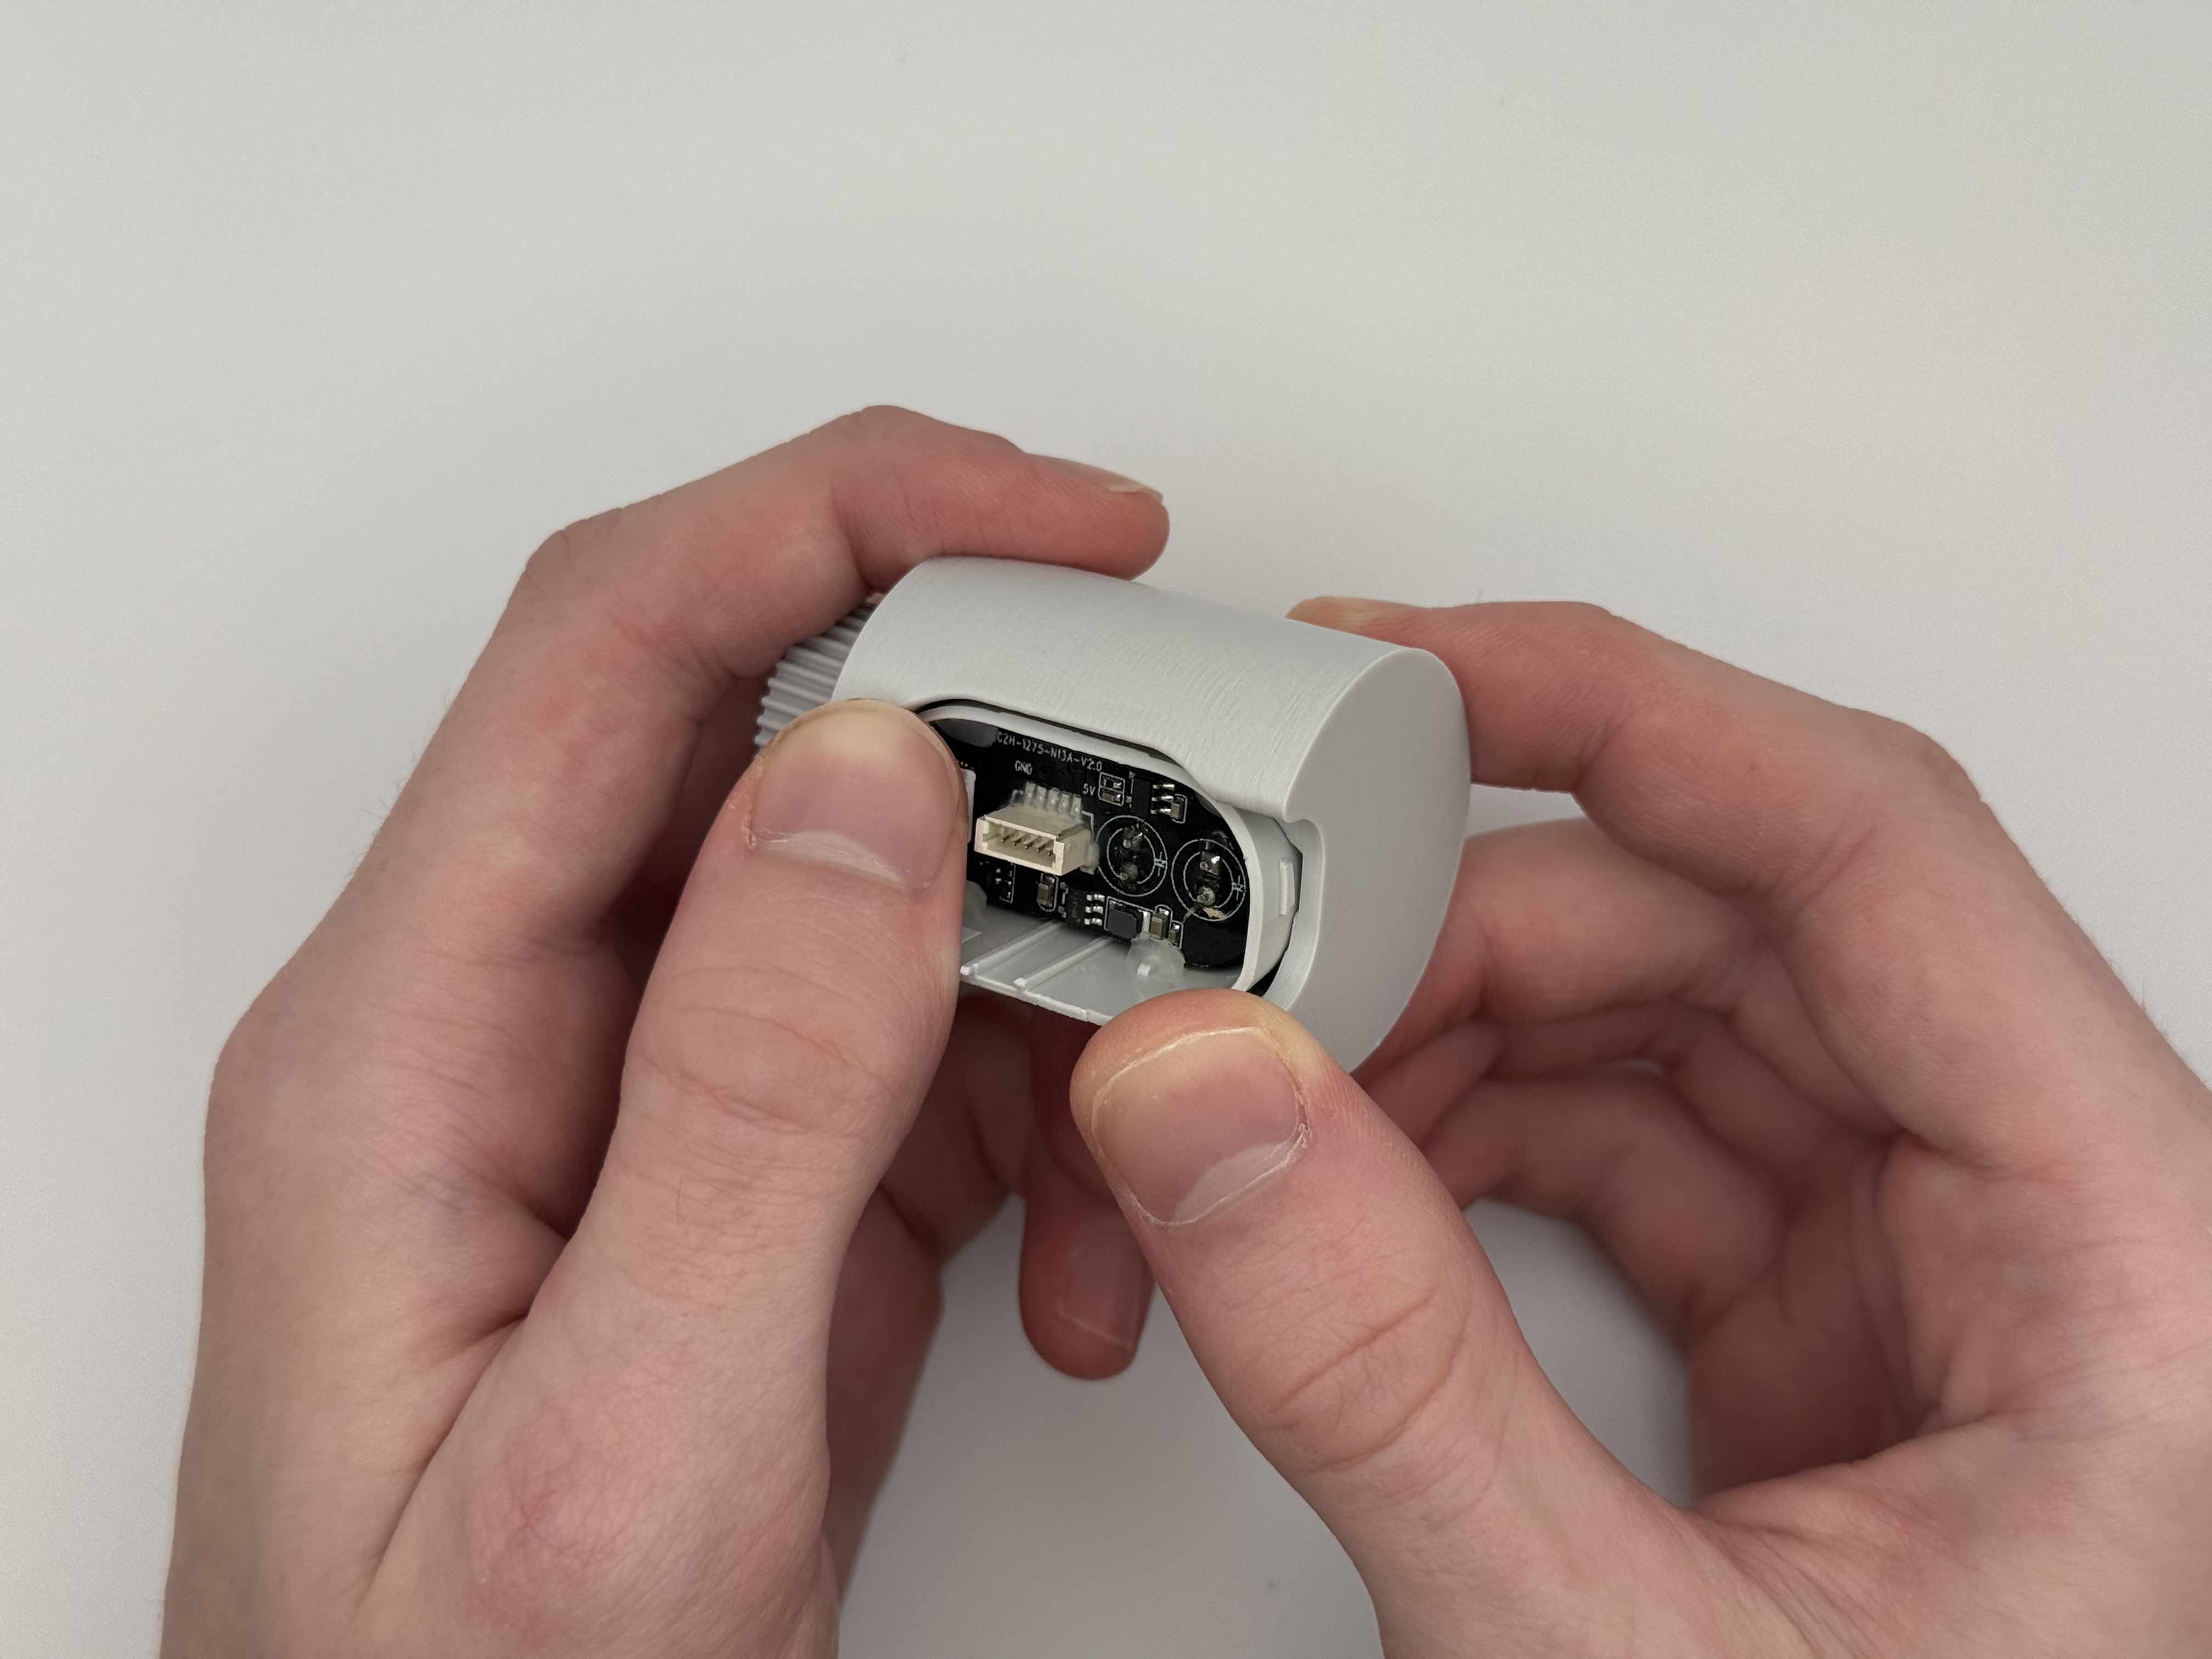
Step 1: This is the time power off your printer, and remove your printer's camera. I highly recommend you follow Bambu Lab's guide on removing the camera HERE. After you've removed the camera, come back here, and do the next step.
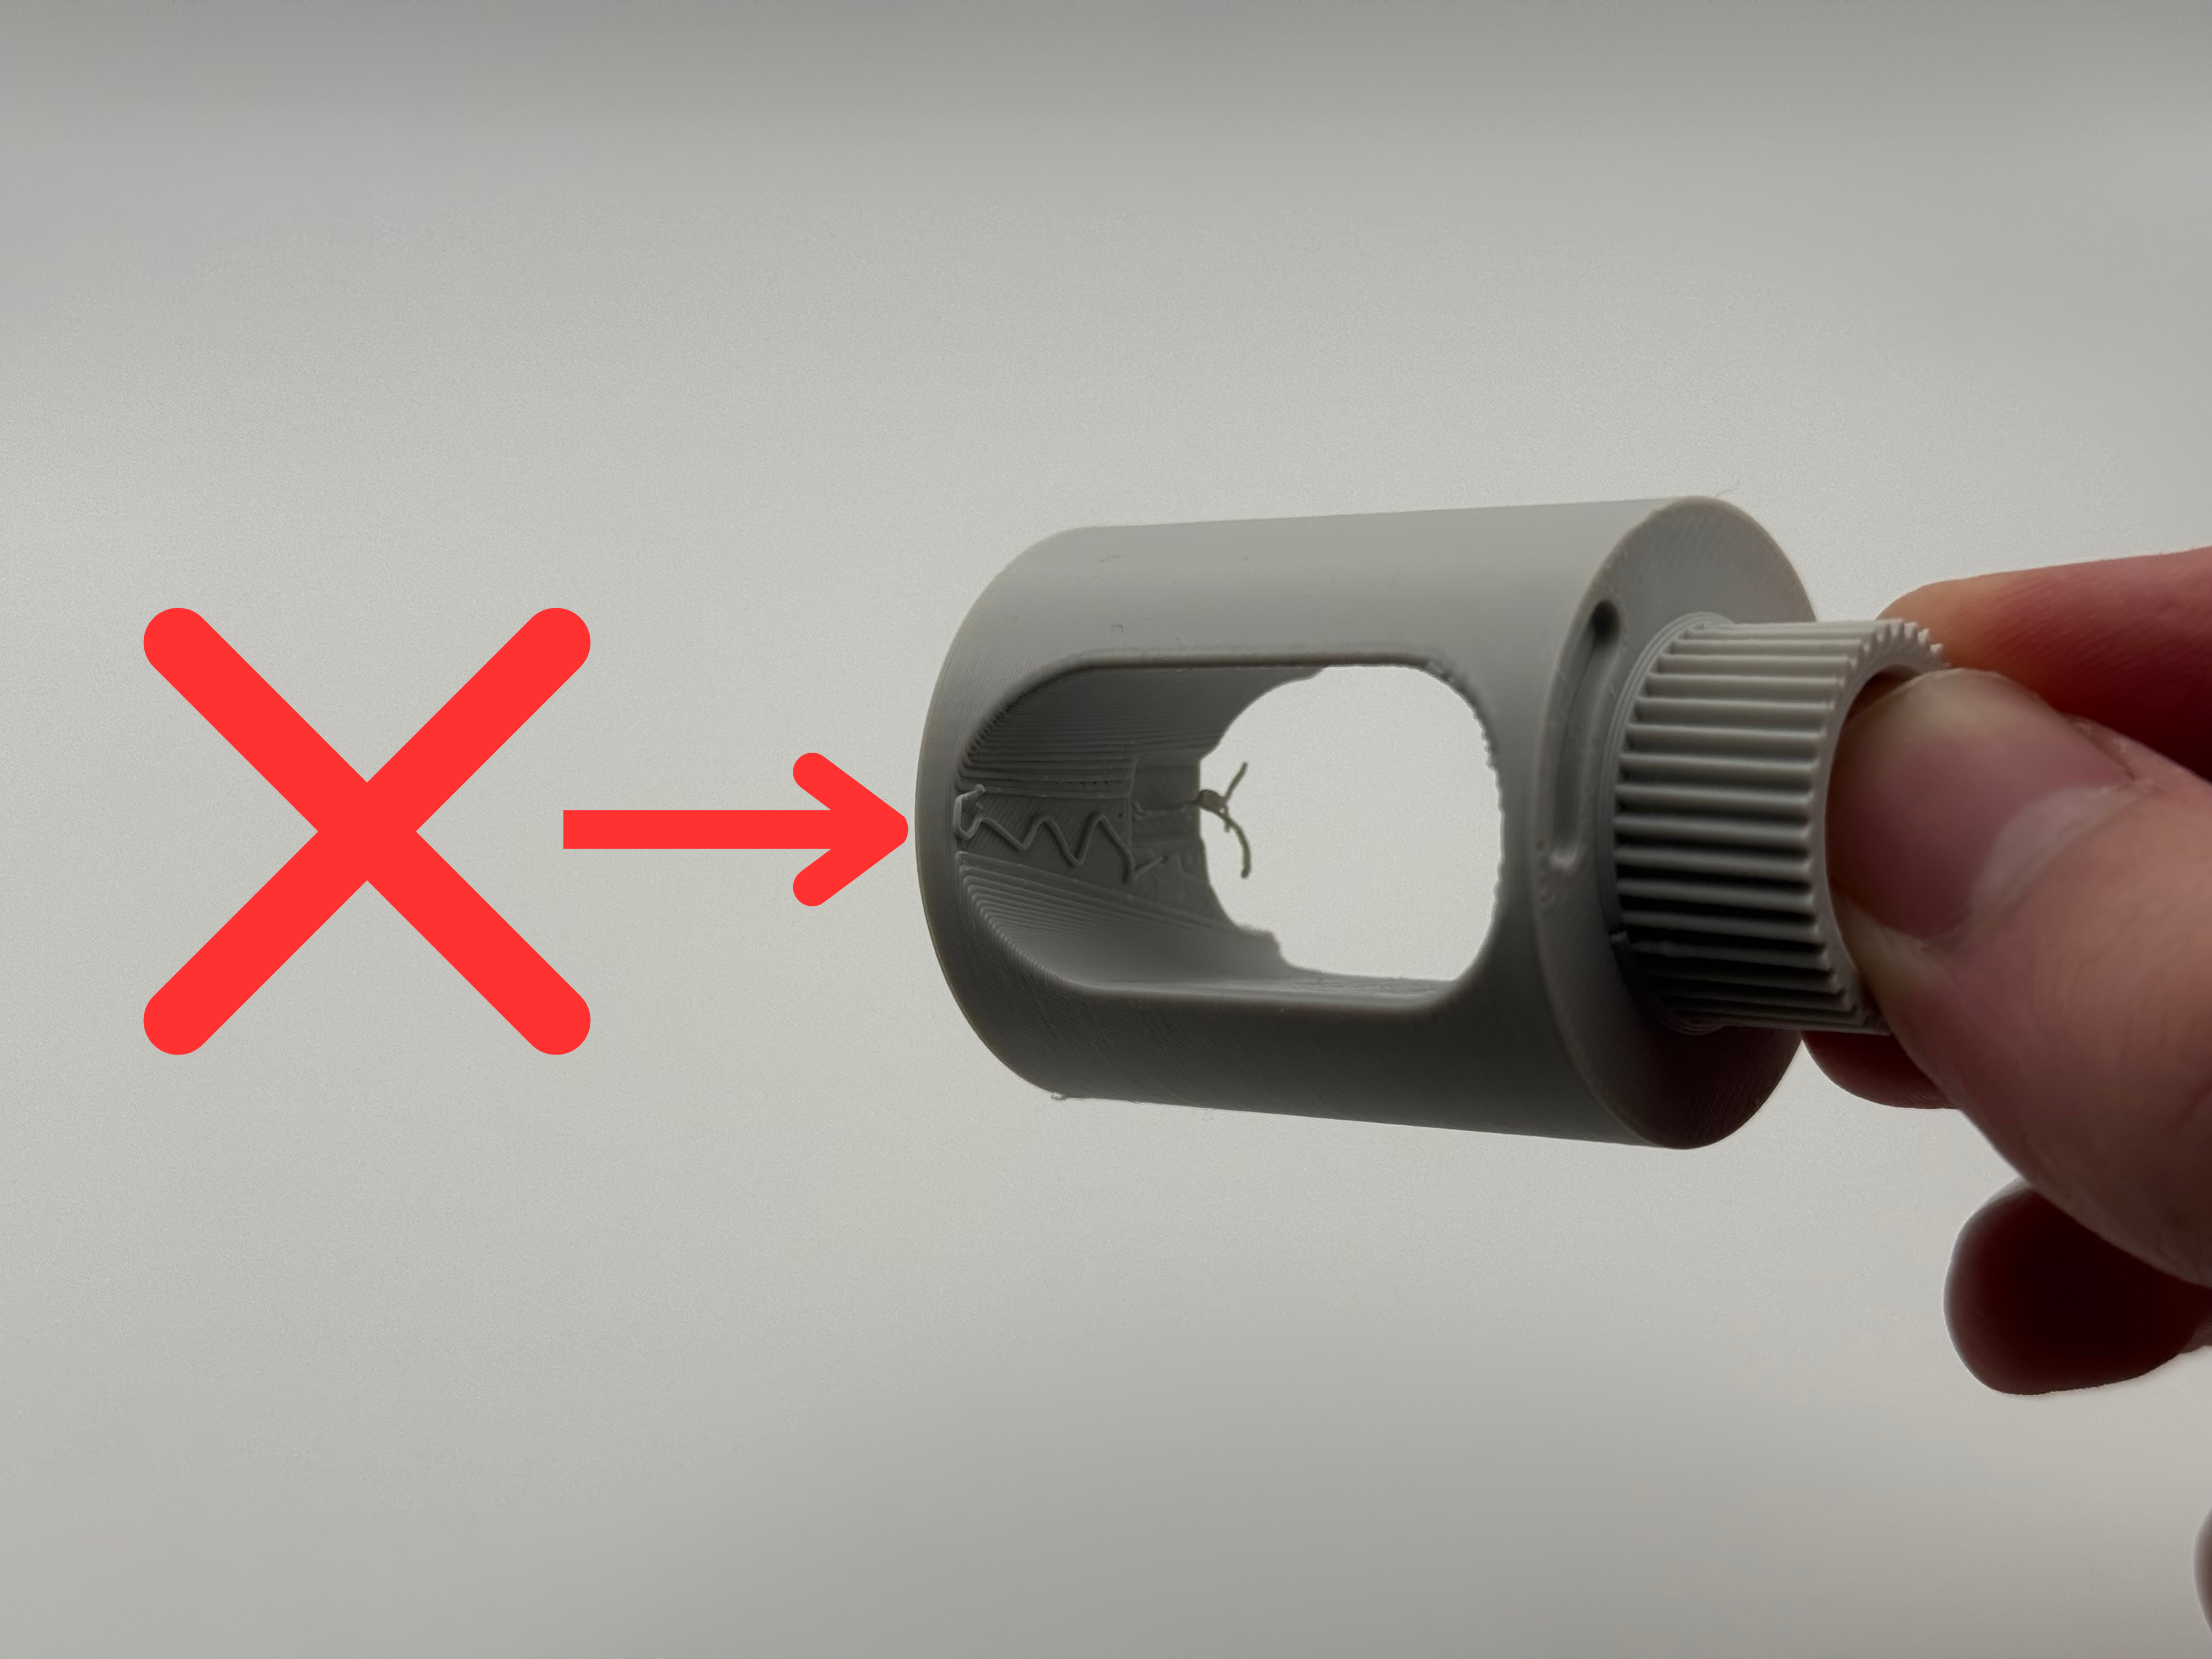
Step 2: Ensure that all support material is removed from the camera cylinder, as that will hinder the camera fitment. Once the camera cylinder is clean of supports, simply slide your camera in from the wider side of the cutout. The camera will stop when fully inserted.
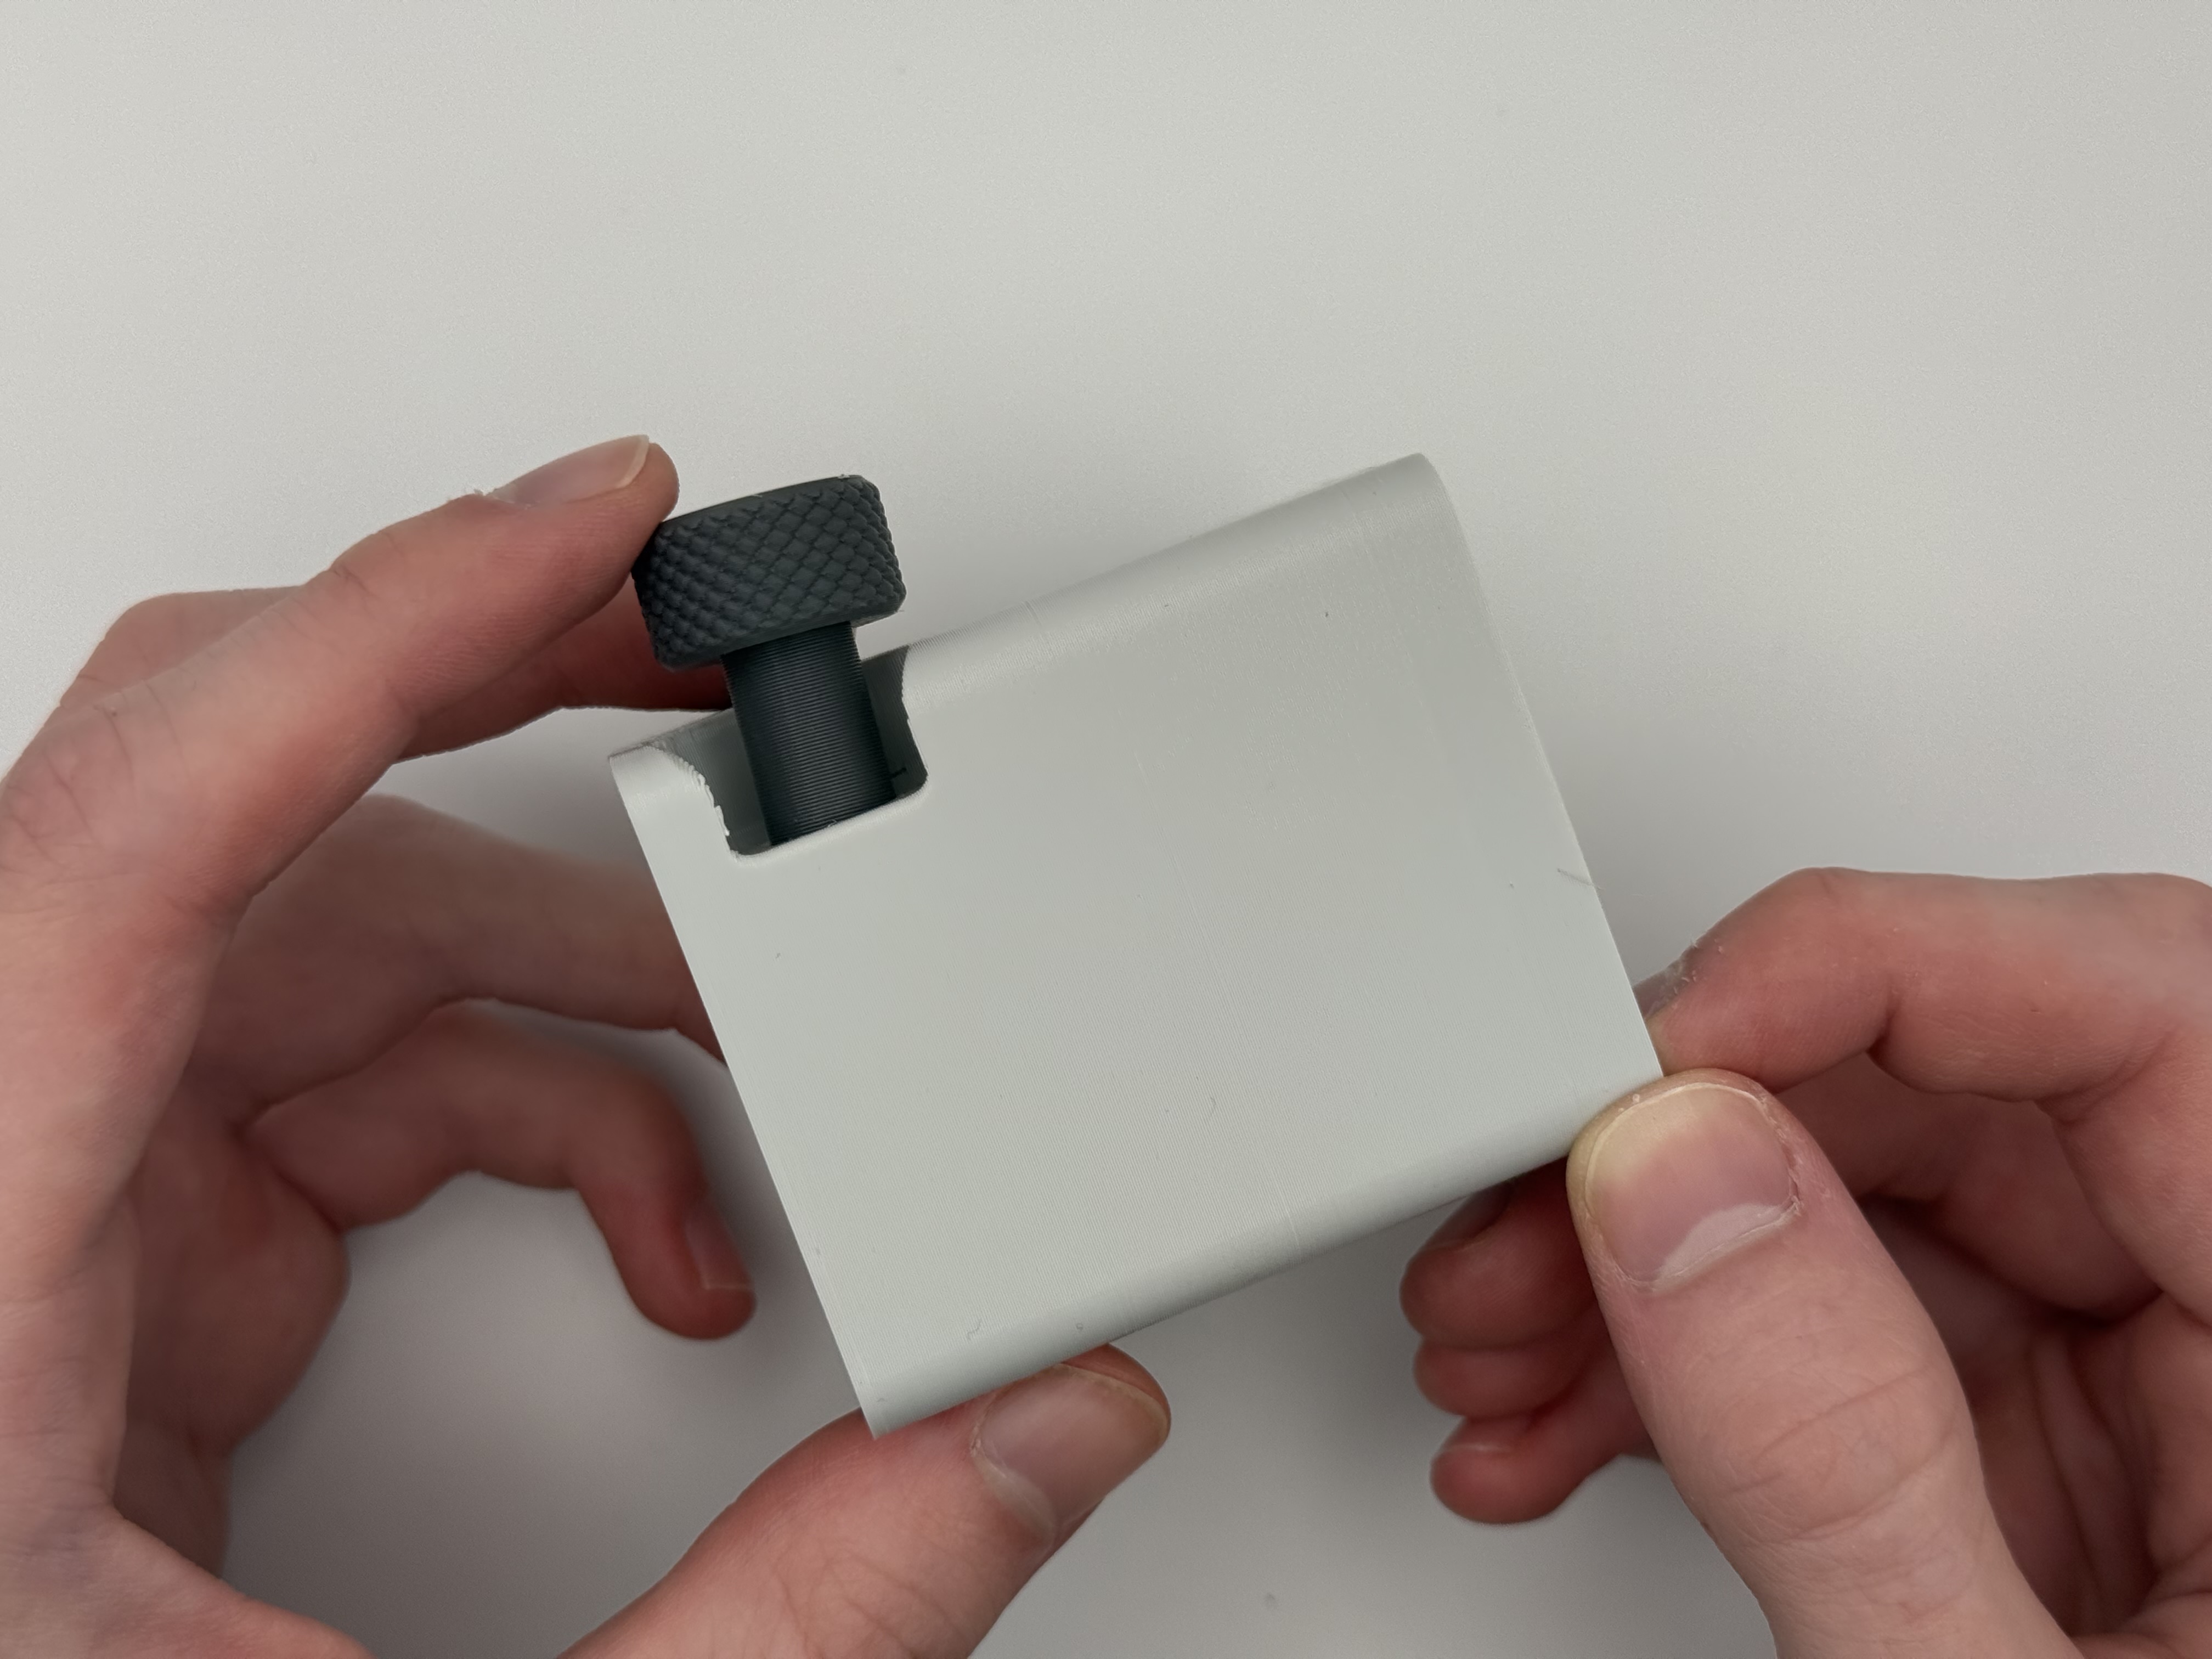
Step 3: Now, we'll install the adjustment knob inside the main body. After you slide the knob into the body, you will use the clip, and clip it in at the bottom.
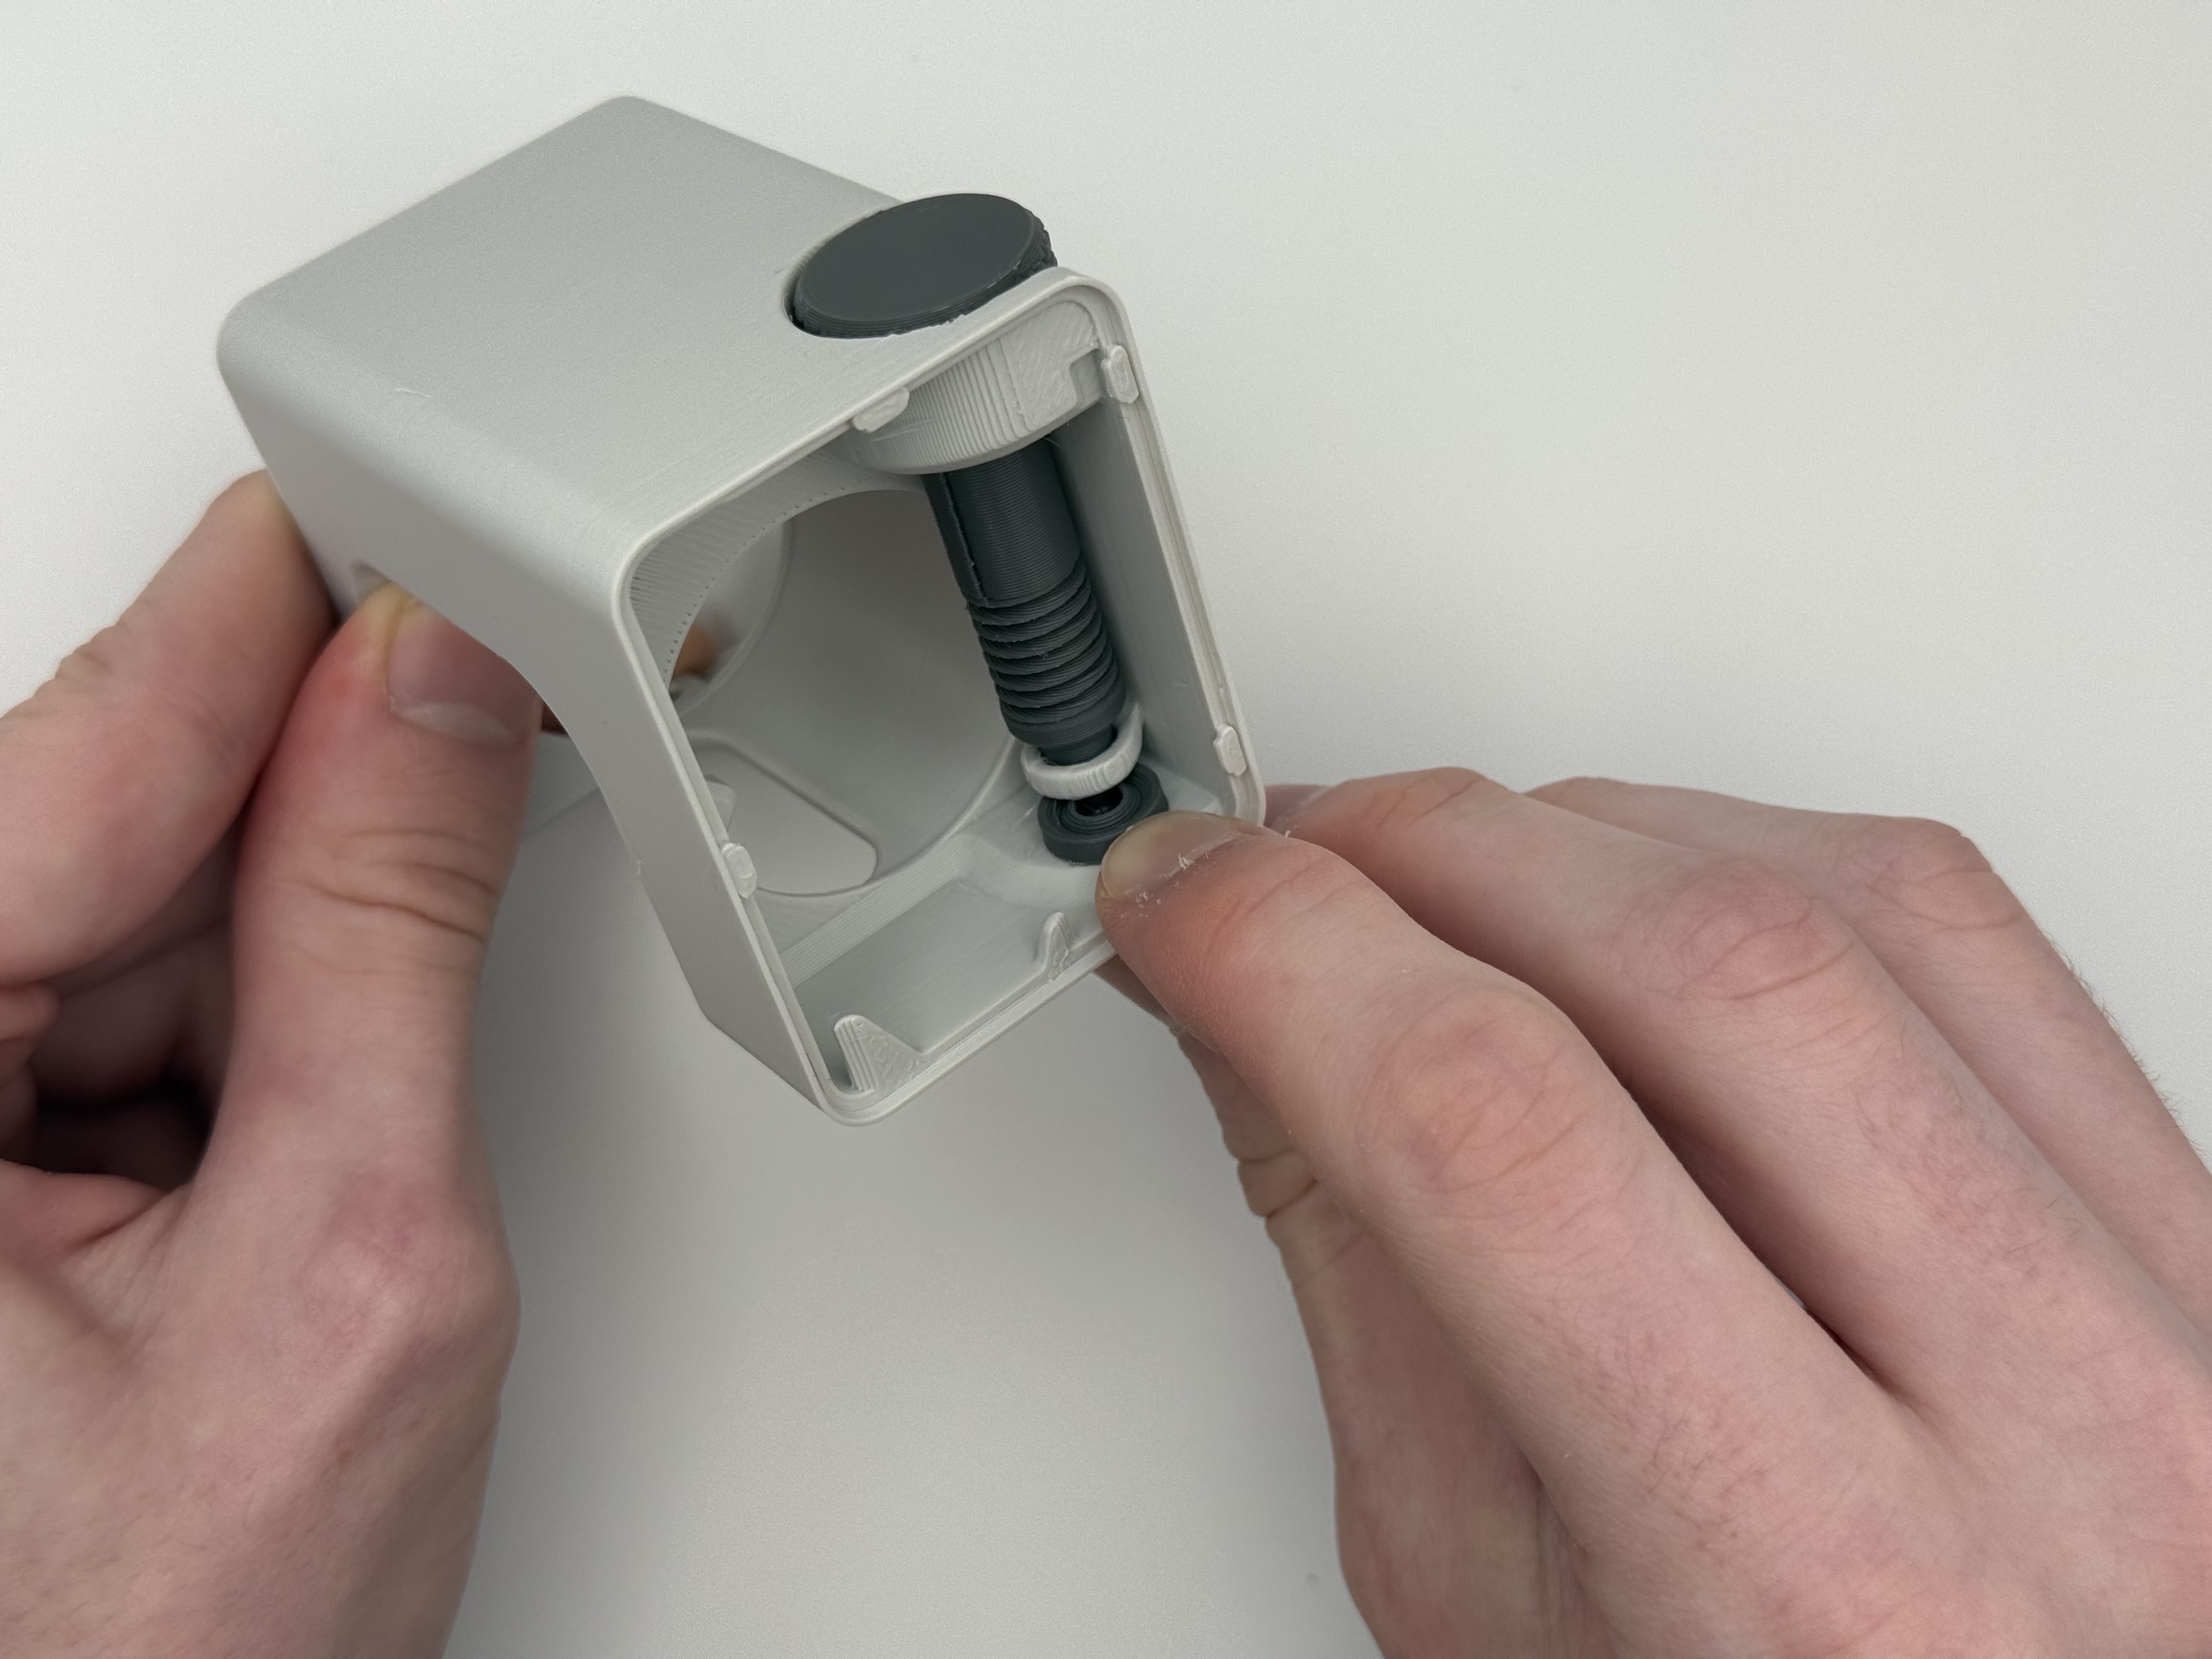
Step 4: Grab the camera plug, and snap it into where the camera used to be. This will cover up where your camera was, and provide an additional mounting point for the adapter plate.
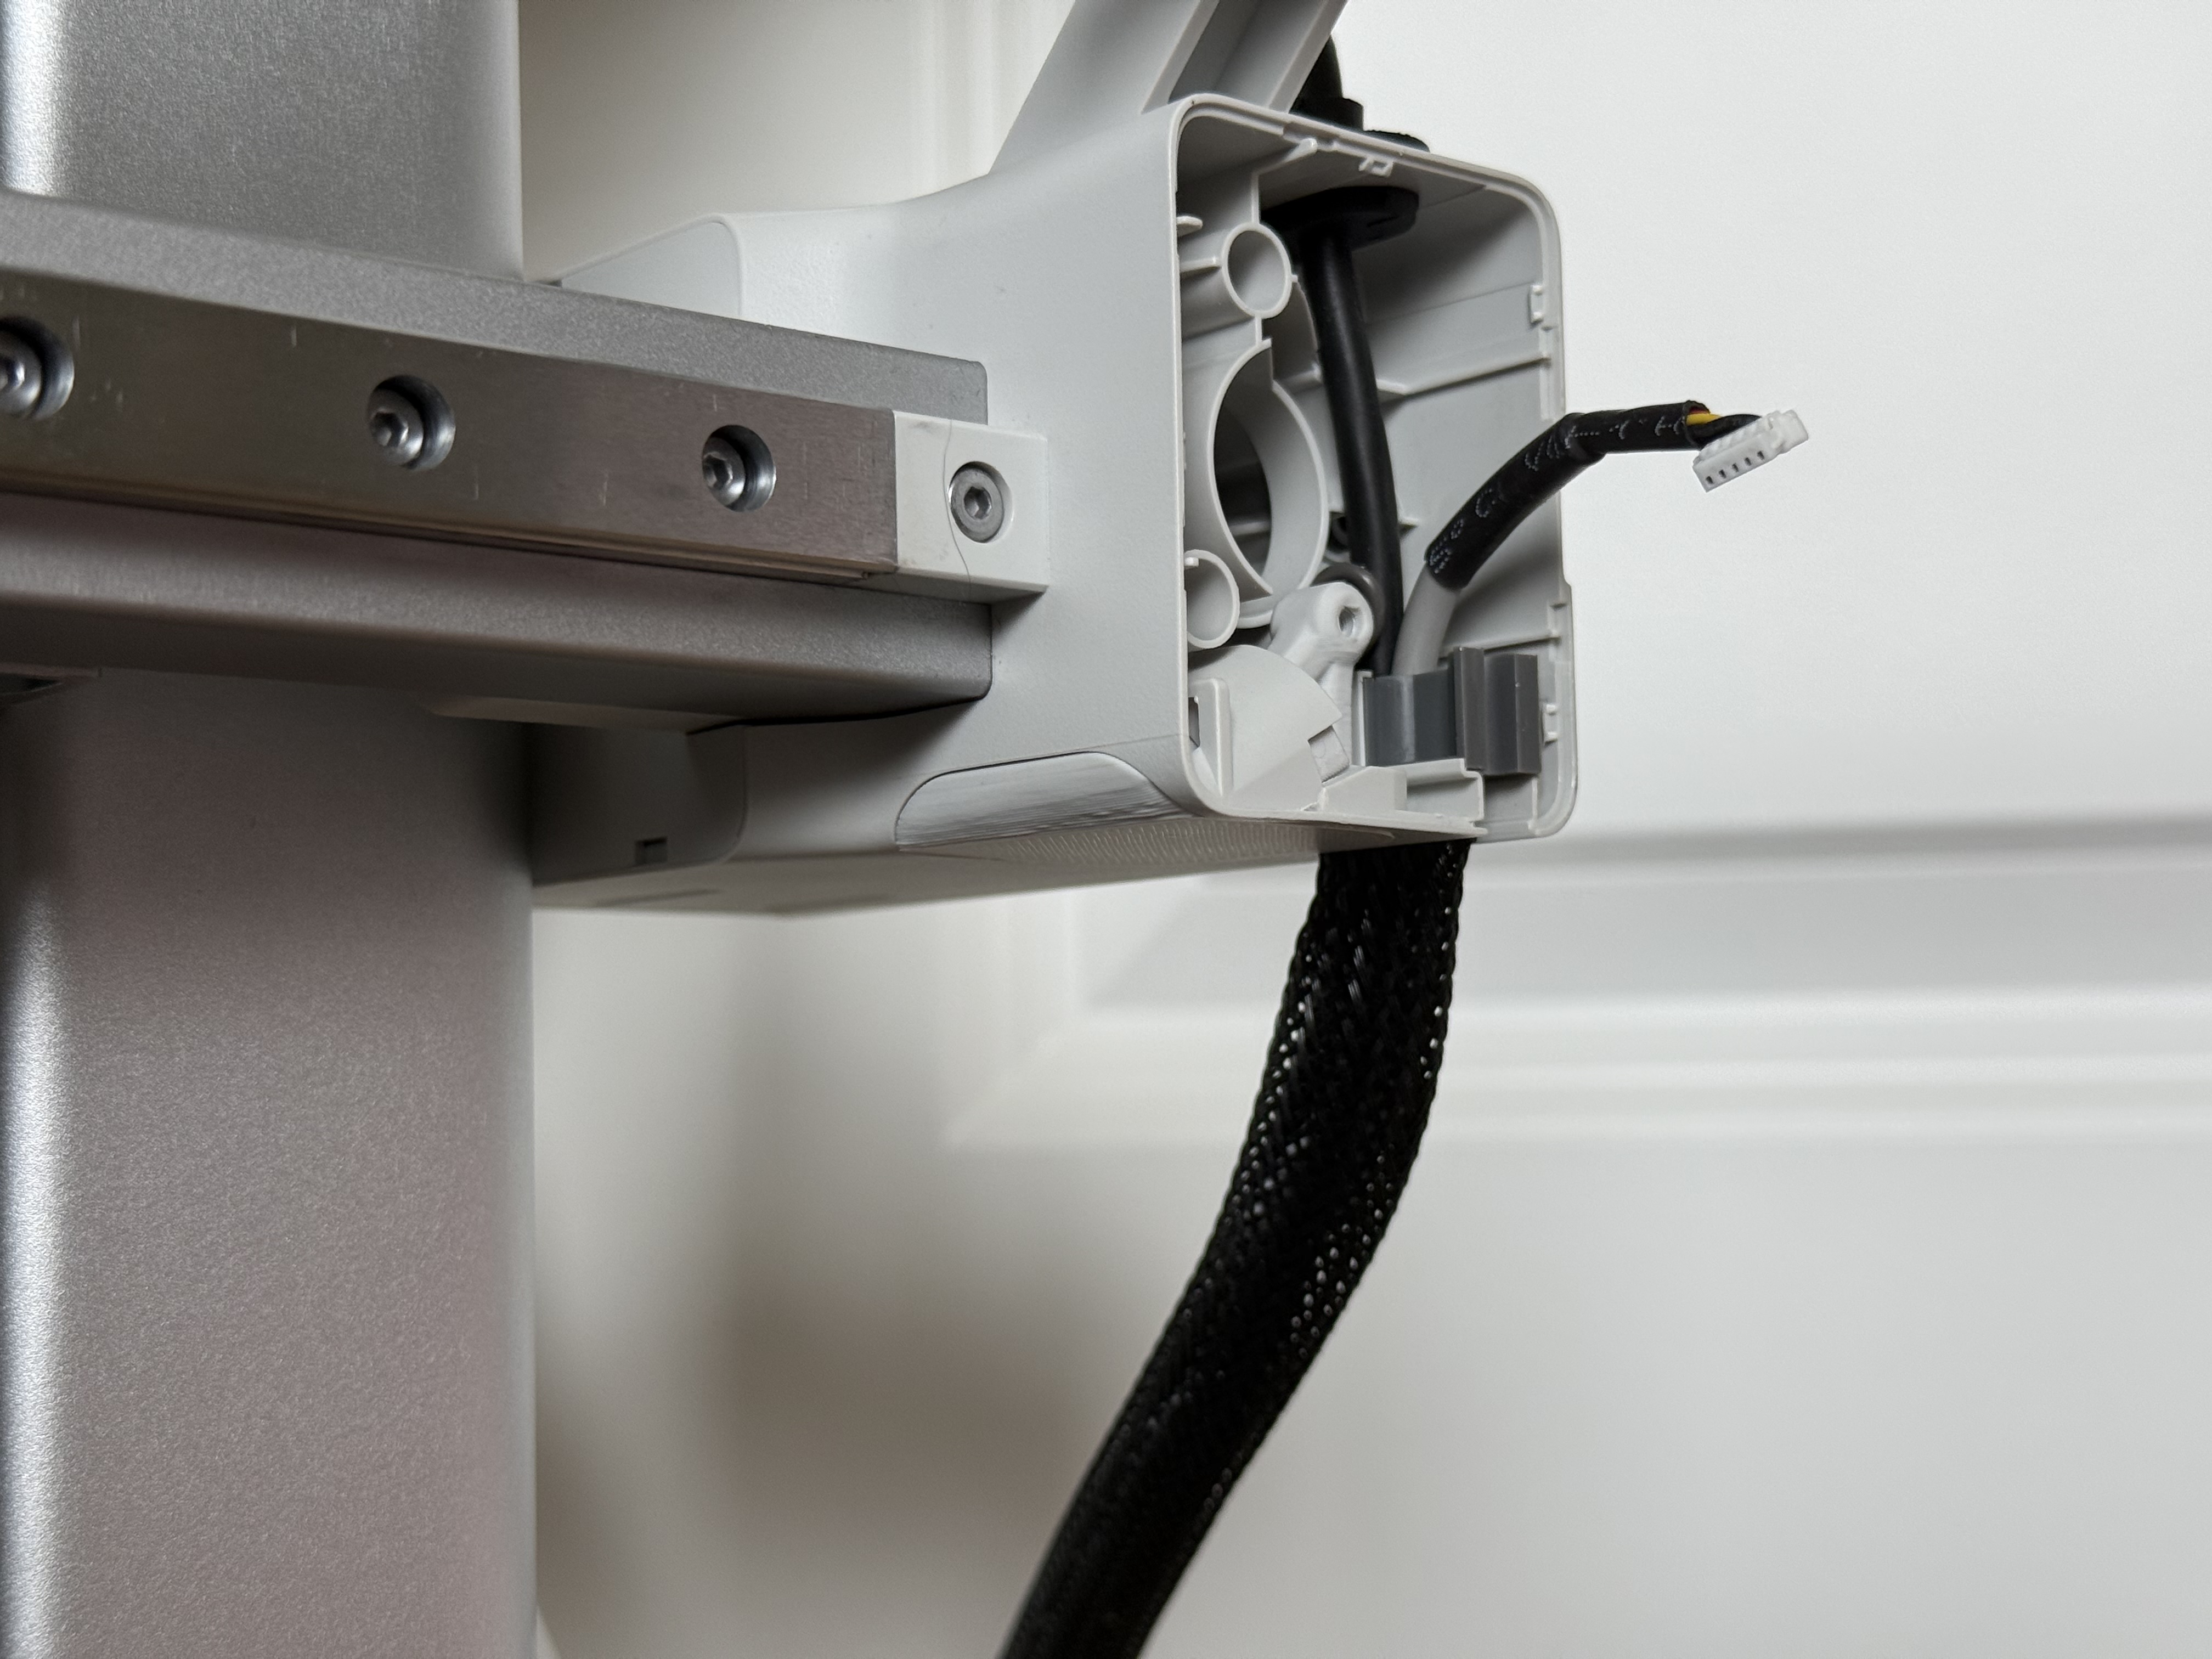
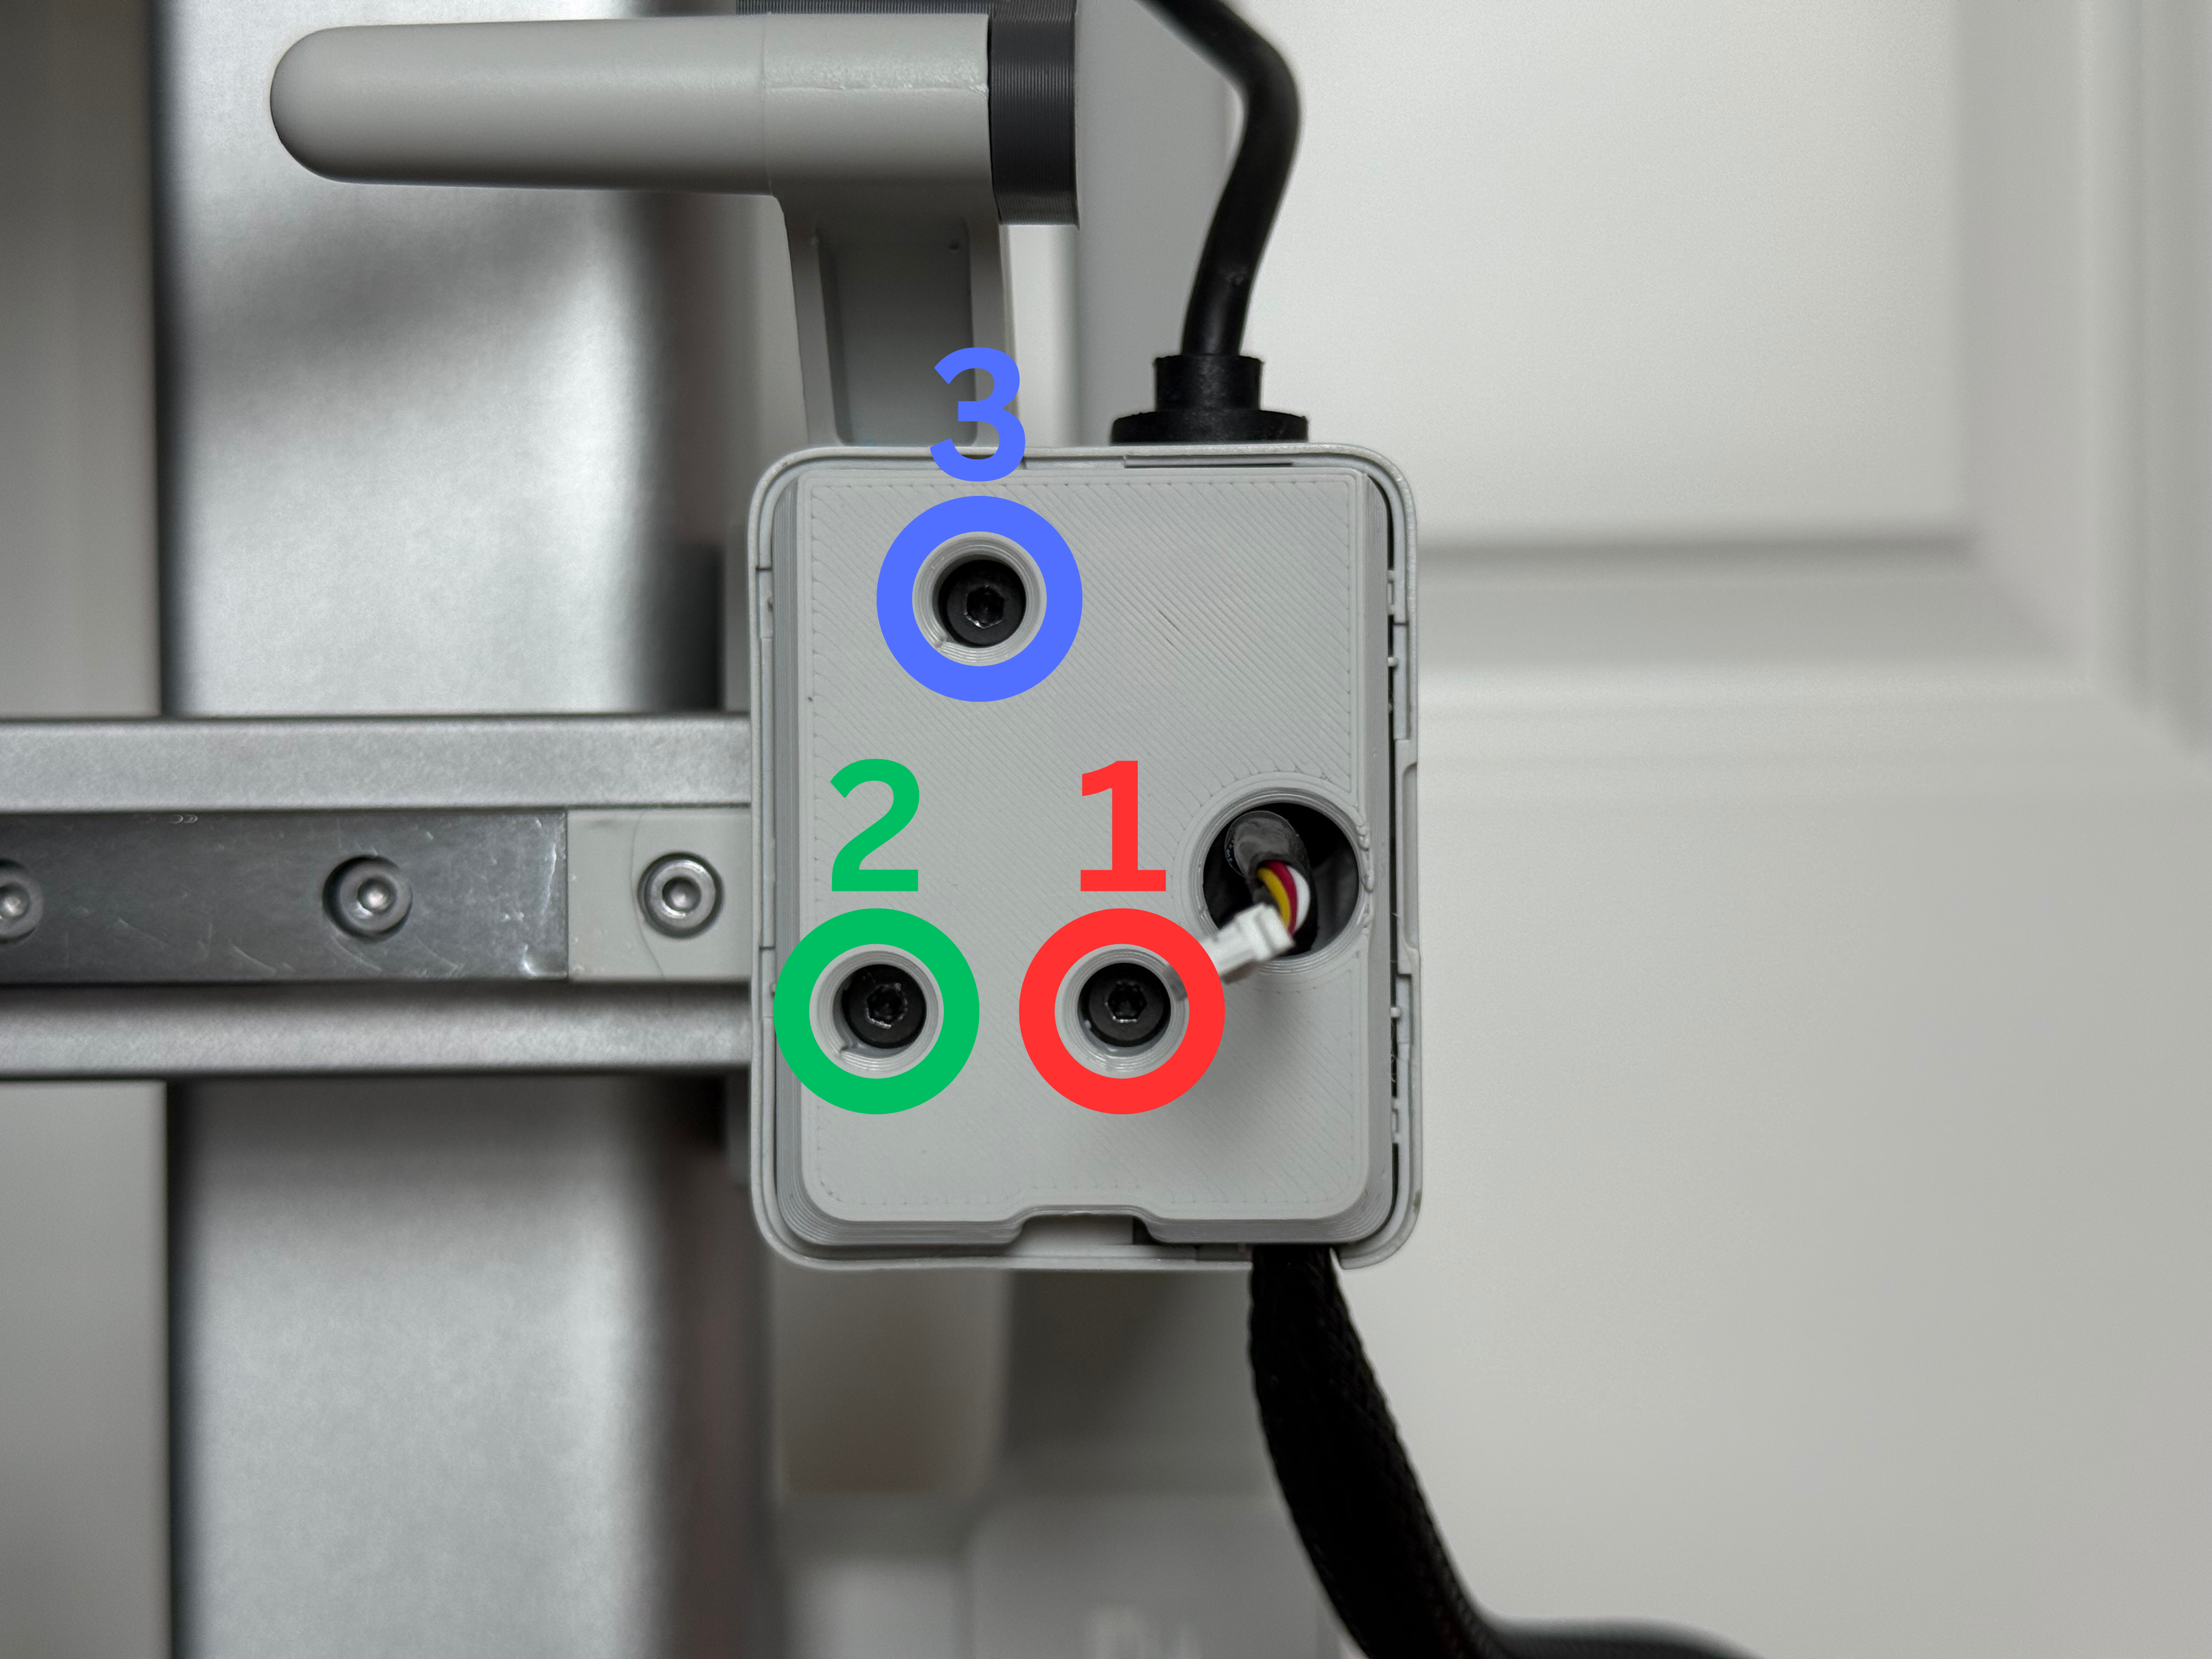
Step 5: Slip the adapter plate onto the printer where the X-asis cover was, and screw it down in the order shown below. It does not need to be super tight, just tighten until firm.
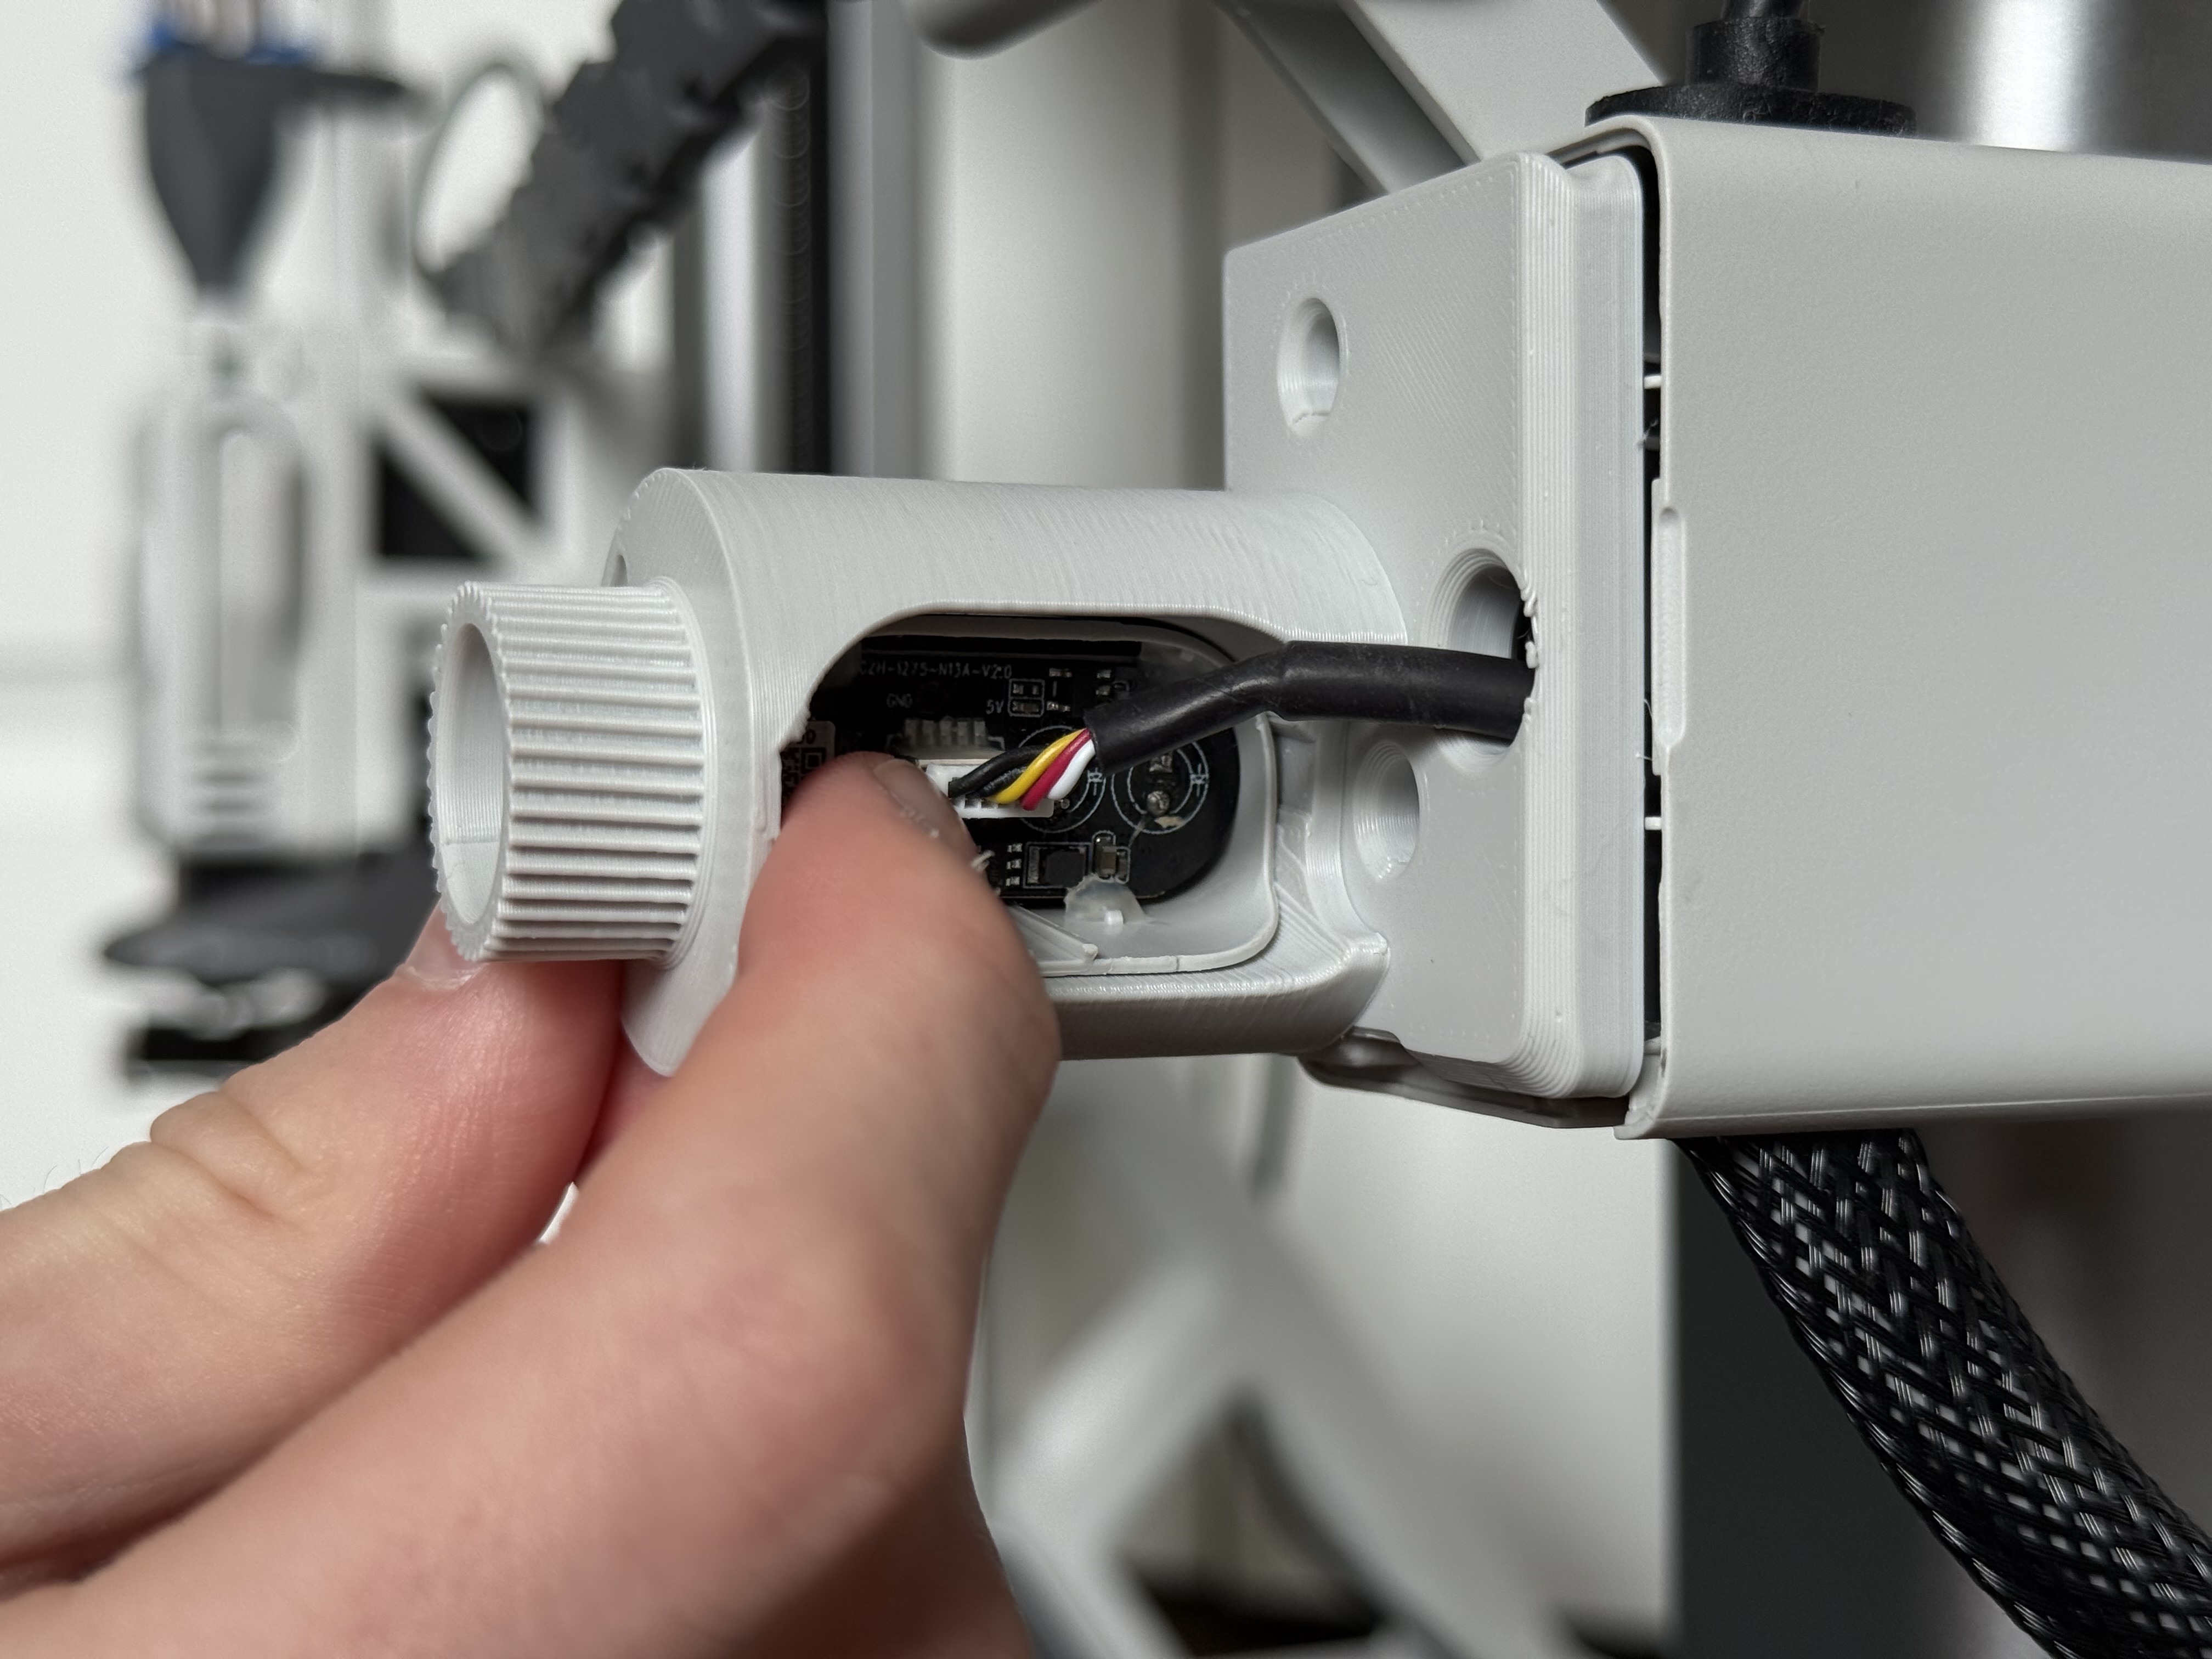
Step 6: Simply plug in your camera.
Step 7: Now take the main body, slide the camera cylinder part way in, and set the top of the main body inside the grove of the adapter plate. With light pressure pushing down, grab the camera cylinder gear, then lightly pull and wiggle in a circular motion to seat the gears. If the instructions were unclear, please watch the GIF video below.
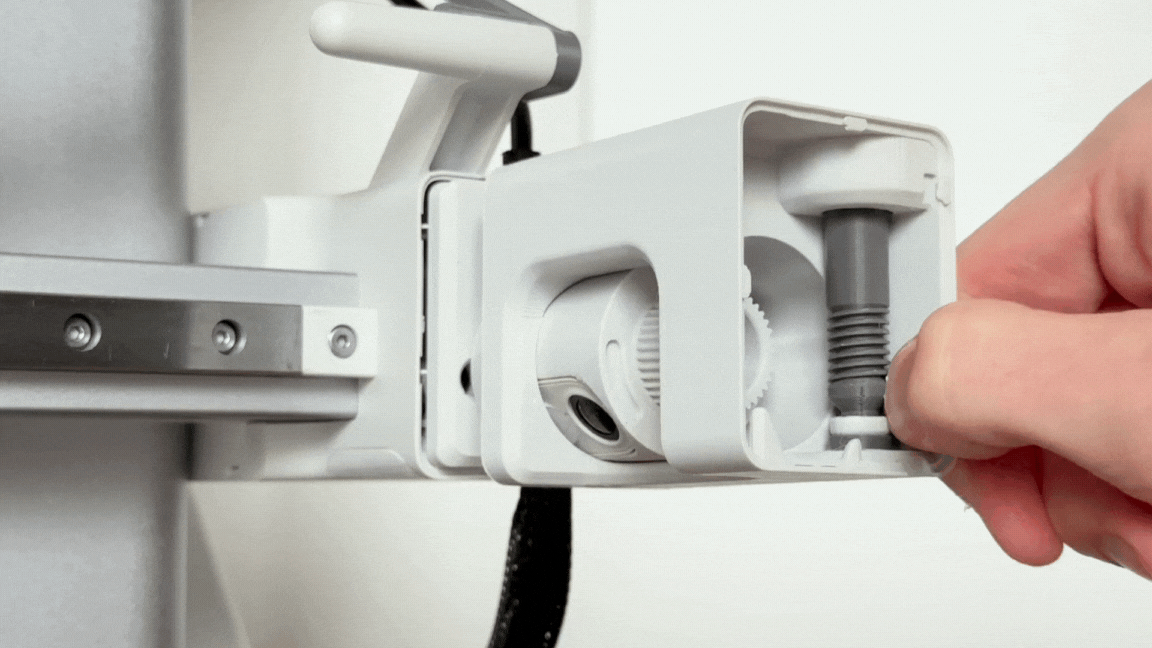
Step 8: Take the last of the four screws, and screw the main body to the adapter plate from the bottom. Be sure not to over-tighten this screw, as it'll cause the camera rotation to be hard; tighten until firm.
(OPTIONAL) Step 9: If you would like for the gear set to have a smoother feel, apply a small amount of printer lube and work it in by turning the adjustment knob.
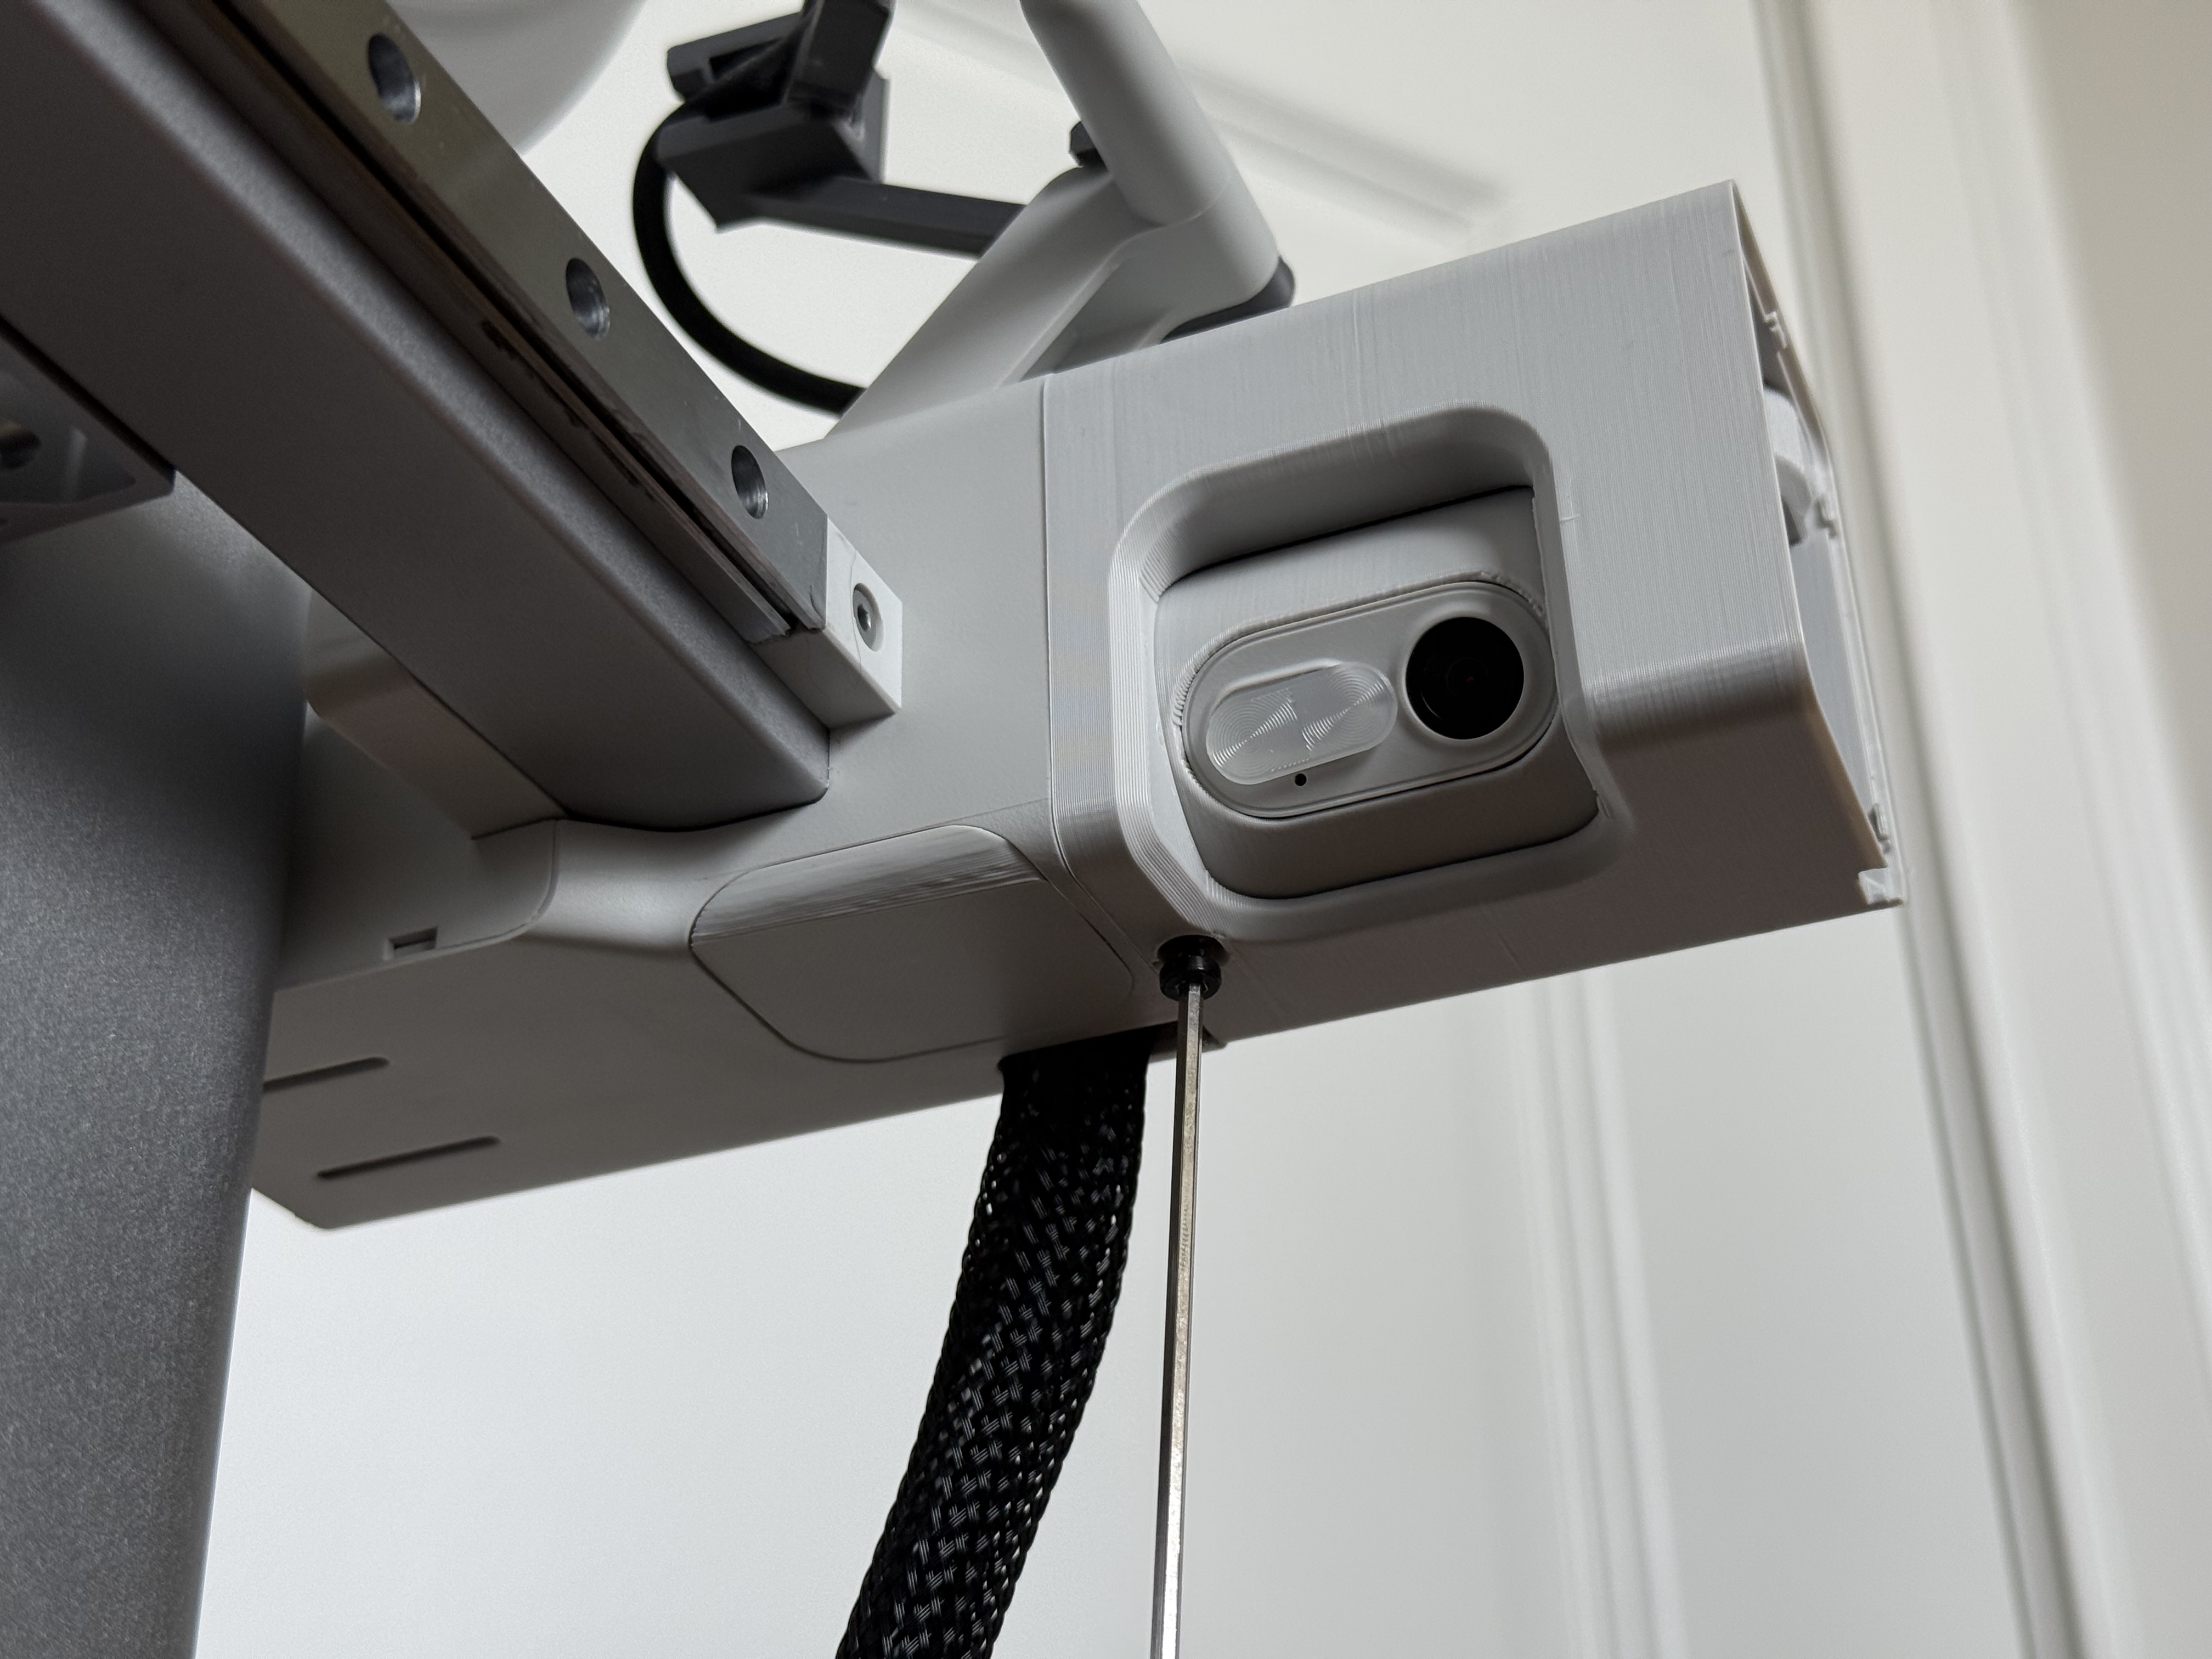
Step 10: Clip the factory X-axis motor cover to the main body.
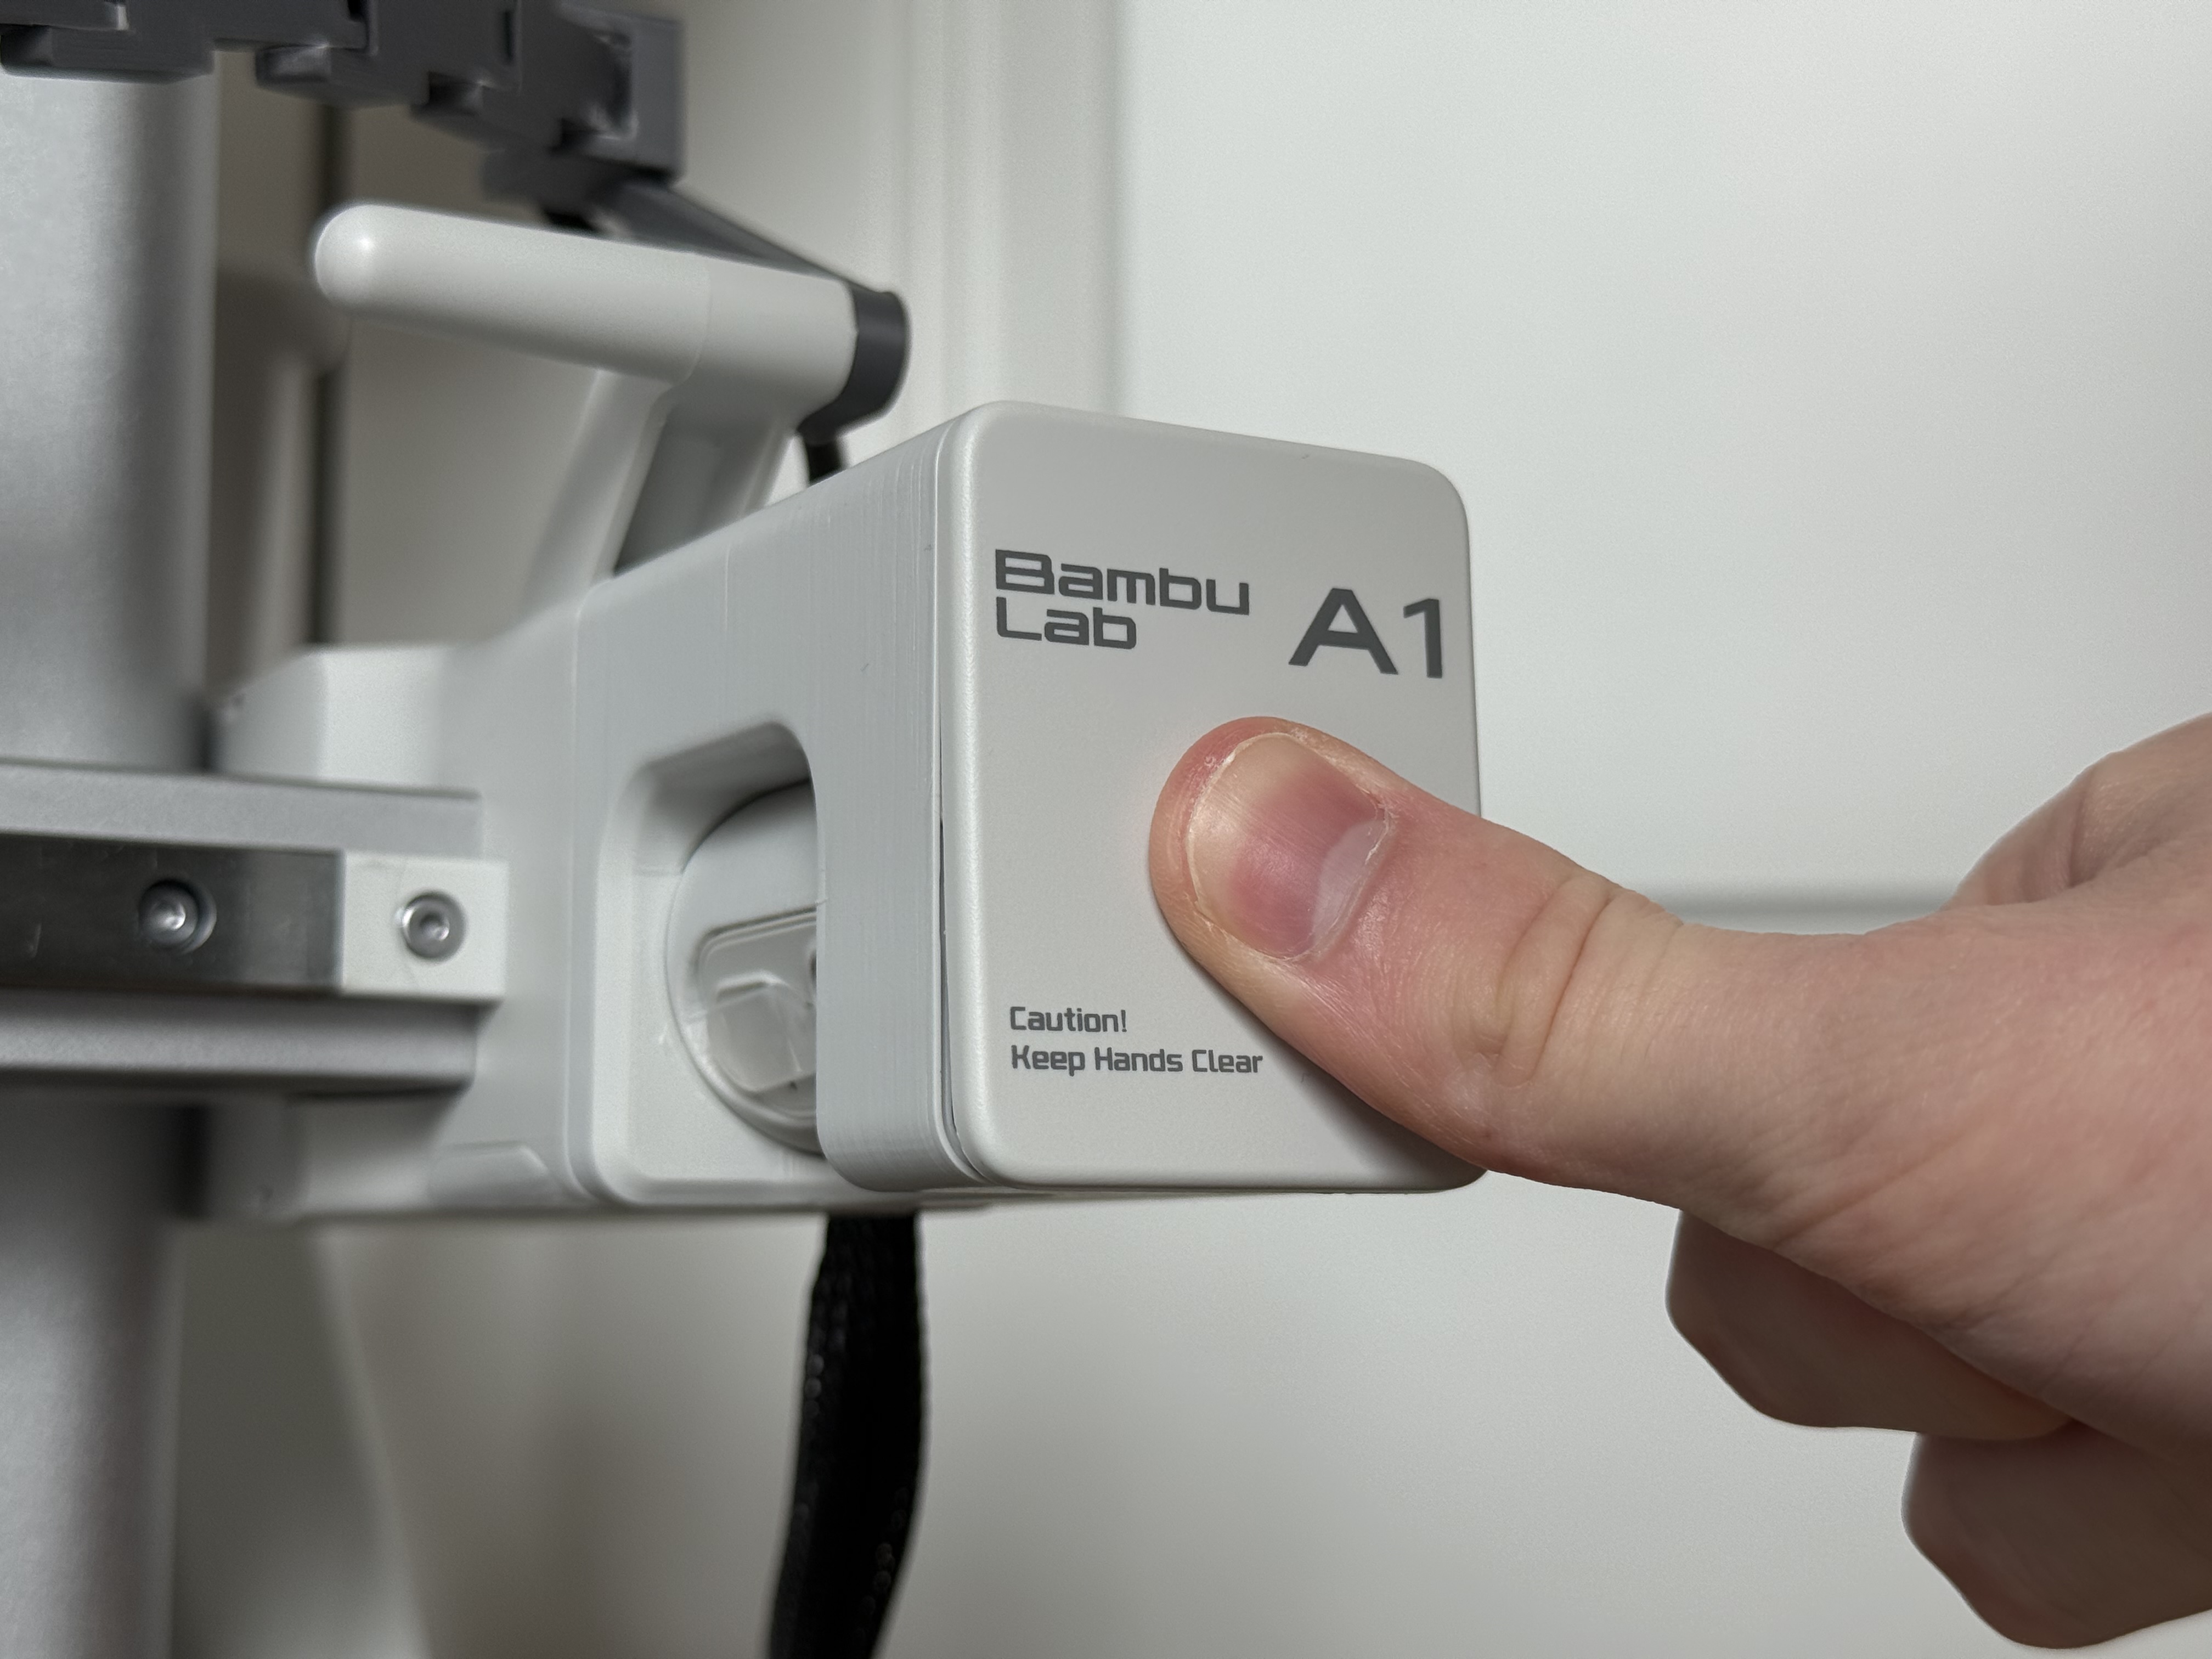
Step 11: Admire the beauty of having a seamlessly integrated adjustable camera!
Adjustable A1 Camera Relocation Kit
Publicado em 6 de nov de 2025