Você está no 3DFinder
Buscamos em Thingiverse, MakerWorld e Printables ao mesmo tempo para te dar o melhor de cada uma.
Descrição
Description
Drastically increase the anti-tank capabilities of your Dummy 13 with this Helldivers-inspired Commando Rocket Launcher. The launcher is able of firing up to 4 standard airsoft bullets before having to be reloaded. The reloading is easy and can be done within seconds by a skilled operator.
Important note: This launcher is designed to take down heavy units. Please do not shoot other people or pets with it!
Printing
The available print profile should work for most people. If you want to print the parts individually, please make sure to print the parts “Piston” and “Exhaust” four times each. The whole launcher can be printed in PLA, if you however want better longevity I recommend printing the rocket pod (part that houses the airsoft bullets), the pistons and the grips in PETG.
Pre-Assembly
Before assembling the Commando, please make sure that all parts have been printed properly and are cleaned from any supports.
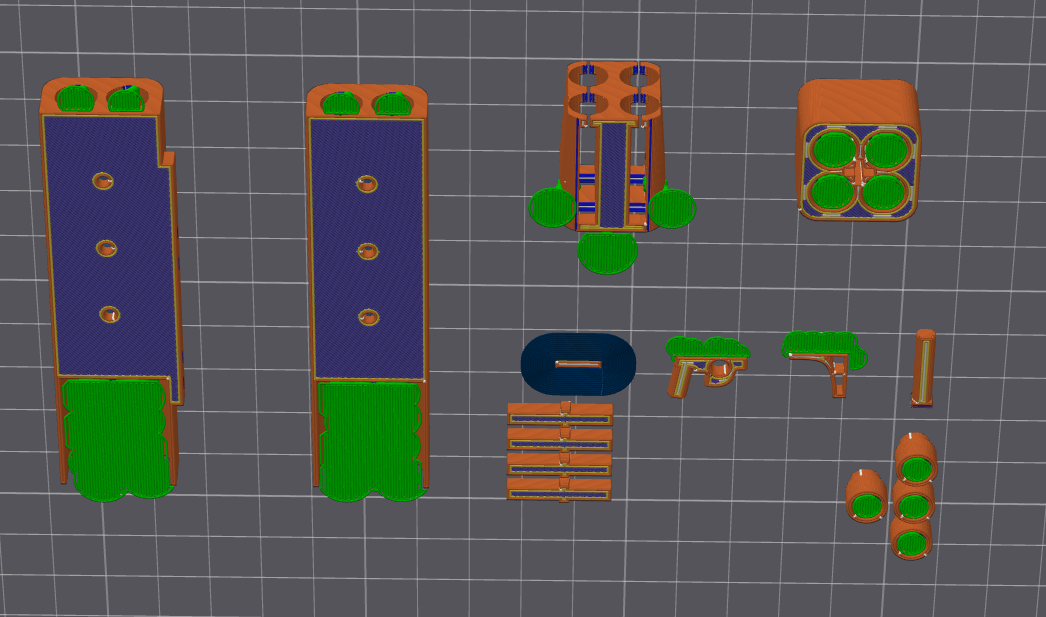
Picture from below, all green bits need to be removed.
Additionally to the printed parts you will need:
- Glue that is compatible with your material both generic crafting glue or SUPERGLUE (o7) will work.
- To help aligning the barrels of the two parts, you can also cut three 4mm pieces of filament, this is optional though.
- Four airsoft bullets should be picked out in advance.
During the assembly you will need to apply the glue to multiple parts. To give a brief overview, every bit that is marked red needs glue during the process. Note: This is just an overview, don't apply the glue straight away!
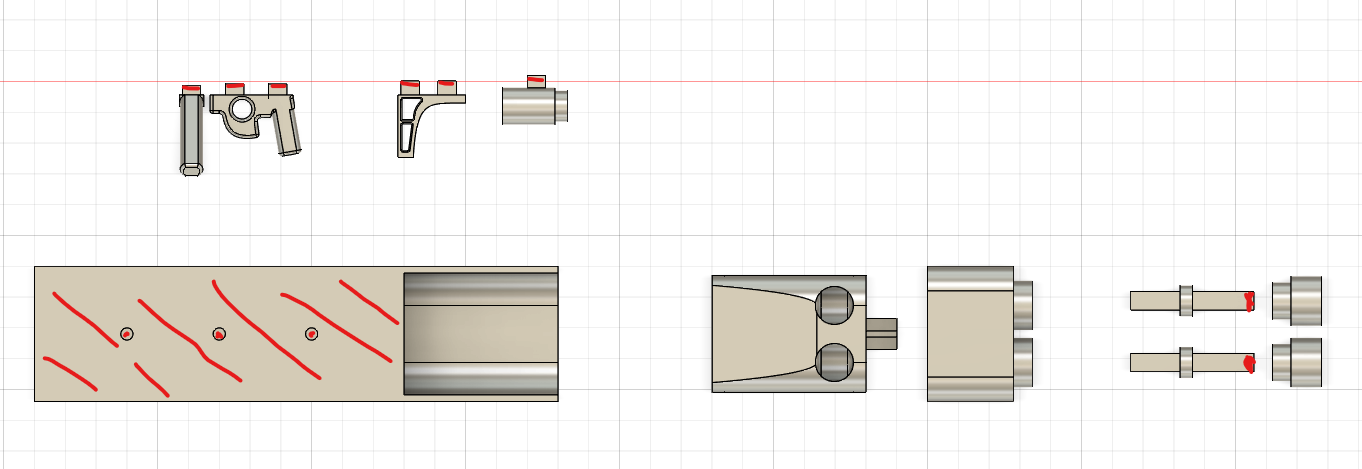
Once you have perpared everything you can begin the …
Assembly
Take the four pistons and put them into the square holes of the rocket pod. Important: The pistons have a shorter and a longer side. The shorter end has to be inserted!
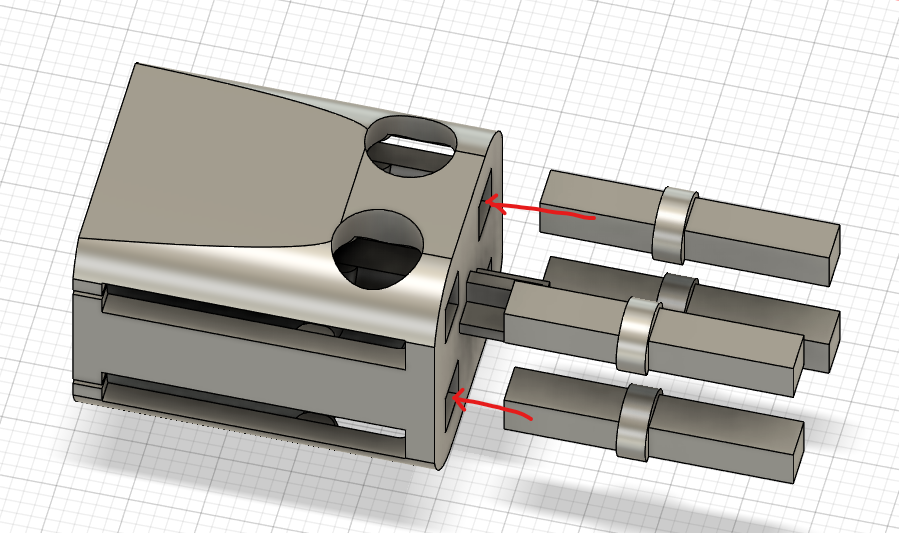
Put the rear part of the rocket pod ontop of the previous bit. Make sure each piston is in the square holes of both sides before gently pushing the rear end in the cross-shaped connector. The parts should slide into each other without too much force. In case they don't fit, check for residue support filament on each side.
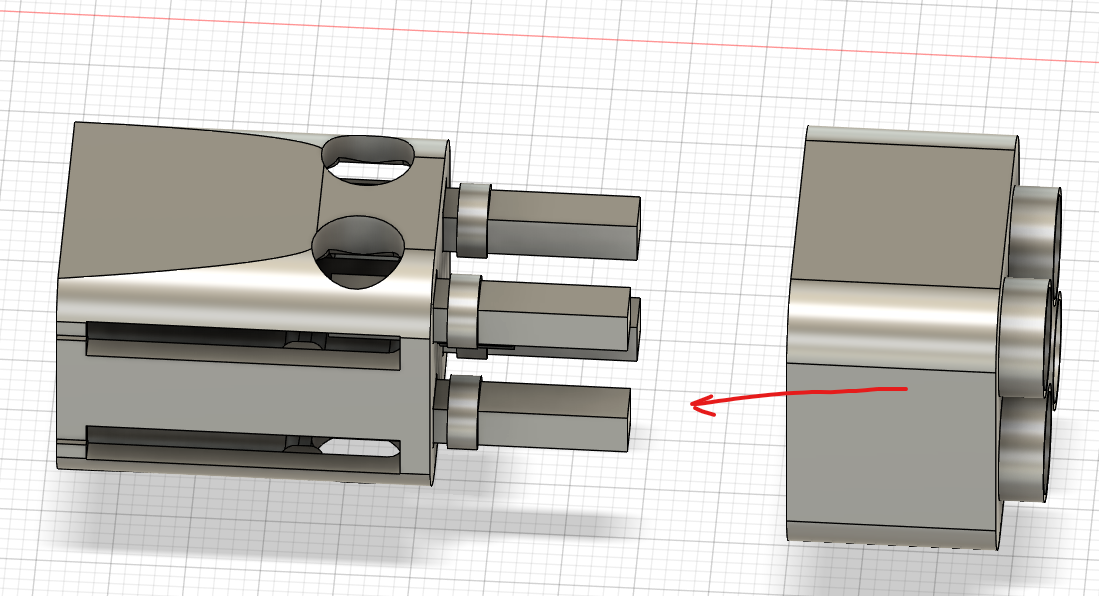
You should now test if the pistons work properly before permanently fixing the end caps to the pistons. To do so, pull each piston all the way back and push an airsoft bullet in each of the holes on the side. You can then lay on the four end caps, without applying glue yet. Put the rocket pod on a table and push each bullet through. Repeat 2-3 times. The bullets should shoot through with slight pressure. When you are happy with each piston, you can apply glue to the rear end of the pistons and stick the end caps on top. This works best with bullets chambered. Set aside to let it dry.
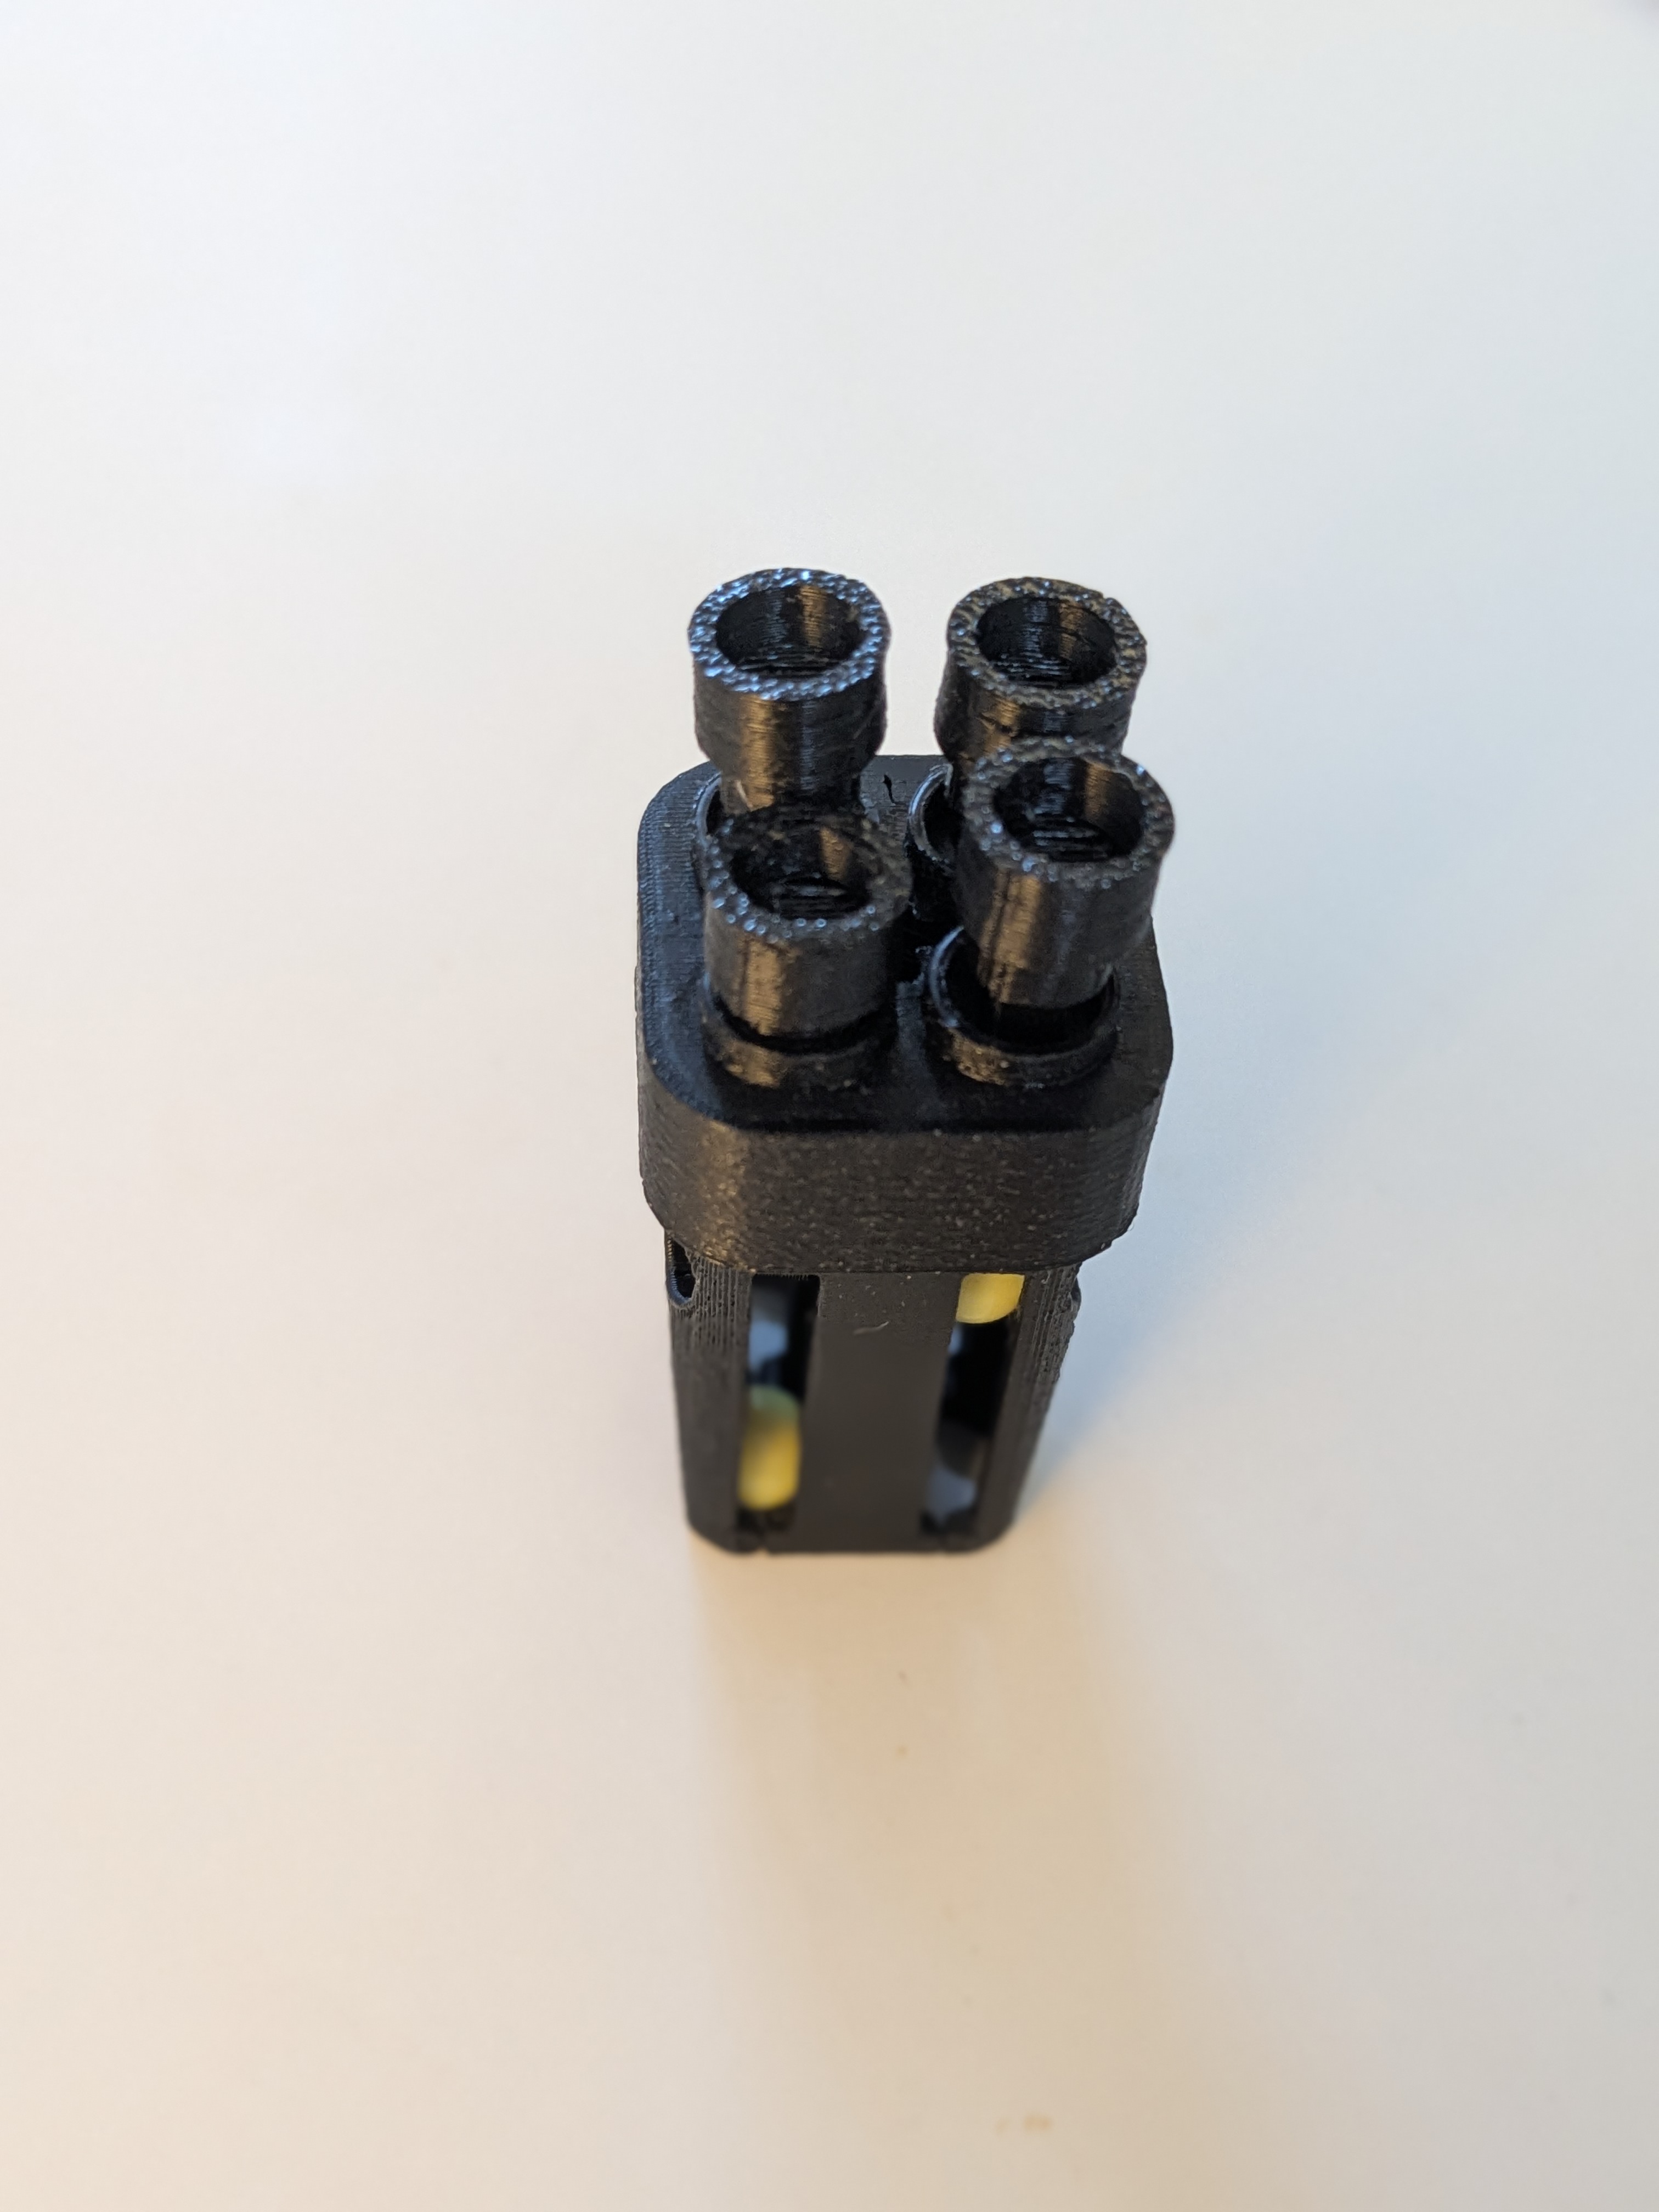
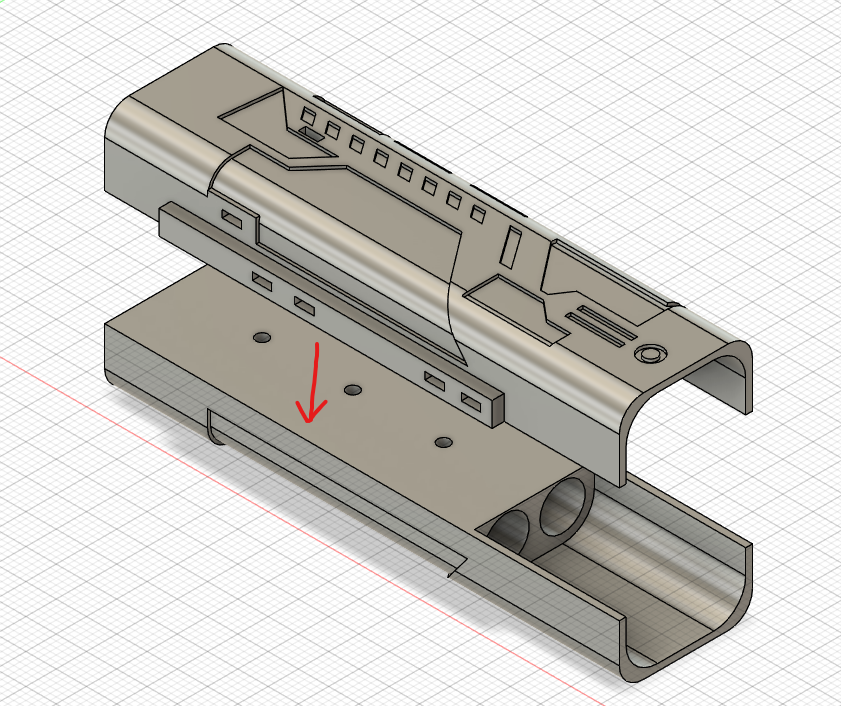
Once the glue on the previous part is dry enough to handle it, you can assemble the two halves of the launcher. To do so, apply a generous amout of glue to one half and use the other to evenly spread it. You can then stick the prepared bits of filament in the holes in the middle and press the parts together. Should the filament bits not fit, leave them out and align the part as well as possible. Briefly check if the rocket pod can be put into the housing at the backend of the launcher.
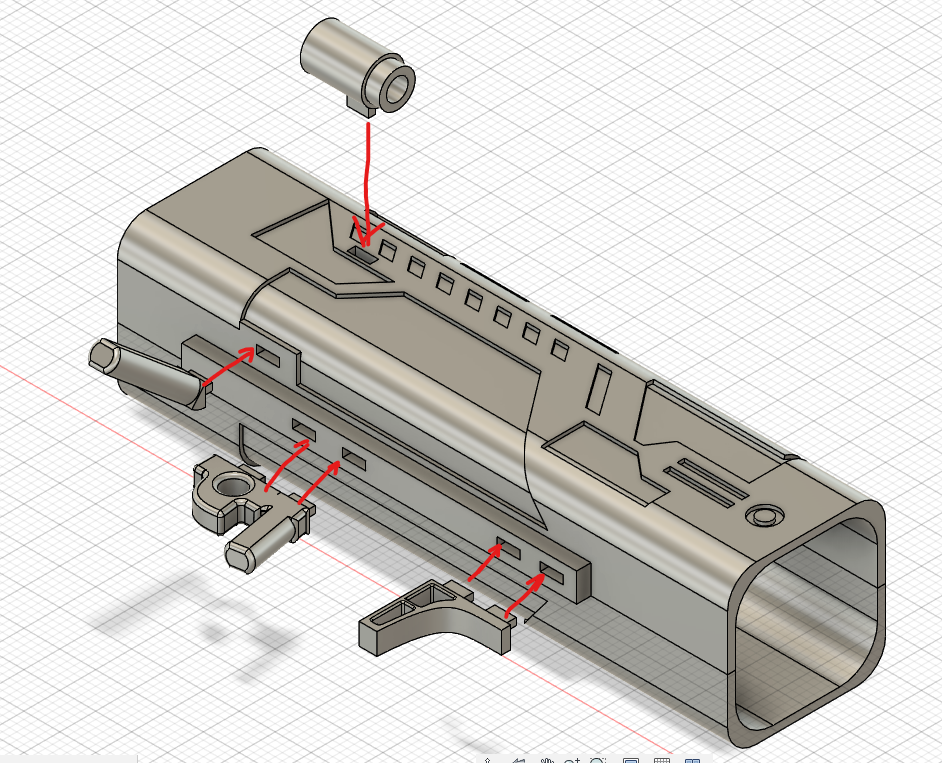
When the glue on the launcher has dried, you can add the grips, shoulder pad and the scope as seen below. Make sure the parts fit their respective holes before applying glue. Once assembled, let everything rest for at least 2-3 hours (better overnight) before using it.
Usage
To load the launcher, pull out the pod so the holes are visible. Pull back the pistons and put one airsoft bullet in each hole. Push the pod back in. Then take aim and use your thumb on one piston at a time to fire the bullets.
And always remember: Friendly Fire isn't.Special thanks to:
Its On My Mind: [https://makerworld.com/@itsonmm](https://makerworld.com/@itsonmm) for his amazing Brick-Compatible BB launcher that inspired the mechanism of the RPG [https://makerworld.com/models/1596719-brick-compatible-bb-launcher-shoots-6mm-pellets#profileId-1723954](https://makerworld.com/models/1596719-brick-compatible-bb-launcher-shoots-6mm-pellets#profileId-1723954)
eduardo_h_yos: [https://www.printables.com/@eduardohyos_1911300](https://www.printables.com/@eduardohyos_1911300) Who came up with the Dummy 13 Helldivers armor you can see in some of the photos
TroisCentTrenteTrois: [https://makerworld.com/de/@TCTT](https://makerworld.com/de/@TCTT) Who created the TPU cape you can see here [https://makerworld.com/models/1794744-dummy13-x-the-mandalorian#profileId-1913198](https://makerworld.com/models/1794744-dummy13-x-the-mandalorian#profileId-1913198)
And of course to you, for taking interest in my design!
Comments and constructive feedback are highly appreciated.
Functional Helldivers 2 Commando RPG for Dummy 13

Publicado em 2 de nov de 2025
Gostou deste modelo? Crie uma conta grátis para salvar seus favoritos e voltar a eles depois.
Criar conta