Você está no 3DFinder
Buscamos em Thingiverse, MakerWorld e Printables ao mesmo tempo para te dar o melhor de cada uma.
Descrição
Here is a holder bracket you can use to install a dial indicator / dial gauge on the toolhead of your P2S.
I use it to do the bed tramming calibration of the build plate, the indicator helps to have a direct reading which is more practical/precise than the sheet of paper that Bambu use on their tutorial : [https://wiki.bambulab.com/en/p2s/maintenance/manual-bed-tramming](https://wiki.bambulab.com/en/p2s/maintenance/manual-bed-tramming)
I do not use the gcode proposed by Bambu, I prefer to manually tram the toolhead all around the plate
The bracket slides into the toolhead, no need to remove the anything except the front cover of course, the nozzle can stay in place :
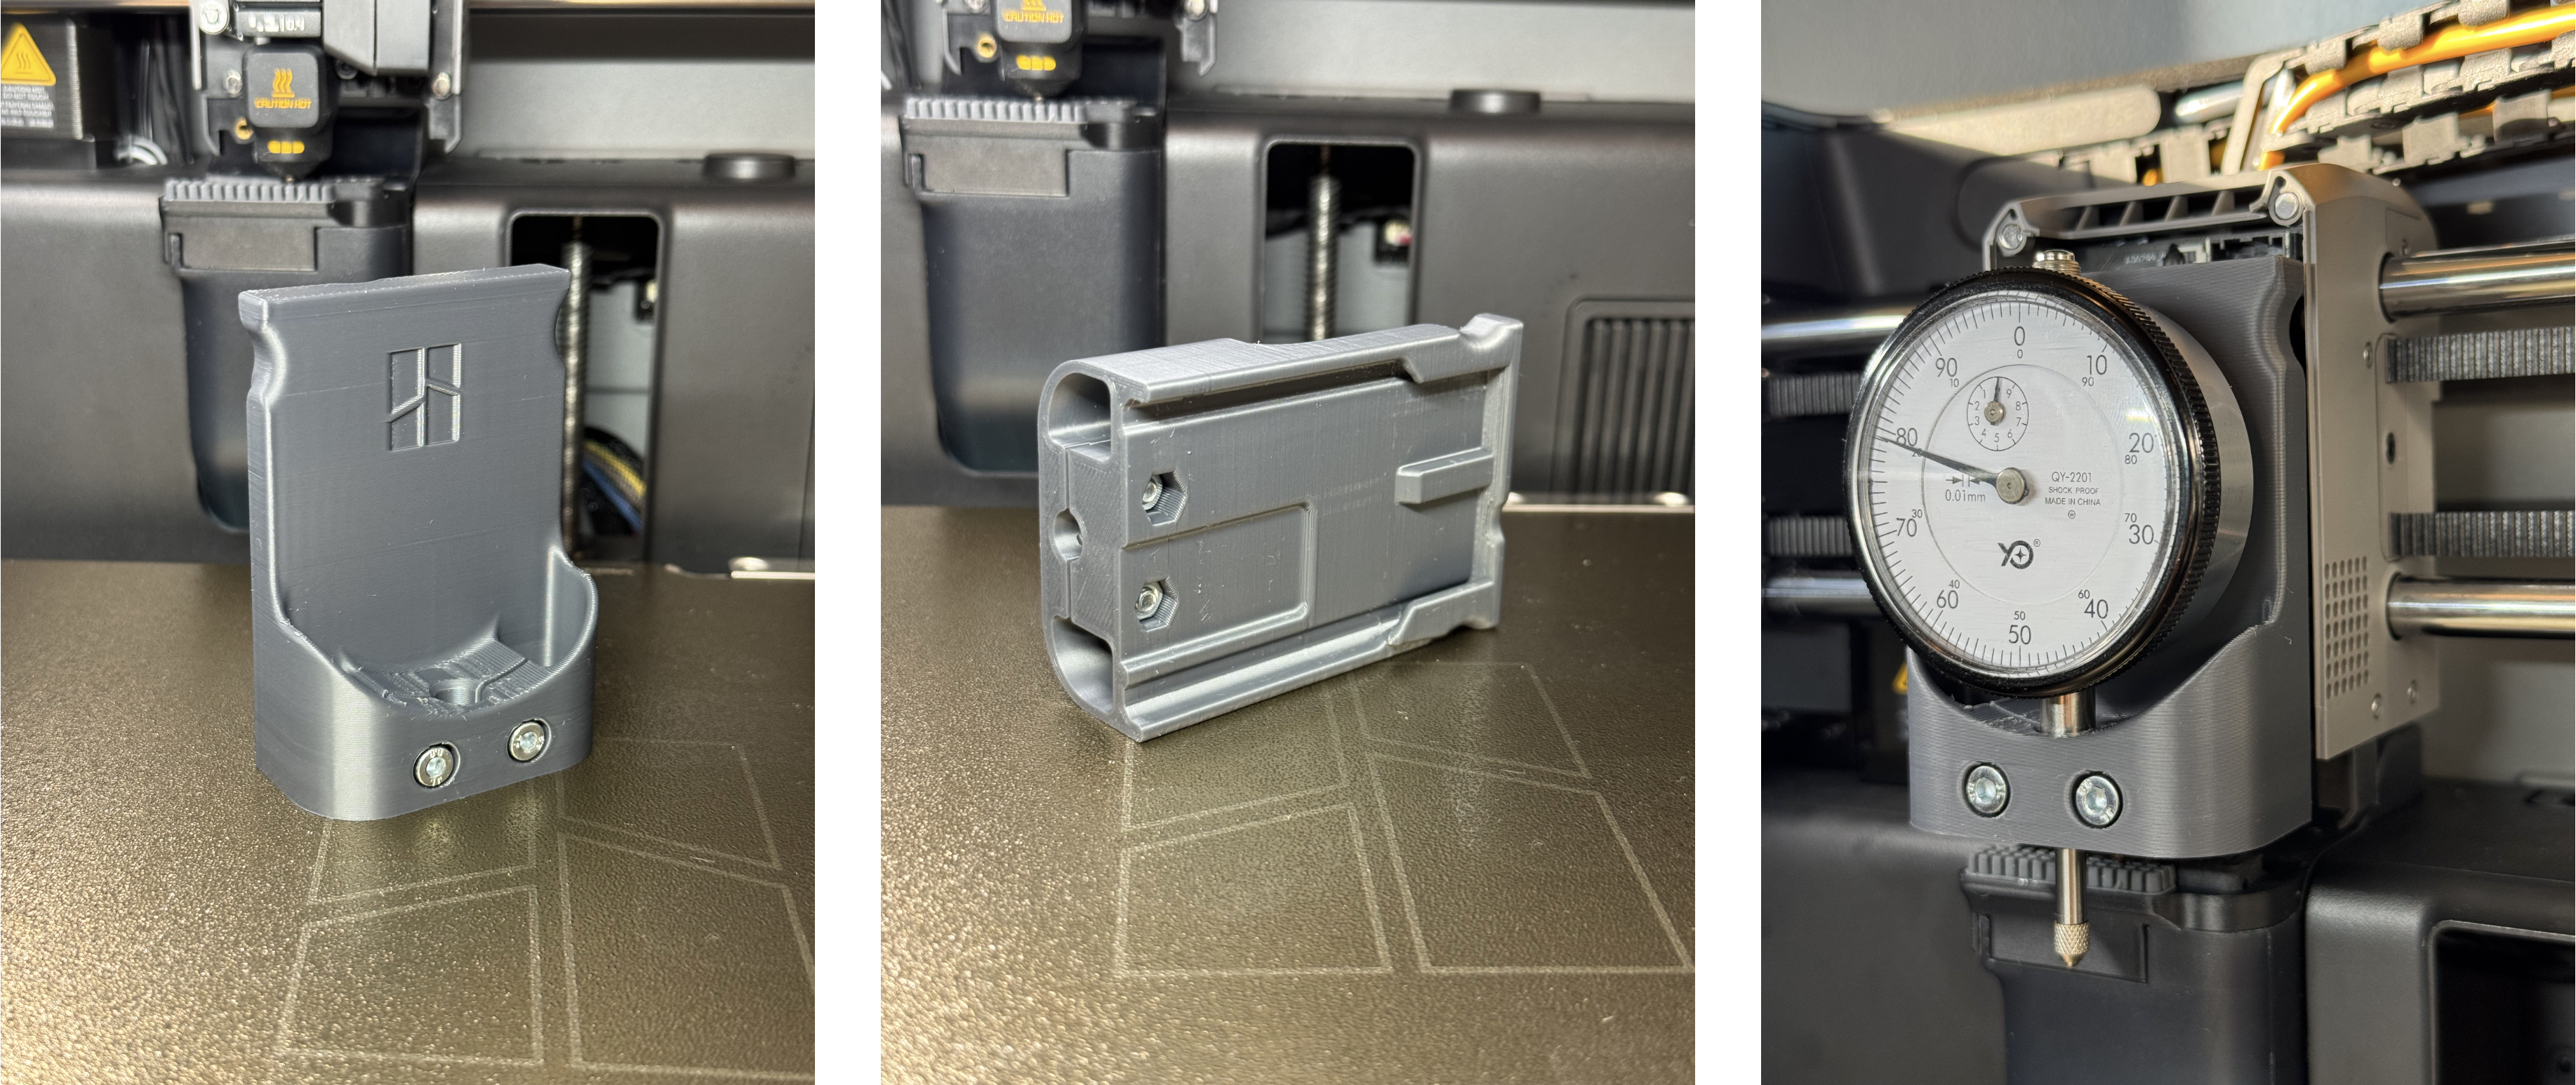
You will need :
- 2× M4 screws (M4-16 is perfect, maximum length is 20mm)
- 2× M4 nuts
- 1× Dial Indicator with a 8mm or a 9.52mm shank, up to 60/61mm of diameter (mine is dia8mm and has 12.7mm of range)
- Material : use the stiffest material you have (PLA, PLA-CF, PETG-CF, ABS-GF or ASA-CF for exemple are perfect for this kind of part)
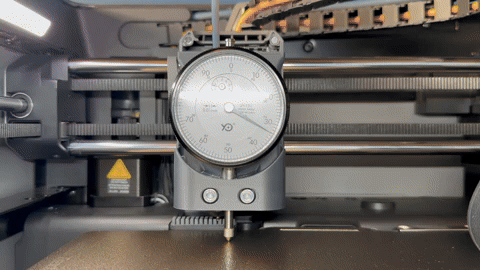
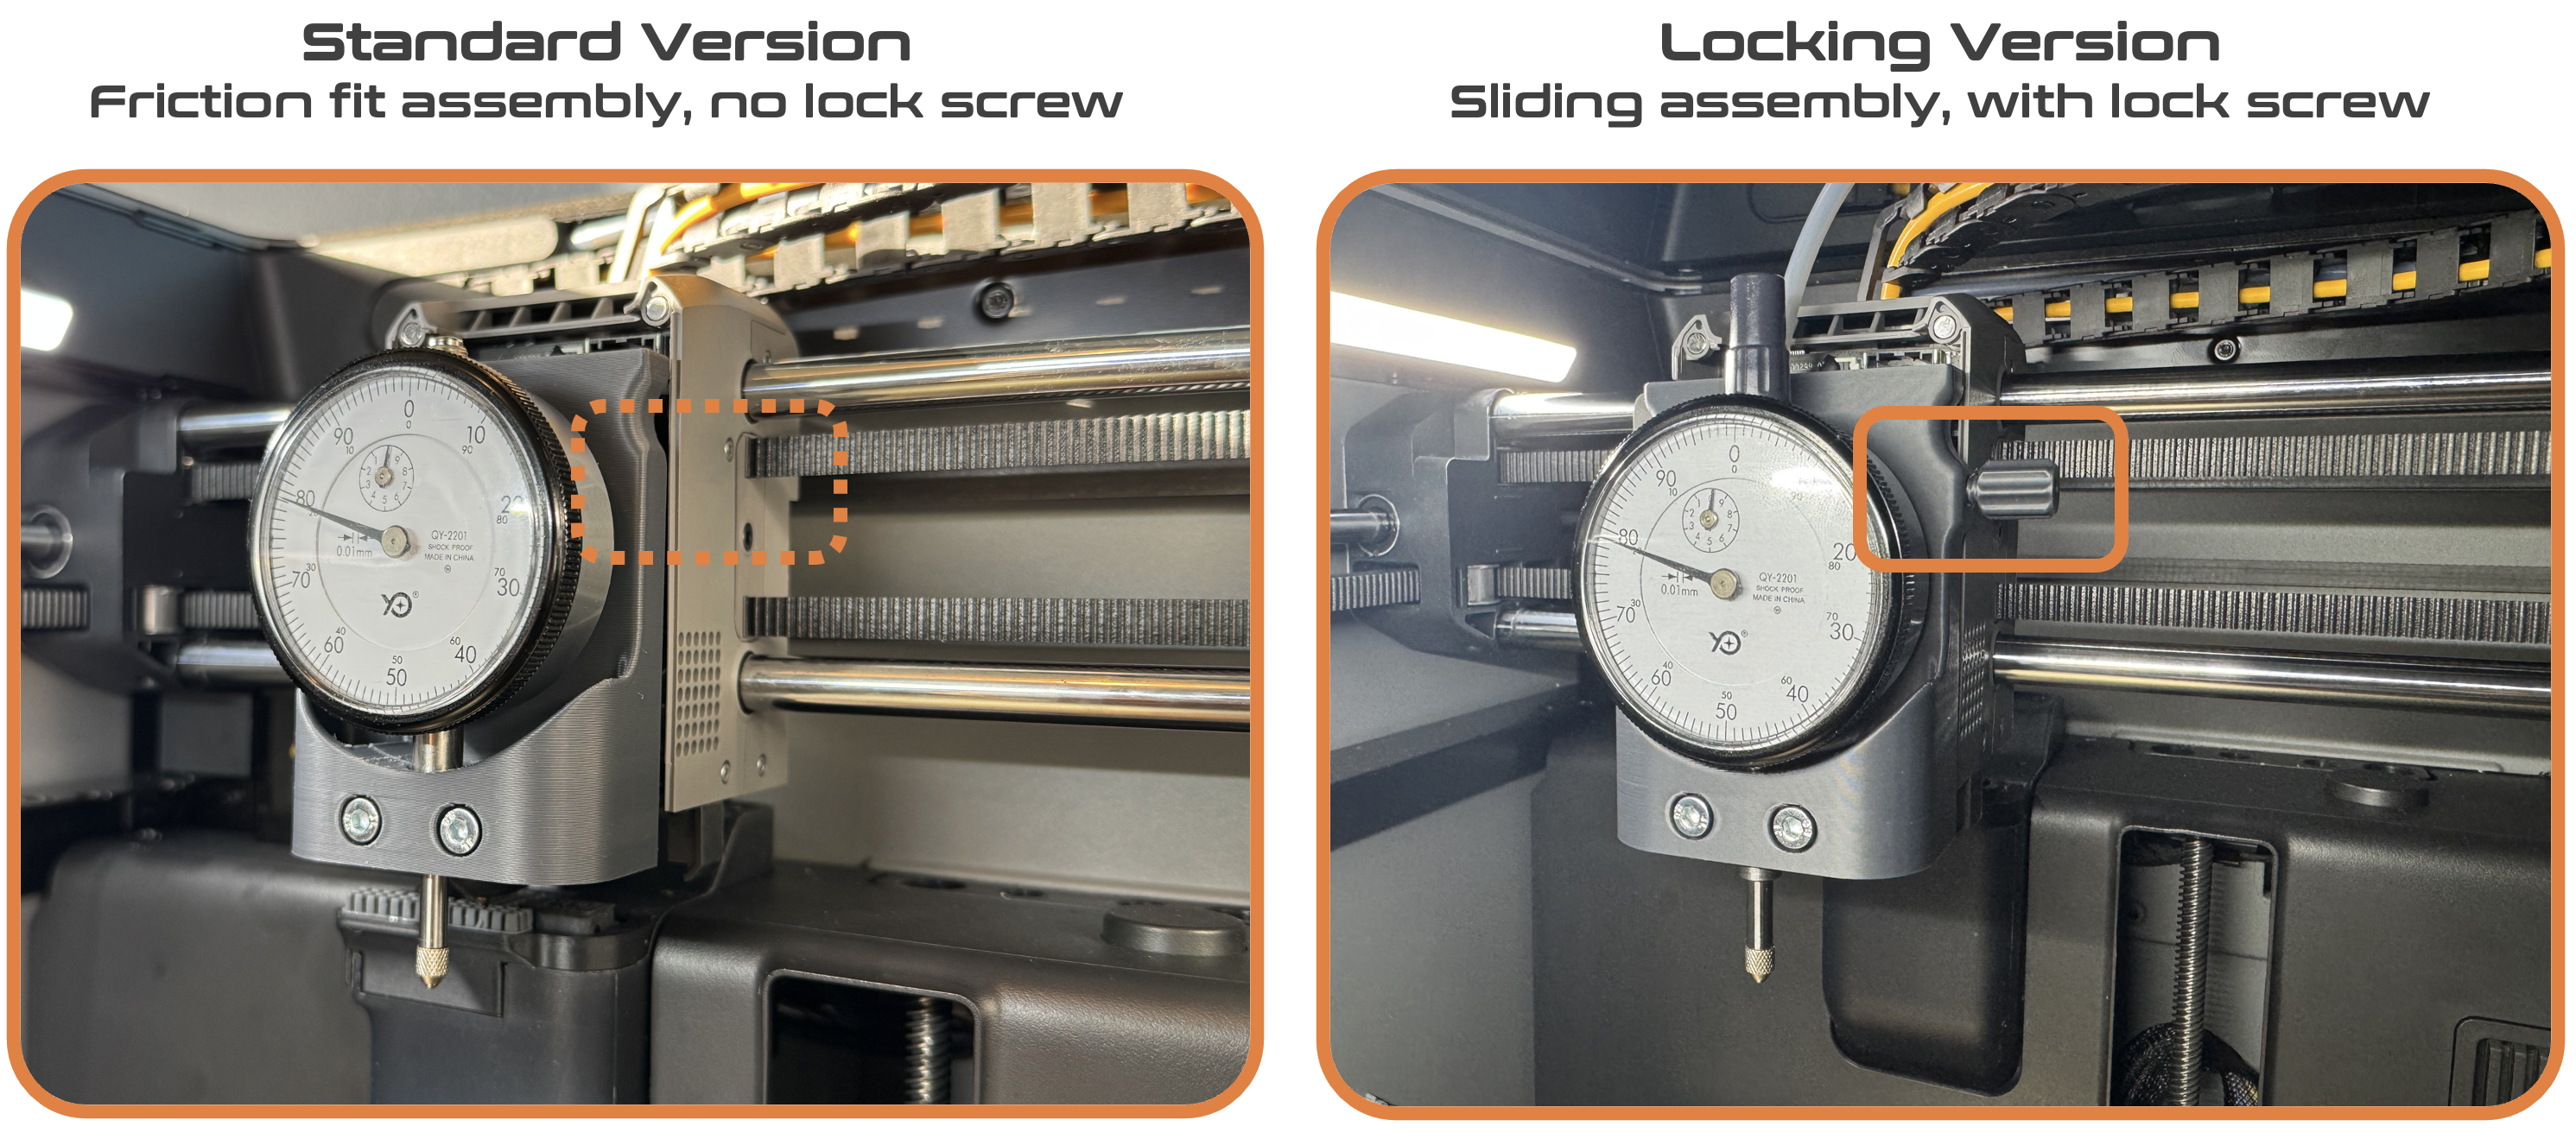
There is not mechanical “lock” as I wanted to prevent any damage on the toolhead, but it is still tight enough to give a sufficient repeatability. I had a discrepancy of maximum 2/100mm (0,02mm) in my tests which I find sufficient for the usage :
29/01/2026 update : a new version has been added. This new proposal has a sliding fit on the toolhead rails (instead of friction fit of the previous one), and is locked in place with a printed screw (no more hardware needed on this area, I preferred a printed screw instead of a steel screw to prevent damage on your toolhead)

P2S Dial Indicator mount (tramming tool)

Publicado em 2 de nov de 2025