Você está no 3DFinder
Buscamos em Thingiverse, MakerWorld e Printables ao mesmo tempo para te dar o melhor de cada uma.
Descrição
Add some flare to your vehicle with this highly customizable hitch cap model!
Features
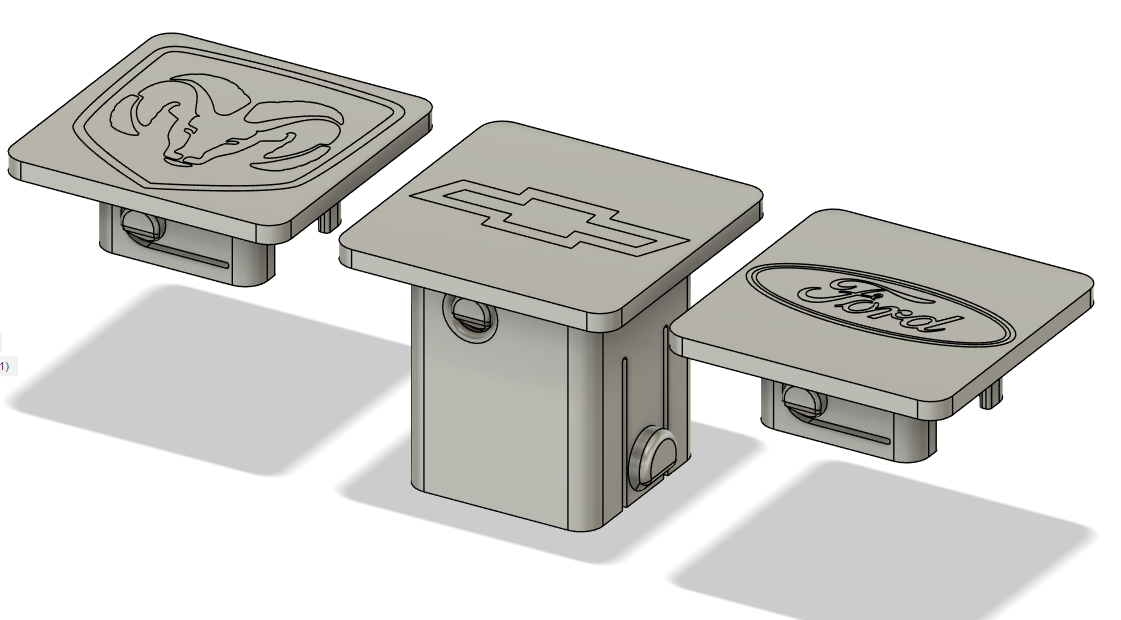
Modular
The Hitch_Cover can be easily removed and swapped out without removing or reprinting the main Hitch_Interface, saving both time and materials.
Parametrizable
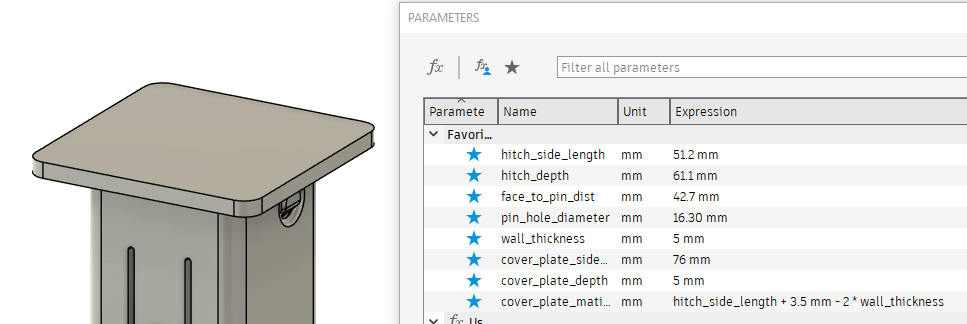
Parameters/Dimensions can be edited to your liking by downloading the .f3d file and selecting the “Change Parameter” interface in Fusion 360.
Customizable
A blank version of the Hitch_Cover is included in the .f3d and .stl files so you can add your own logo. Advertise your company, rep your favourite sports team, sky's the limit.
Instructions
Printing as-is
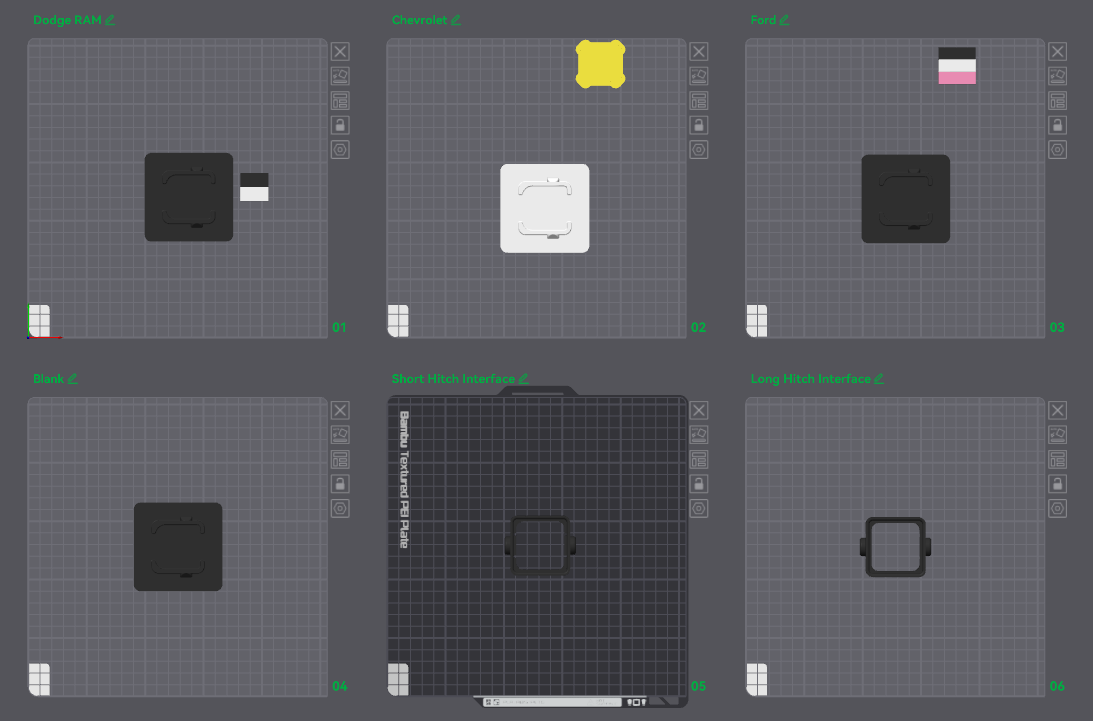
1. Download the 3MF file and import it into your slicer. I'm using Bambu Studio.
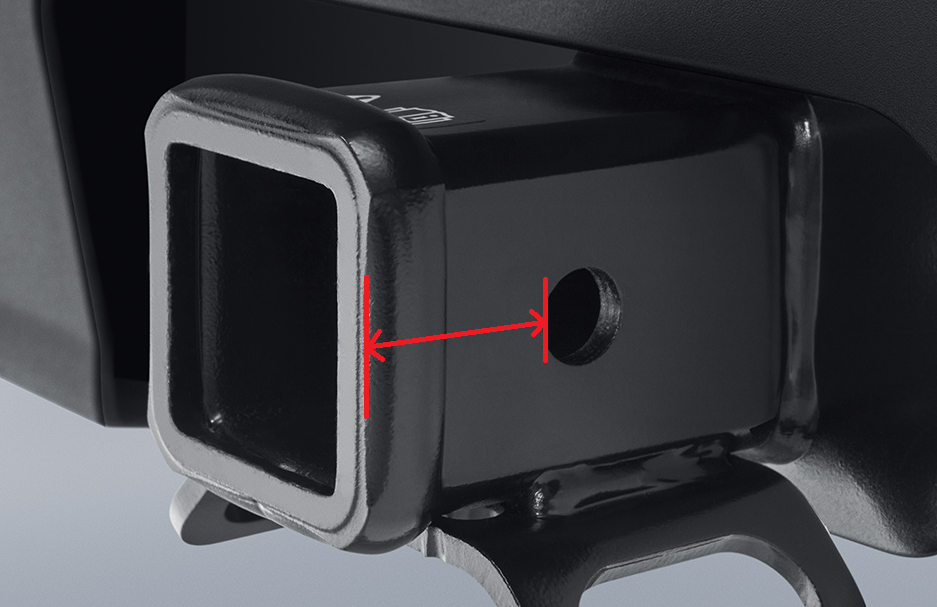
2. Measure the distance from the rear-edge of your hitch pin hole, to the rear face of your hitch receiver, then choose the correct hitch interface file.
- Hitch_Interface_Short: Supports 43mm (and smaller) distances from hitch face to pin hole
- Hitch_Interface_Long: Supports 59mm (and smaller) distances from hitch face to pin hole
- Everything else: See “Modifying Parameters” section below to learn how to make a custom Hitch_Interface for your vehicle
3. If you're using Bambu Studio, my slicing settings should have carried over from the 3MF. Otherwise, review the Print Settings section to set your slicing settings accordingly, then paint the logos as needed and hit print!
Modifying Parameters before Printing
1. If your hitch face to pin distance and hitch depth aren't compatible with the two options I've provided, modify the hitch_depth and face_to_pin_center parameters (in that order) in Fusion360 to suit your needs. You can also adjust the hitch_side_length parameter if you don't have a 2 inch hitch receiver.
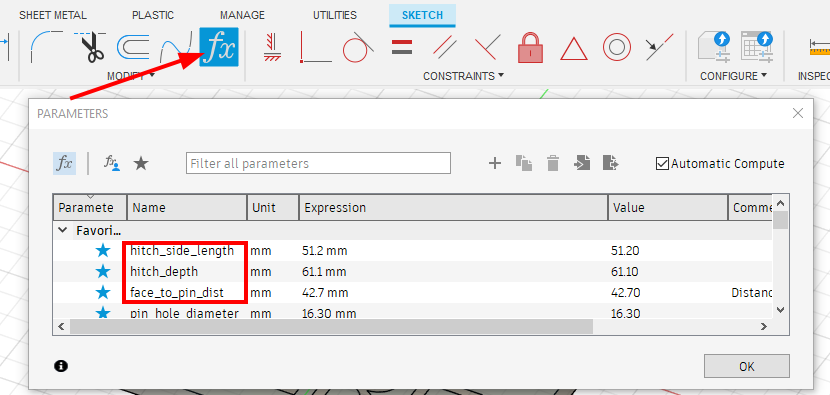
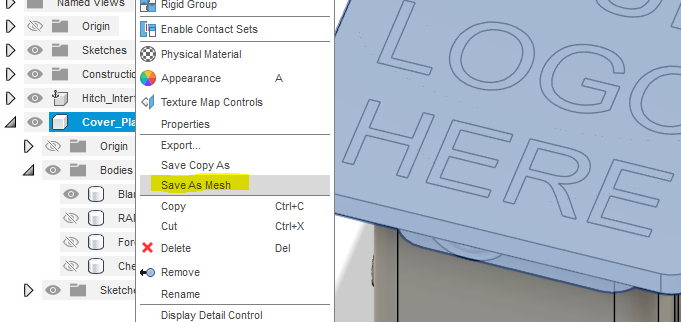
2. Once you've made your changes, right-click the Hitch_Interface component in Fusion 360 and select ‘Save As Mesh’
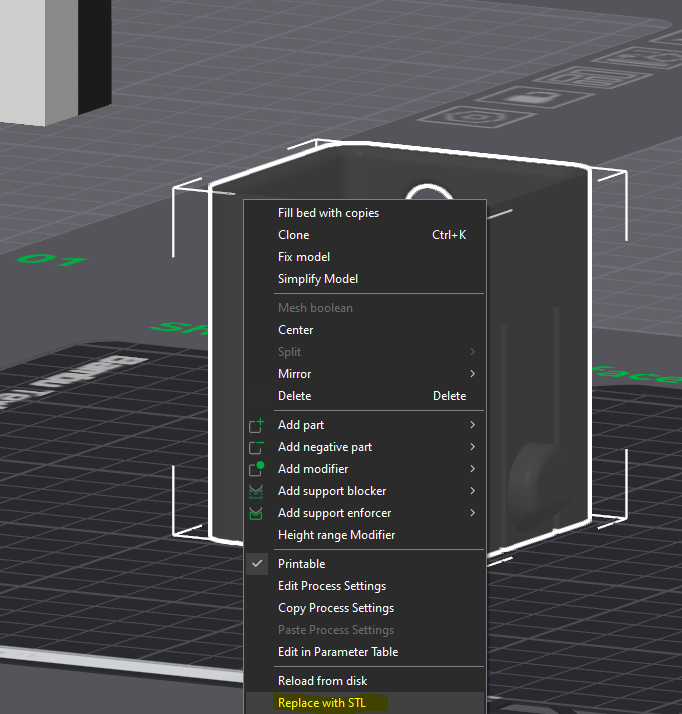
3. Import the resulting stl file into my 3mf project in your slicer, and replace the stl's with the ones you've just created. Bambu Studio has a “Replace with STL” option in their right click context menu.
4. If you're using Bambu Studio, my slicing settings should have carried over from the 3MF. Otherwise, review the Print Settings section to set your slicing settings accordingly, then paint the logos as needed and hit print!
Print Settings
- All components should be printed in a temperature and UV resistant material such as ASA, PETG, ABS, etc.
Hitch_Cover
- Print Face-Down, then pause inspect the first layer from above before continuing
- Layer Height: 0.16
- Infill: 30%
- Wall Generator: Arachne
- Wall Loops: 3
- Bottom Paint Penetration Layers: 6
- Speed - Outer Wall: 50mm/s
- Speed - Inner Wall: 150mm/s
- Support: Tree (Auto)
- Support Critical Regions Only ✅
Hitch_Interface
- (Using default 0.20mm Strength @BBL X1C profile)
- Print on side to ensure the latch mechanism flexes along the layer line direction
- Layer Height: 0.2
- Infill Density: 15-30%
- Wall Generator: Classic
- Wall Loops: 3
- Support: None
Notes
- This is not licensed for commercial use. Subscribe to my Patreon for the commercial license to all my models.
- Share your custom designs in the comments section below!
Changelog
- 2026-02-03: Added fillet to hitch receiver and decreased pin extrusion by 0.5mm to reduce stress on compliant mechanism
- 2026-03-08: Rotated Hitch Interface in .3MF so it will now be printed on its side to strengthen the compliant mechanism
Modular Trailer Hitch Cap

Publicado em 19 de out de 2025
Gostou deste modelo? Crie uma conta grátis para salvar seus favoritos e voltar a eles depois.
Criar conta