Você está no 3DFinder
Buscamos em Thingiverse, MakerWorld e Printables ao mesmo tempo para te dar o melhor de cada uma.
Descrição
CardputerLLM - 适用于 Cardputer && Module LLM 的外壳
该打印套件适用于 GOROman 的 LLMCardputer 项目,可将 Module LLM 安装于 Cardputer 的底座并组合使用,详见 [https://github.com/GOROman/LLMCardputer](https://github.com/GOROman/LLMCardputer)
特性
- 可折叠支架
- 整机厚度与原始 cardputer 一致
- 保留了所有 Module LLM 的接口
BOM 清单
- M5Stack Cardputer
- GROVE HY2.0-4Pin 传感器连接线
- M5Stack Module LLM
- 3D 打印外壳 L1
- 3D 打印外壳 S1
- 3D 打印外壳 M1
- 内六角圆柱头螺栓 M2x5 3 个
- 内六角圆柱头螺栓 M2x8 1 个
- 内六角扁平头螺栓 M2x3 1 个
- 内六角扁平头螺栓 M2x4 2 个
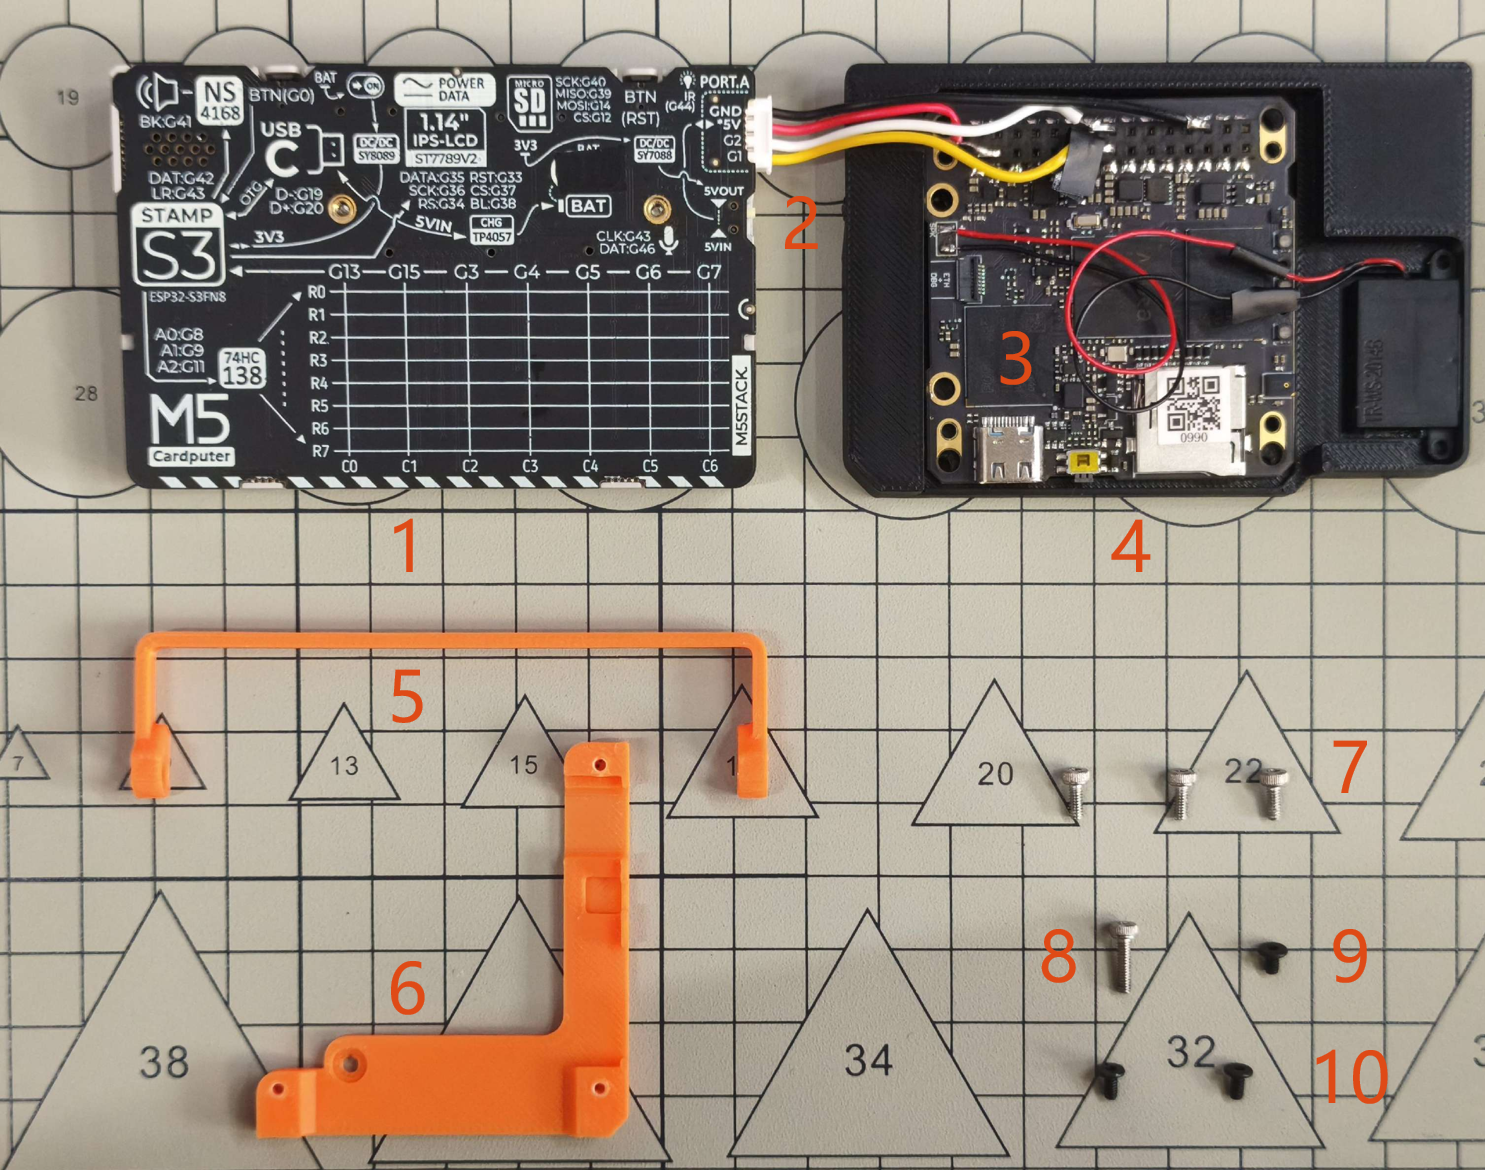
组装说明
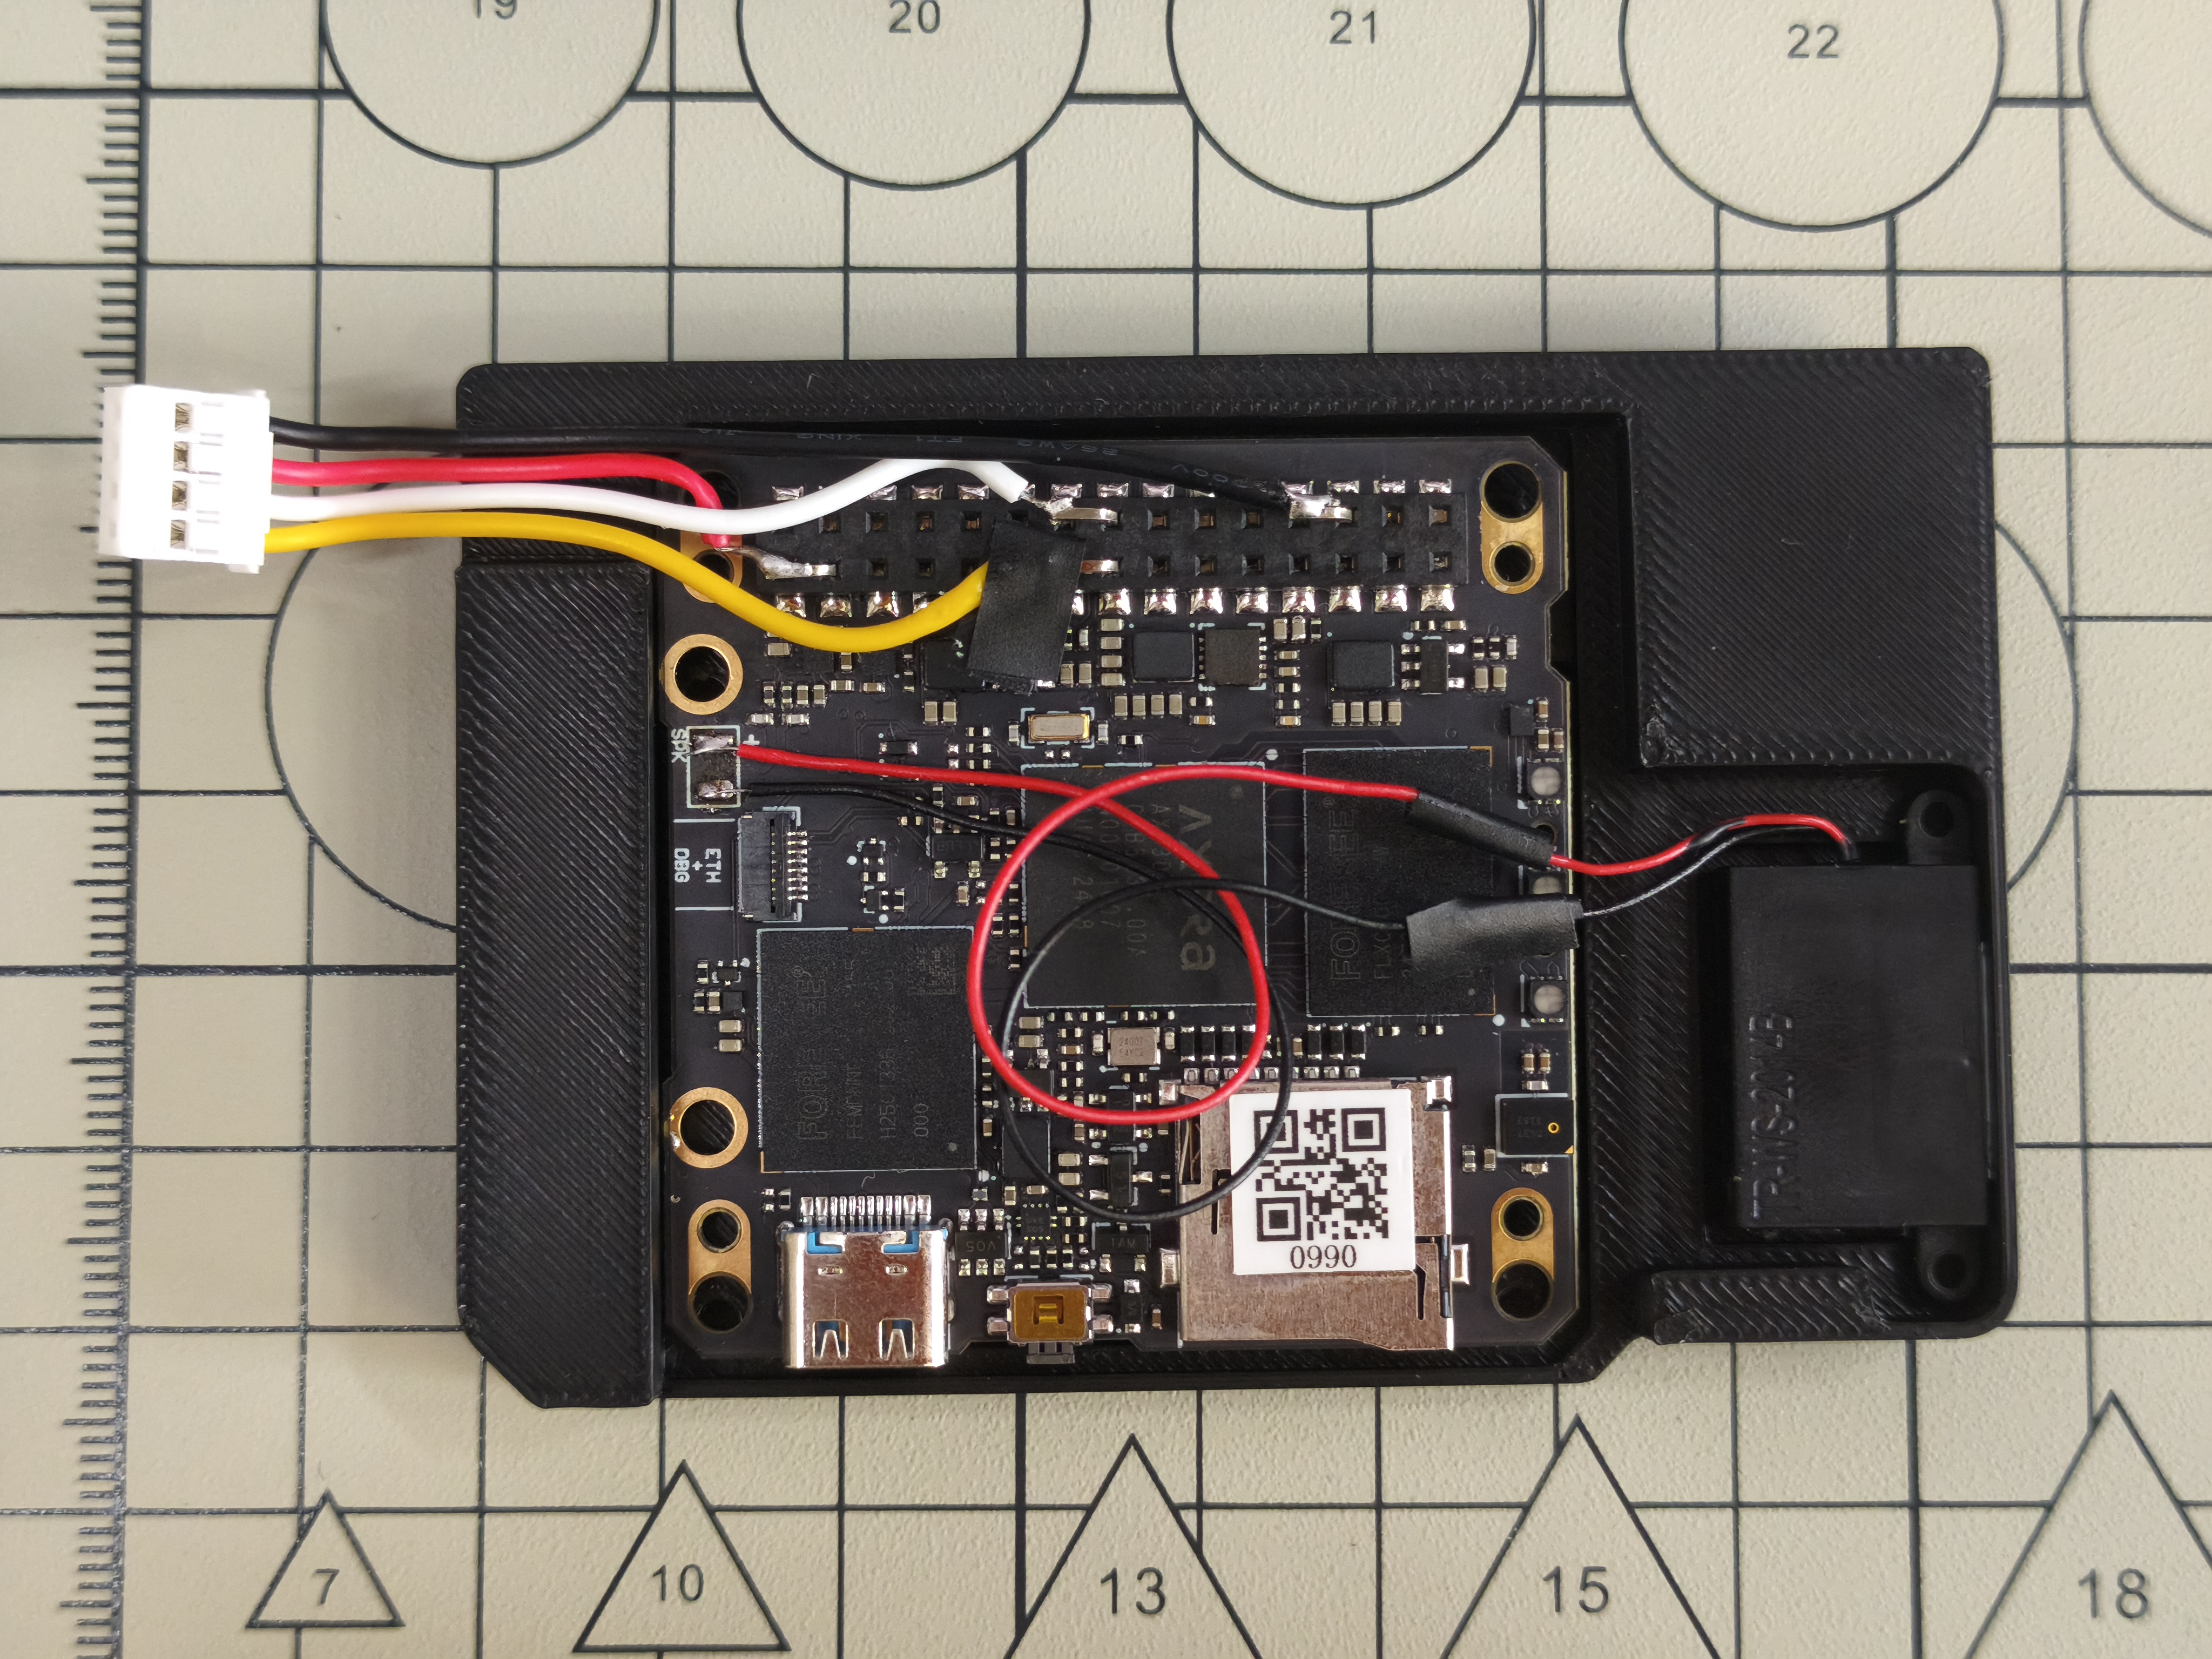
将 Module LLM 的主板与扬声器安装到 3D 打印外壳 L1, 其中连接扬声器与 Module LLM 的导线需要延长
GROVE 传感器连接线需要连接至 Module LLM,具体的接线方式请参考 [https://github.com/GOROman/LLMCardputer](https://github.com/GOROman/LLMCardputer)
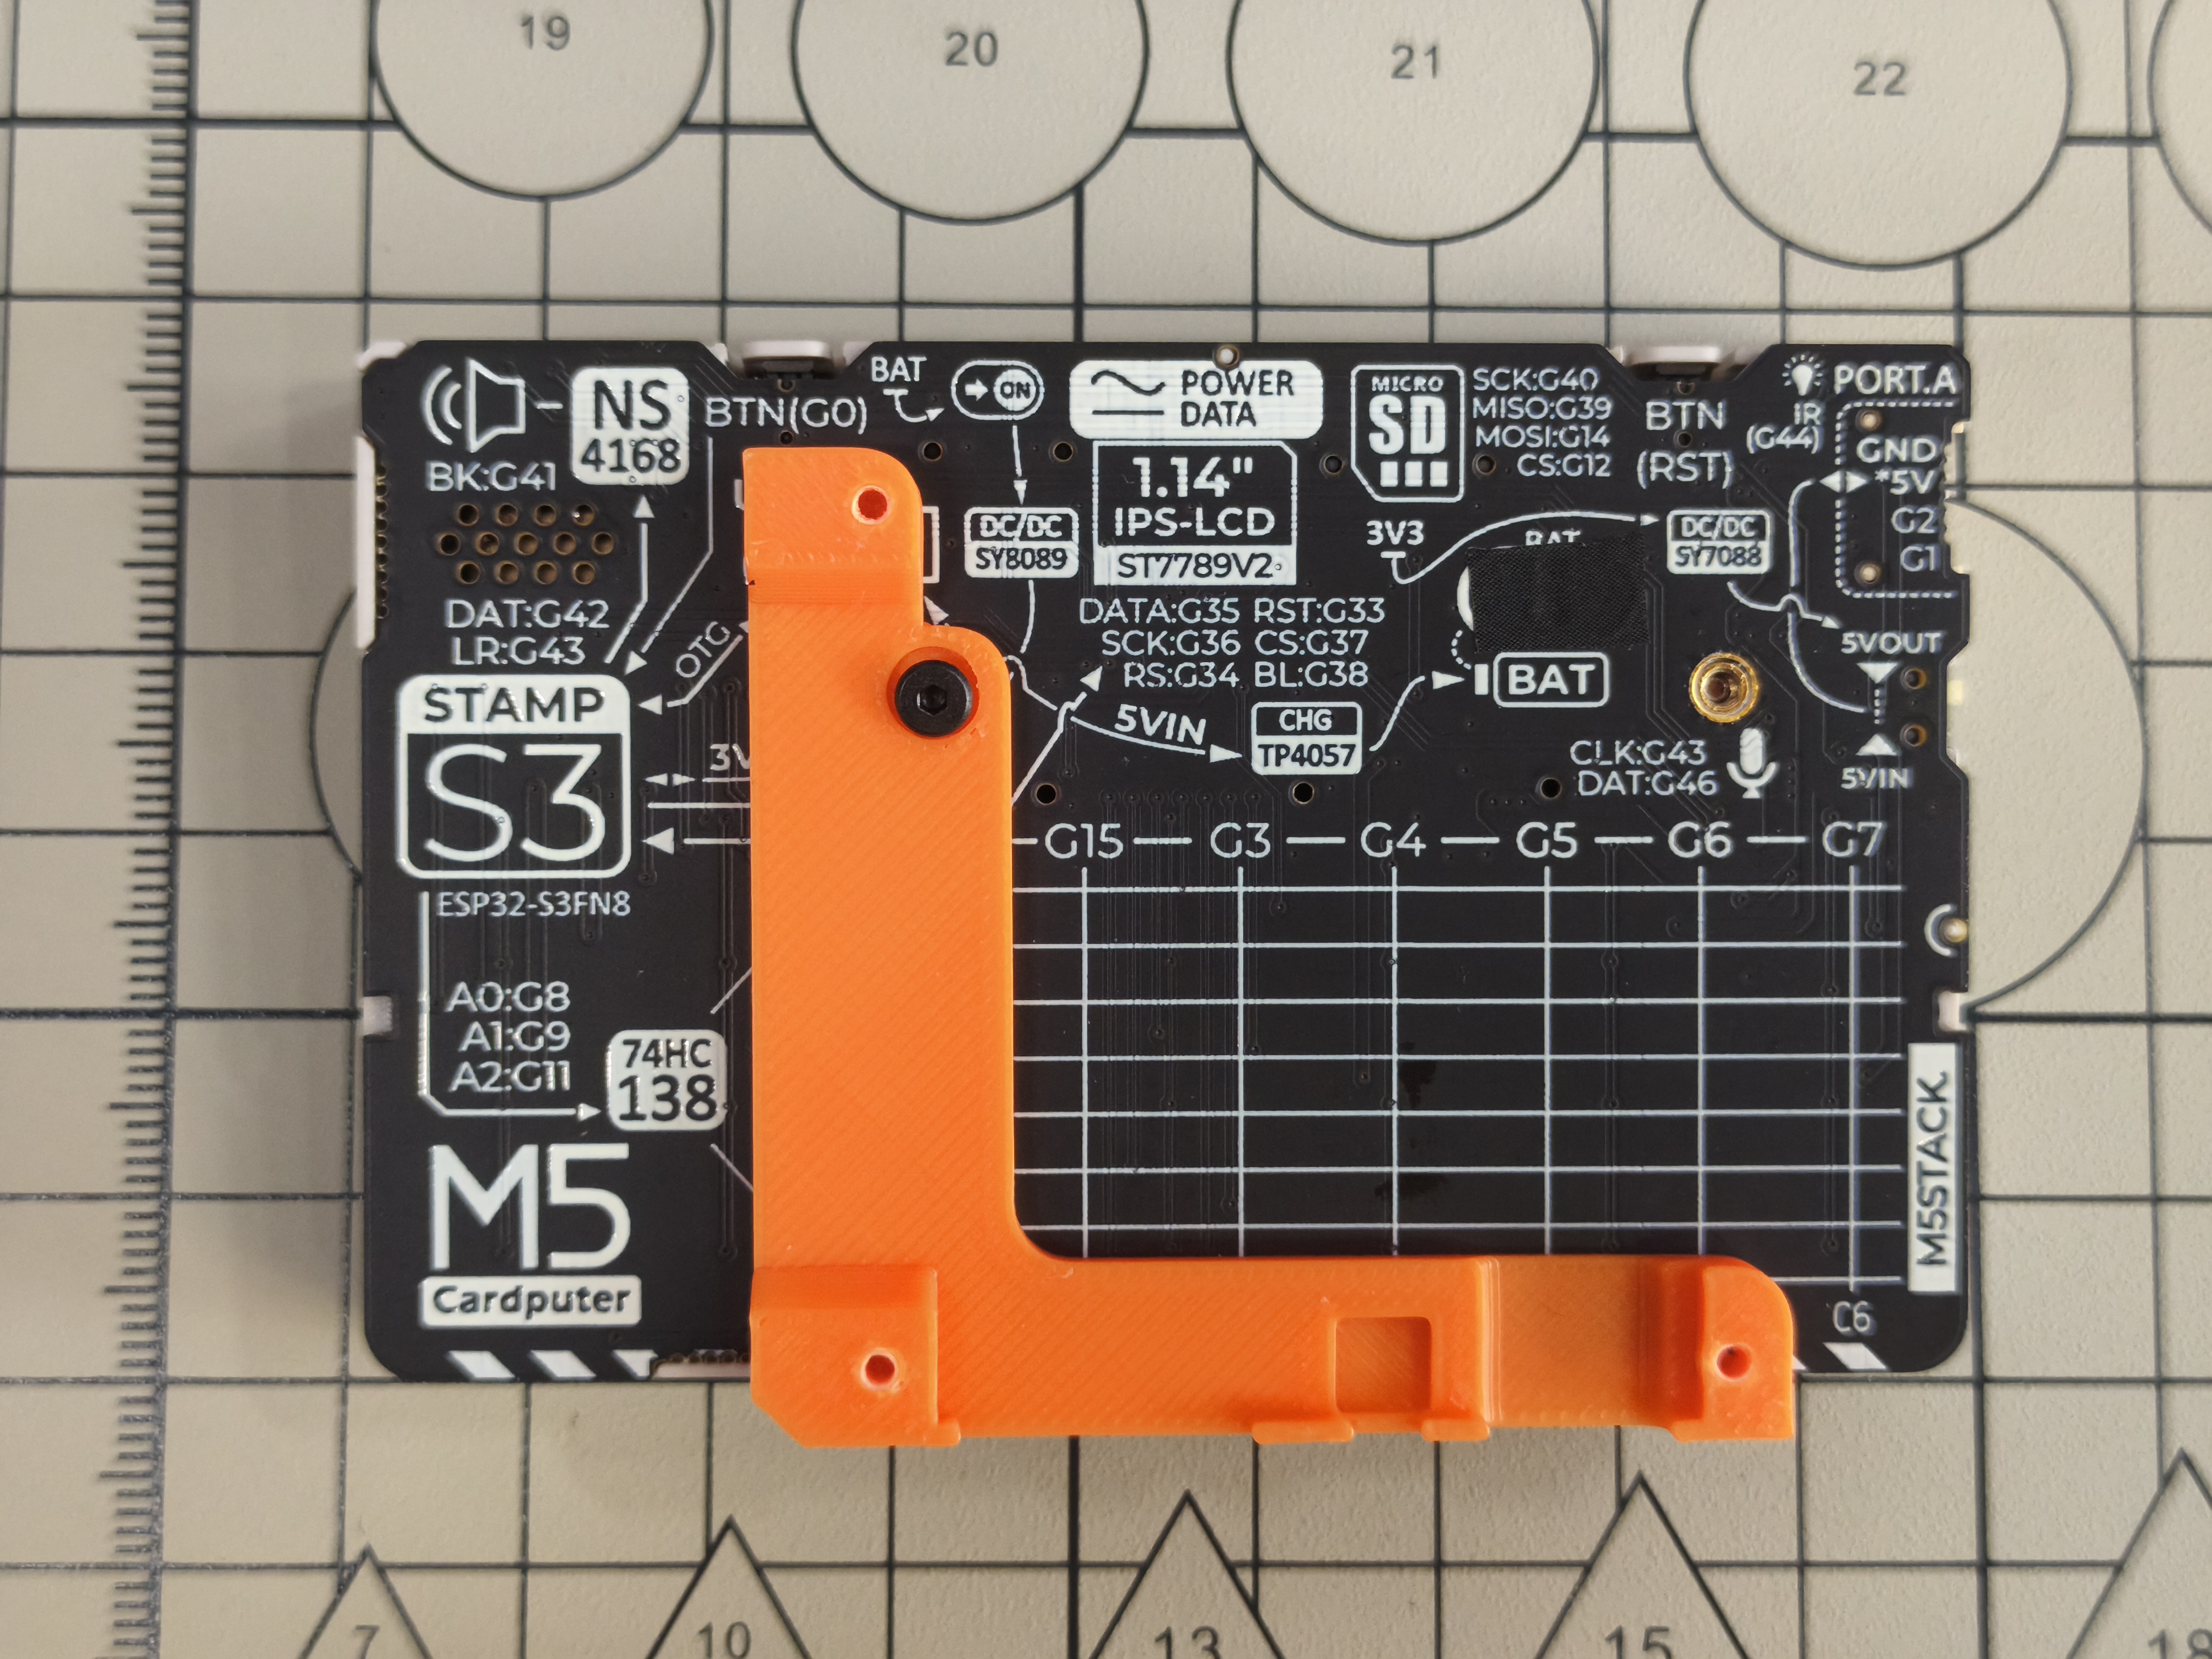
使用内六角扁平头螺栓 M2x3 将 3D 打印外壳 M1 安装至 Cardputer
连接 Cardputer 与 Module LLM
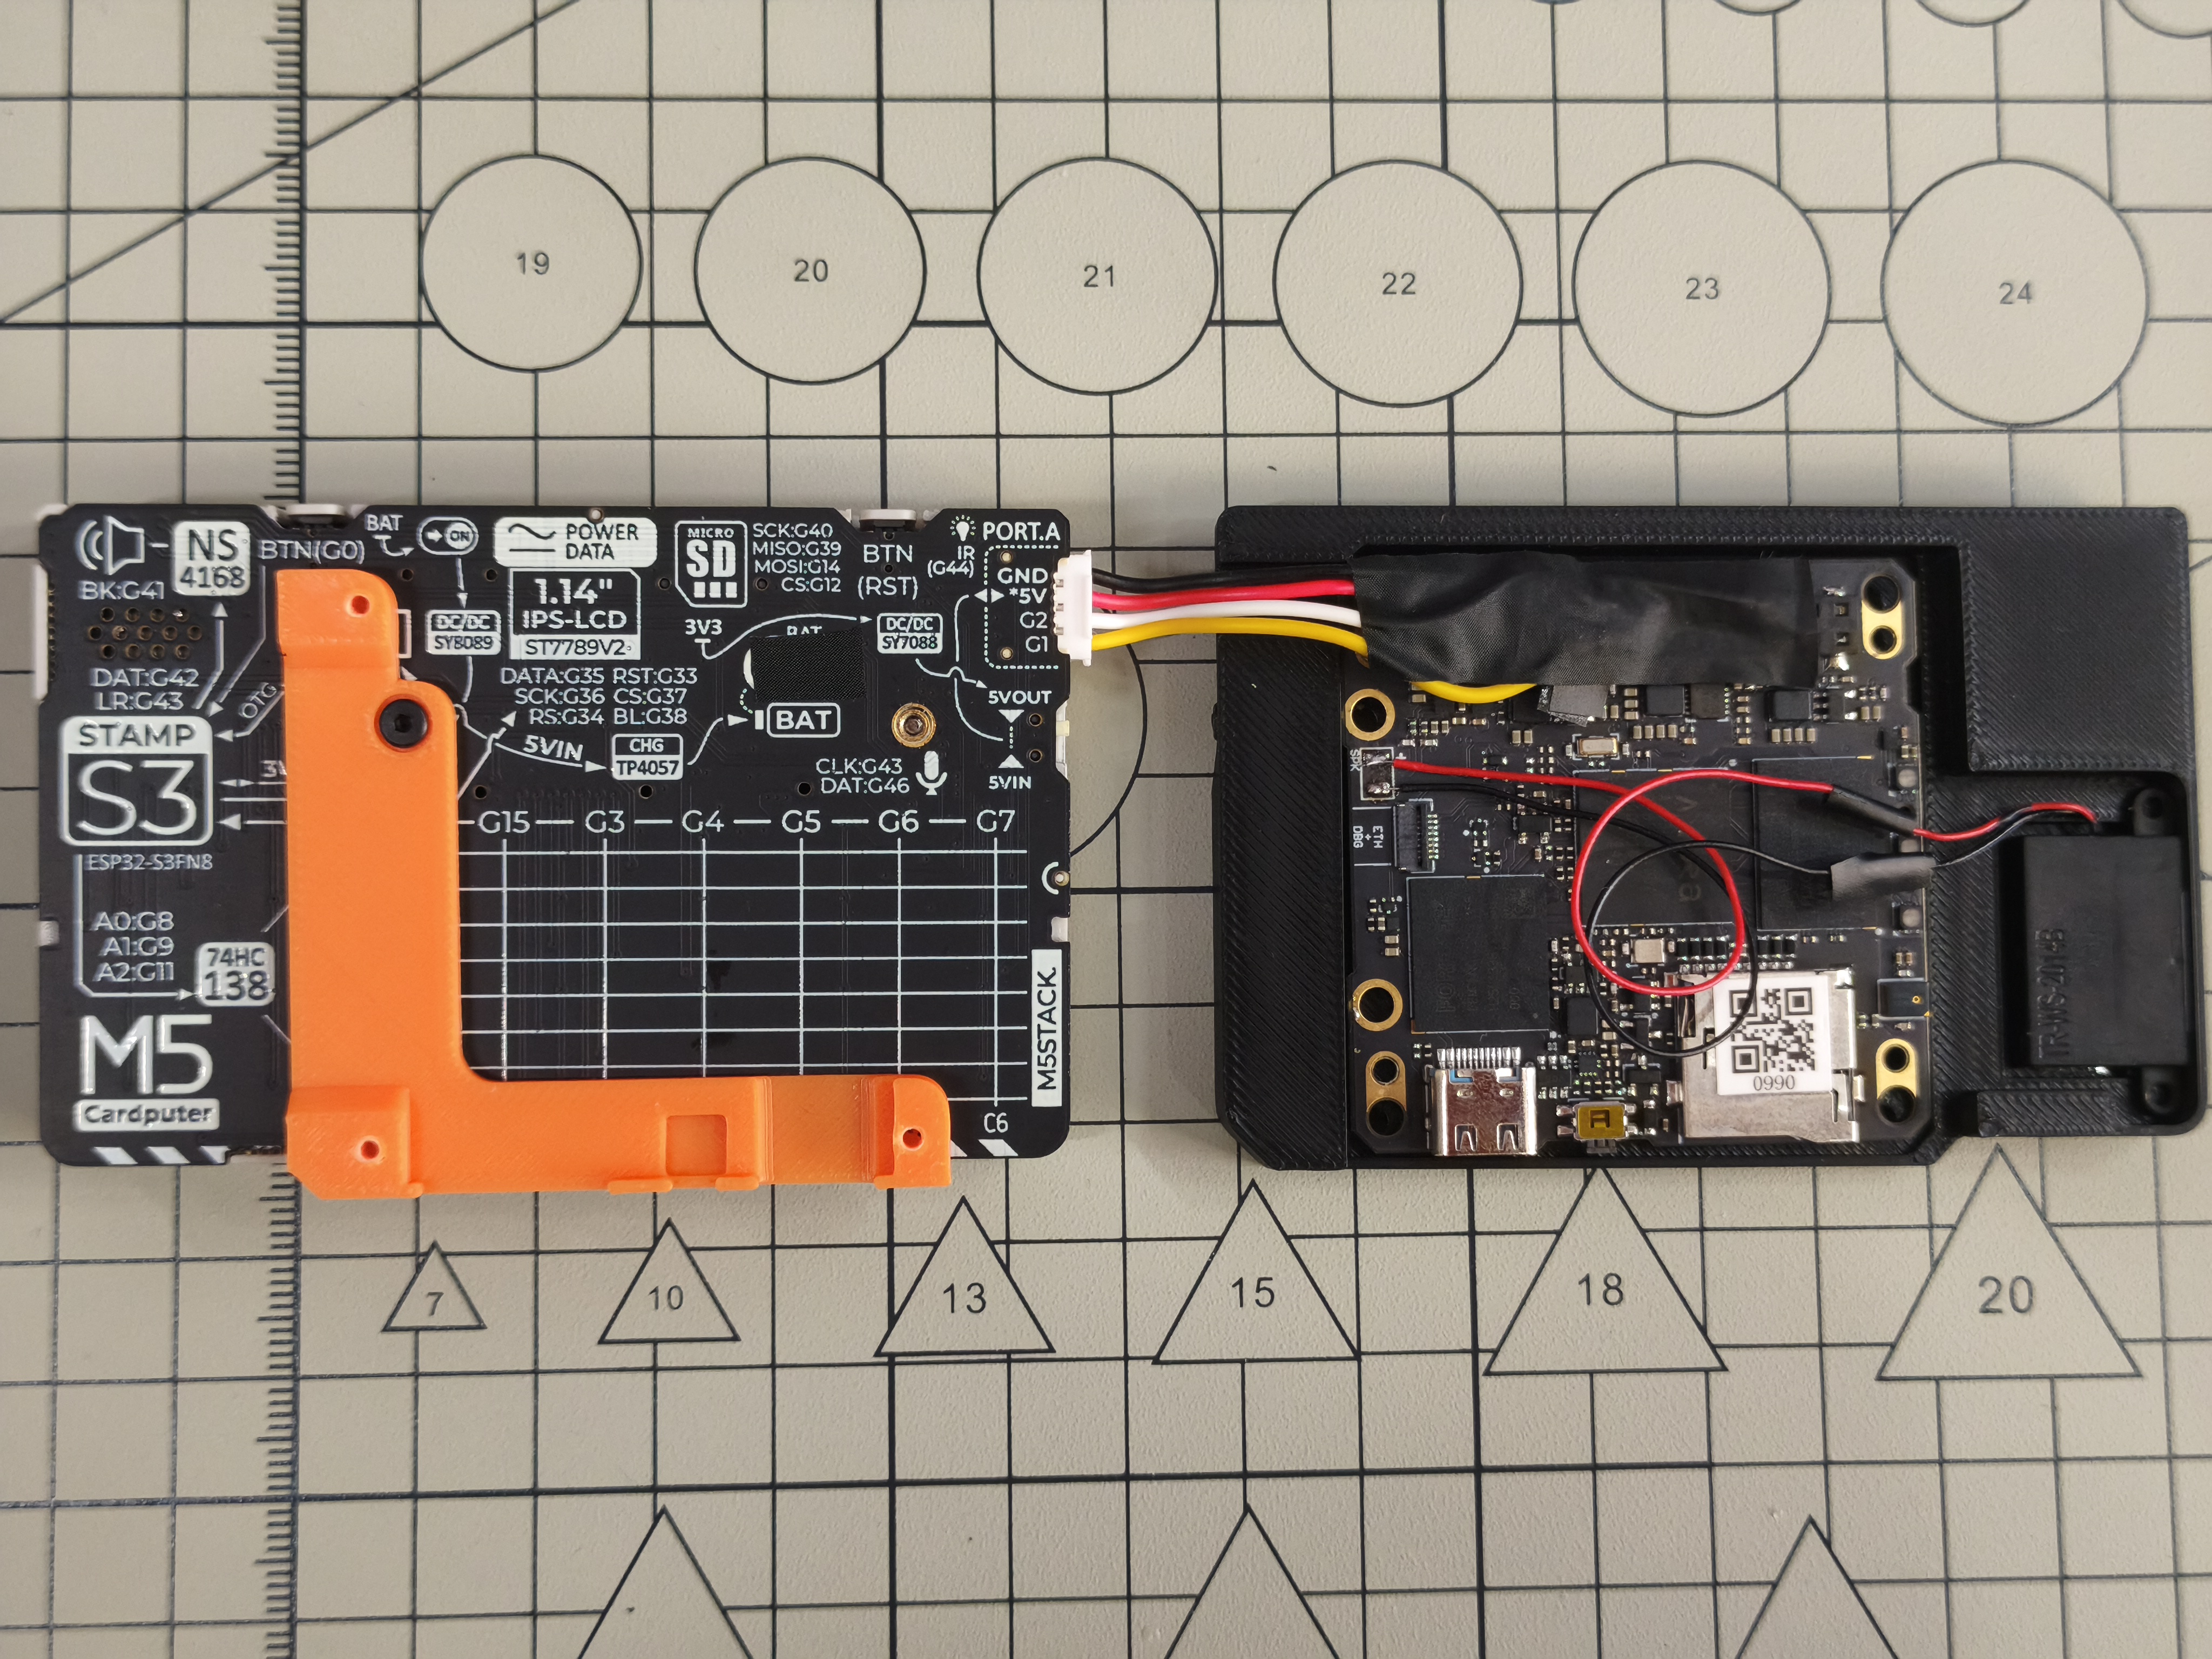
使用 3 个内六角圆柱头螺栓 M2x5 与 1 个 内六角圆柱头螺栓 M2x8 将 3D 打印外壳 L1 安装至 Cardputer
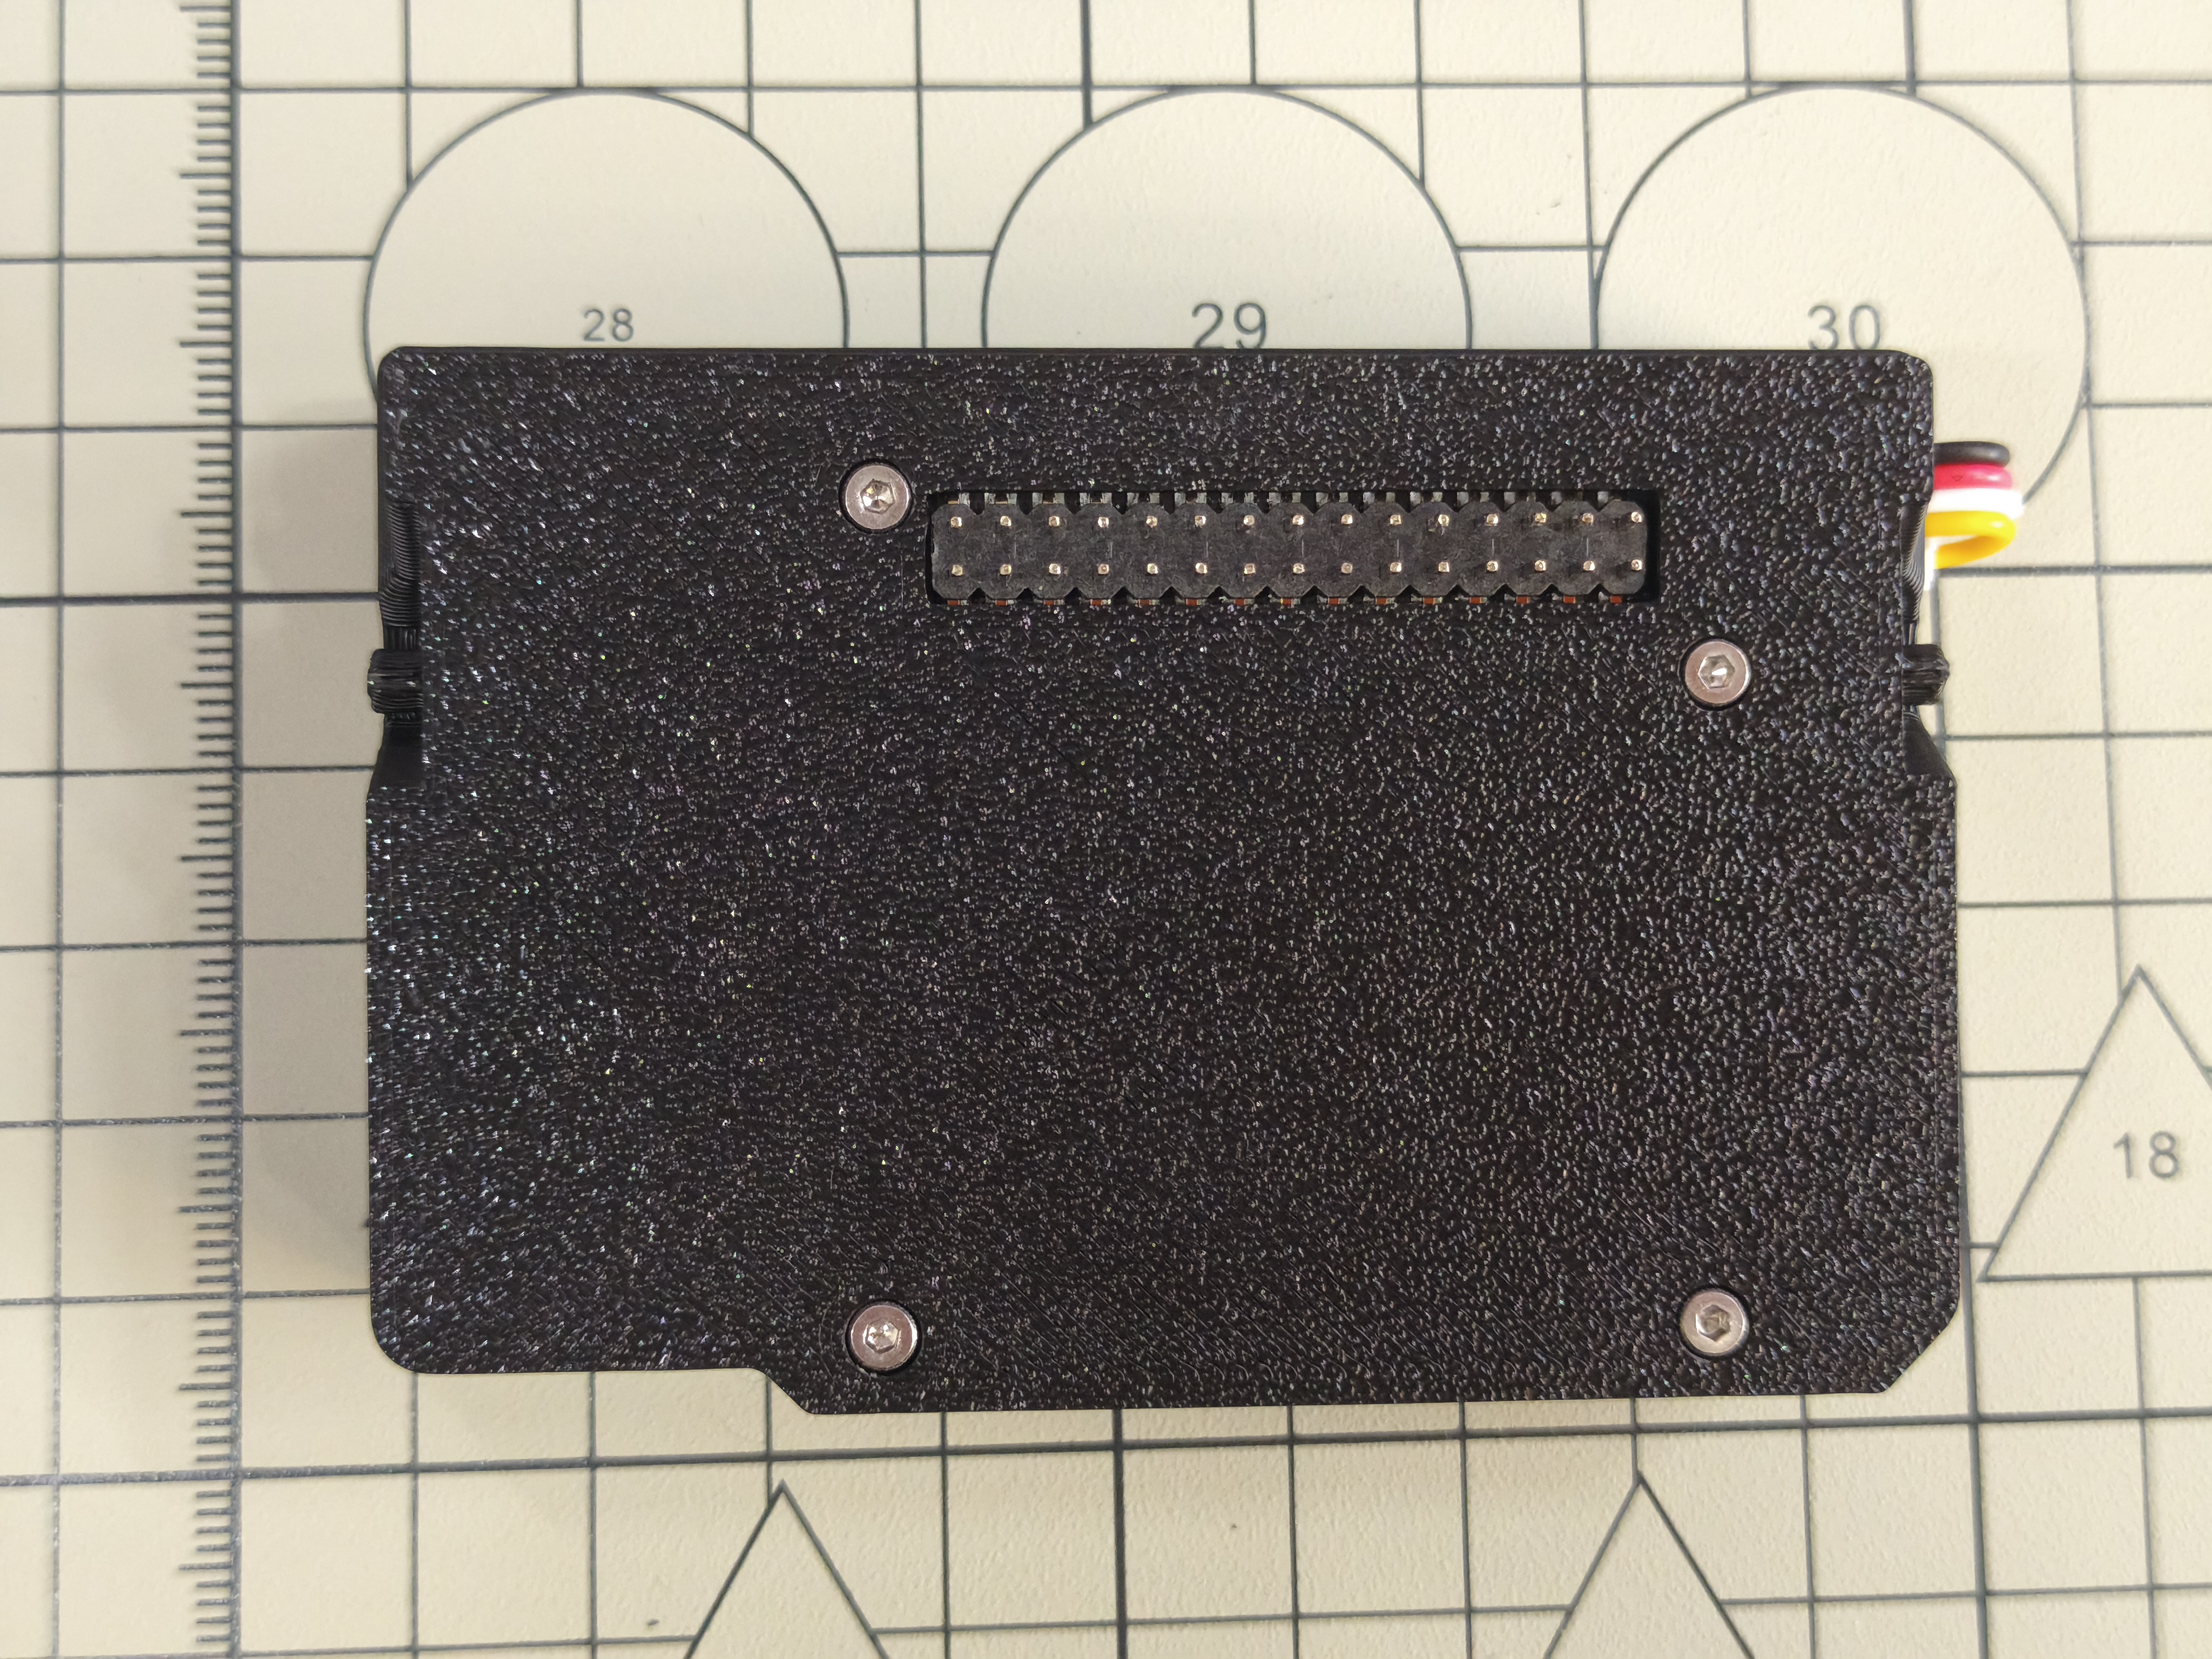
使用 2 个内六角扁平头螺栓 M2x4 将 3D 打印外壳 S1 安装至 3D 打印外壳 L1
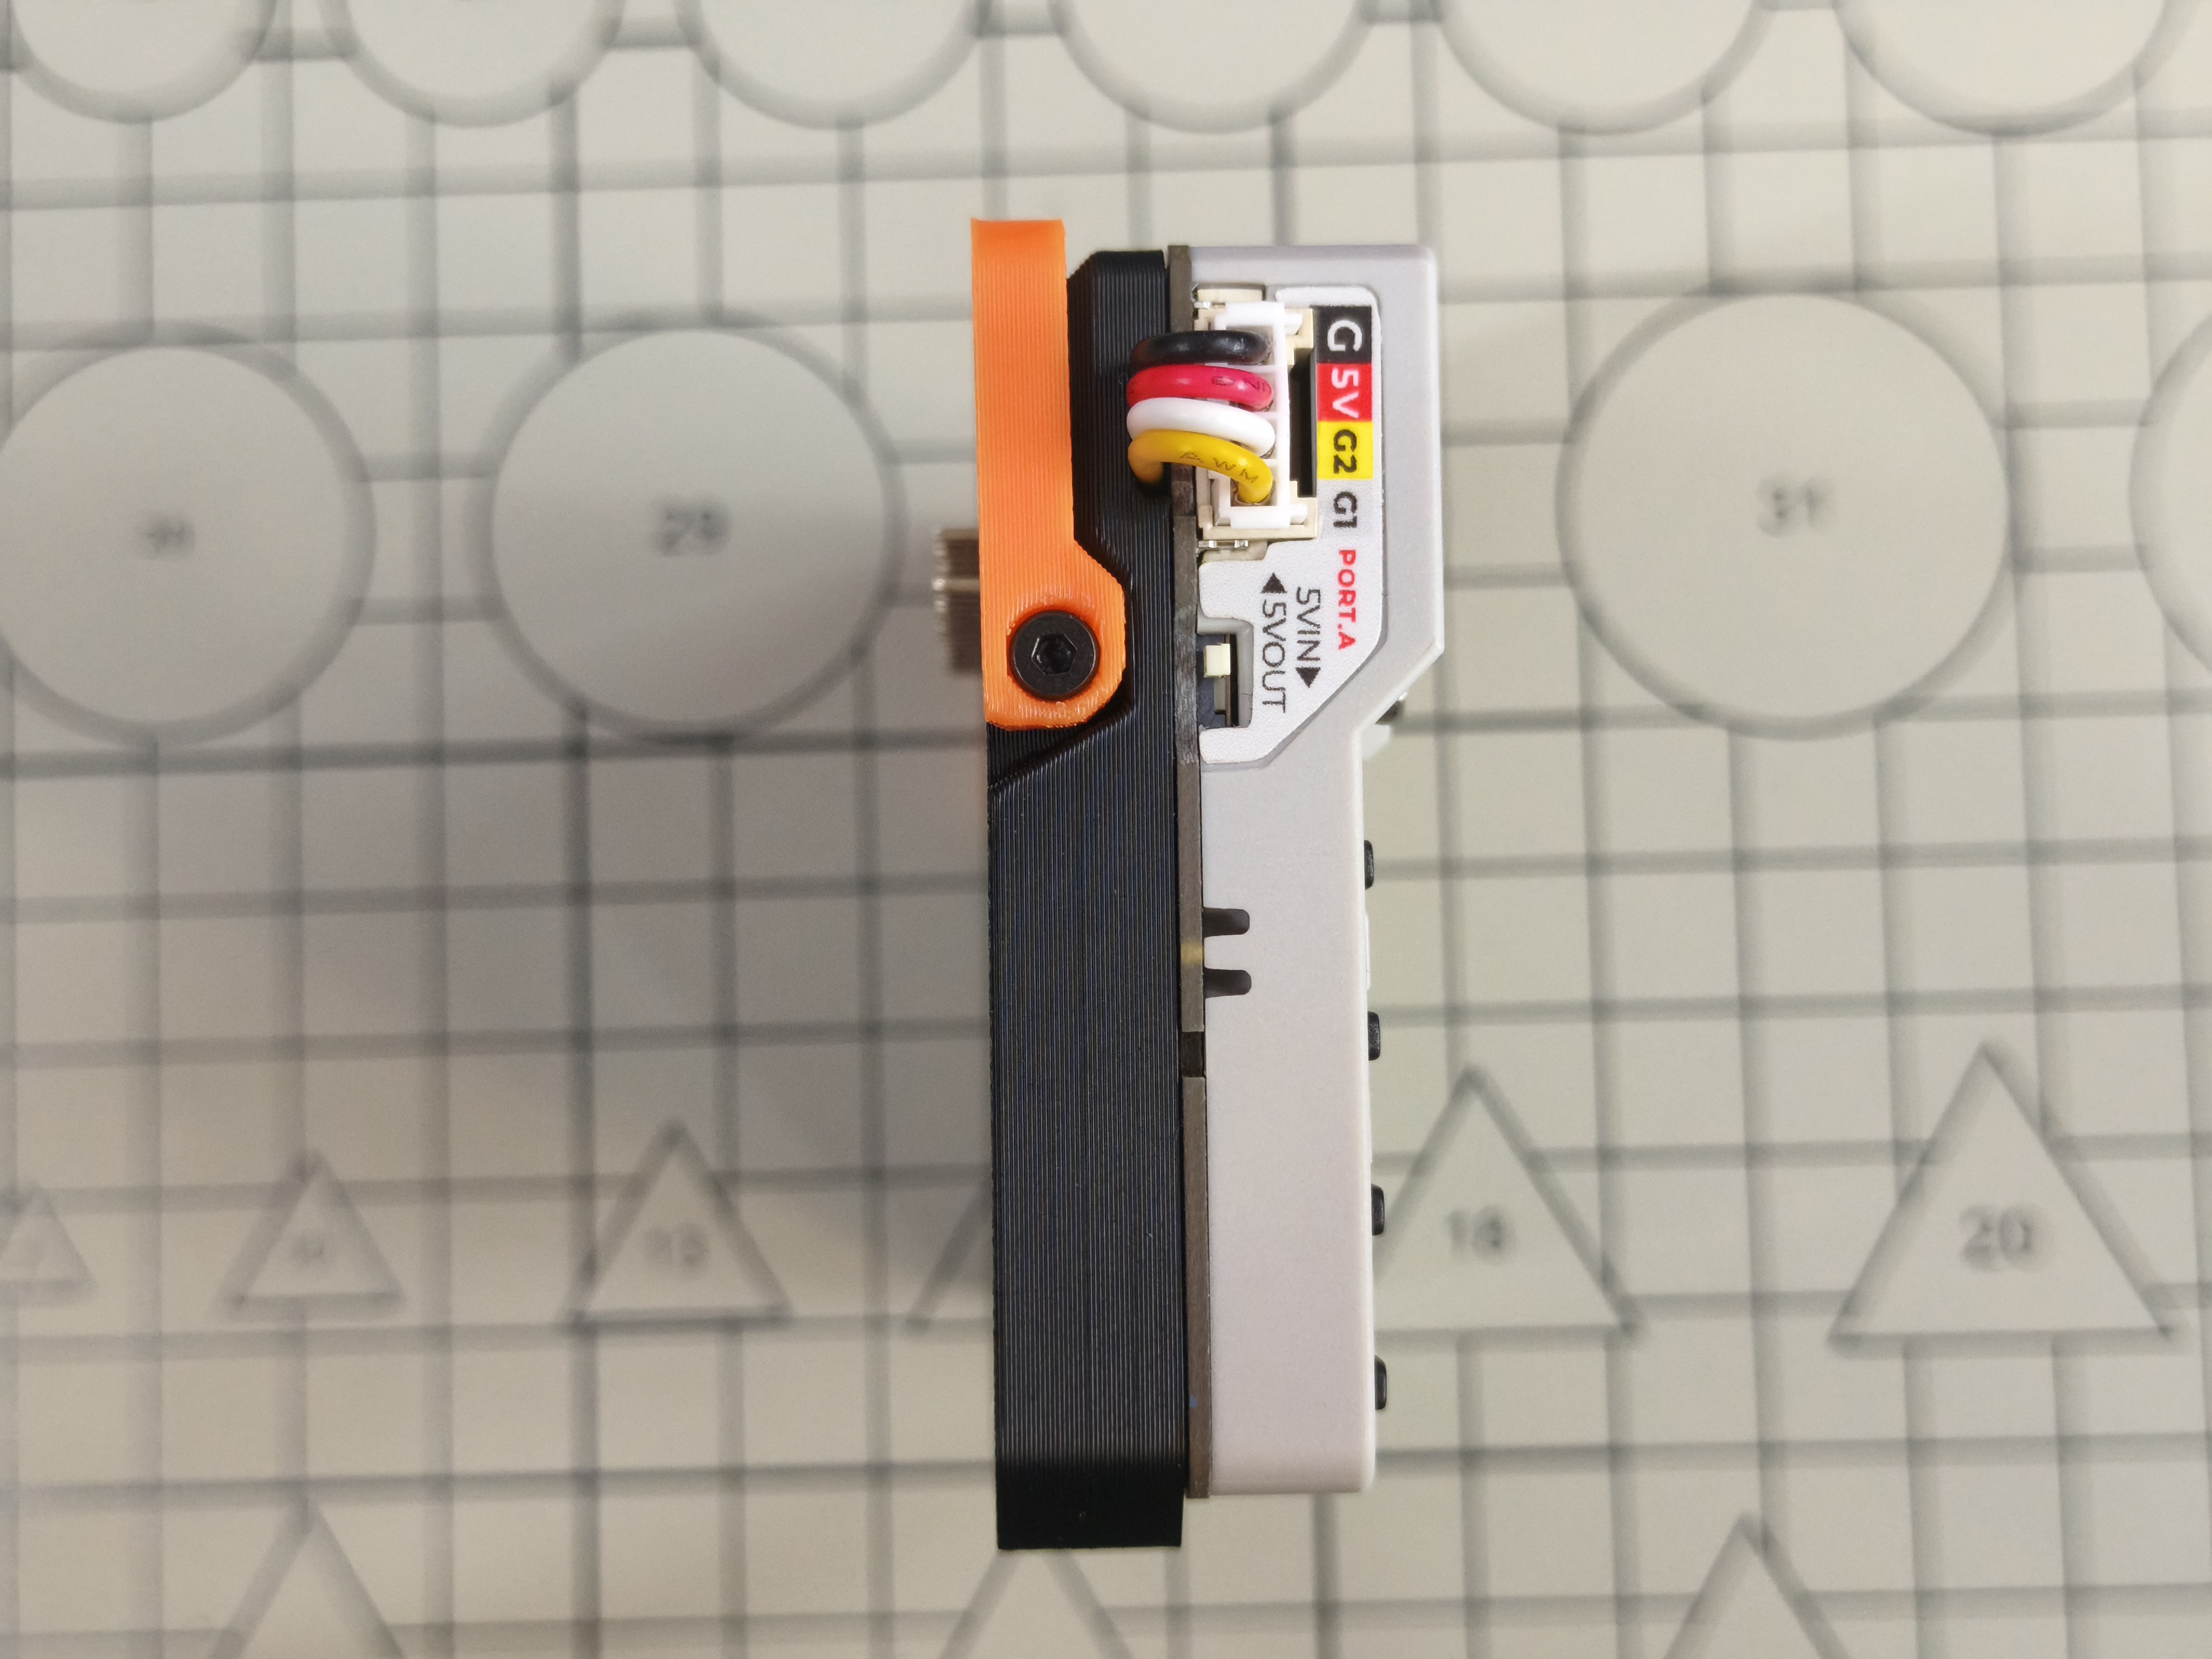
组装完成
补充说明
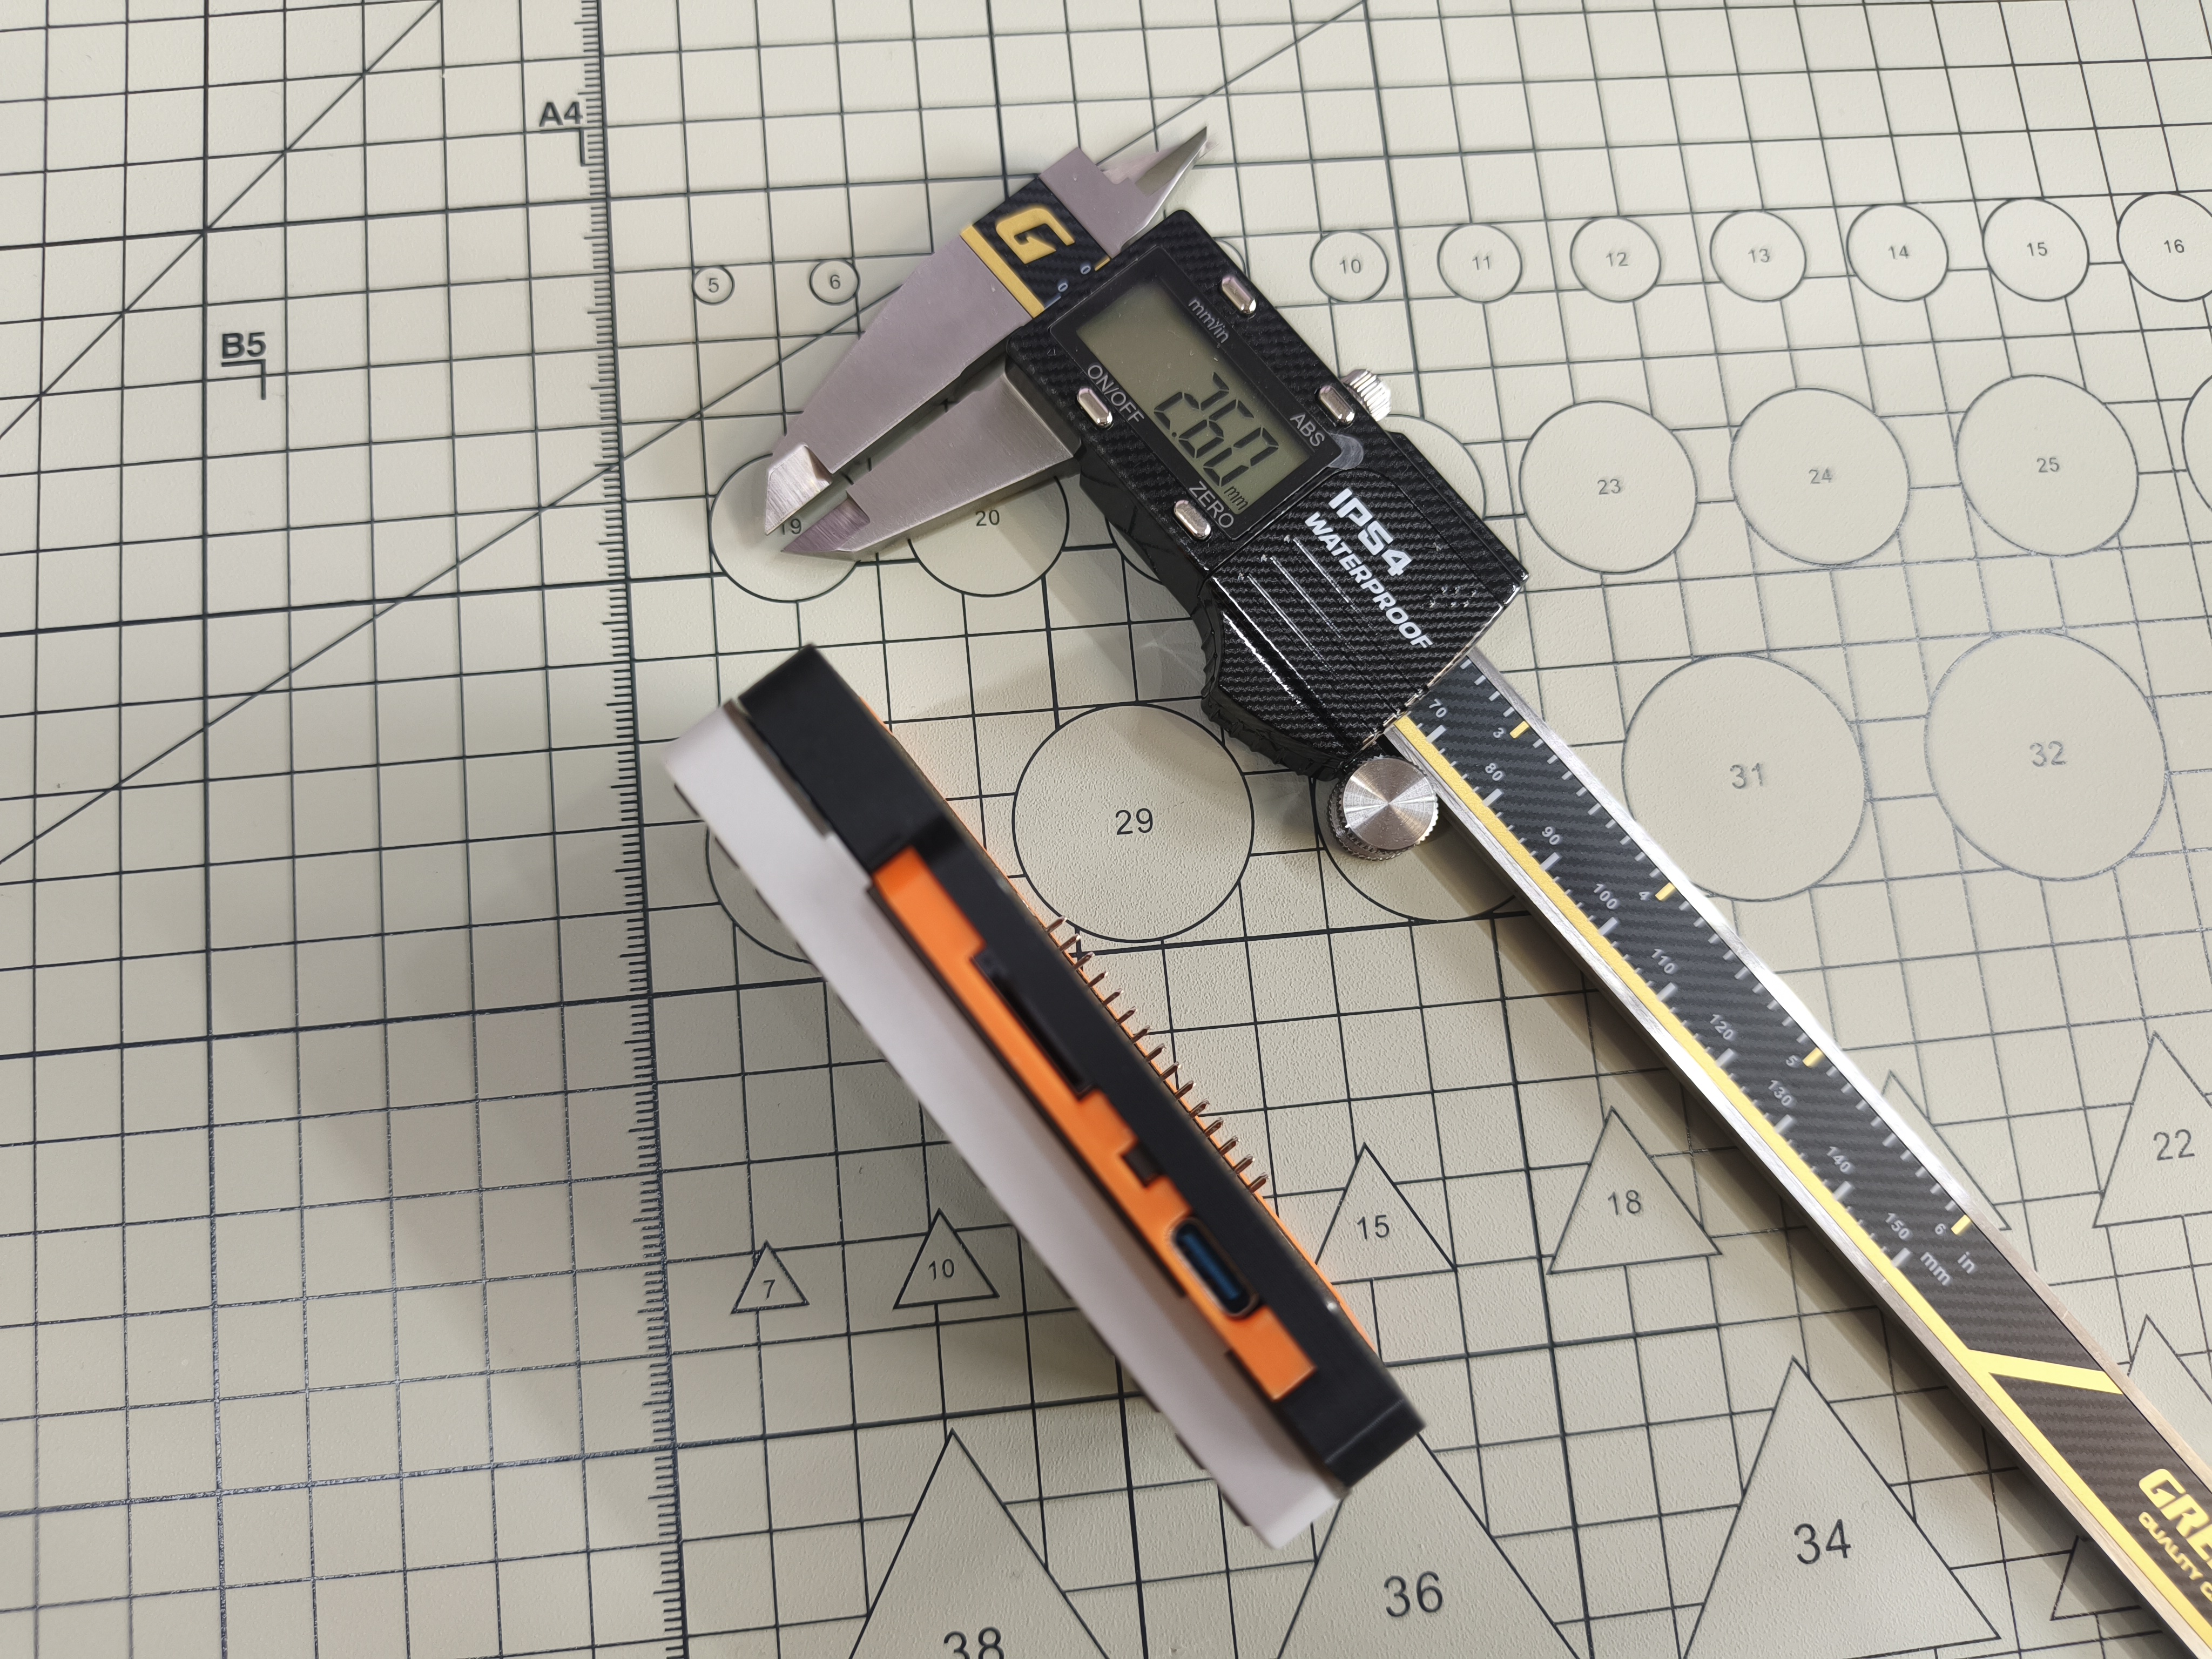
为了让 CardputerLLM 的厚度与原始 Cardputer 一致,Module LLM 的排针会凸出外壳约 2.6 mm,追求平整表面可以剪去排针。当然,展开支架也可以让 CardputerLLM 平稳放置于桌面上
CardputerLLM - Cardputer && Module LLM 外壳

Publicado em 1 de out de 2025
Gostou deste modelo? Crie uma conta grátis para salvar seus favoritos e voltar a eles depois.
Criar conta