Você está no 3DFinder
Buscamos em Thingiverse, MakerWorld e Printables ao mesmo tempo para te dar o melhor de cada uma.
Descrição
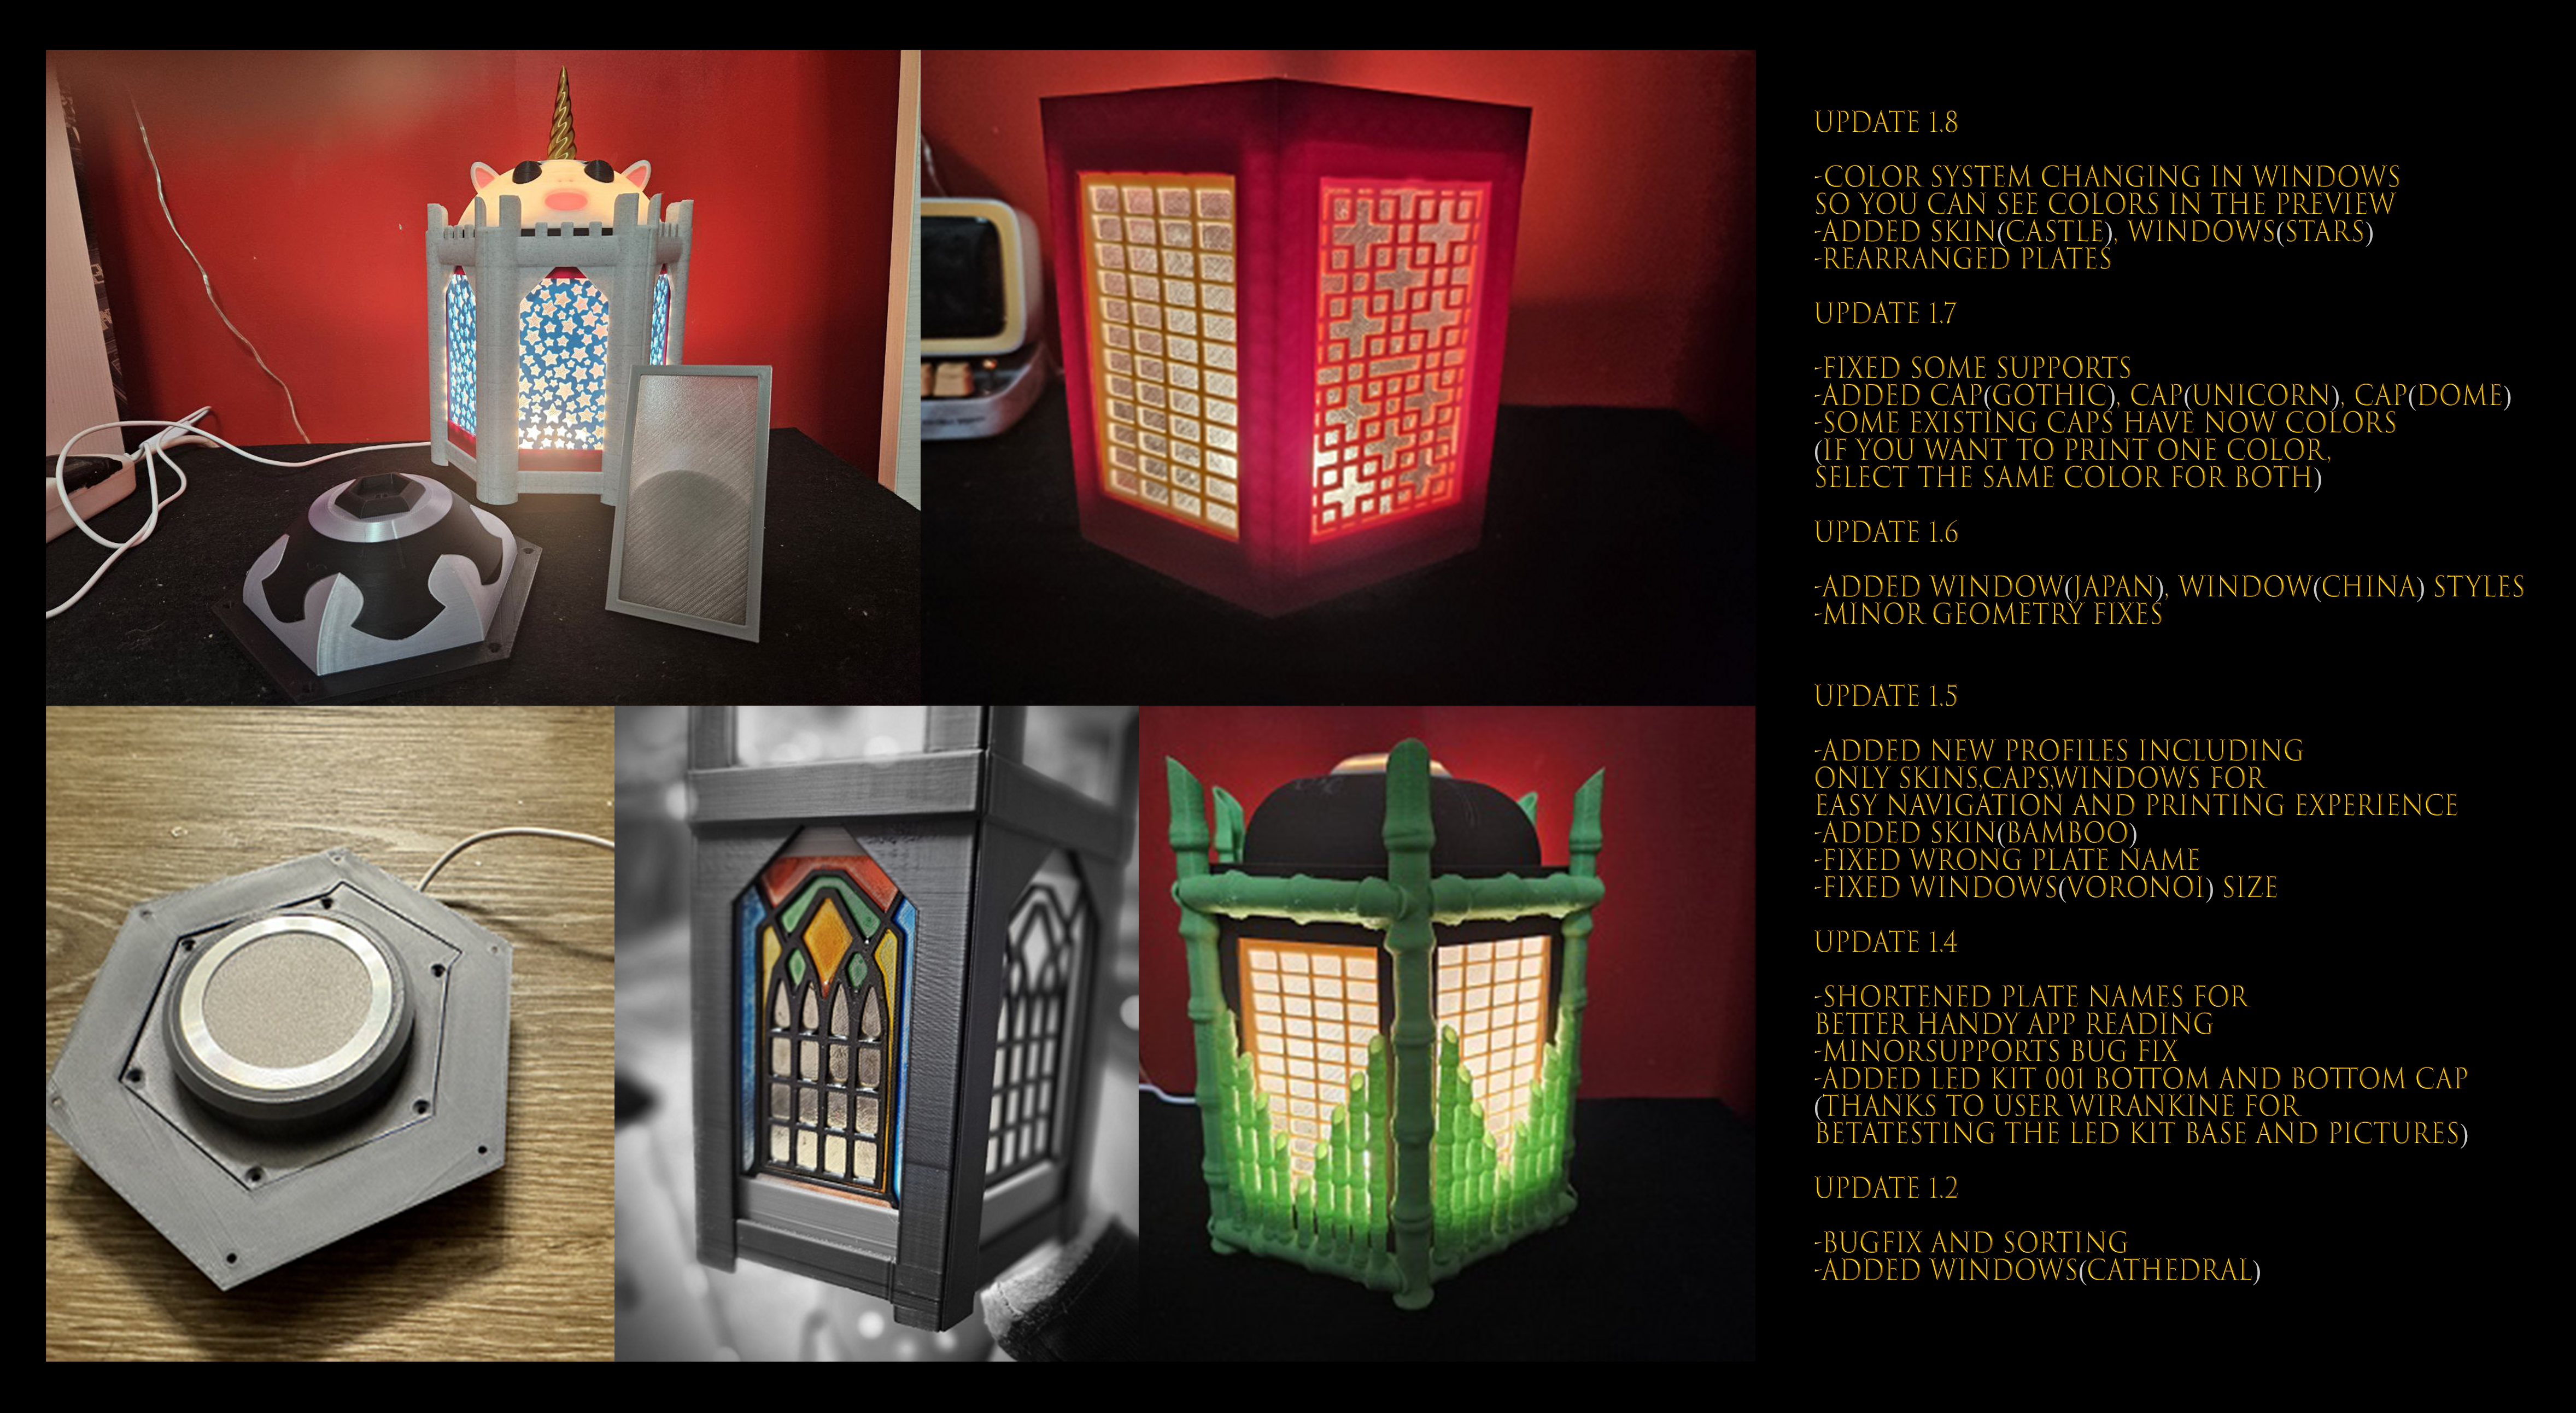
Update 1.8.1 - 1.9
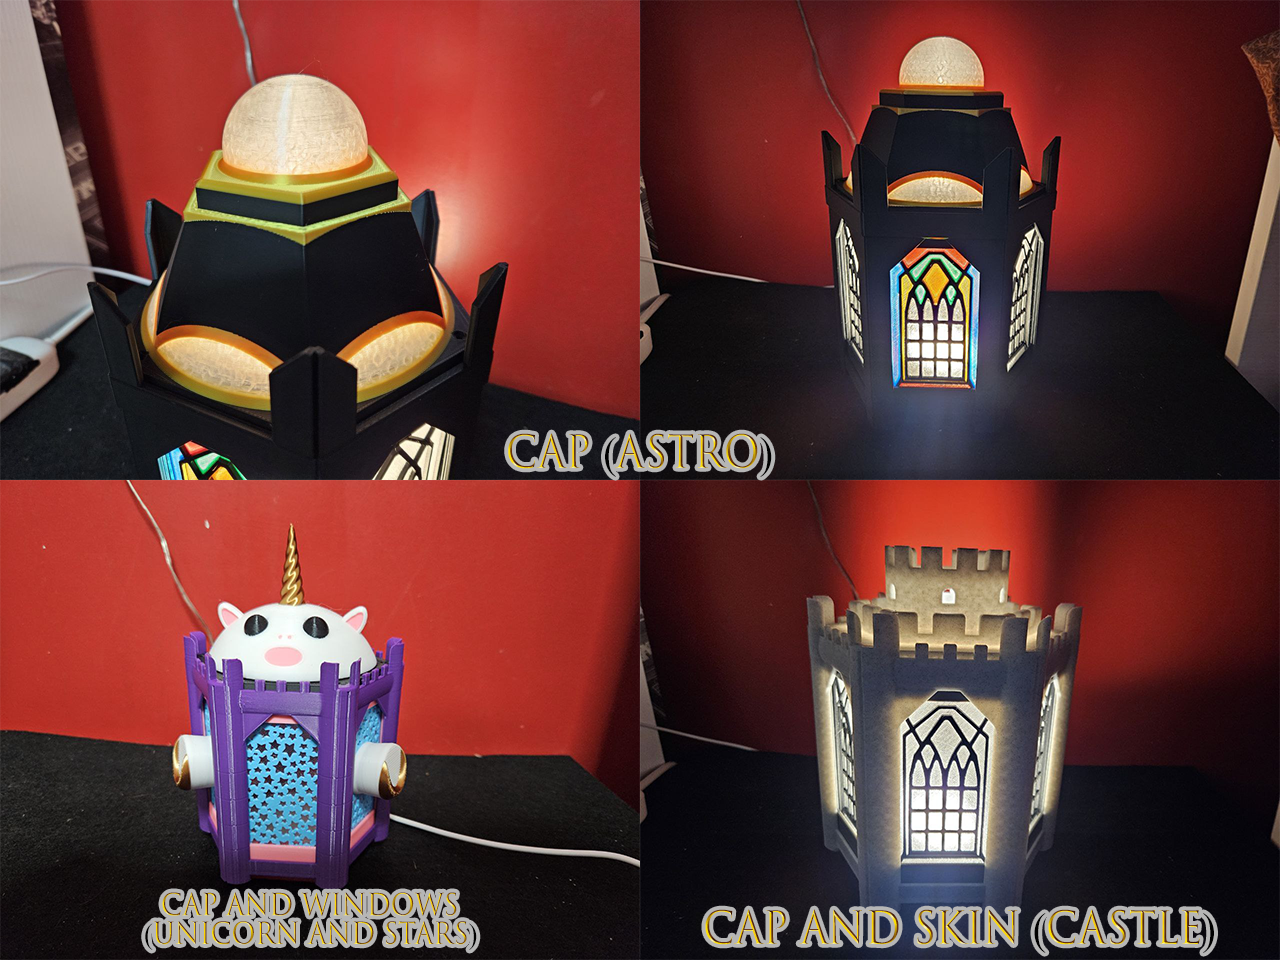
- Added: Windows(Unicorn Stars), Cap(Castle), Cap(Astro)
- various fixes
Darksword Modular Fantasy Lantern
Concept
Hello! this is my last work, let me introduce my concept of modular lantern
i make props and lights for larp from many years, but usually my works are standalone creations, so I thought “how can i make something that can be easy to assemble, easy to swap between different pieces like, electronics, aesthetics, features etc..”
and here we go!
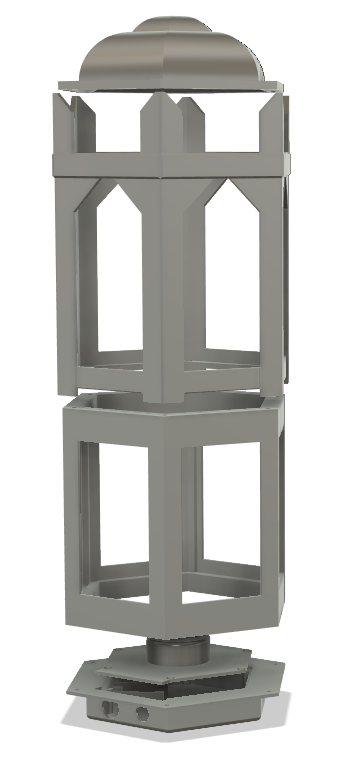
this lantern is splitted in:
- Inner Structure: The core part where all pieces are assembled
- Cap: like the name suggest, is the top part
- Bottom: this is the part where you can find the light source electronics (or different lights will come in the future)
- Bottom Cap: is the cover of the bottom part and holds the light source
- Skin: is the Themed aesthetics around the main part
- Windows: the transparent part where the light passes through
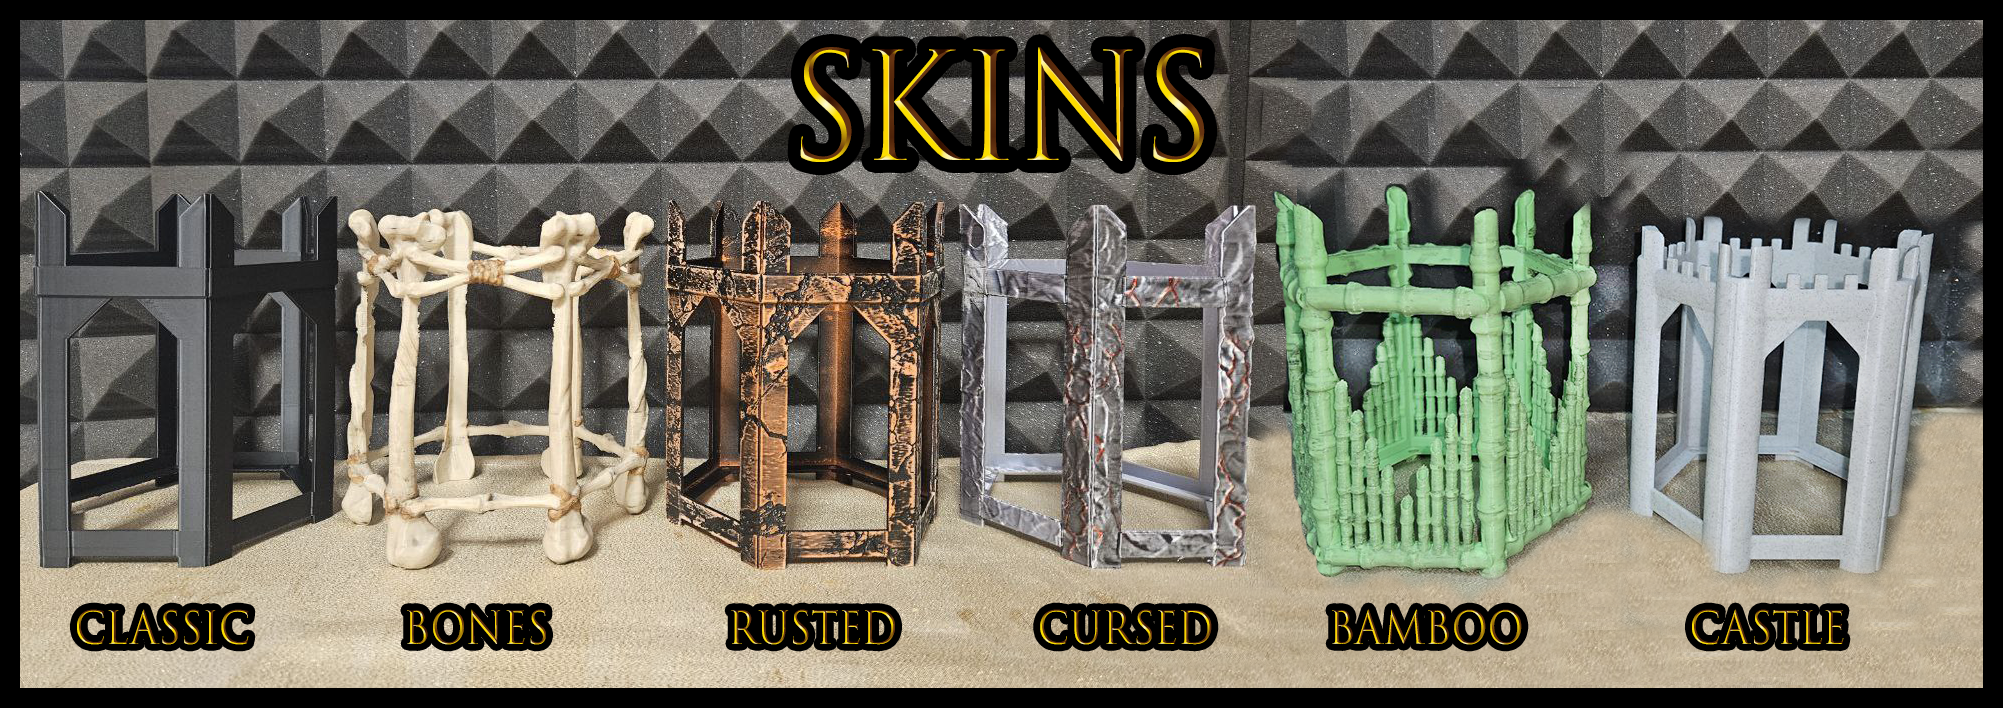
Skins
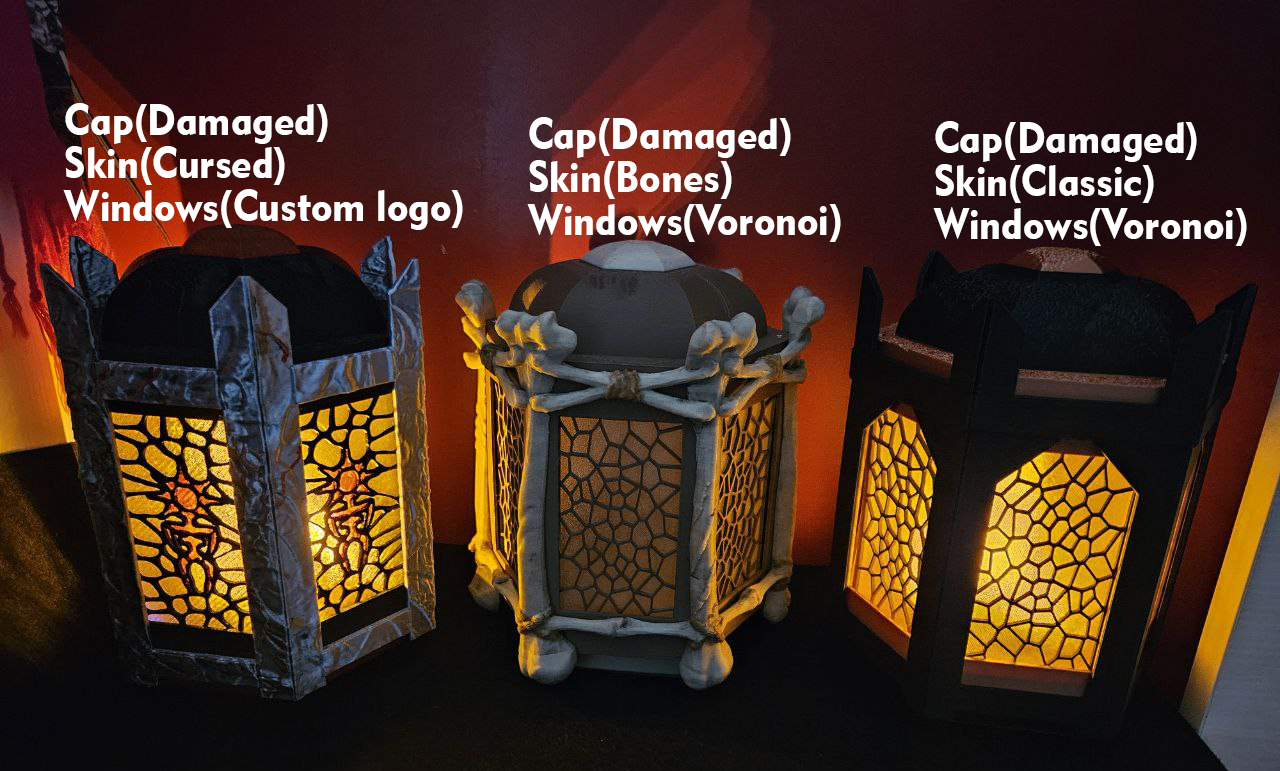
The Themed aesthetics of this lantern are the Skin and the Cap parts, so for example, if you want to print a rusted themed aesthetics, you need to print “Cap(Rusted)” and “Skin(Rusted)”. of course you can mix every part of this lantern as you wish.
you can put a rusted piece on a bone piece etc… etc..
look at this example
Printing Instructions
after several tests, i made the profile with some customizations for the best results.
every skin is scaled to 100,50% for better fitting, some supports are manually generated for easy removing and avoid useless supports.
feel free to give me some feedbacks, i have printed every piece serveral times but, due to long print time, i can't test every single customization i made every time. so sorry if something goes wrong, i do my best ç_ç
Windows need to be printed with clear filament (i used white color in the profile)
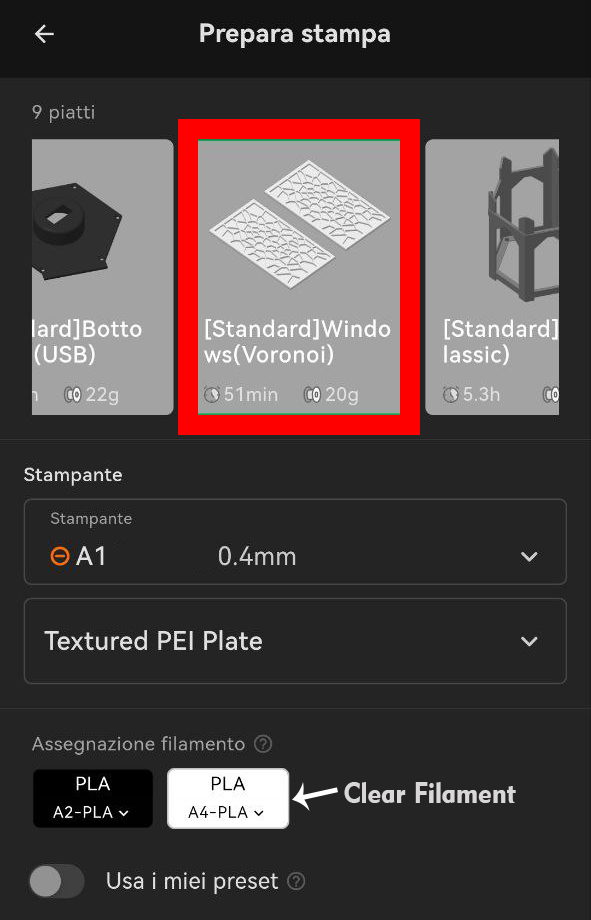
disclaimer: the bone skin and bamboo skins are full of supports and need a lot of patience to remove everything. i suggest using a scraper
Light Source
You can choose different light sources:
- Led Kit 001
- Lipo Electronics
if you want more light sources just send me some requests
for Led Kit 001 you need:
Bambulab Led Kit 001 from Here
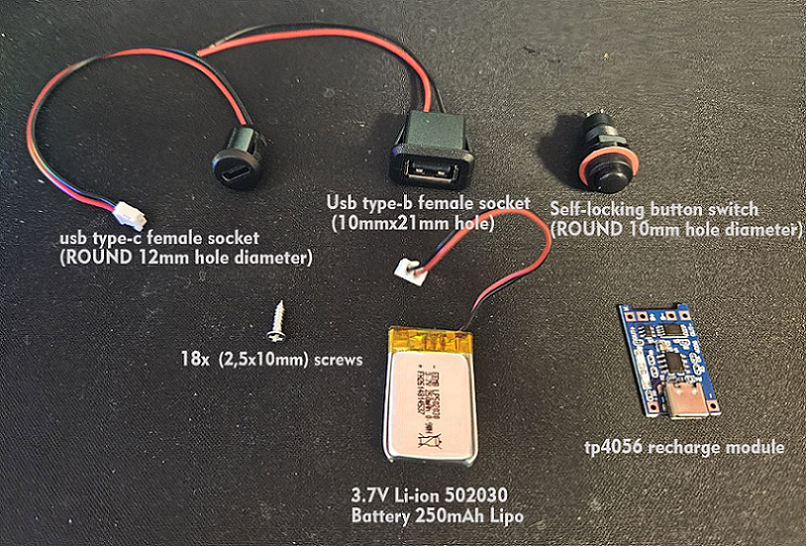
for Lipo Electronics you need:
Product links are only for reference, you can find the same products cheaper on other sites
1x: tp4056 recharge module Amazon
1x: 3.7V Li-ion 502030 Battery 250mAh Lipo (W20.5mm, H5.3mm, L32mm) Amazon
1x: usb type-c female socket (ROUND 12mm hole diameter) Amazon
1x: Self-locking button switch (ROUND 10mm hole diameter) Amazon
1x: Usb type-b female socket (10mmx21mm hole) Amazon
1x: Usb led light Amazon
Soldering iron
a Welder
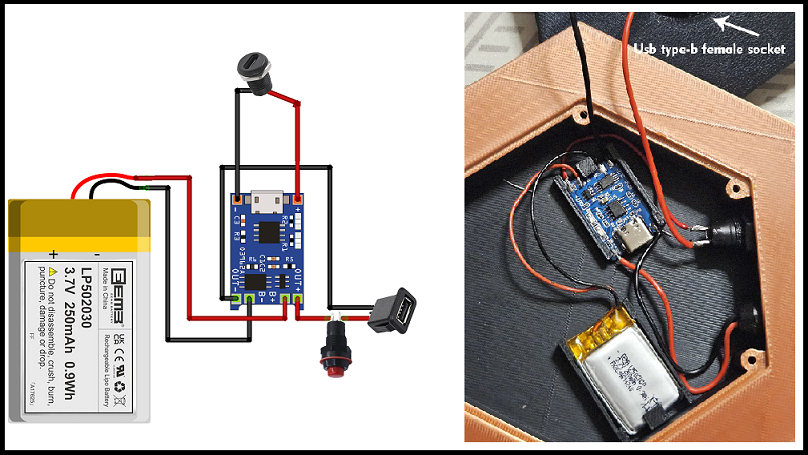
Follow the tp4056 schematics for the wires
Assembly Instructions
- You need: 18x (2,5x10mm) screws (you can adapt 3mm screws but you will get the best result with 2,5mm ones)
- if you want to put the hook, you can use a 3,5mm screw one
Bottom(Led Kit 001) Assembly (how to video Here)
- Insert the Led Kit 001 in the Bottom Cap(Led Kit 001)
- Insert the Cable in the hole of Bottom(Led Kit 001)
- put the Bottom cap on the Bottom with screws
- insert Windows in the Inner Structure
- put the Inner Structure inside the Skin
- put the Cap and screws
- put the Bottom with screws
- Enjoy!
Bottom(Lipo) Assembly (how to video Here)
- assembly all the Bottom(Lipo) electronics part and put the Bottom Cap(USB) with screws
- insert Windows in the Inner Structure
- put the Inner Structure inside the Skin
- put the Cap and screws
- insert the usb light on the Bottom Cap(USB)
- put the Bottom with screws
- Enjoy!
you can also watch this video for the assembly of the whole lantern (Youtube)
Modular Fantasy Lantern (Big)

Publicado em 13 de fev de 2024
Gostou deste modelo? Crie uma conta grátis para salvar seus favoritos e voltar a eles depois.
Criar conta