Você está no 3DFinder
Buscamos em Thingiverse, MakerWorld e Printables ao mesmo tempo para te dar o melhor de cada uma.
Descrição
A model where RC meets Mr. Potato Head. That was the challenge I set out for myself.
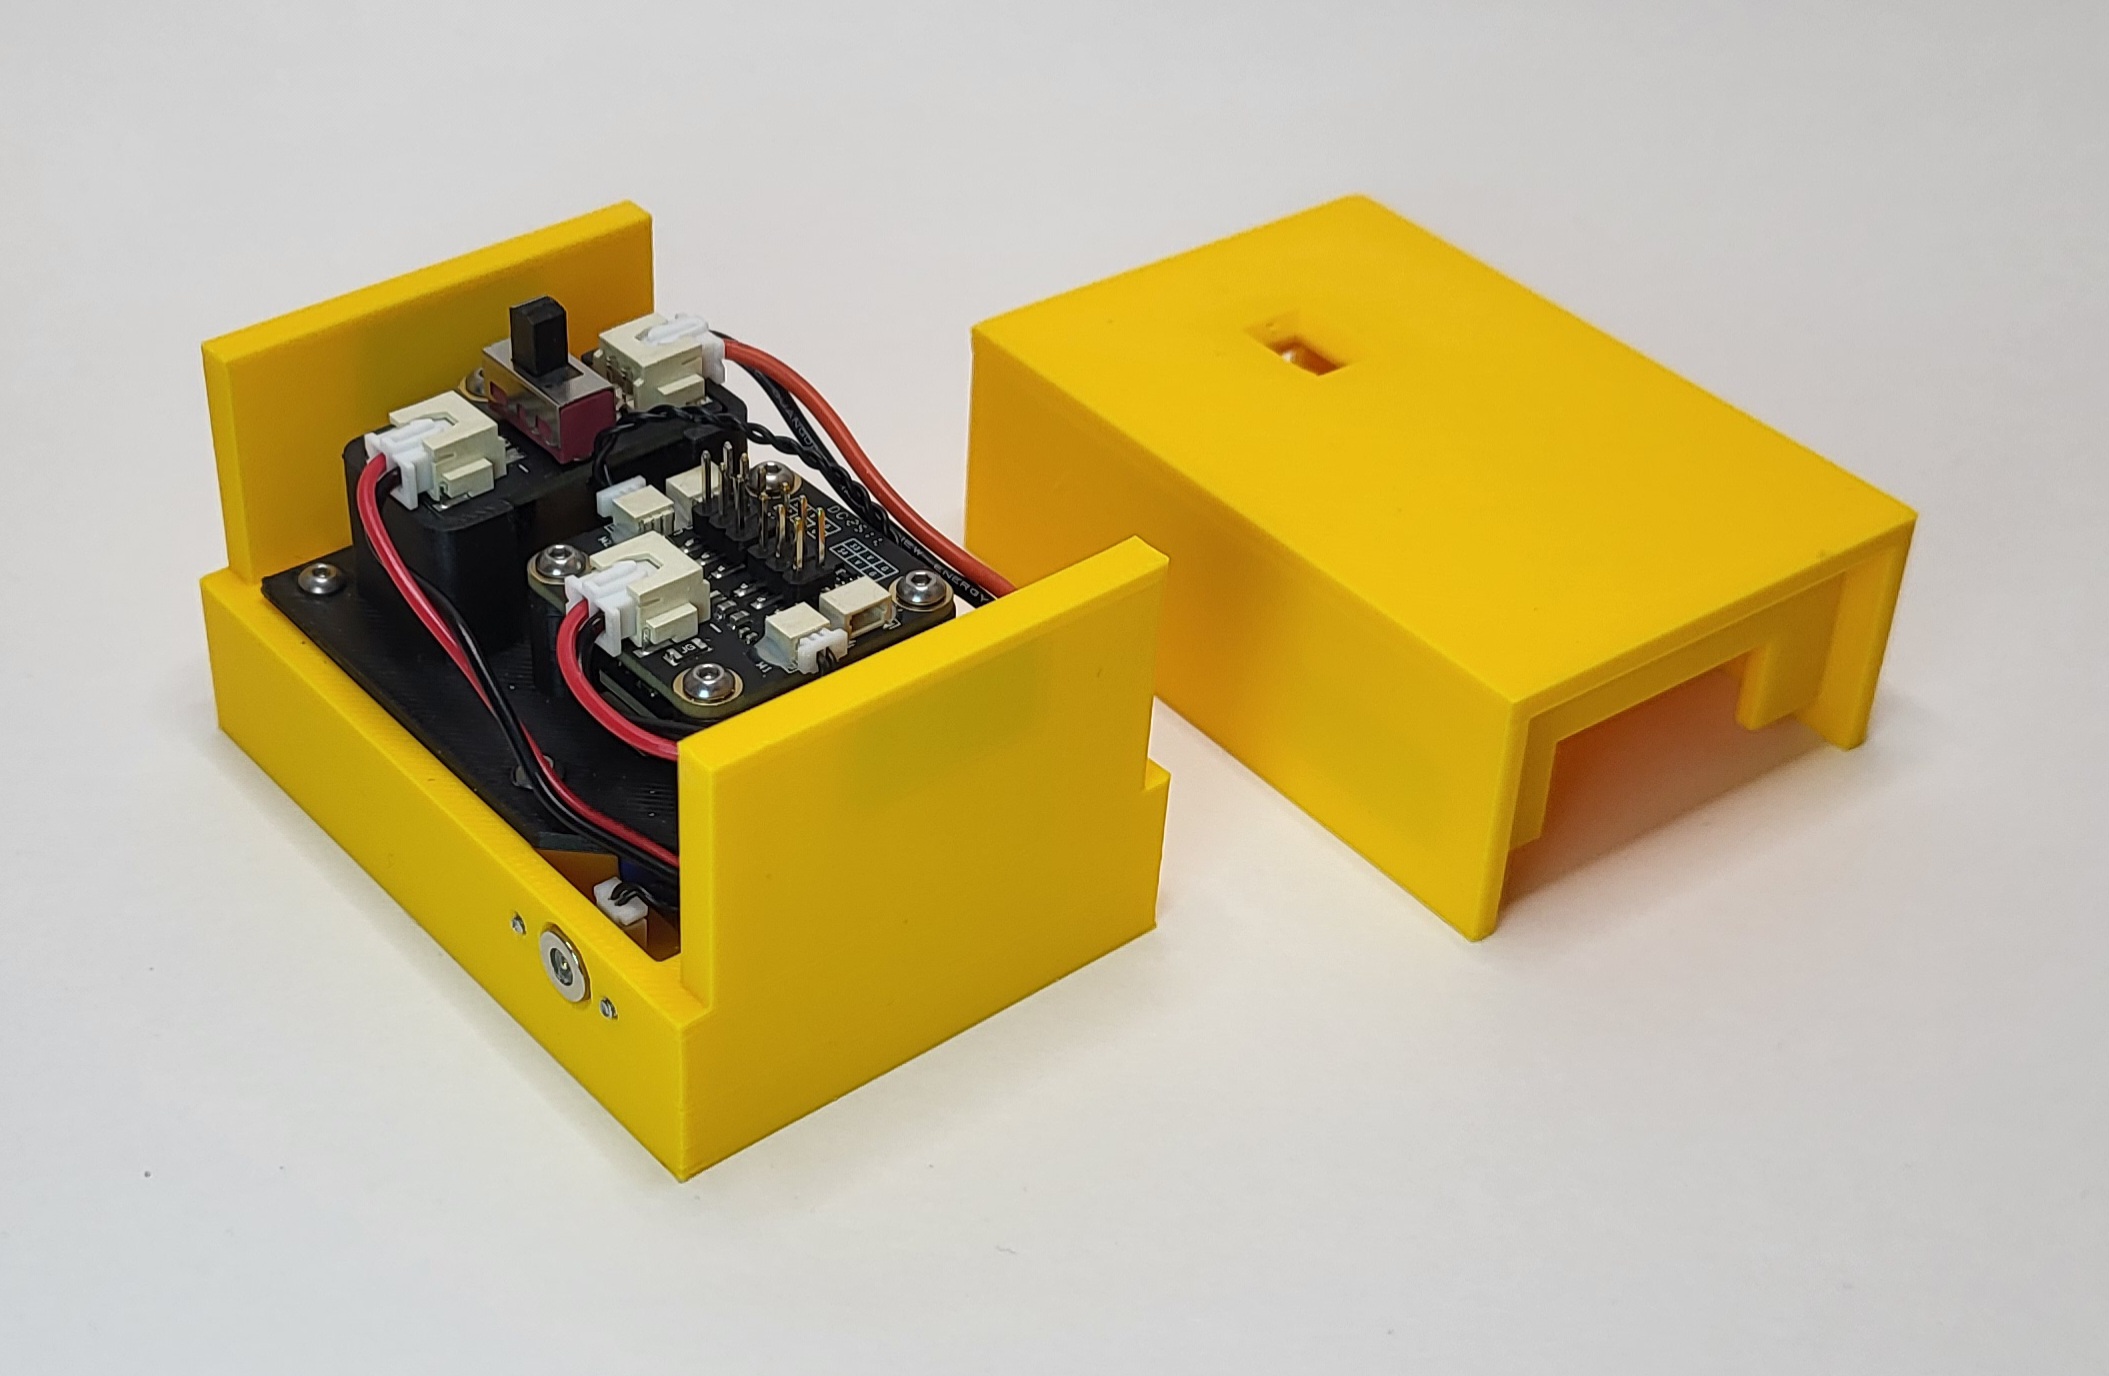
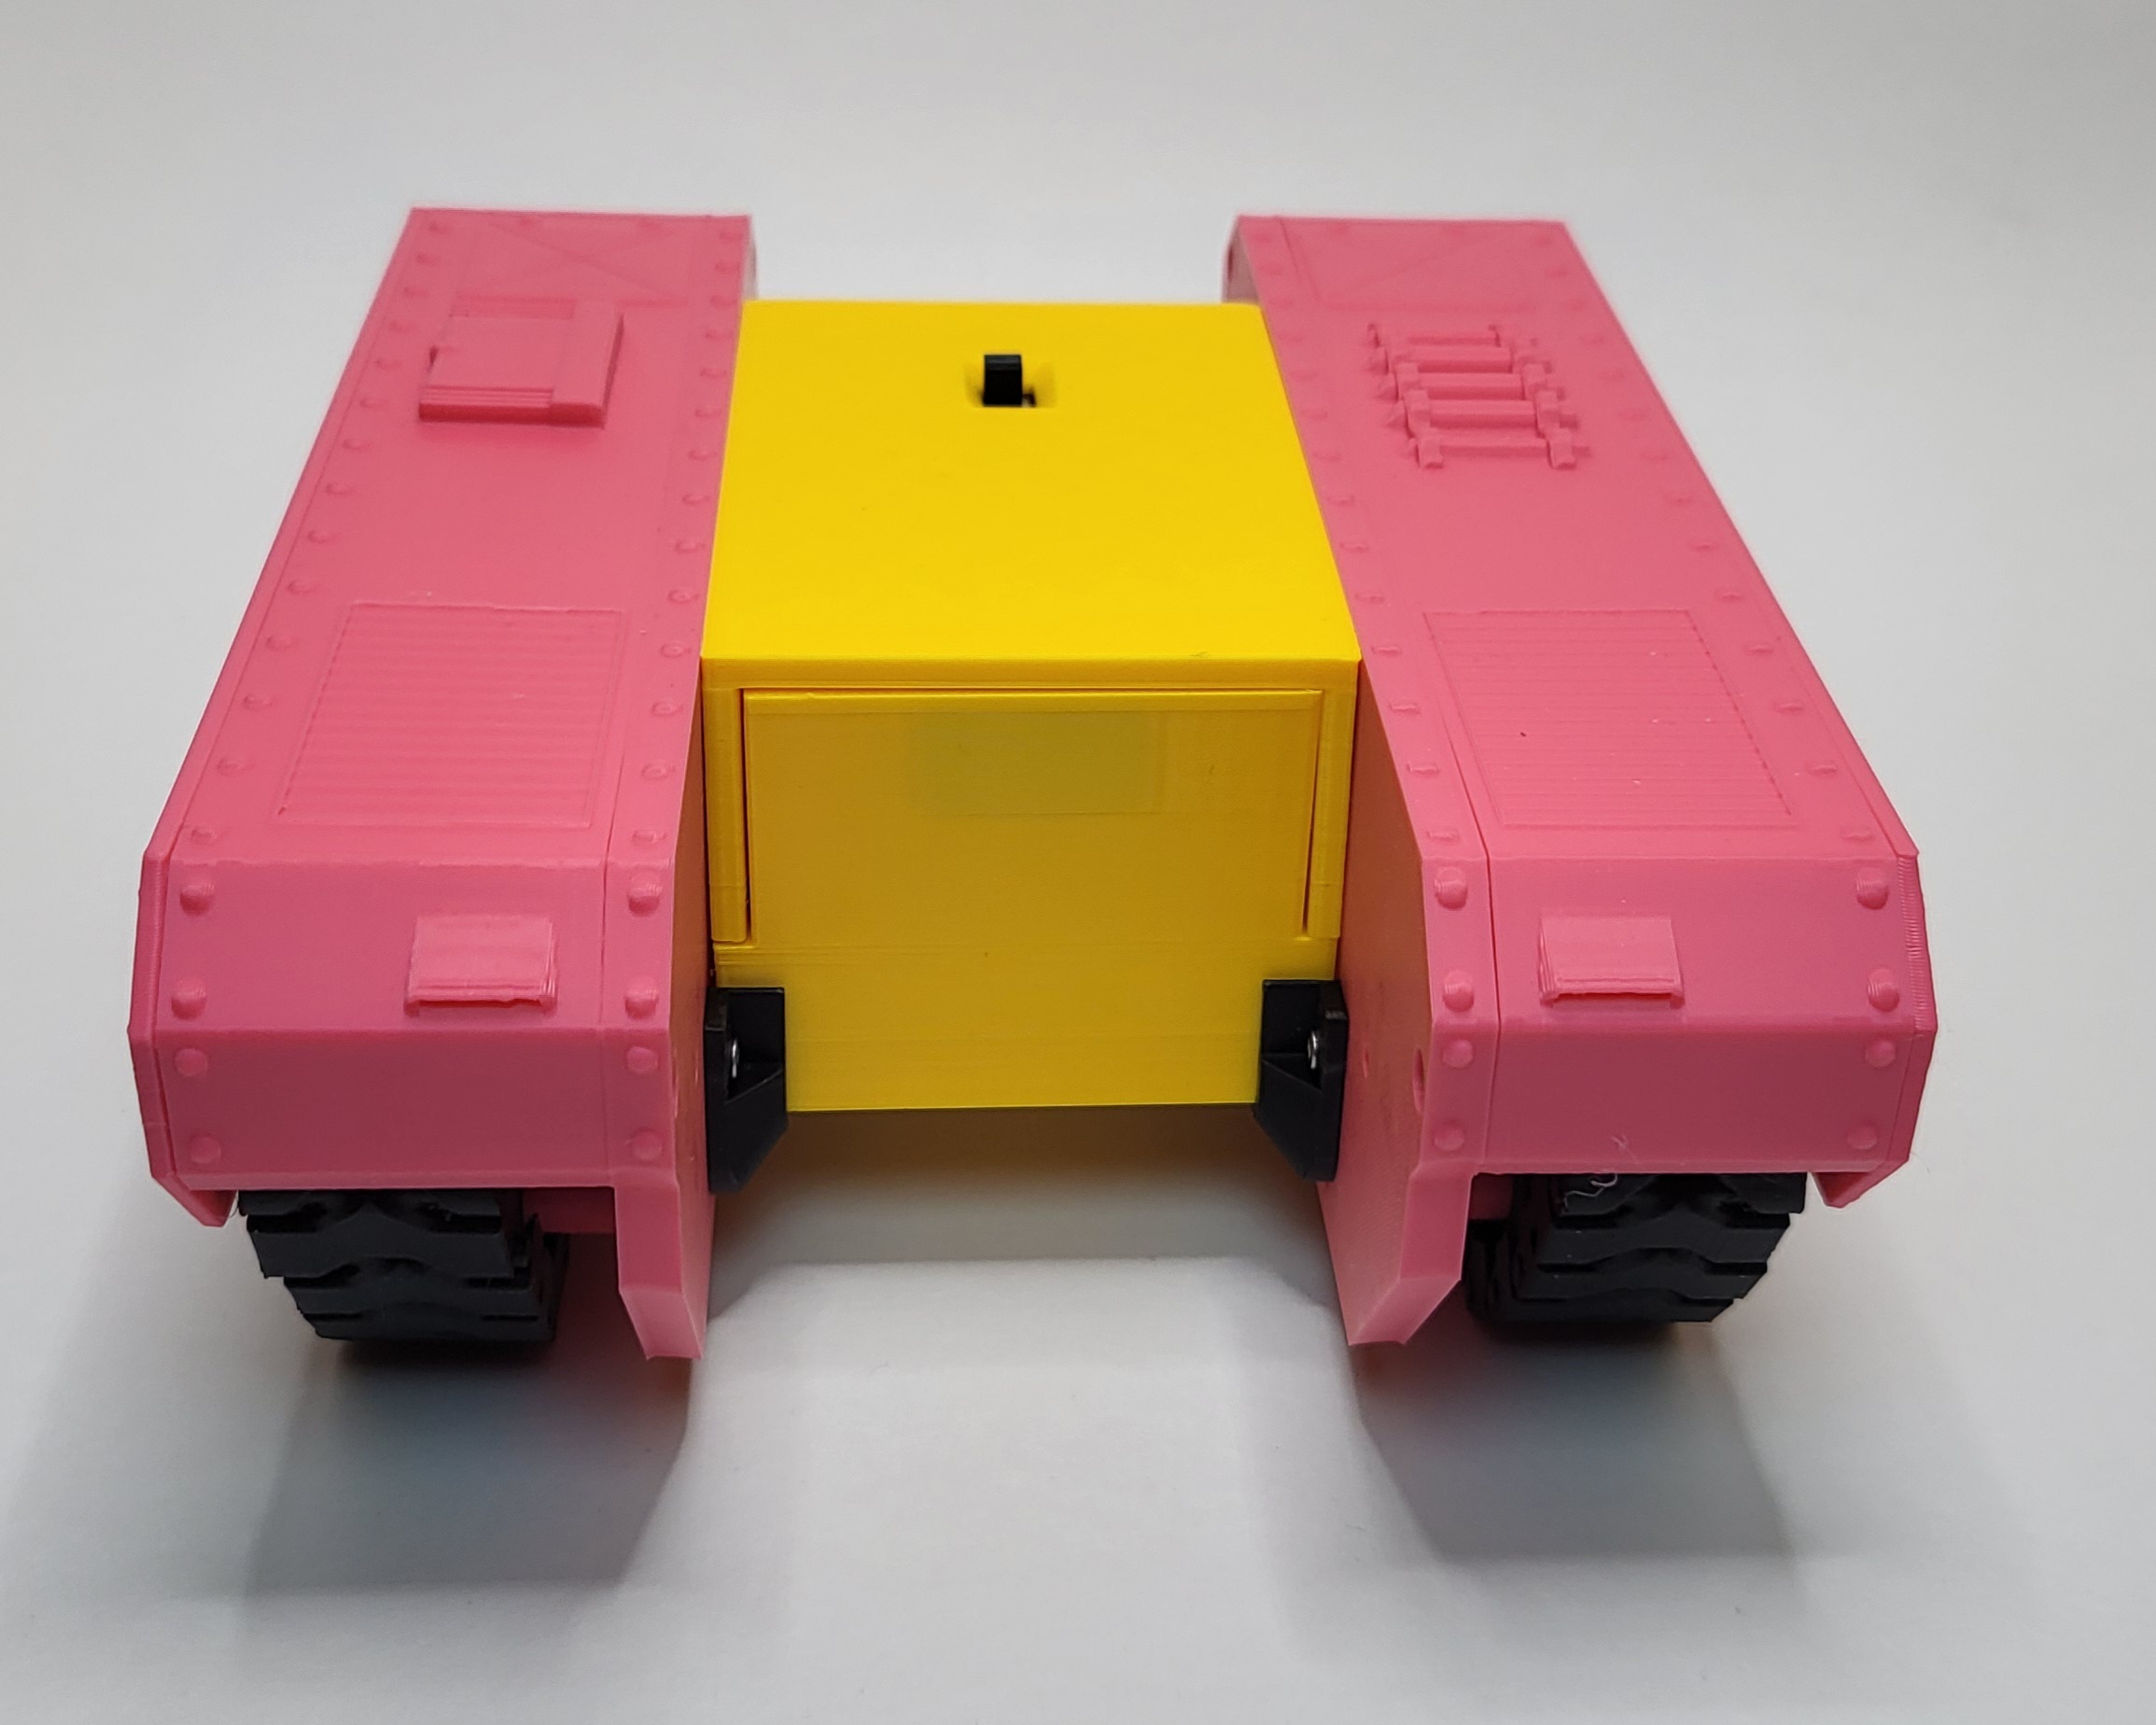
A model centred around a core that is housing most of the RC hardware while using the 7mm Magnetic Connectors and embedded magnets to allow for 3D printed parts with motors to be detached and replaced easily within seconds.
 | 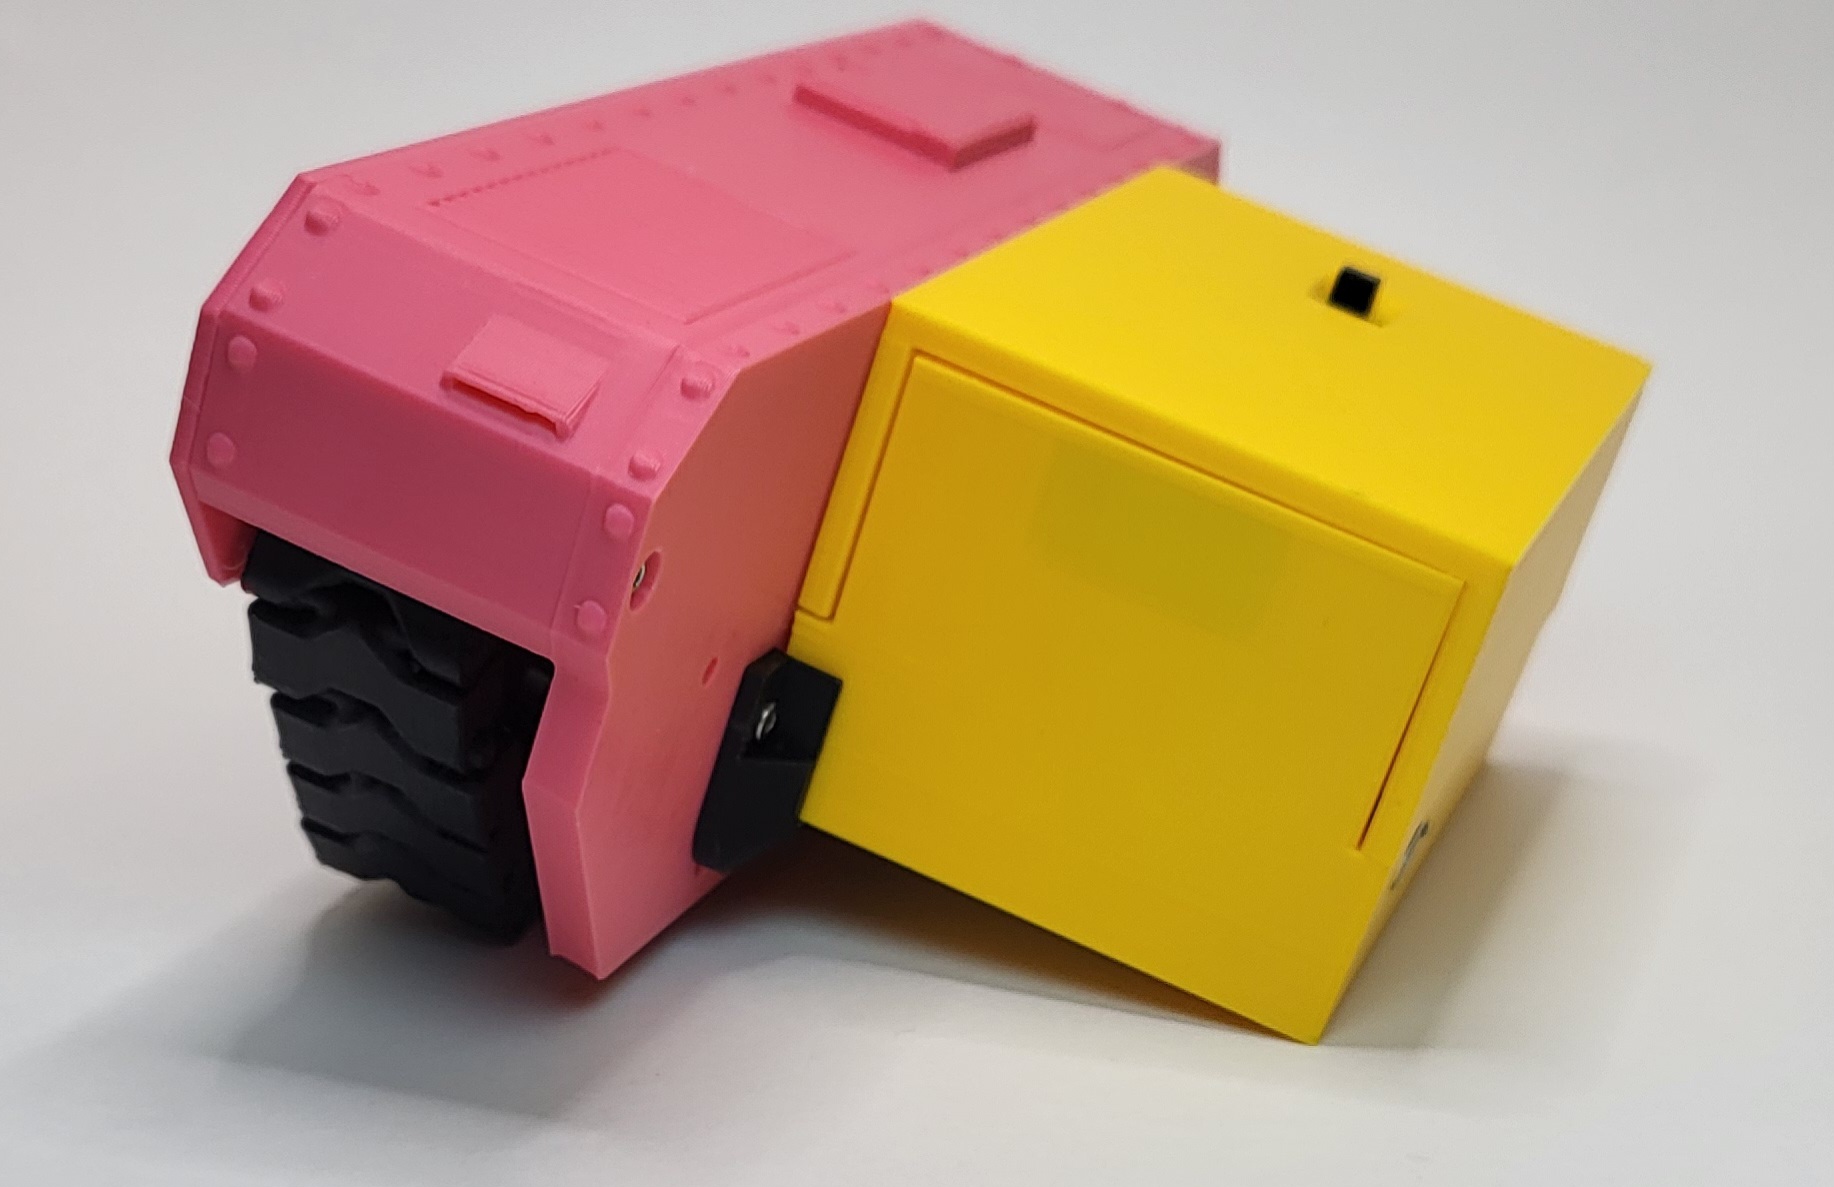 |  | 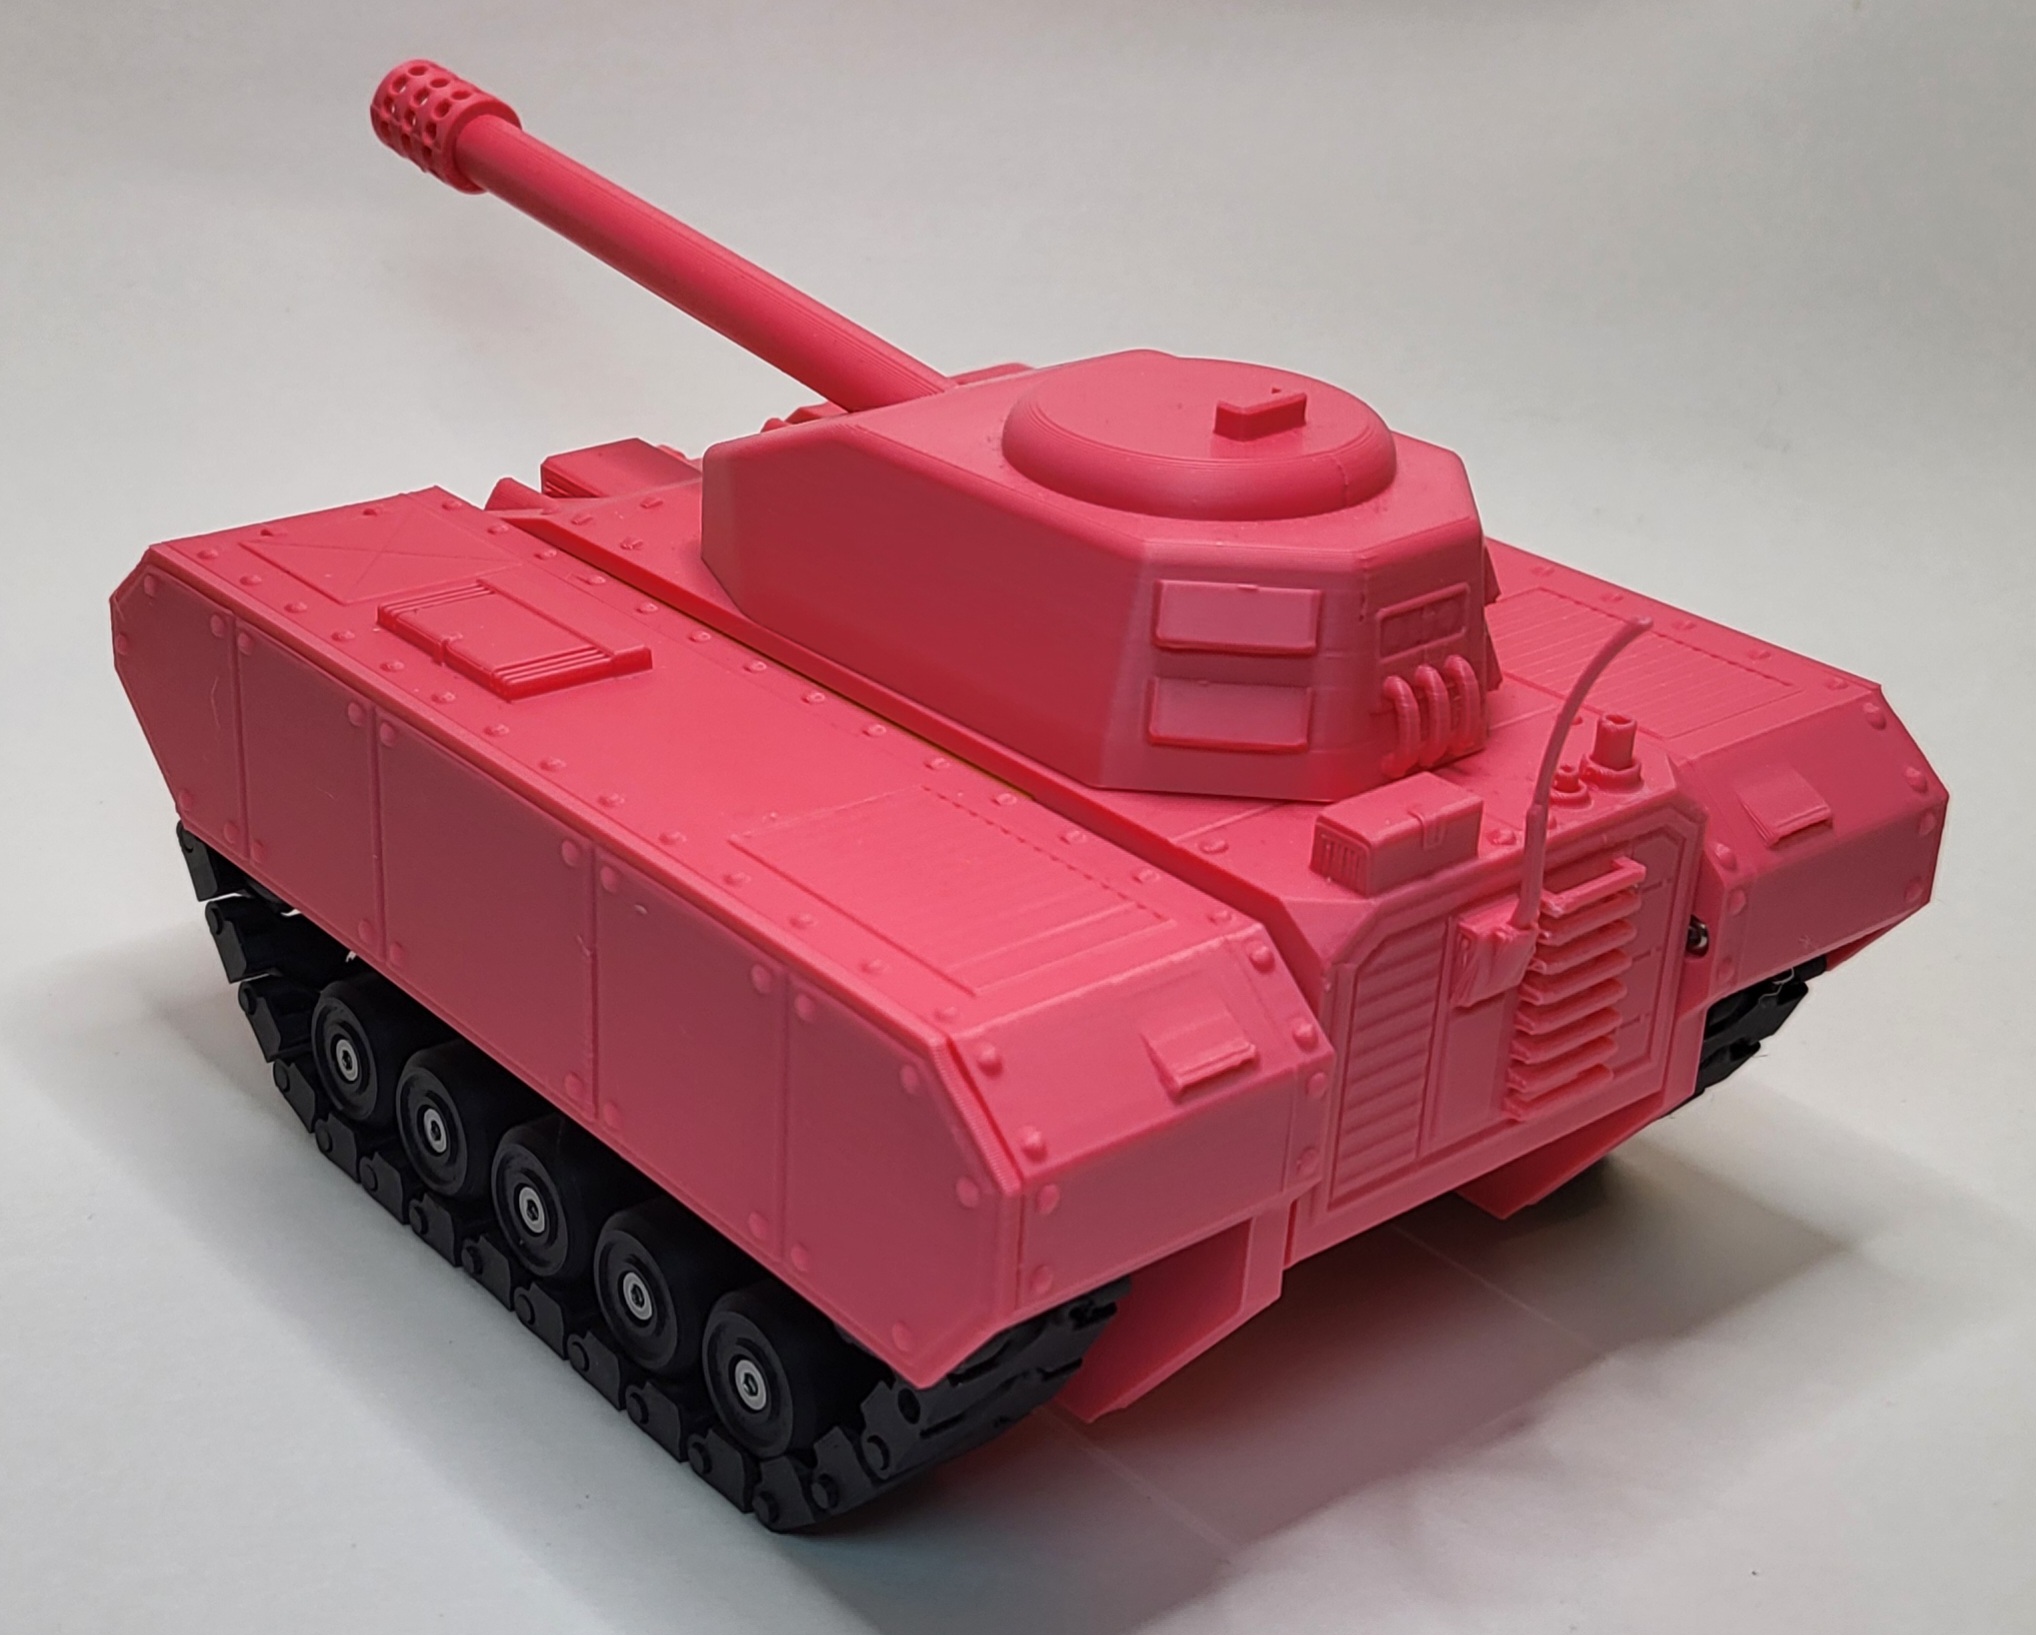 |
Right now there is only the Pink Tank and the Banana Tank to switch between, but I will add different styles in the future. Also, I fully support anyone who wishes to design their own parts to work with the core. If anyone does, drop me a message and I'll add a link to your model here in the description.
Normally, I would just put the assembly guides in the description, but these guides are longer than what I normally make so I've made .pdf's for the Pink Tank, Banana Tank, Controller and Core as well as a ‘Printing notes and Hardware list’ .pdf.
PRINTING NOTES AND HARDWARE LIST:
Pauses will occur during printing to allow for 20x10x2 Rectangular Magnets (CB003) to be inserted into certain parts. You will need four (4) magnets for the Core and four (4) magnets for every tank design.
The following is the orientation of the magnets for the core and Pink Tank. The orientation of these magnets is very important. The magnets in the Core Bottom will connect with the magnets in Tank Body 1. In the picture below you can see the parts in the slicer at the layer they will pause at and the orientation that the magnets will need to be. The North poles should be facing out from the Core Bottom, and you want the South poles to be facing inward, towards each other when inserting the magnets into Tank Body 1.
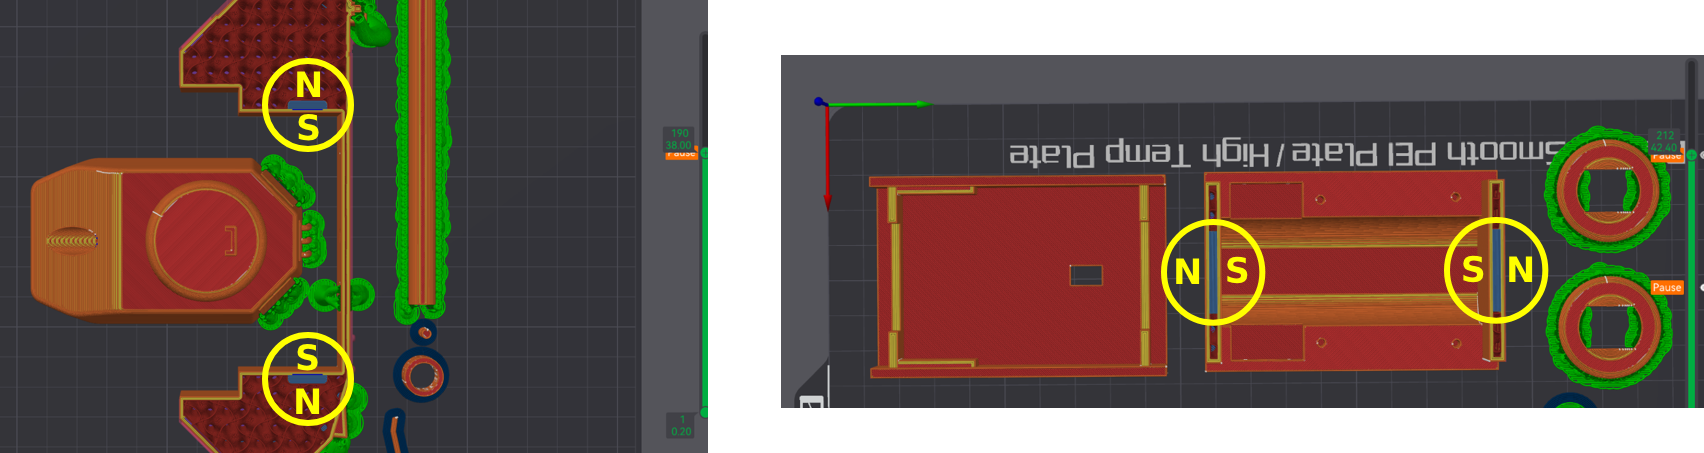
The same goes for the Core Top and the Left and Right Tank Plate 1. You want the North pole facing out from the Core Top and you want the South pole facing the bed when inserting them into the plates.
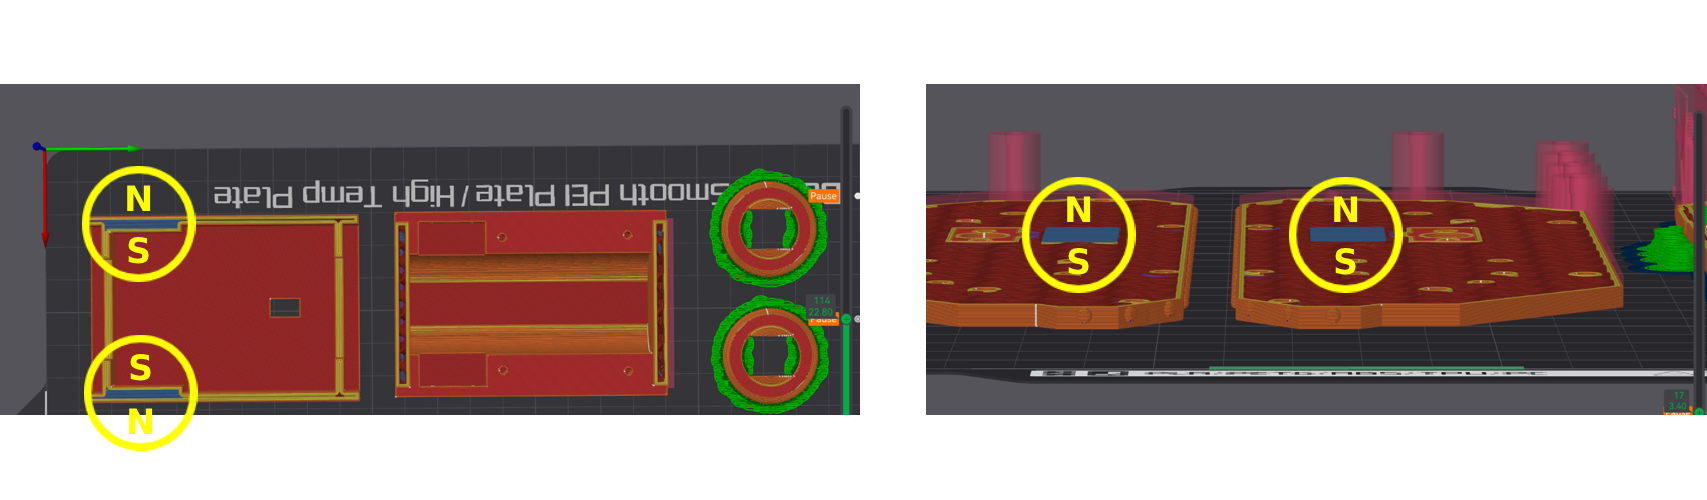
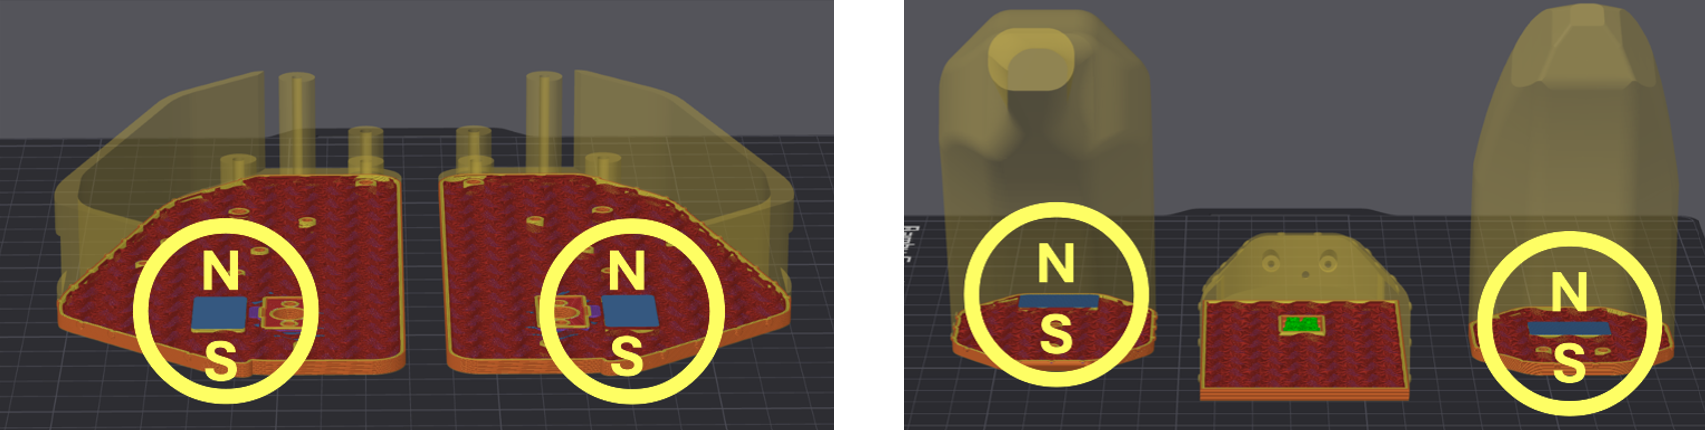
The Banana Tank magnets should all be inserted South side facing the build plate.
A full BOM is listed further down the model page, but here is a part list for the individual tanks and core/controller.
PARTS LIST:
Core and Controller:
(2) Li-ion Batteries
(2) Core Board
(1) Receiver core
(1) Transmitter core
(2) Single-Axis joysticks with wires
(2) Power switches
(2) 100mm XH2.54 wire
(2) 100mm SH1.0 wires
(2 pair) 7mm Magnetic Connectors
(4) M2x4 FHCS Machine Screws
(30) M2.5x6 BHCS Machine Screws
(4) M2.5x12 SHCS Machine Screws
(1) 2x14mm DA003 Dowel
(1) Battery Charger
(4) 20x10x2 Rectangular Magnets (CB003)
Pink Tank:
(2) N20 400RPM motors
(2) 50mm SH1.0 wires (included with motors)
(18) MR63ZZ bearings
(14) M3x23 SHCS Machine Screws
(4) M2x4 FHCS machine screws
(12) M2x8 FHCS machine screws
(12) M2.5x6 BHCS machine screw
(2) pairs of 7mm Magnetic Connectors (1 package)
(4) 20x10x2 Rectangular Magnets (CB003)
Banana Tank:
(2) N20 400RPM motors
(18) MR63ZZ bearings
(4) M2x12 SHCS Machine Screws
(16) M2x8 FHCS machine screws
(16) M3x23 SHCS Machine Screws
(2) 100mm SH1.0 wires
(4) M2x4 FHCS machine screws
(2) pairs of 7mm Magnetic Connectors (1 package)
(4) 20x10x2 Rectangular Magnets (CB003)