Você está no 3DFinder
Buscamos em Thingiverse, MakerWorld e Printables ao mesmo tempo para te dar o melhor de cada uma.
Descrição
Death Star Kinetic Lamp – 100% 3D Printed

⚠️ Disclaimer: This model was created as a personal fan project and is shared for free. For personal use only, not for commercial purposes.
This is the best Star Wars-inspired lamp you can build at home! 30cm of diameter
This project takes inspiration from a kinetic lamp concept I once saw online and similar mechanisms like this one, but everything here was developed completely from scratch with my own redifined mechanisms and solutions: the sphere with its Death Star surface relief, the dual-ring system, and the fully printed screws that hold it all together.
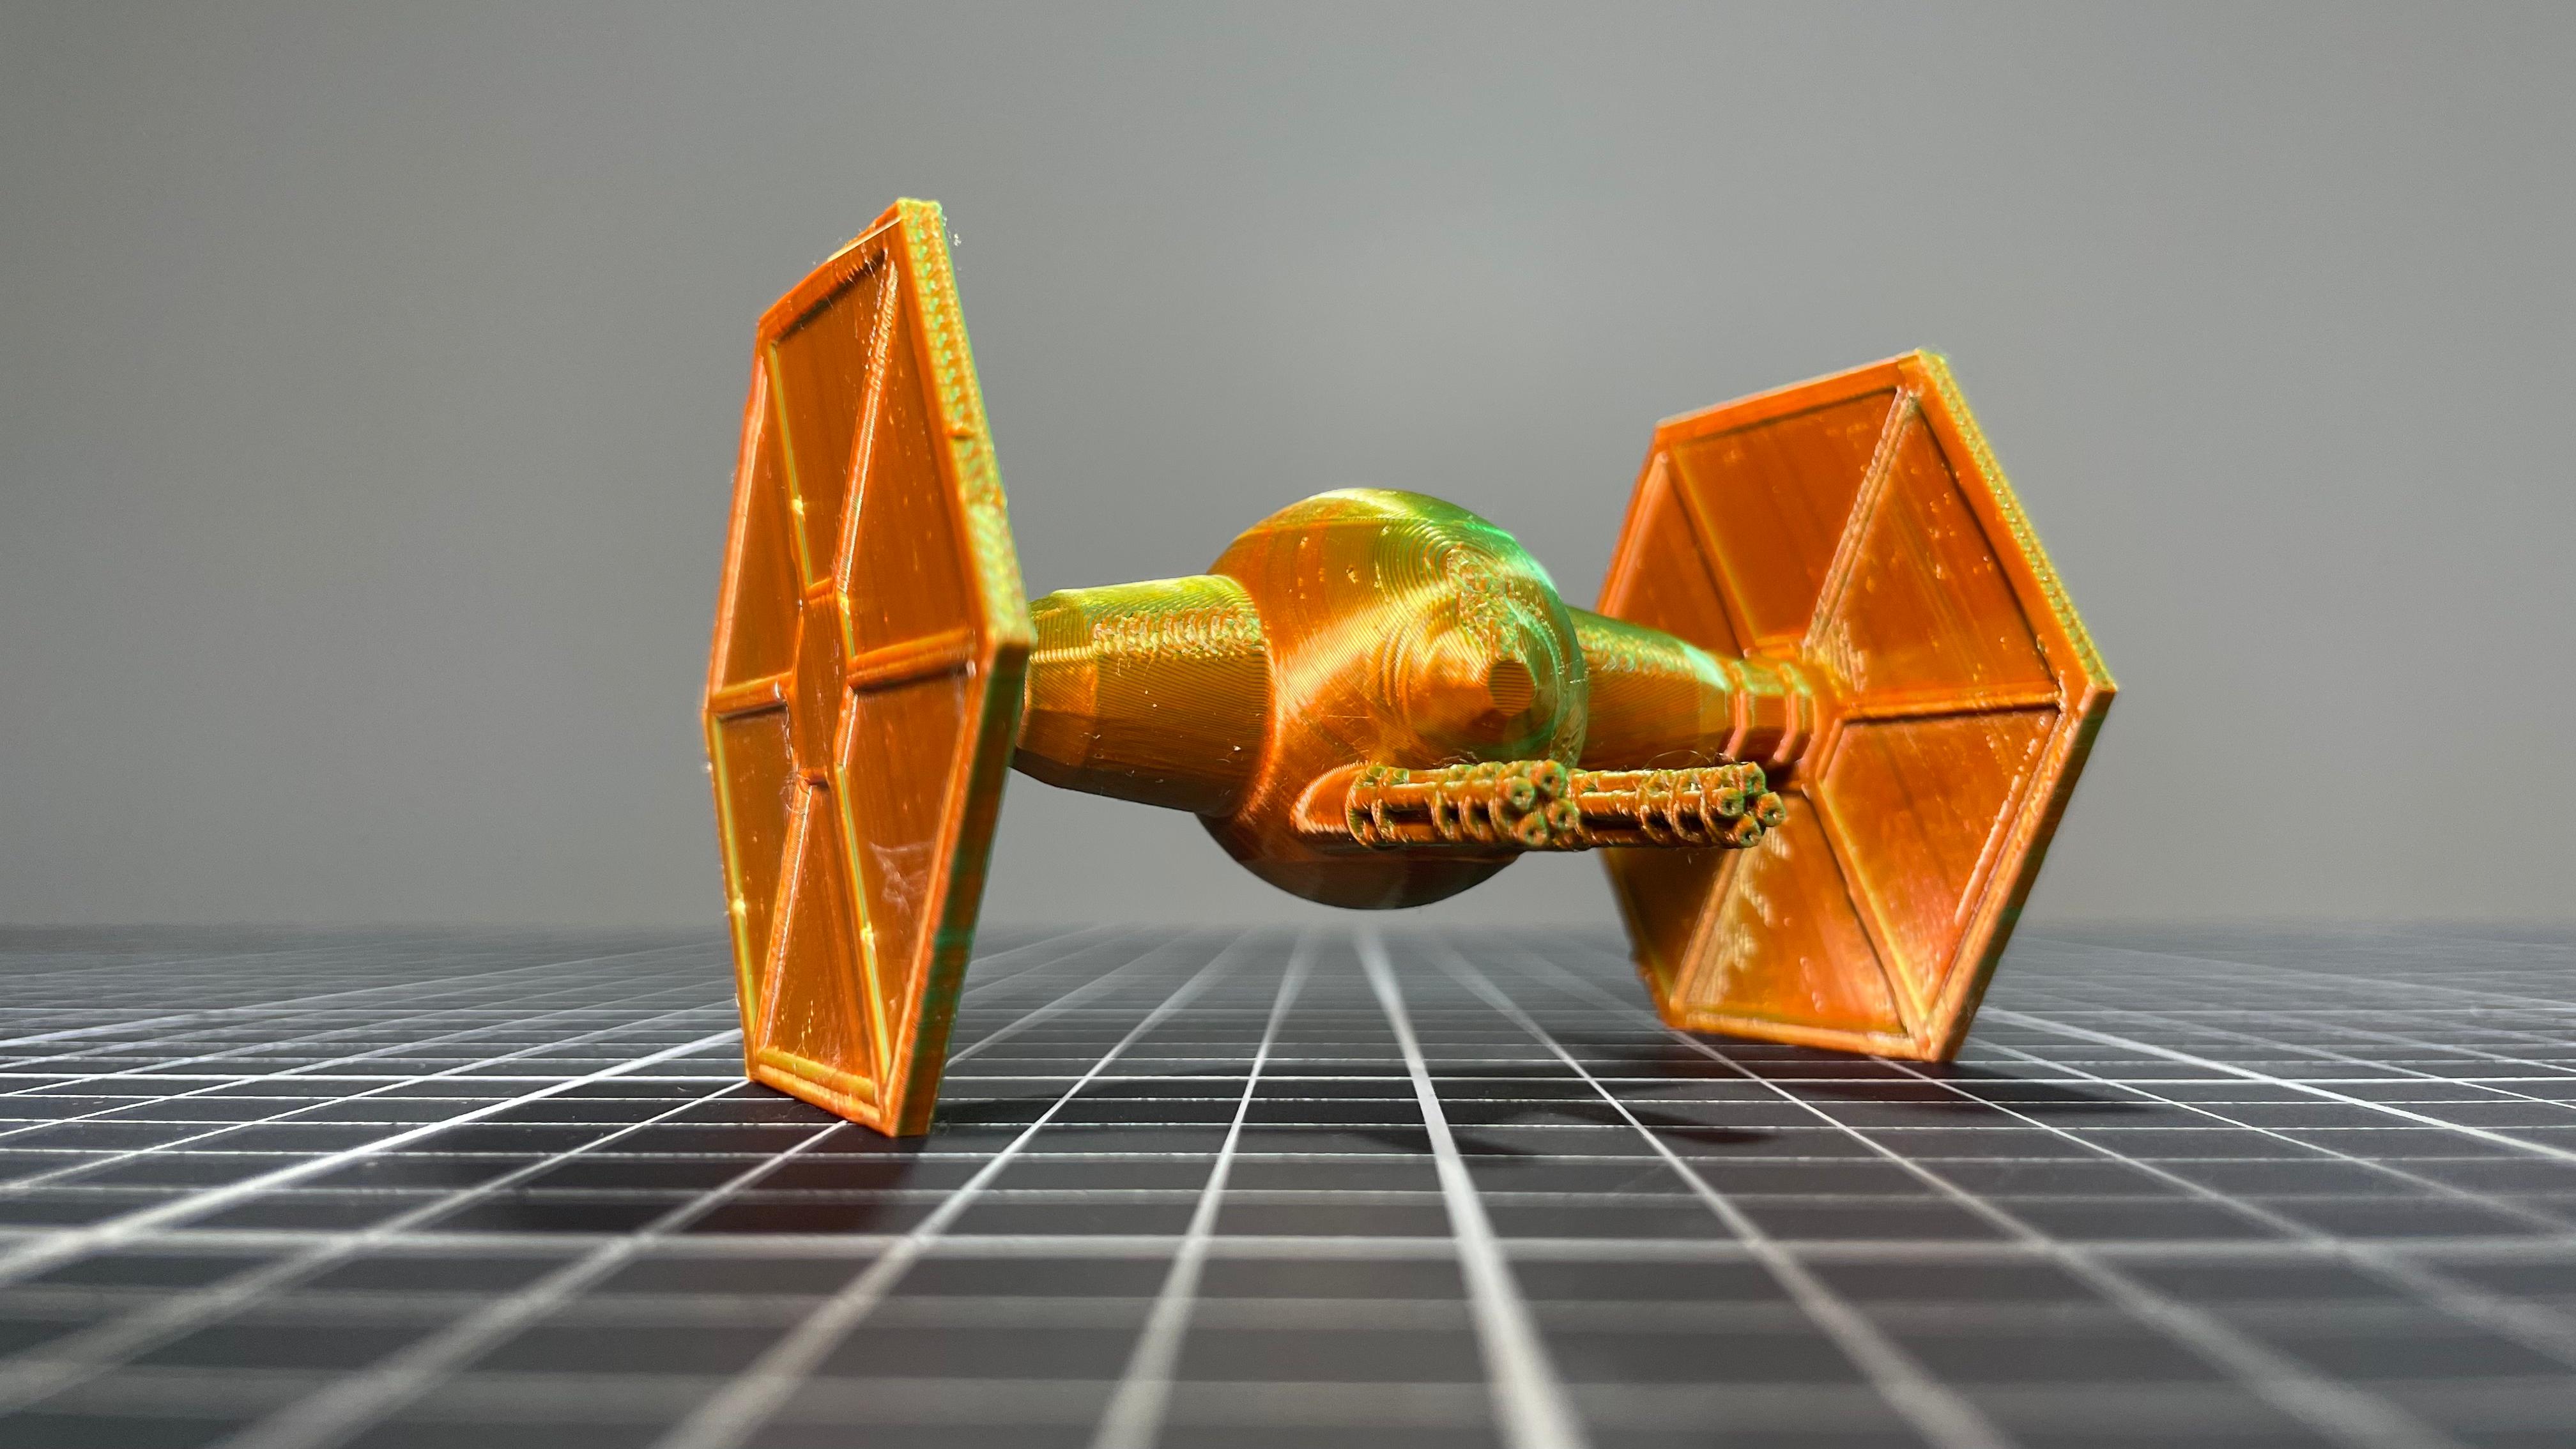
UPDATE: Added Tie Fighters as pendants!
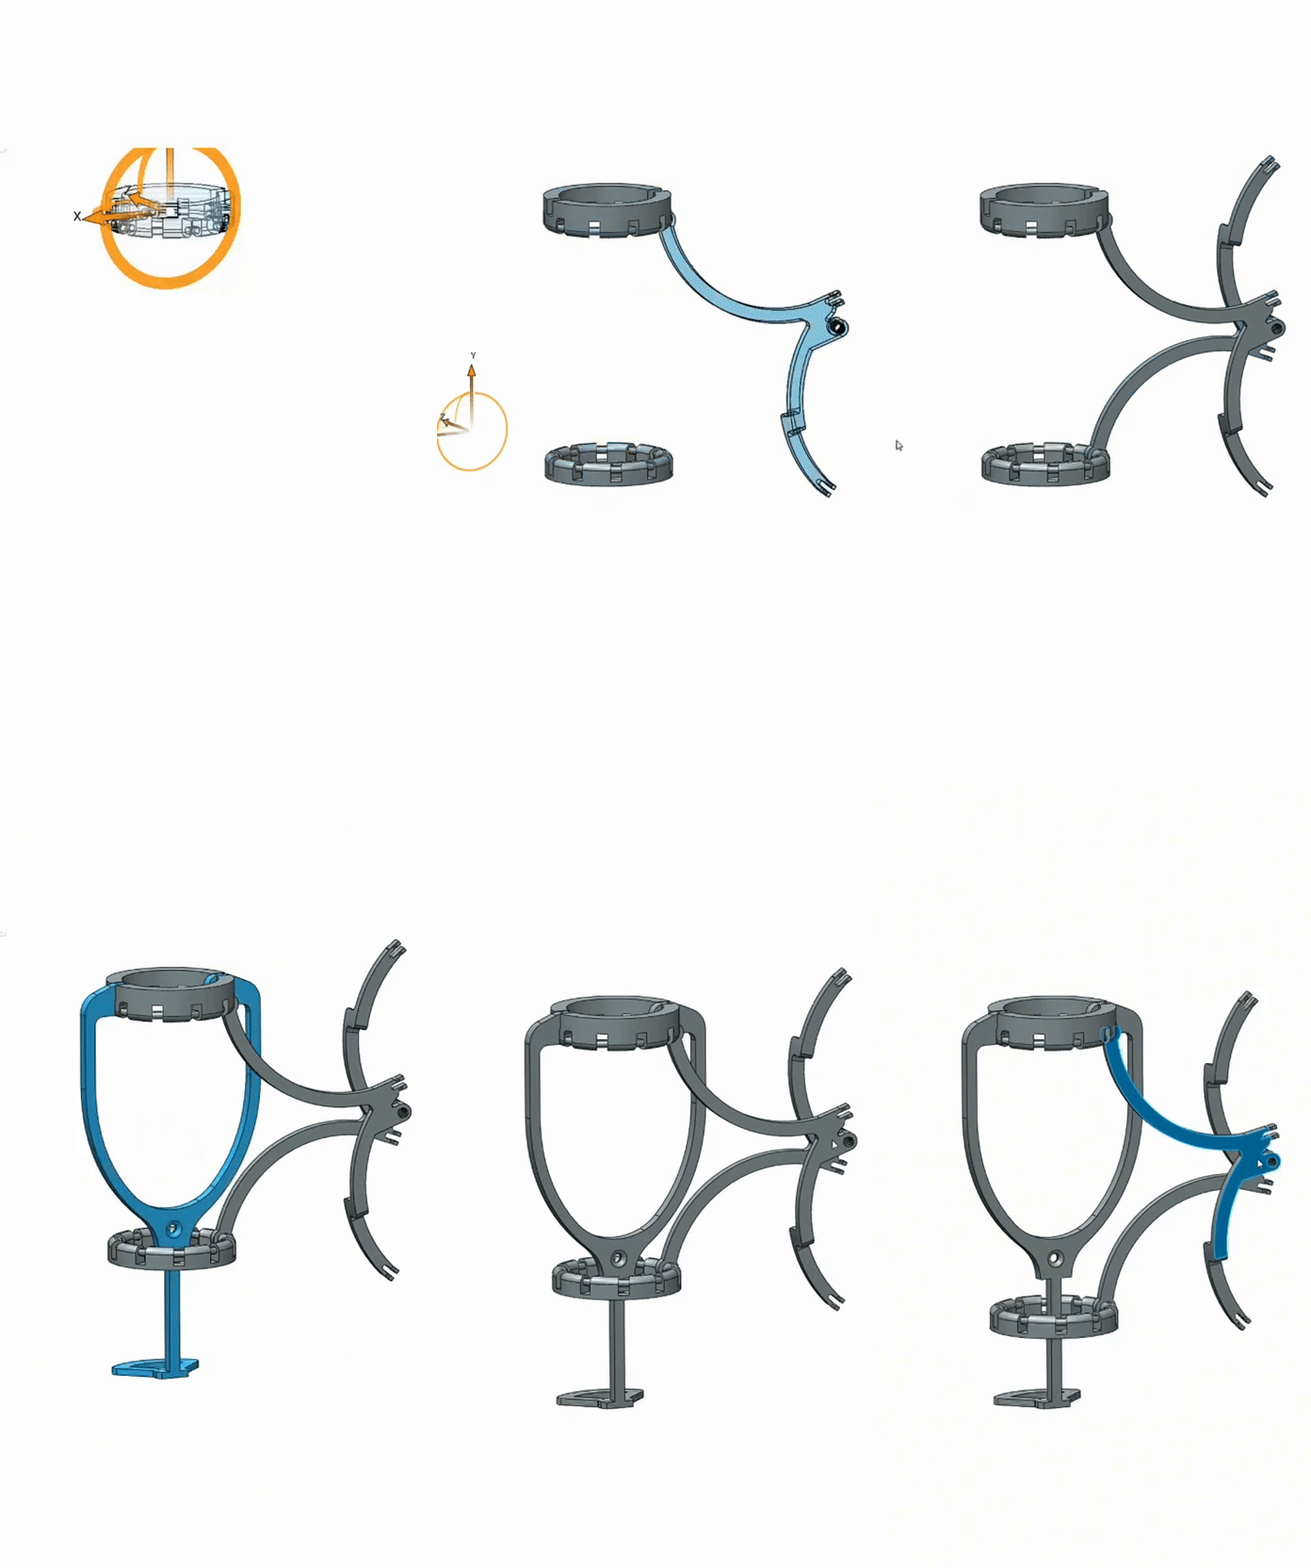
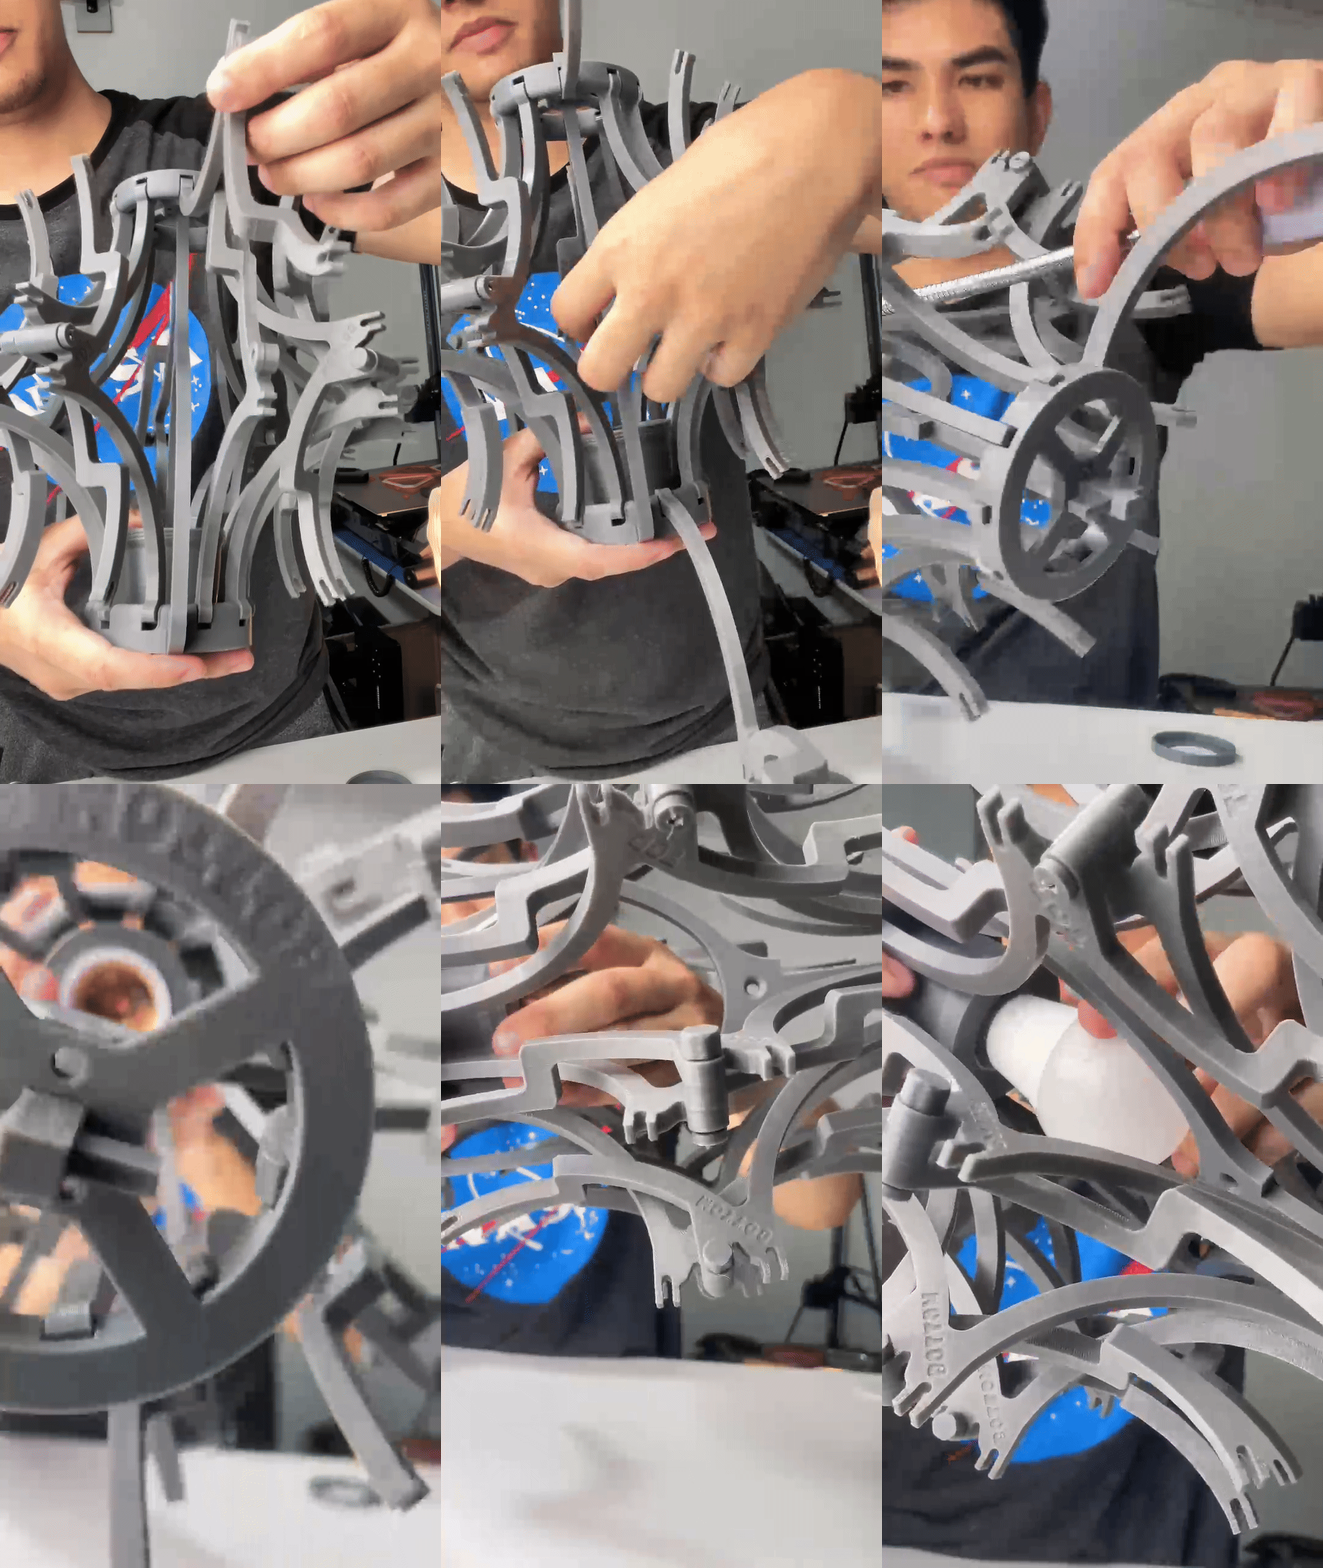
The most challenging part was the mechanism: two rotating rings and moving arms connected with printed screws, so no external hardware is required.
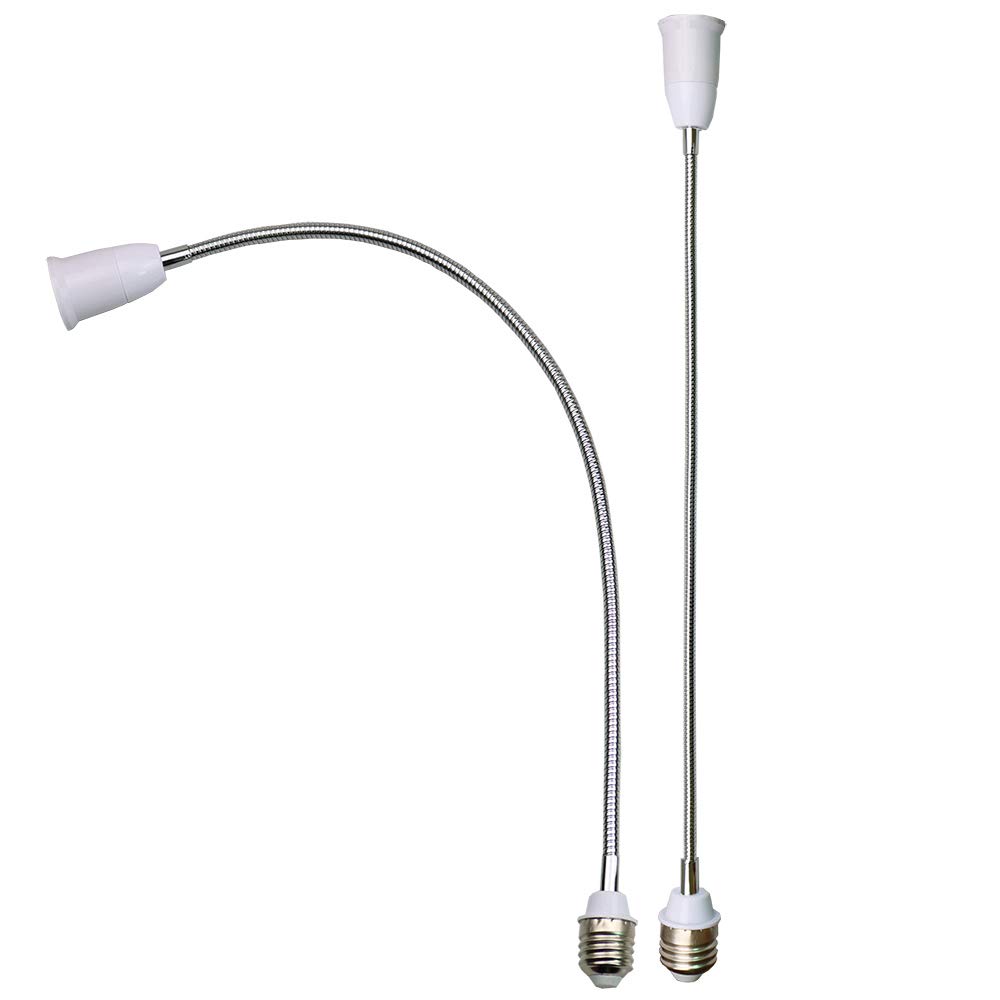
For the light source, instead of cutting and wiring cables, I discovered a Socket Extender that worked perfectly as a plug-and-play solution
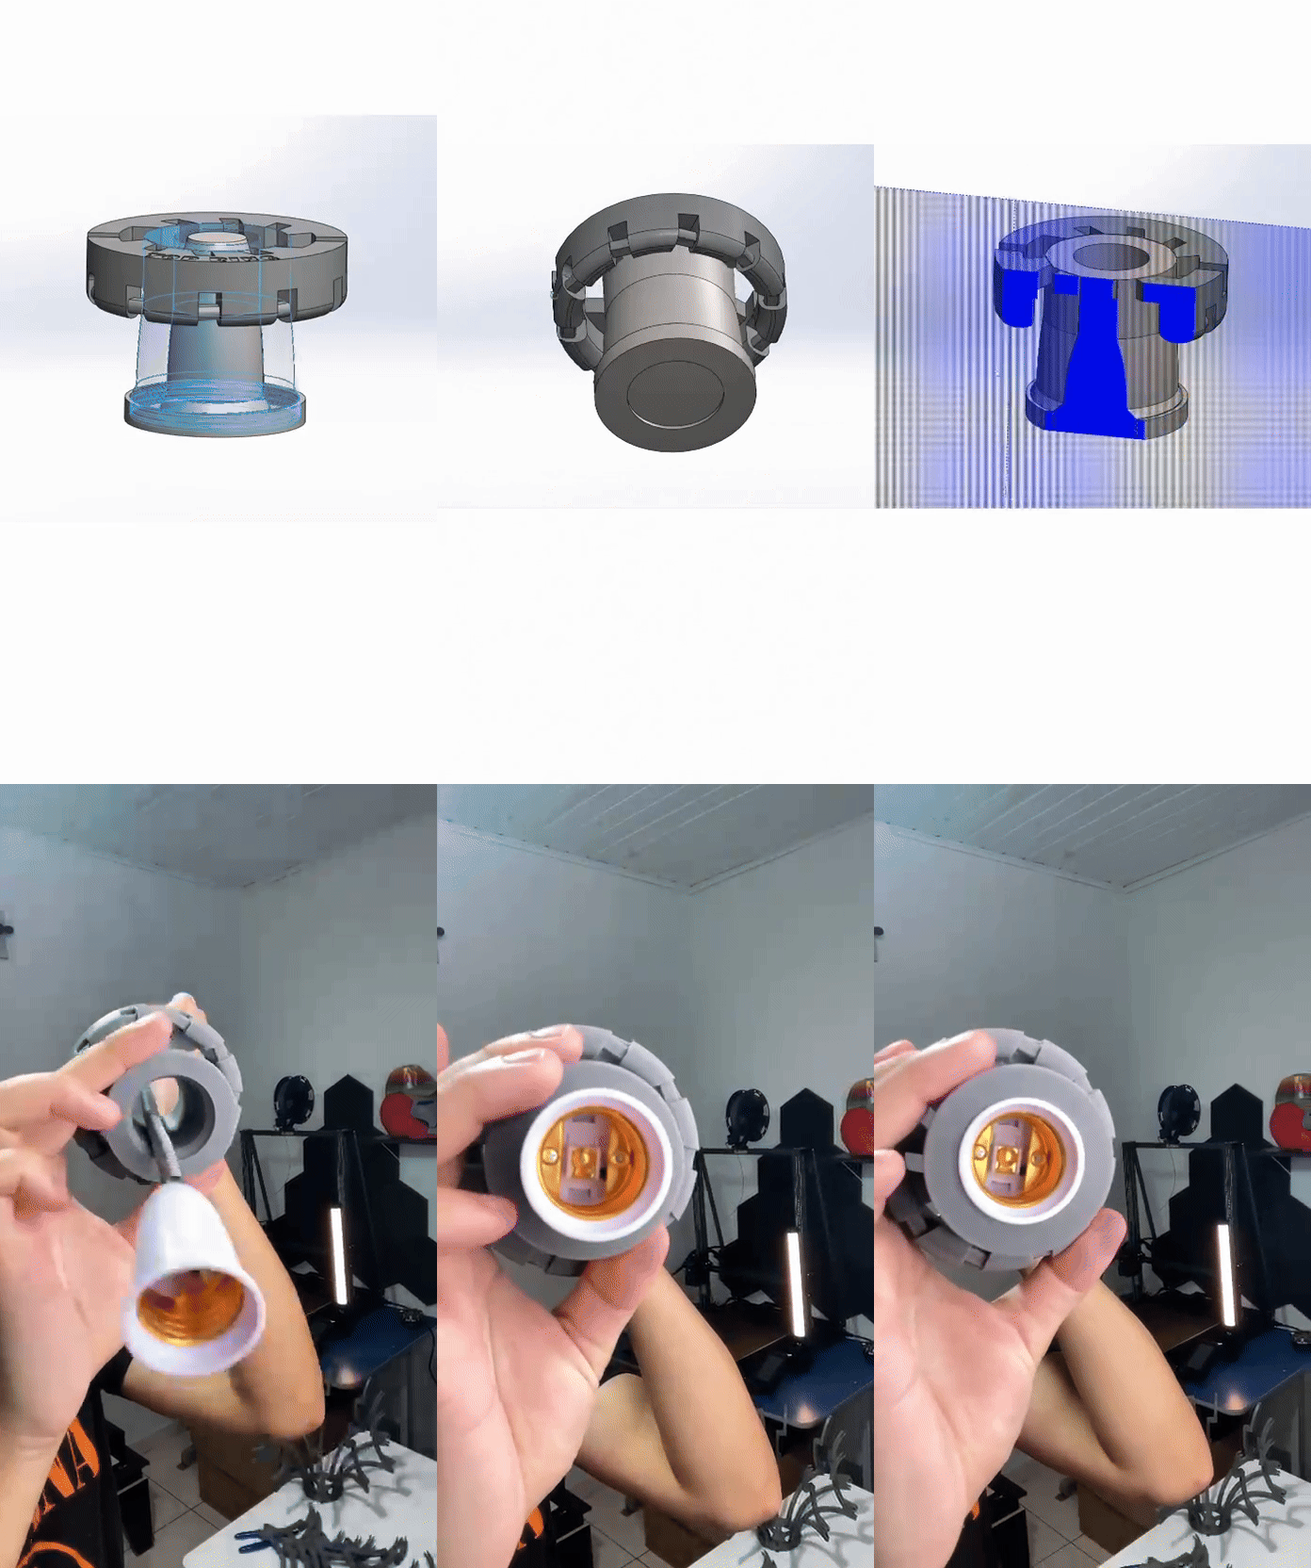
Still, I included an optional upper ring in the last plate, with the slot for an E27 adapter (without the circular cap), like in this case, which everyone uses. But you would need to cut the wires.
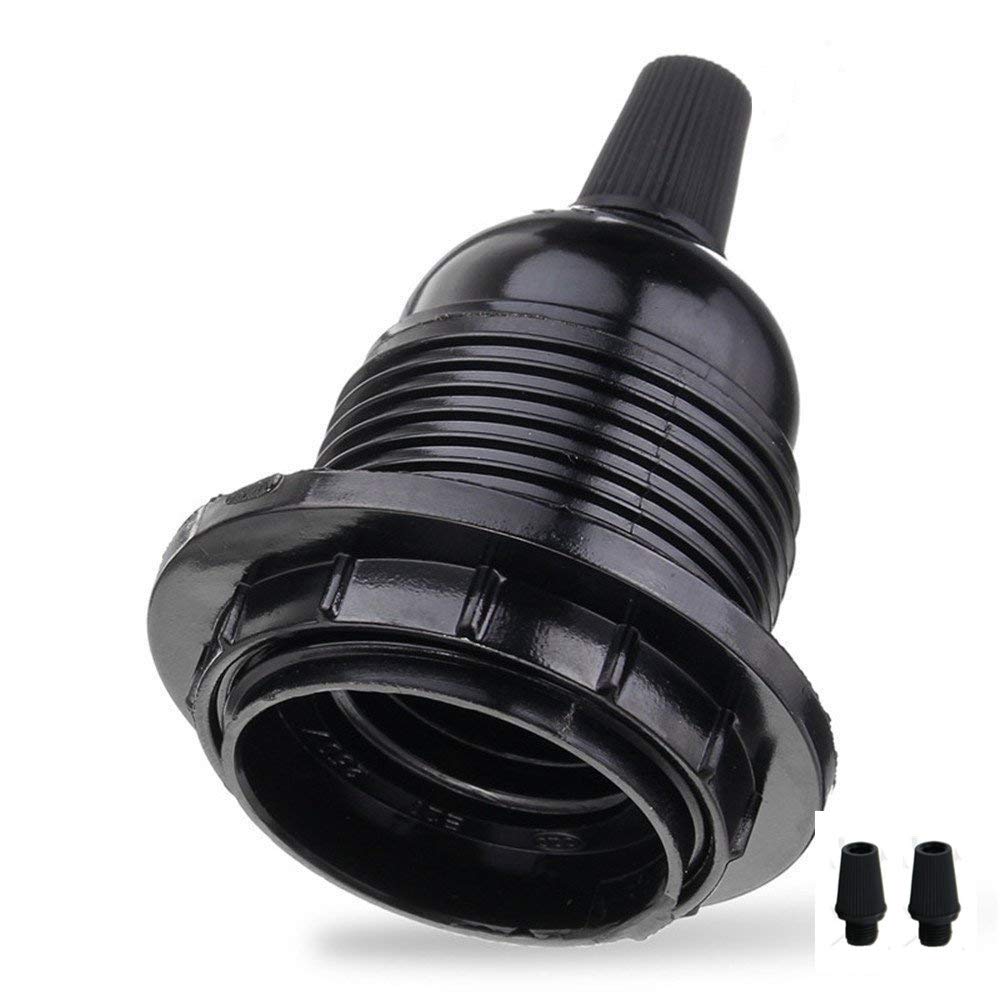
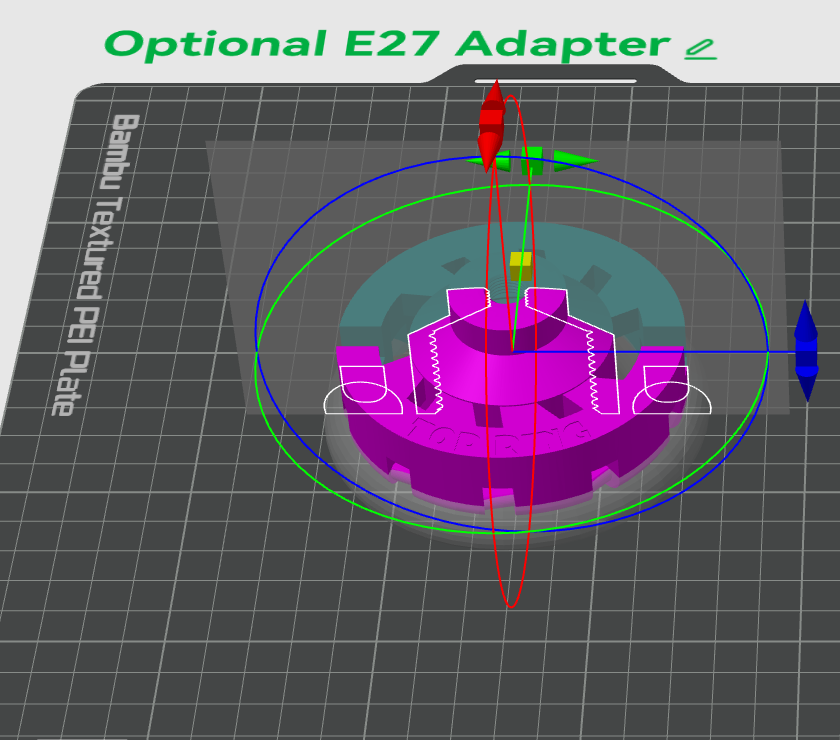
The Assembly Video:
The video of my entire process: from idea, design, prototype, to the final result:
Complementary Instructions
The arms and rings are labeled as Bottom / Top. Assemble them according to their label, since the arms are slightly different. For this reason, you cannot use a bottom arm as a top arm.
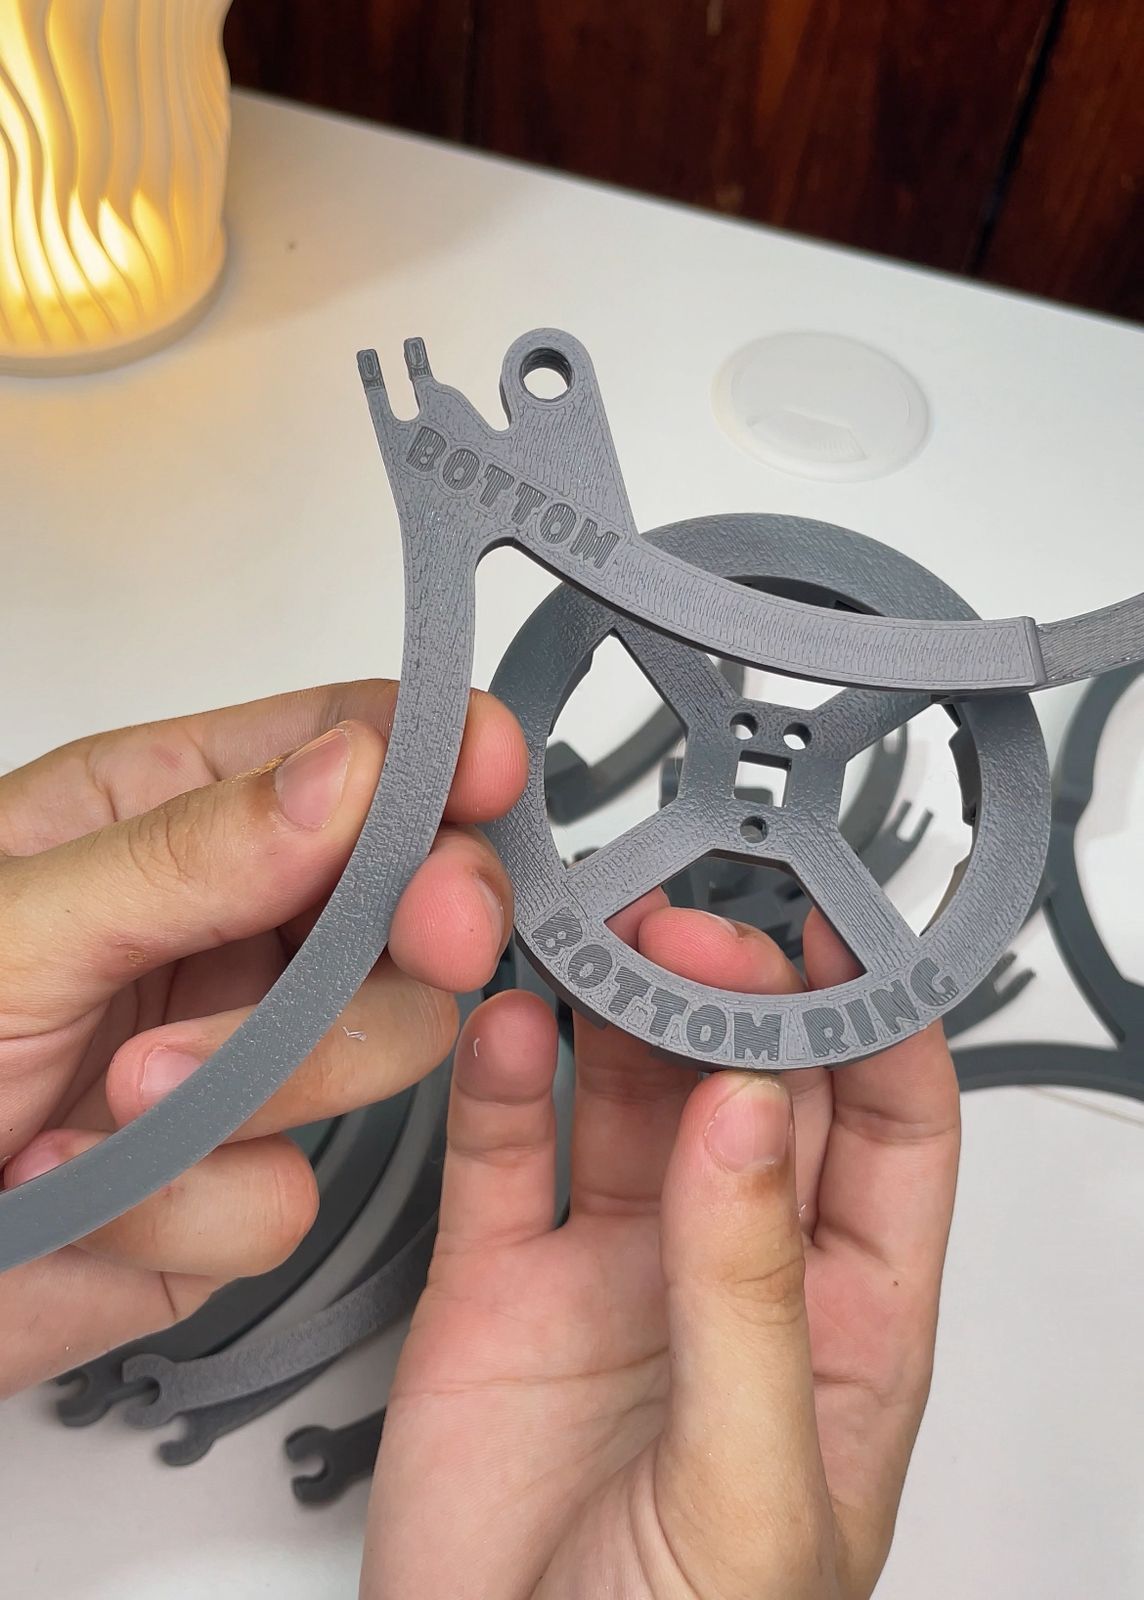
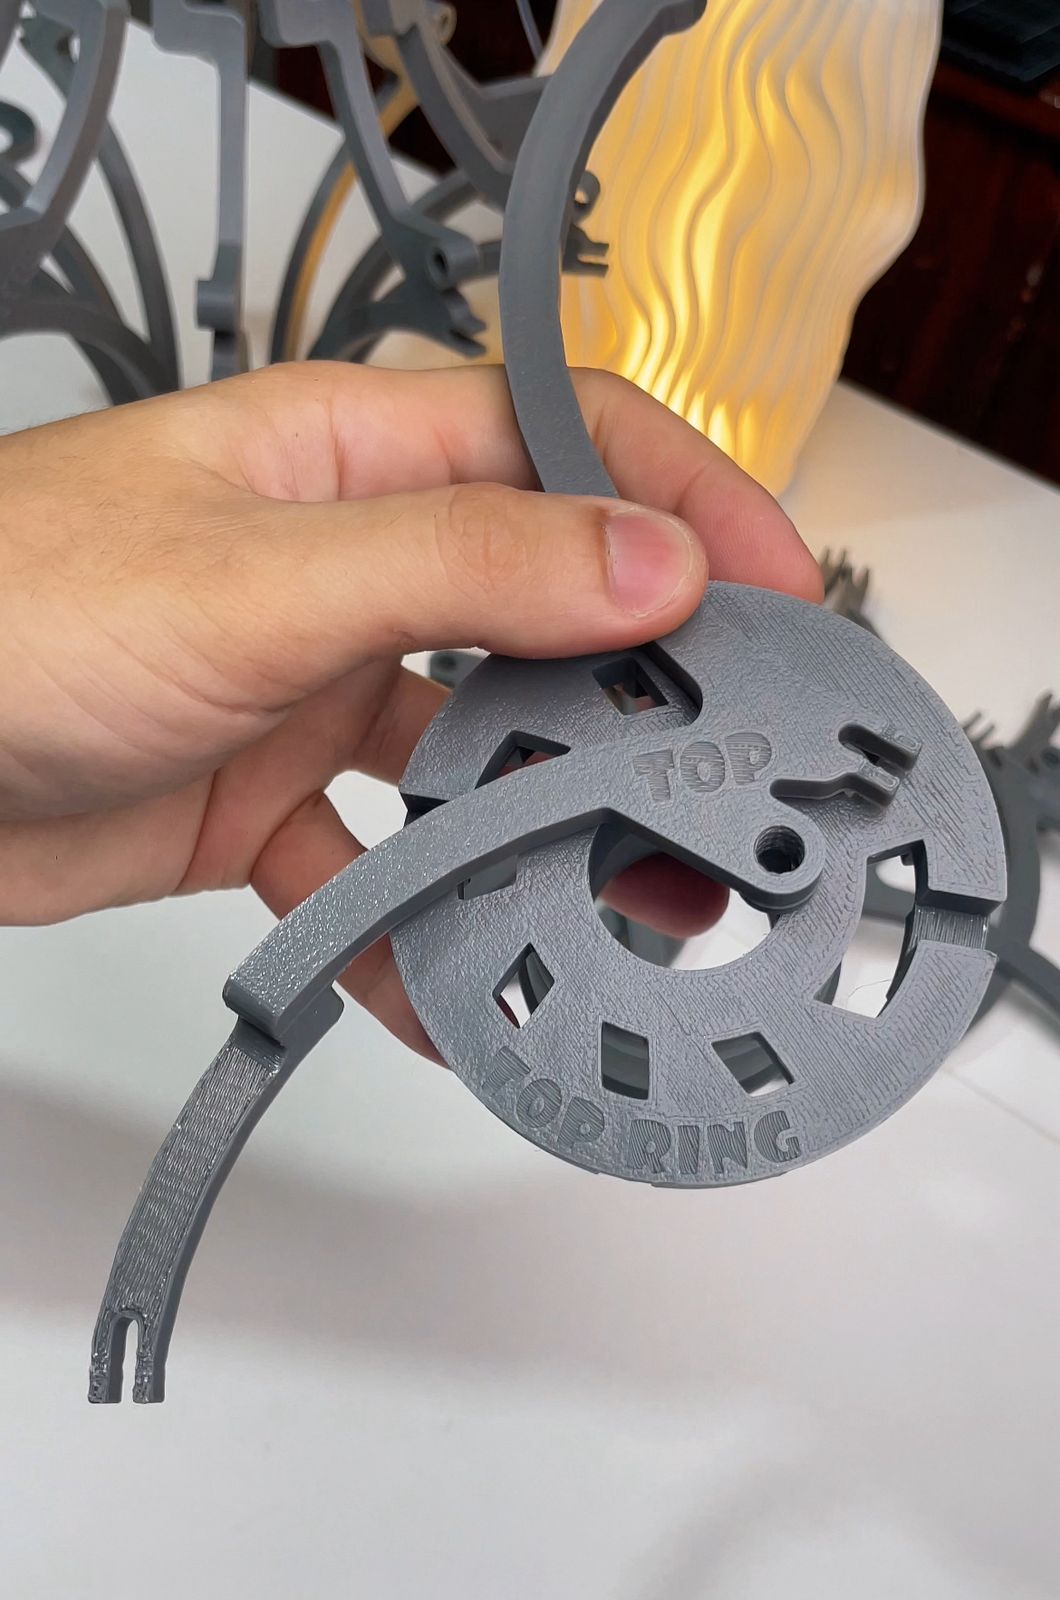
After tightening the screws and nuts, I recommend applying a bit of oil so the mechanism can move up and down smoothly.
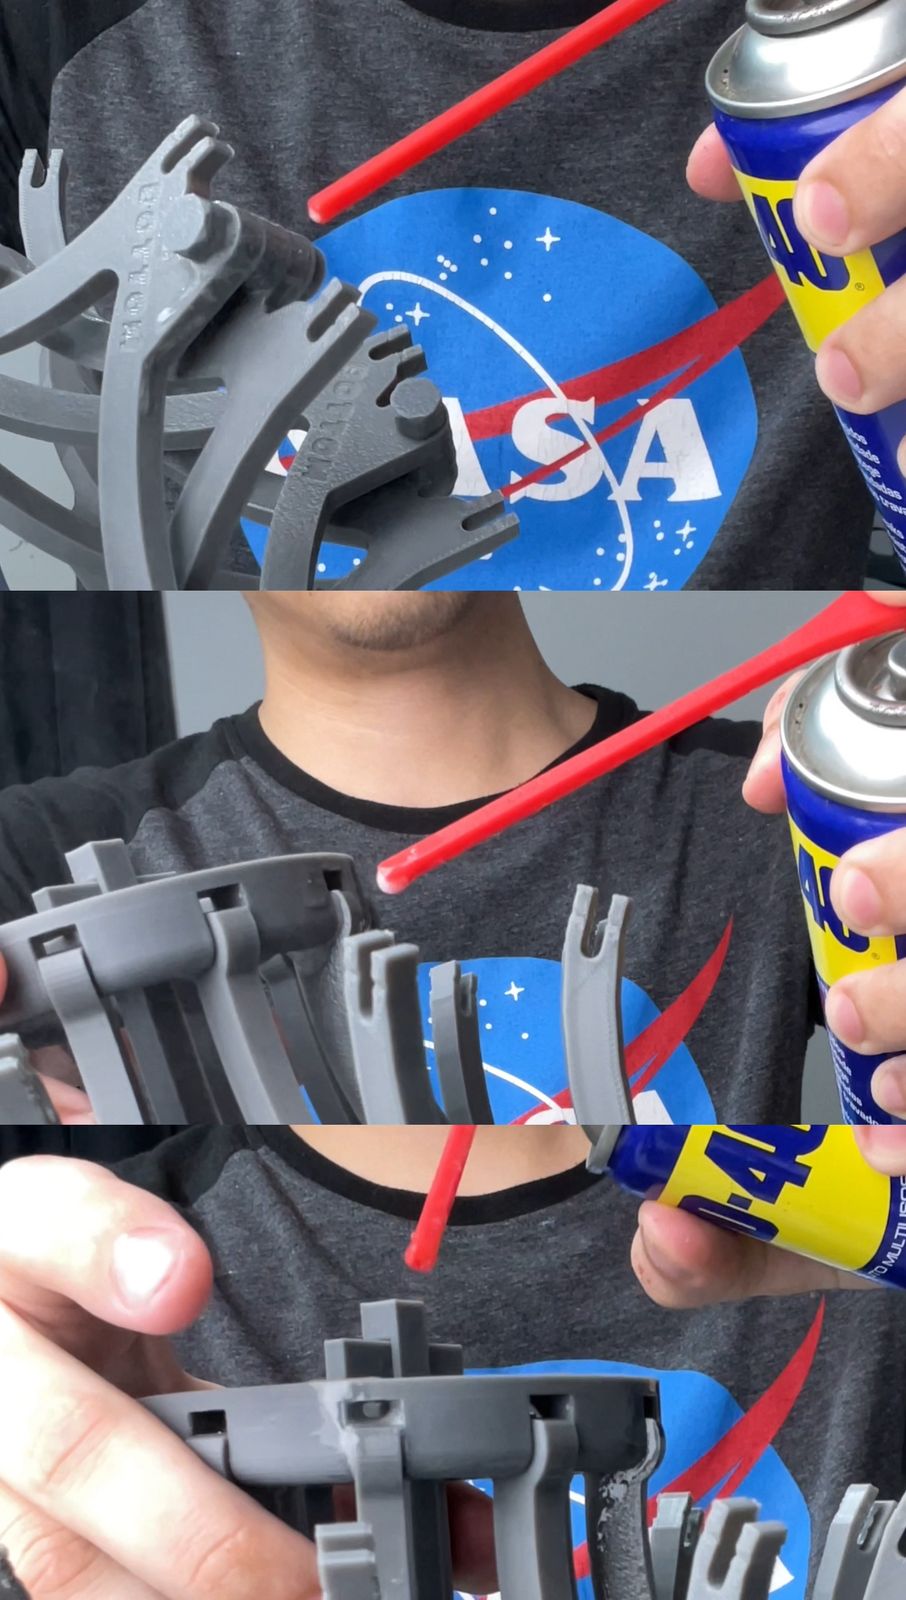
Remember to leave a few arms unattached so you can insert the light bulb and the extender. Don’t forget to screw on the cap after placing the extender.
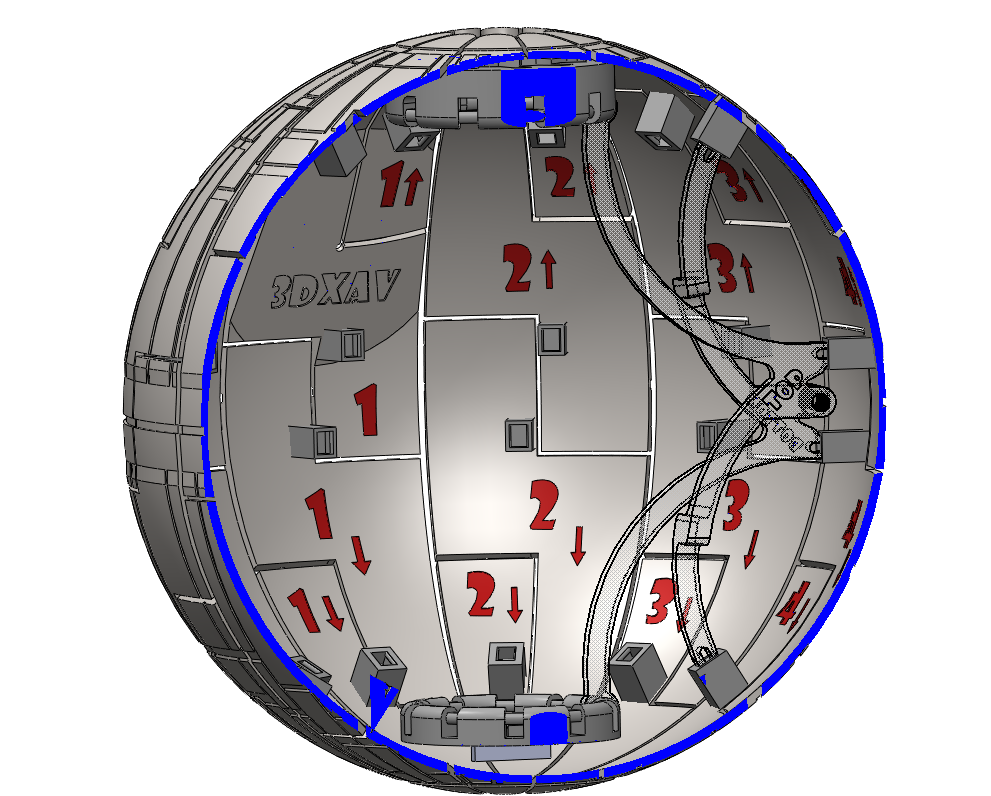
I added numbers and arrows to indicate the position of each piece of the sphere. As you can see, you should place them in a clockwise direction. The surface lines will also help you confirm if the pieces are being placed correctly.
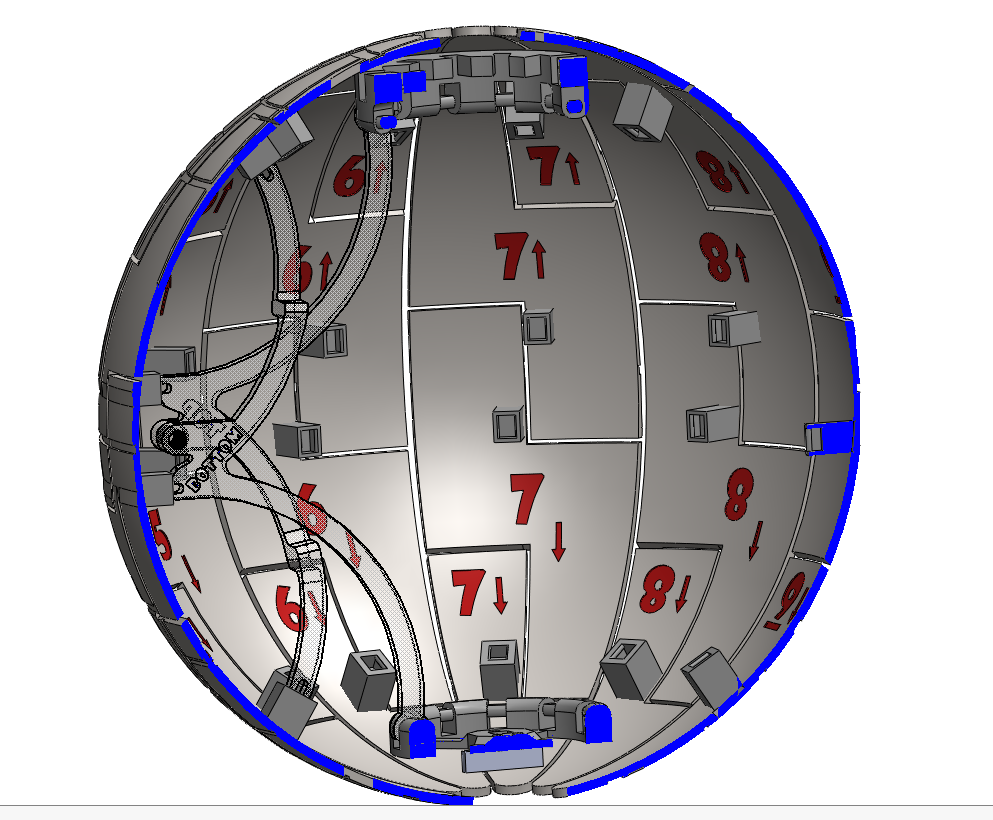
Pay close attention to section 8, since the font I used makes the number appear larger at the top, which gives the impression that it’s upside down — but it’s not.
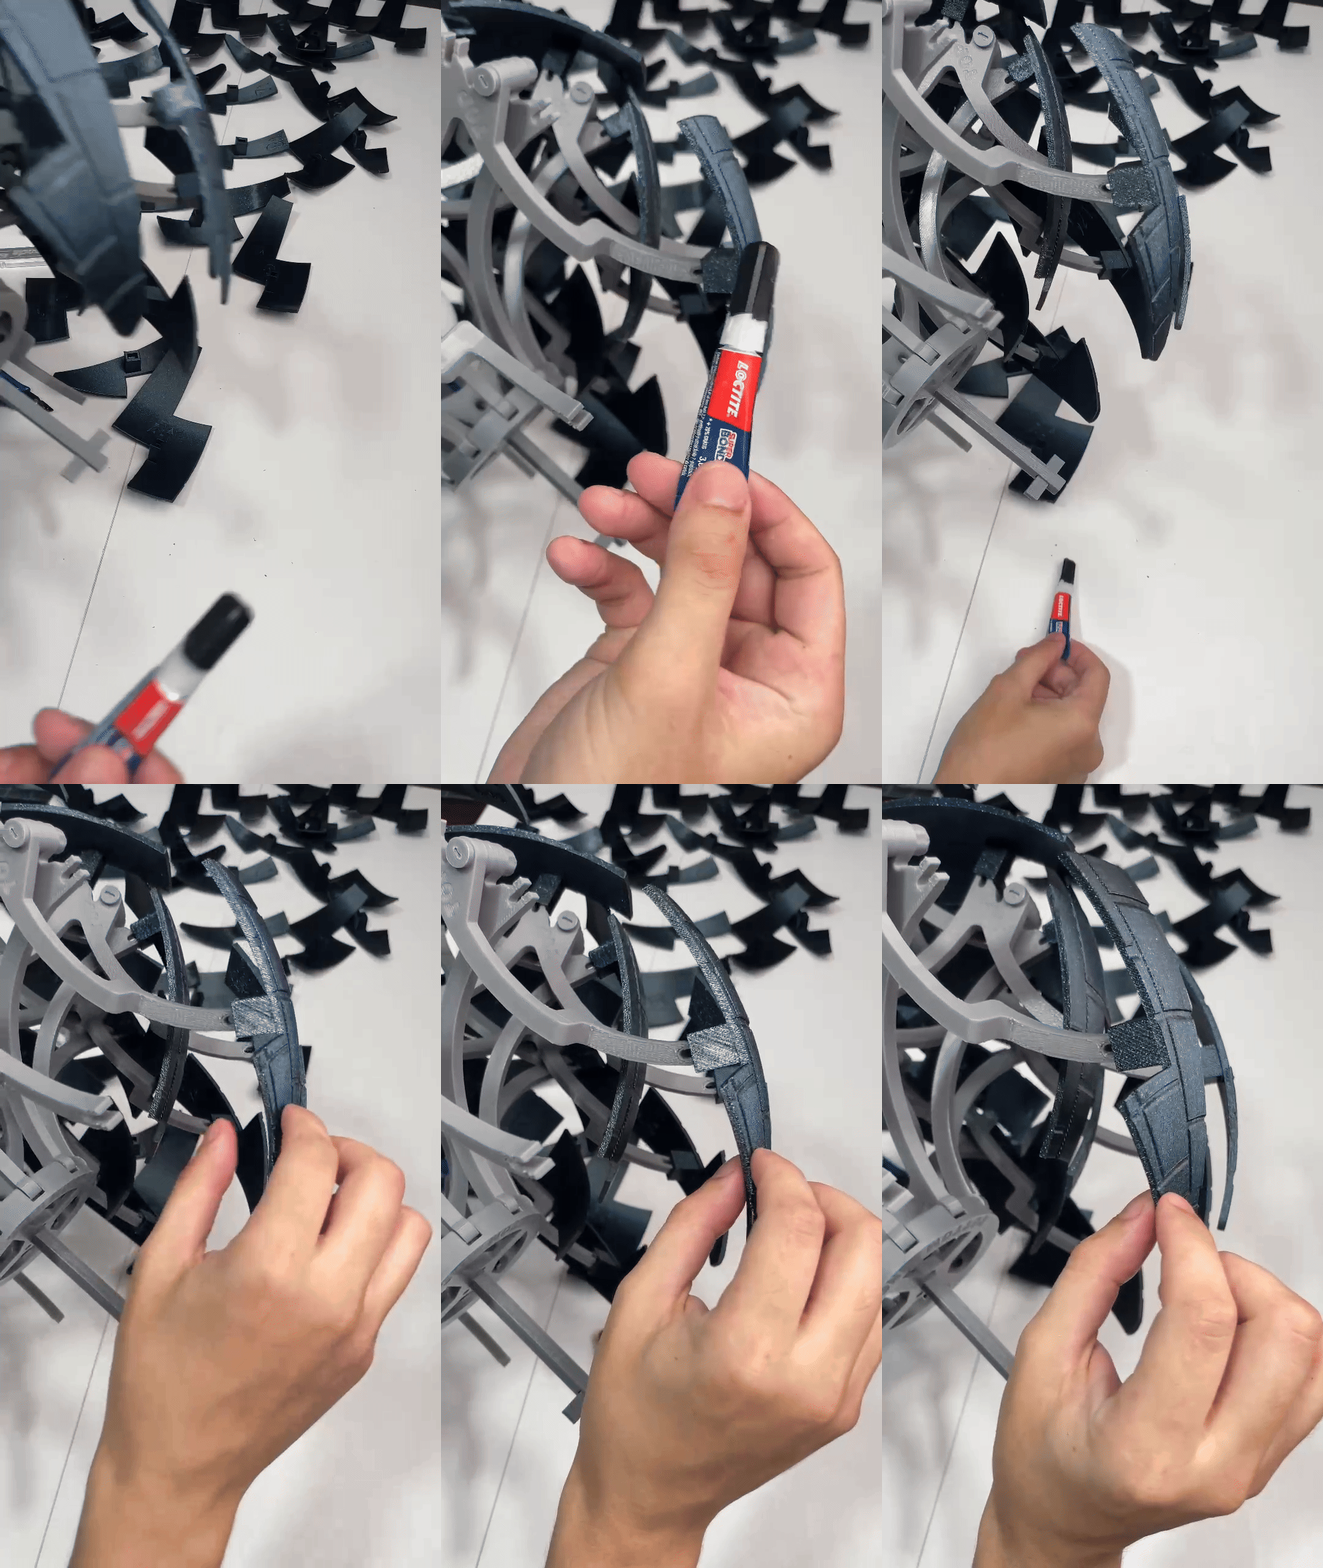
After inserting all the pieces of the sphere, I recommend using a bit of super glue / cyanoacrylate to keep them in position, since constant opening and closing may loosen them.
Open/Close System: Use a short piece of TPU with two knots spaced 38–40 mm apart. One knot should be double, and the other single. Thread them through these holes, creating a makeshift mechanism.
- To open it: Use your finger to push while pulling the end with the single knot. This knot is small enough to pass through the hole, but once through, it remains isolated, keeping the mechanism open and preventing it from closing by gravity.
- I made two holes on the opposite side, in case you need to sand or cut filament burrs for the knot to pass through and end up widening the hole too much (as happened to me).
To close it: Push the single knot inward and then gently pull the opposite end.
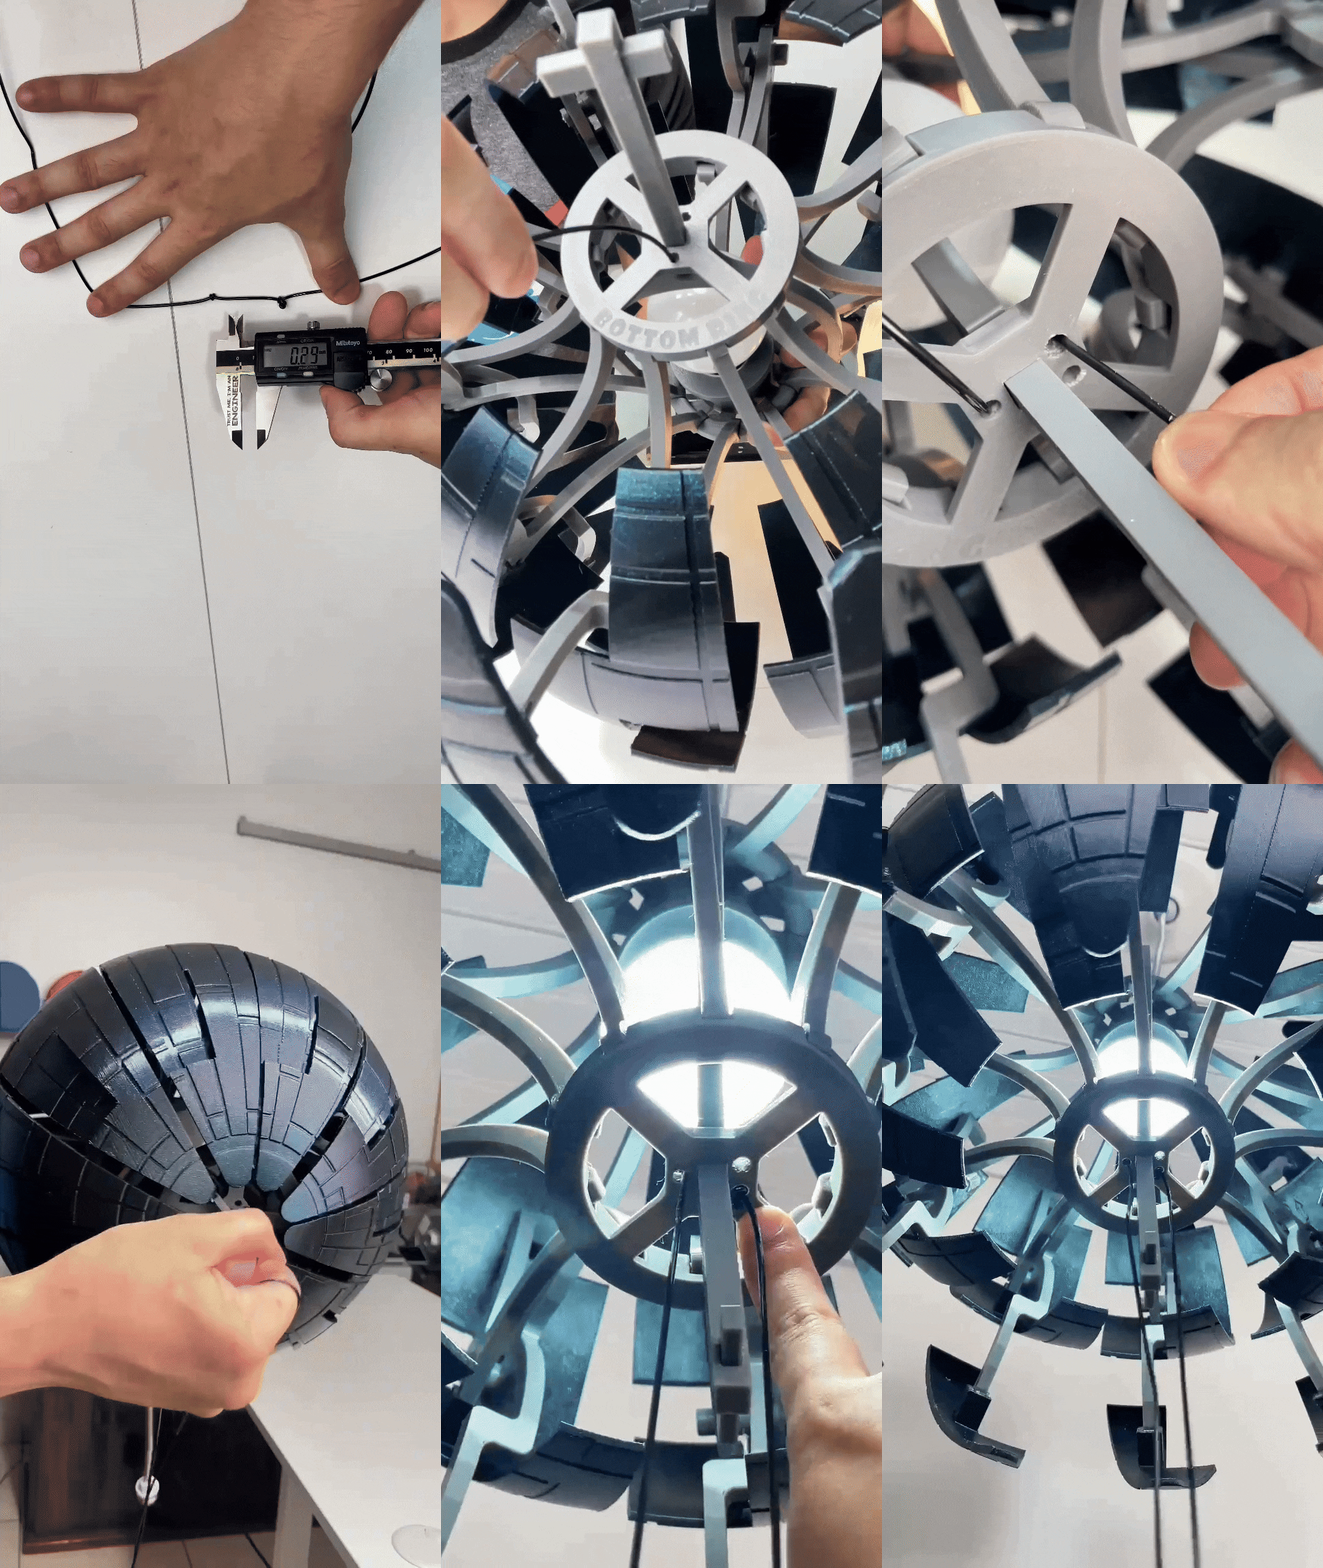
It’s an improvised and rudimentary system, but it works! Later I’ll come up with a better system. I believe that for big problems, simple solutions often work best.
Finally. I don’t recommend using incandescent bulbs unless the filament you are using is heat-resistant.
I’m sharing the STEP files for free so you can print, customize, and enjoy your own version. With a little creativity, the possibilities are endless!
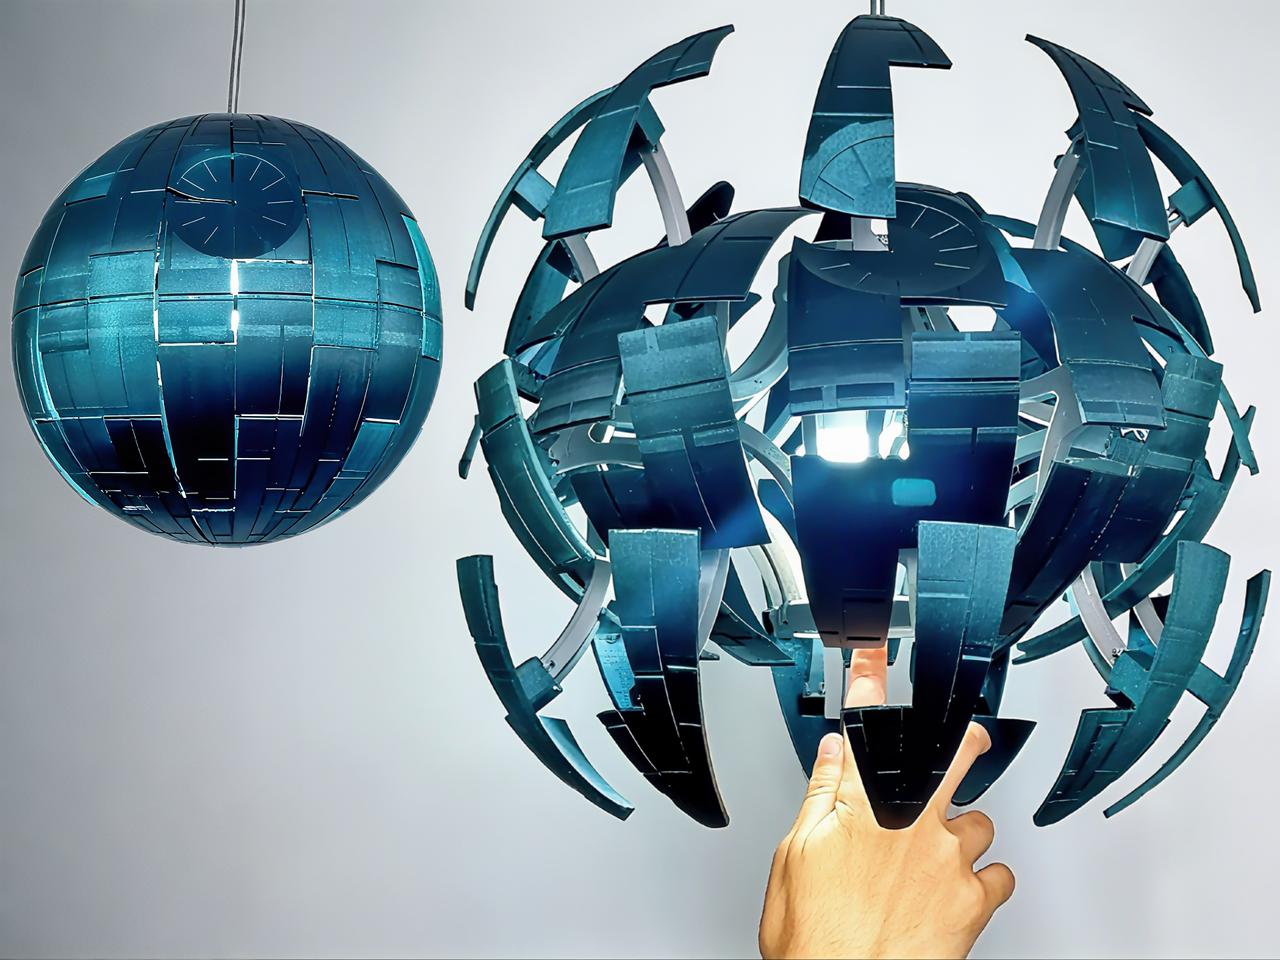
THE MOST Stunning Make (Credit @geekyhawkes)
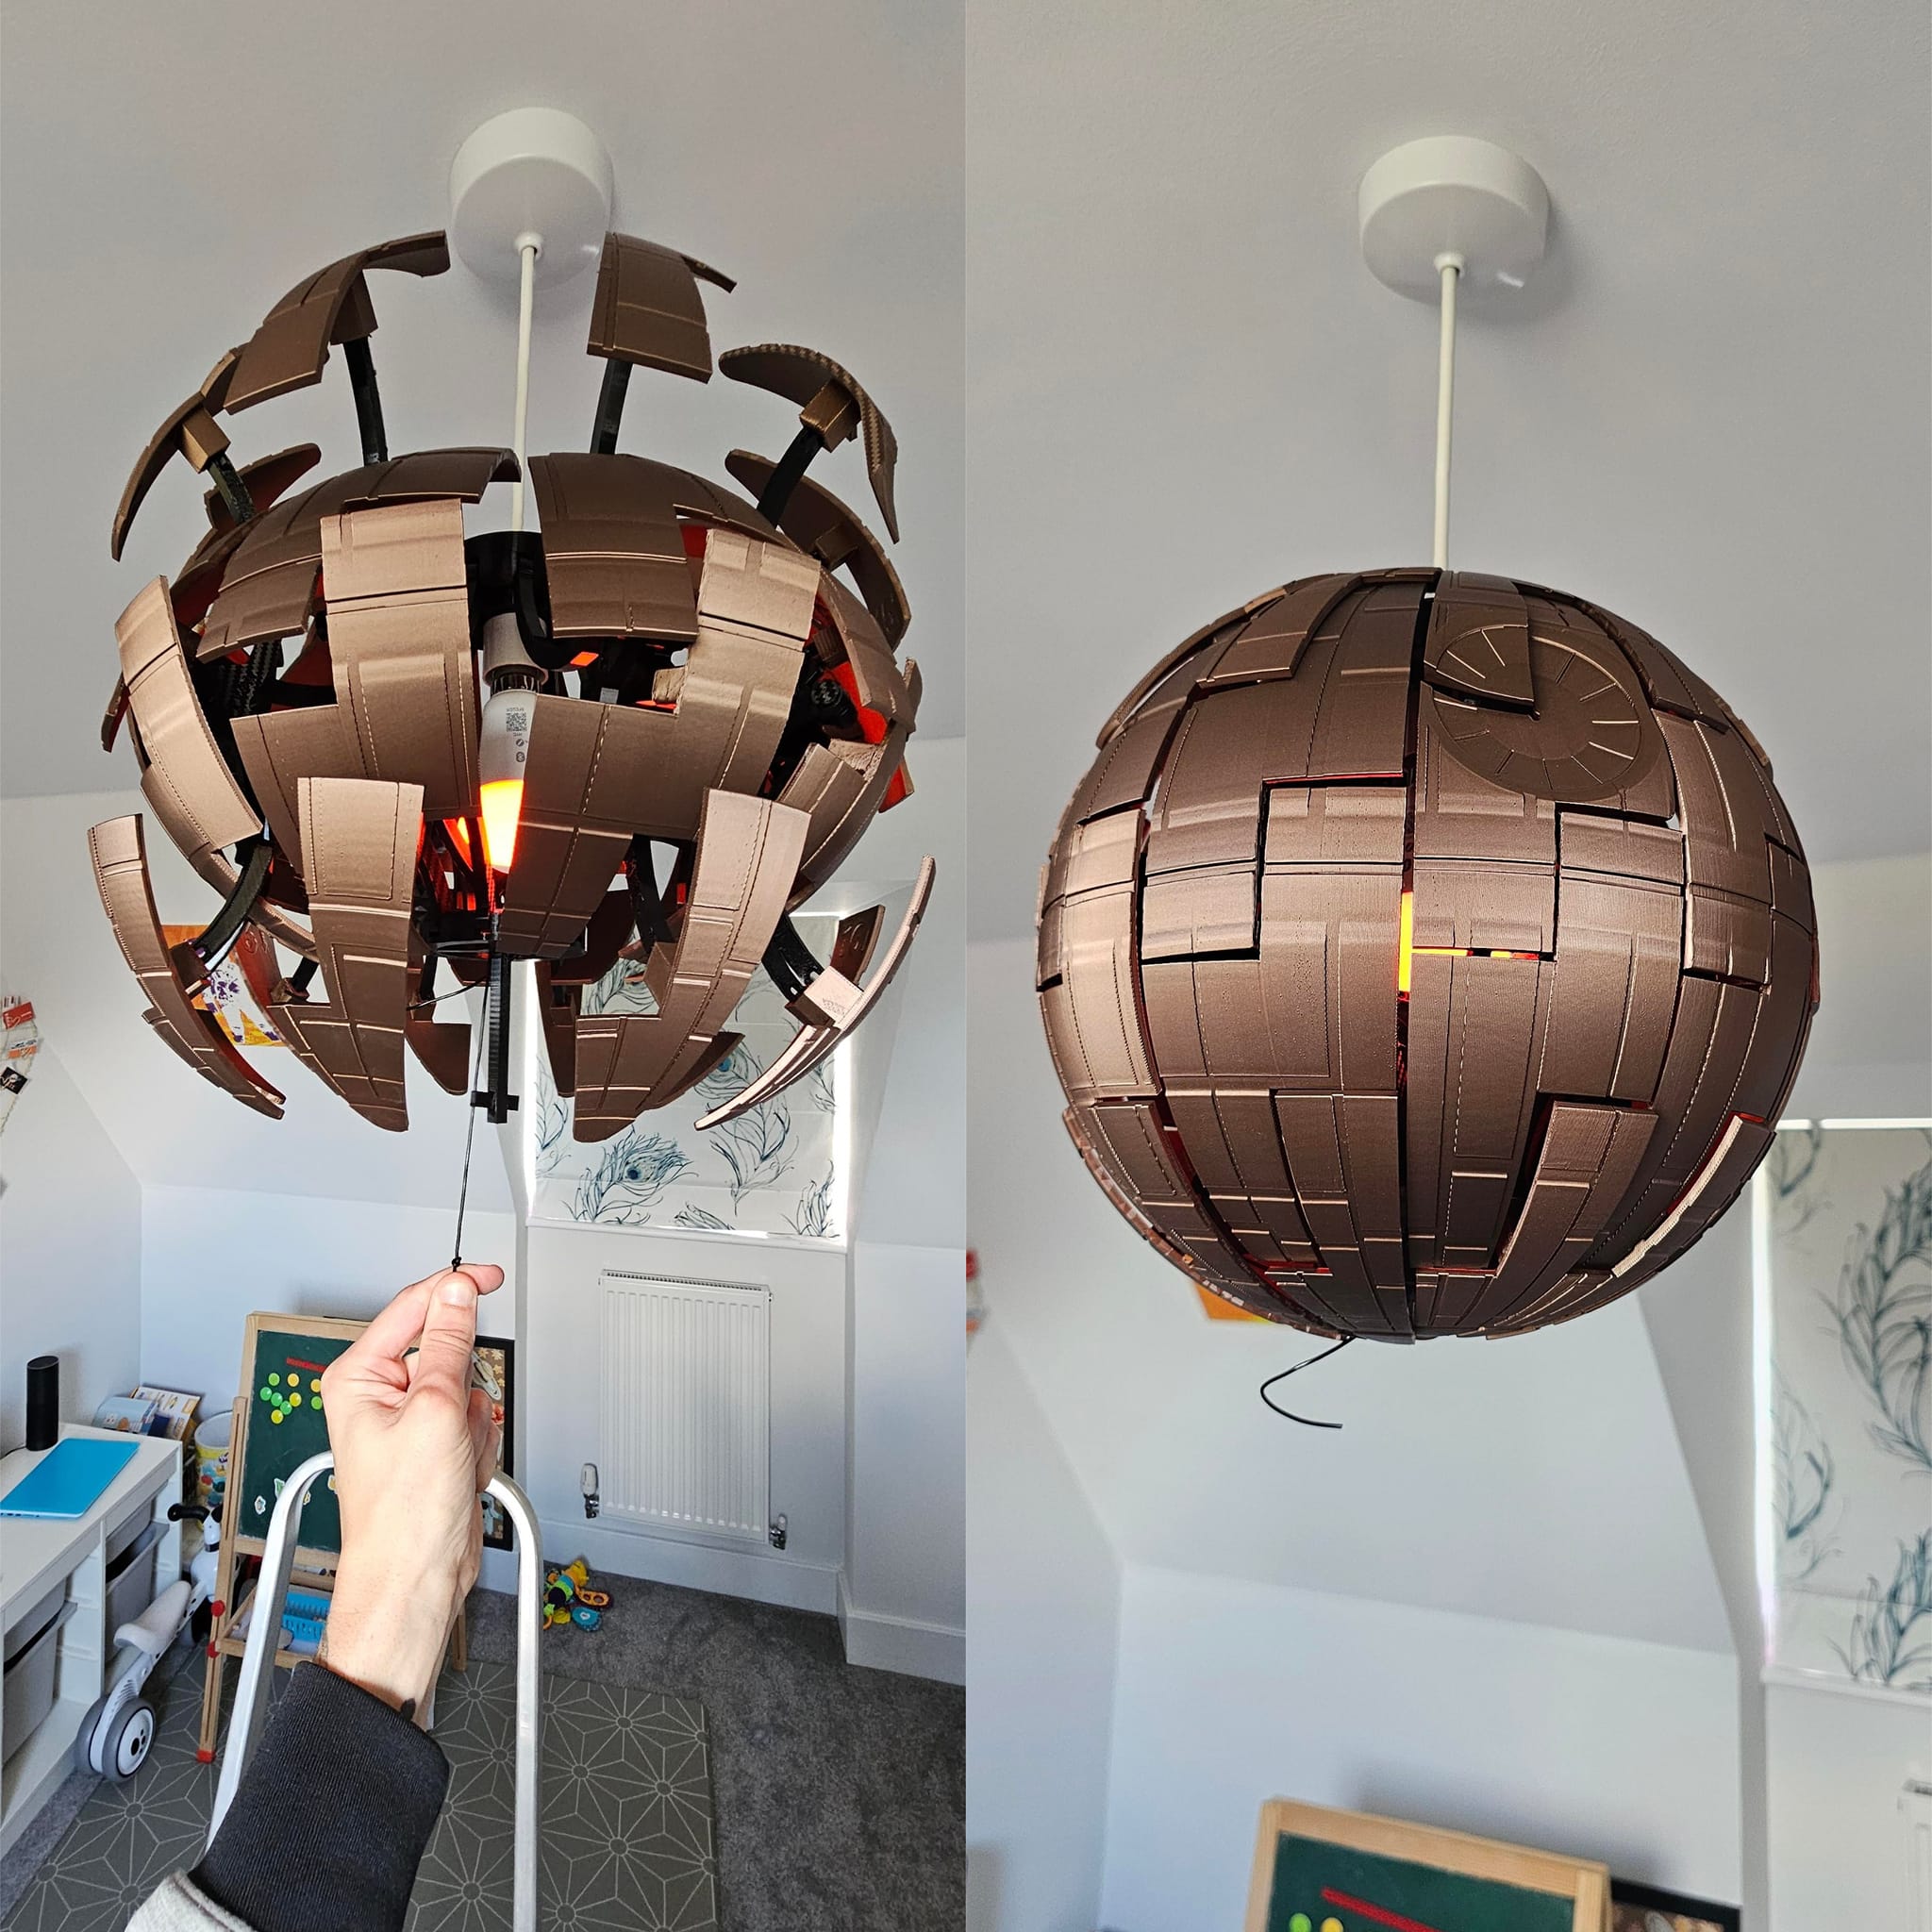
Exploding Death Star Pendant Lamp

Publicado em 18 de set de 2025
Gostou deste modelo? Crie uma conta grátis para salvar seus favoritos e voltar a eles depois.
Criar conta