Você está no 3DFinder
Buscamos em Thingiverse, MakerWorld e Printables ao mesmo tempo para te dar o melhor de cada uma.
Descrição
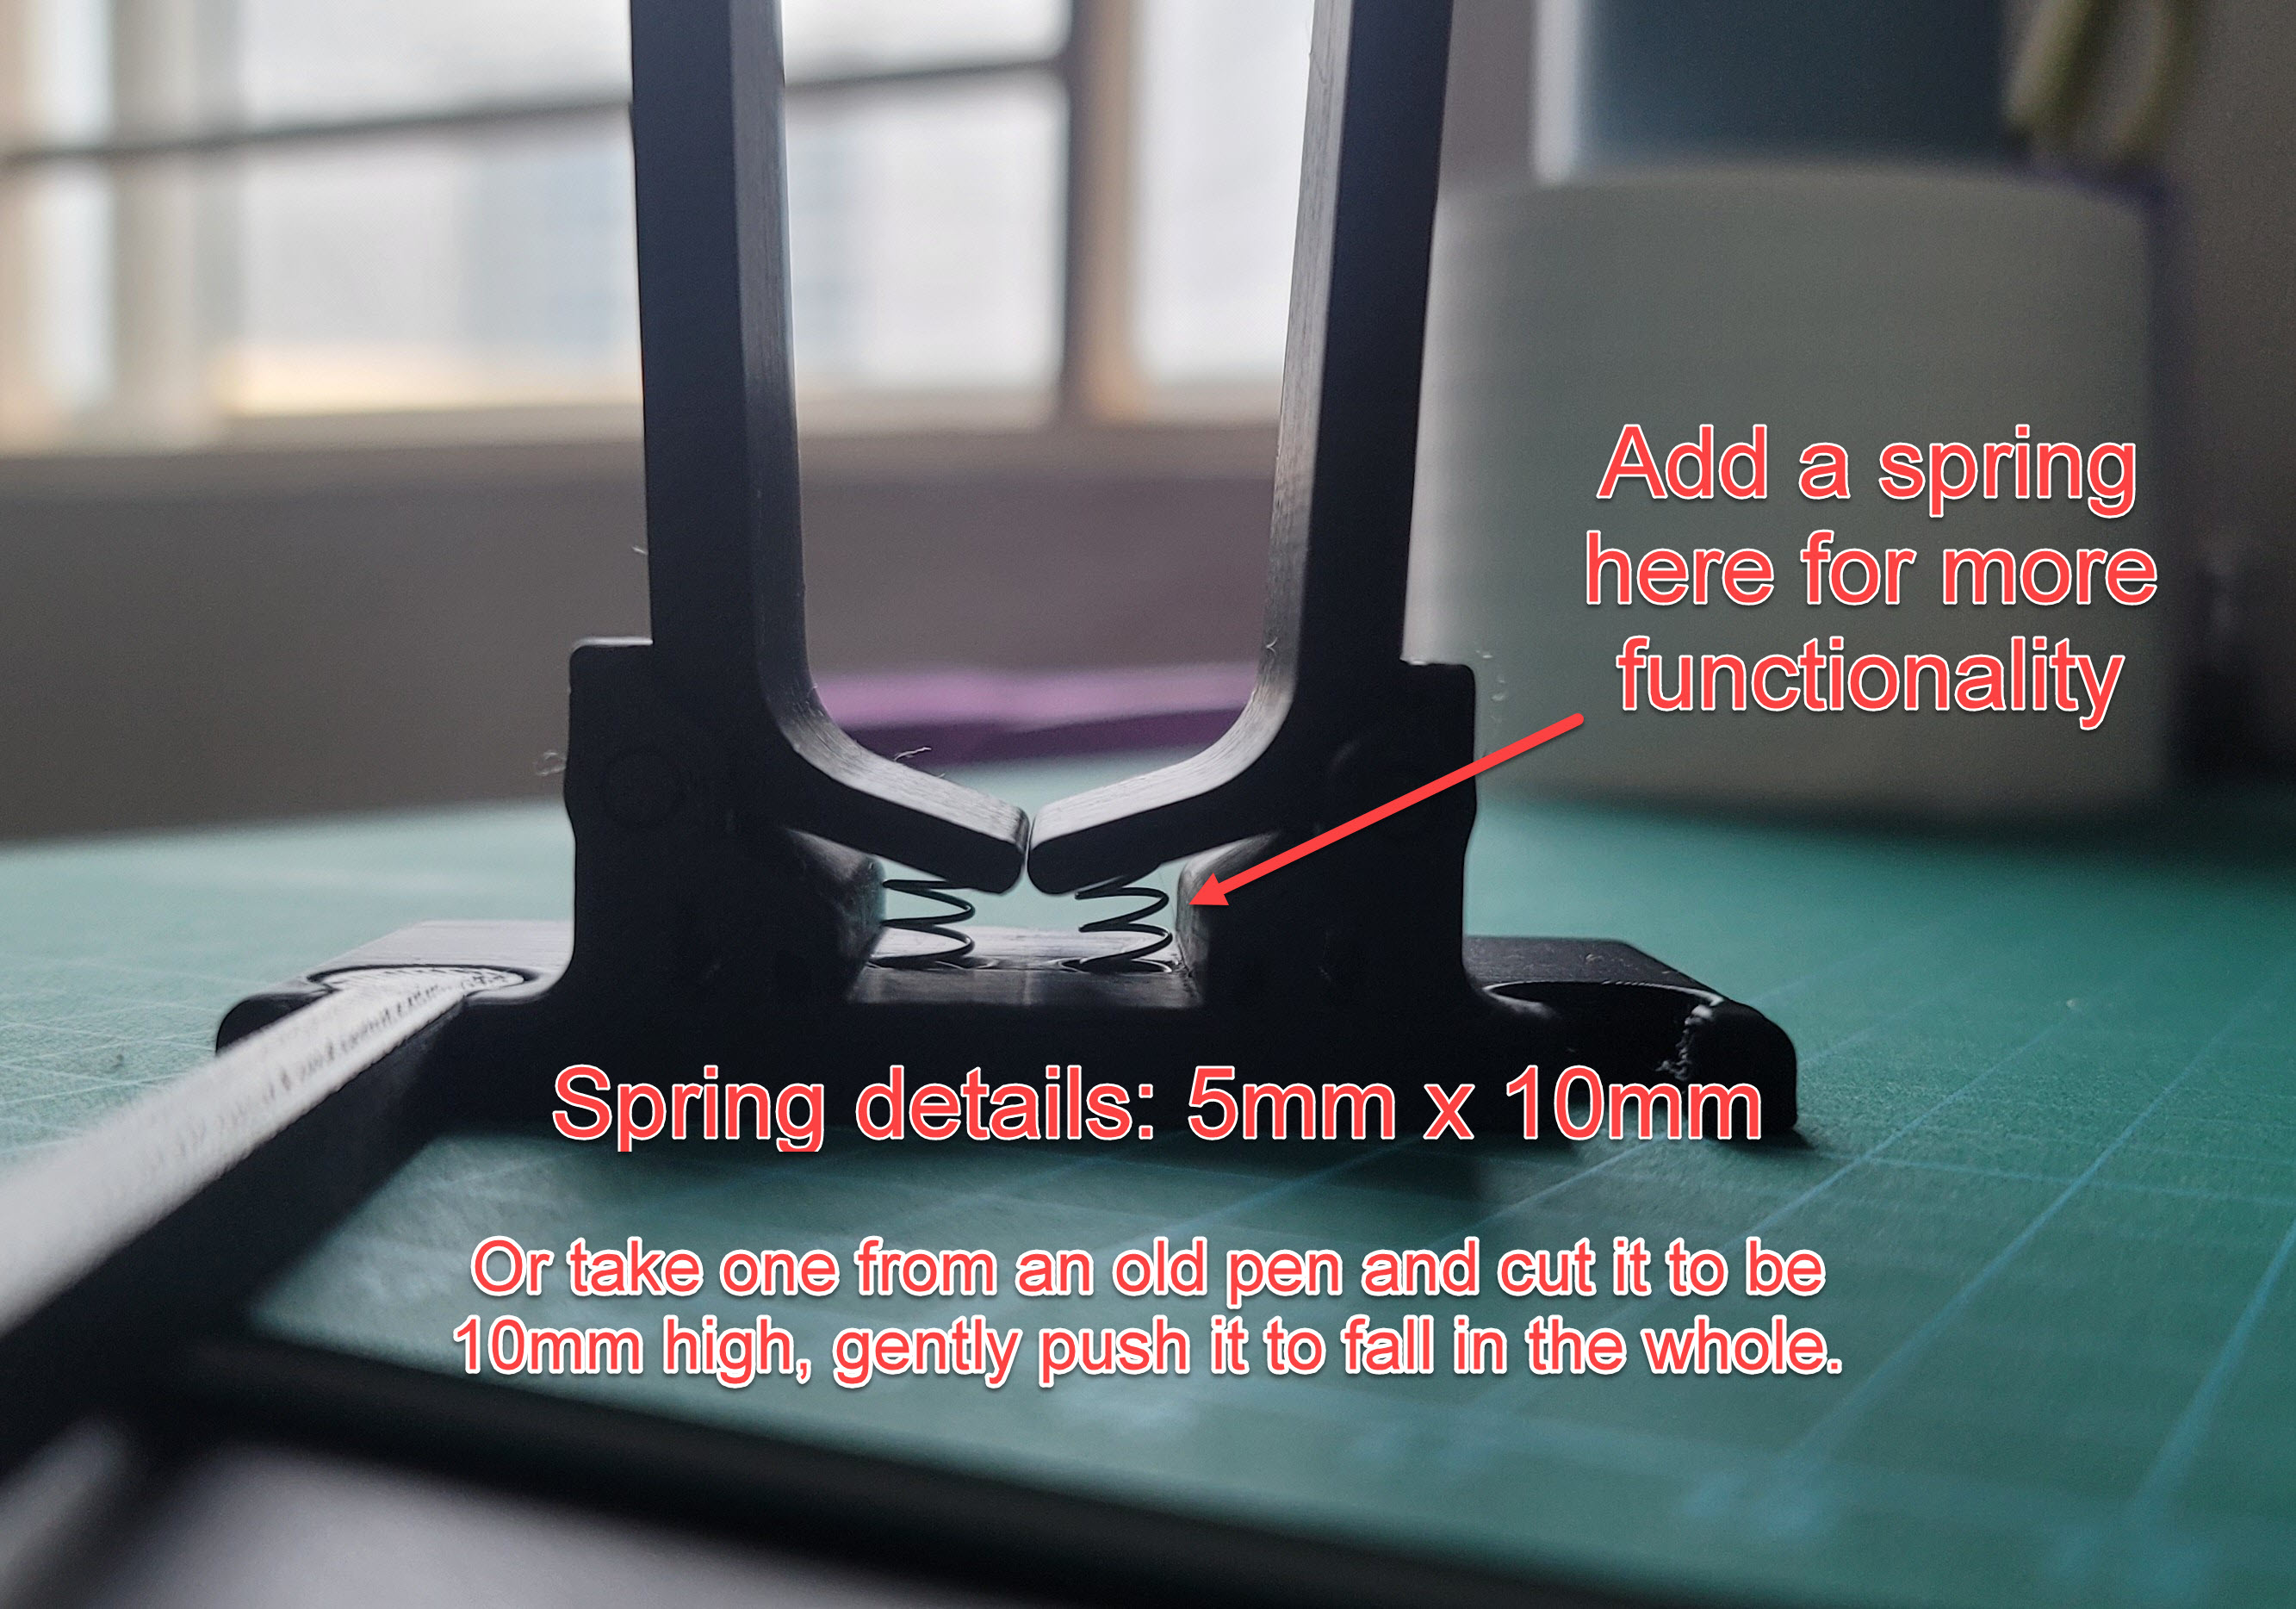
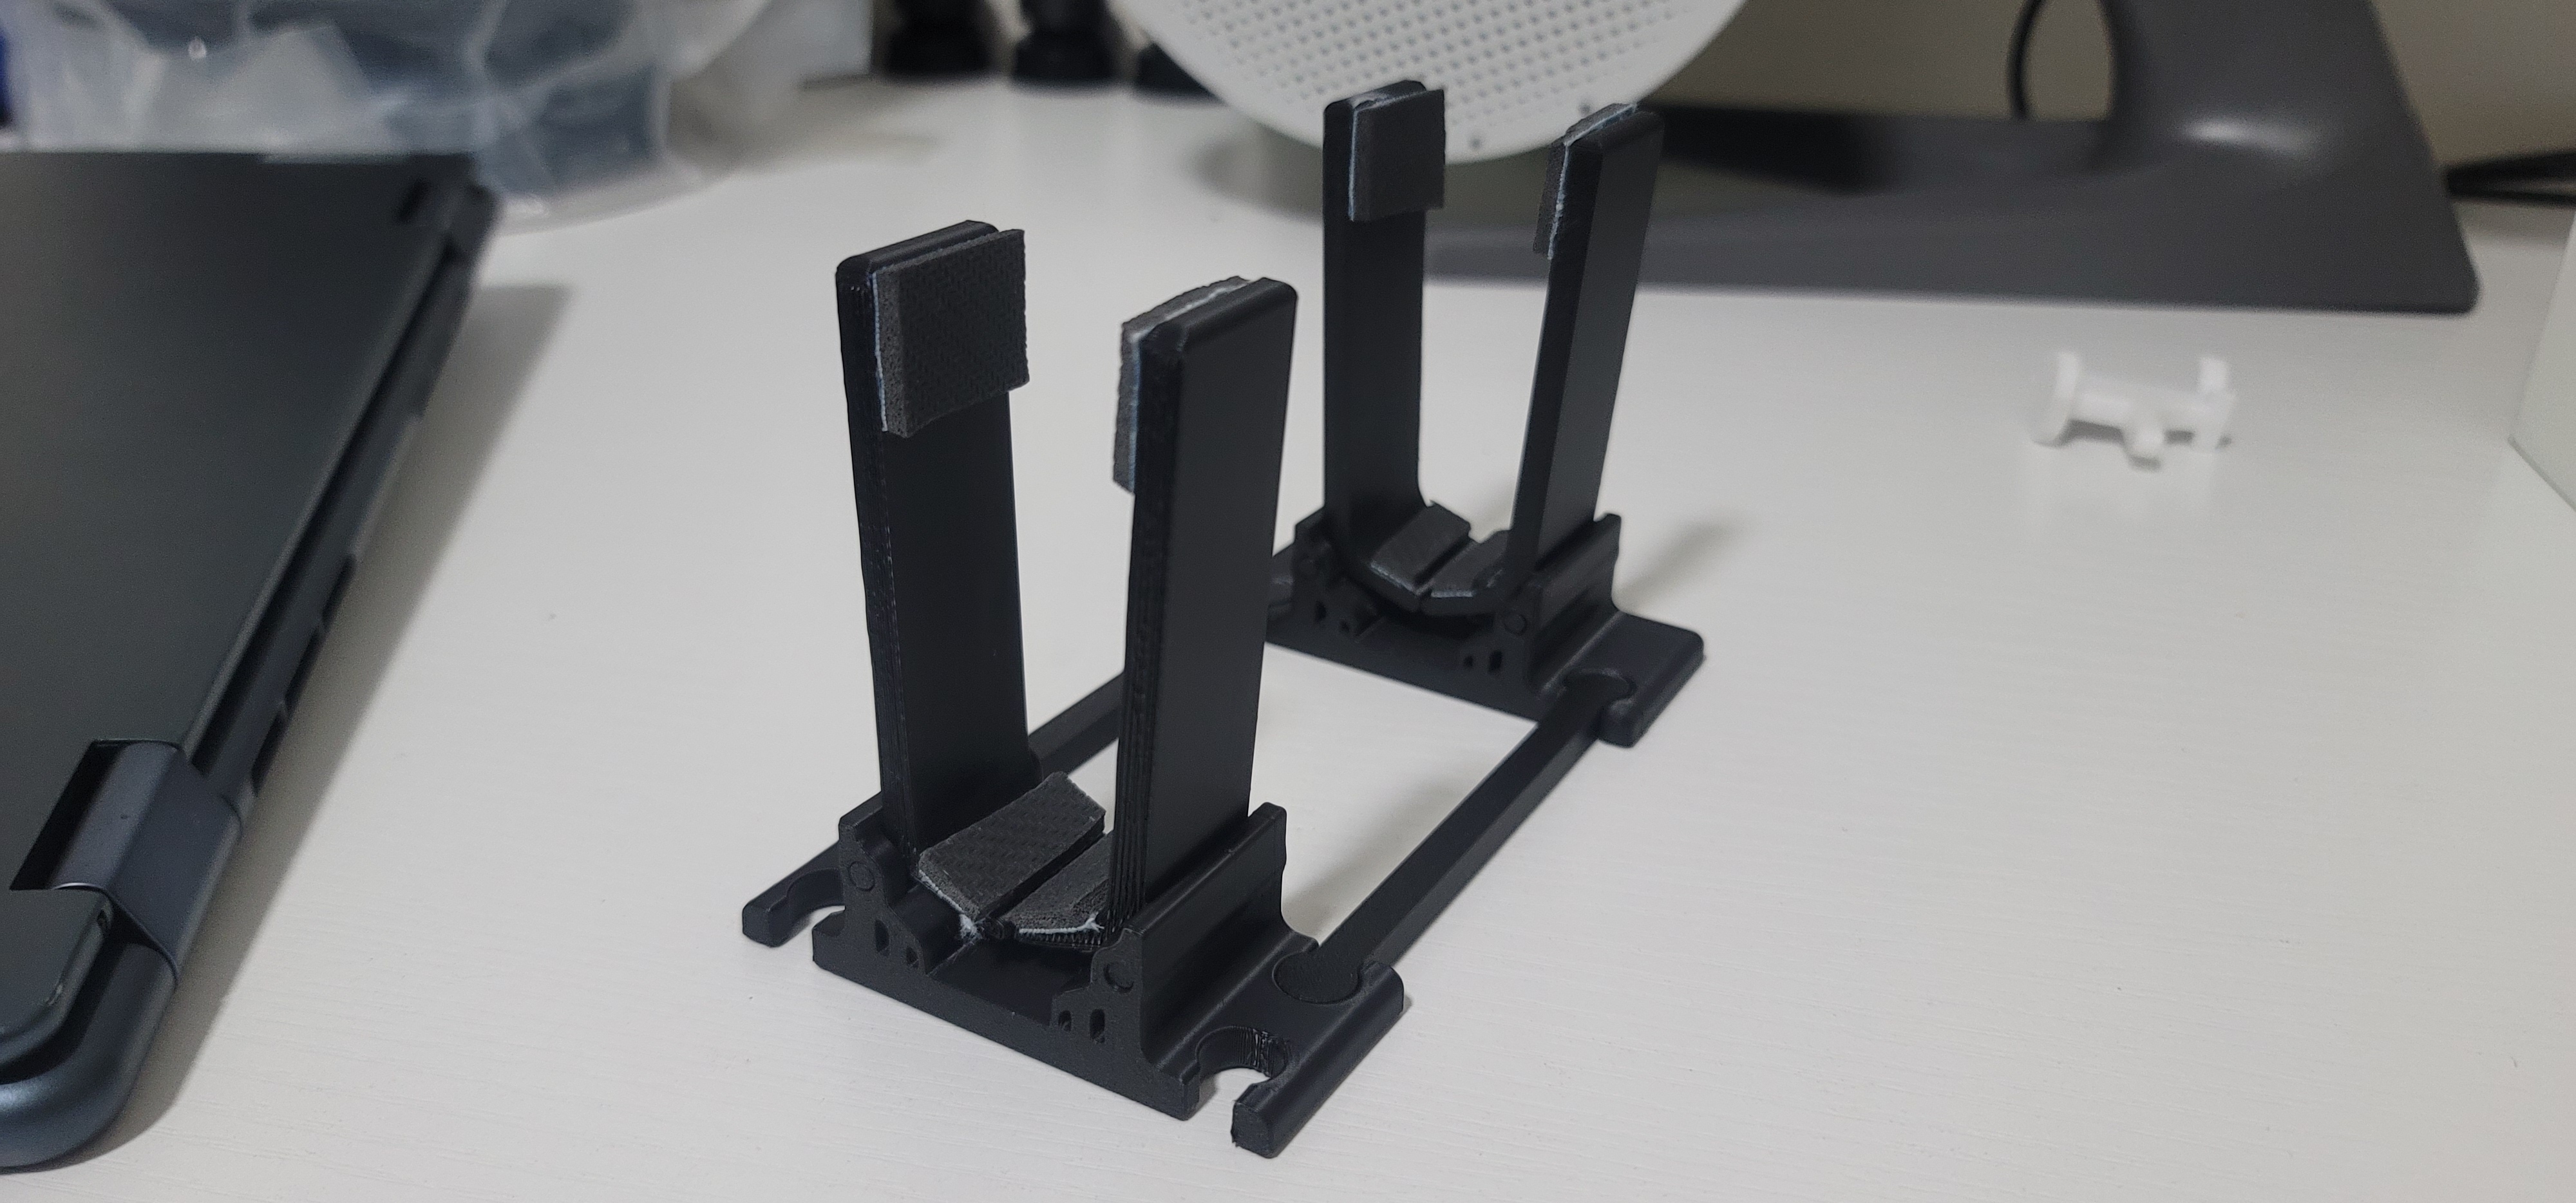
This is a 3D printed adjustable stand designed for laptops, tablets, and iPads. It is printed in place with functional hinges, so no assembly is required after printing. The design includes small compartments where you can insert springs (5 mm width × 10 mm height) for extra functionality and grip.
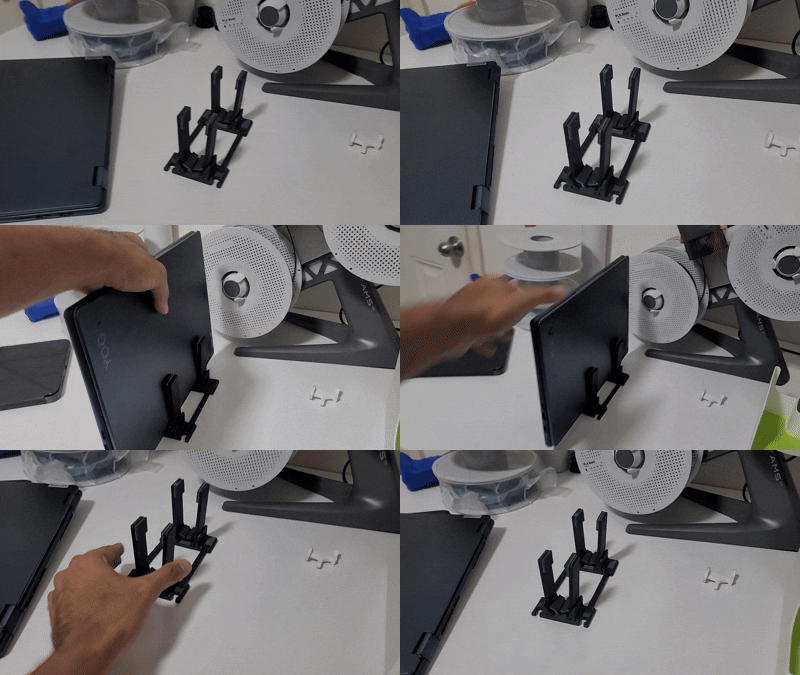
For better protection, I added rubber padding at the top and bottom of the supports so devices won’t scratch or slide. The stand works well with different device sizes and can even hold multiple devices side by side.
I recommend printing this model in PLA with a layer height of 0.16 mm quality. It will take about 30 minutes longer compared to standard settings, but the extra detail ensures the hinges print cleanly and won’t fuse to the base.
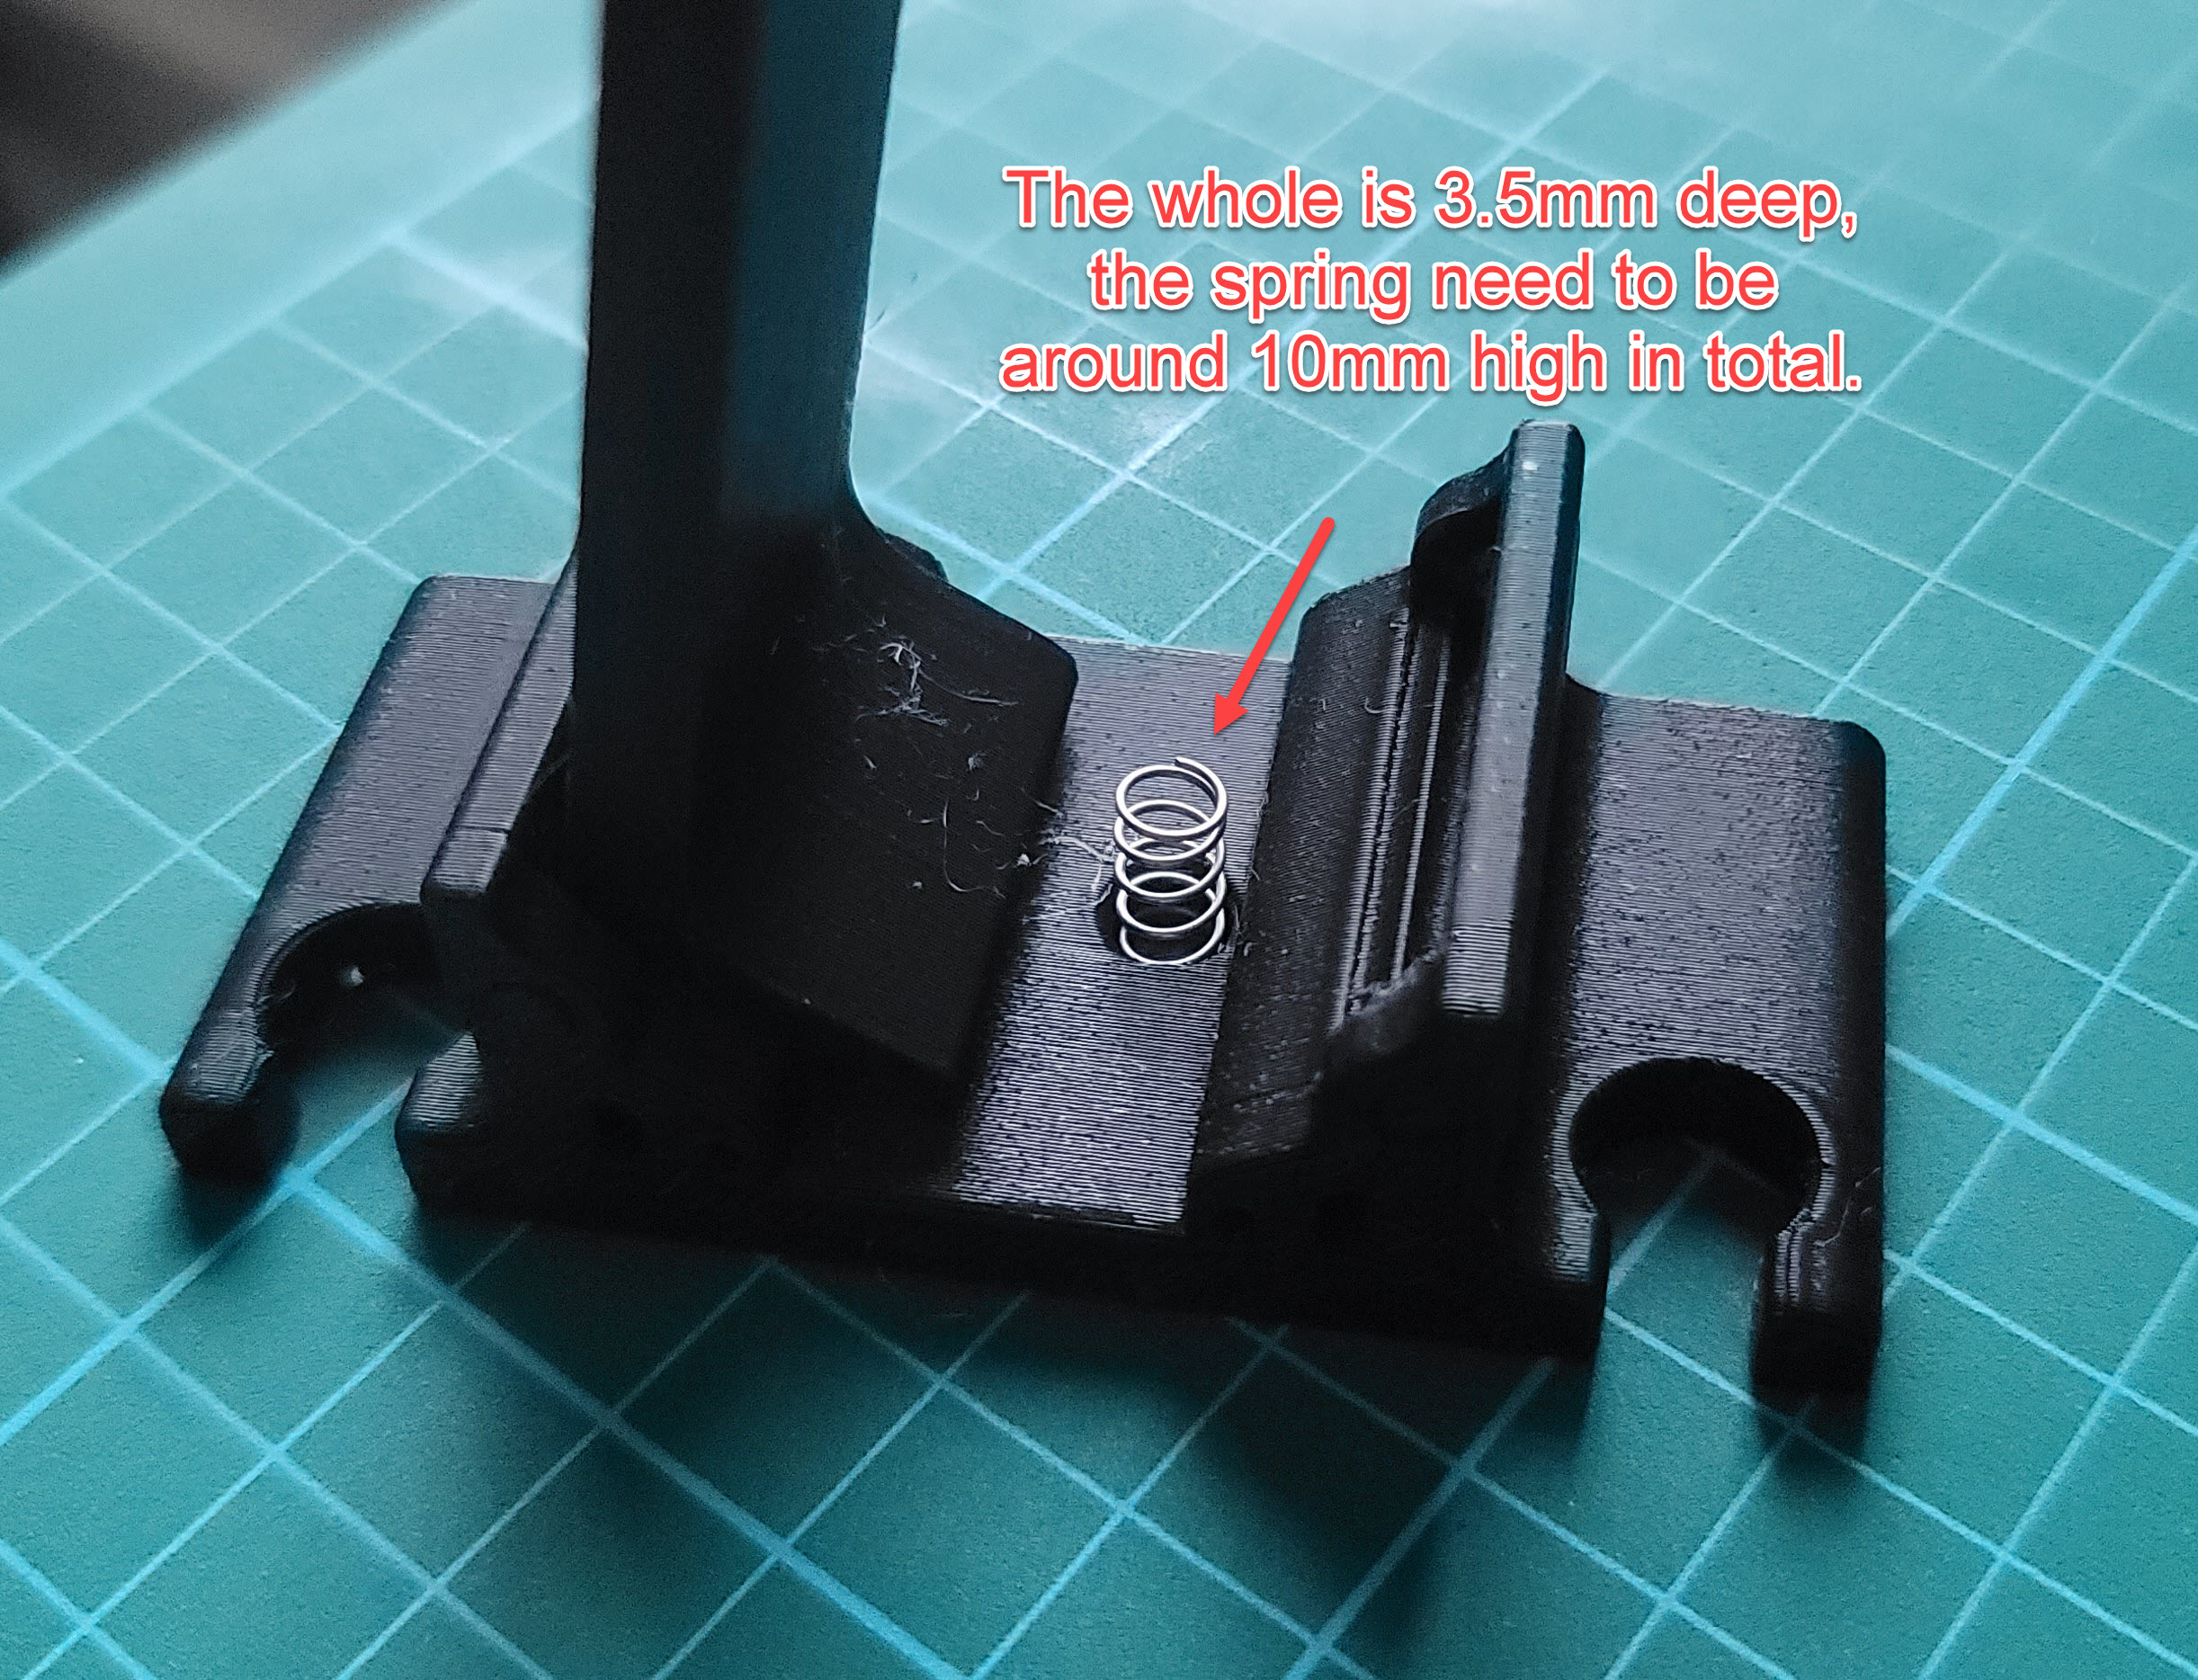
If you don’t have springs on hand, you can easily repurpose one from an old pen. Just cut it to around 10 mm in height and place it in the spring cavity (3.5 mm deep).
This design is simple, functional, and great for keeping your workspace tidy while protecting your devices.
How to add springs (Optional Assembly Steps (Adding Springs & Rubber Pads)
If you’d like to upgrade your stand with springs and protective rubber pads, follow these simple steps:
1. Free the hinges
After printing, gently remove any support material. Wiggle the hinged arms a little until they break free and move smoothly. This will give the stand its flexibility.
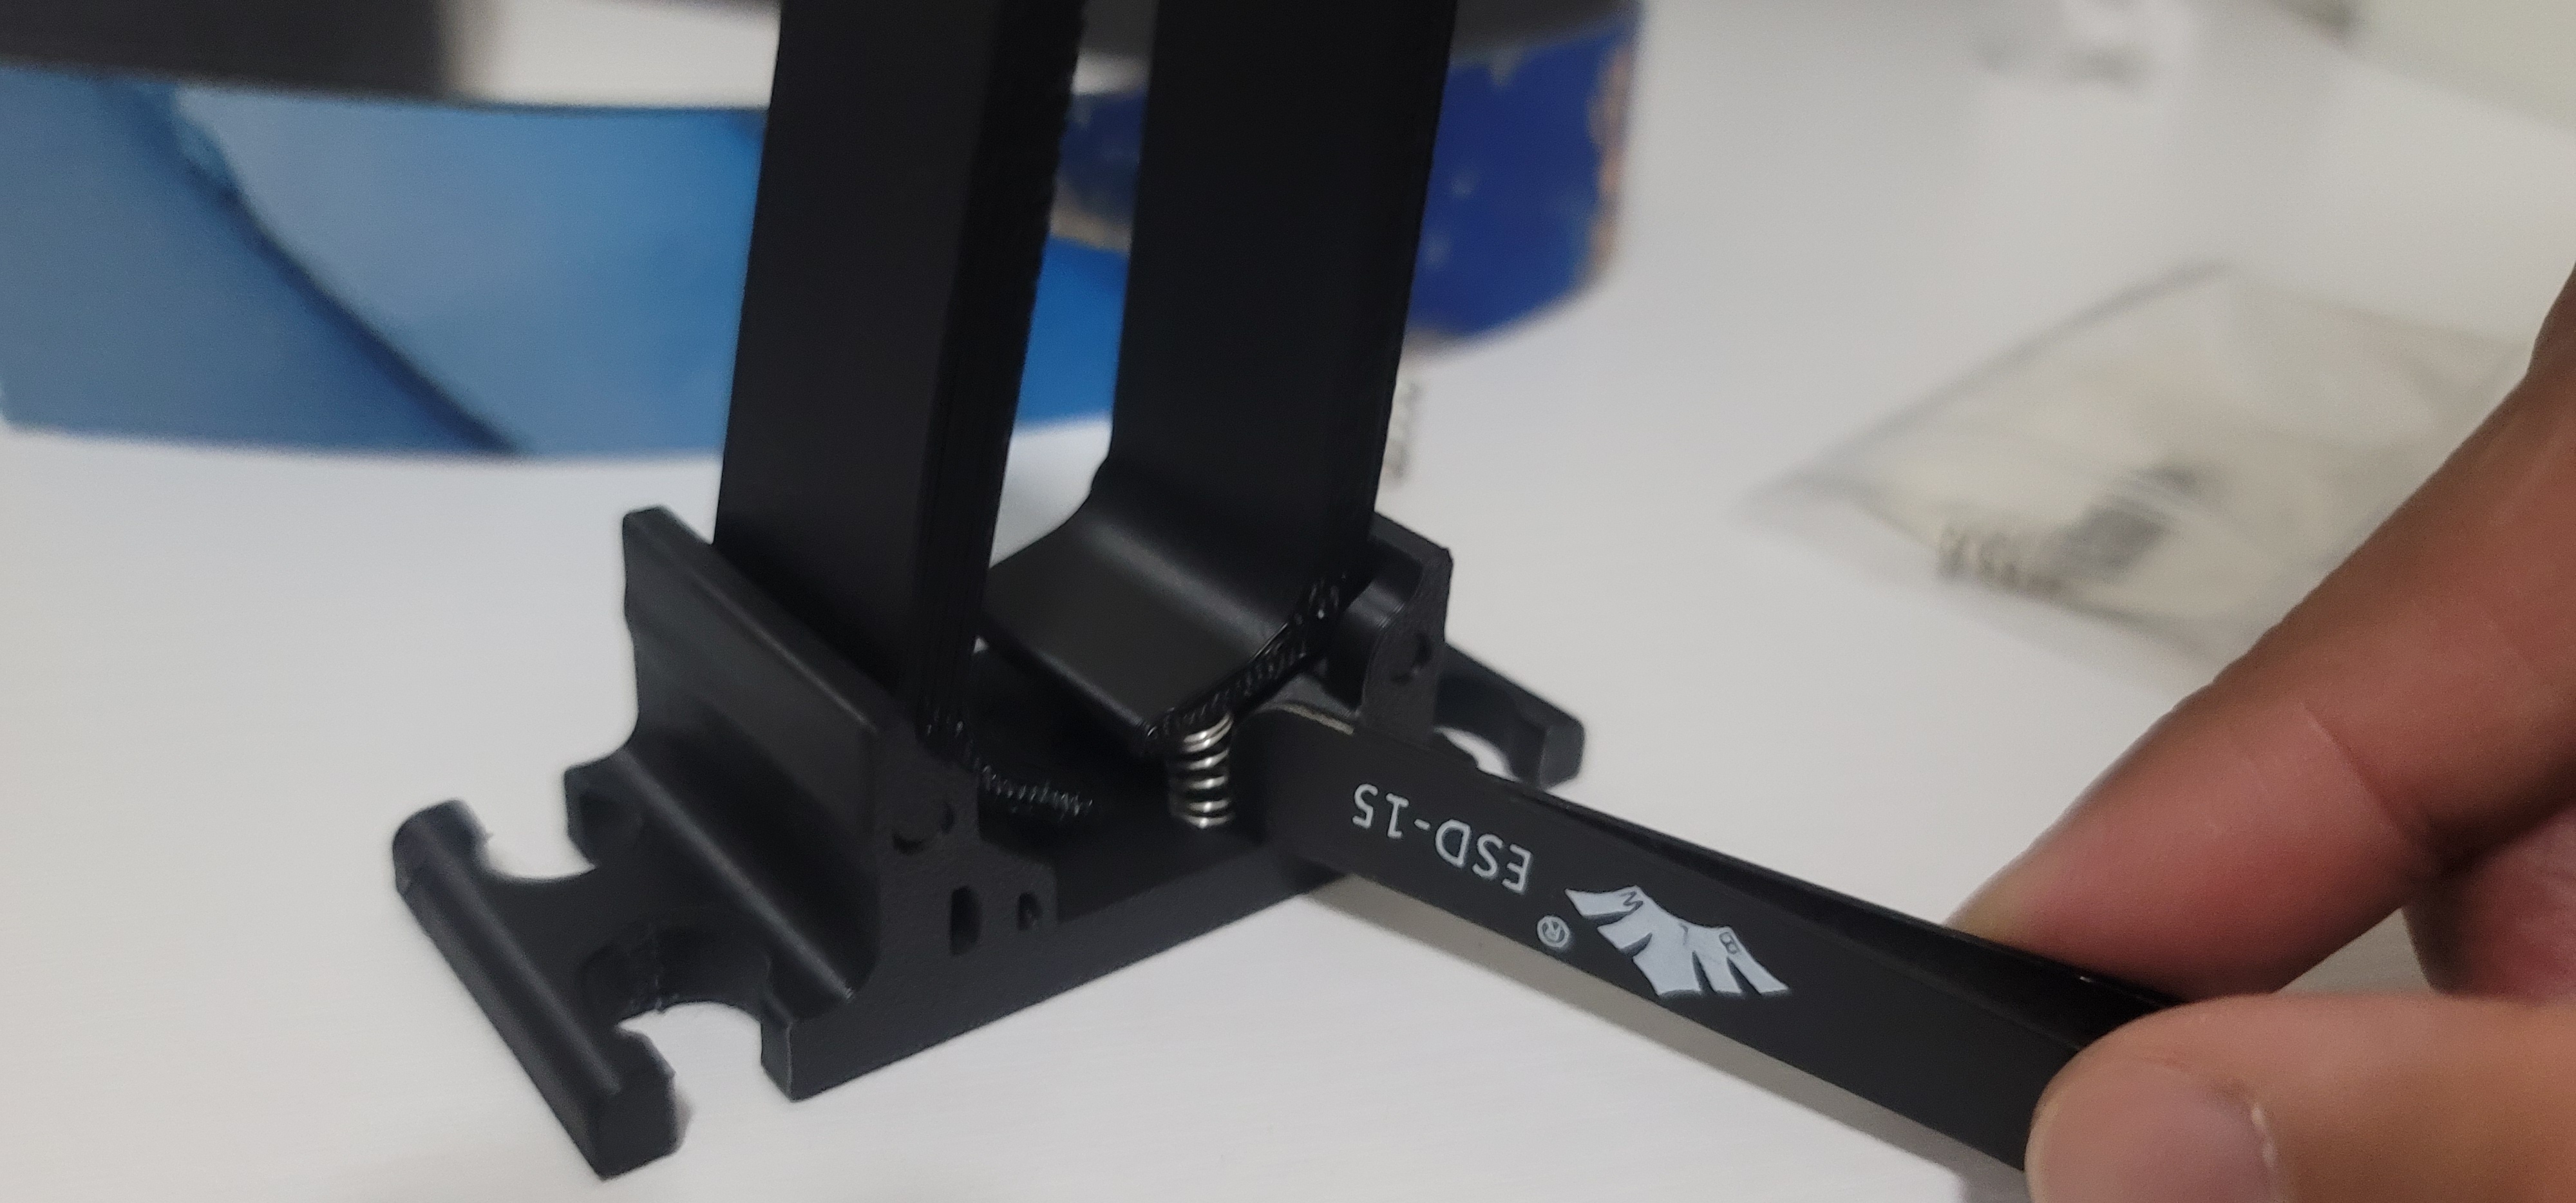
2. Insert the springs
Take a spring (5 mm wide × ~10 mm high) and carefully slide it into the small hole designed for it. The cavity is 3.5 mm deep, so the spring will sit snugly once it drops into place.
3. Secure the springs
Make sure the spring is aligned and properly seated in the cavity. It should remain in position without extra fixing.
4. Add protective rubber
Cut small pieces of rubber (mouse pad scraps work perfectly). Superglue them onto the top and bottom contact points of the stand. This prevents scratches and keeps your devices safe from wear.
5. Test the mechanism
Place your device into the stand. When you lift it out, the springs will automatically push the arms back open, ready for the next use.
Here are some pictures to help you see what is behind the scenes.
END RESULT

Gostou deste modelo? Crie uma conta grátis para salvar seus favoritos e voltar a eles depois.
Criar conta